13. Administration
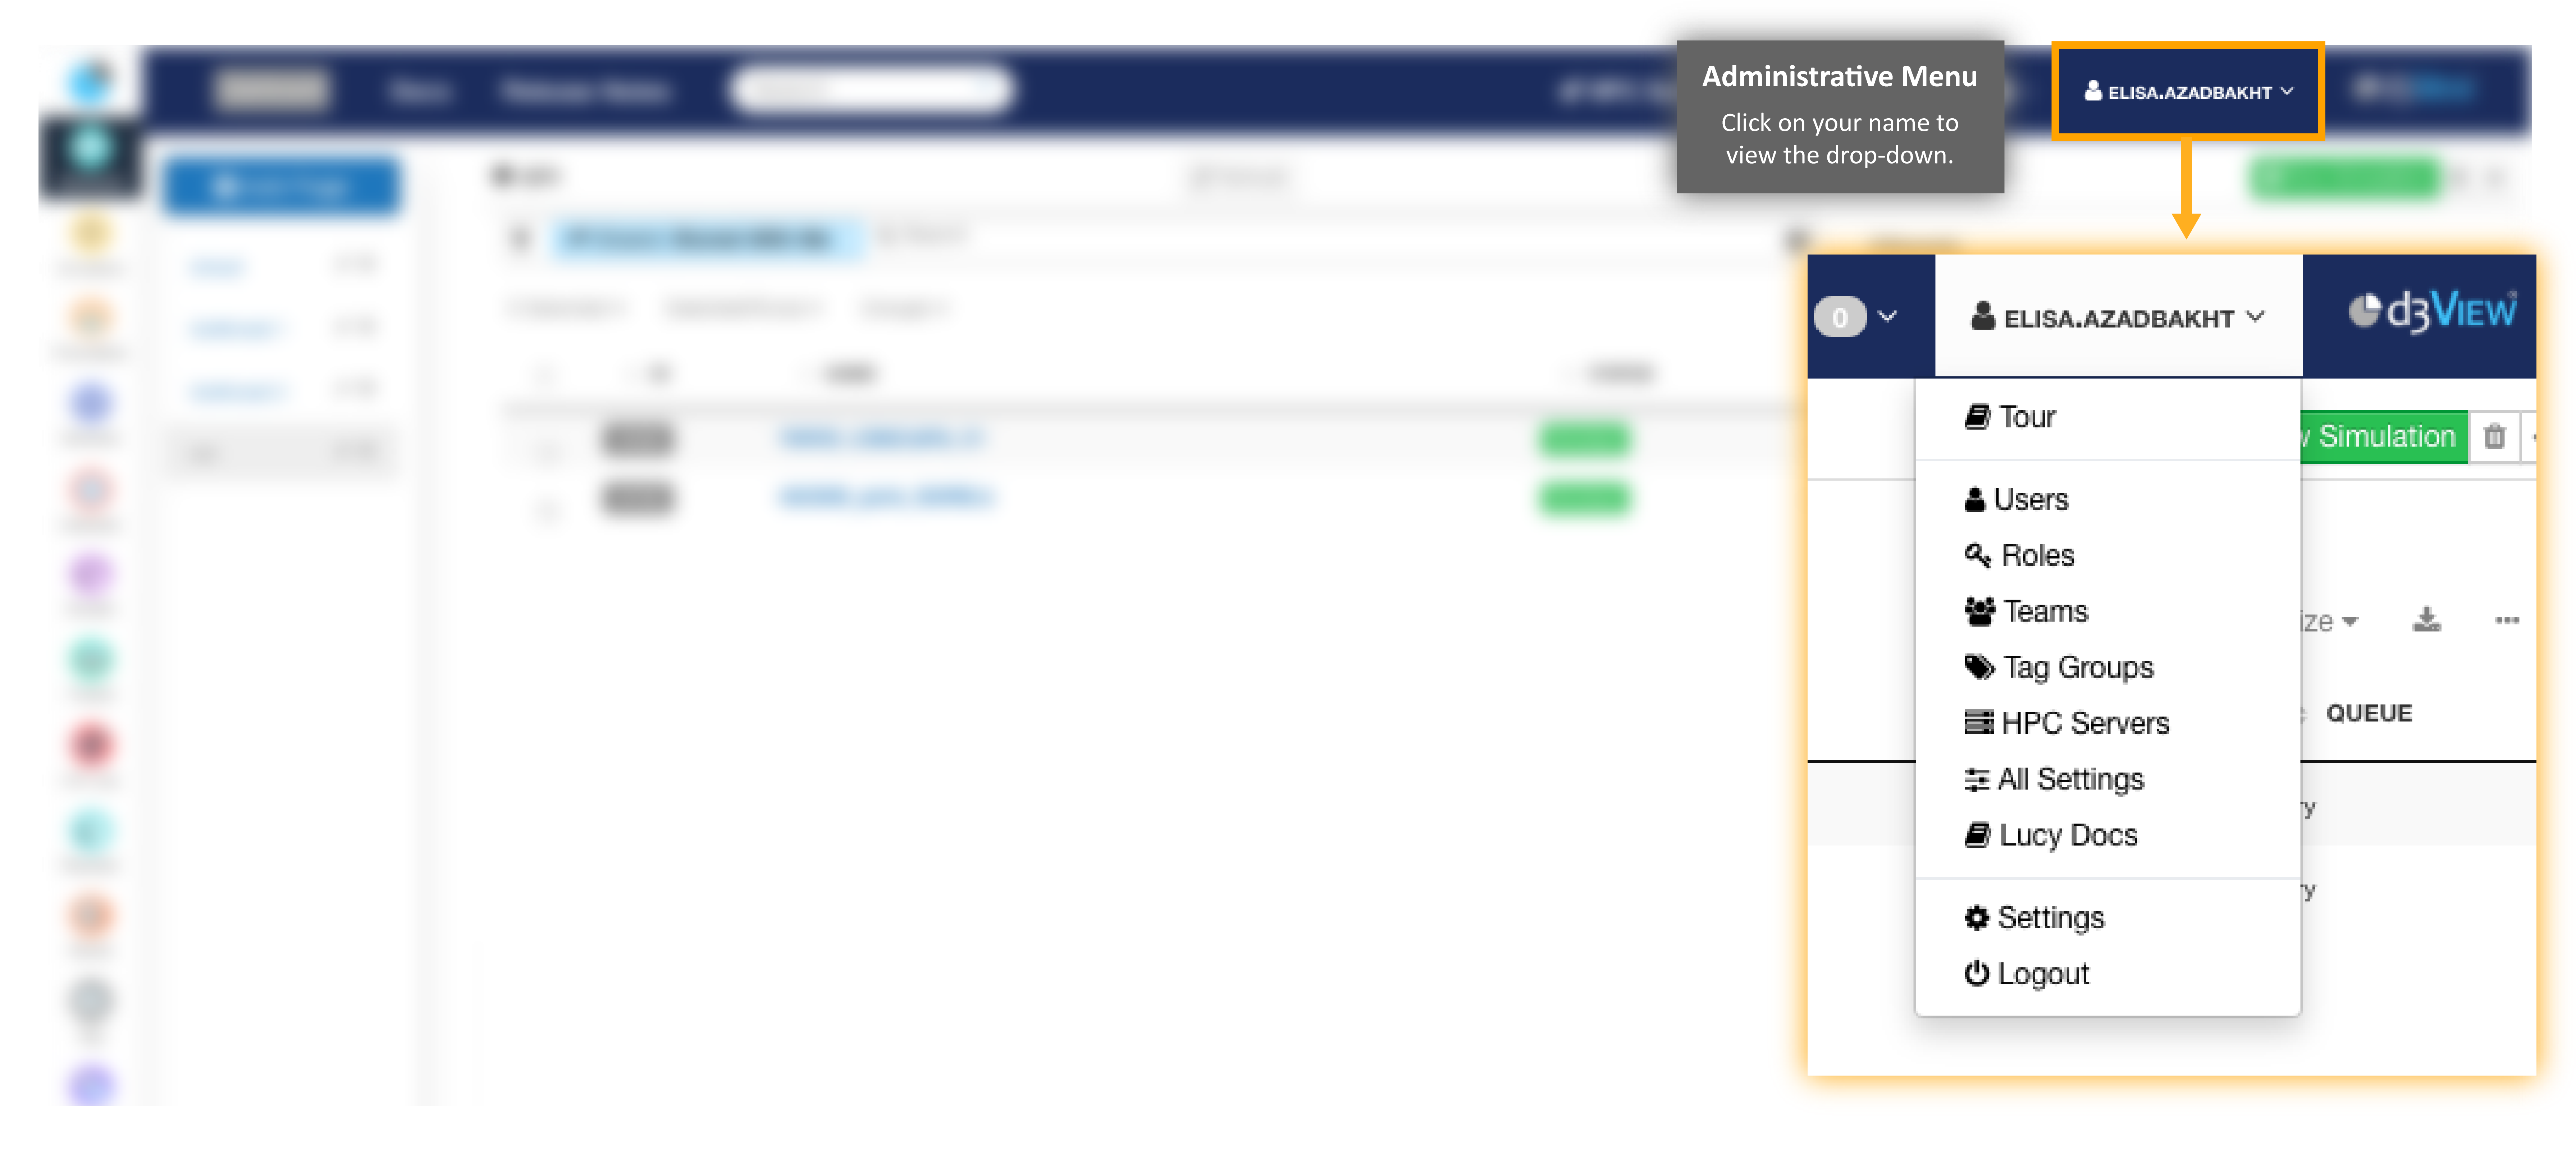
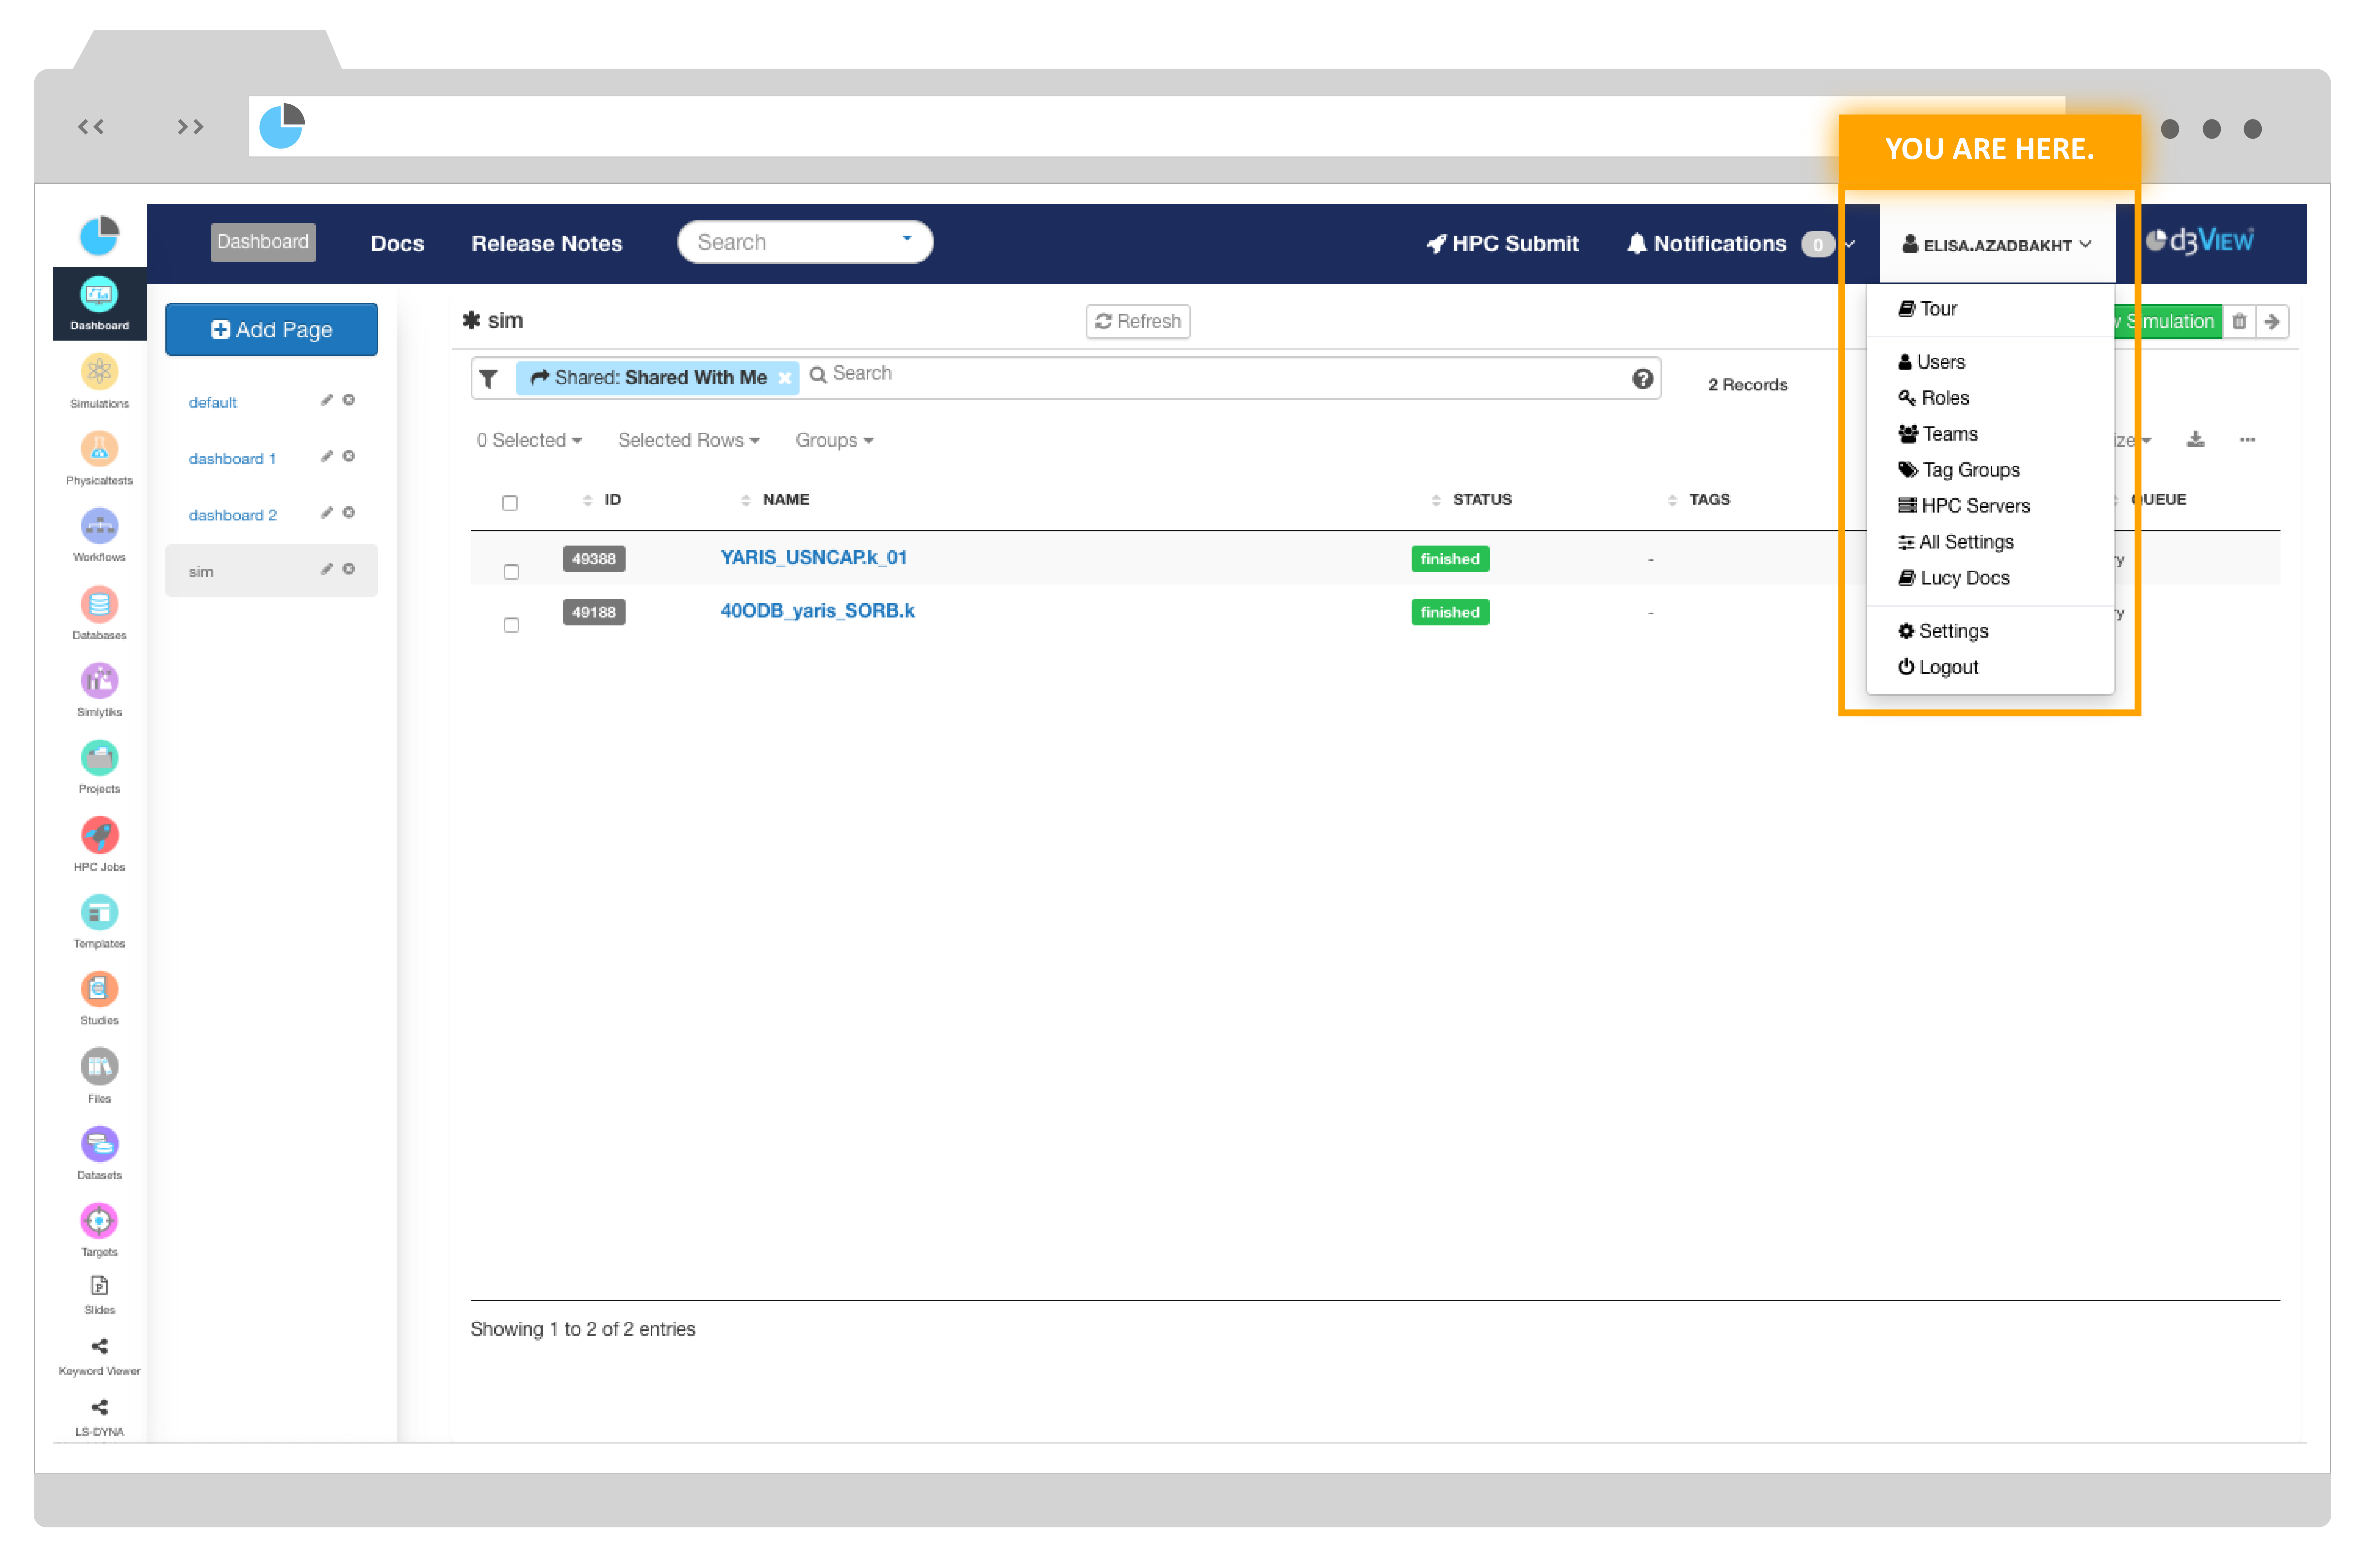
As an administrator, you extra capabilities can be explored on your page at the top right corner. Click on your name to view the drop-down administration menu. In this tutorial, we’ll cover the important aspects of your administrator functions.
Administrative Menu
What Will Be Covered:
- Users
- Adding a User
- User Logins
- Roles
- Teams
- HPC Servers
- Editing HPC Servers
- HPC Utilization
- All Settings
- Post Processors
- LDAP Settings
- Logs
- Lucy Docs
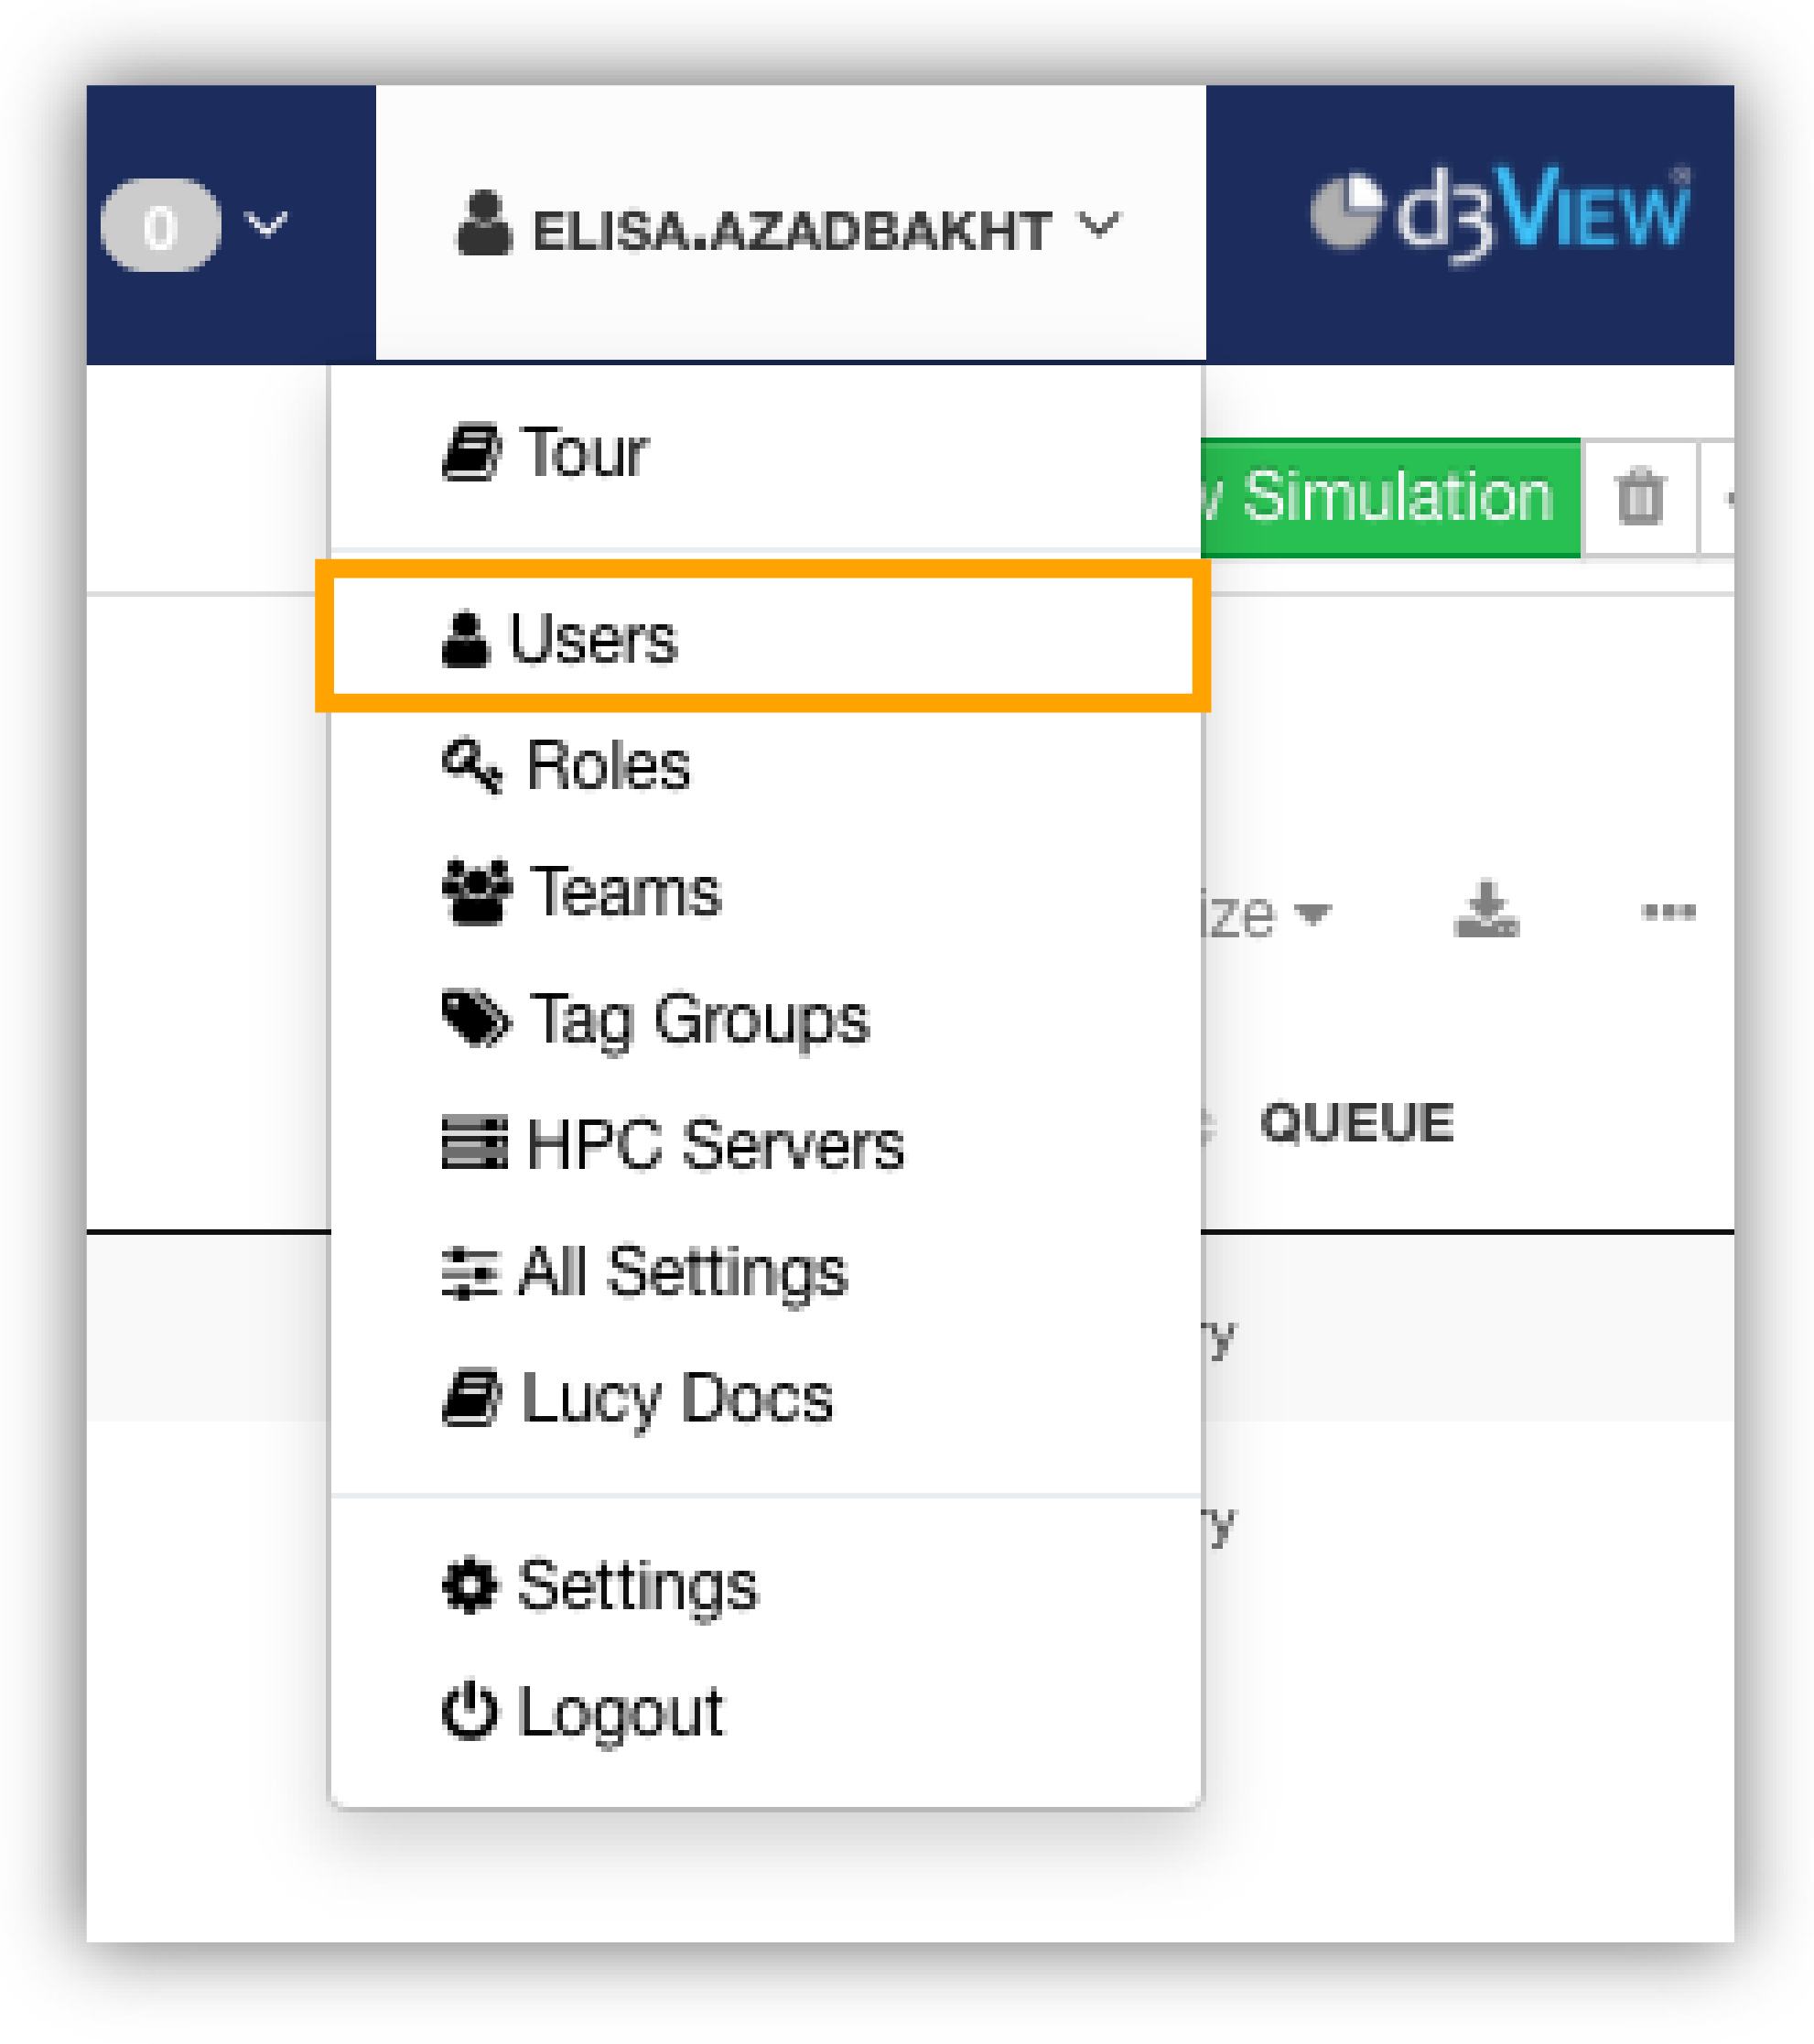
13.1. Users
Click on the Users option in the Administrative Menu to get started.
Users Option
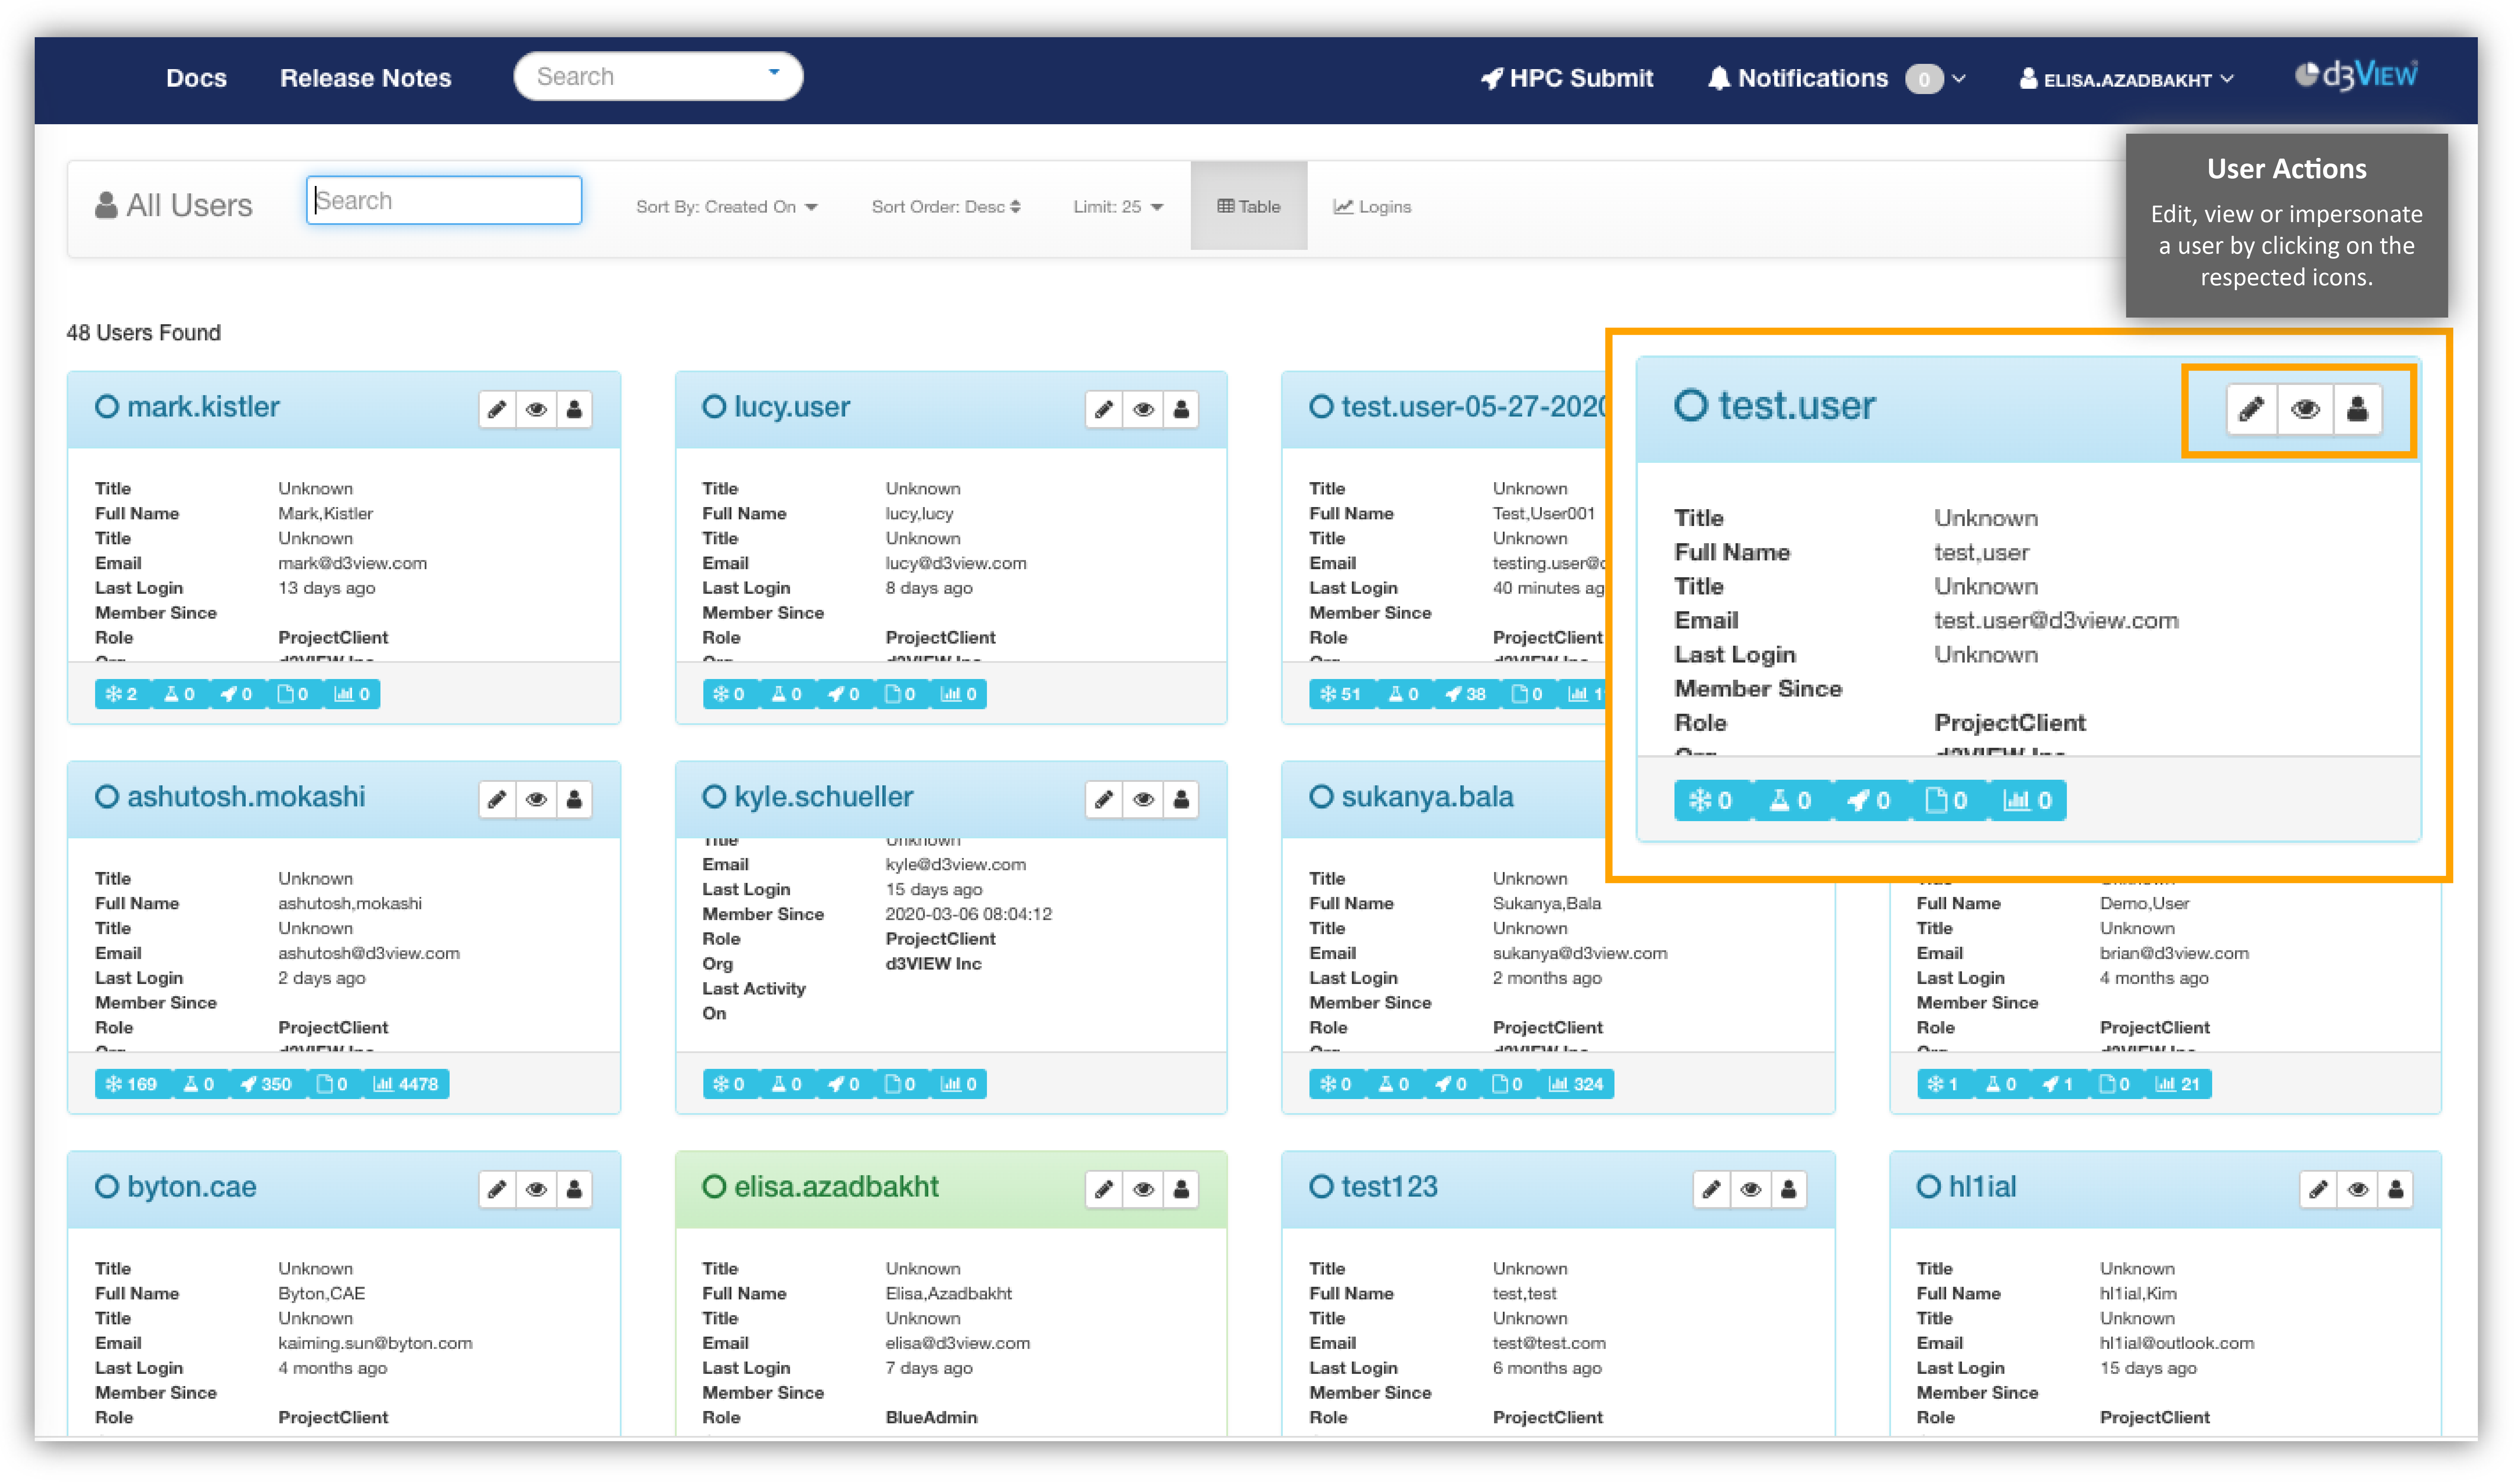
The users section shows you thumbnail views of all users under your administration. You can perform actions such as edit, view or impersonate on individual users.
All Users
Where Am I?
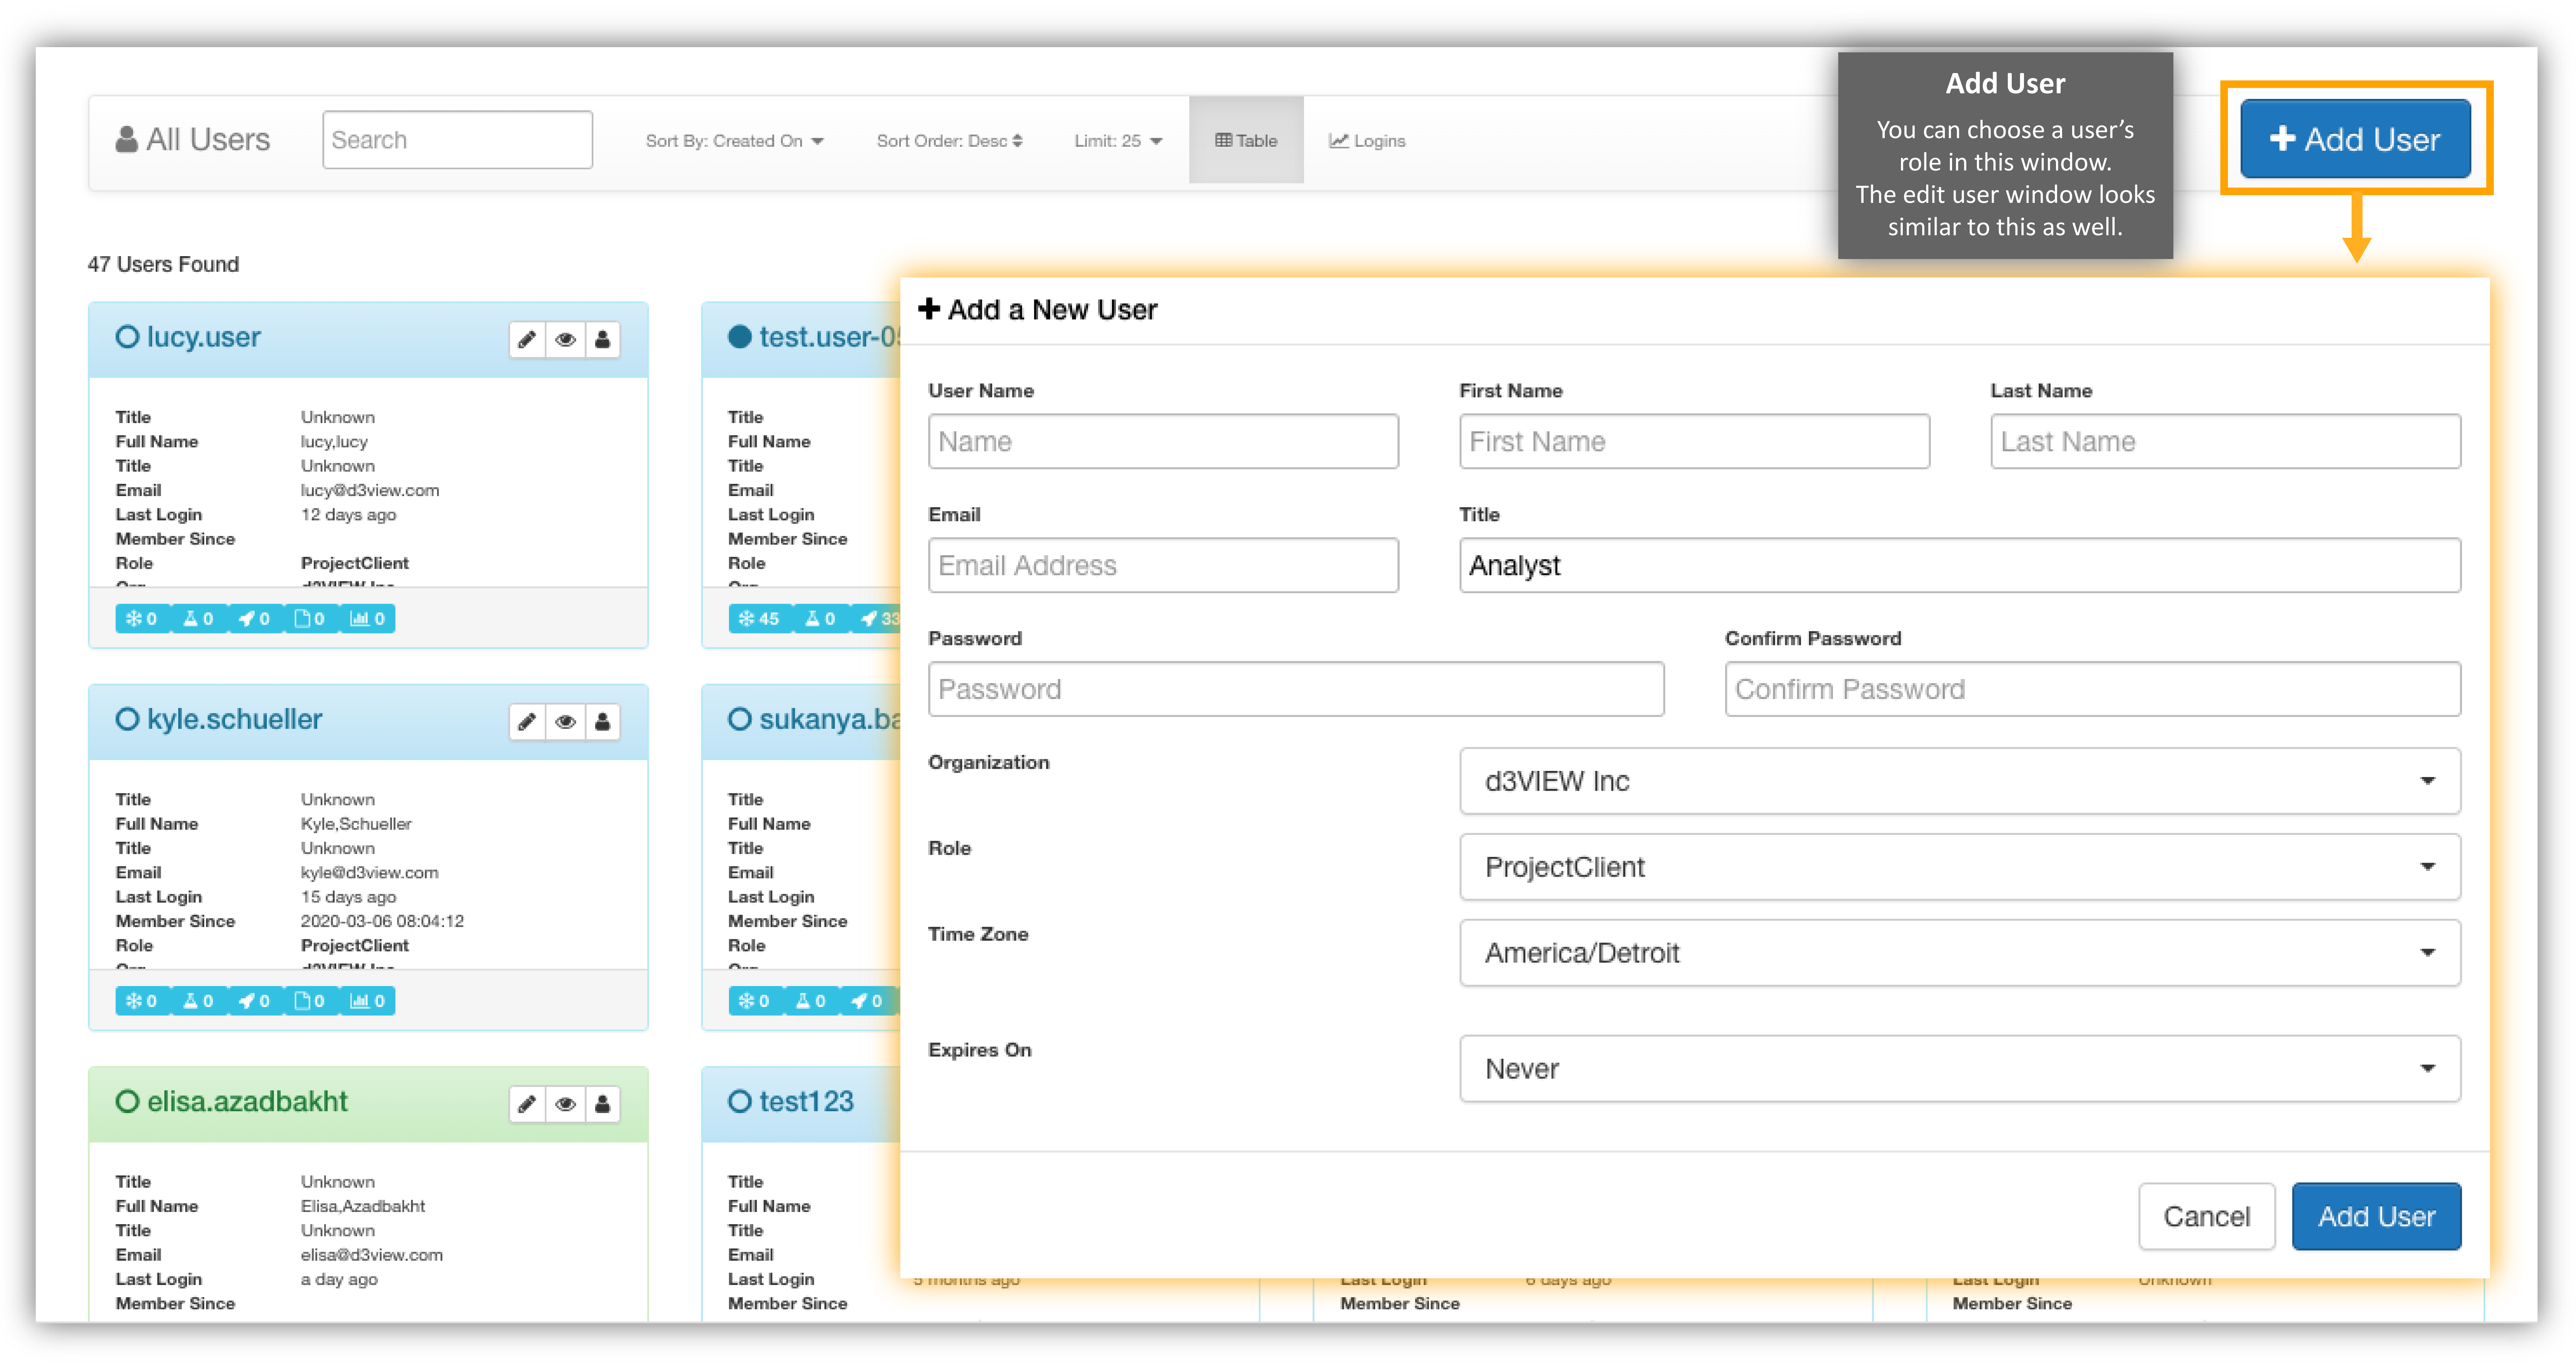
Add User
Click on “Add User” at the top right to create another user. The window for creating or editing a user is basically the same. Here, you can choose a role for the user.
Add User
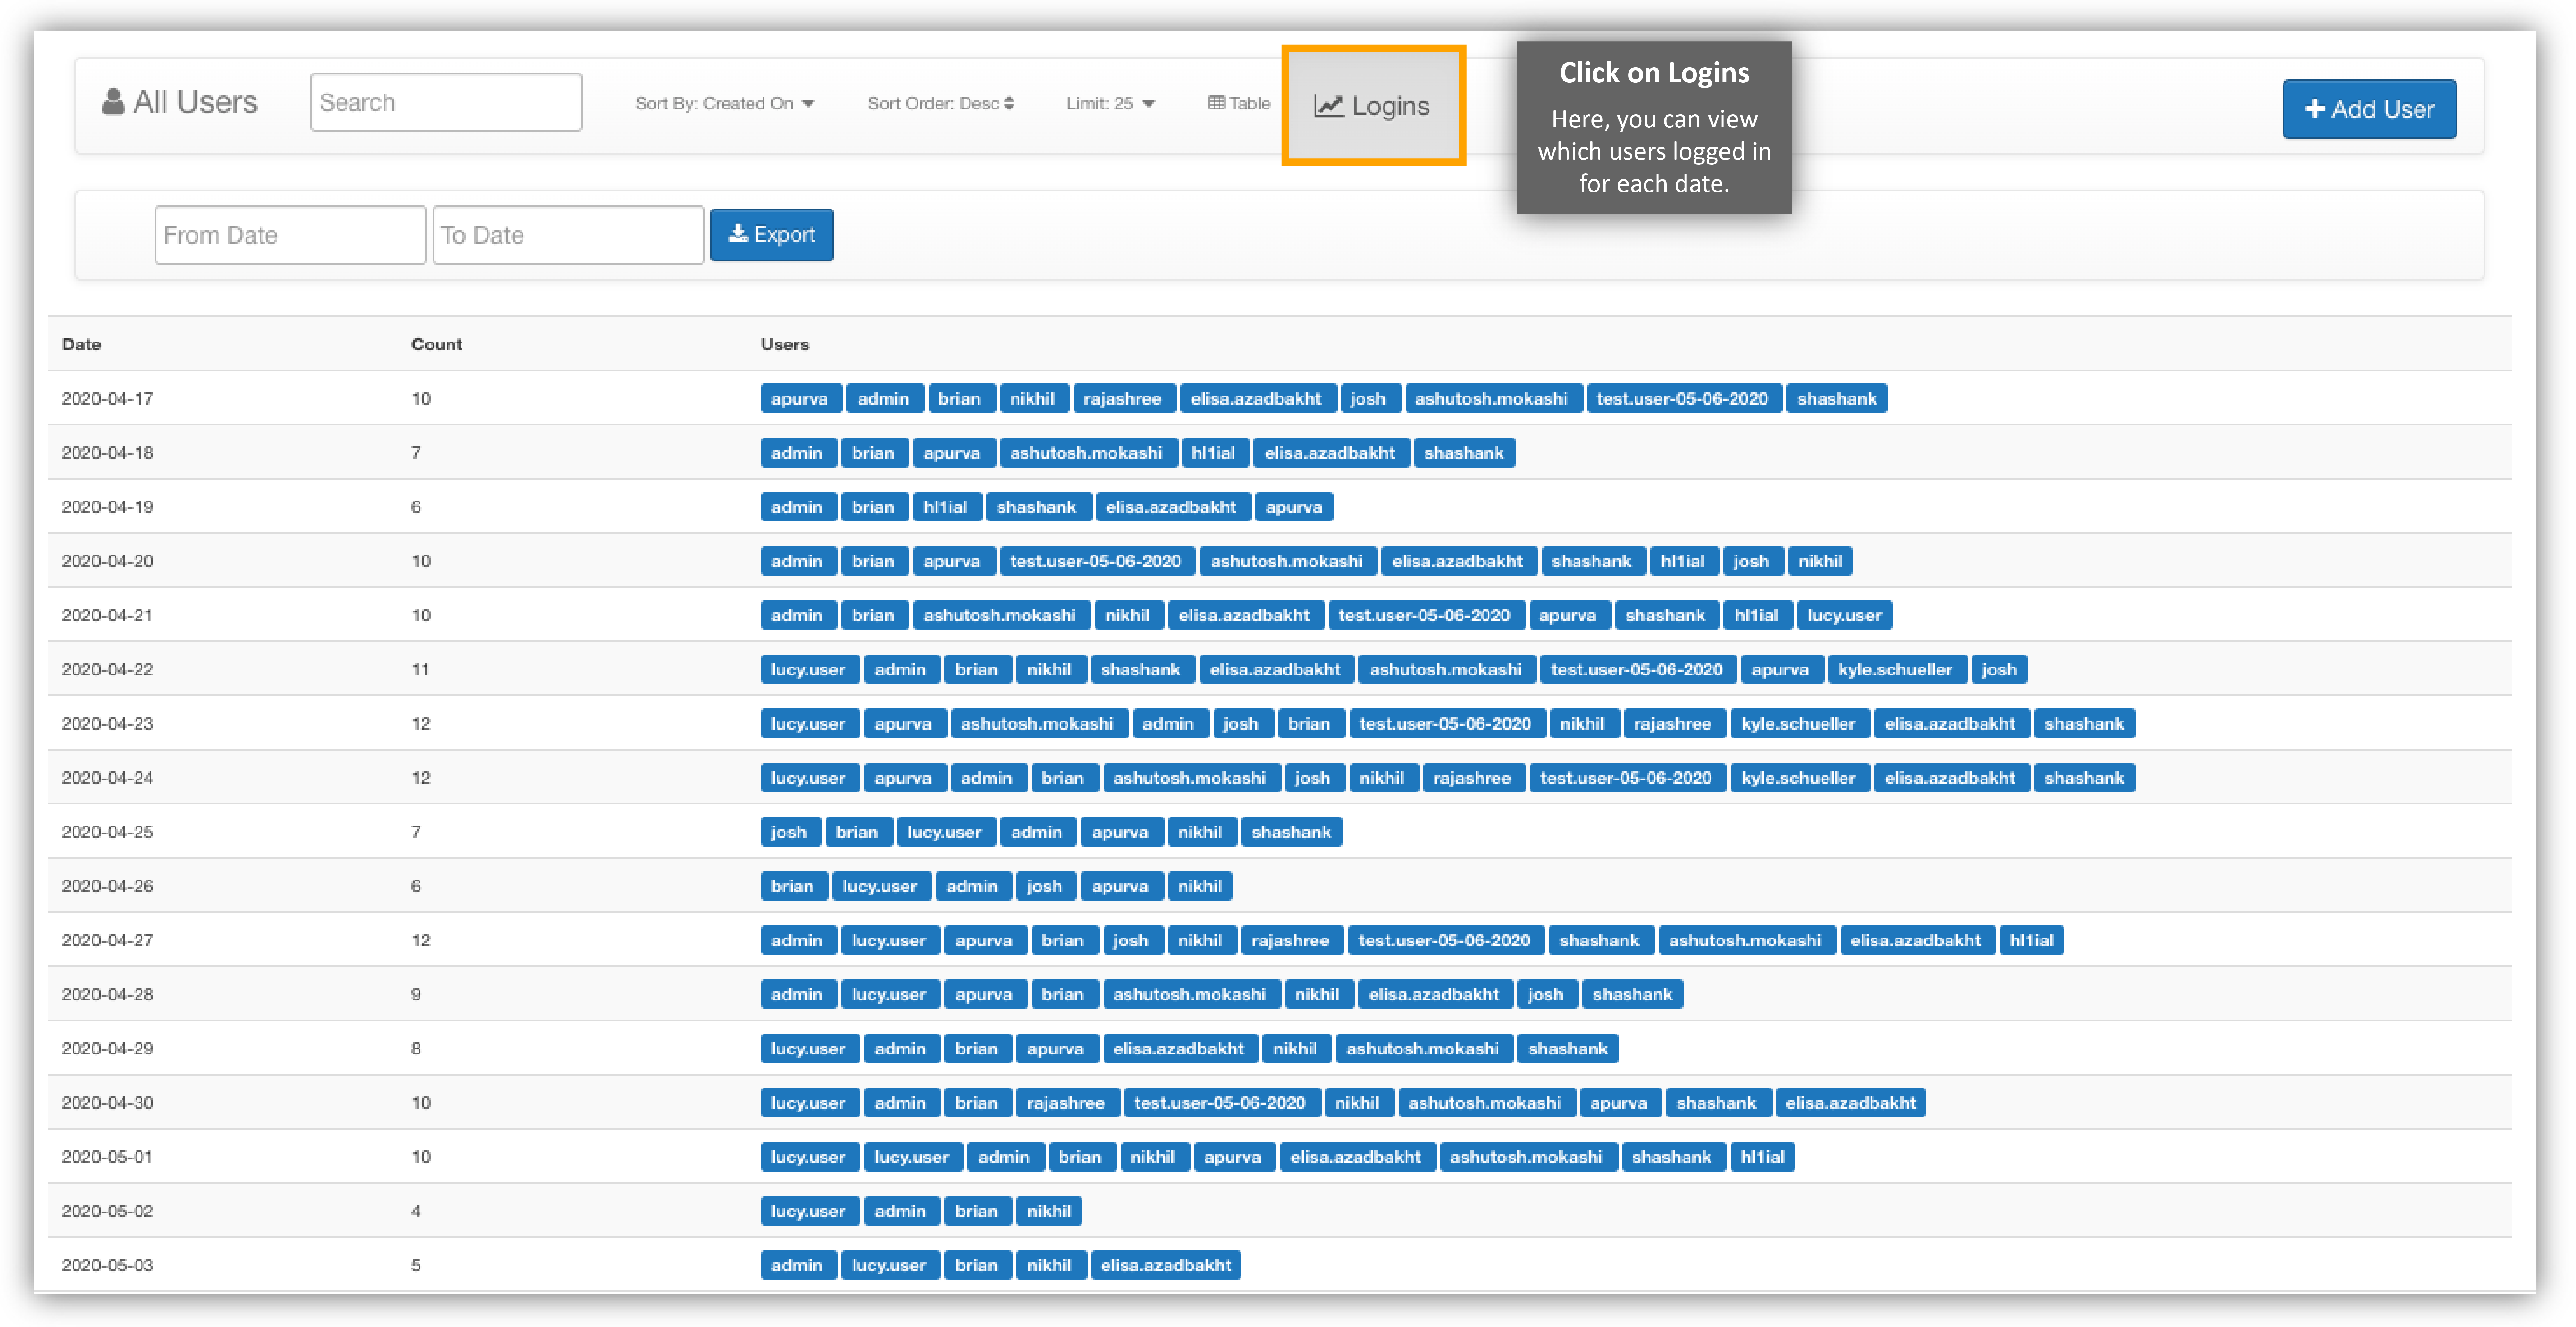
User Logins
Click on “Logins” on the grey bar next to “Table” to see which users logged onto the platform on particular dates.
User Logins
13.2. Roles
Roles make it easier assign permissions to users. You can give reading or writing capabilities to a particular role and give that role to certain users.
Click on the Roles option in the Administrative Menu to get started.
Roles Option

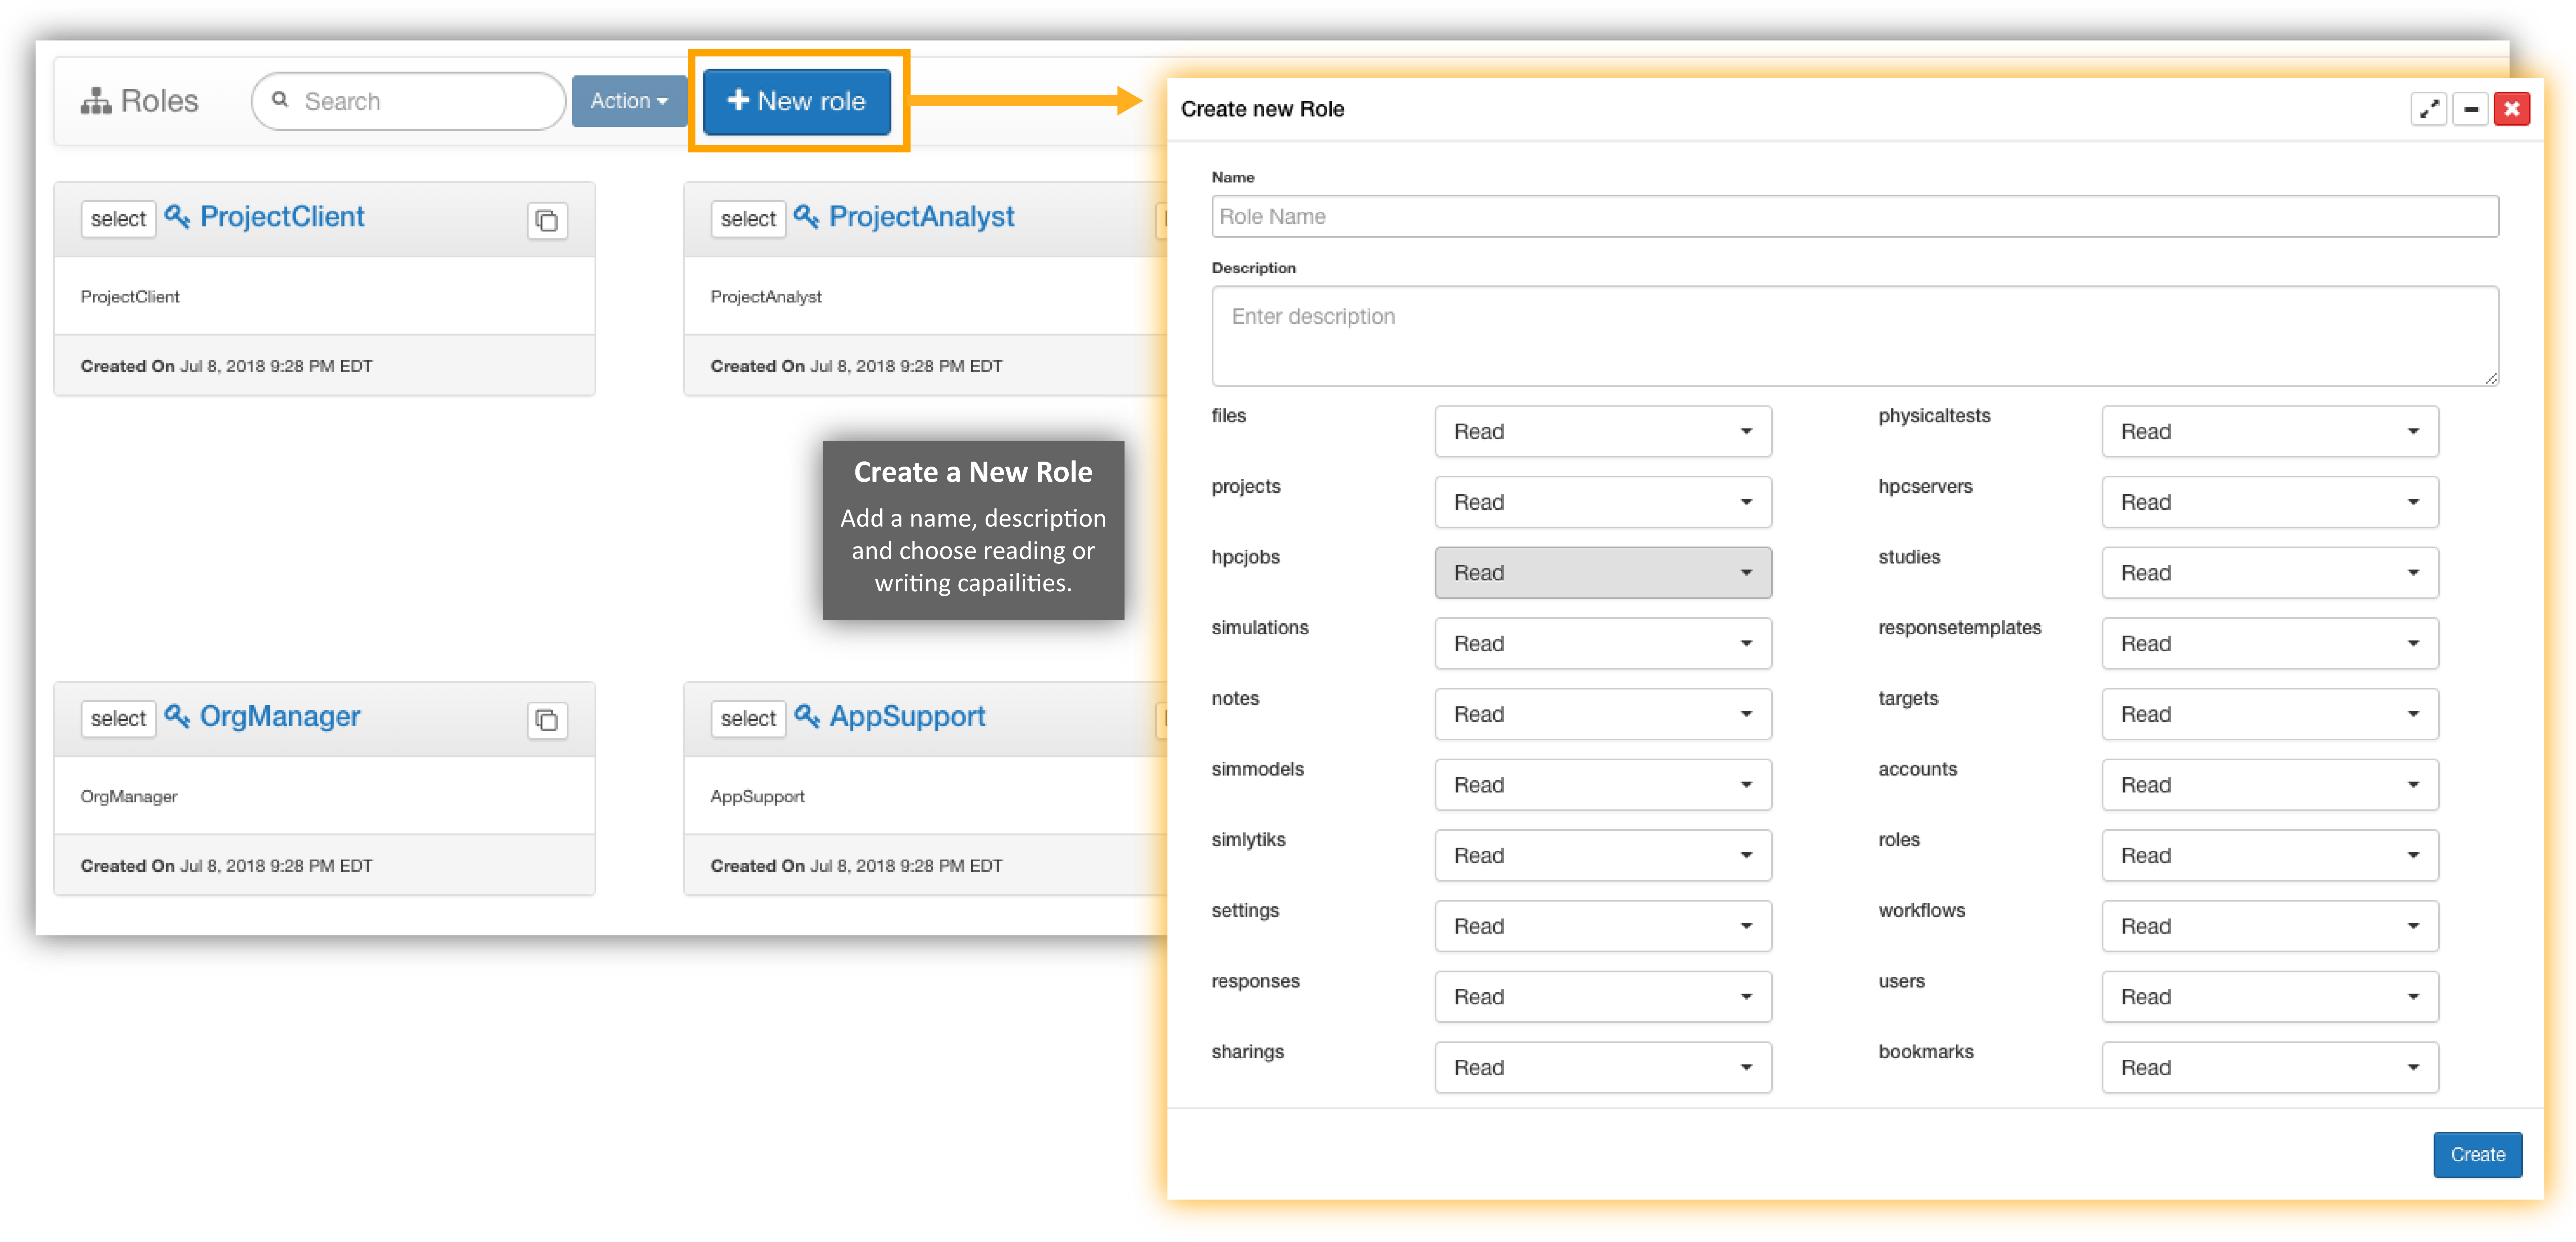
New Role
Click on ”New Role” next to “Actions”. Make sure to give a new role a name and description as well as set reading and writing capabilities for all the options listed.
Create a New Role
Where Am I?
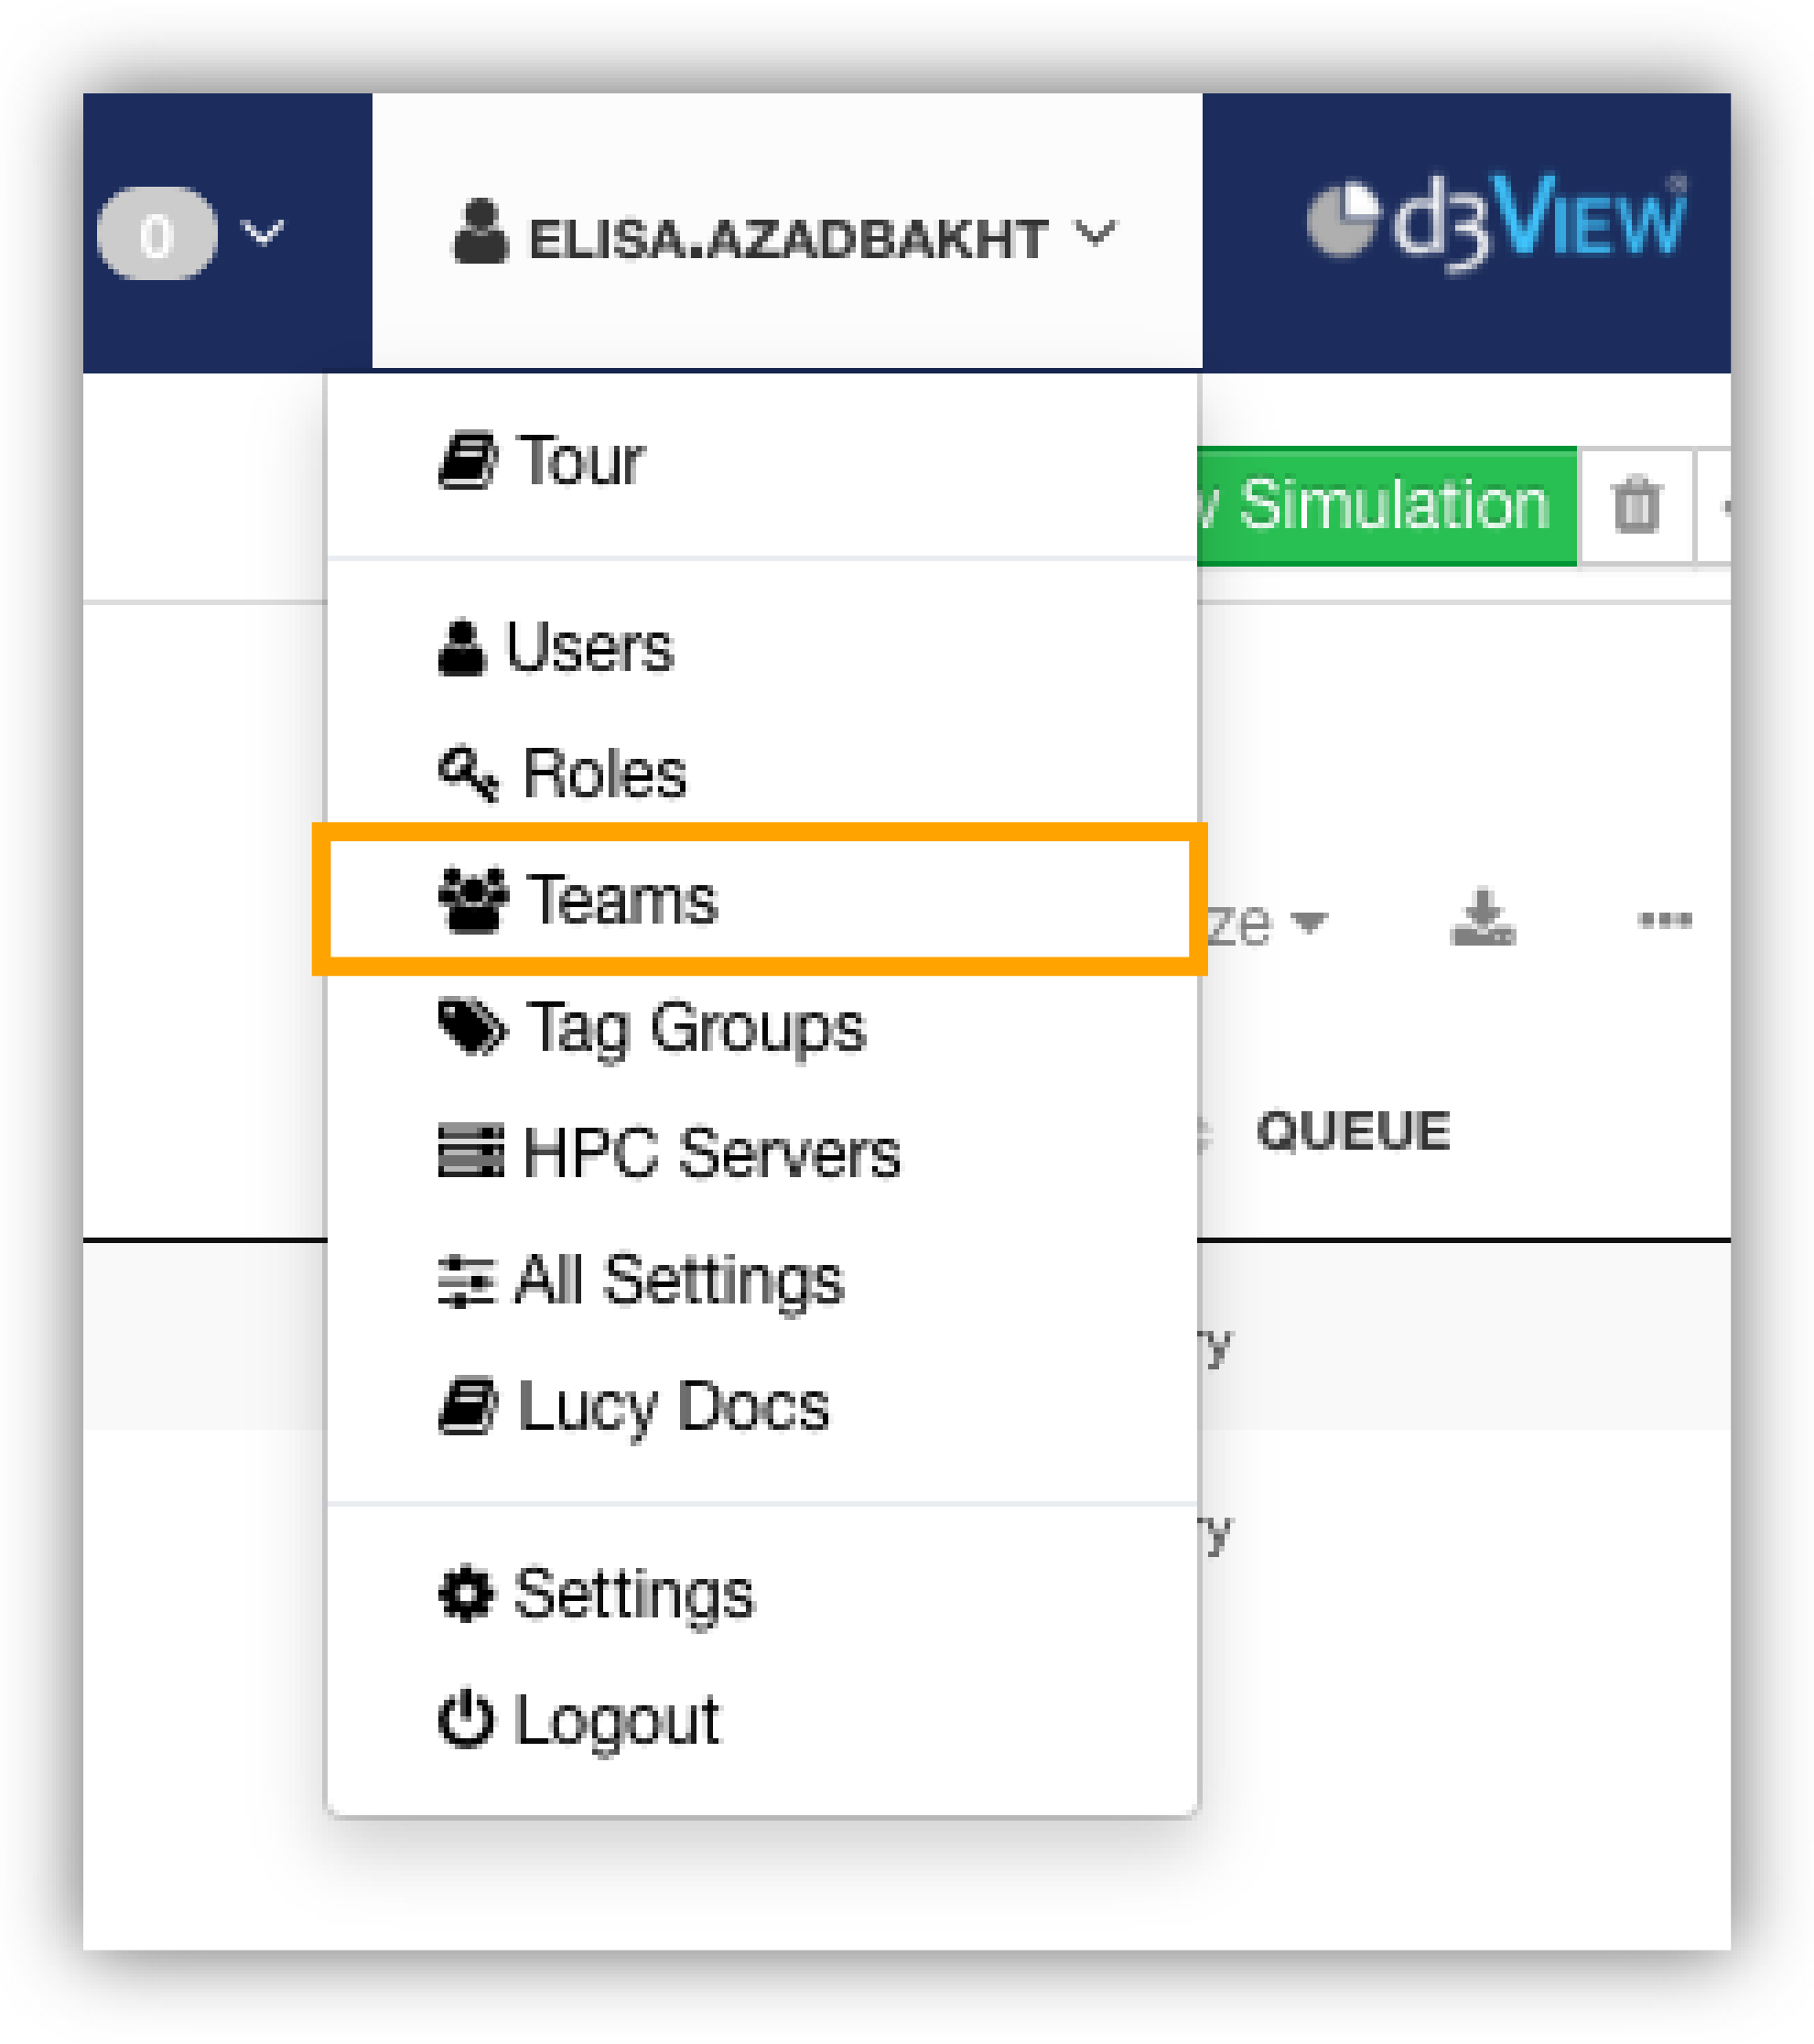
13.3. Teams
You can organize your users into teams. Replicate your office or labs’ teams onto the platform so you can stay more focused and efficient.
Click on the Teams option in the Administrative Menu to get started.
Teams Option
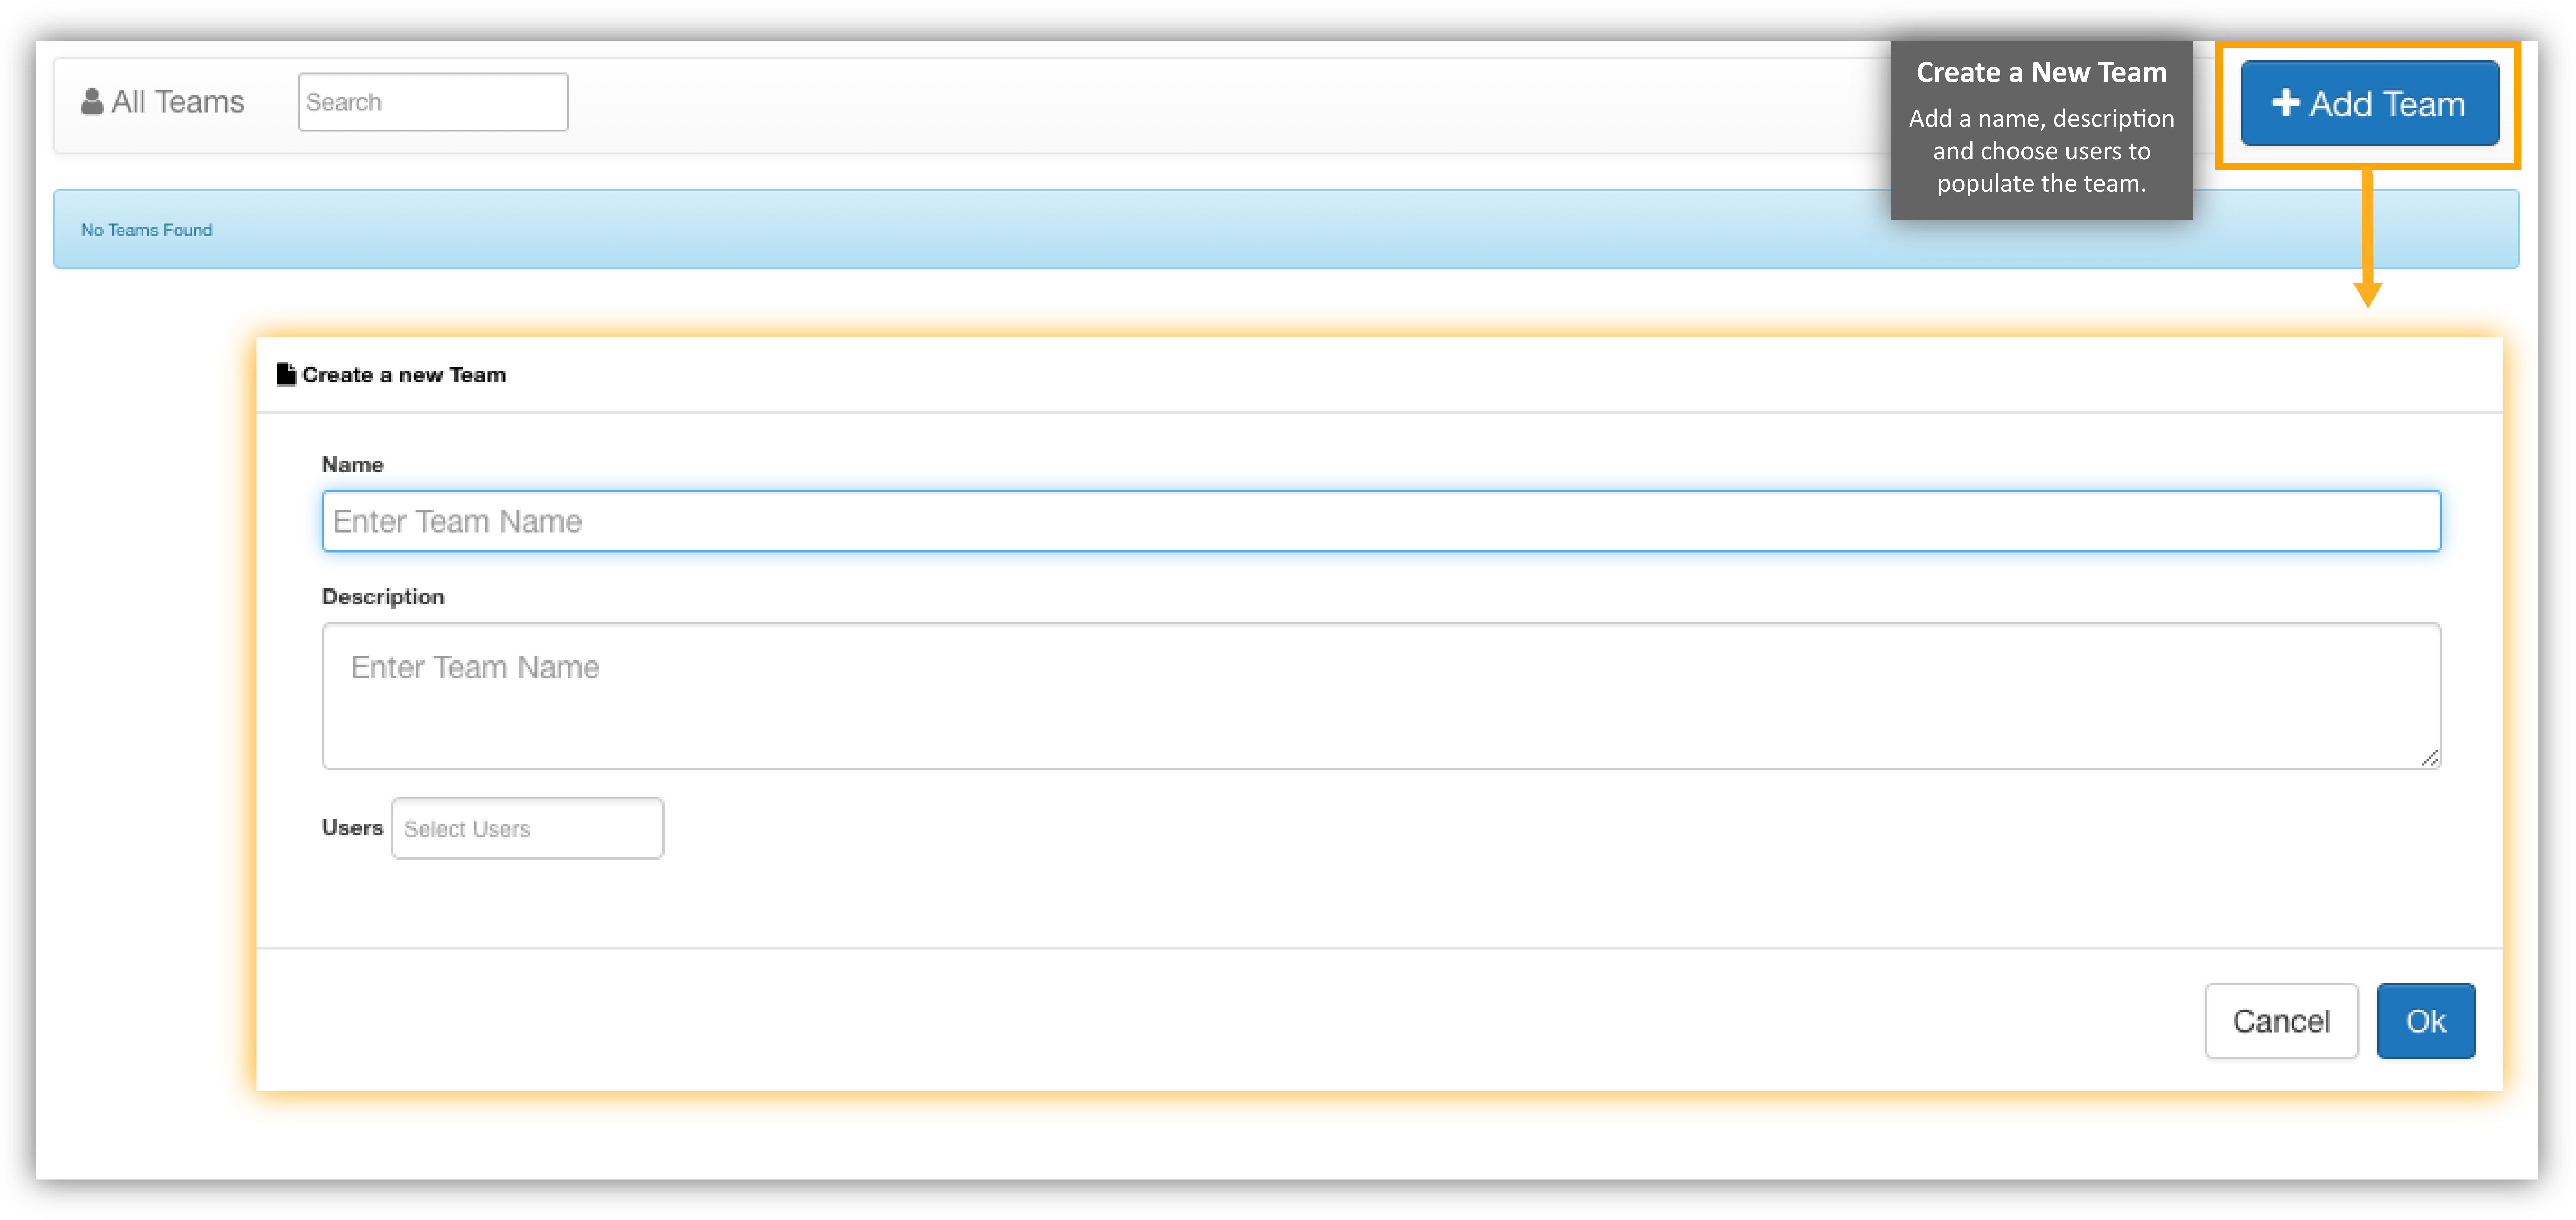
Add Team
Click on “Add Team” at the top right corner to create another team. In the new window, choose a name, description and users to populate you team.
Add a Team
Where Am I?
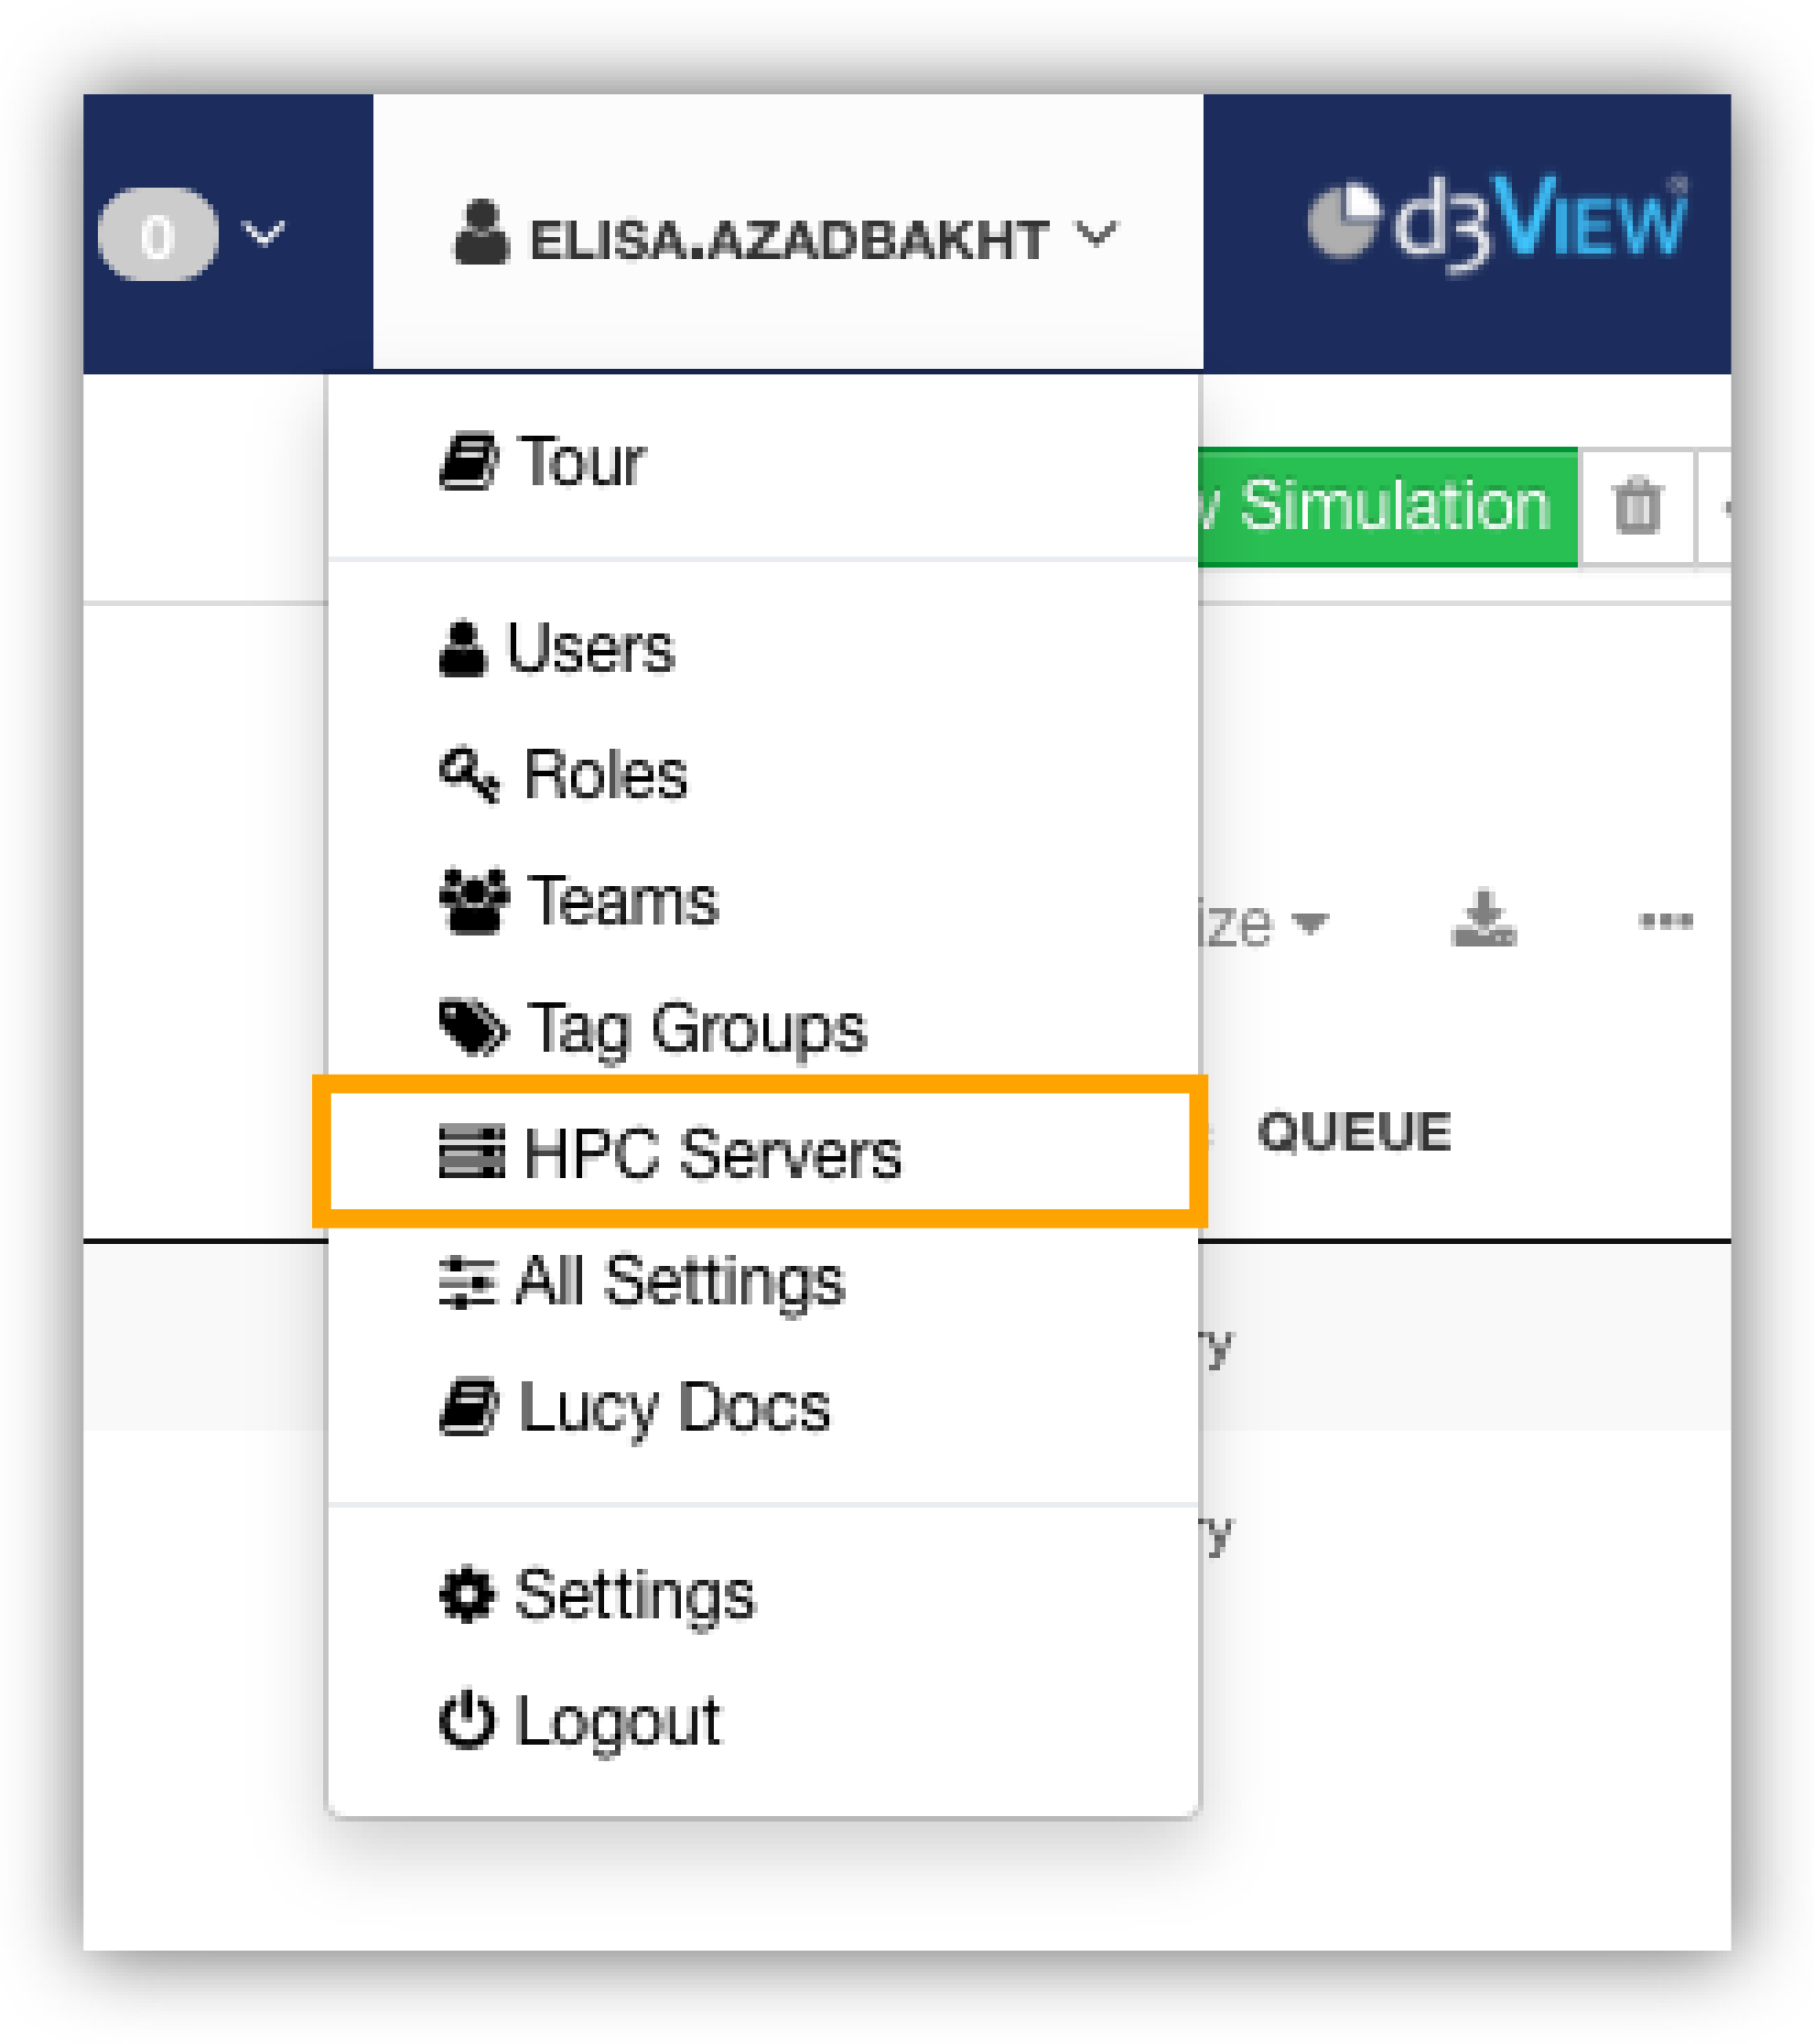
13.4. HPC Servers
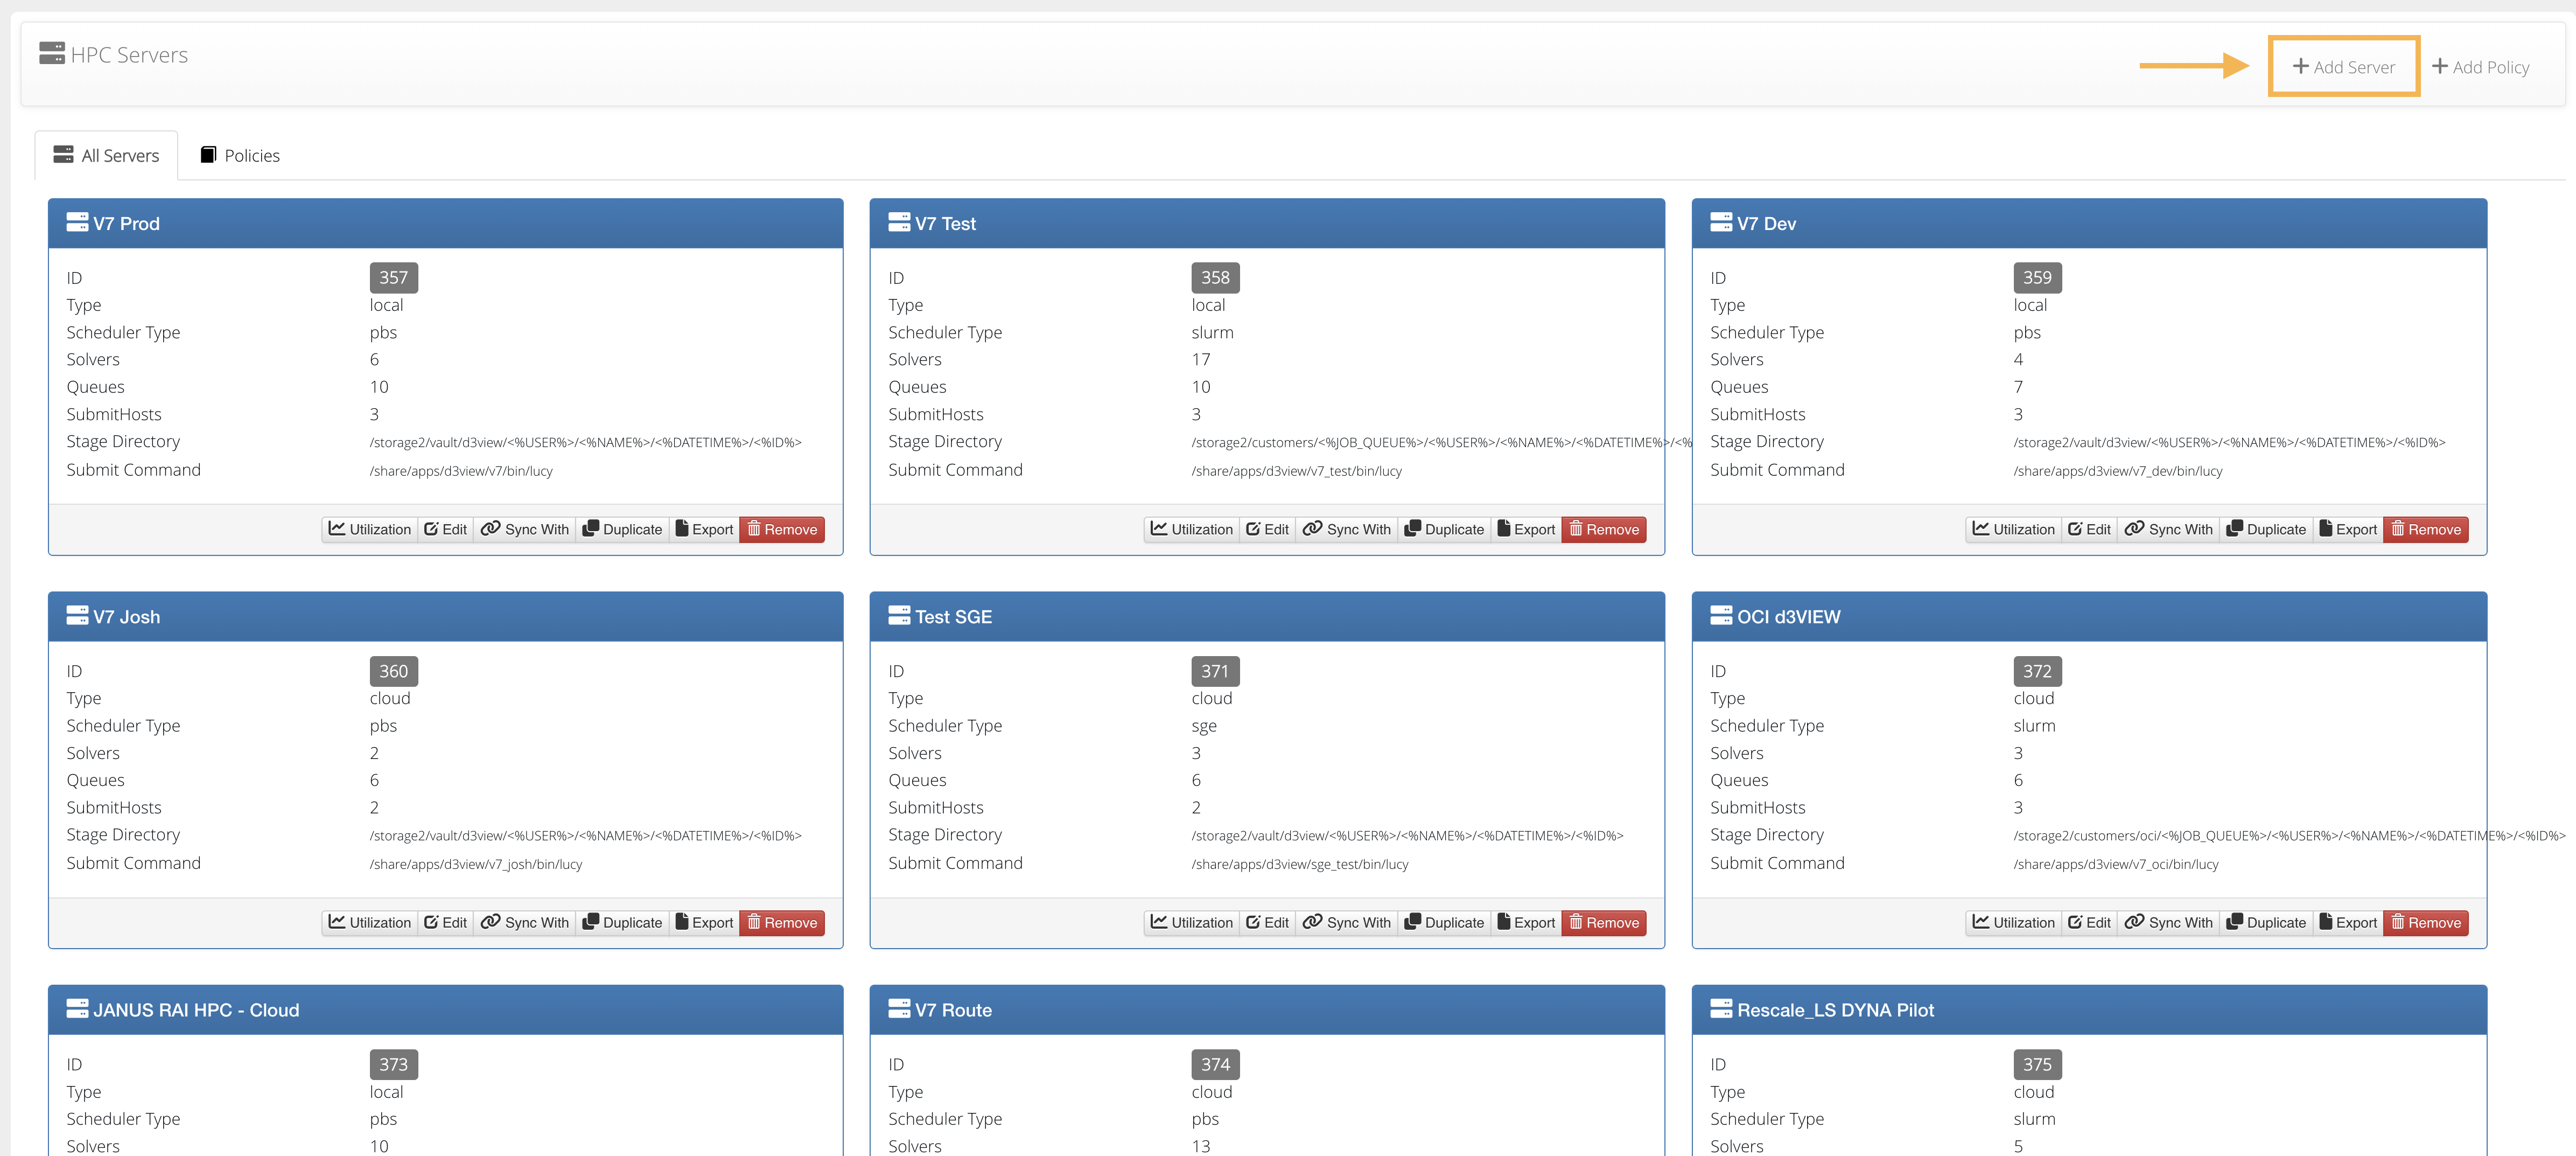
Click on the HPC Servers option in the Administrative Menu to get started.
HPC Servers Option
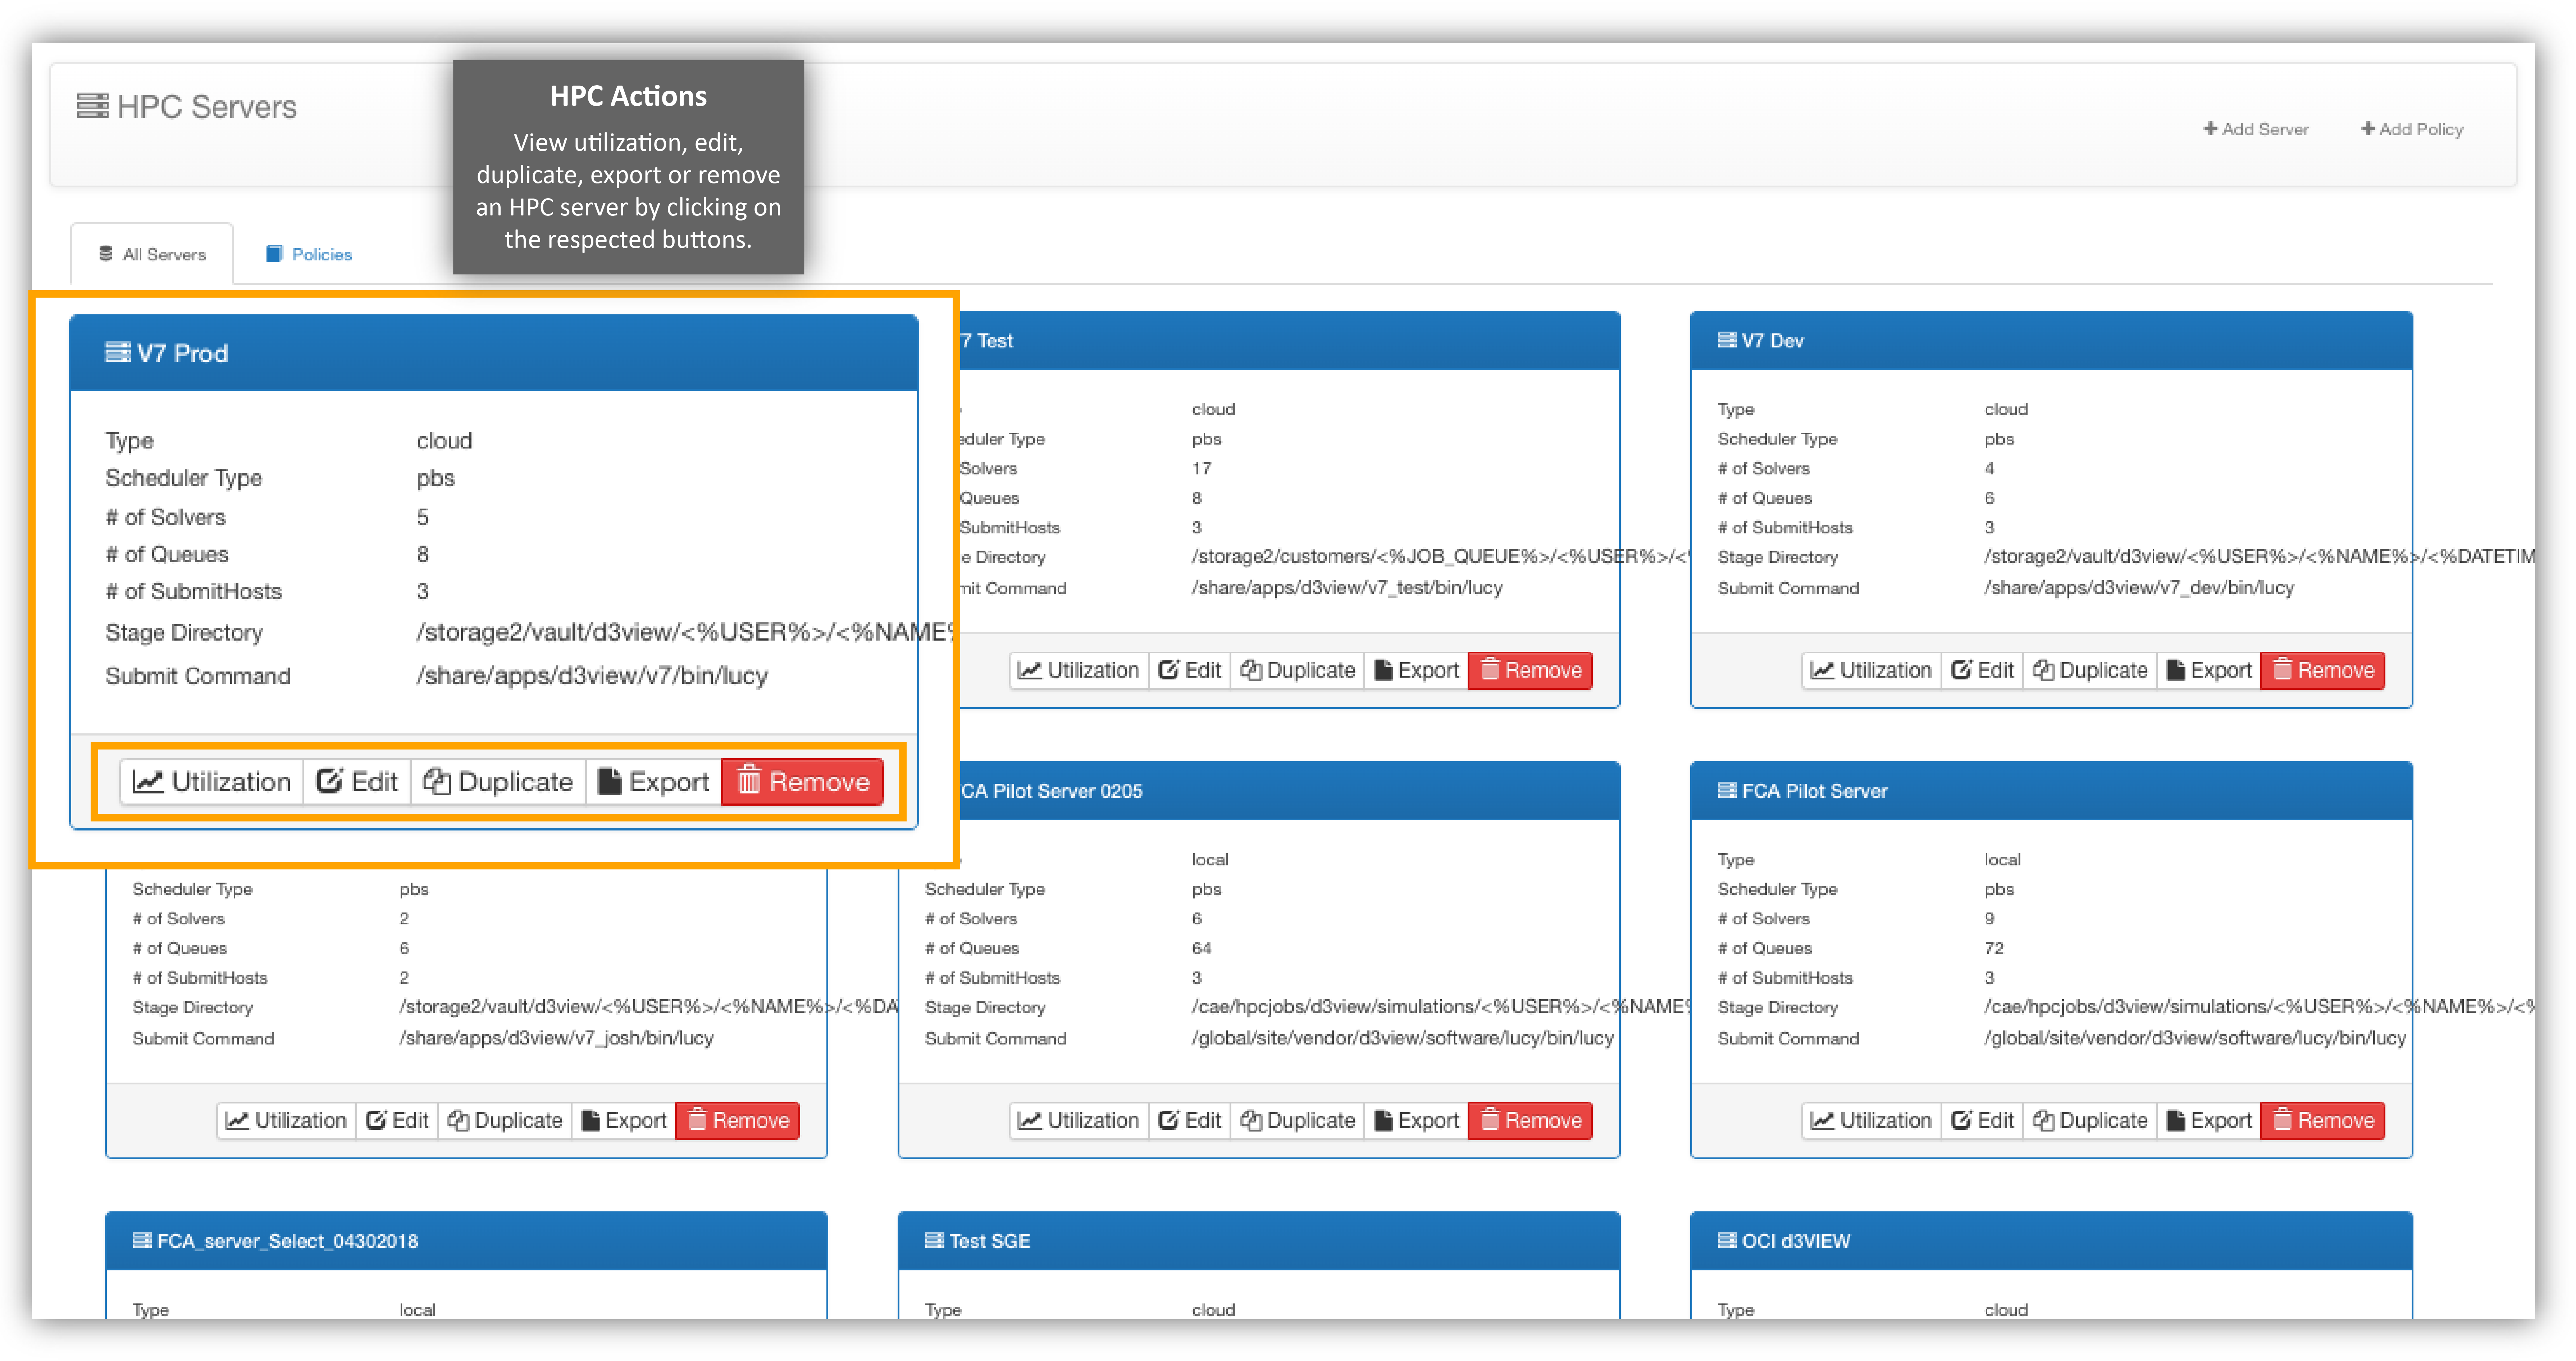
View thumbnails of all your HPC servers and perform actions on them such as viewing utilization, editing, duplicating, exporting or deleting.
All HPC Servers
Where Am I?
Add an HPC Server
Click on ”Add Server” at the top to start a new HPC server configuration.
Add an HPC Server
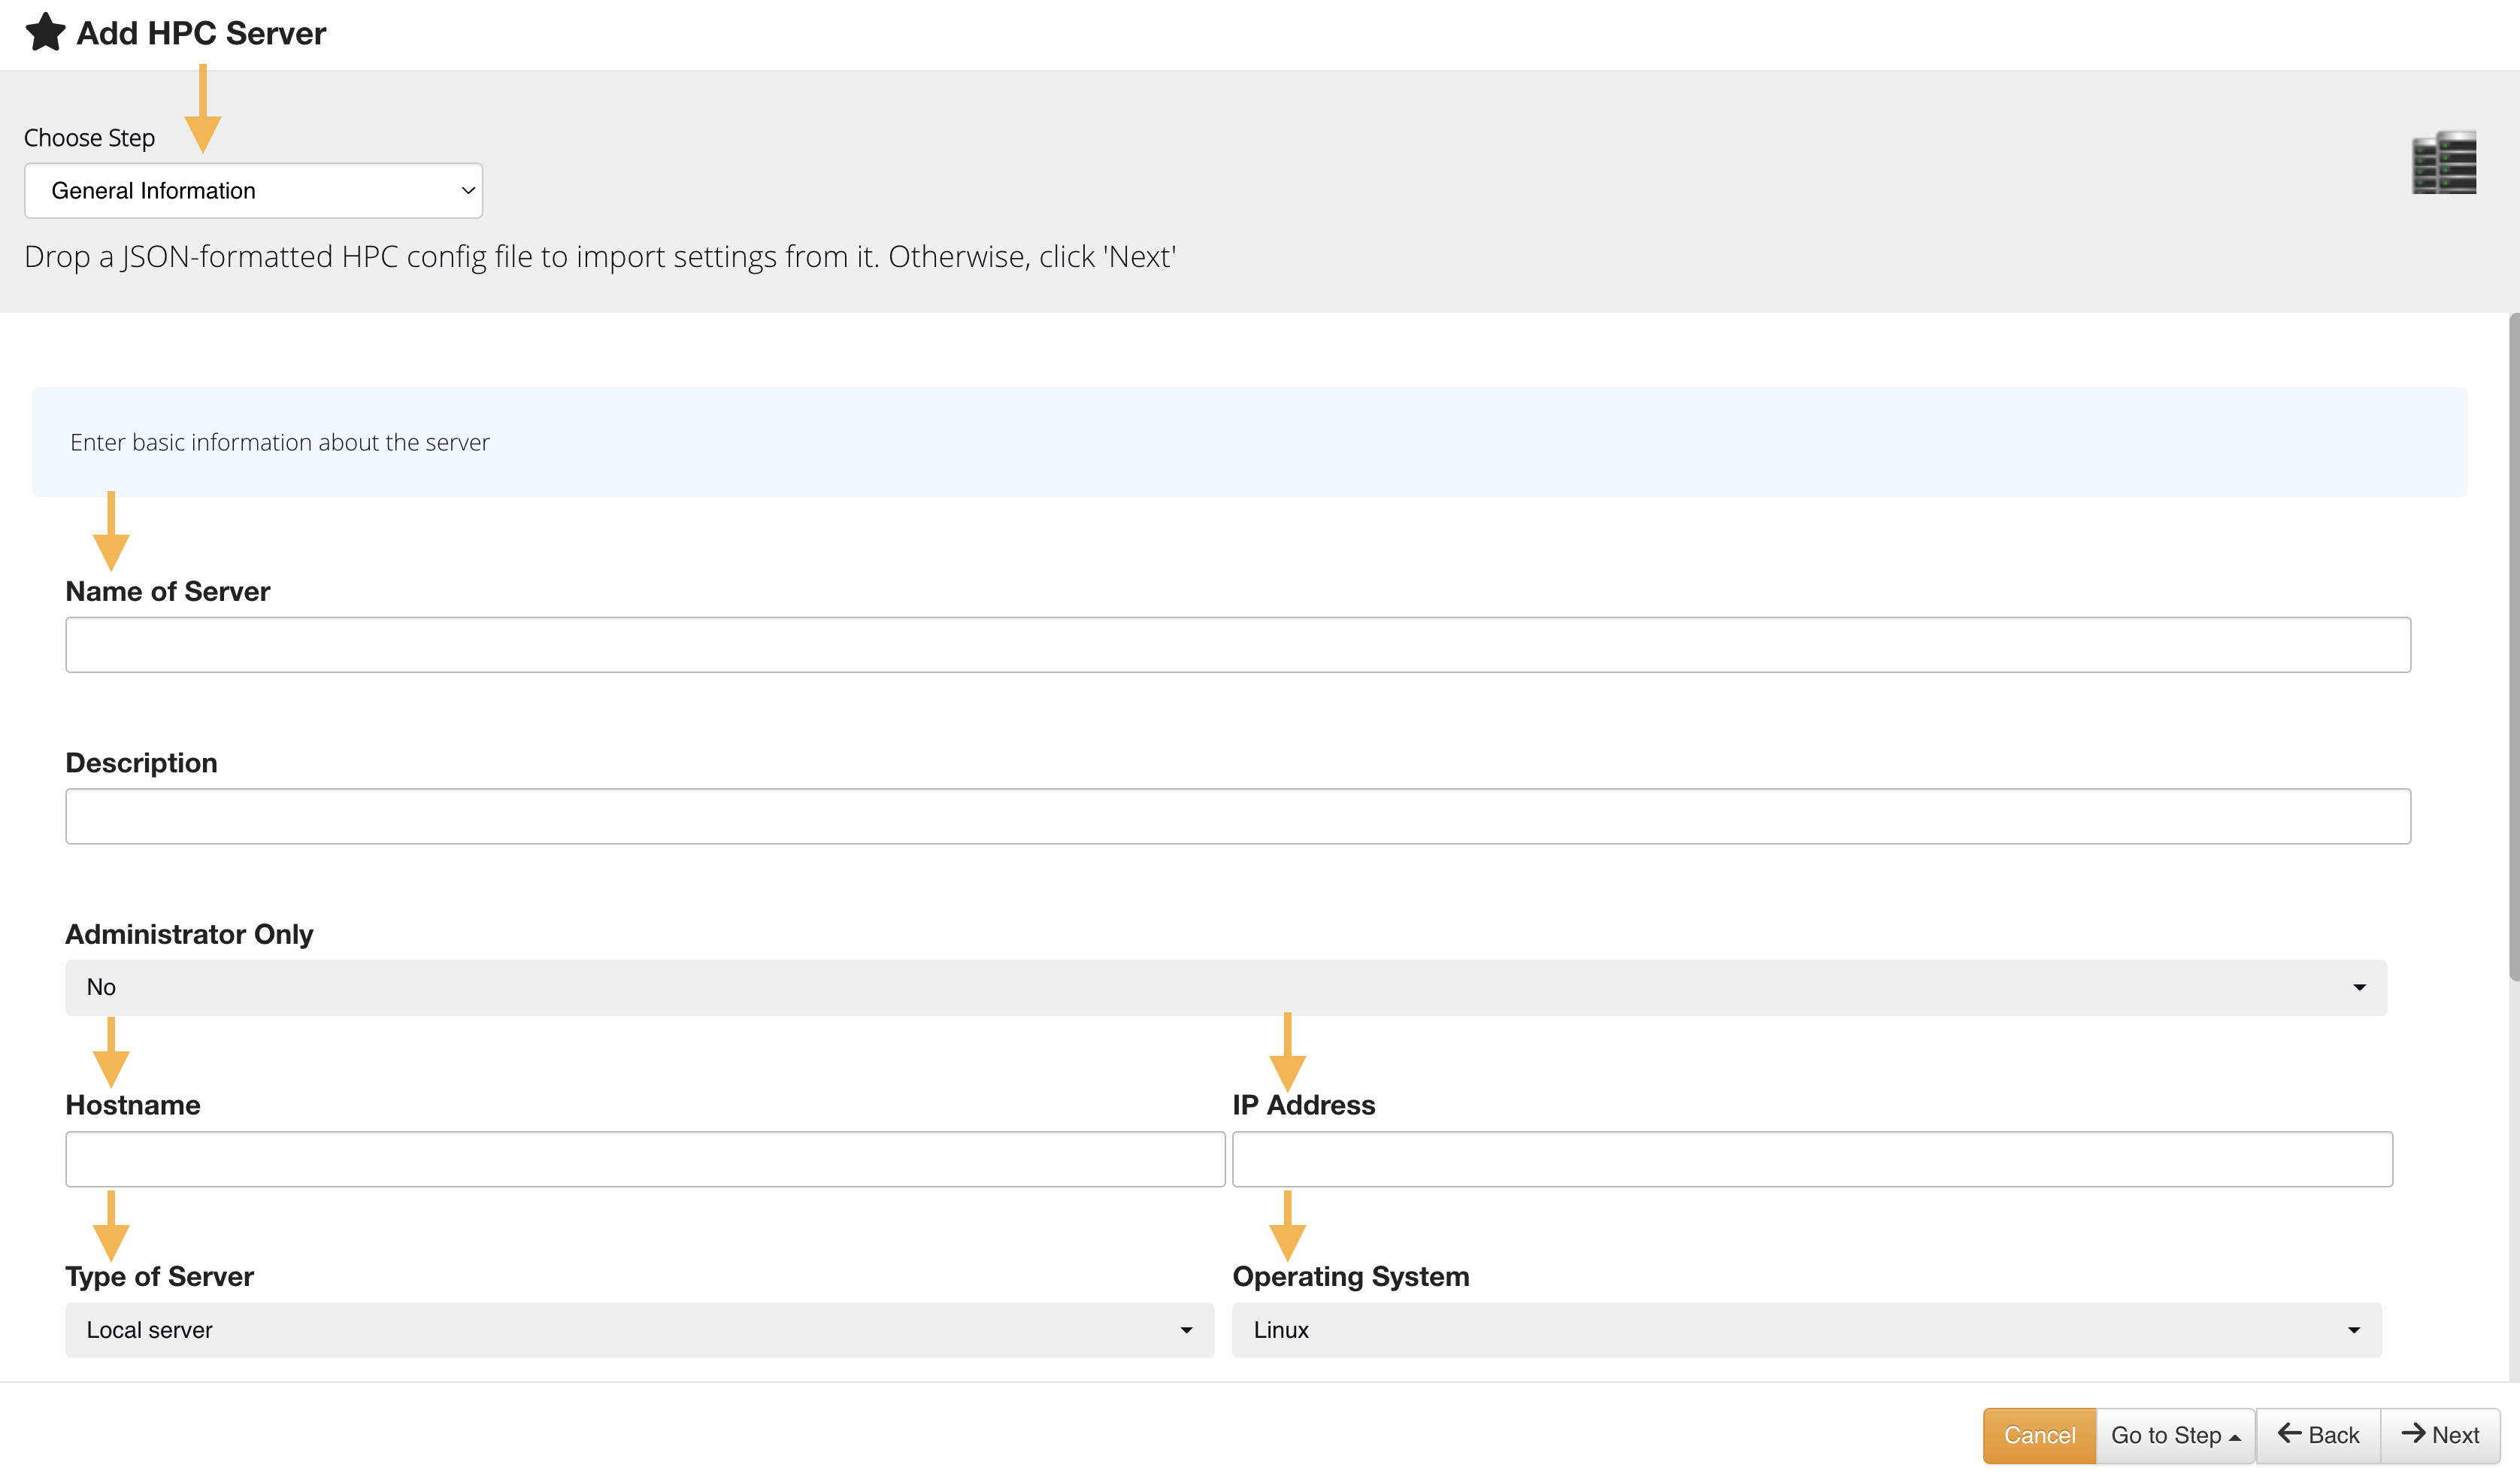
Under “Choose Step” at the top, pick General Information in the drop-down. Make sure to name your server, include the host name and IP address, as well as choose type of server. d3VIEW works with Linux for the operating system.
General Information
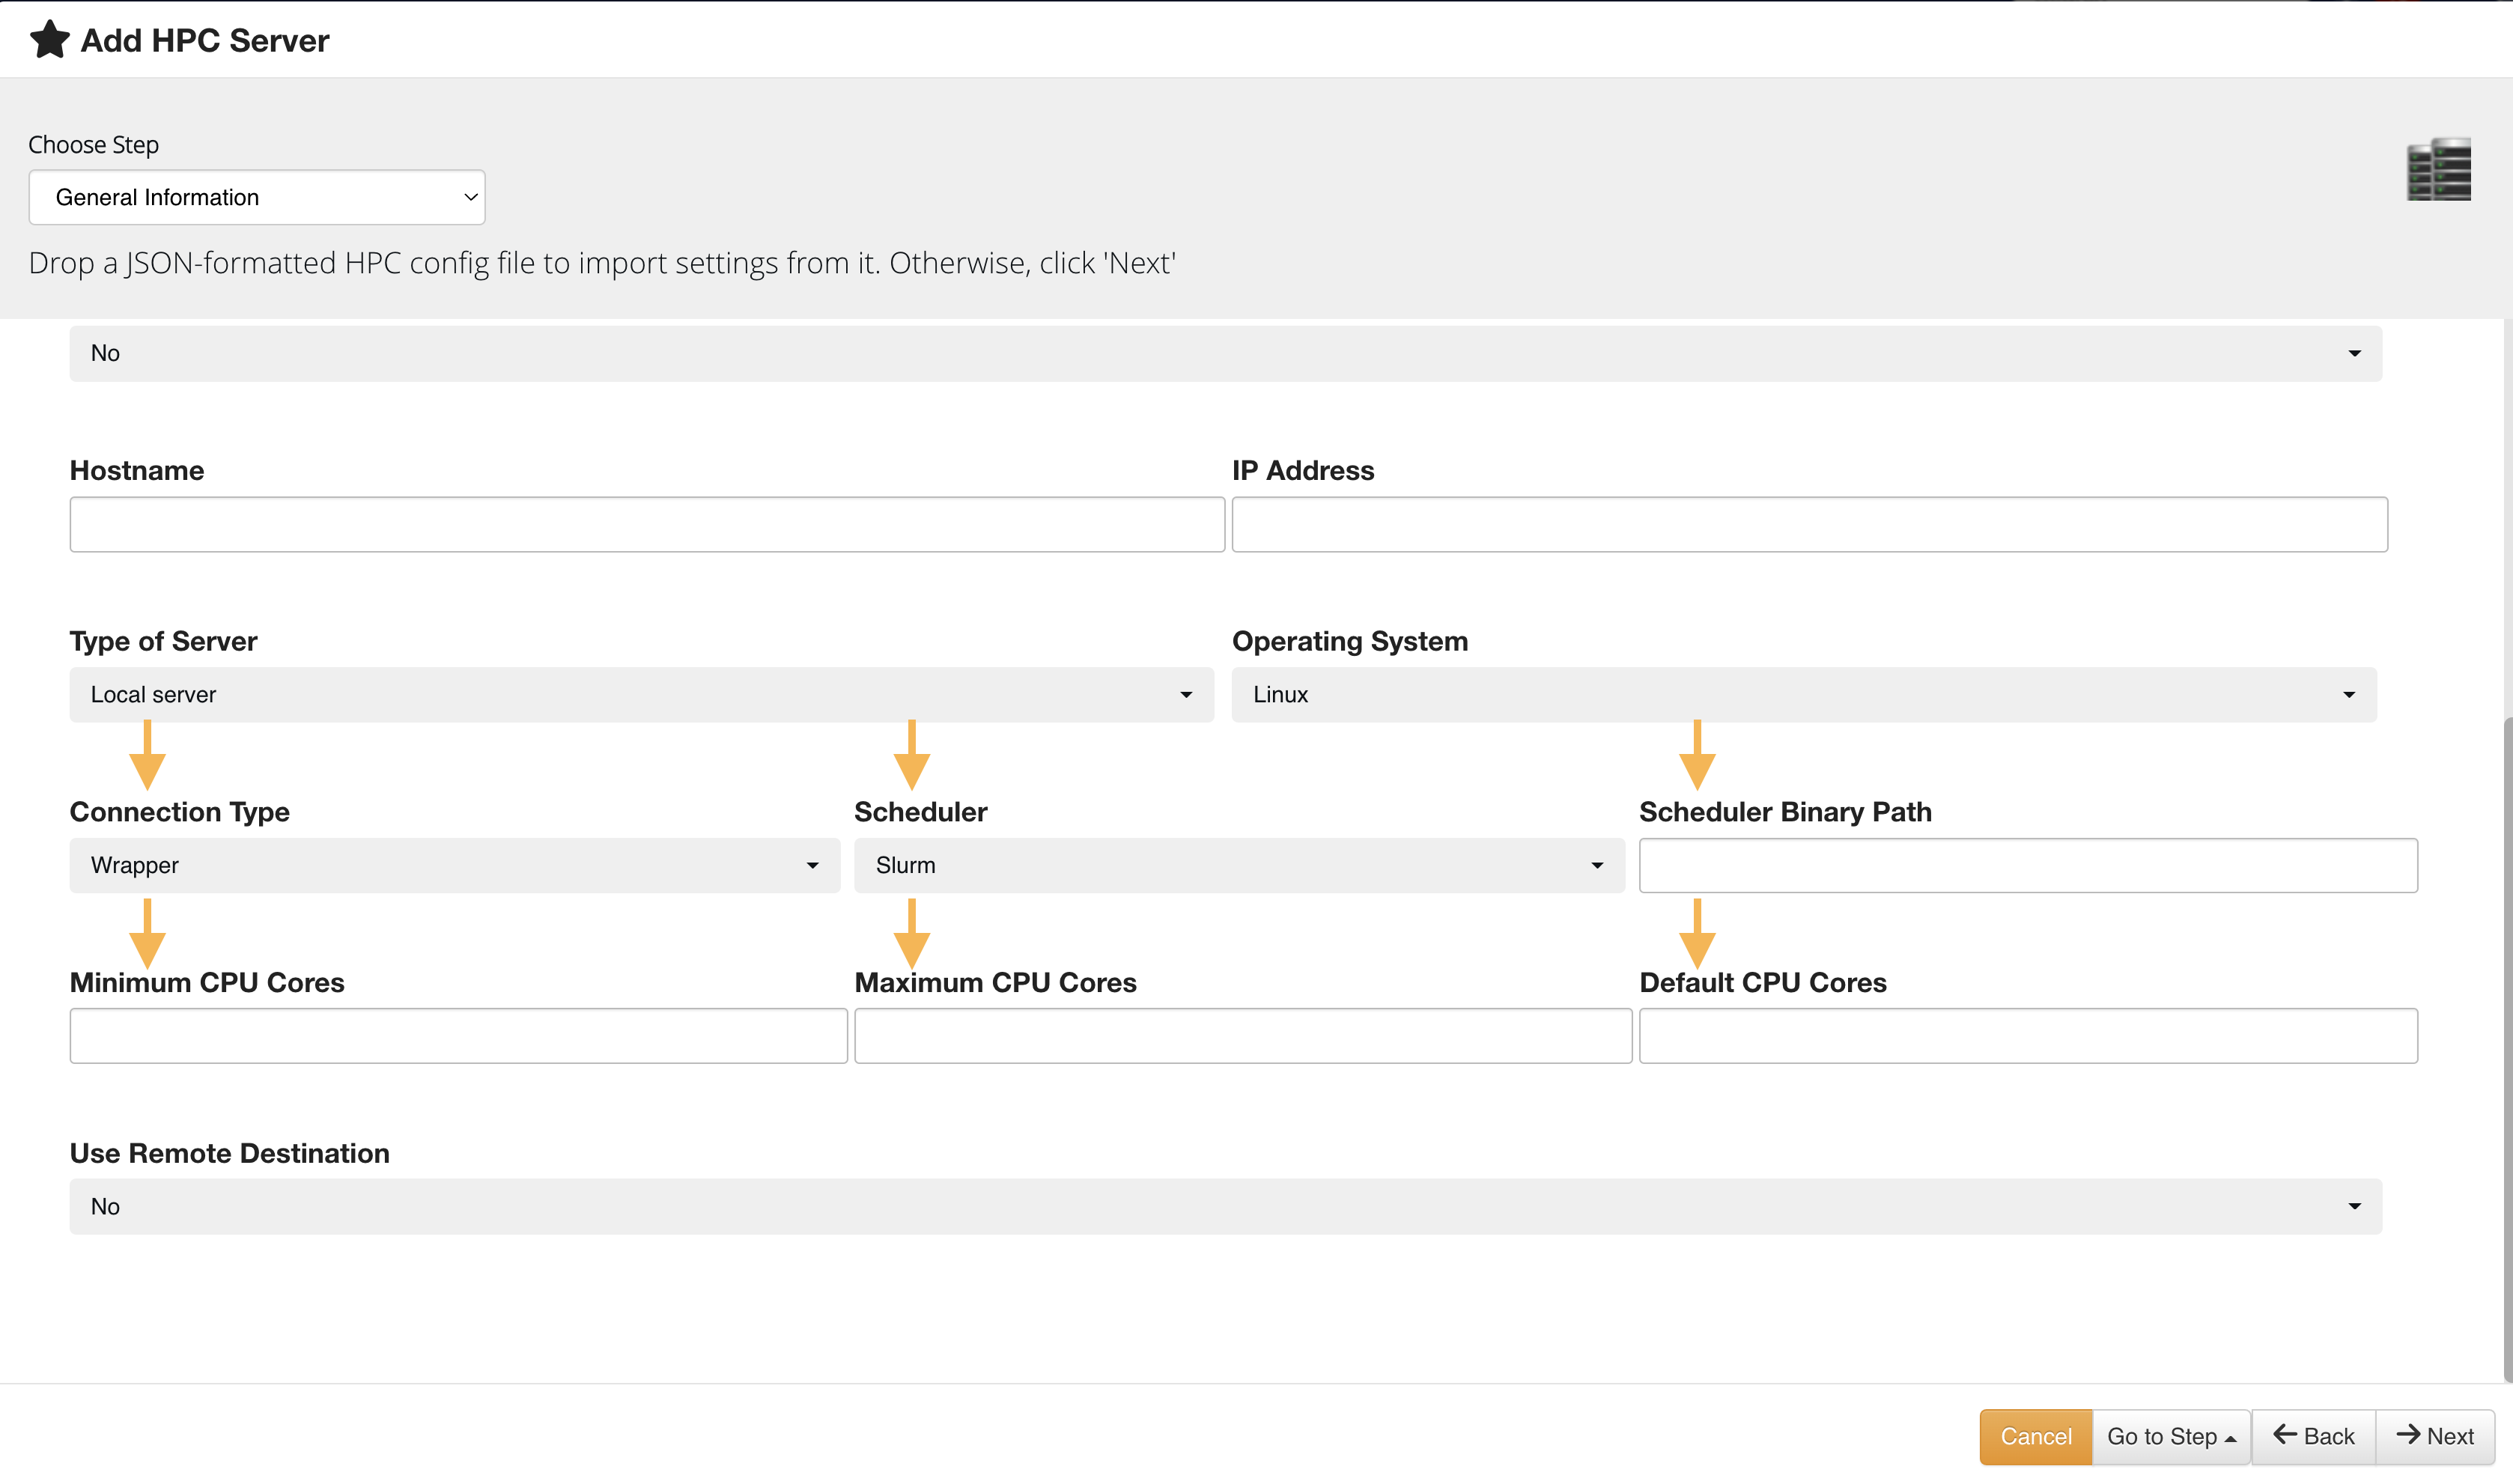
Scroll to see more configuration options. Choose the connection type, scheduler and scheduler path, as well as minimum, maximum and default core usage.
More General Information
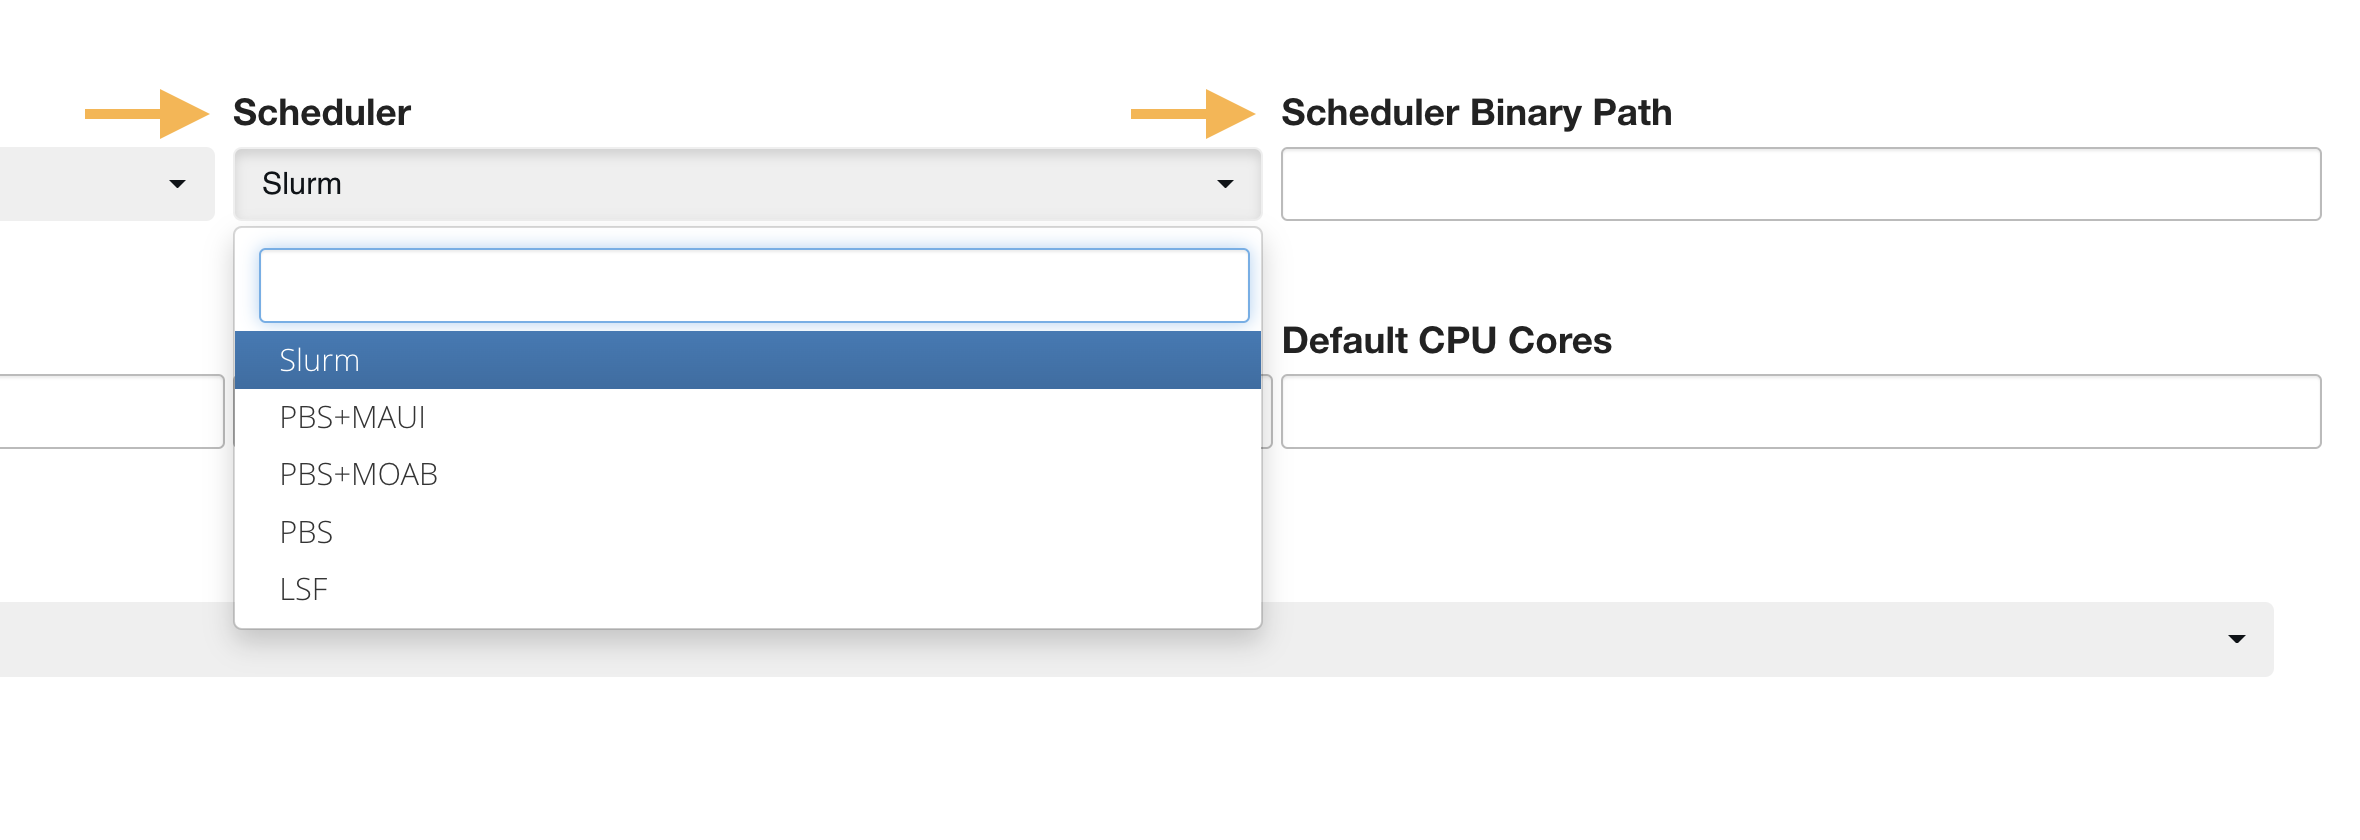
For the scheduler, choose from multiple scheduler types and connect any scheduler via the location (binary path). This makes scheduler connection quick and easy.
Connect Scheduler
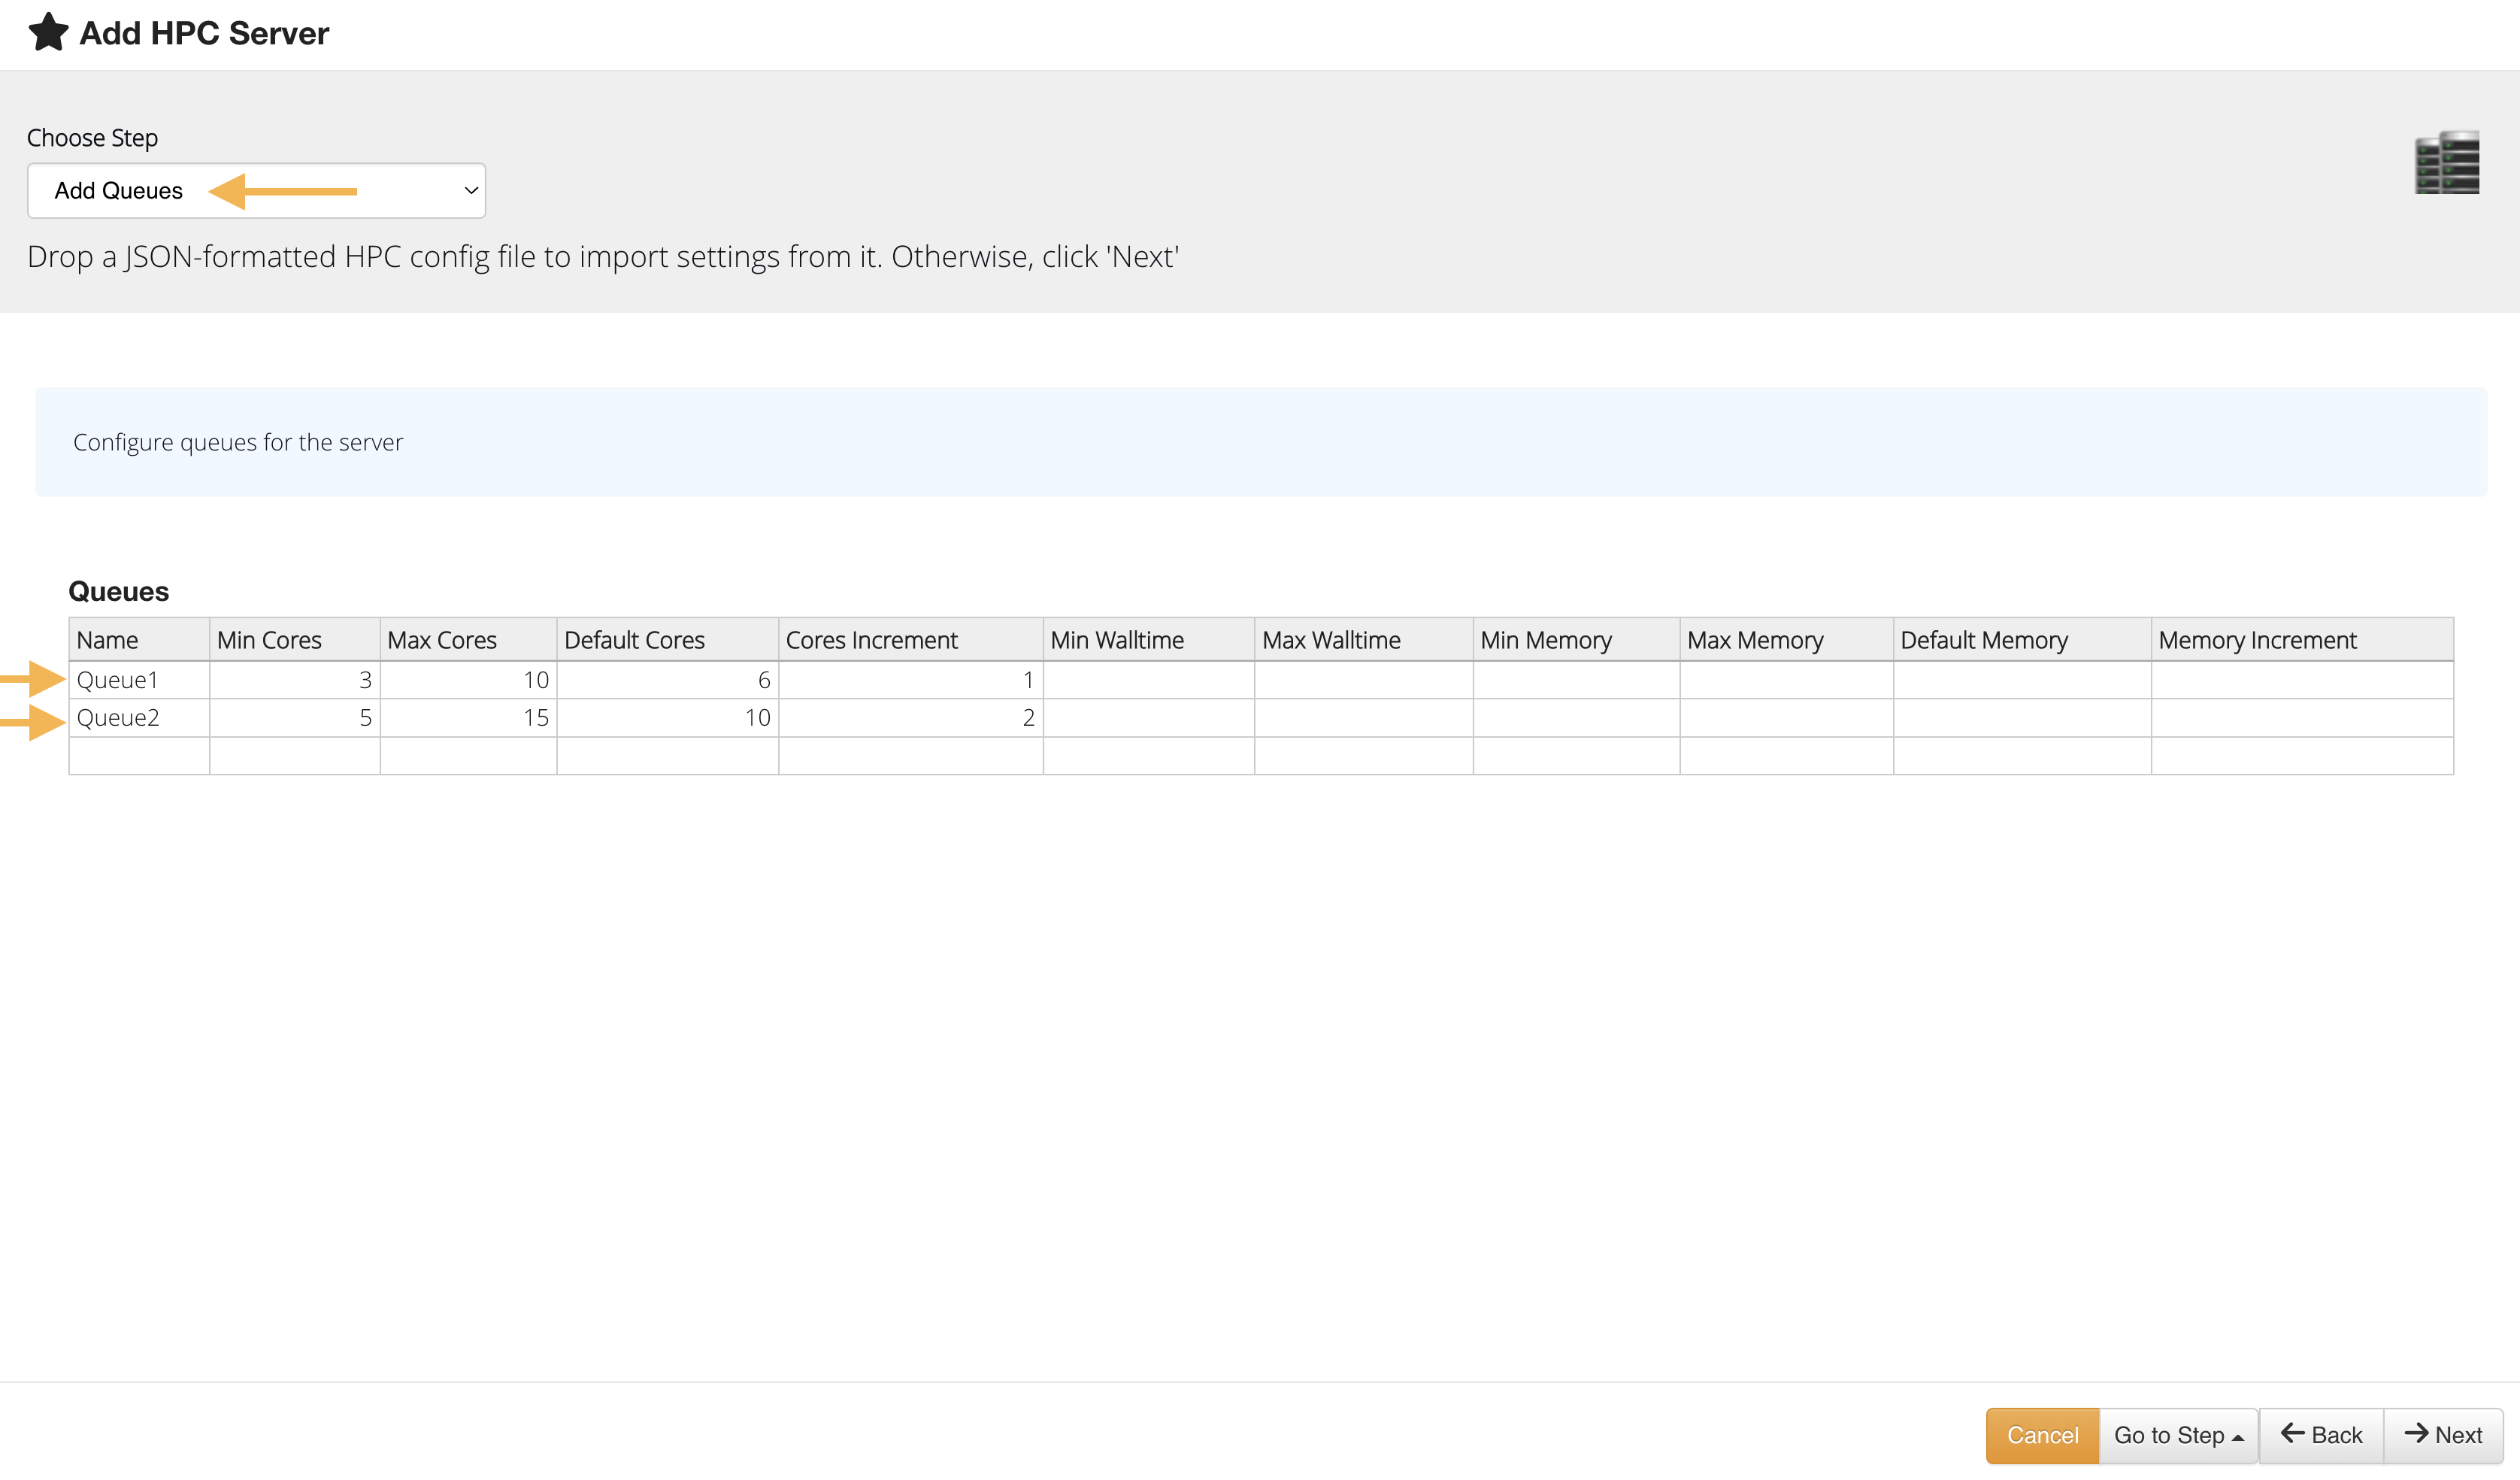
Next, we’ll go back up to “Choose Step” and select “Add Queues”. Server Queues are cores divided into partitions, which then can be assigned to users, teams, etc. They allow us to control and organize our HPC resources.
Start typing out your queues and queue specifications in the provided table. More rows will appear as you fill the cells.
Add Queues
We’ll add solvers next. Choose this step at the top and click “+ Add” to create a new solver.
Add Solvers
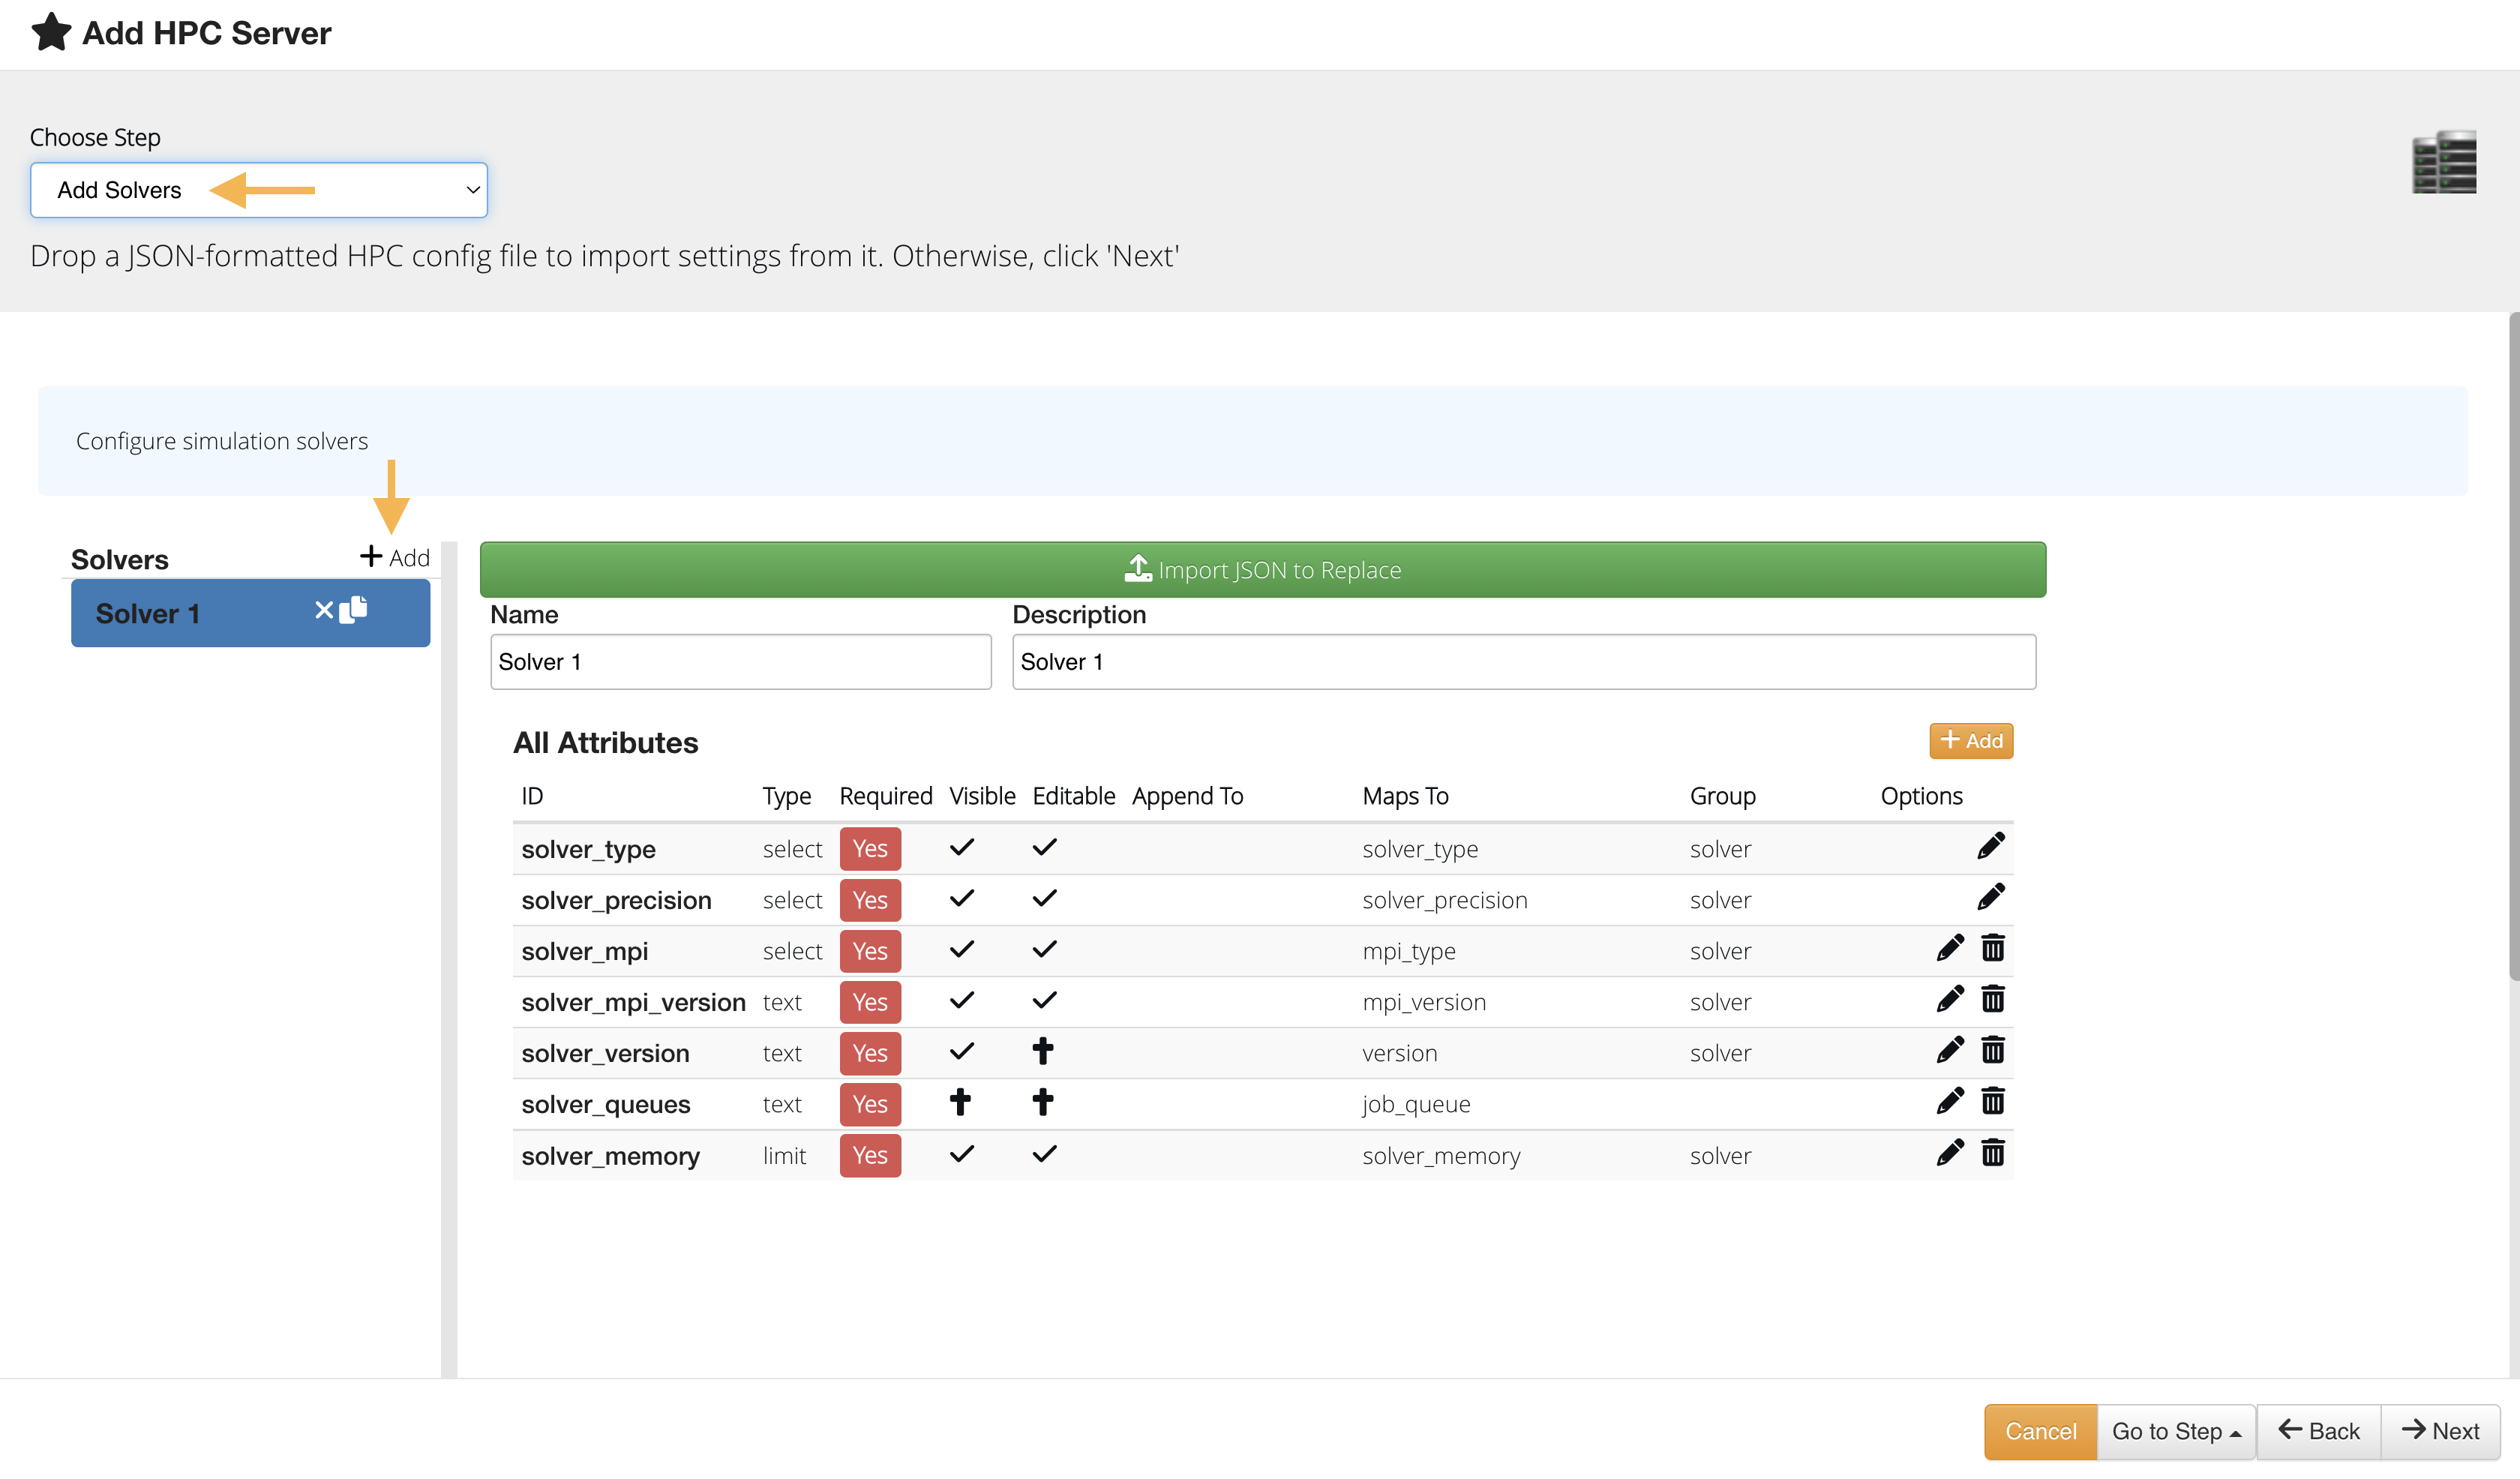
Solvers allow us to create default configurations for job submissions to the HPC. We are free to add, edit and define attributes for the solvers, so we can have an unlimited number of applications. Click the + add icon to create a new solver attribute or any of the pencil icons to edit existing attributes.
Add or Edit Solver Attributes

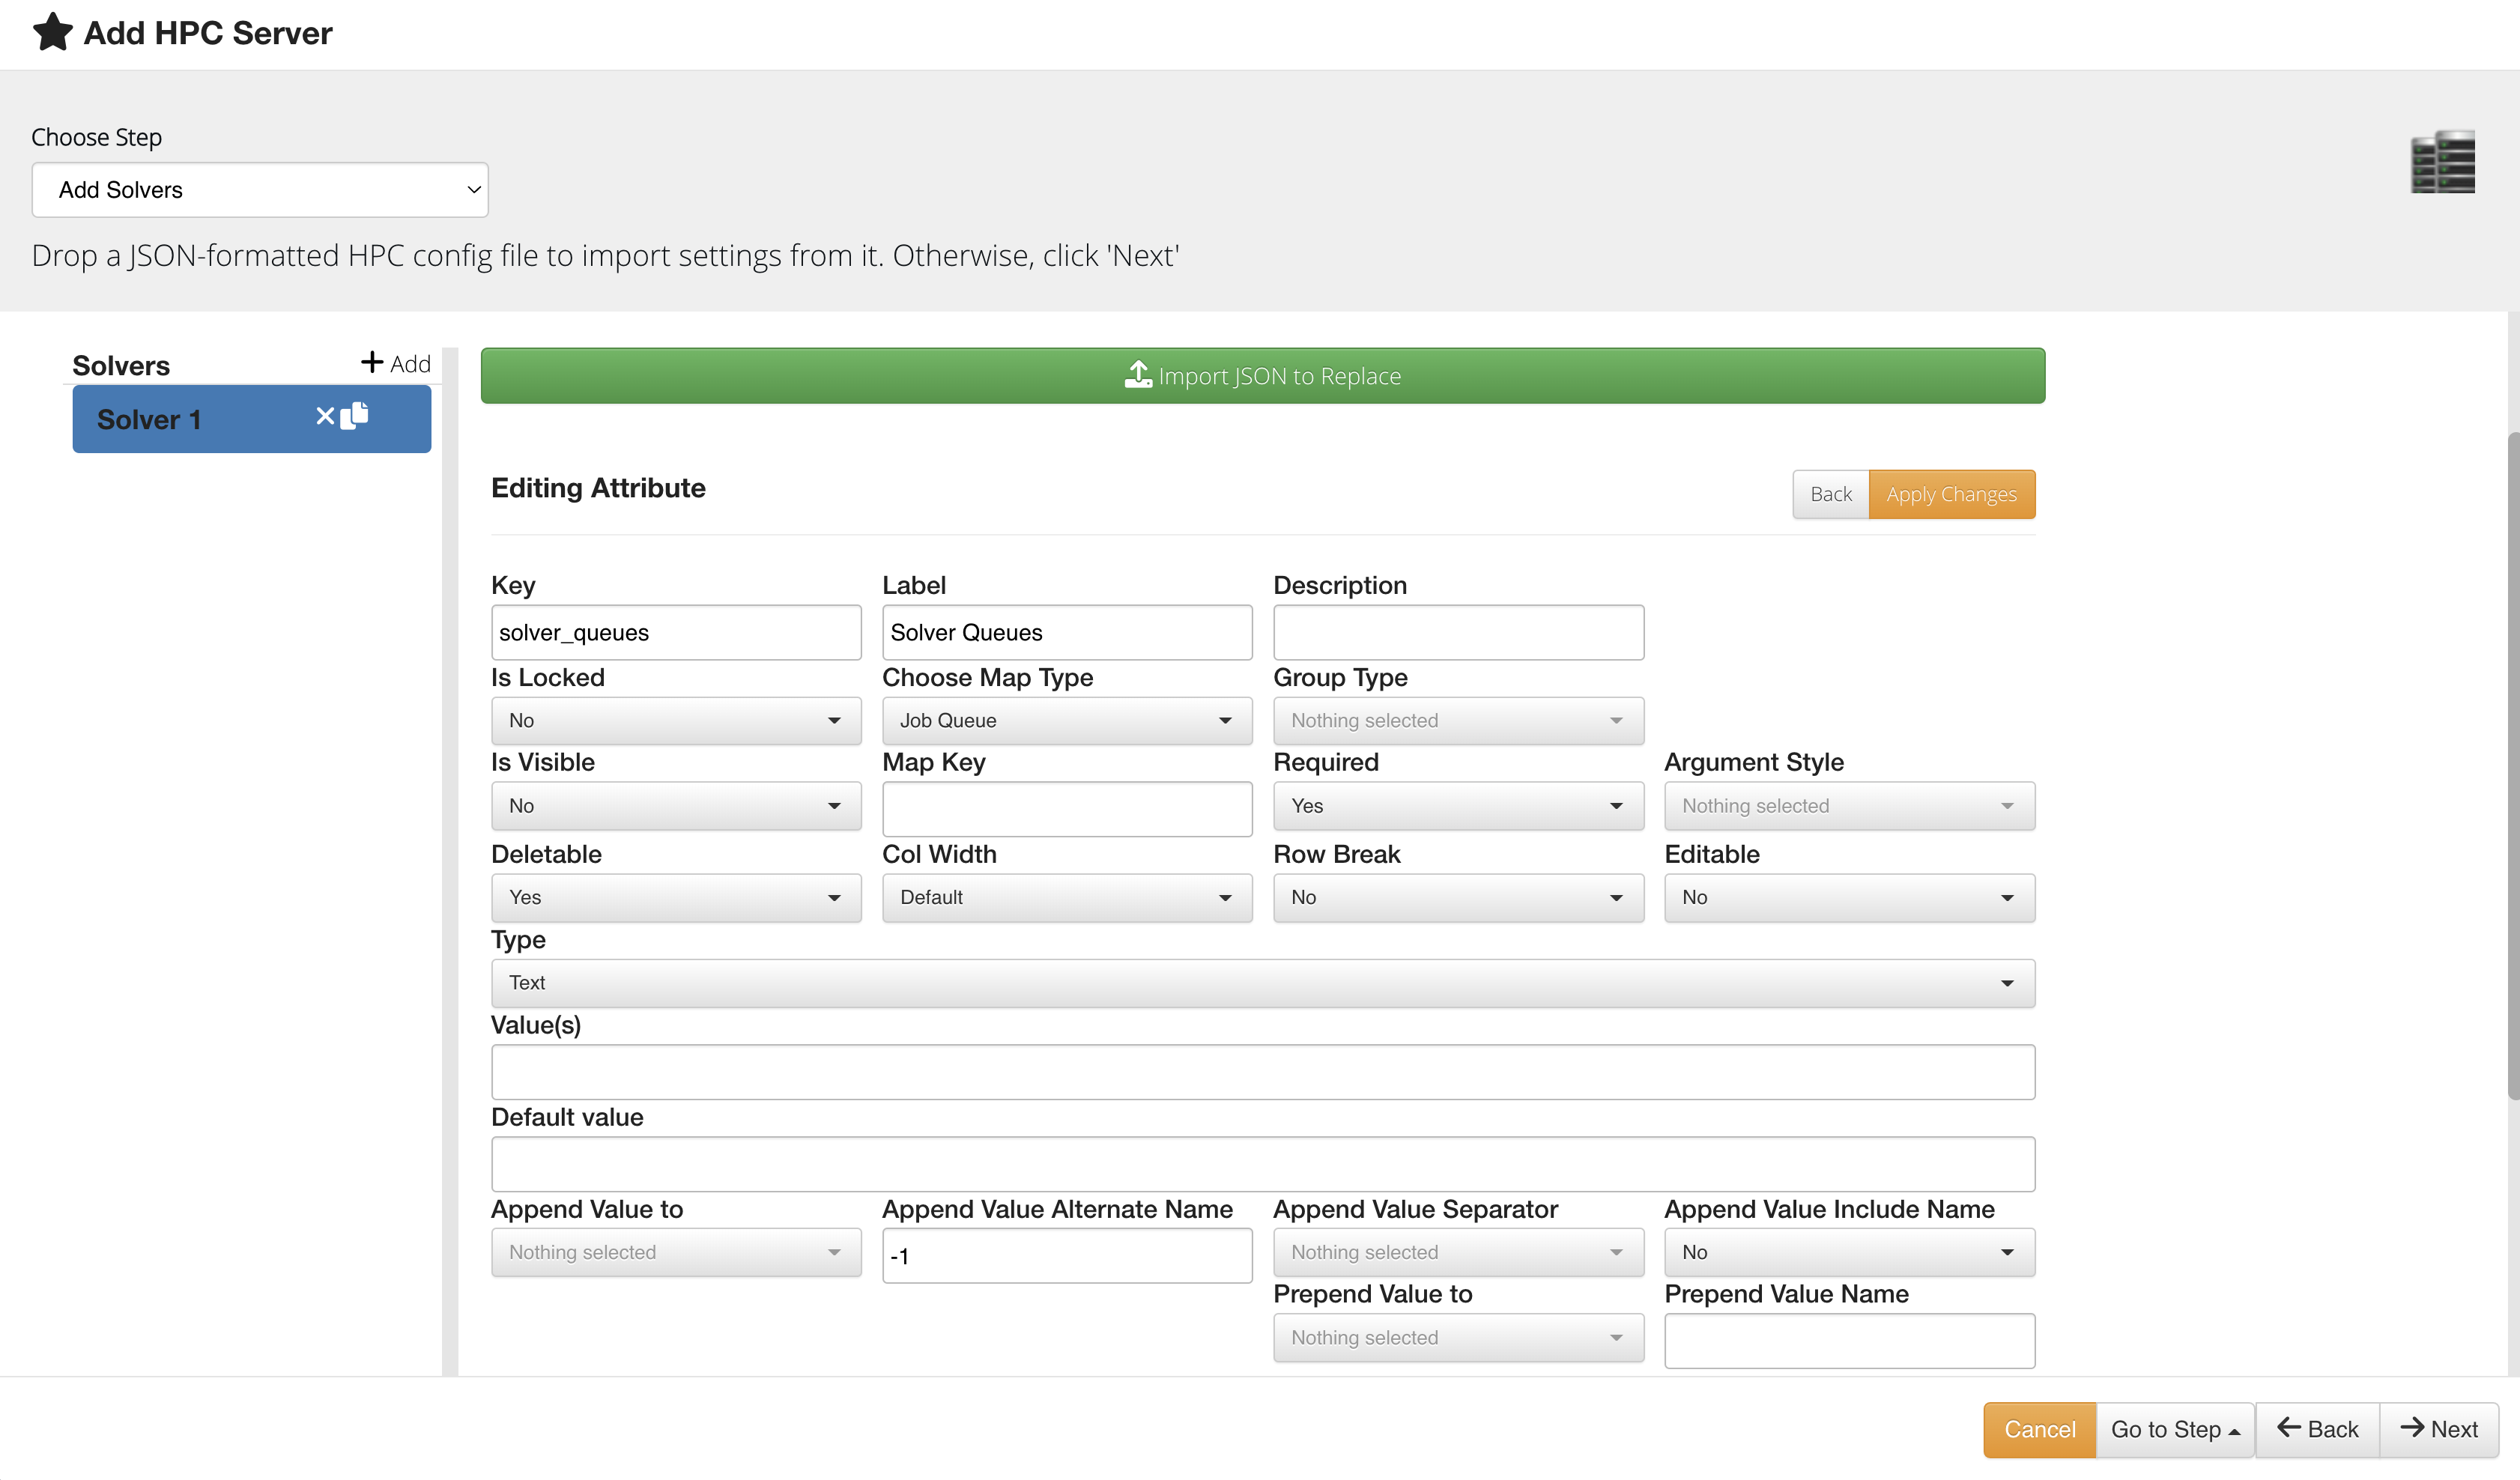
For example, we can edit the solver queues and associate particular partitions to the solver.
Edit Solver Queues
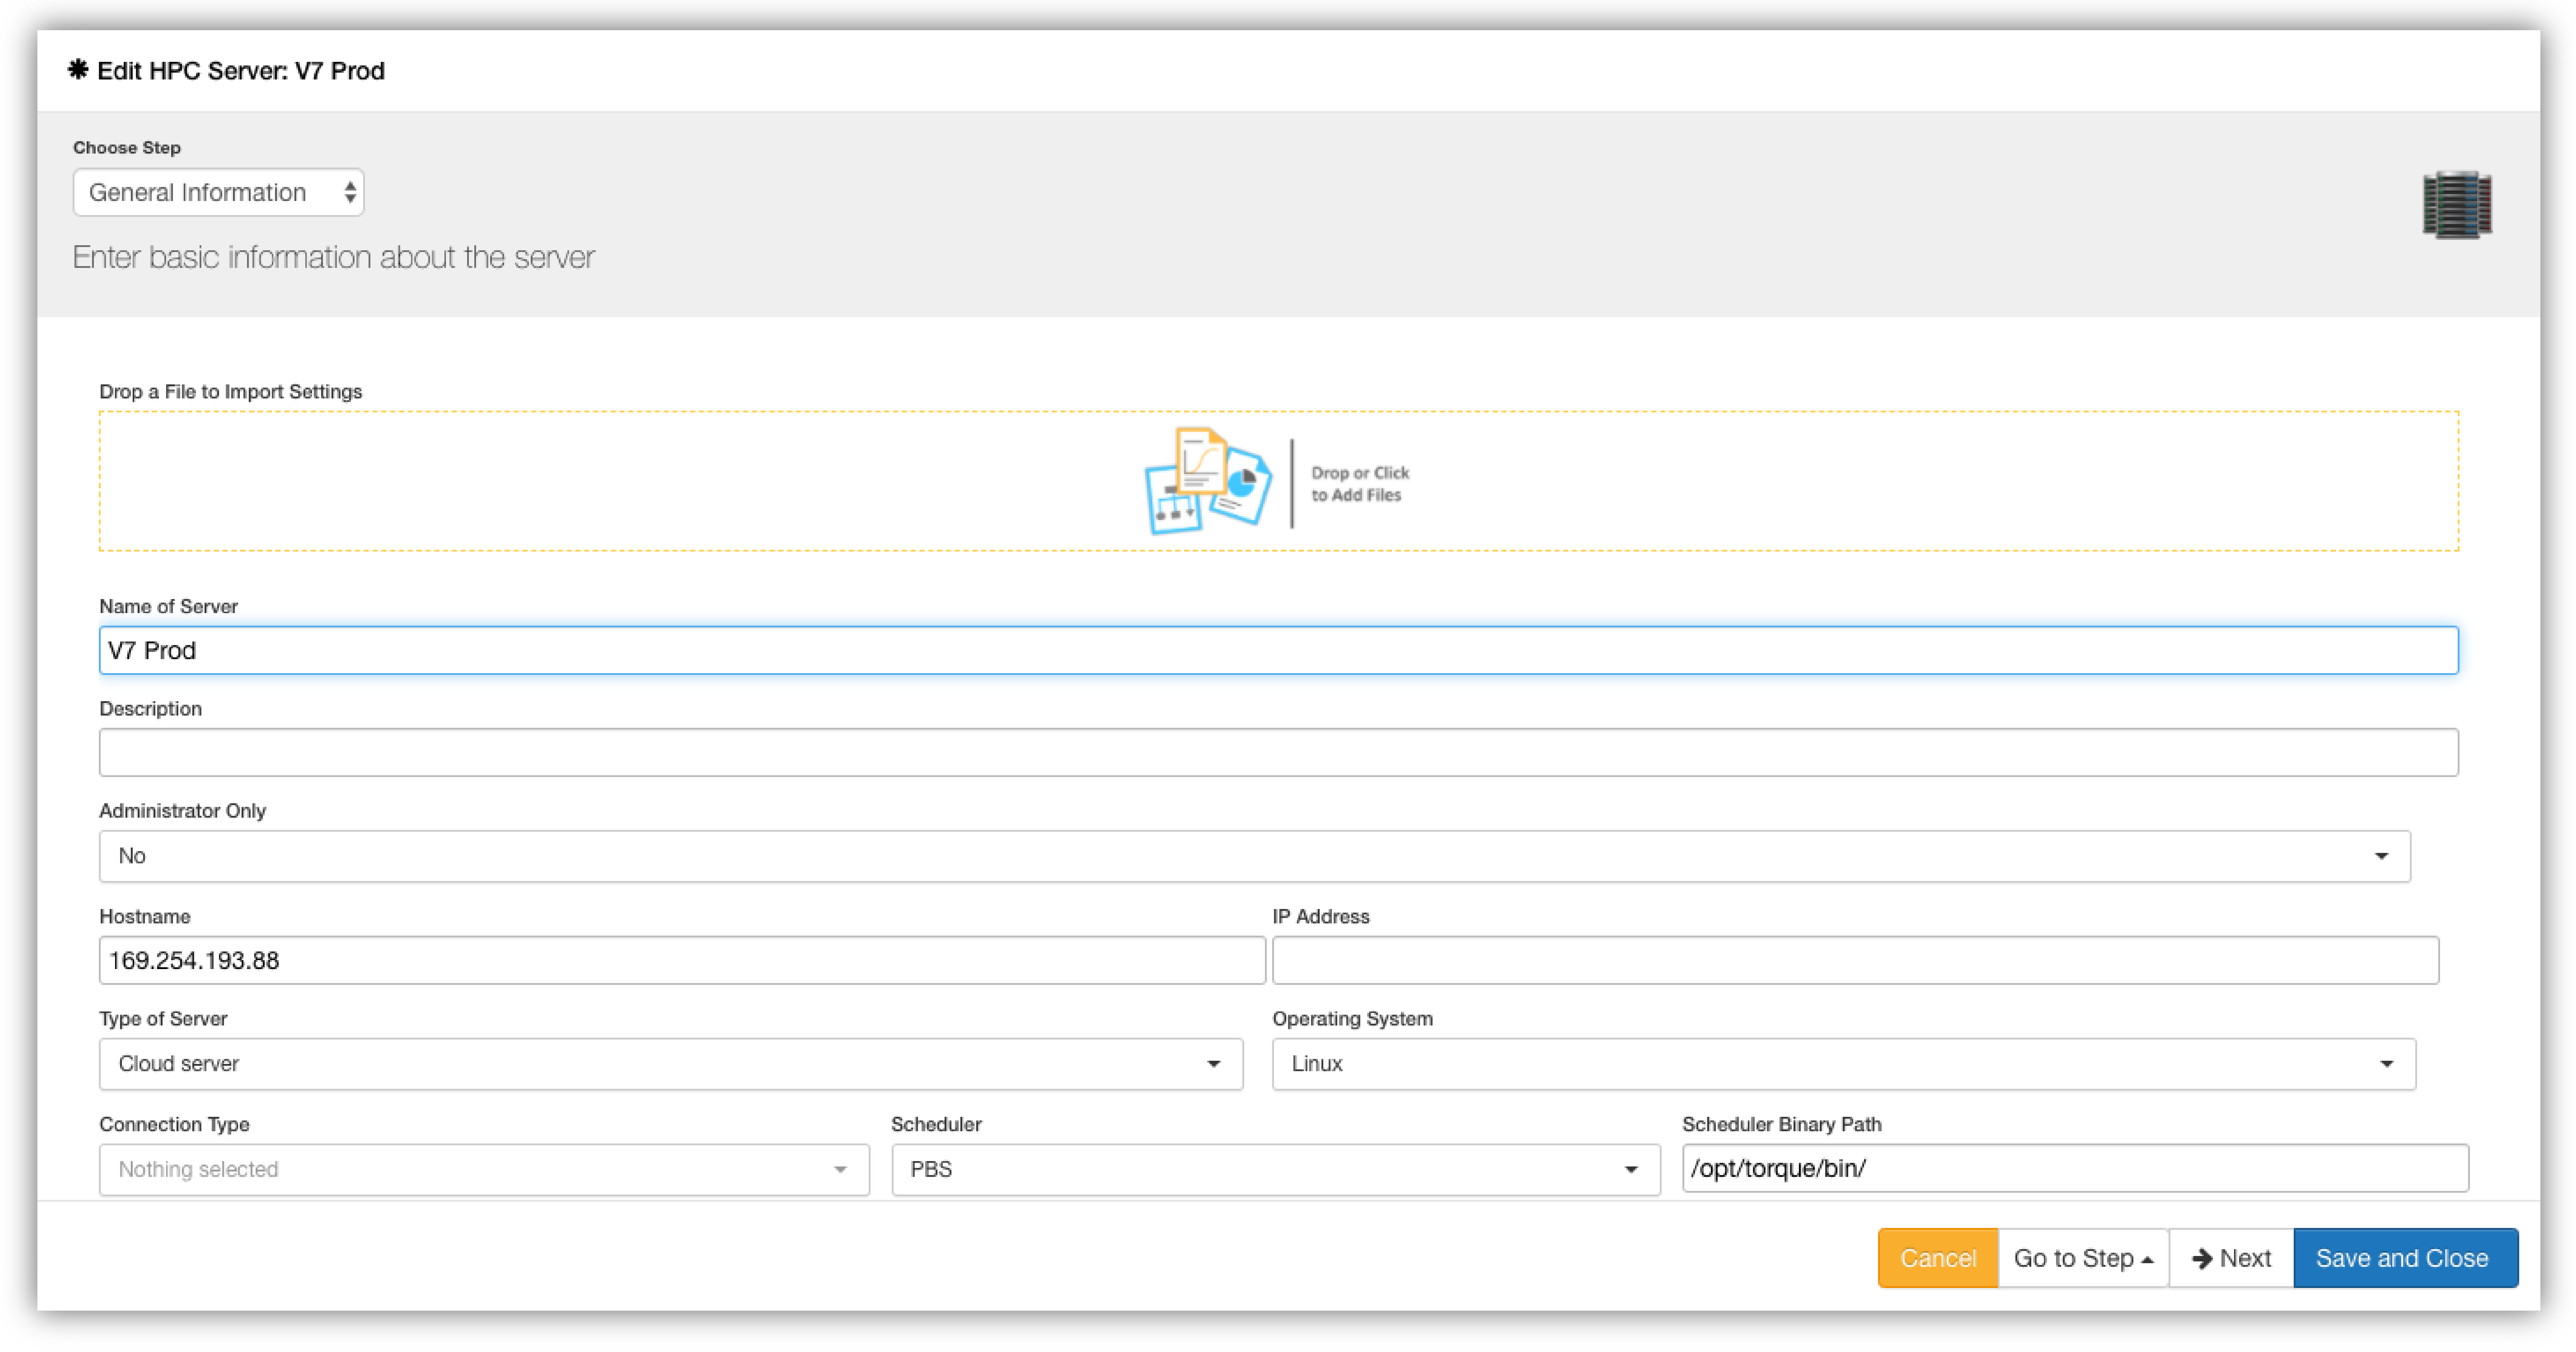
Edit HPC Server
Click on ”Edit” next to a server thumbnail to update its settings.
Edit a HPC Server
HPC Utilization
You can view HPC usage by clicking on “Utilization” next to a HPC thumbnail. This window will show you visualizations and information such as core usage, running jobs and peak utilization.
HPC Utilization Window

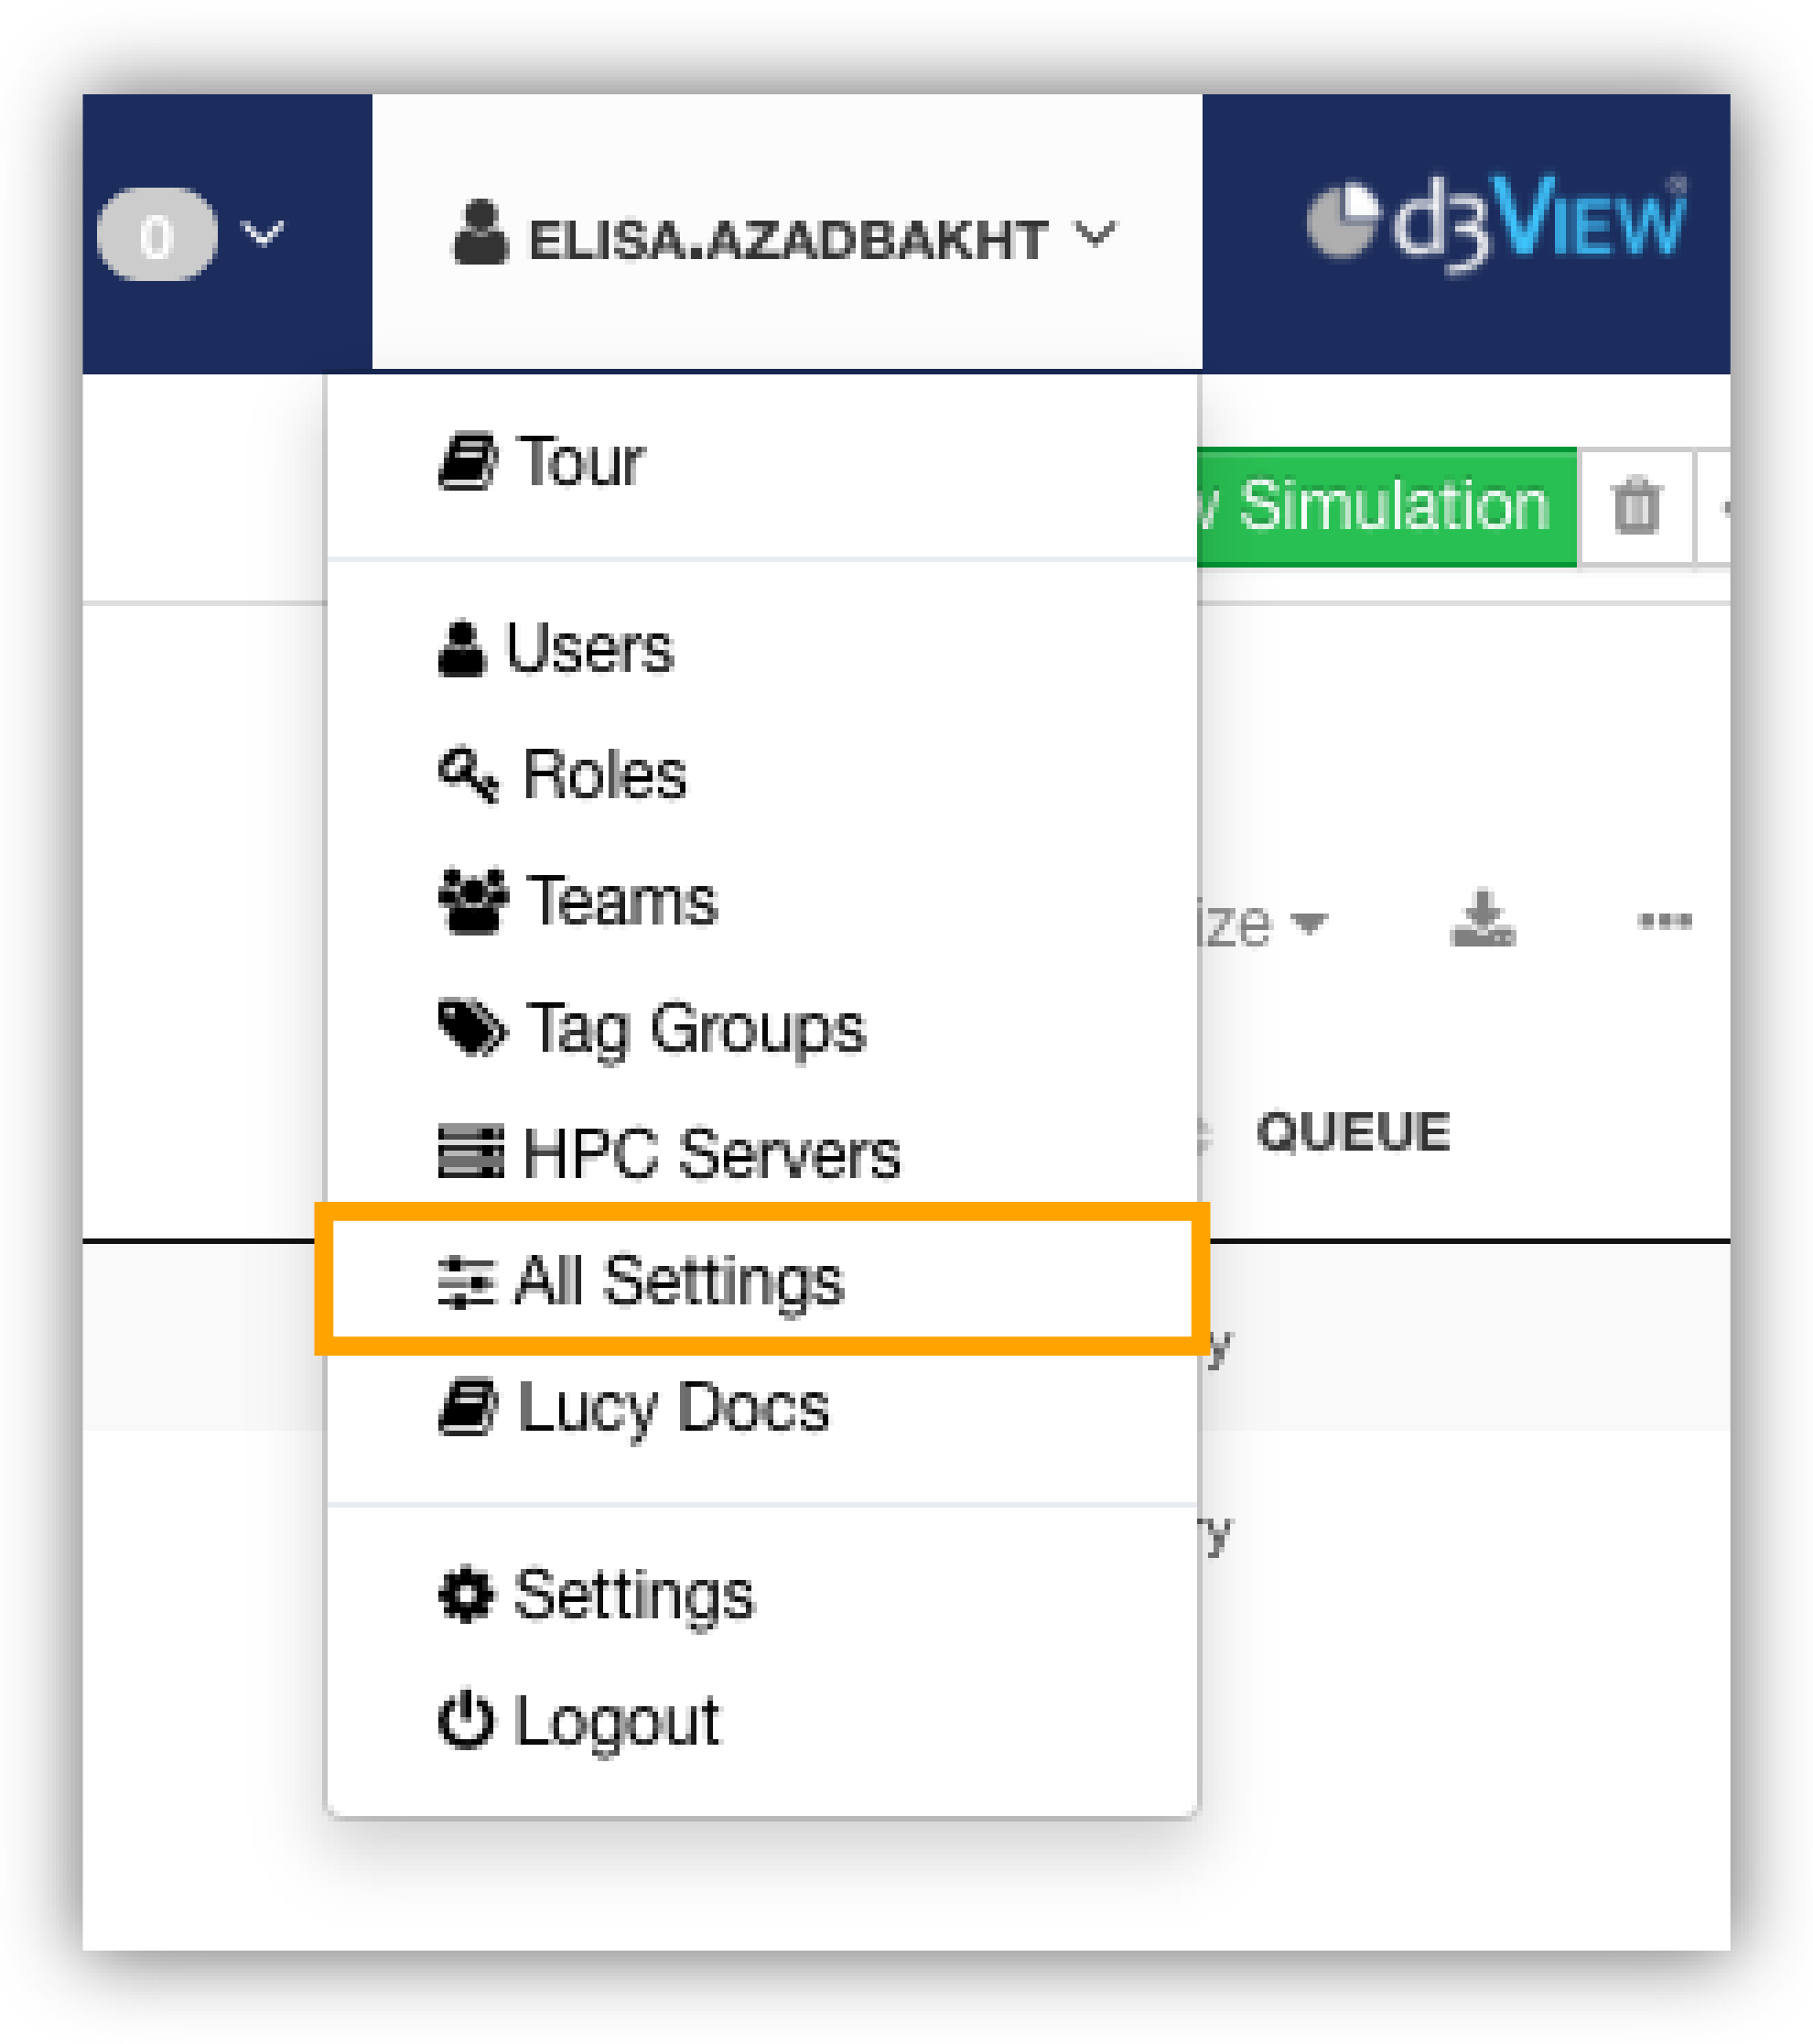
13.5. All Settings
Click on the All Settings option in the Administrative Menu to get started.
All Settings Option
This takes you to a page which presents an overview of everything. Click on other links in the side panel to explore and update settings.
All Settings Overview
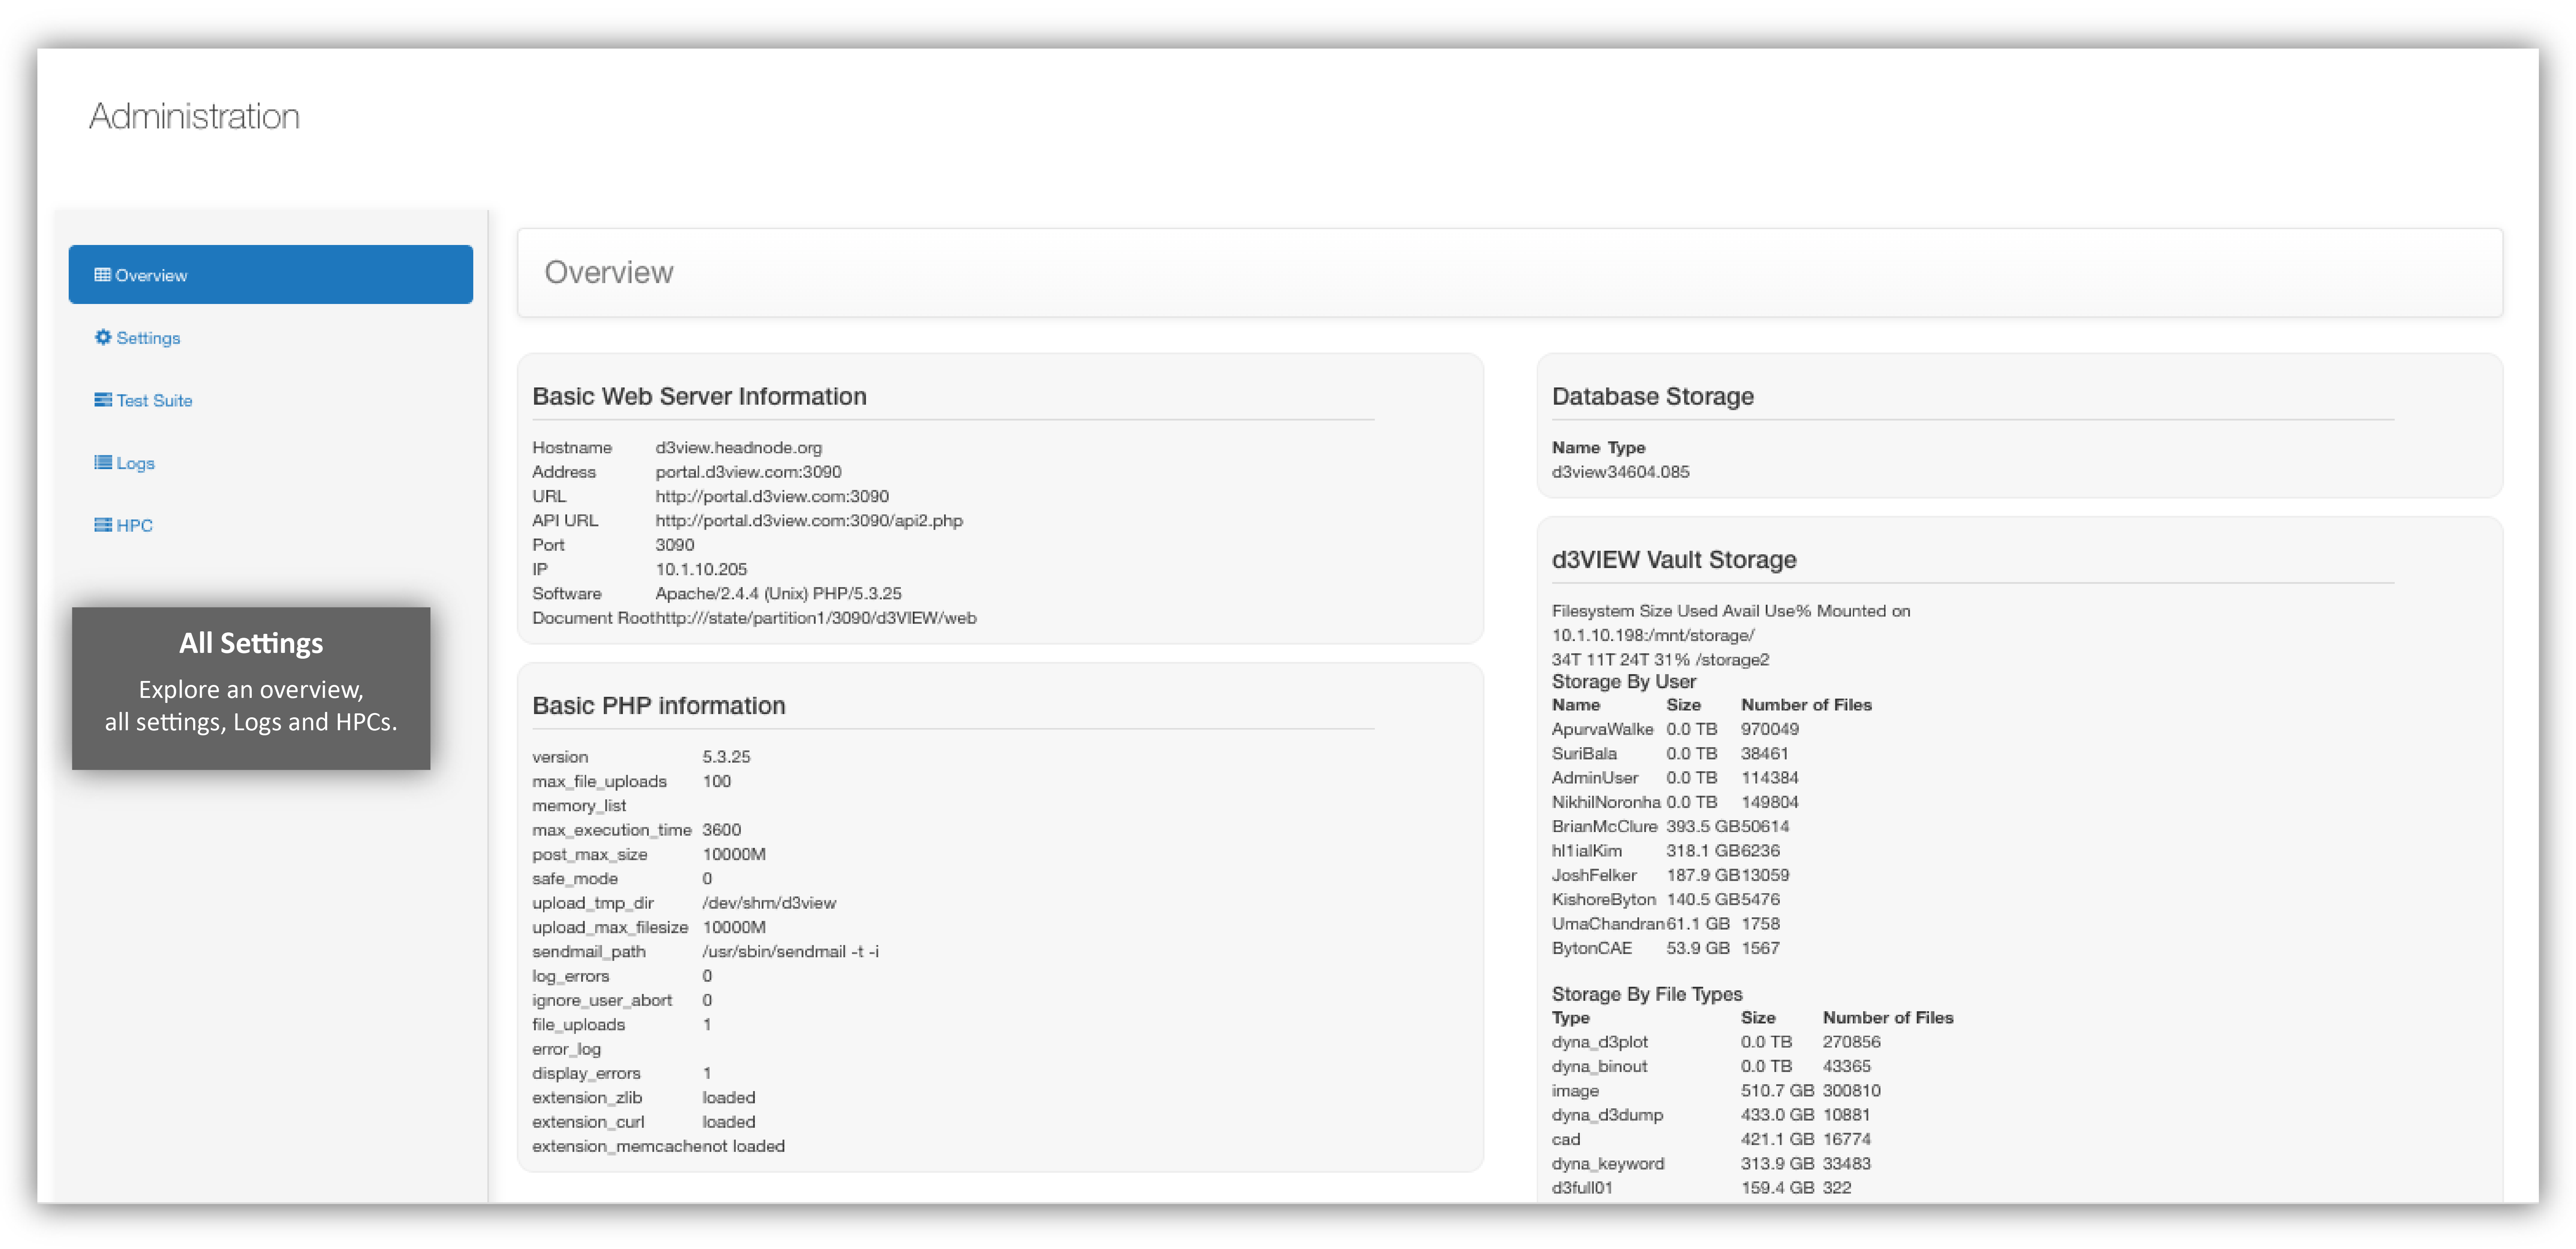
Where Am I?
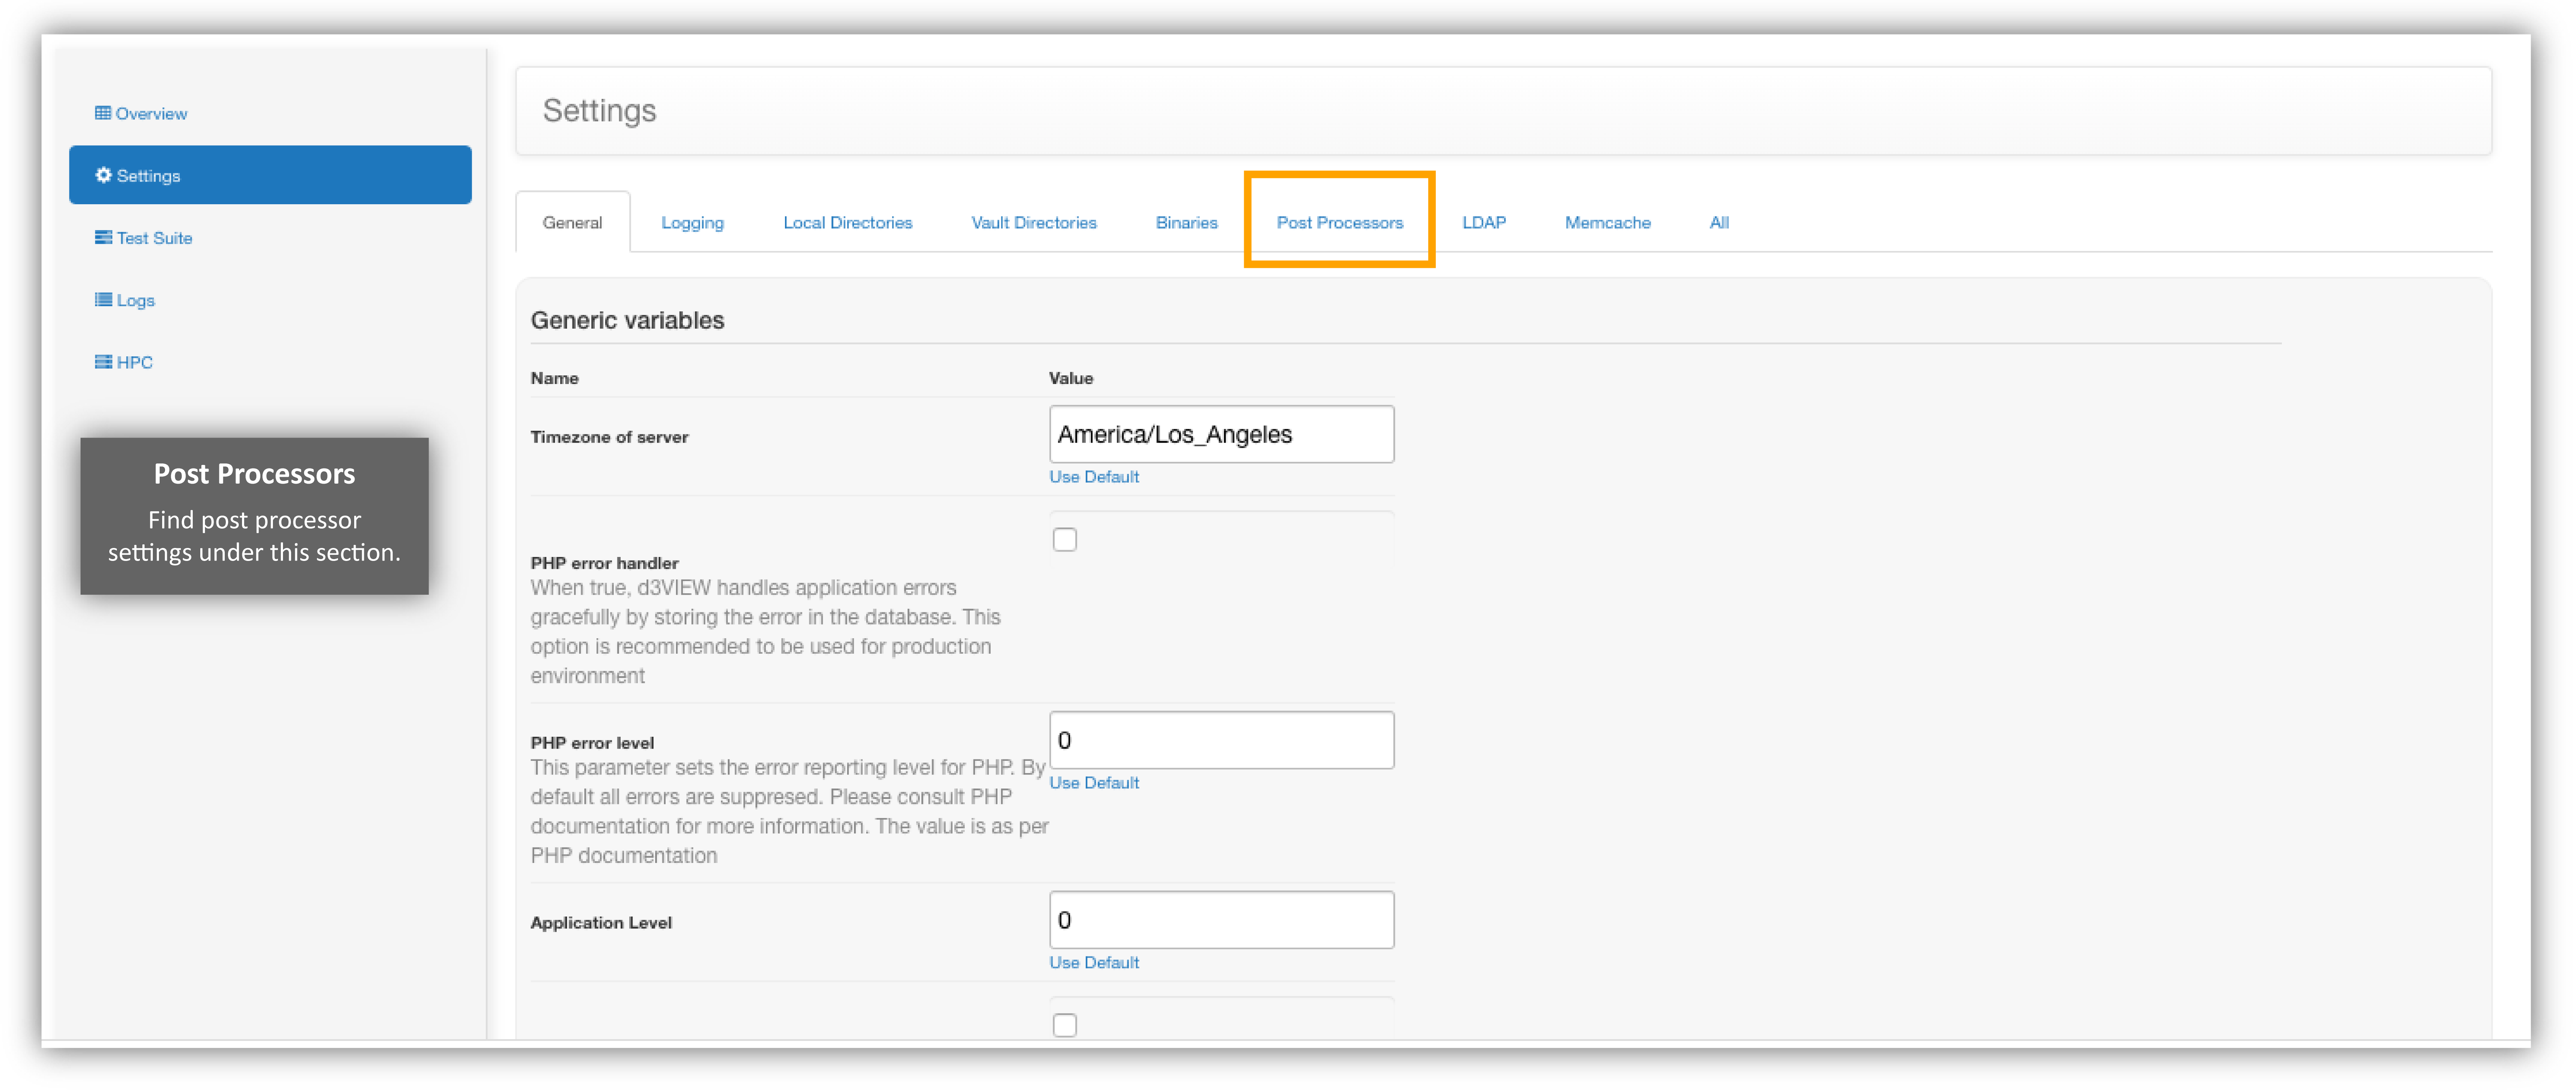
Post Processors
Under the settings section on the side panel, you can update an array of settings. The buttons for these sections are located on top. Click on Post Processors to go to this section.
Click on Post Processors
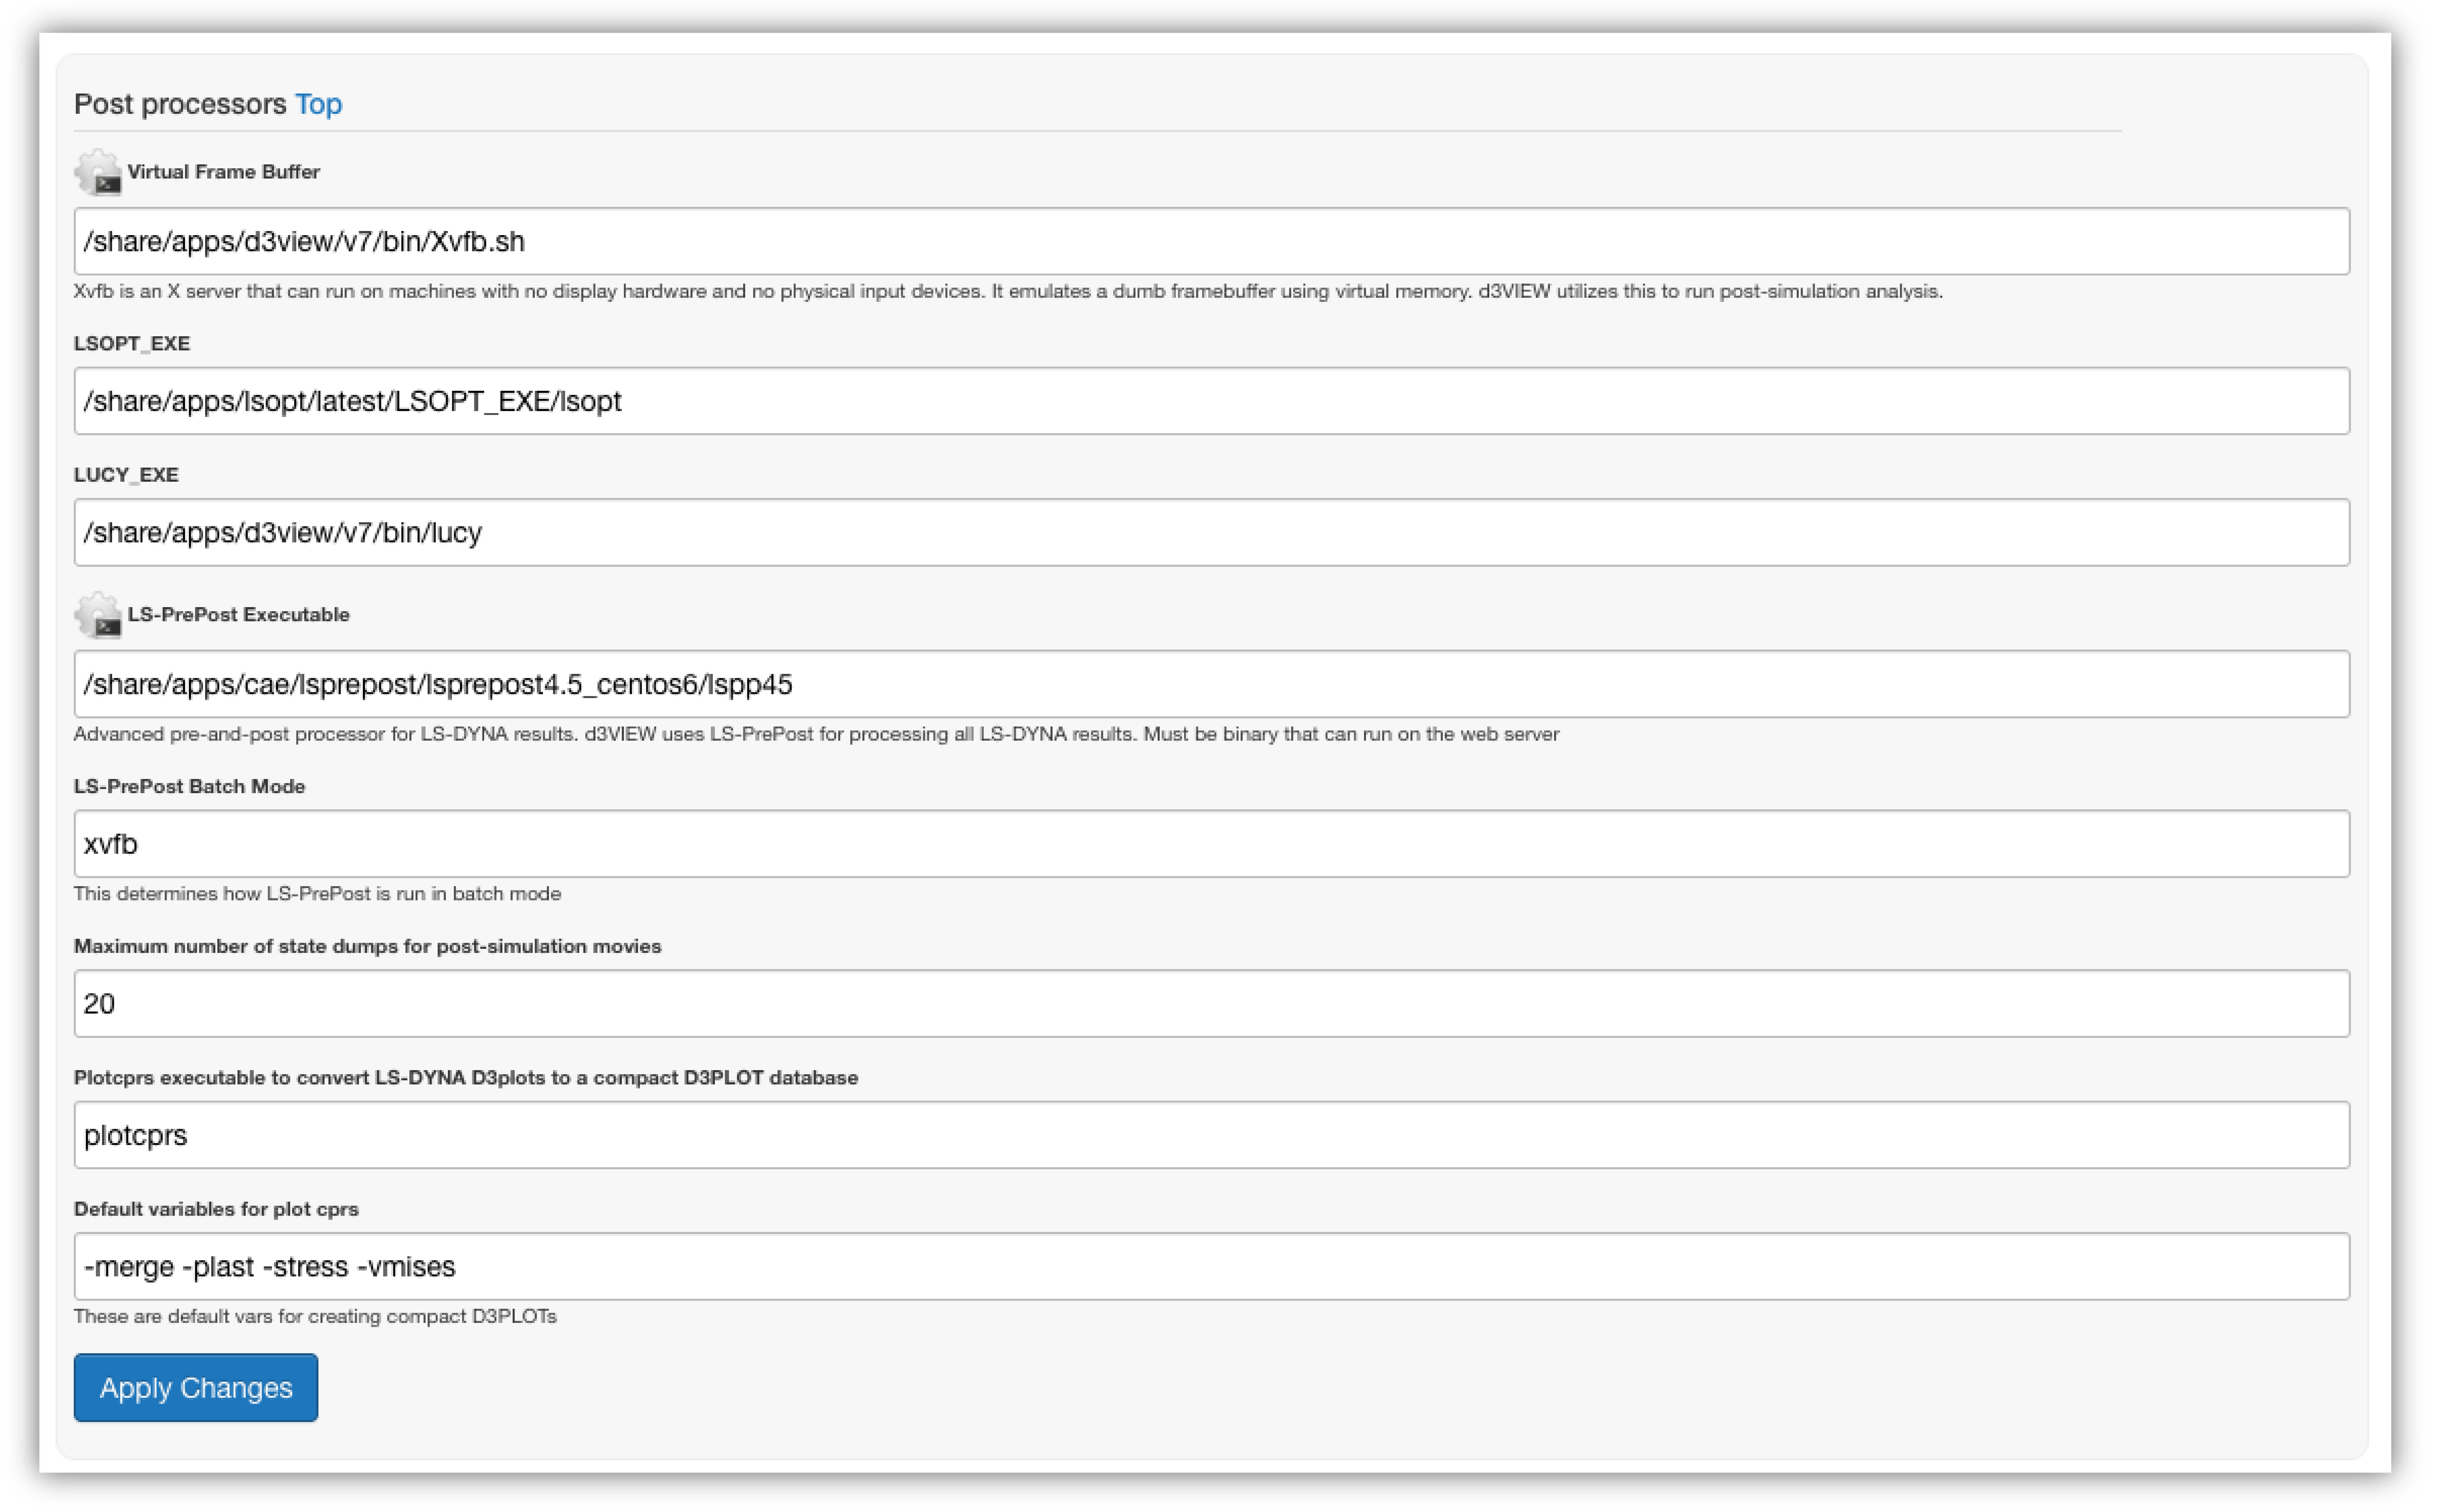
Update these settings as you like.
Post Processors Settings
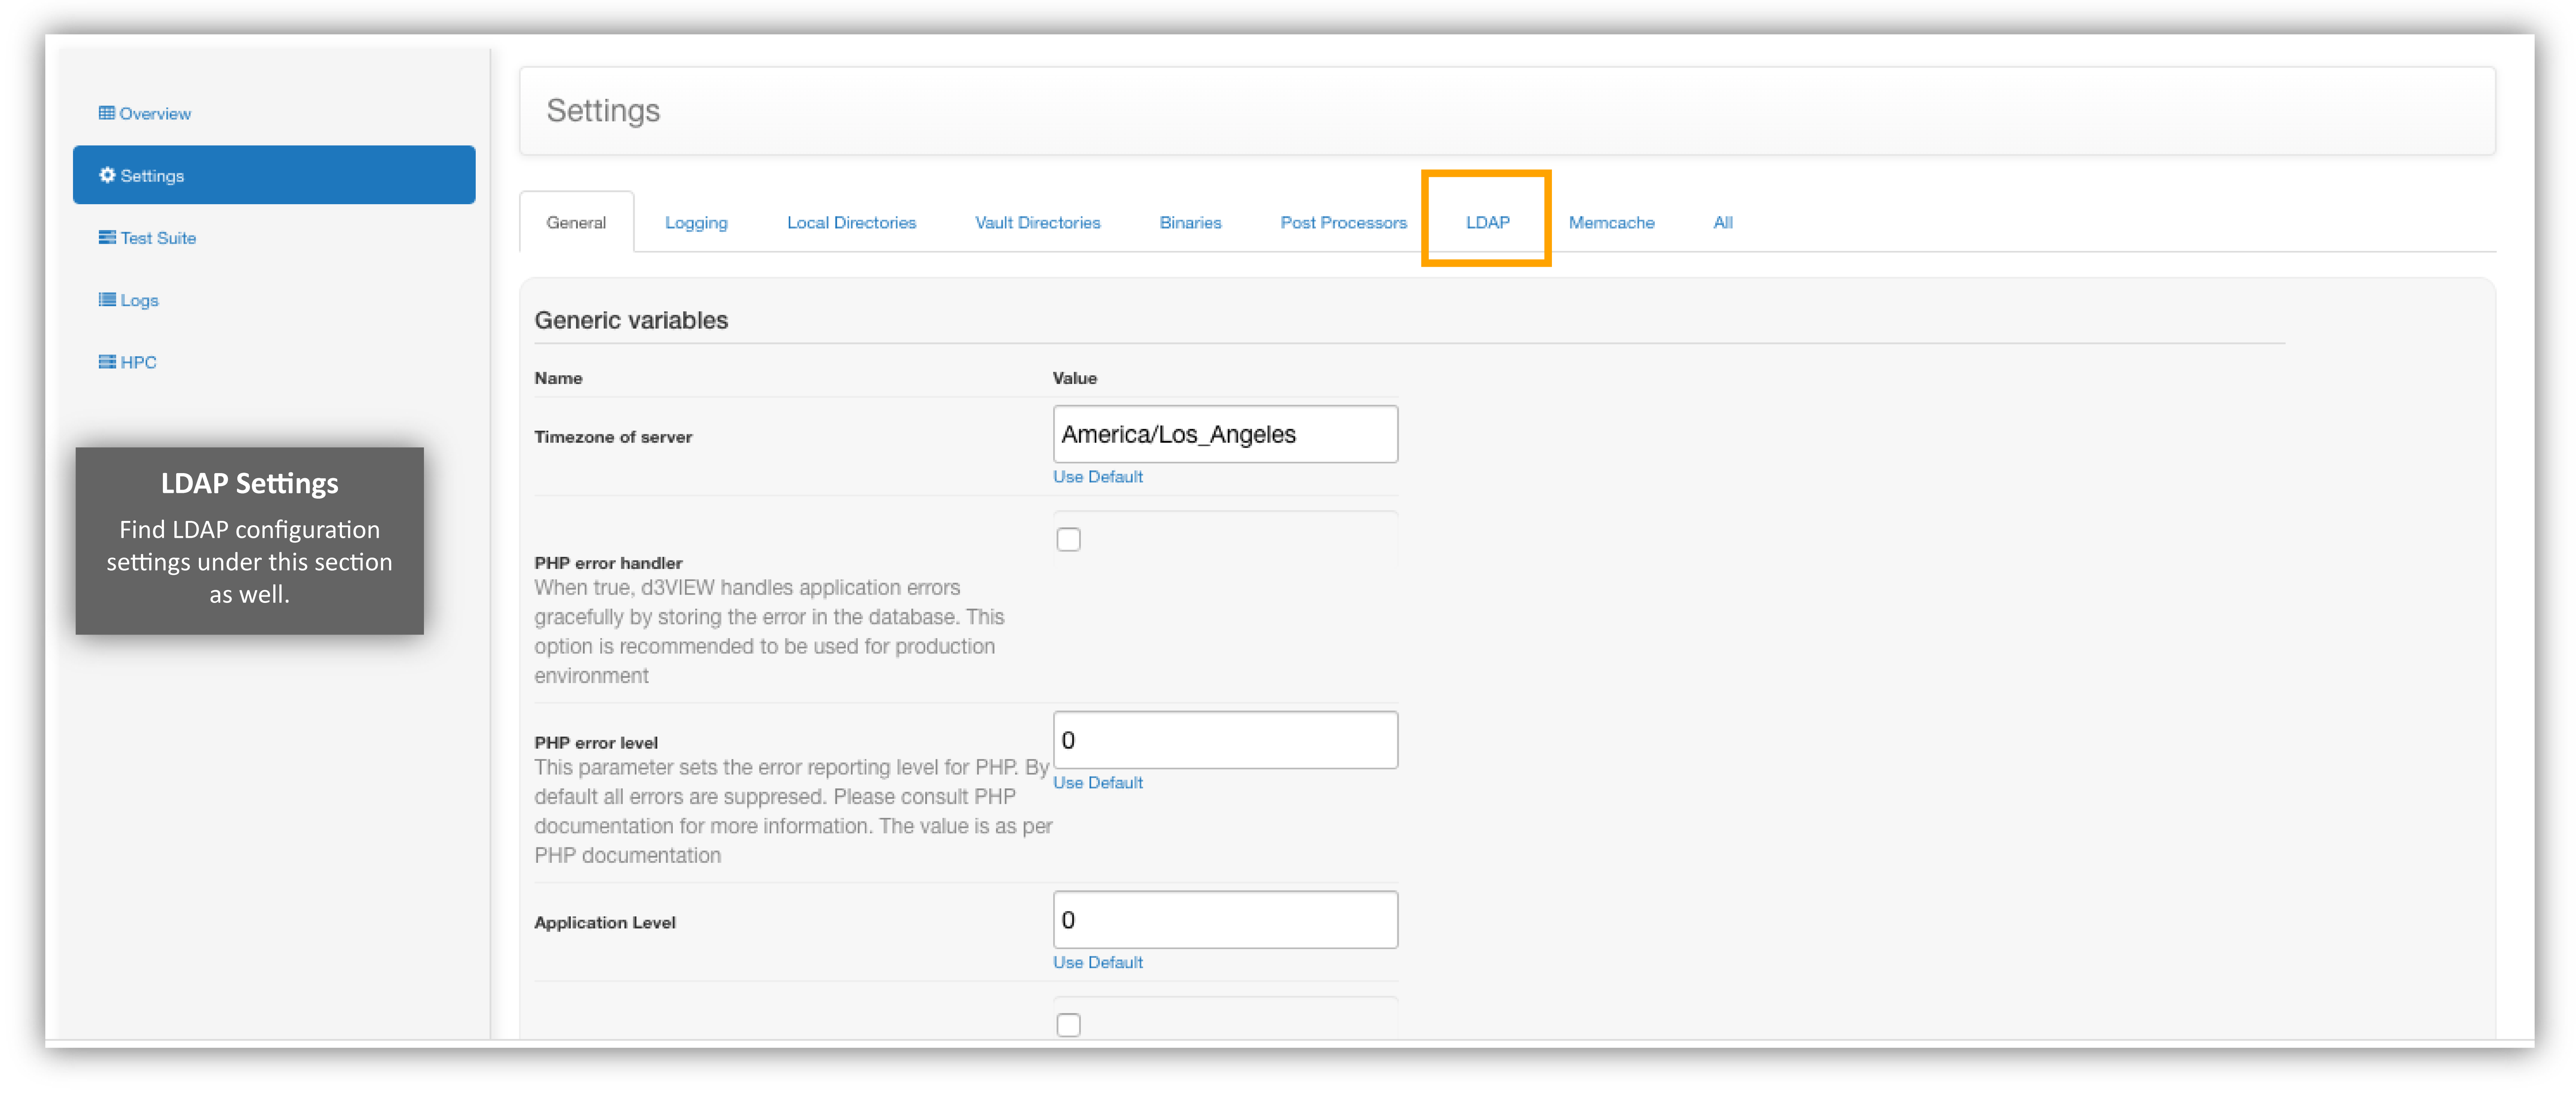
LDAP Settings
Under the same side panel section, click on “LDAP” at the top right next to “Post Processors”.
Click on LDAP Settings
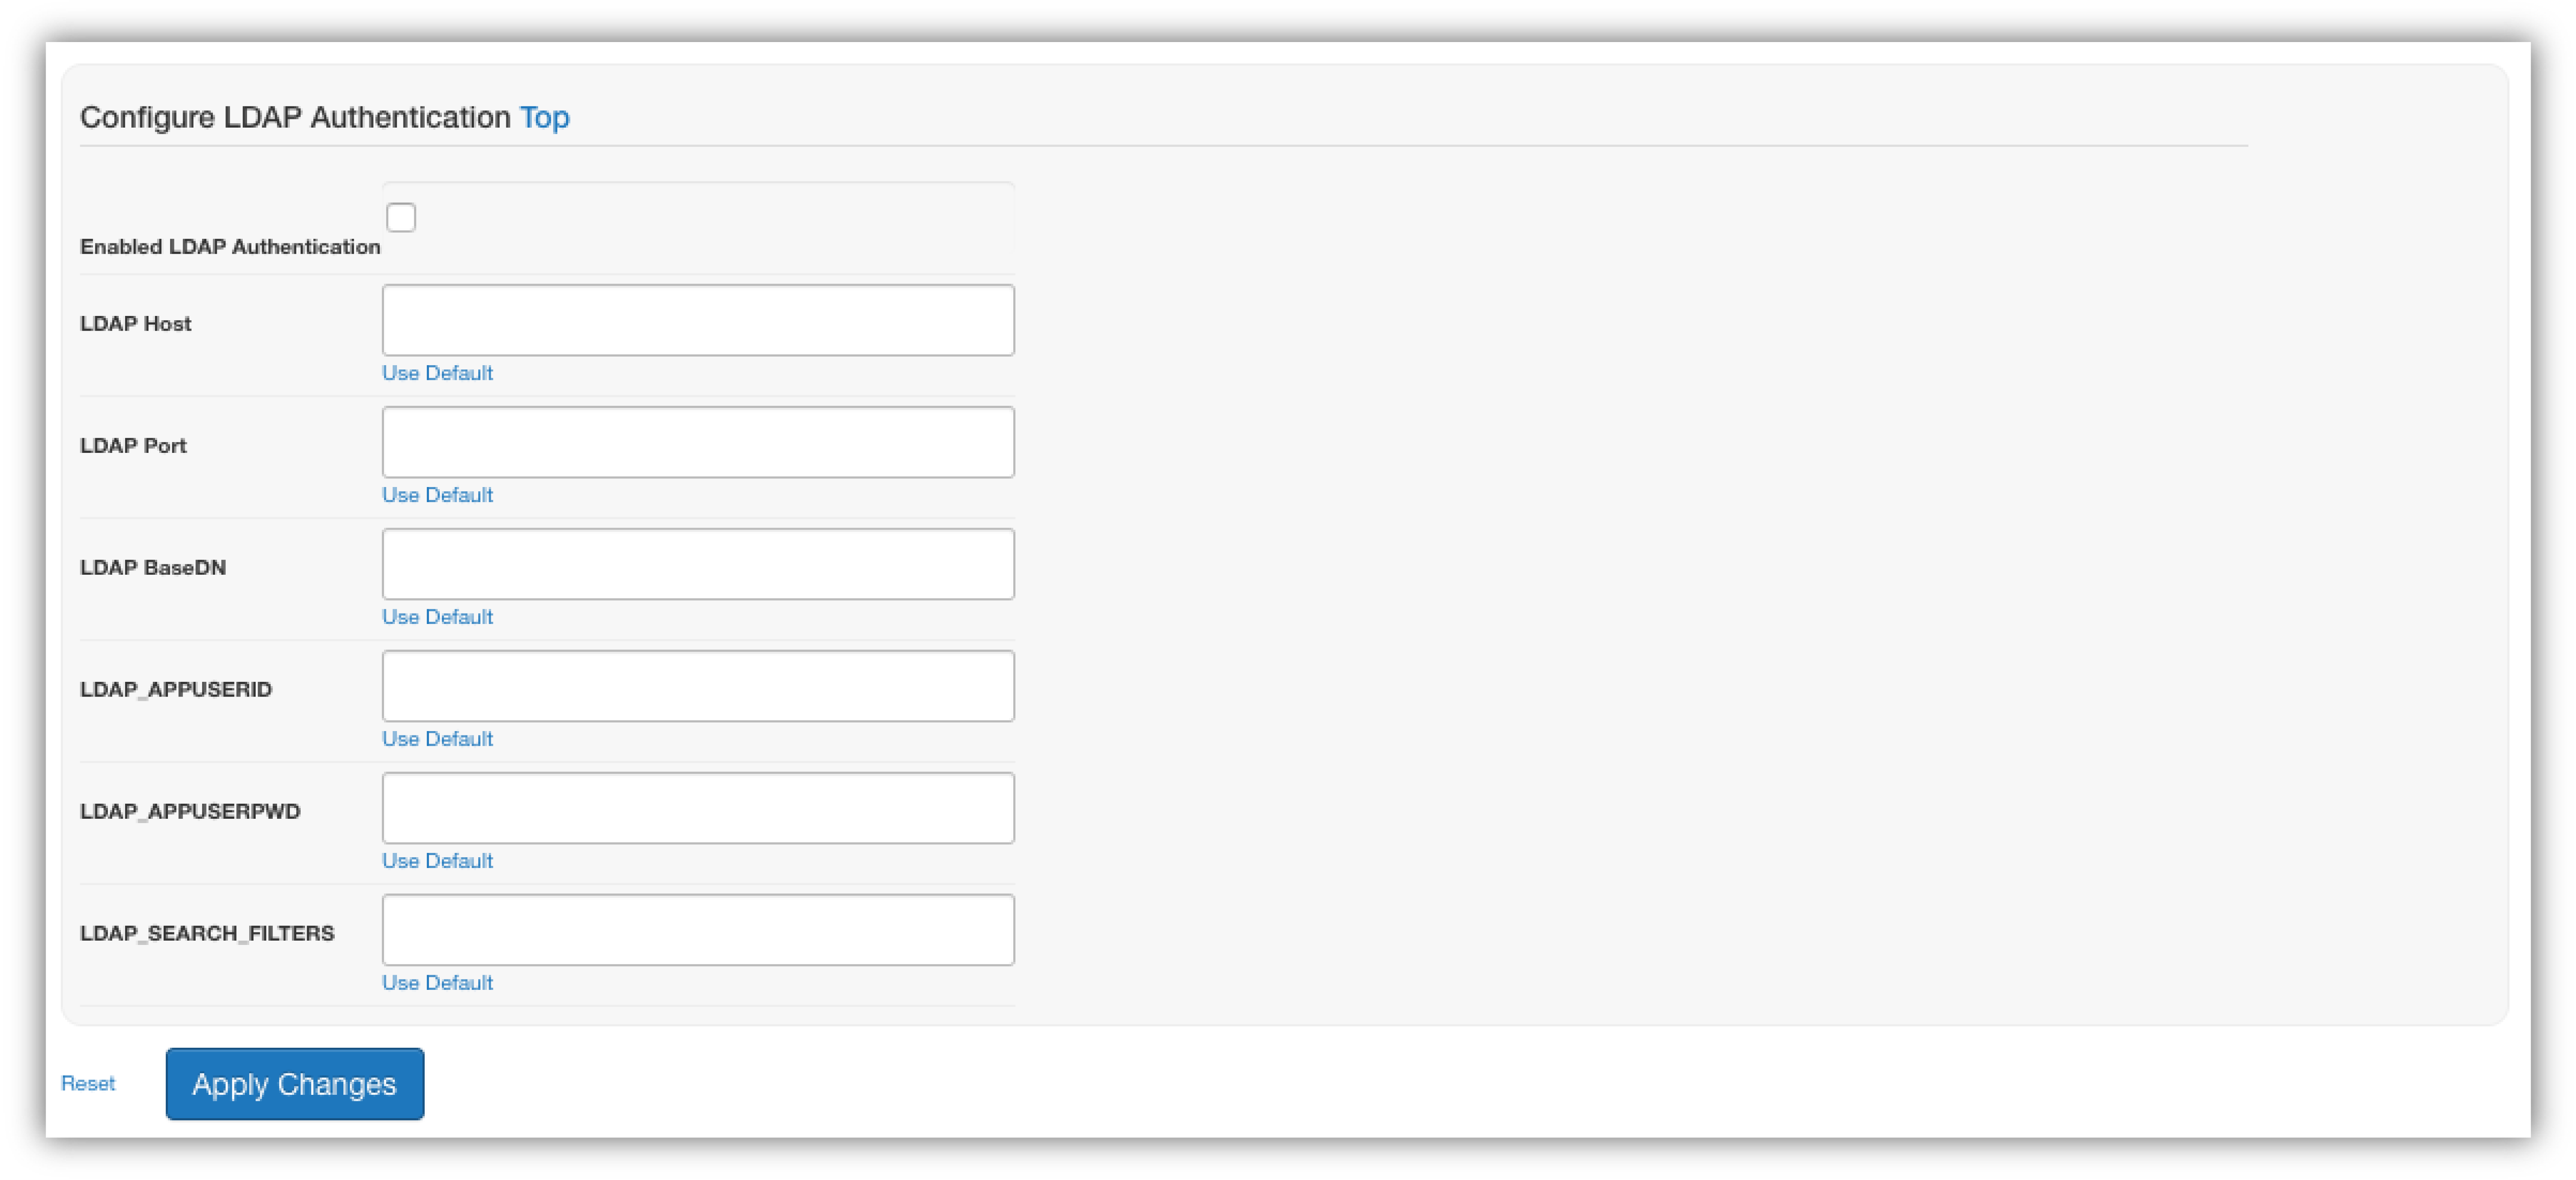
Here, you can edit you LDAP configuration.
LDAP Settings
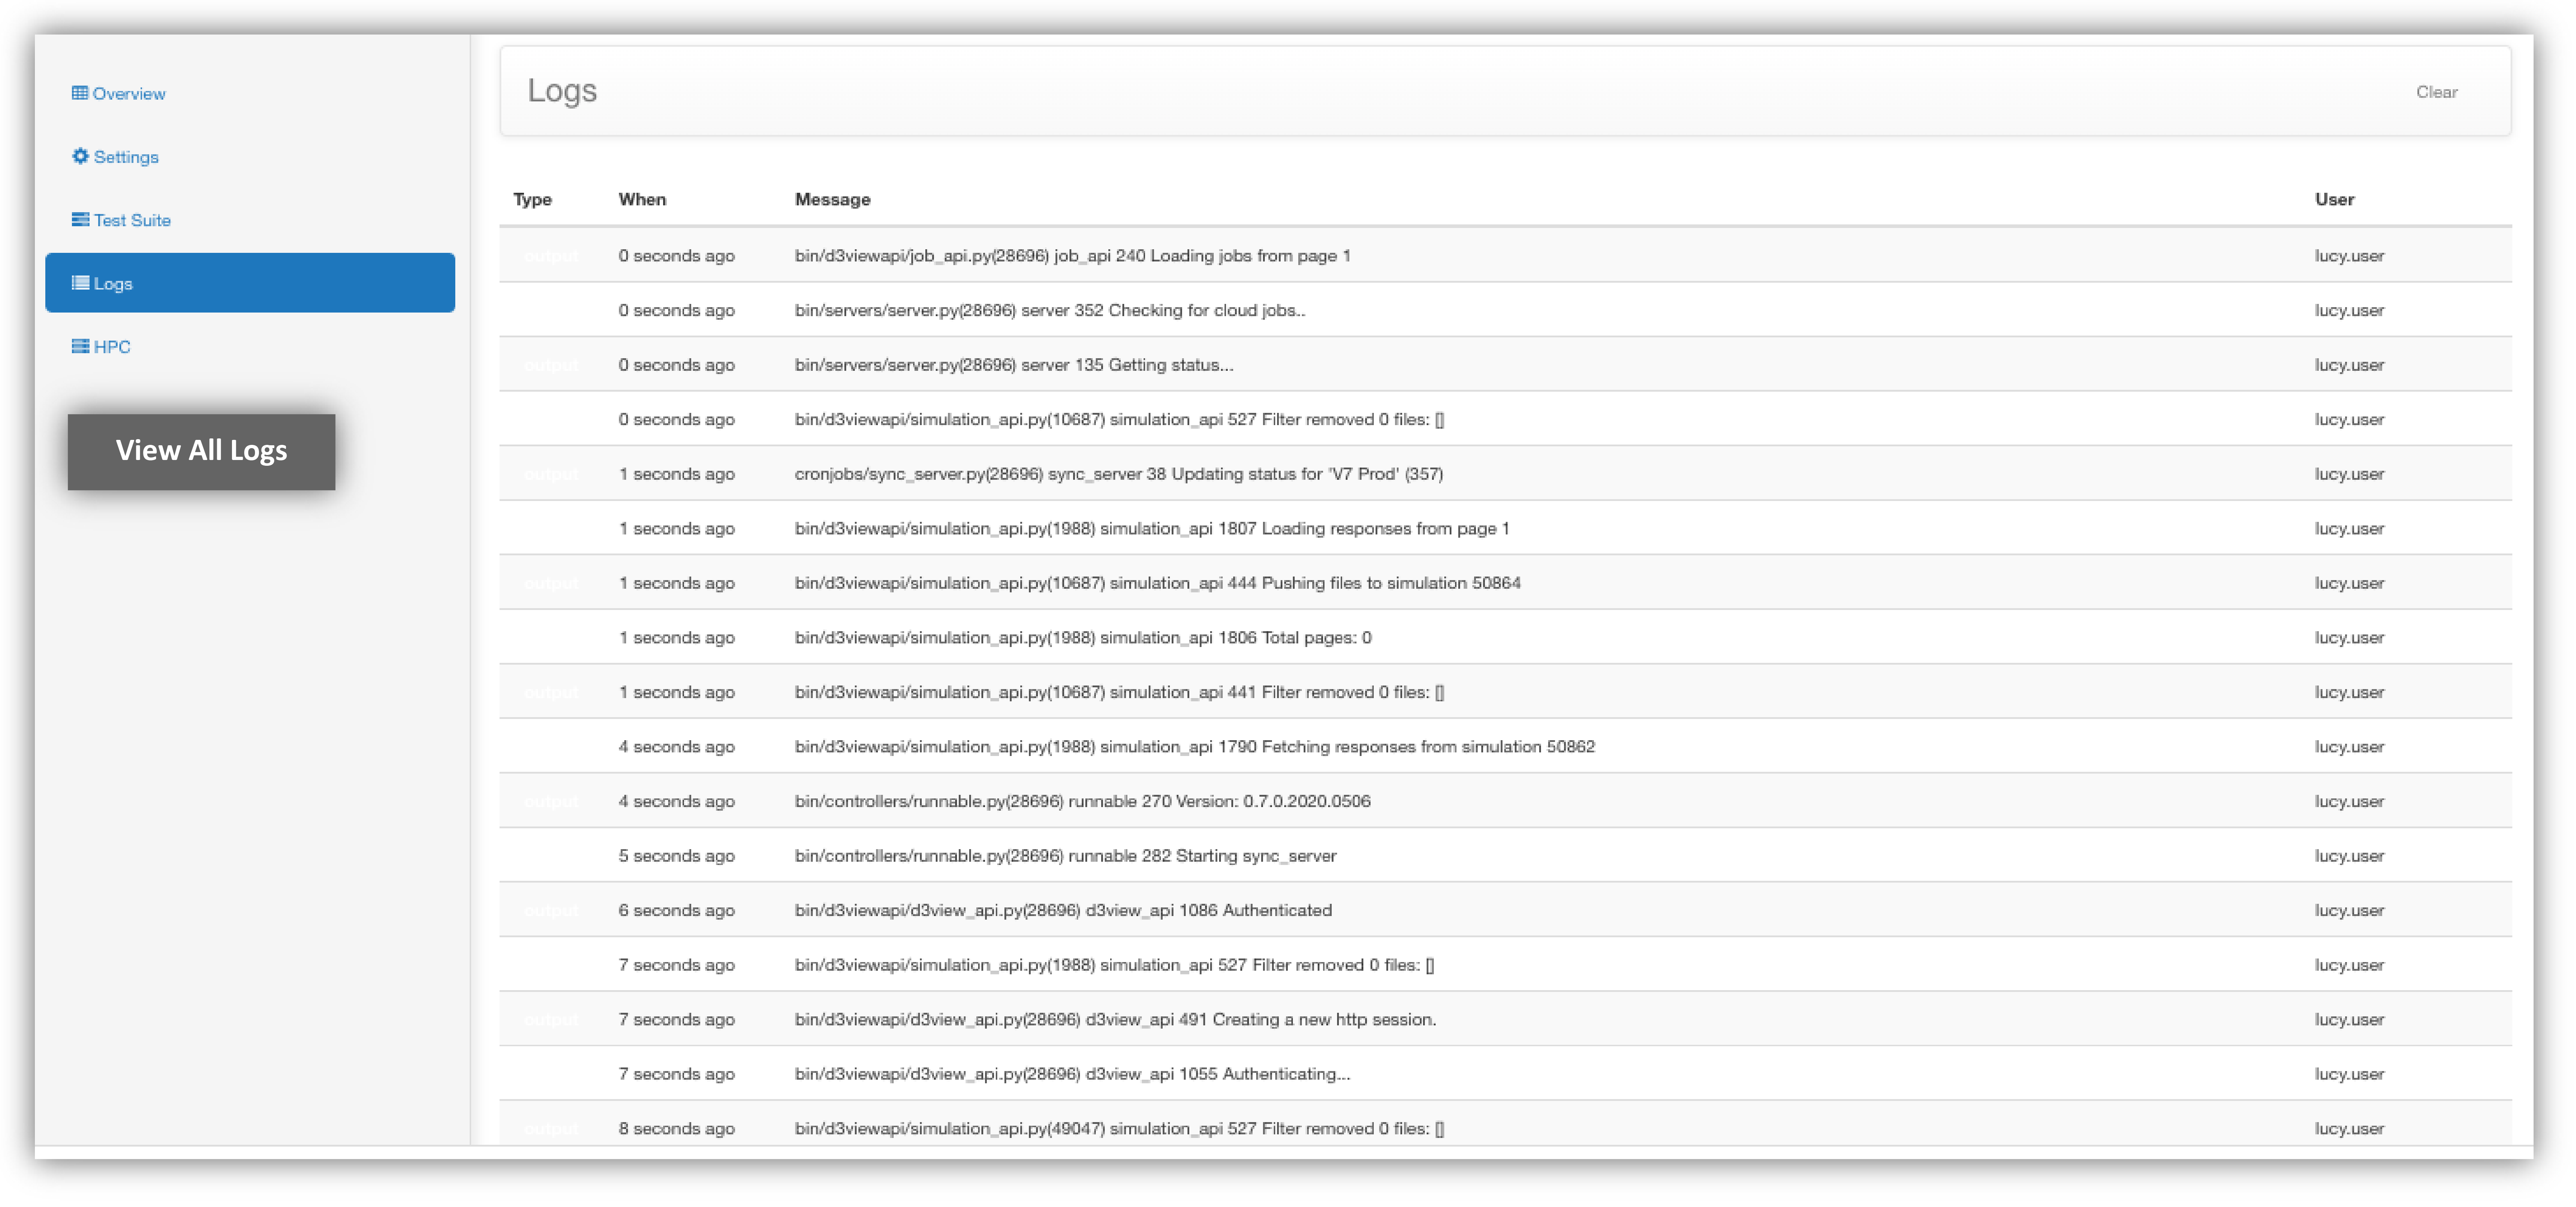
Logs
One the side panel, click on the section, “Logs”. Here, you can view all logs on the platform and under which user it was performed.
View All Logs