4.  Building and Configuring
In this section, we’ll go over building our workflow and configuring our workers in order to have a successful execution.
4.1. Adding Workers
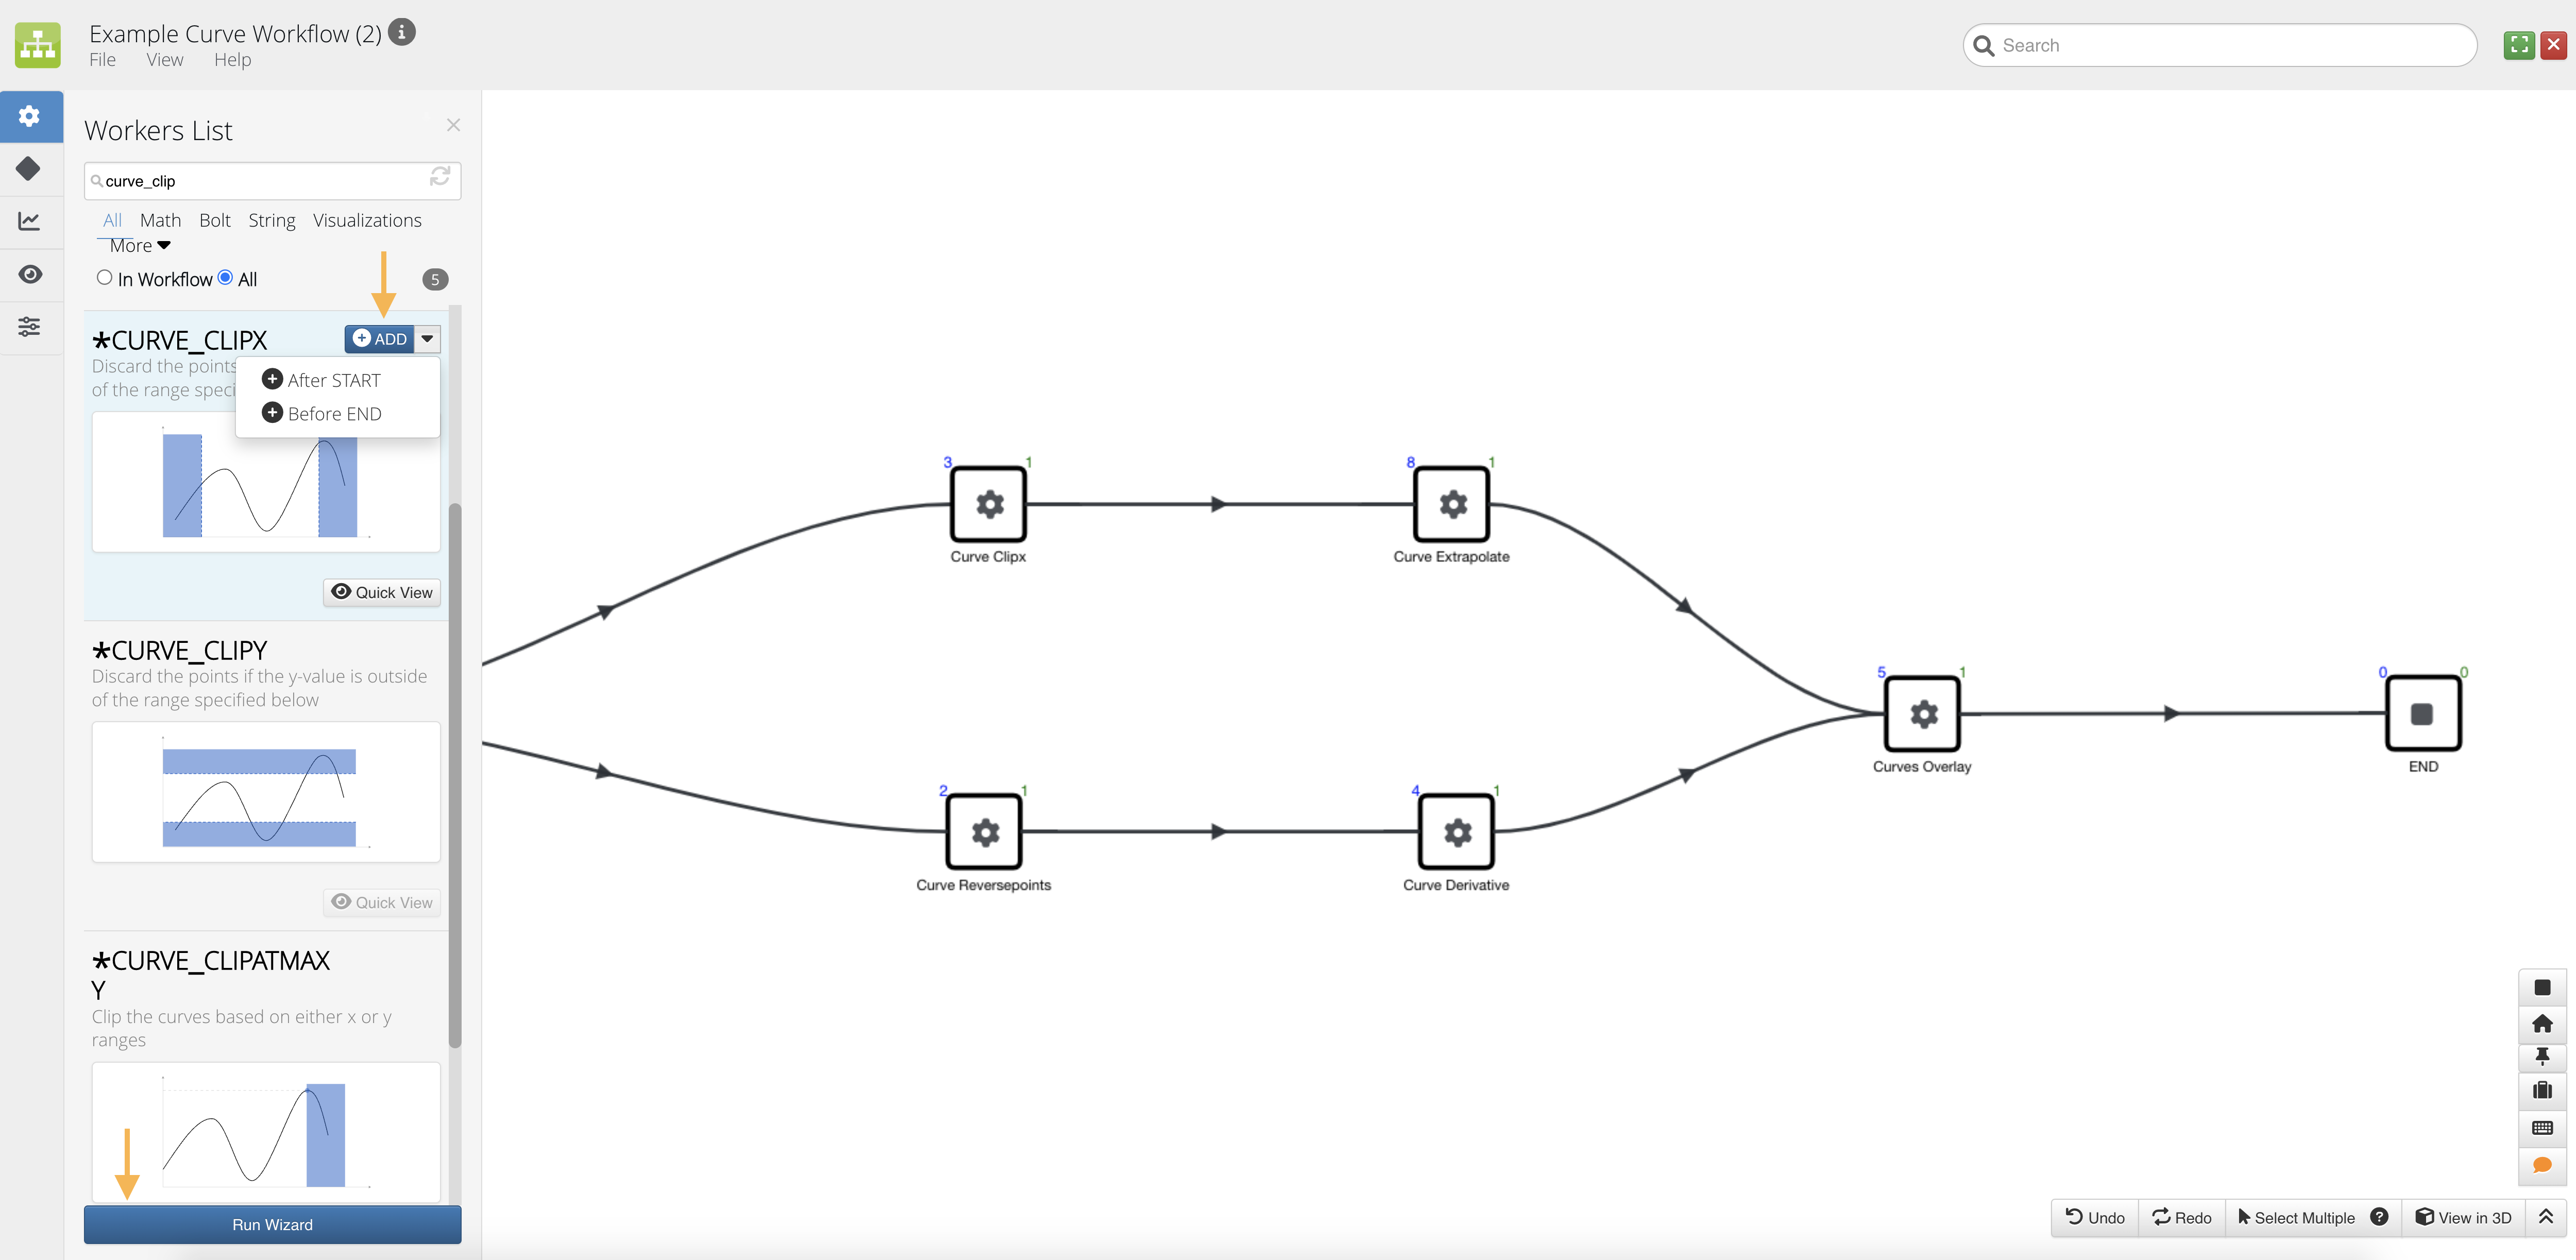
Add a worker onto the canvas by dragging-and-dropping anywhere onto the workflow, using the add options or running the wizard.
Add Worker
Simlytiks Visualizers
You can set up and incorporate any Simlytiks Visualizer into a workflow. Go to this section under the Filter icon in the workers list to see all available visualizers.
4.2. Configuring Workers
Click on a worker to configure it in a separate modal window.
Click on Worker
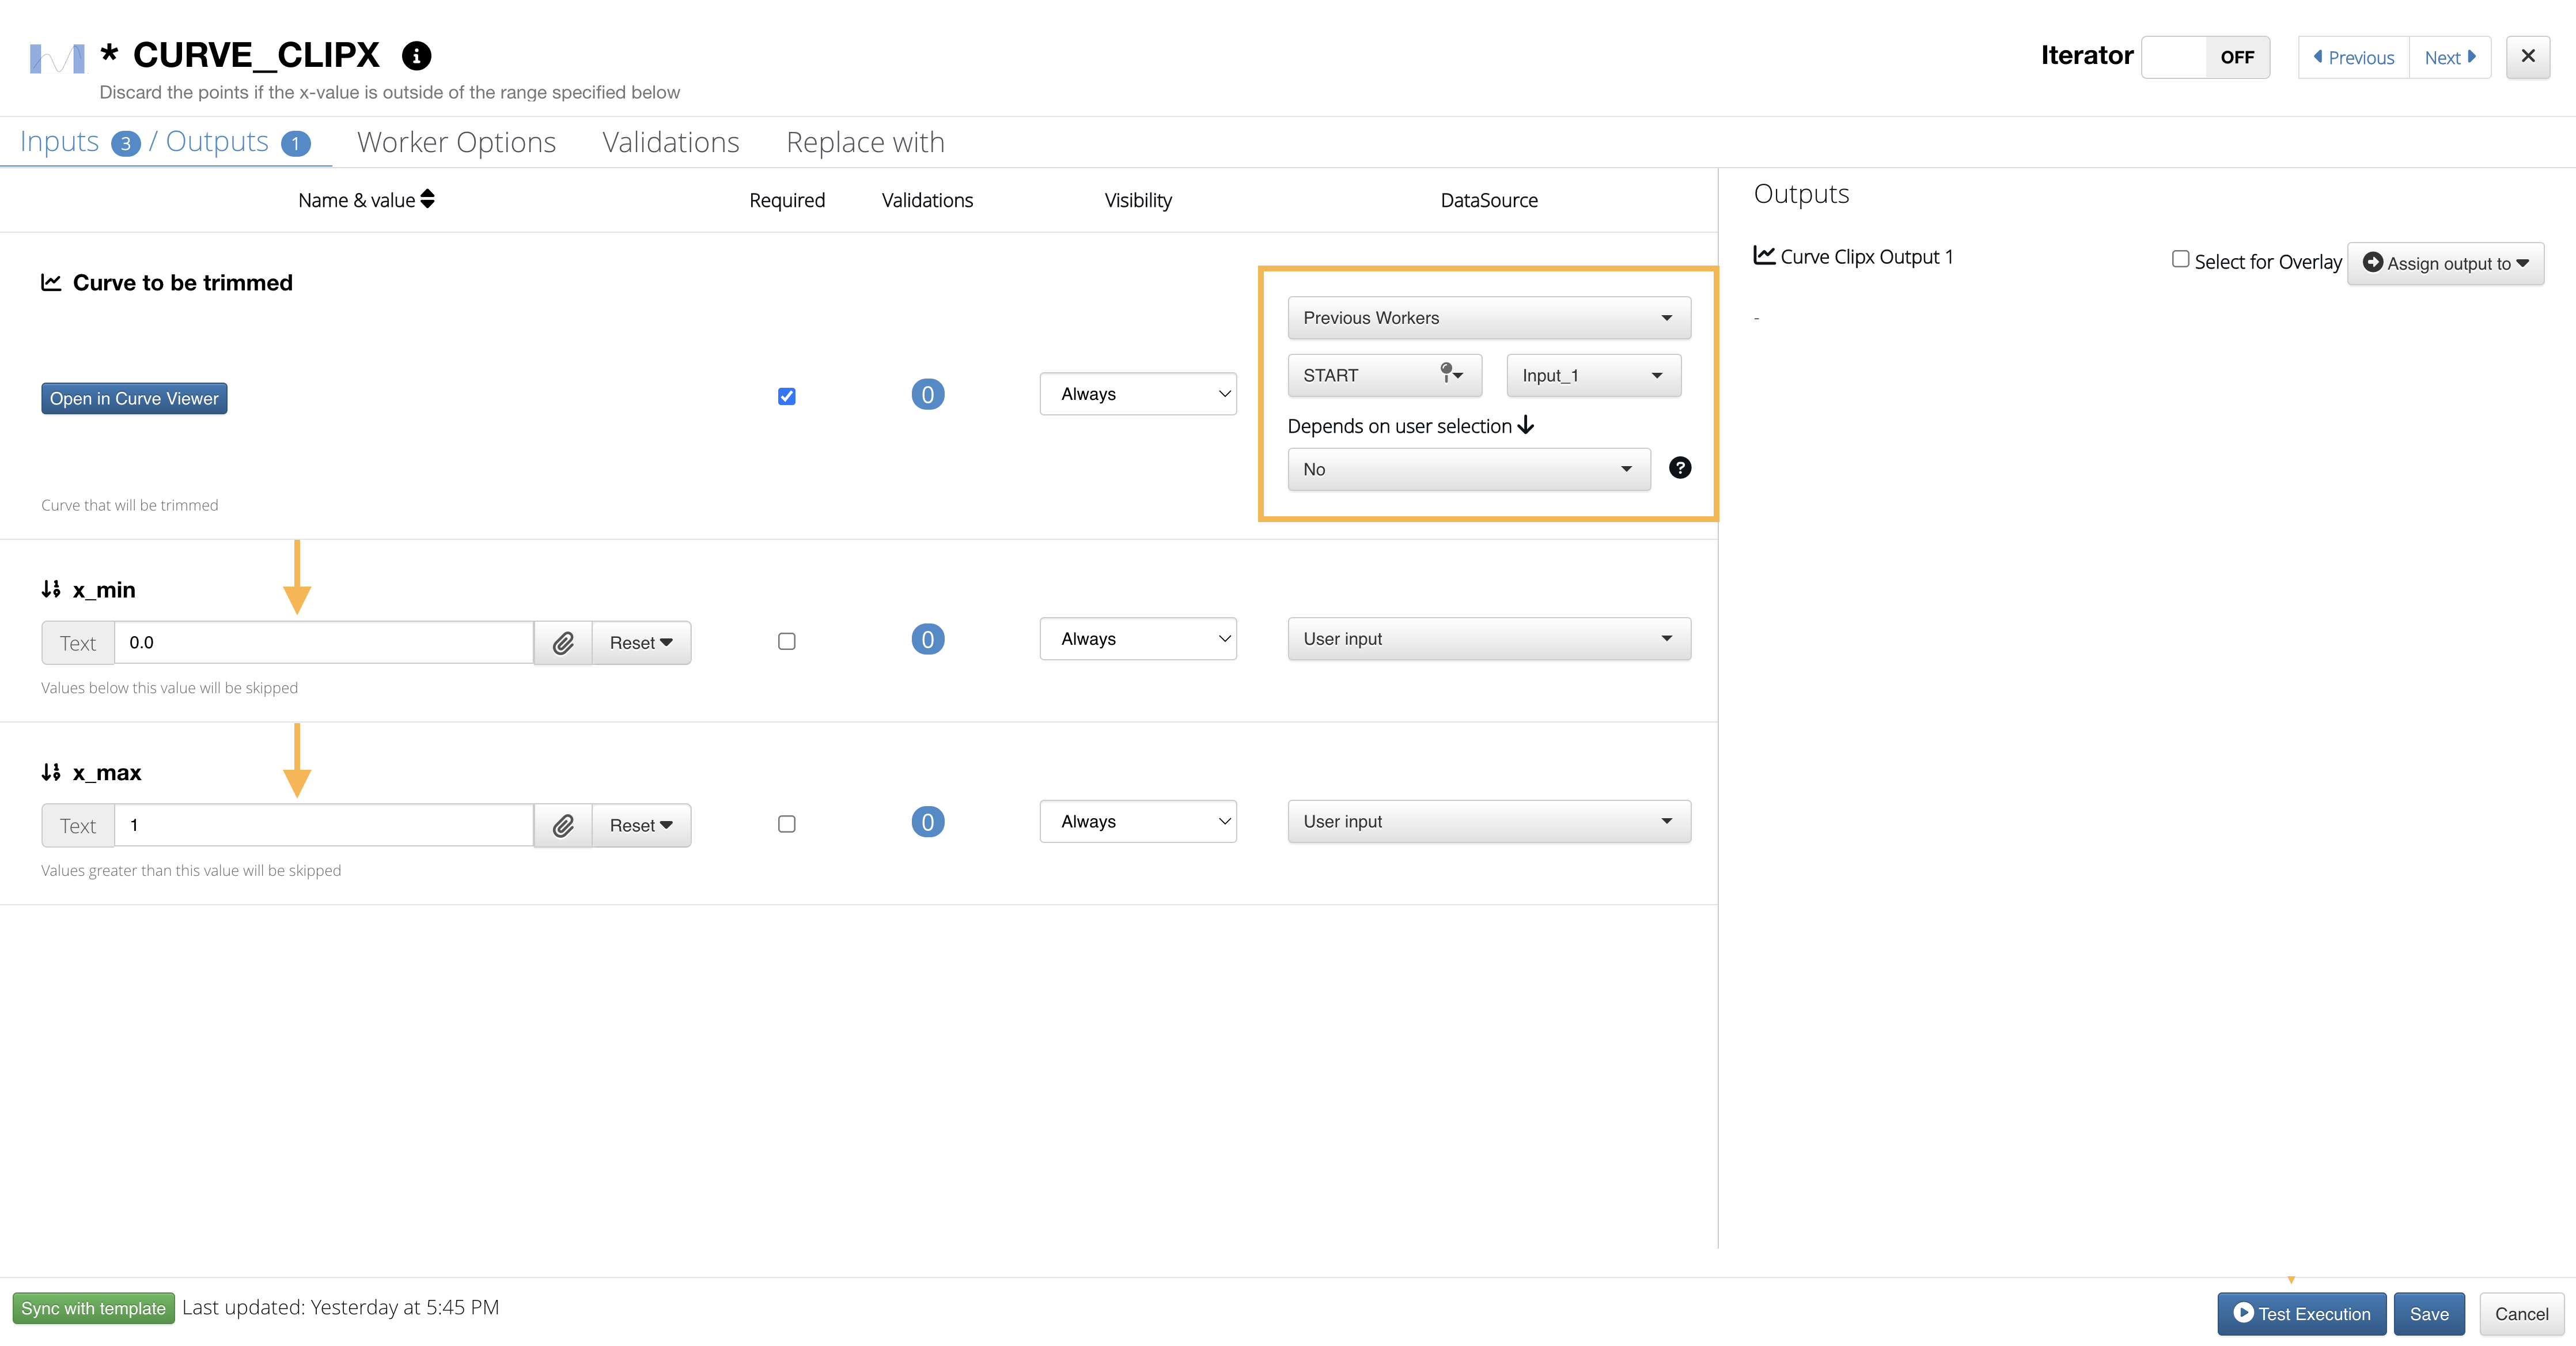
For each input, choose how to get data, either by inputing local data, using data from previous worker or getting it from the workers list.
Input Data Source Options
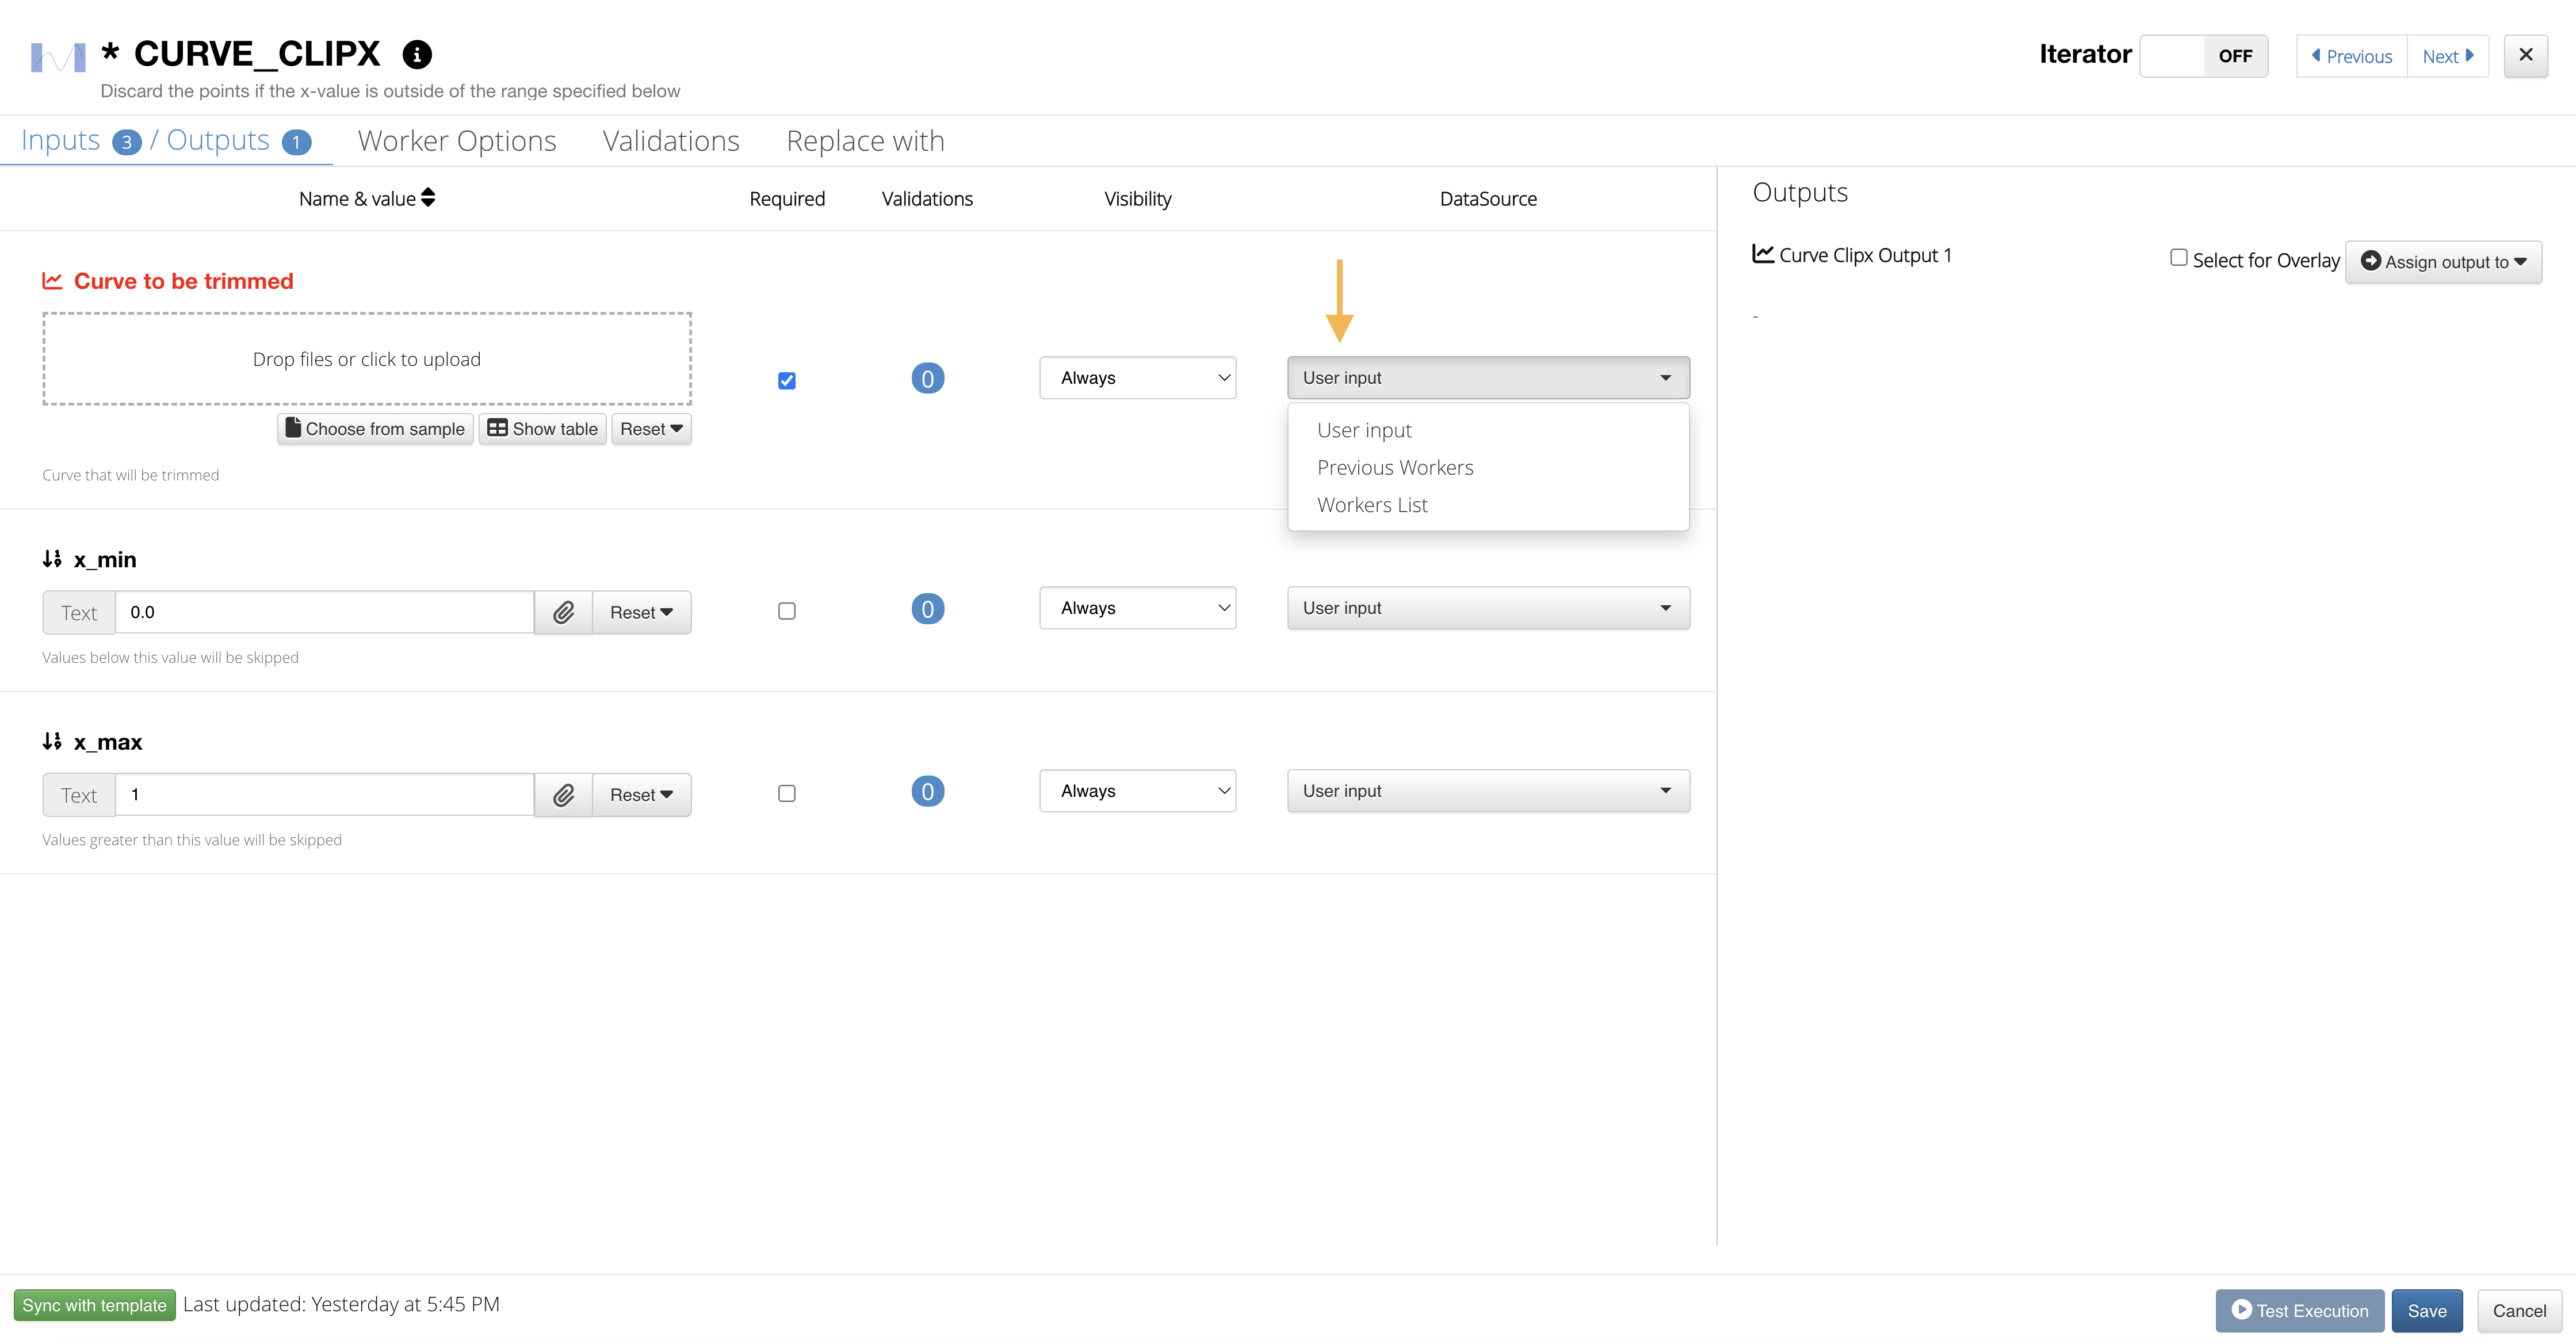
Here, we’ve chosen to use a previous worker input. Make sure fill out any other necessary inputs.
Input Data Source Options
Testing Execution
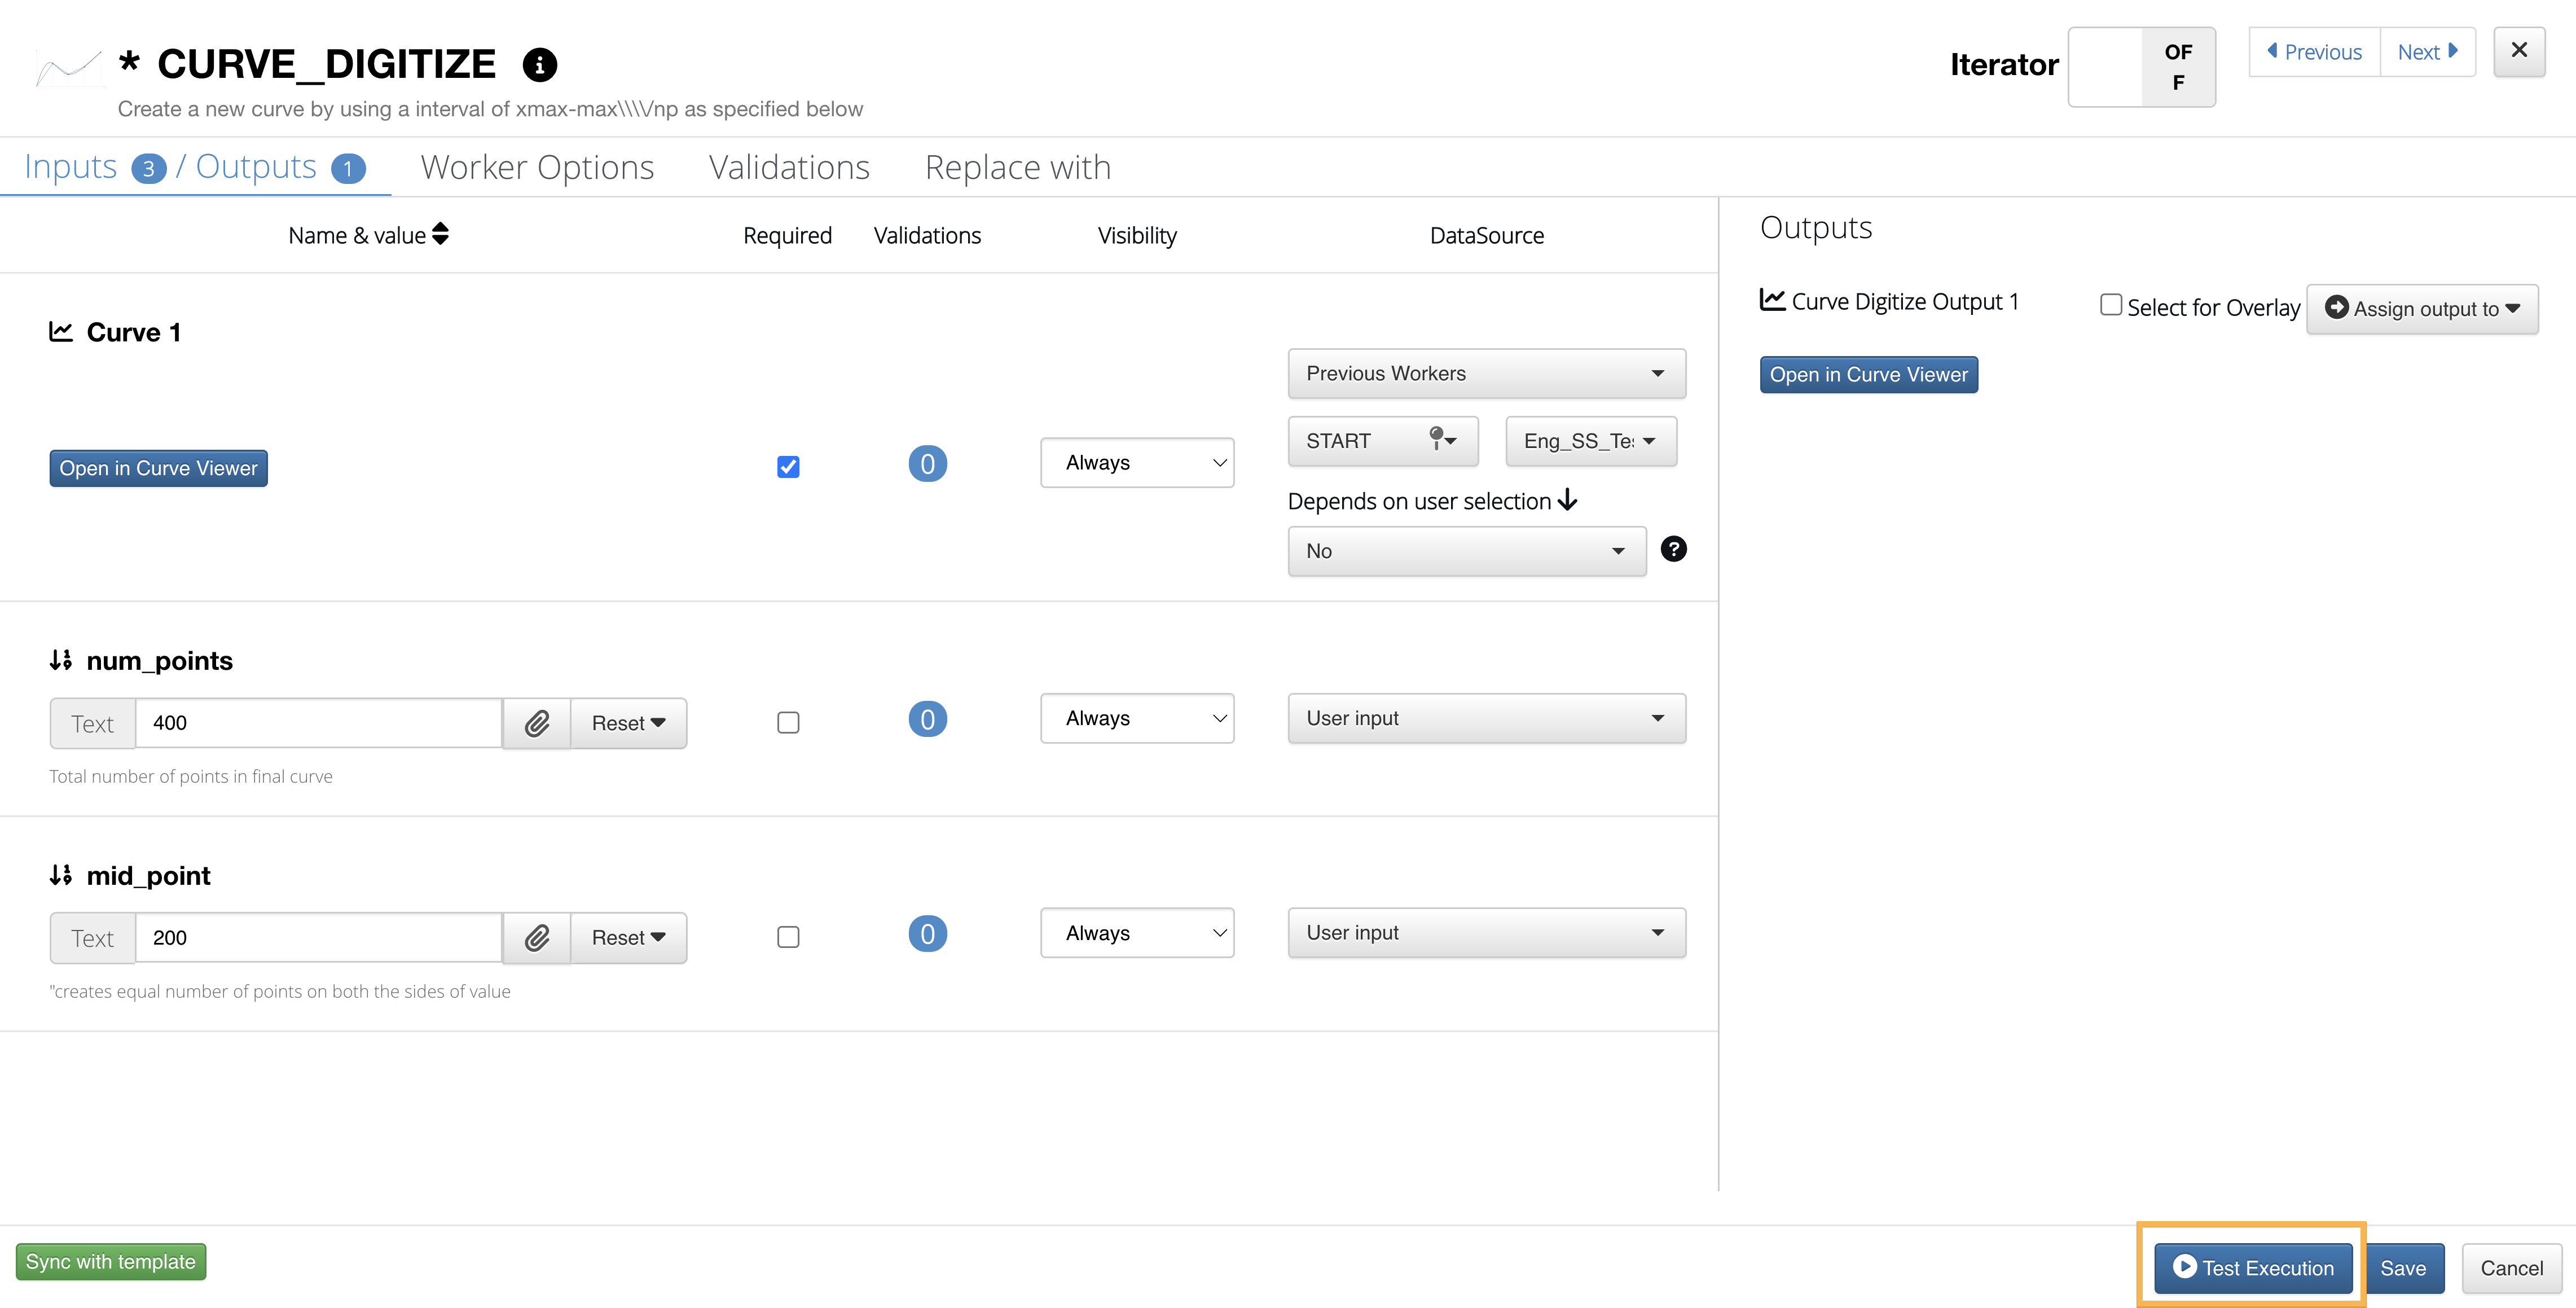
When configuring workers, we can test the execution of a worker in the modal window to help eliminate any error in our configuration:
Test Execution
4.3. Building Options
Let’s go over some capabilities for building the structure.
Adding and Editing Connections
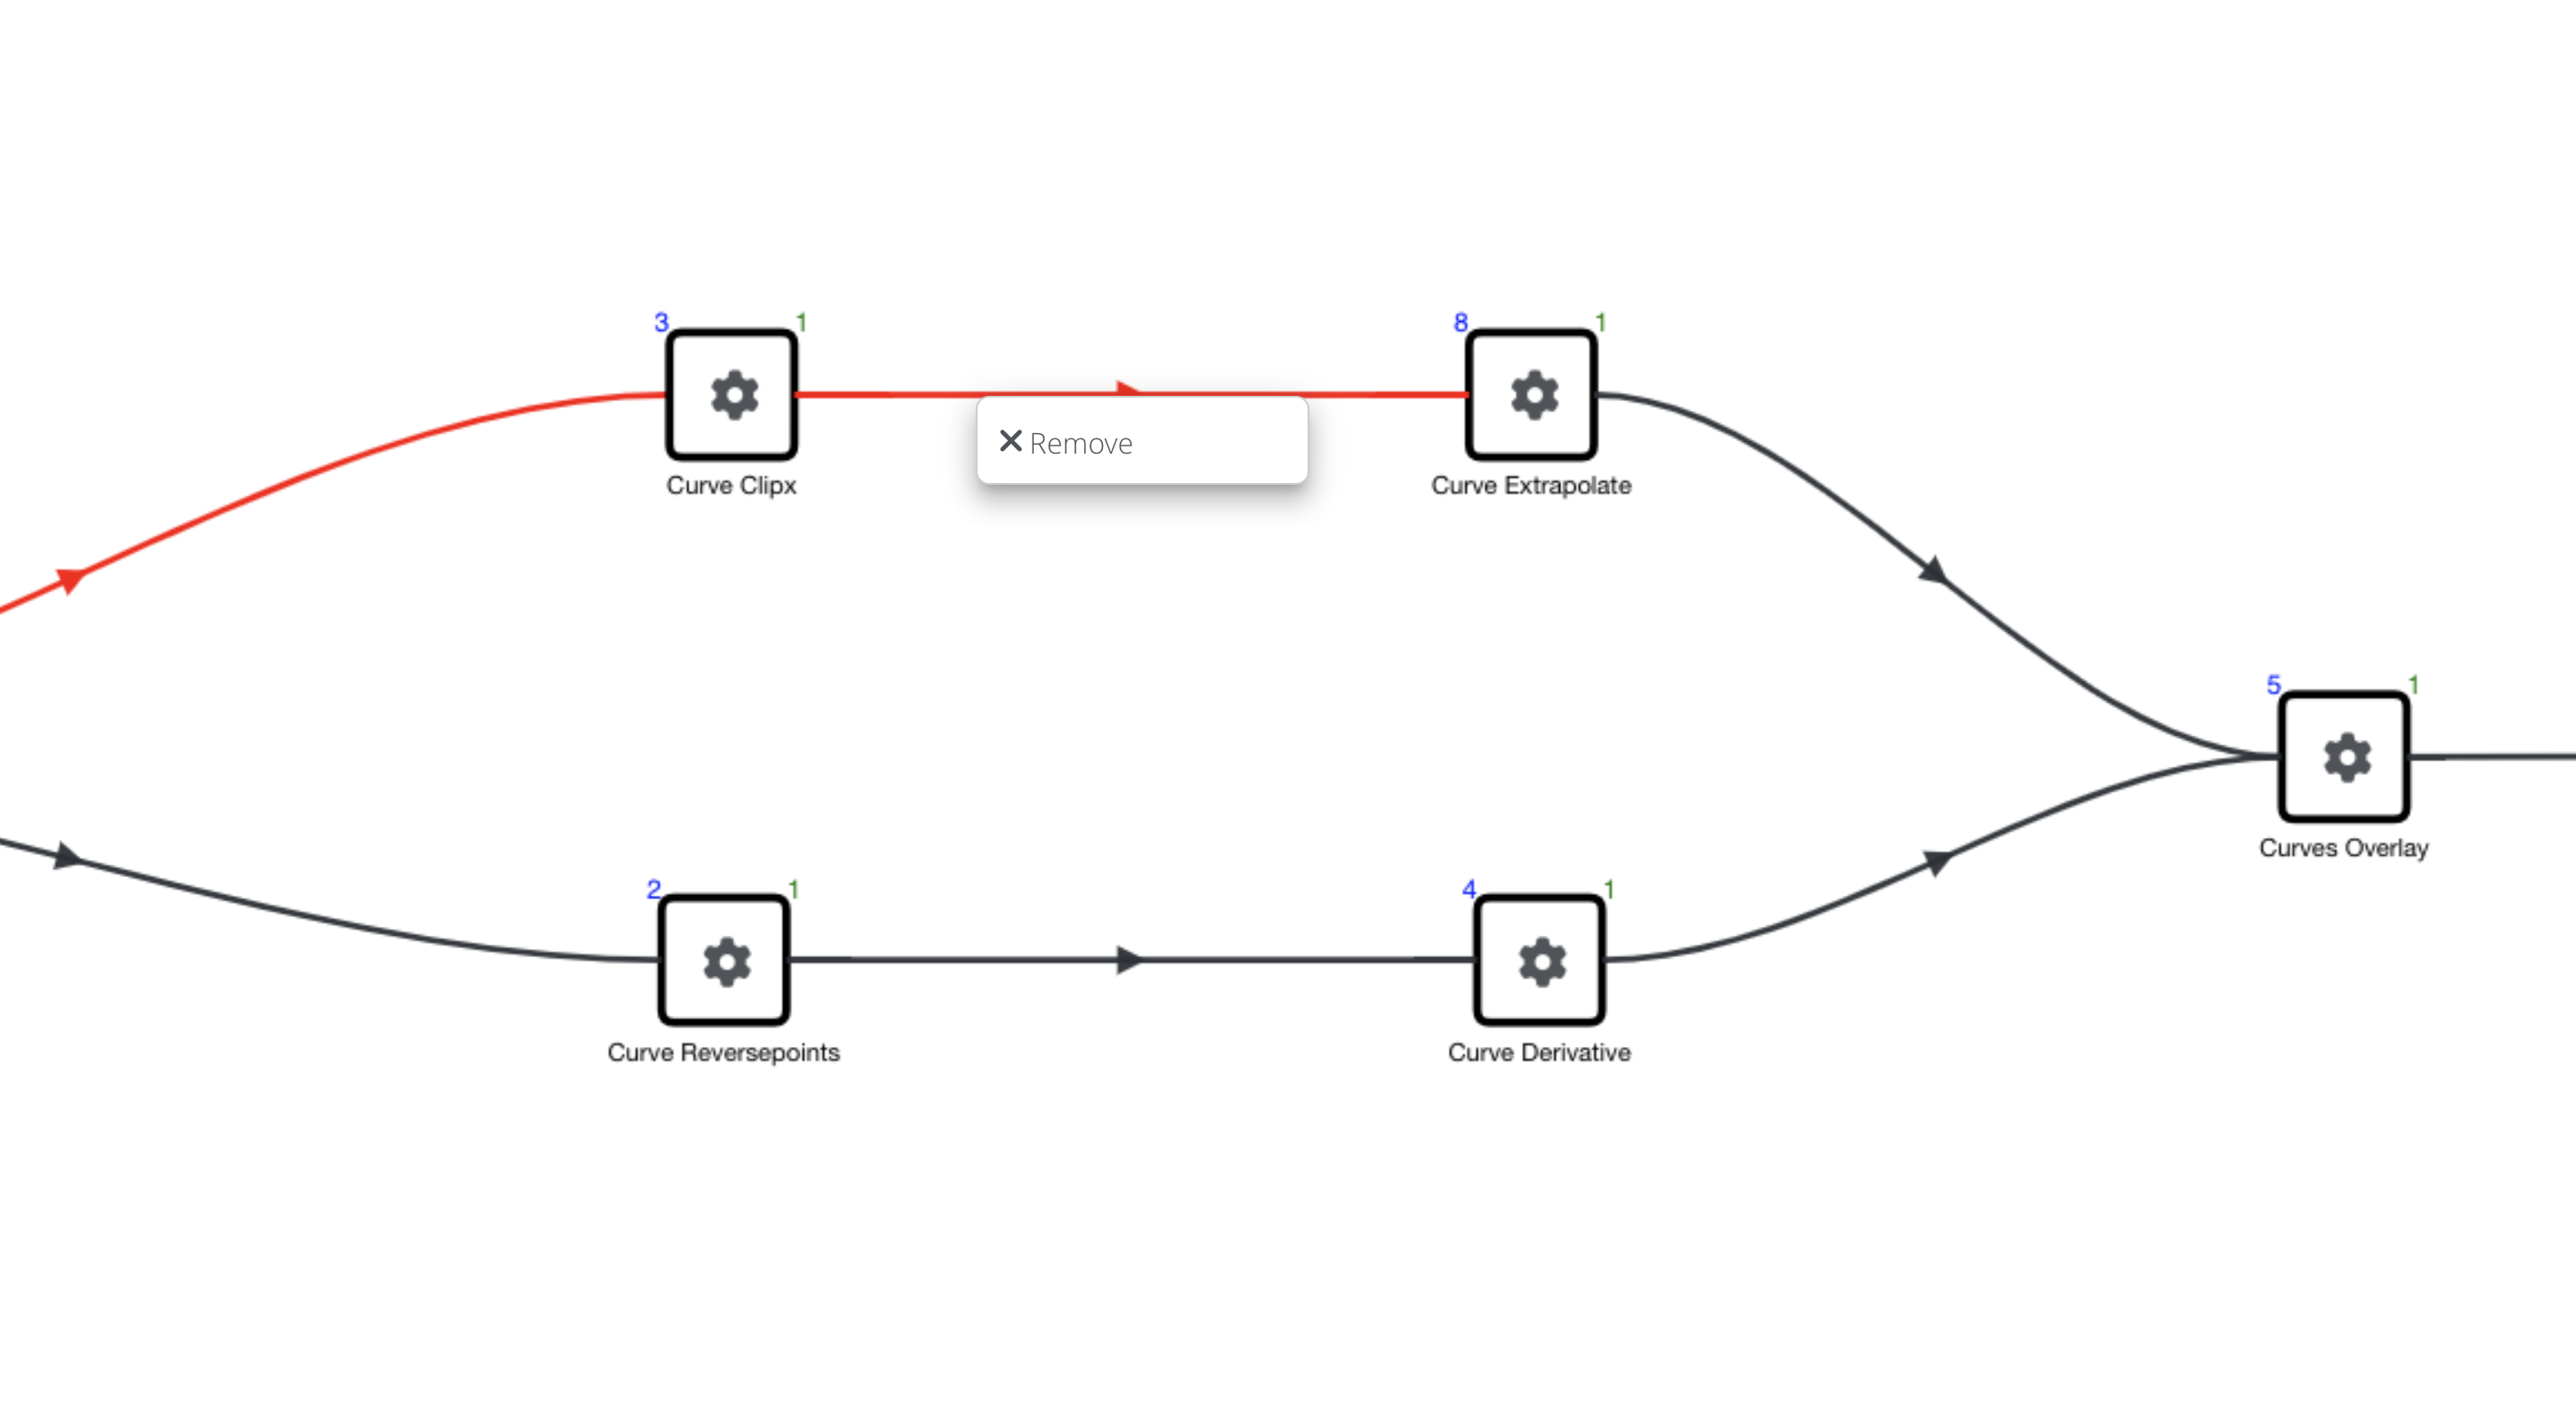
To connect workers together, click one side of one worker and to one side of another worker.
Right-click on a worker connection to delete it.
Delete Worker Line
Worker Options
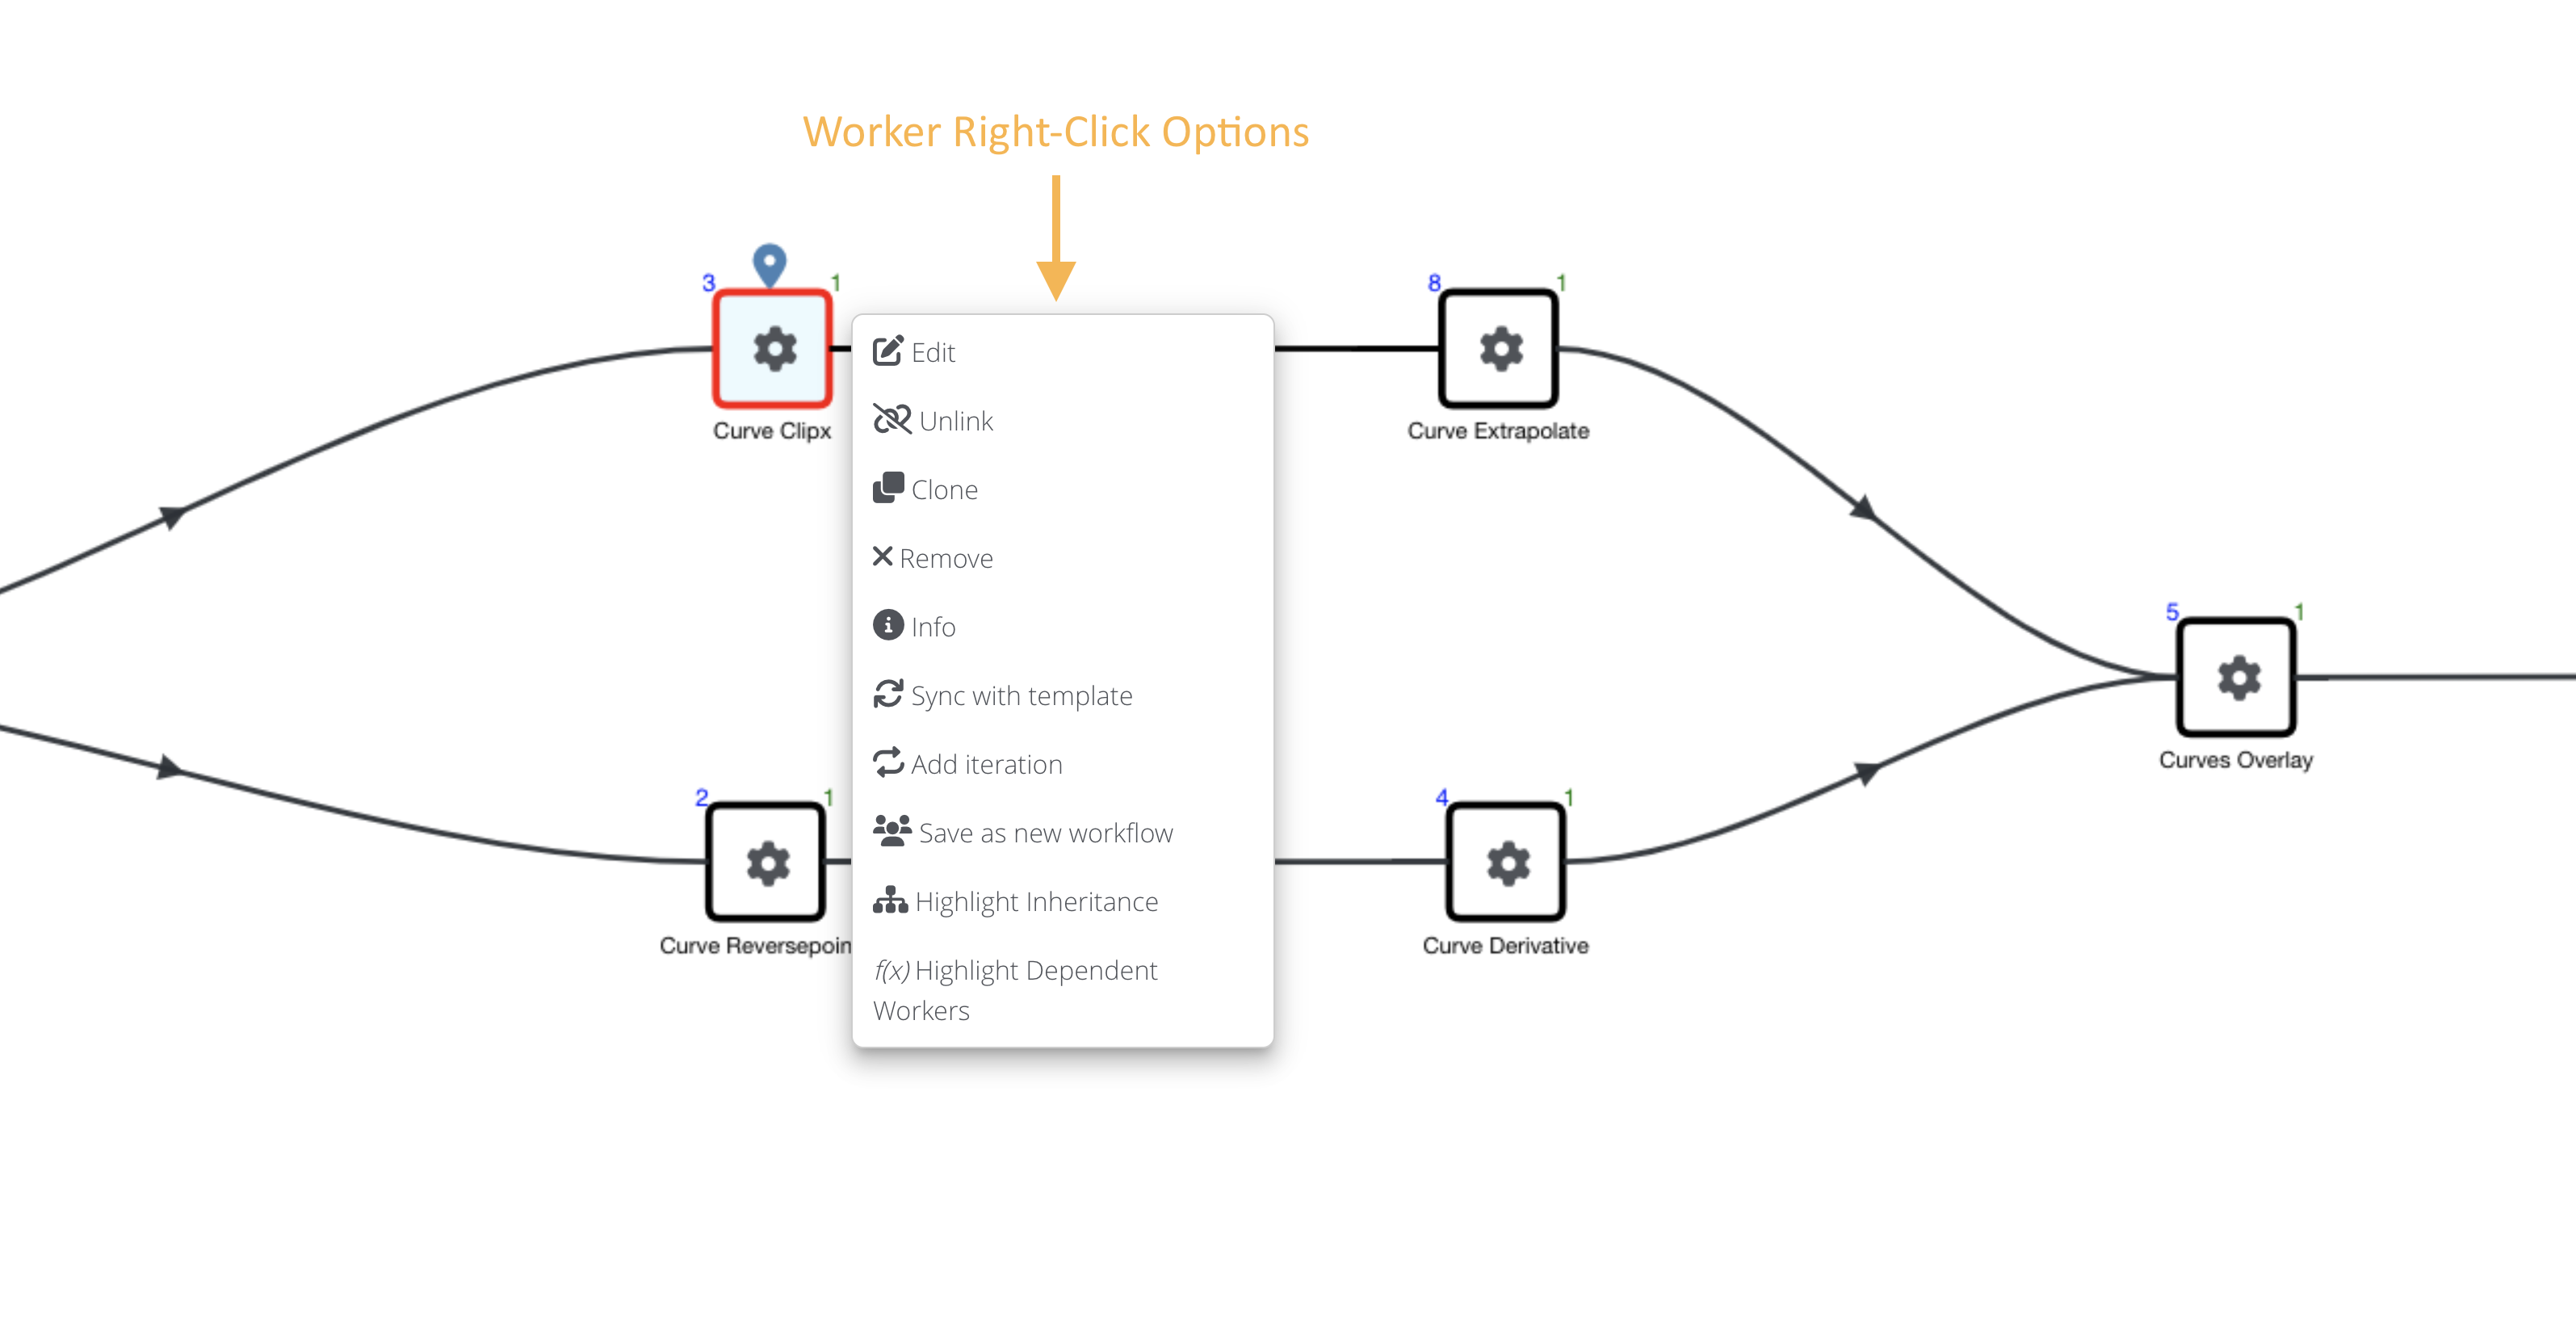
View all worker options by right-clicking on it. Here, we can perform actions like cloning the worker, editing it, unlinking its lines or deleting it.
Worker Right-Click Options
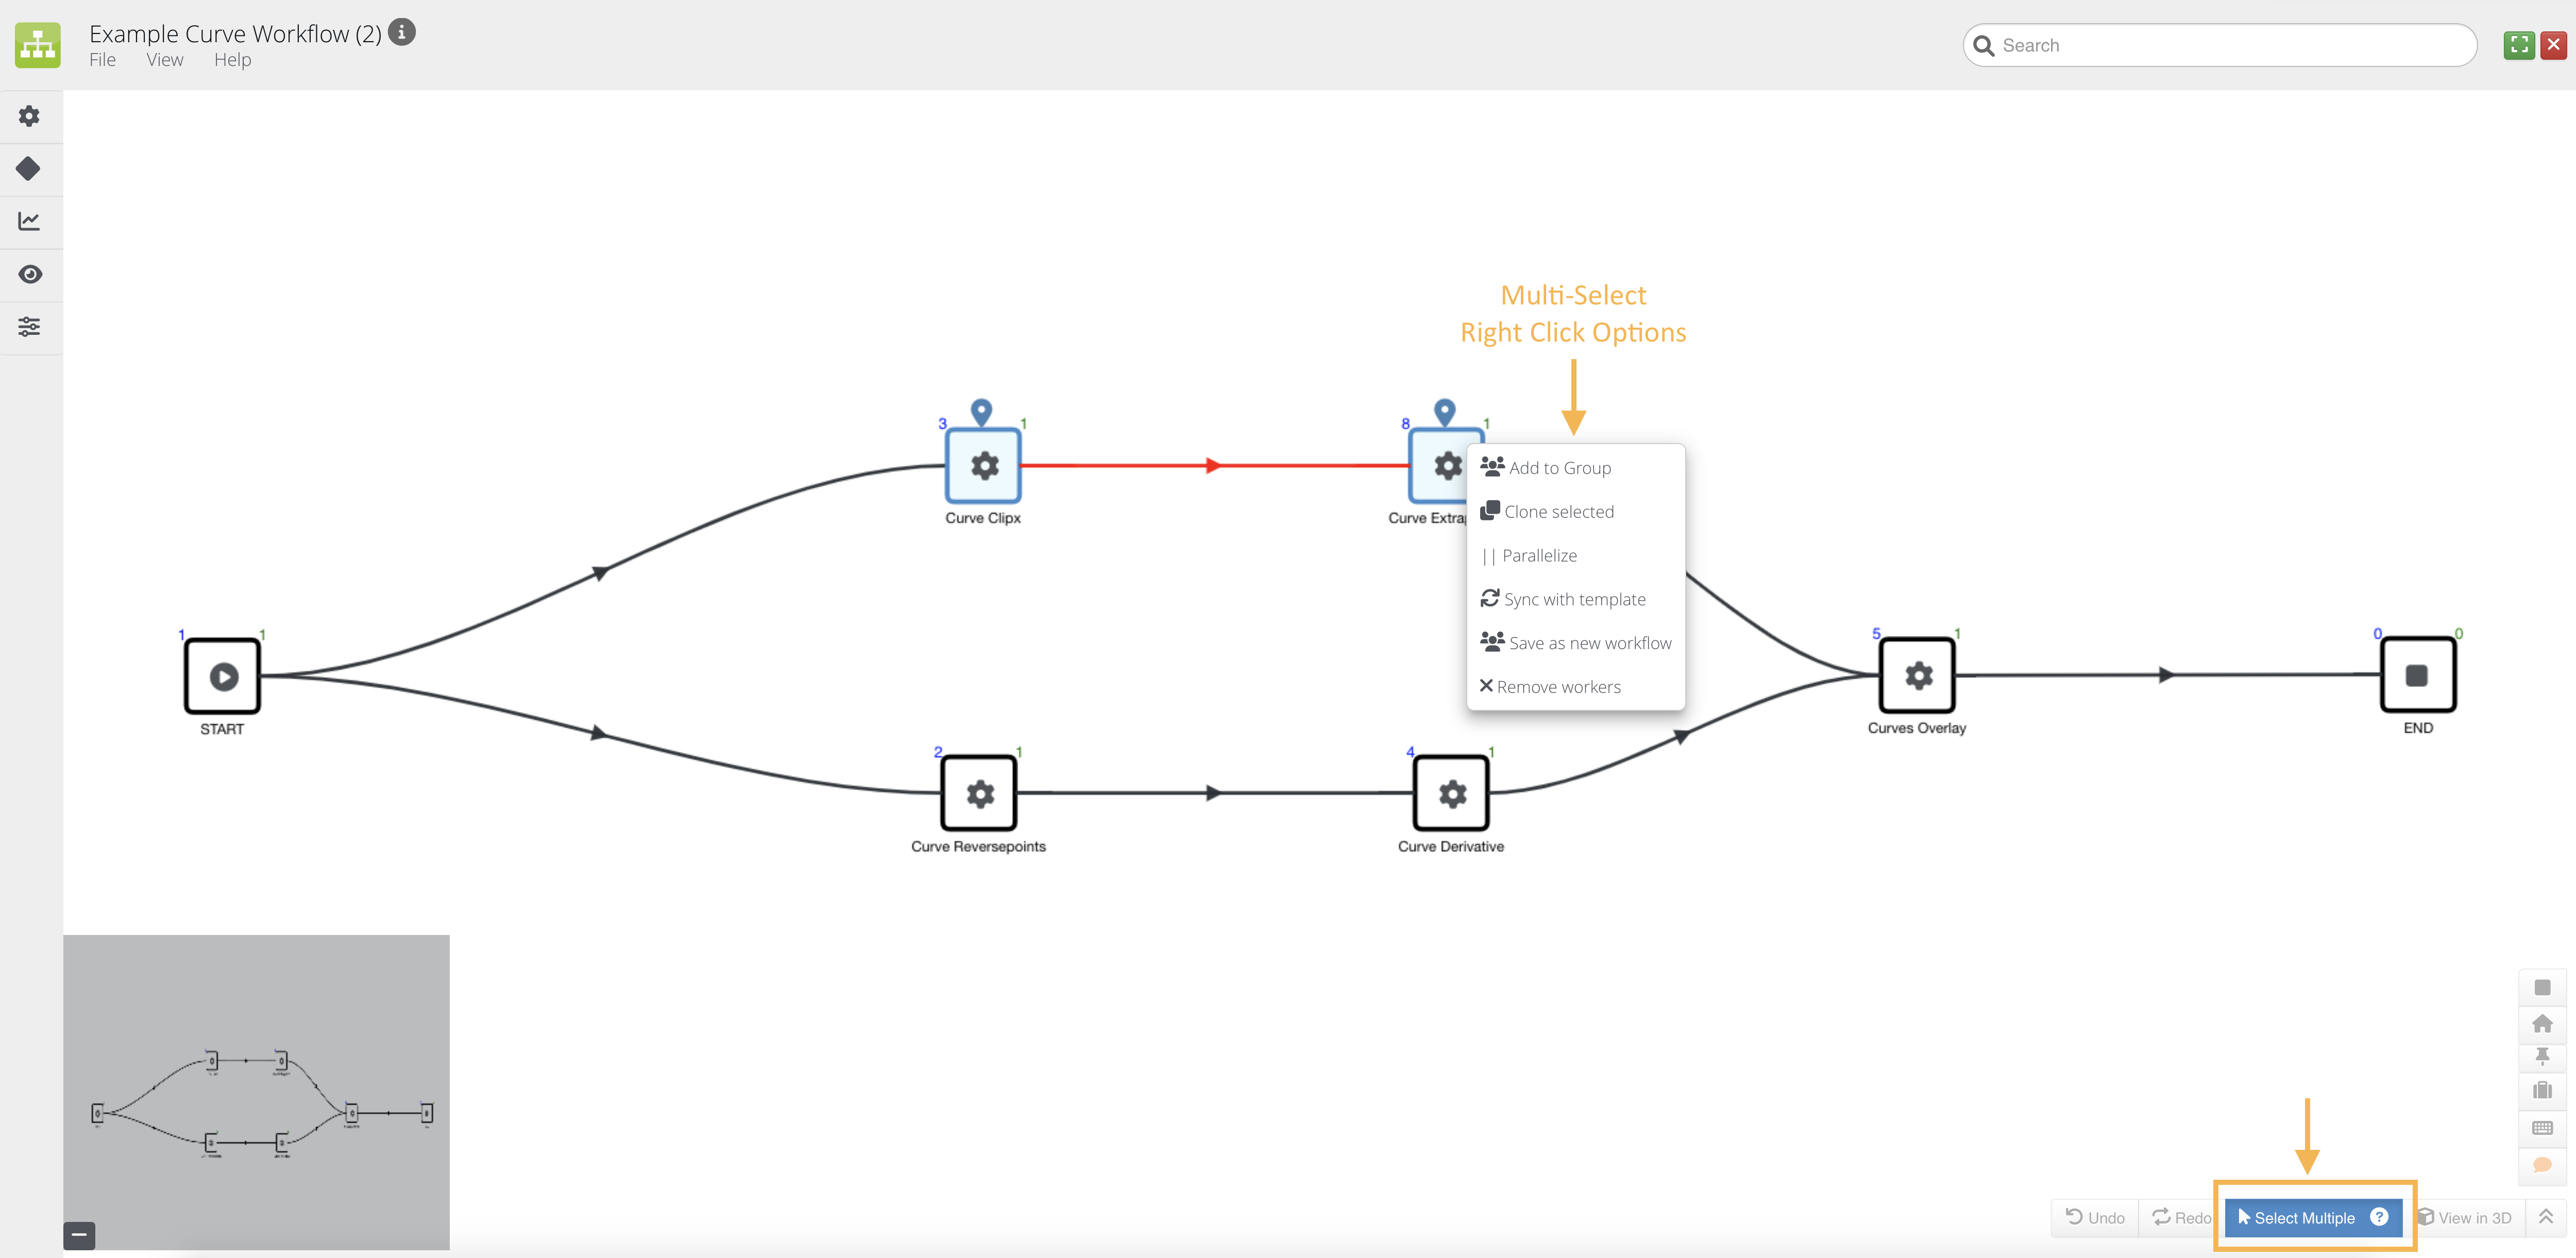
Multi-Select
With the bottom-left multi-select button turned on, we can select more than worker. Now when we right-click, we can remove or clone all selected workers, save them as a new workflow and even create a parallelization with them.
Multi-Select Right-Click
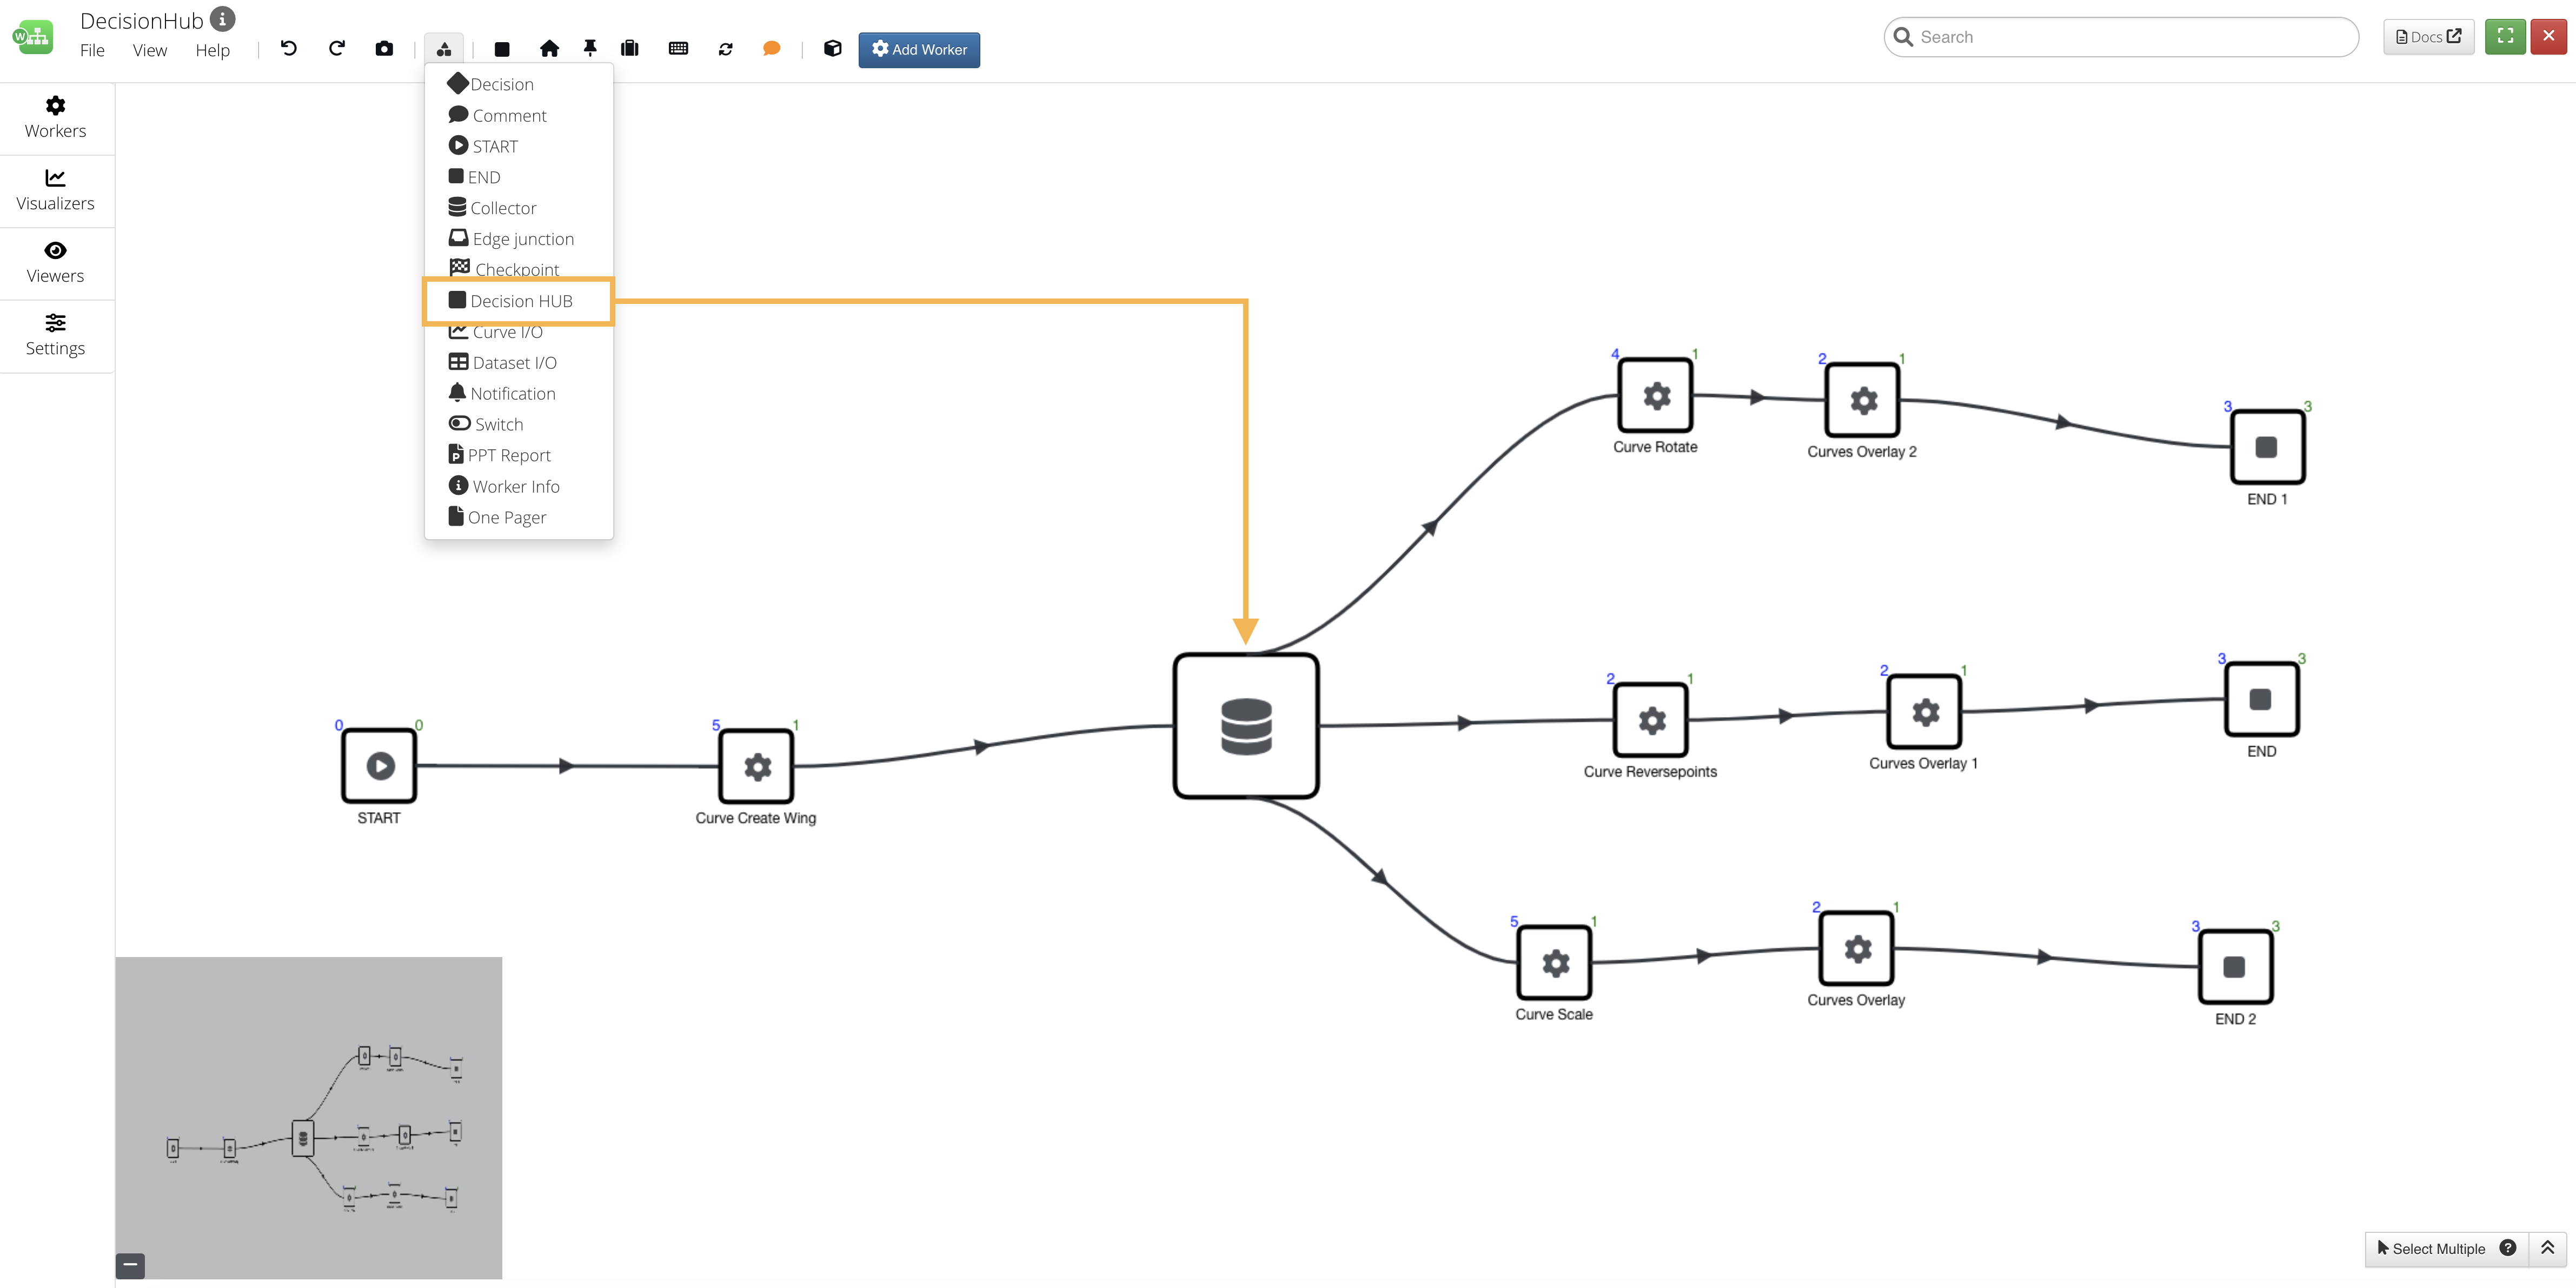
4.4. Decision Hub
We use decision workers to simply make decisions on how to further execute a workflow. We set up validations that continue the workflow based on if a previous worker met a certain requirement.
Add a decision hub from the Shapes menu in the left side panel options.
Add Decision Hub
Configuring
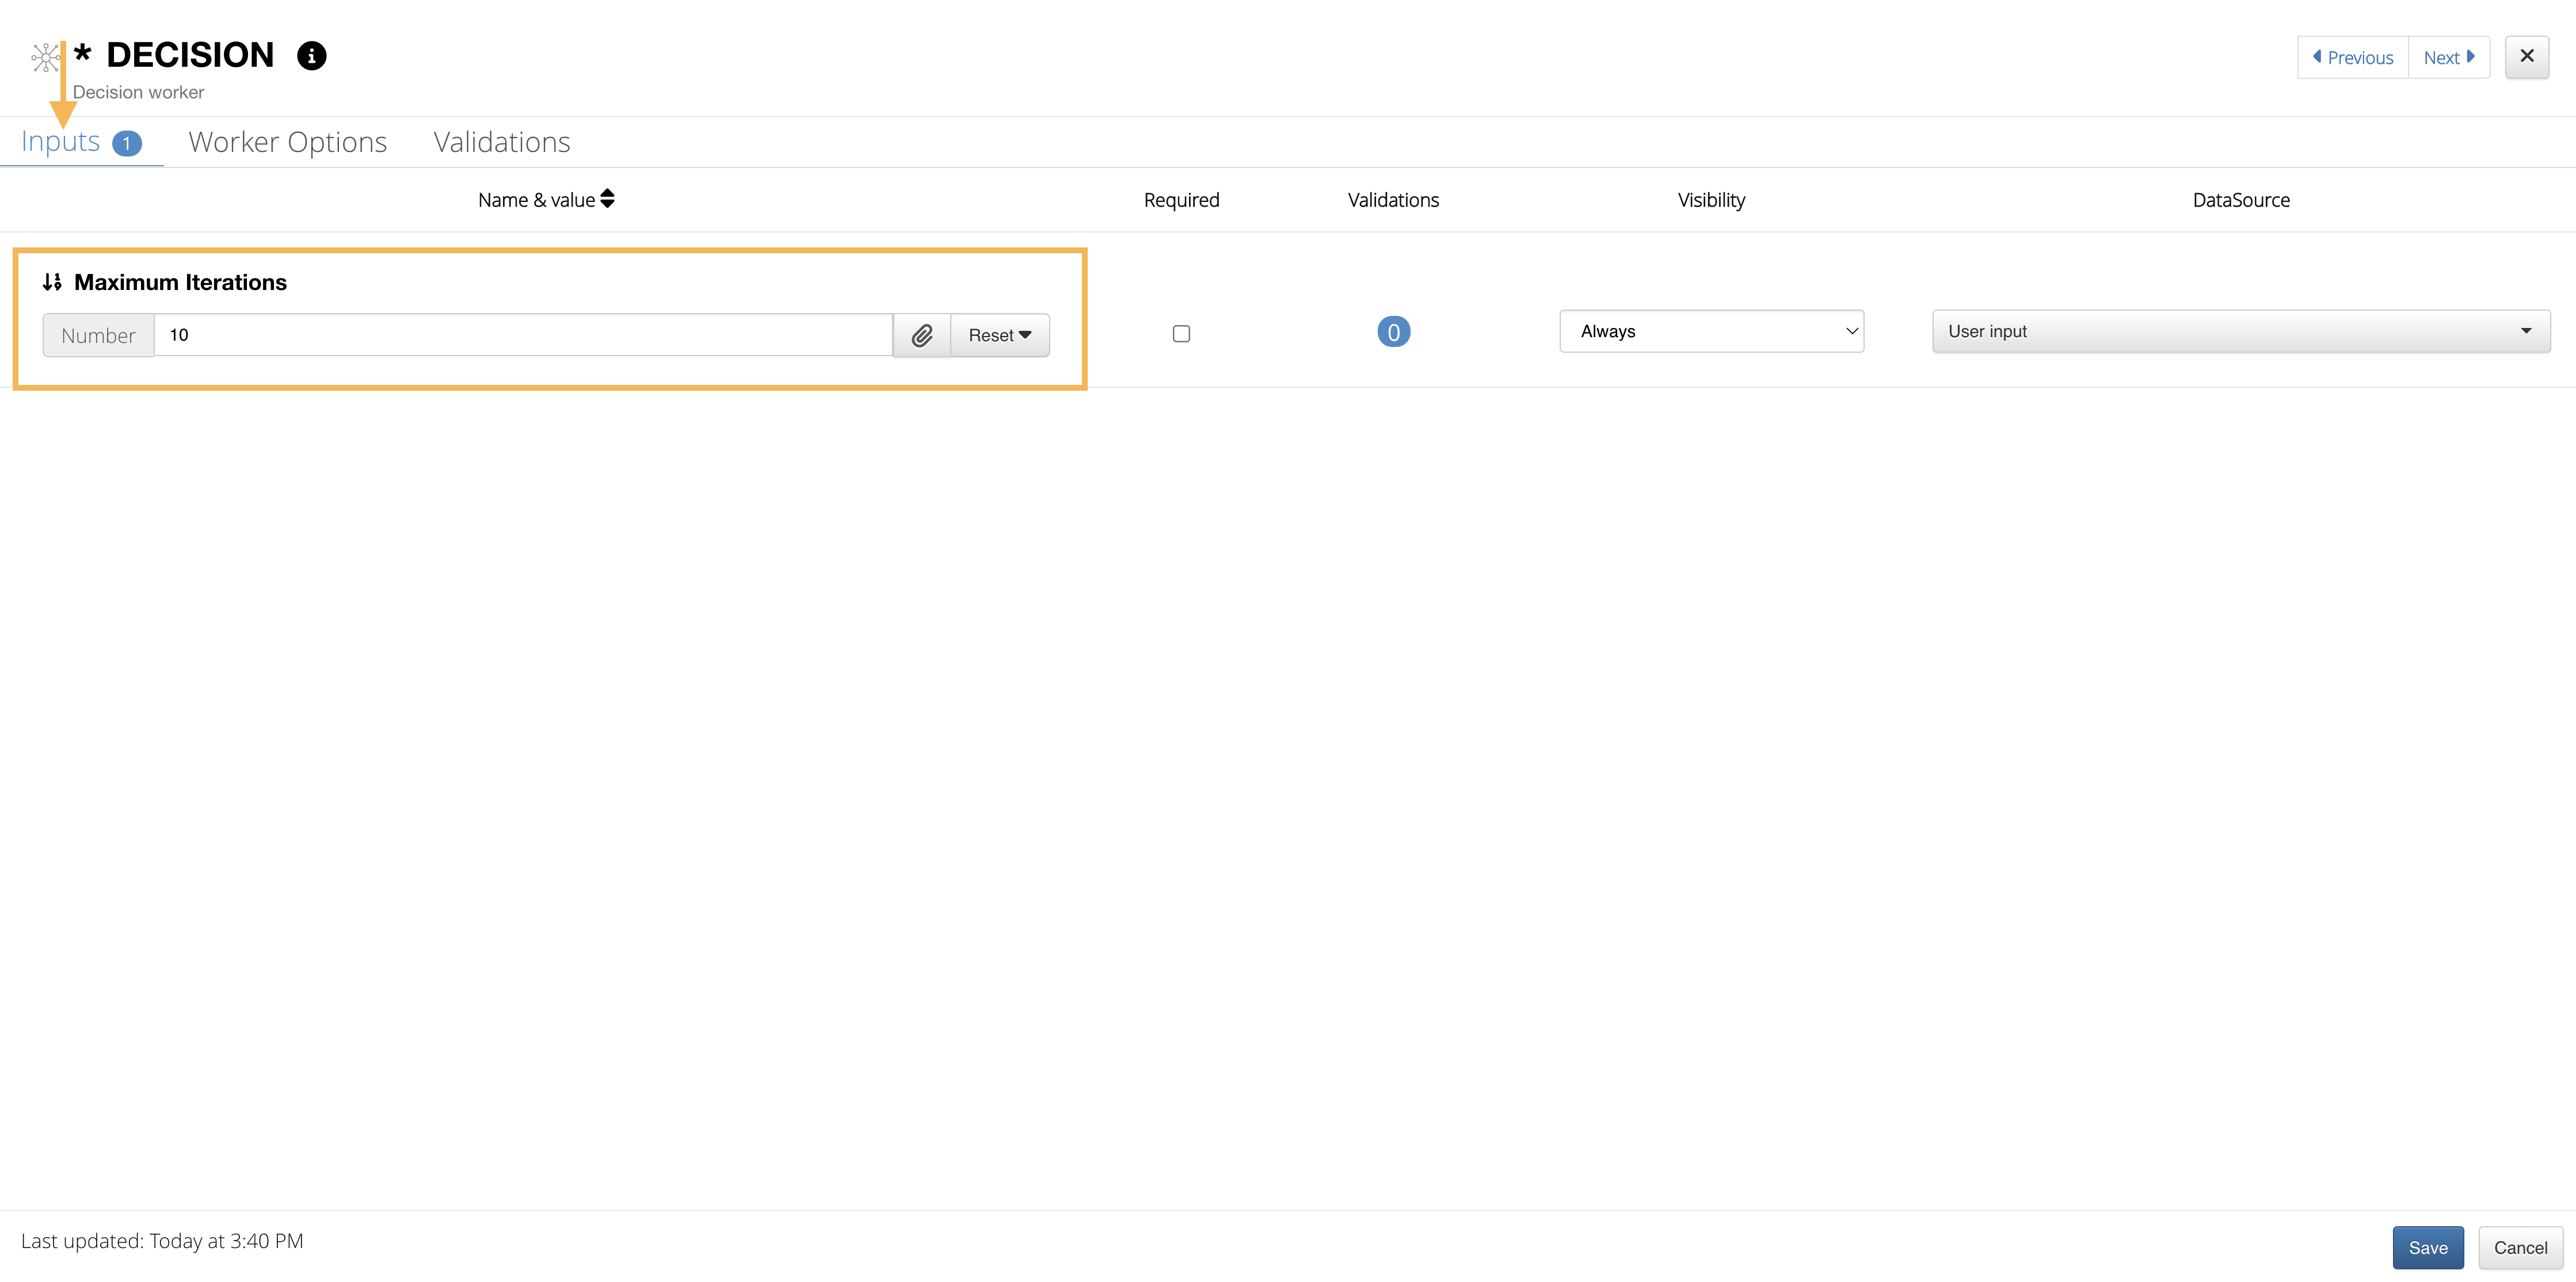
Click on the decision hub to start configuring it. From here, we’ll make sure to choose the max amount of iterations in the input tab.
Input Tab
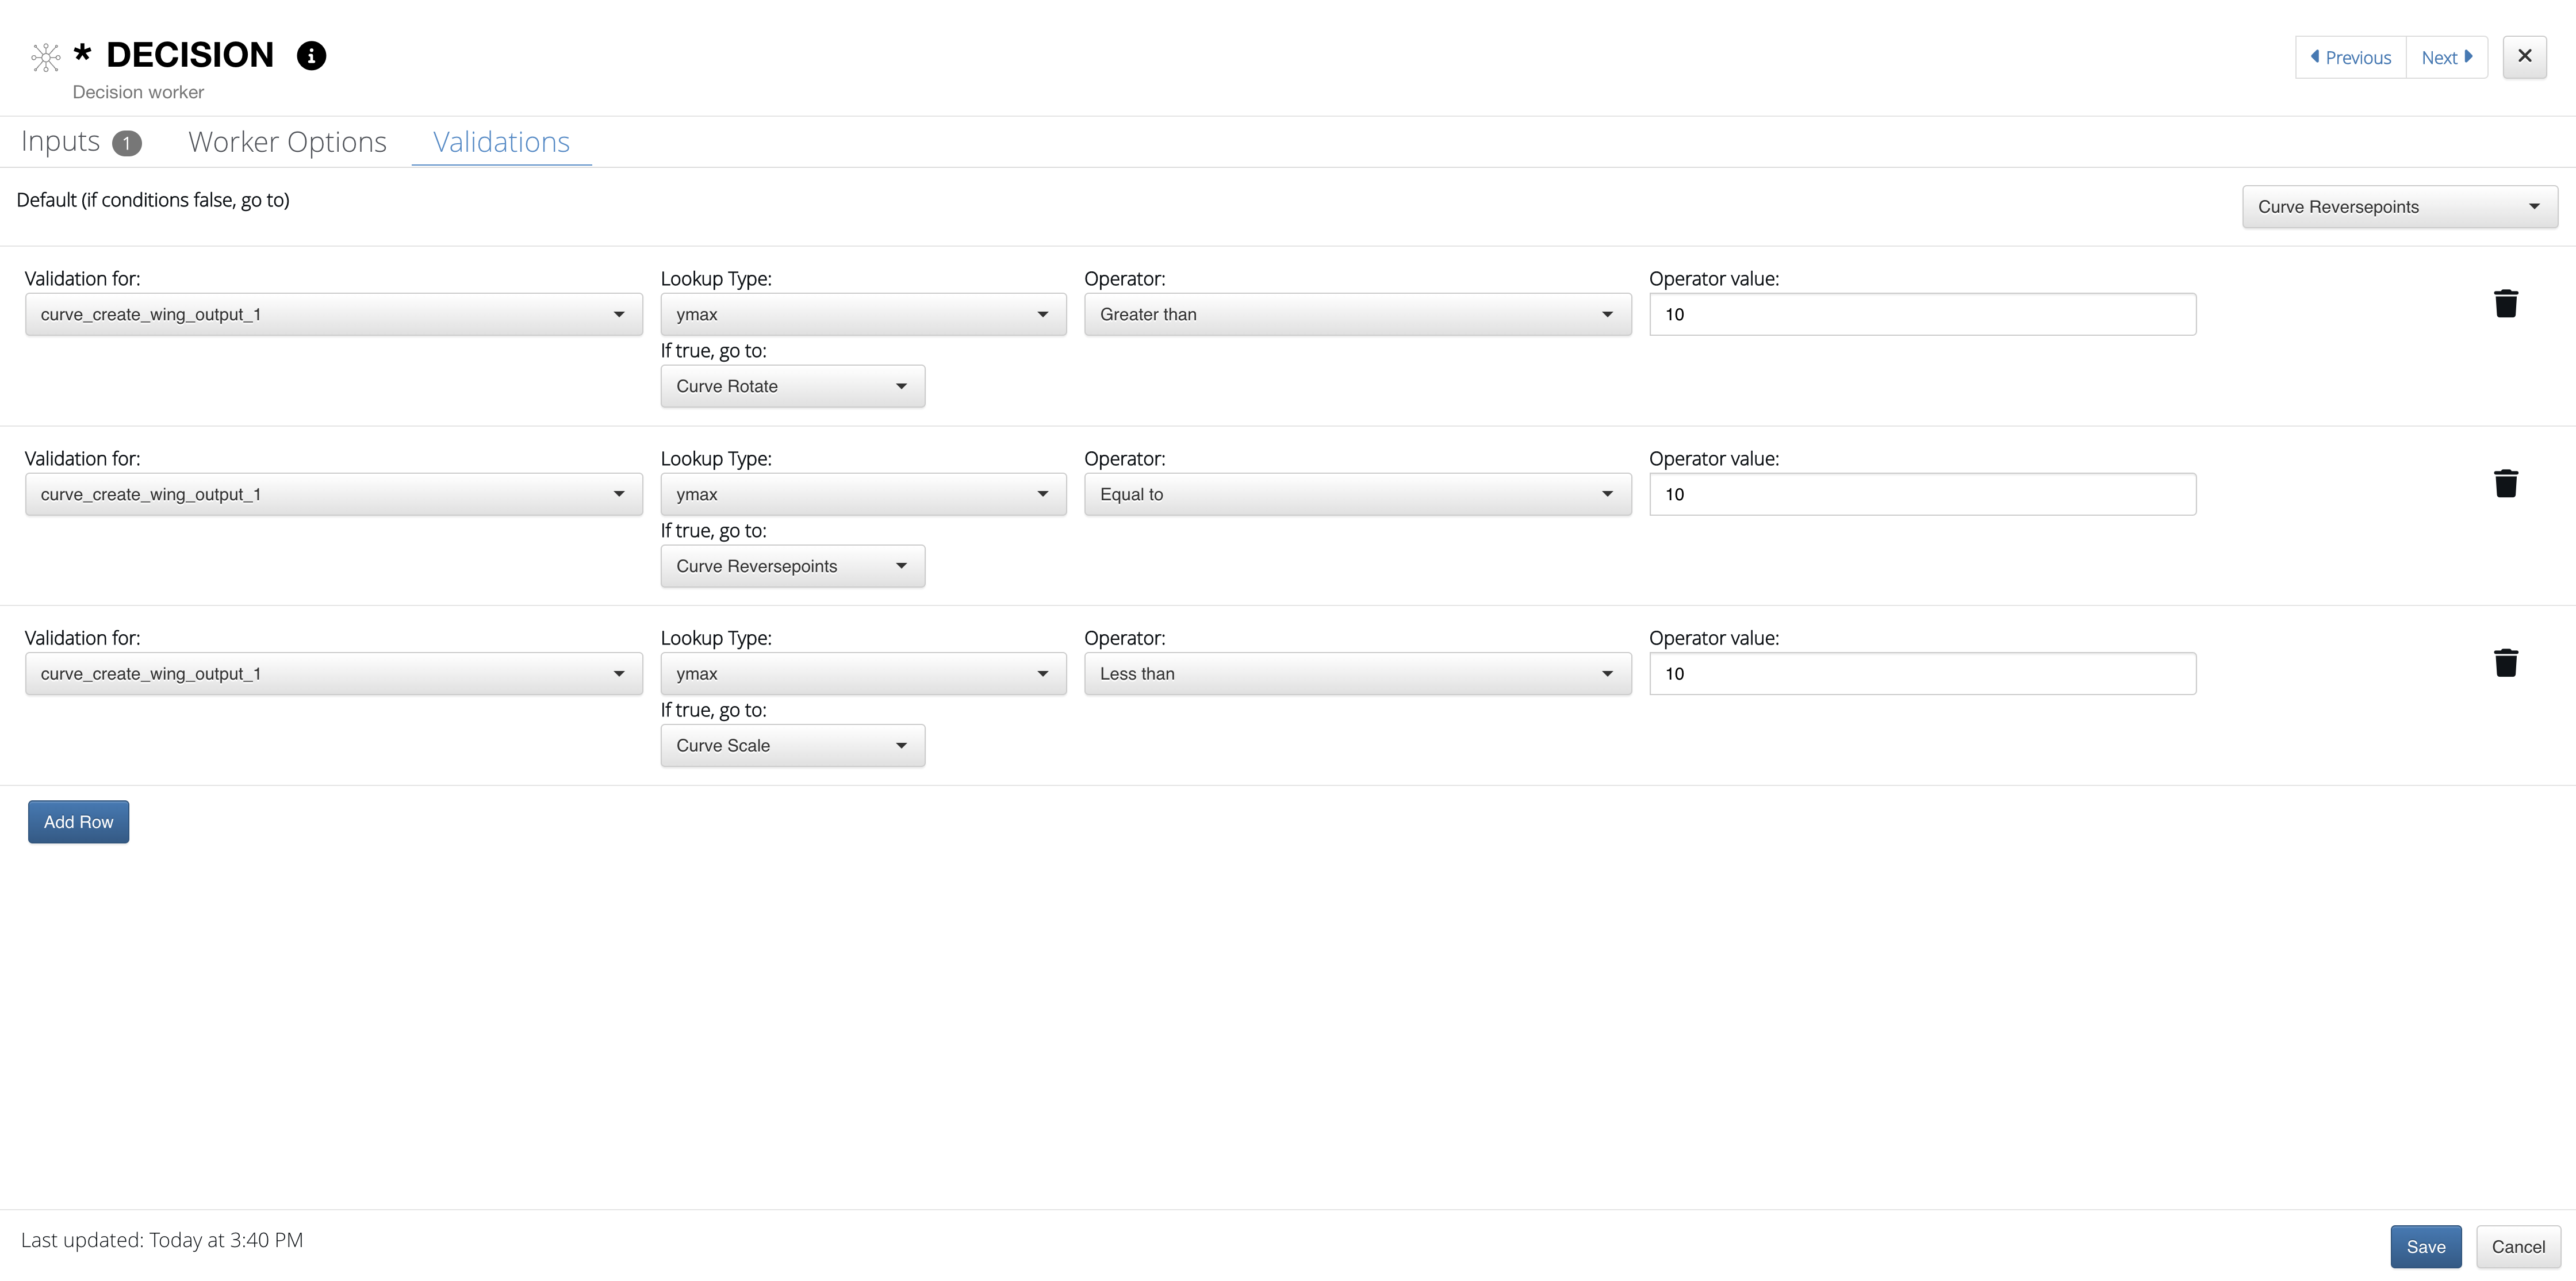
Then, we’ll click over to the validations tab to tell the decision worker how to continue the worker execution. At the top, we’ll make sure to choose a worker if the workflow does not meet any of the validation requirements. Then, we’ll add rows to populate our validations.
Add Rows

Here is how we’ve set up the validations for our decision hub. We’ve chosen different qualifications for Y max and specified the next worker if the previous worker output meets these requirements. This is how the decision hub will decide which worker to execute next in the workflow.
Worker Validations
Here is how the workflow may execute with a decision hub. The hub choose Curve Reverse Points to execute which resulted in a full execution of the middle path only.
Decision Hub Execution

4.5. Report Generator
There is a specified worker we can use for generating reports directly from our workflow. Let’s go over how to set it up.
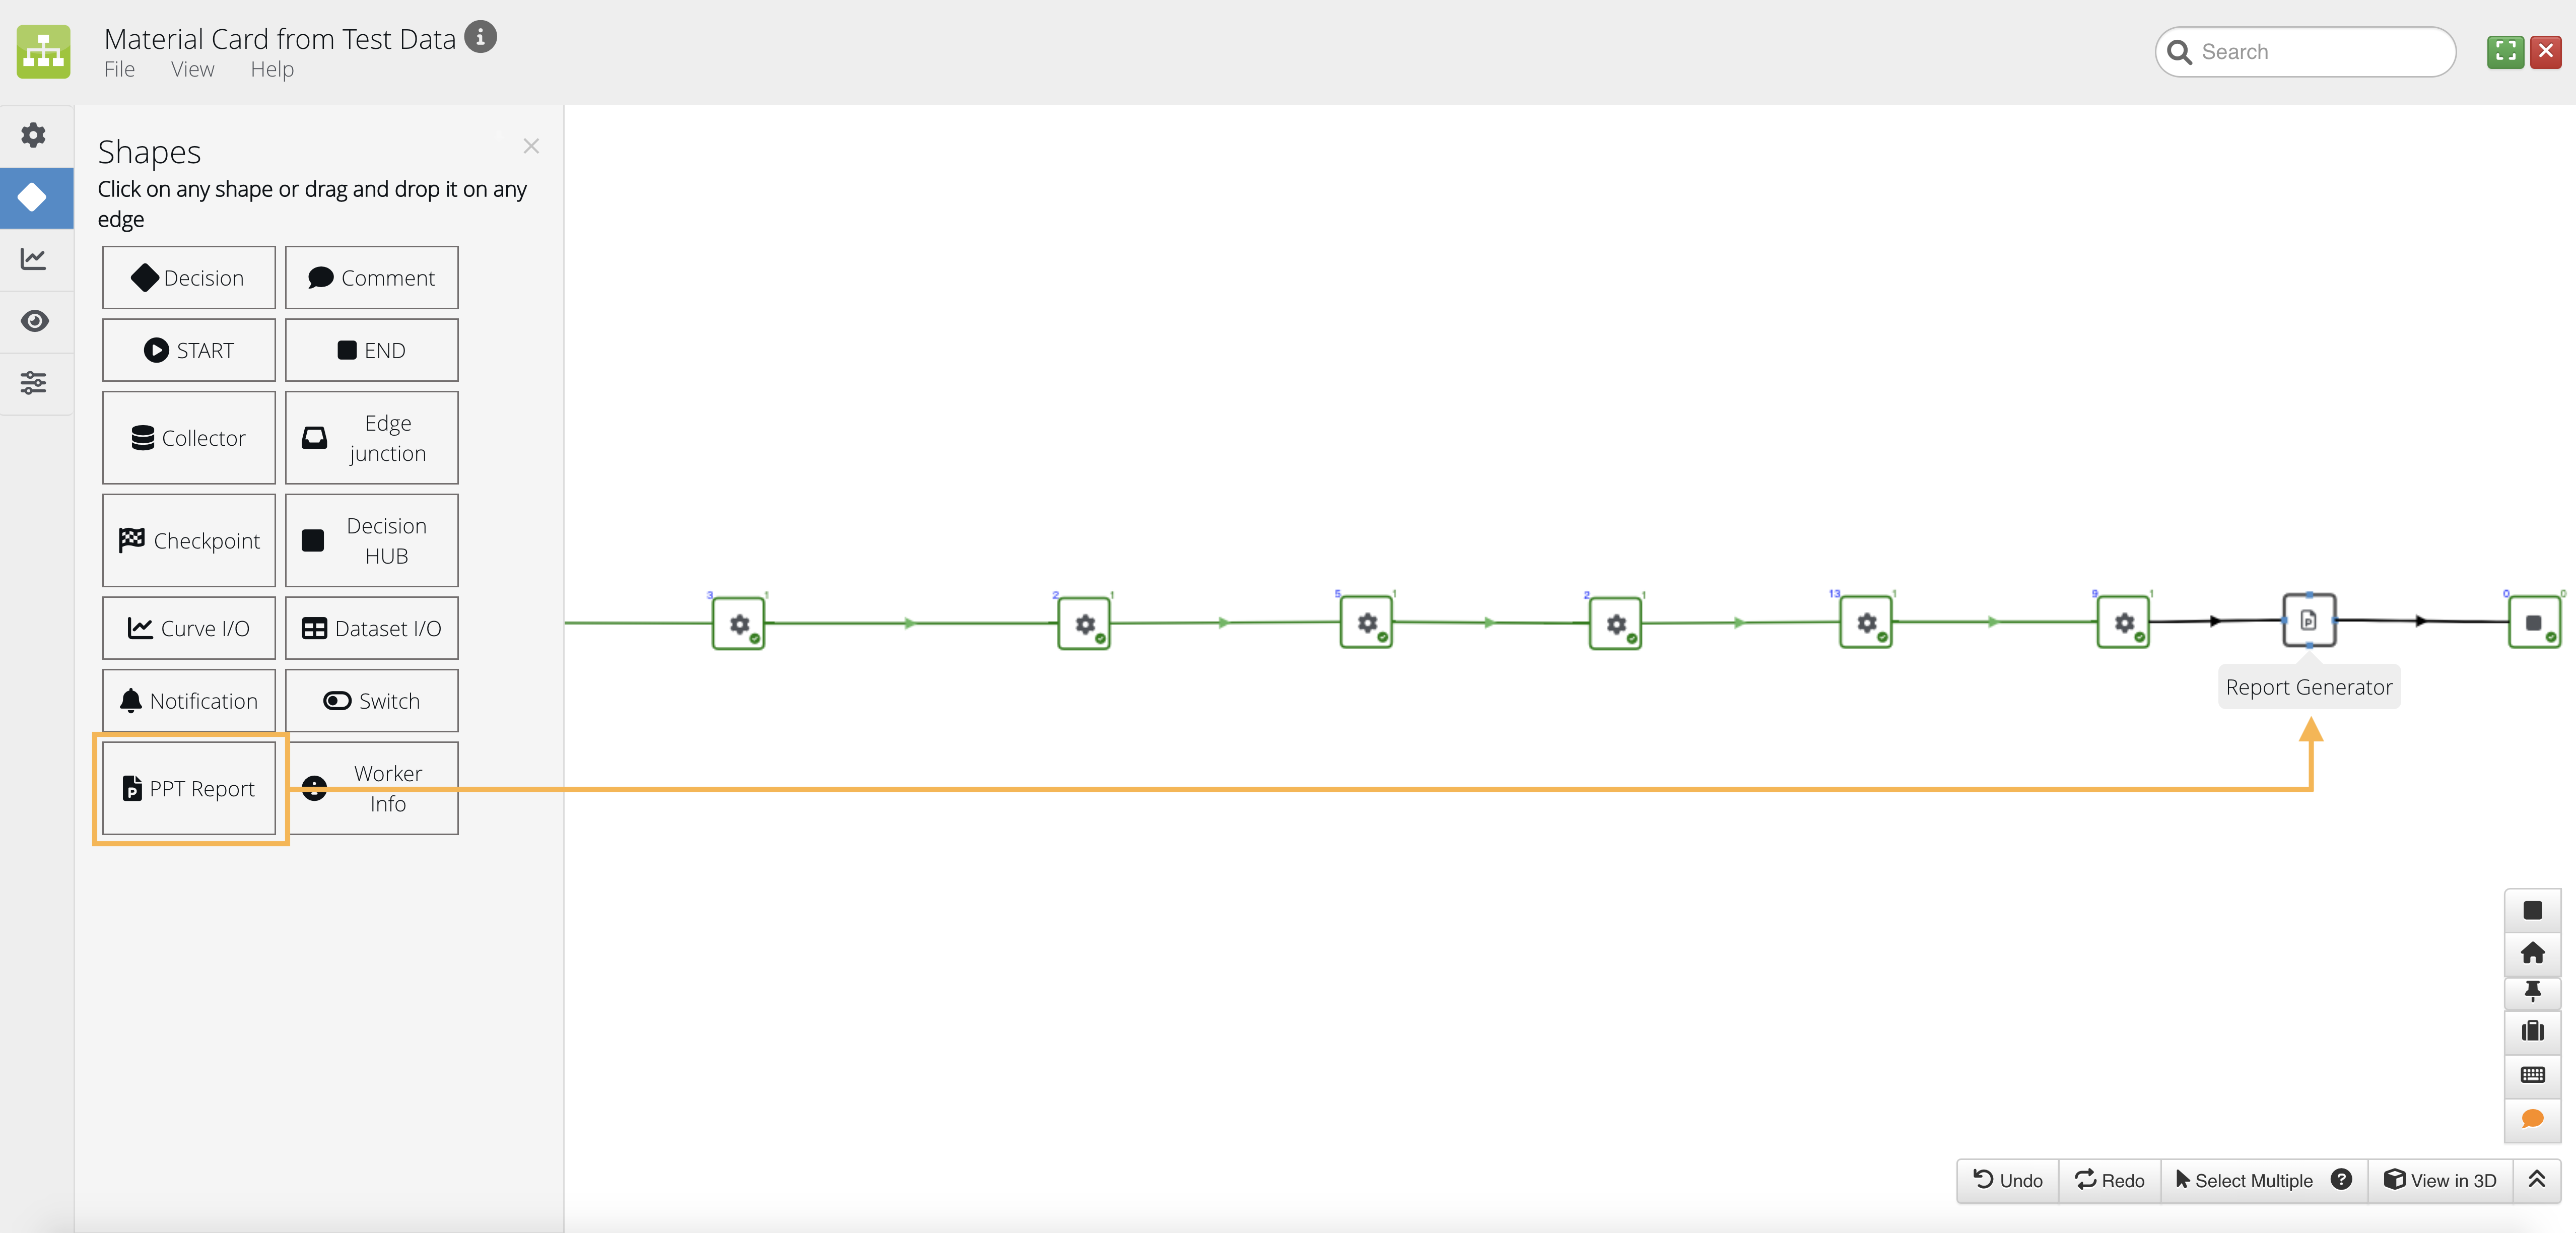
Under the shapes menu, click and drag the PPT Report onto the workflow right before the end worker. Then, click on the worker to configure it.
Add PPT Report Shape to Workflow
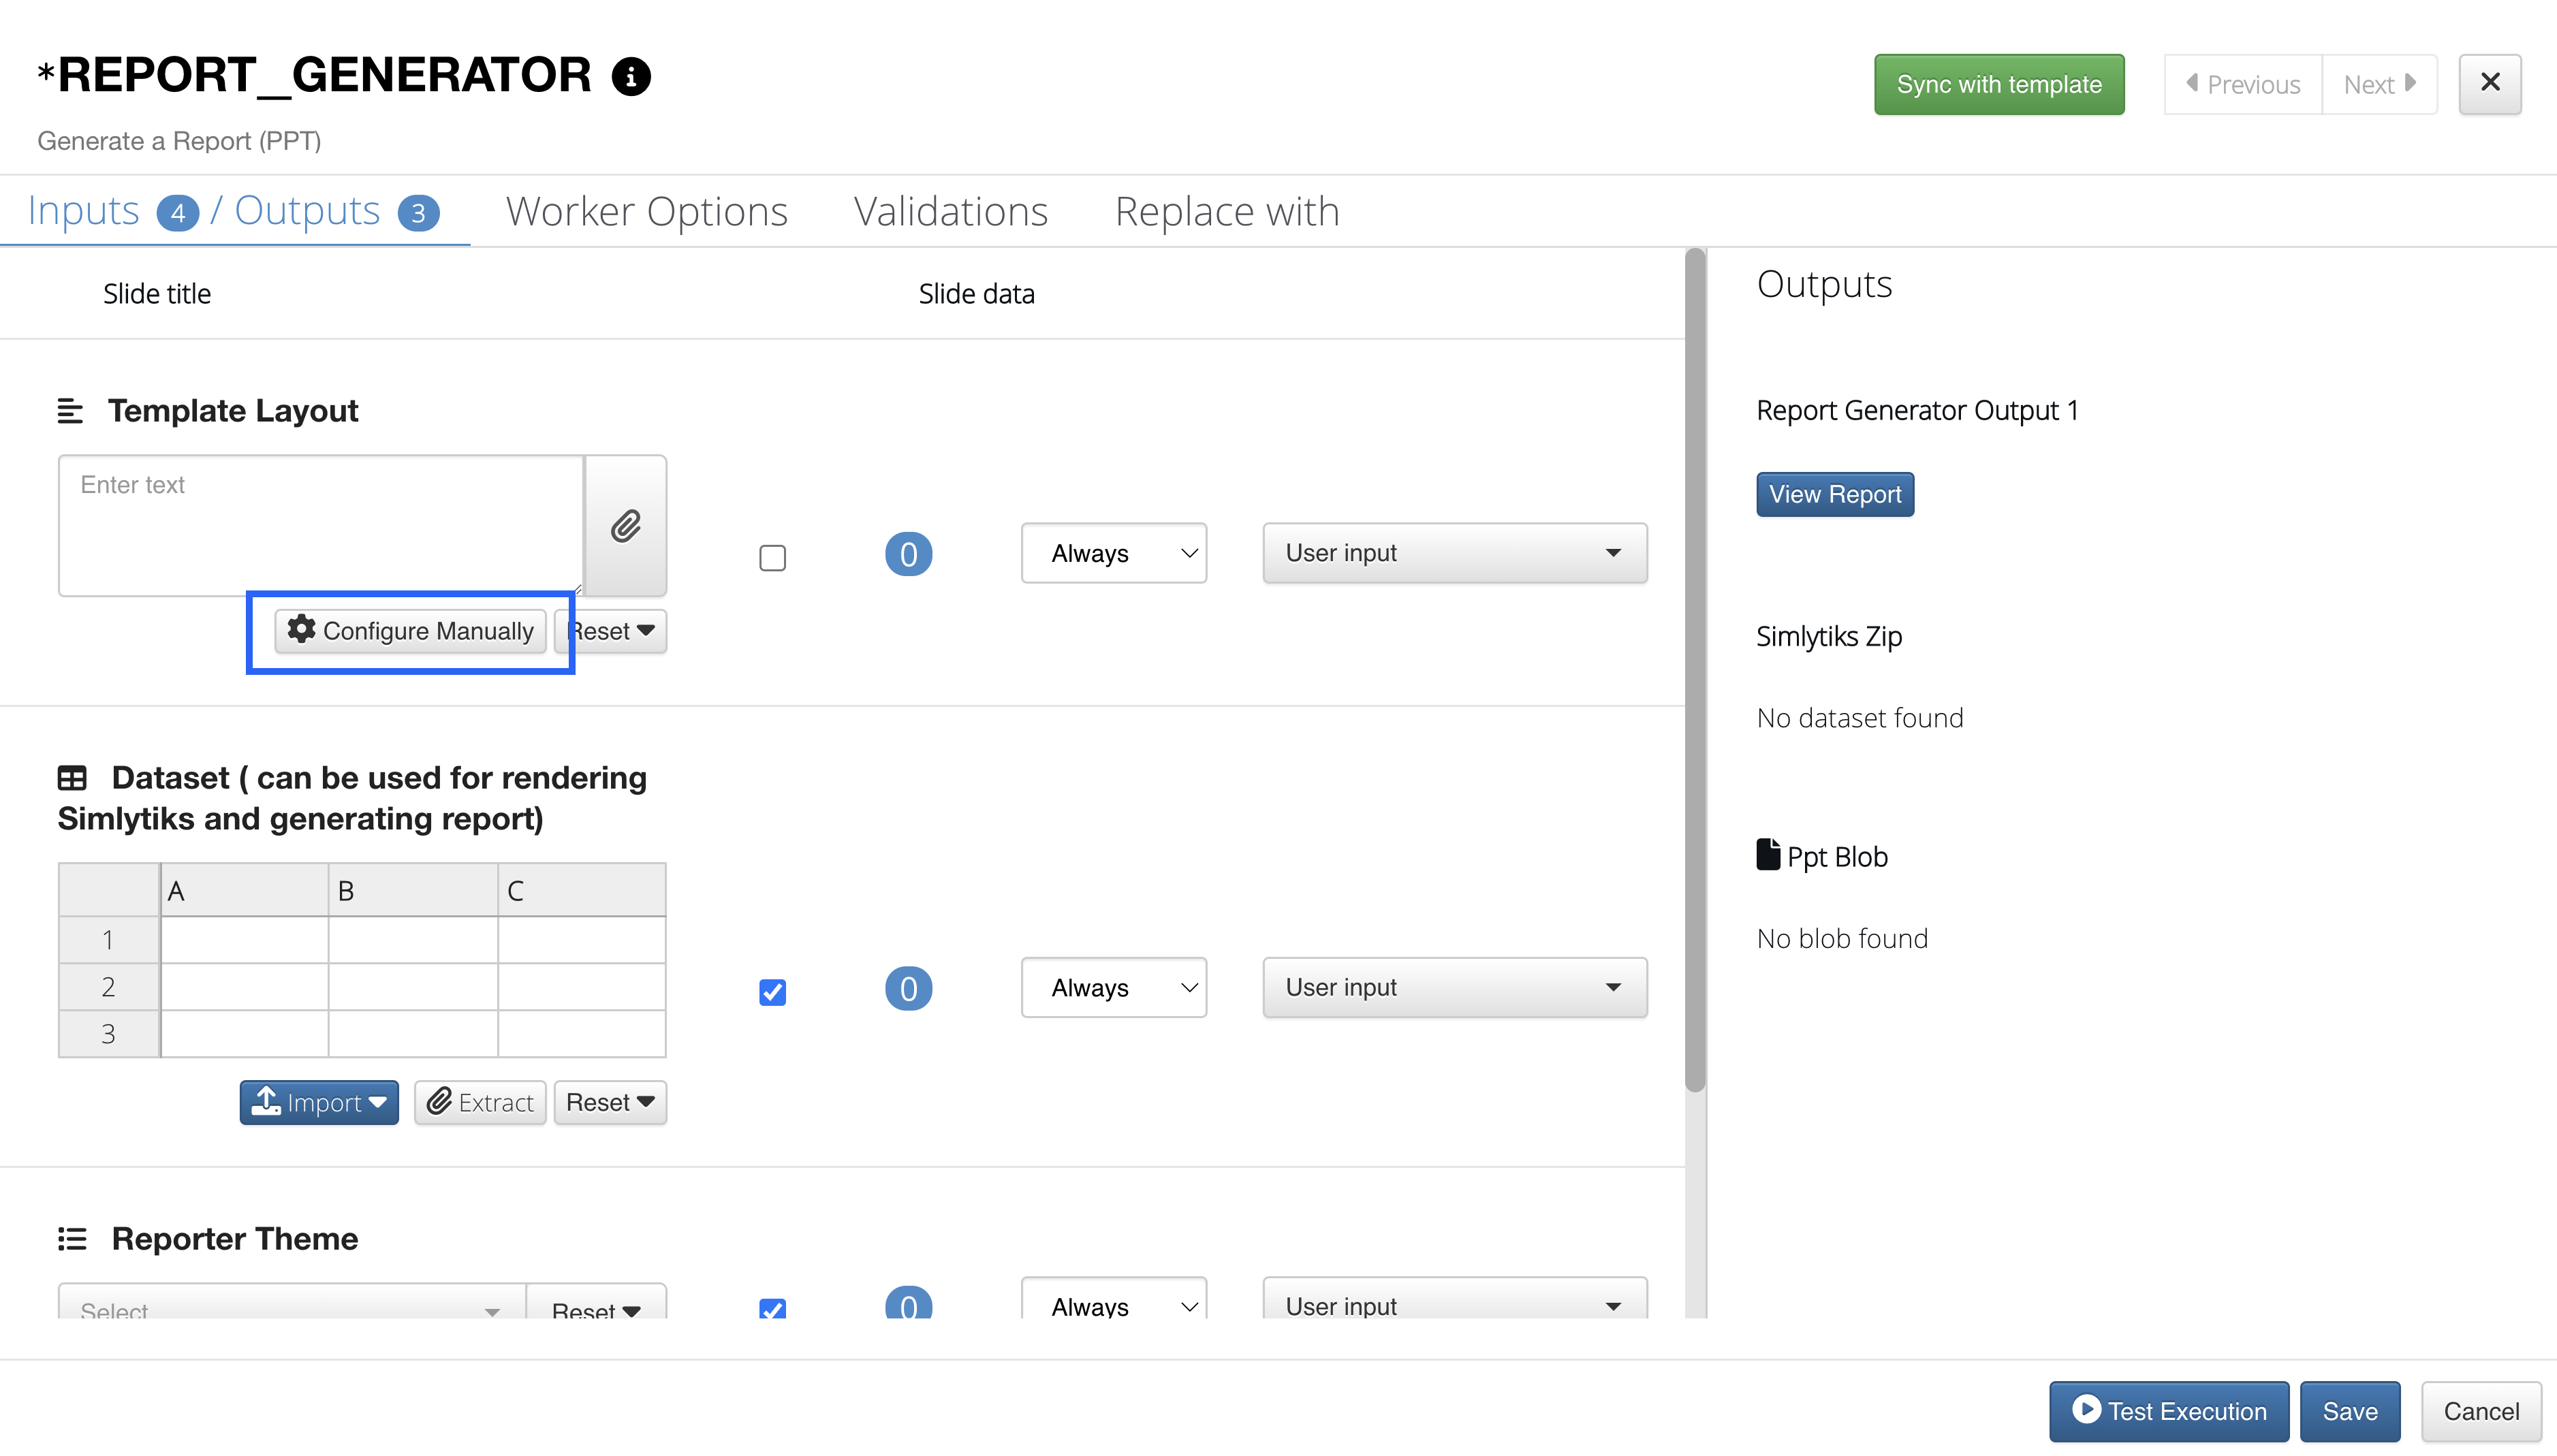
Here, we’ll configure our report manually by clicking on this button under Template Layout.
Configure Report Manually
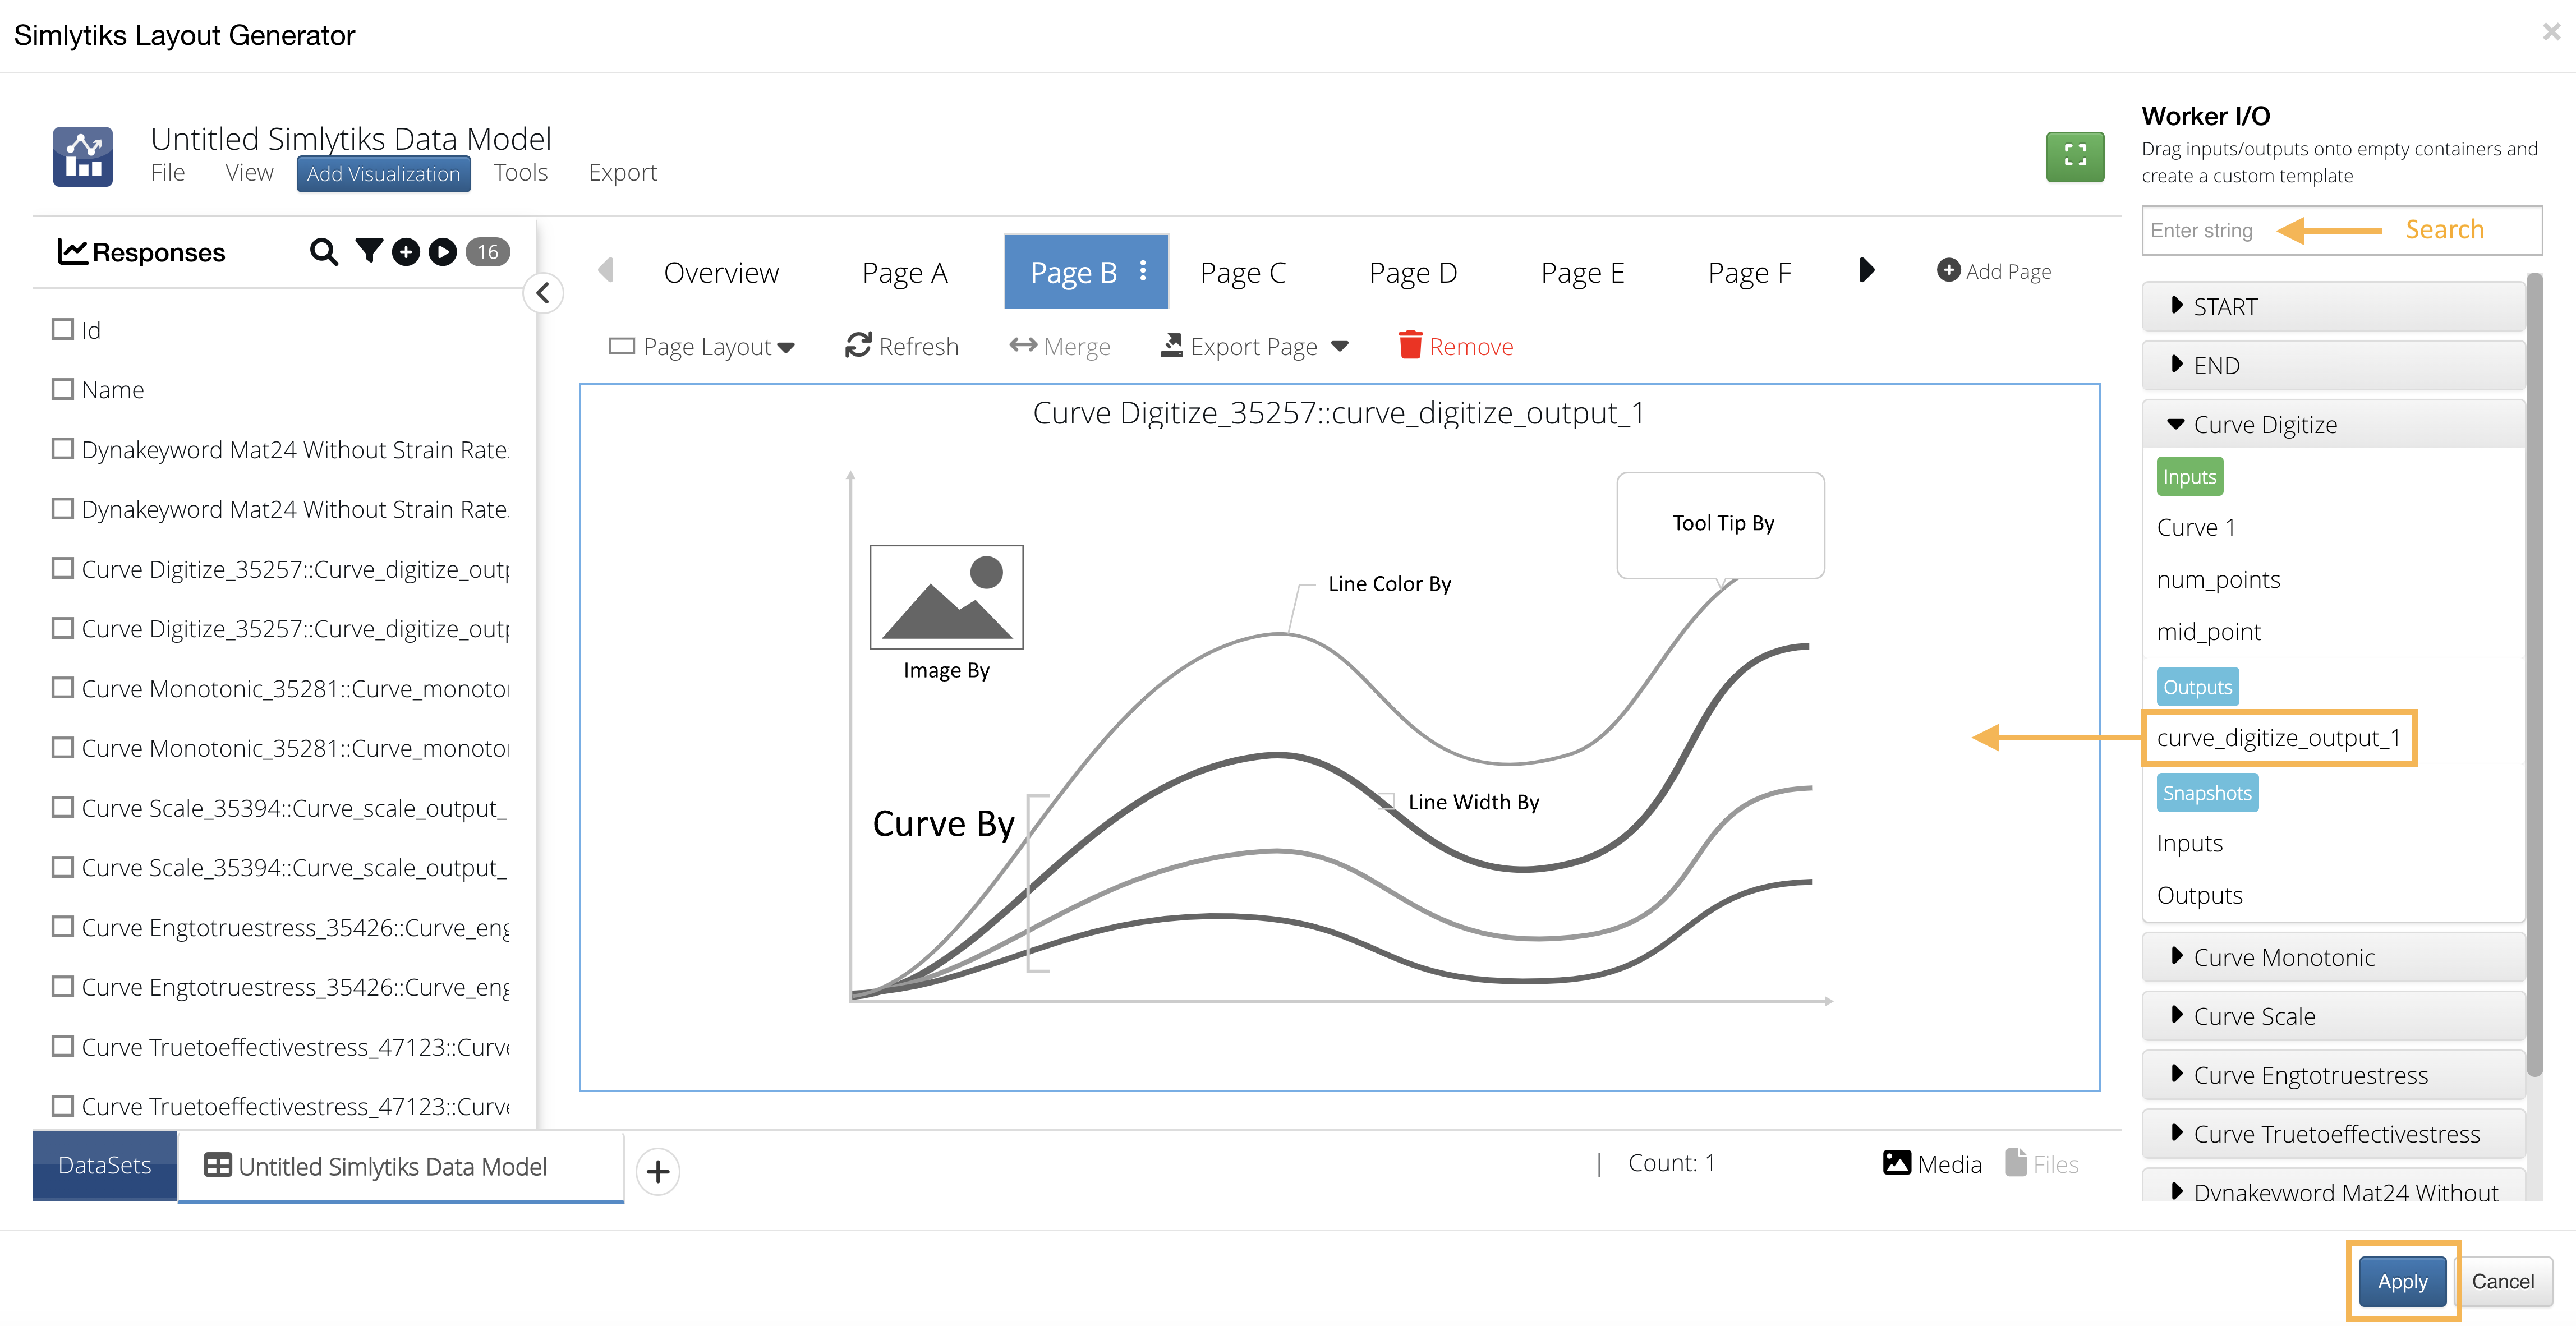
This gives us a preview of our Simlytiks Report layout. We can drag-and-drop inputs or outputs onto page sections to create our desired layout. Use the search bar at the top to find a particular input or output. Here, we’ve added all the outputs to their own page section as shown with Curve Digitizer. Finish by clicking Apply and saving the worker.
Simlytiks Layout Generator
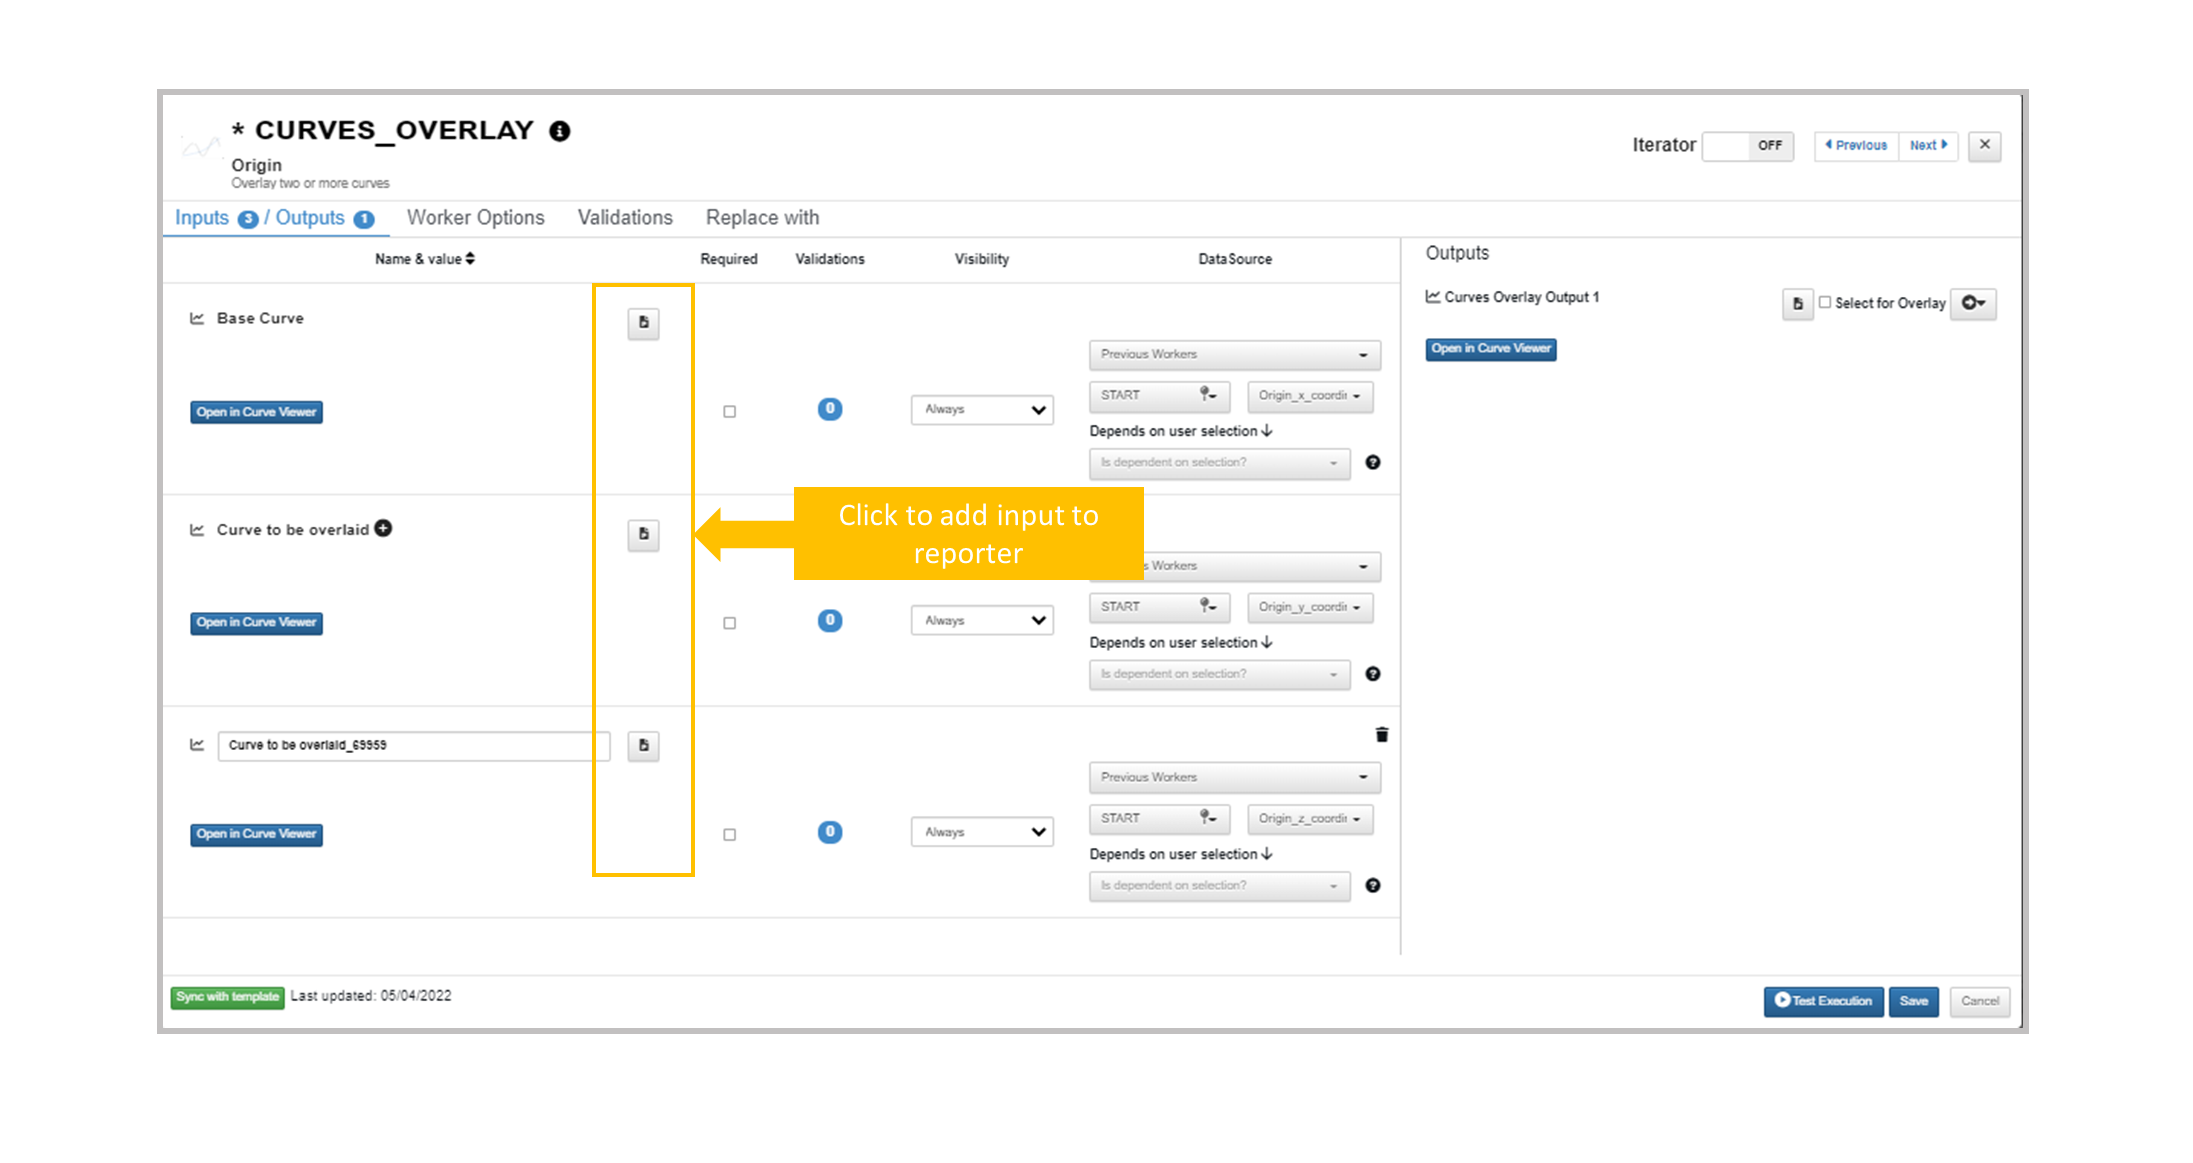
Another way to add inputs to the report generator is directly from a worker modal.
Add Worker Inputs to Report Generator
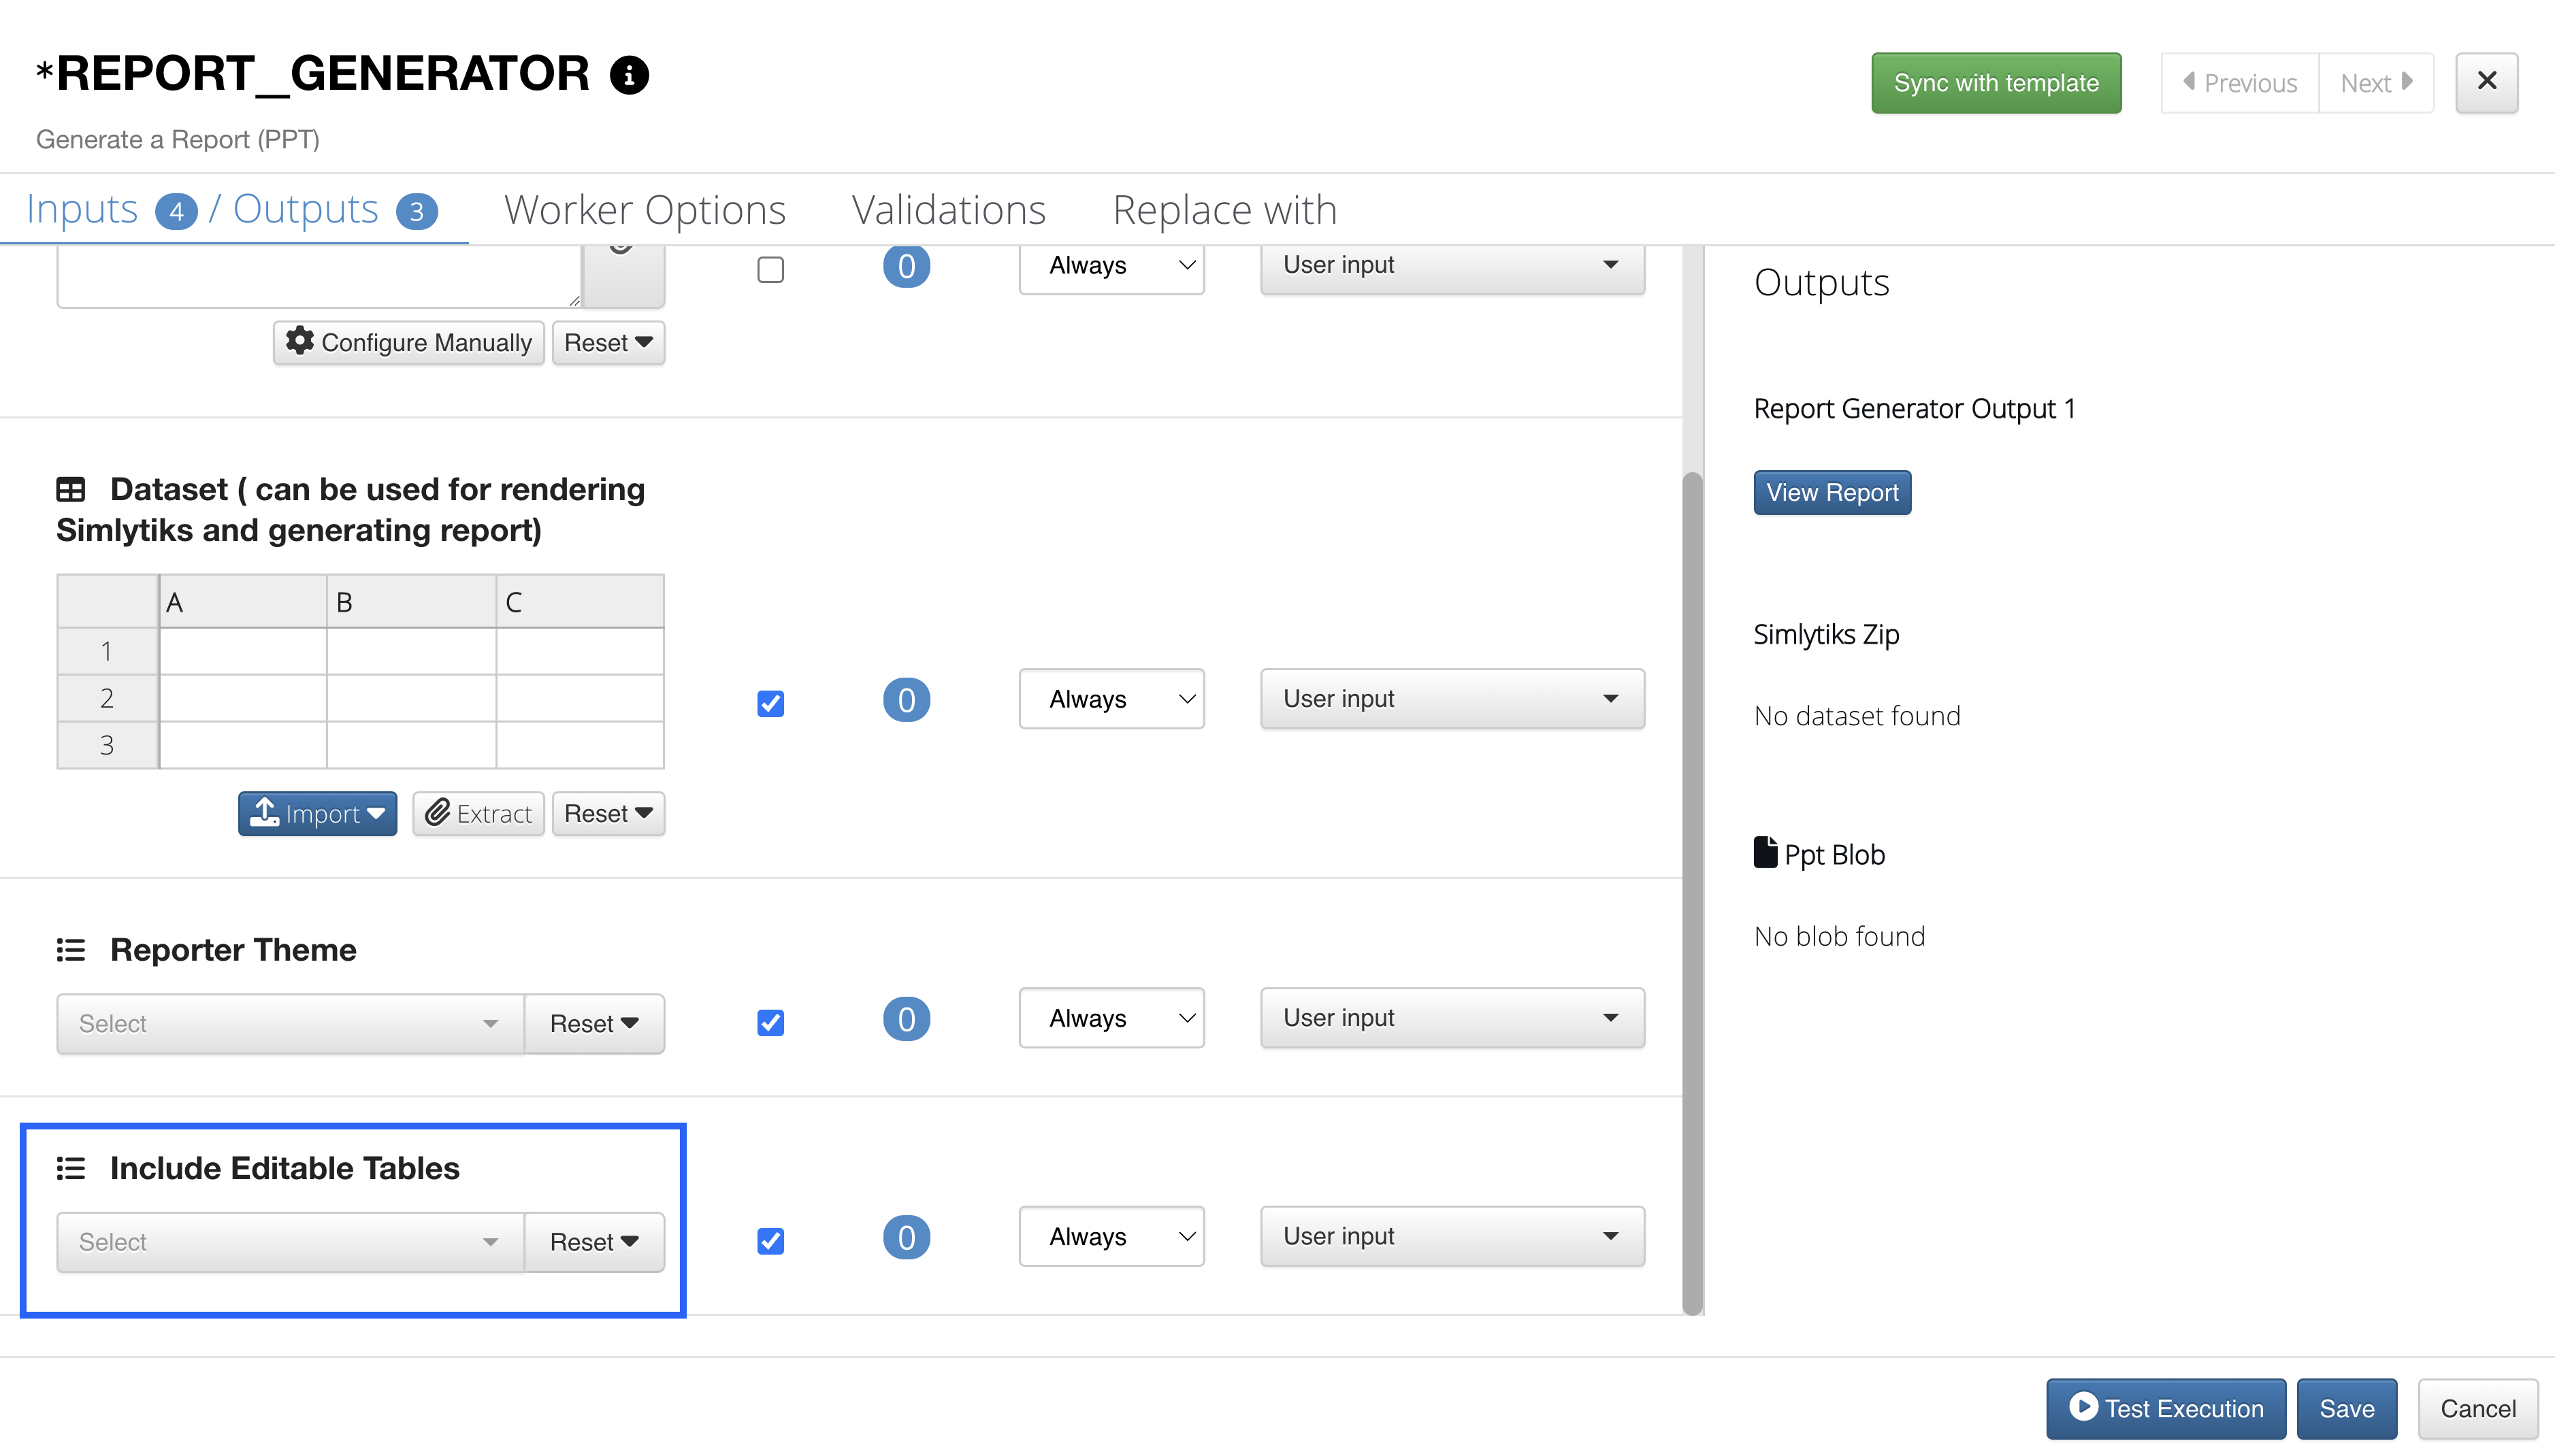
The Report Generator also has a new option (June 3, 2022) to include editable tables in the report.
Add Worker Inputs to Report Generator
4.6. Shapes
The Shapes Menu (now located at the top of the workflow canvas) hosts a variety of common workers used to support the workflow for easy sharing and importing, and general efficiency. Aside from the Decision Hub and Report Generator reviewed above, here are overviews of a few other useful shape workers.
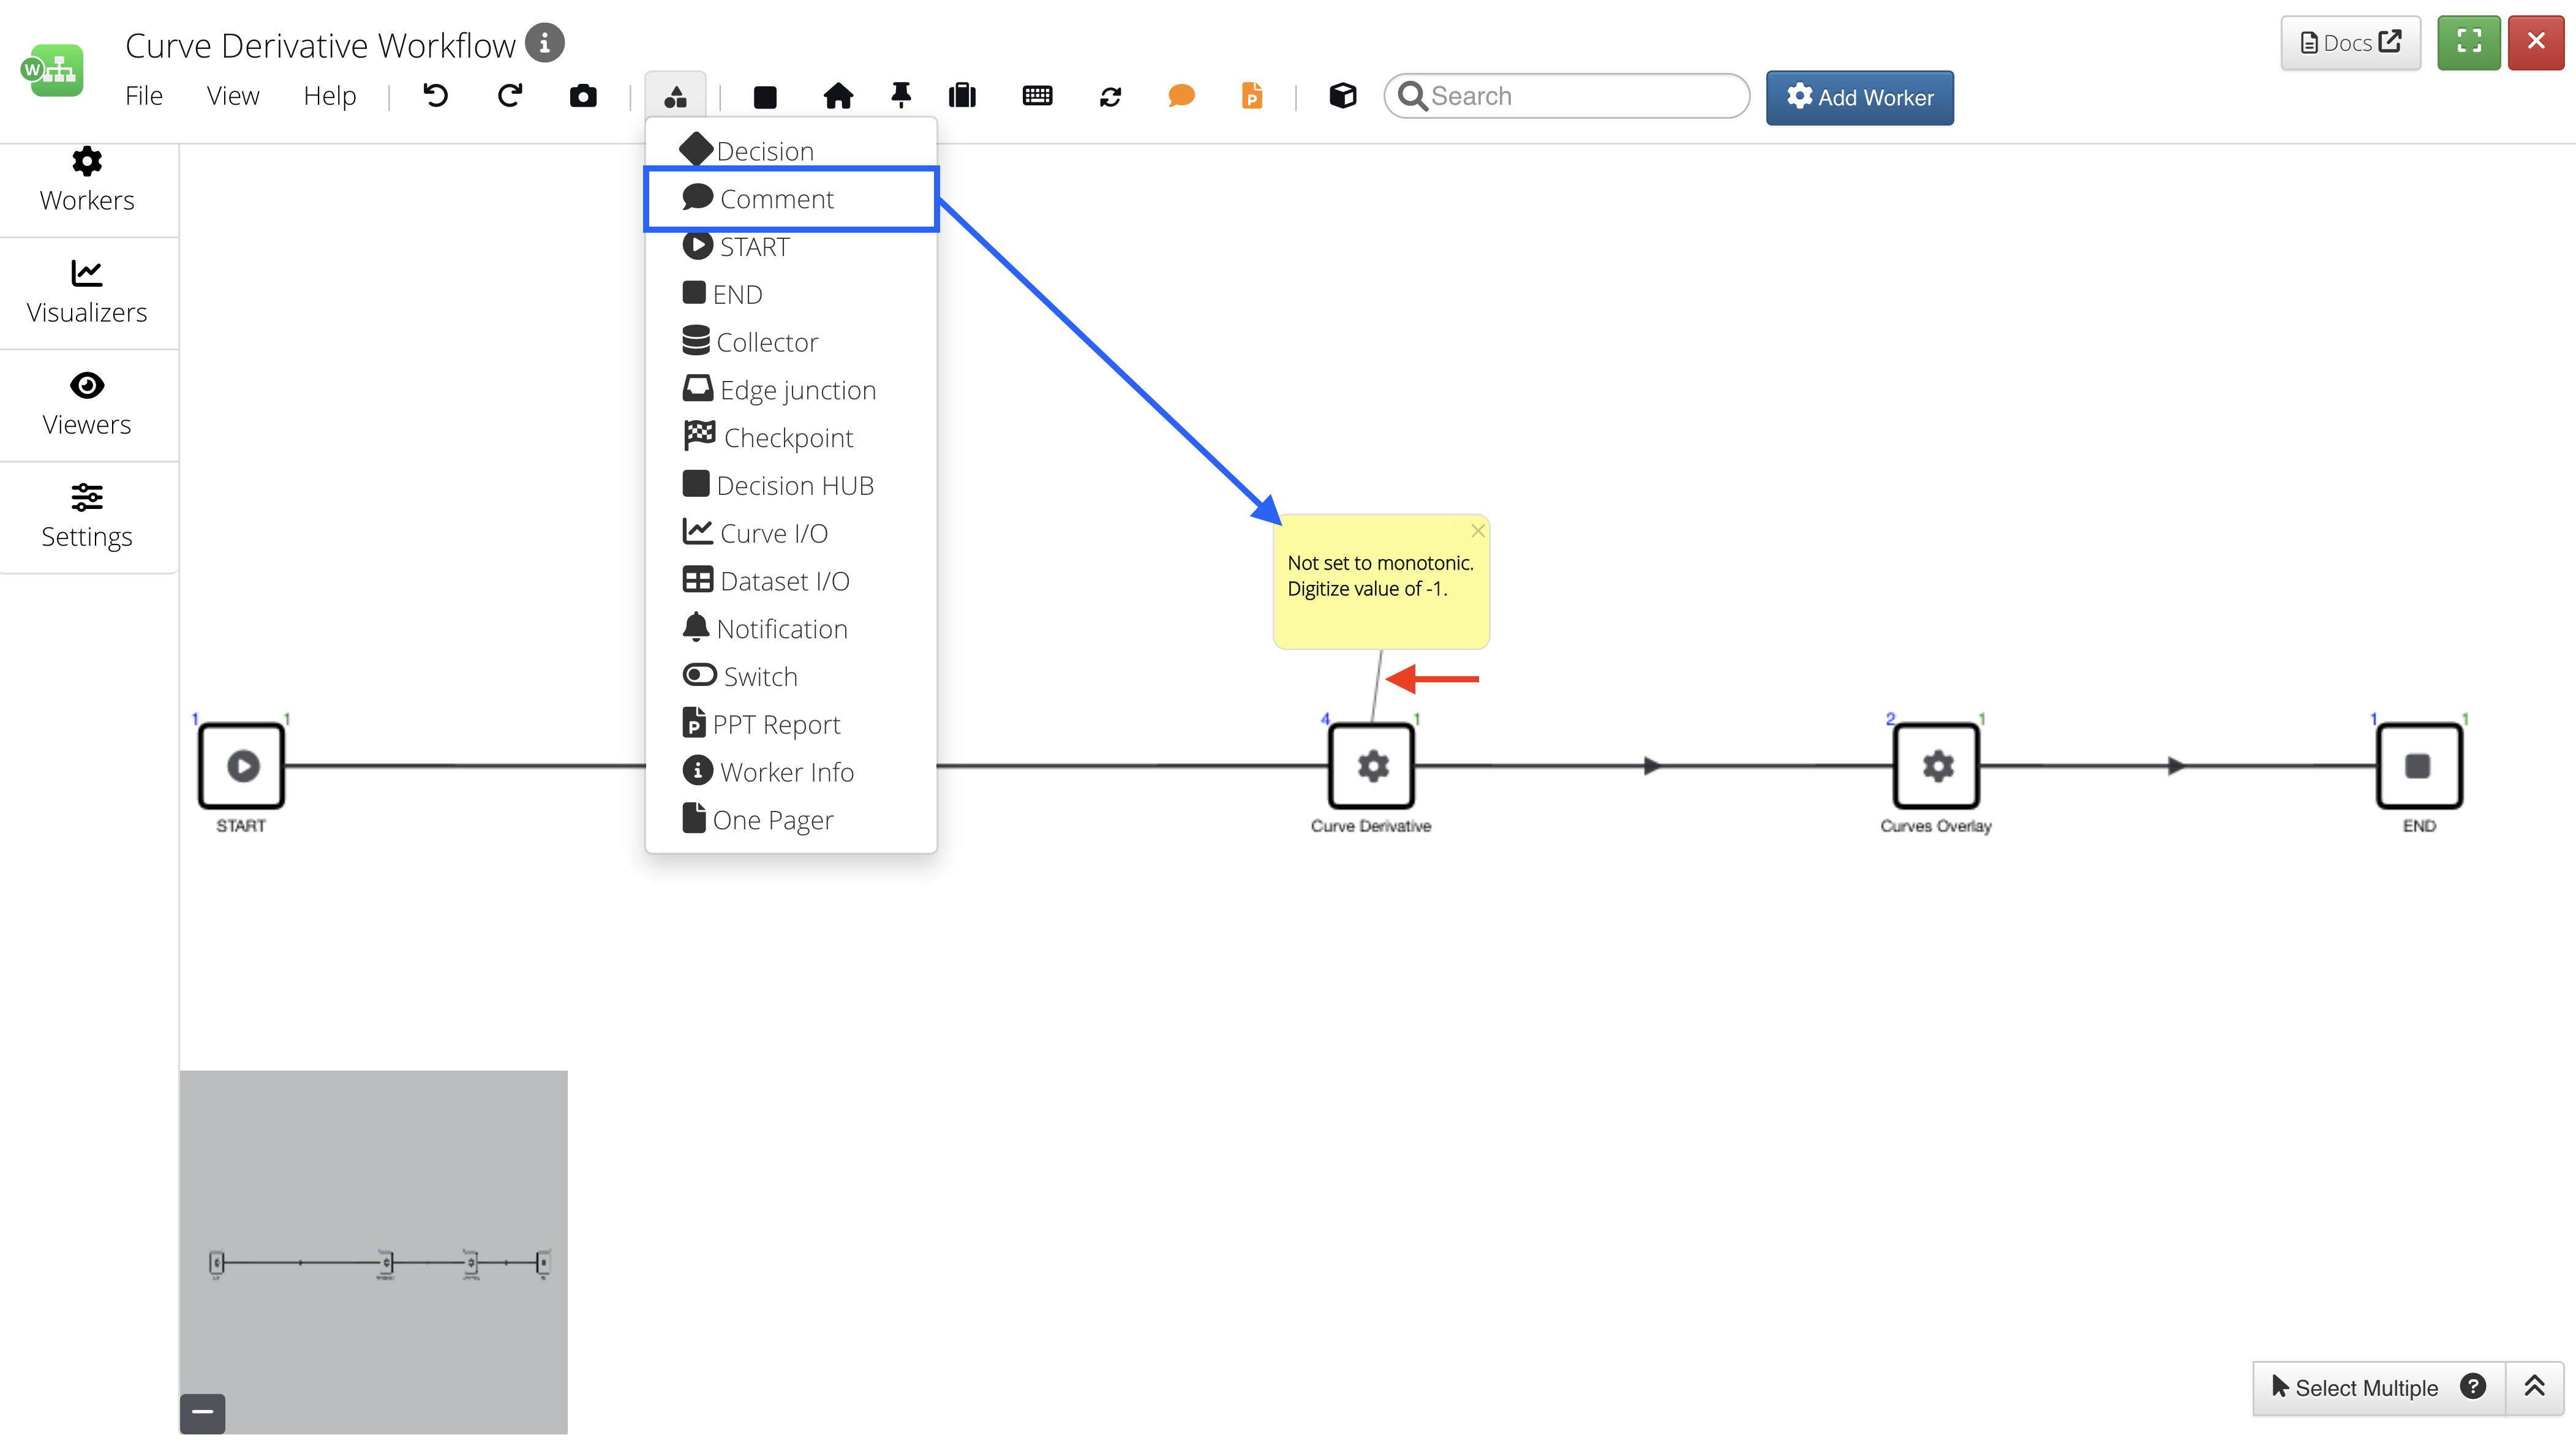
Comment
Add a comment anywhere on the workflow to note important information. Hover the comment over a worker to link them.
Add a Comment
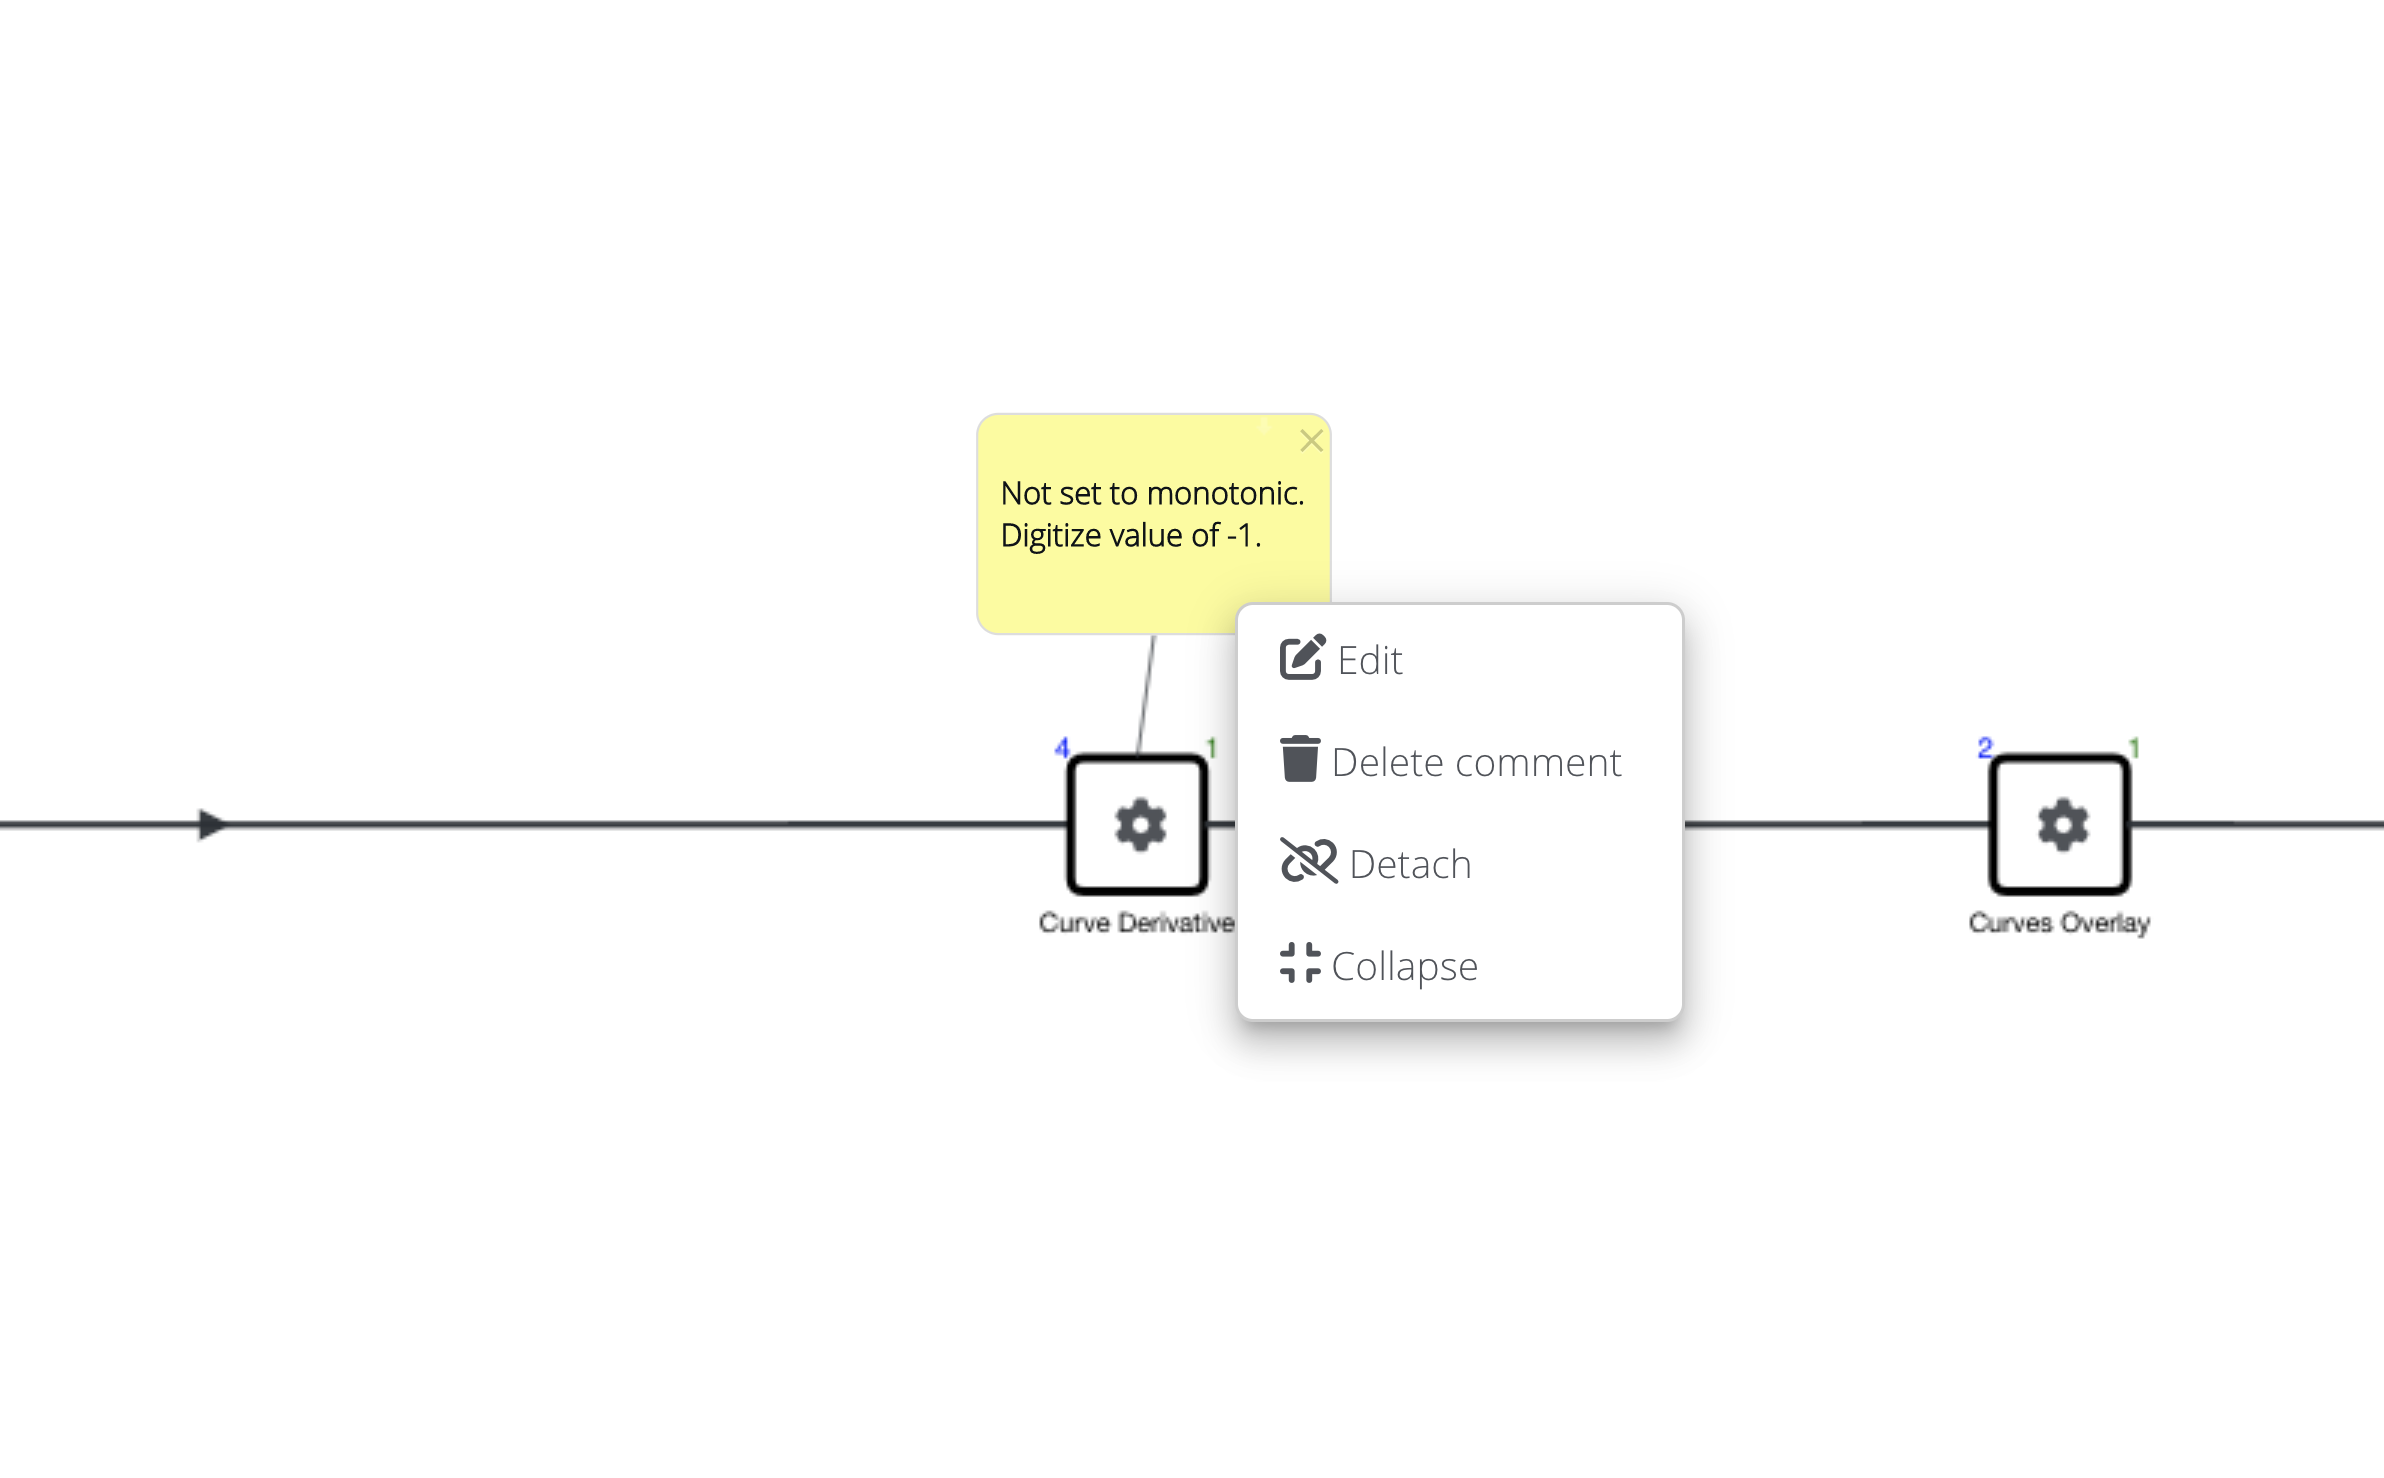
Right-click on the comment to edit, delete, detach (from the worker) or collapse (hide) it.
Comment Right-Click Options
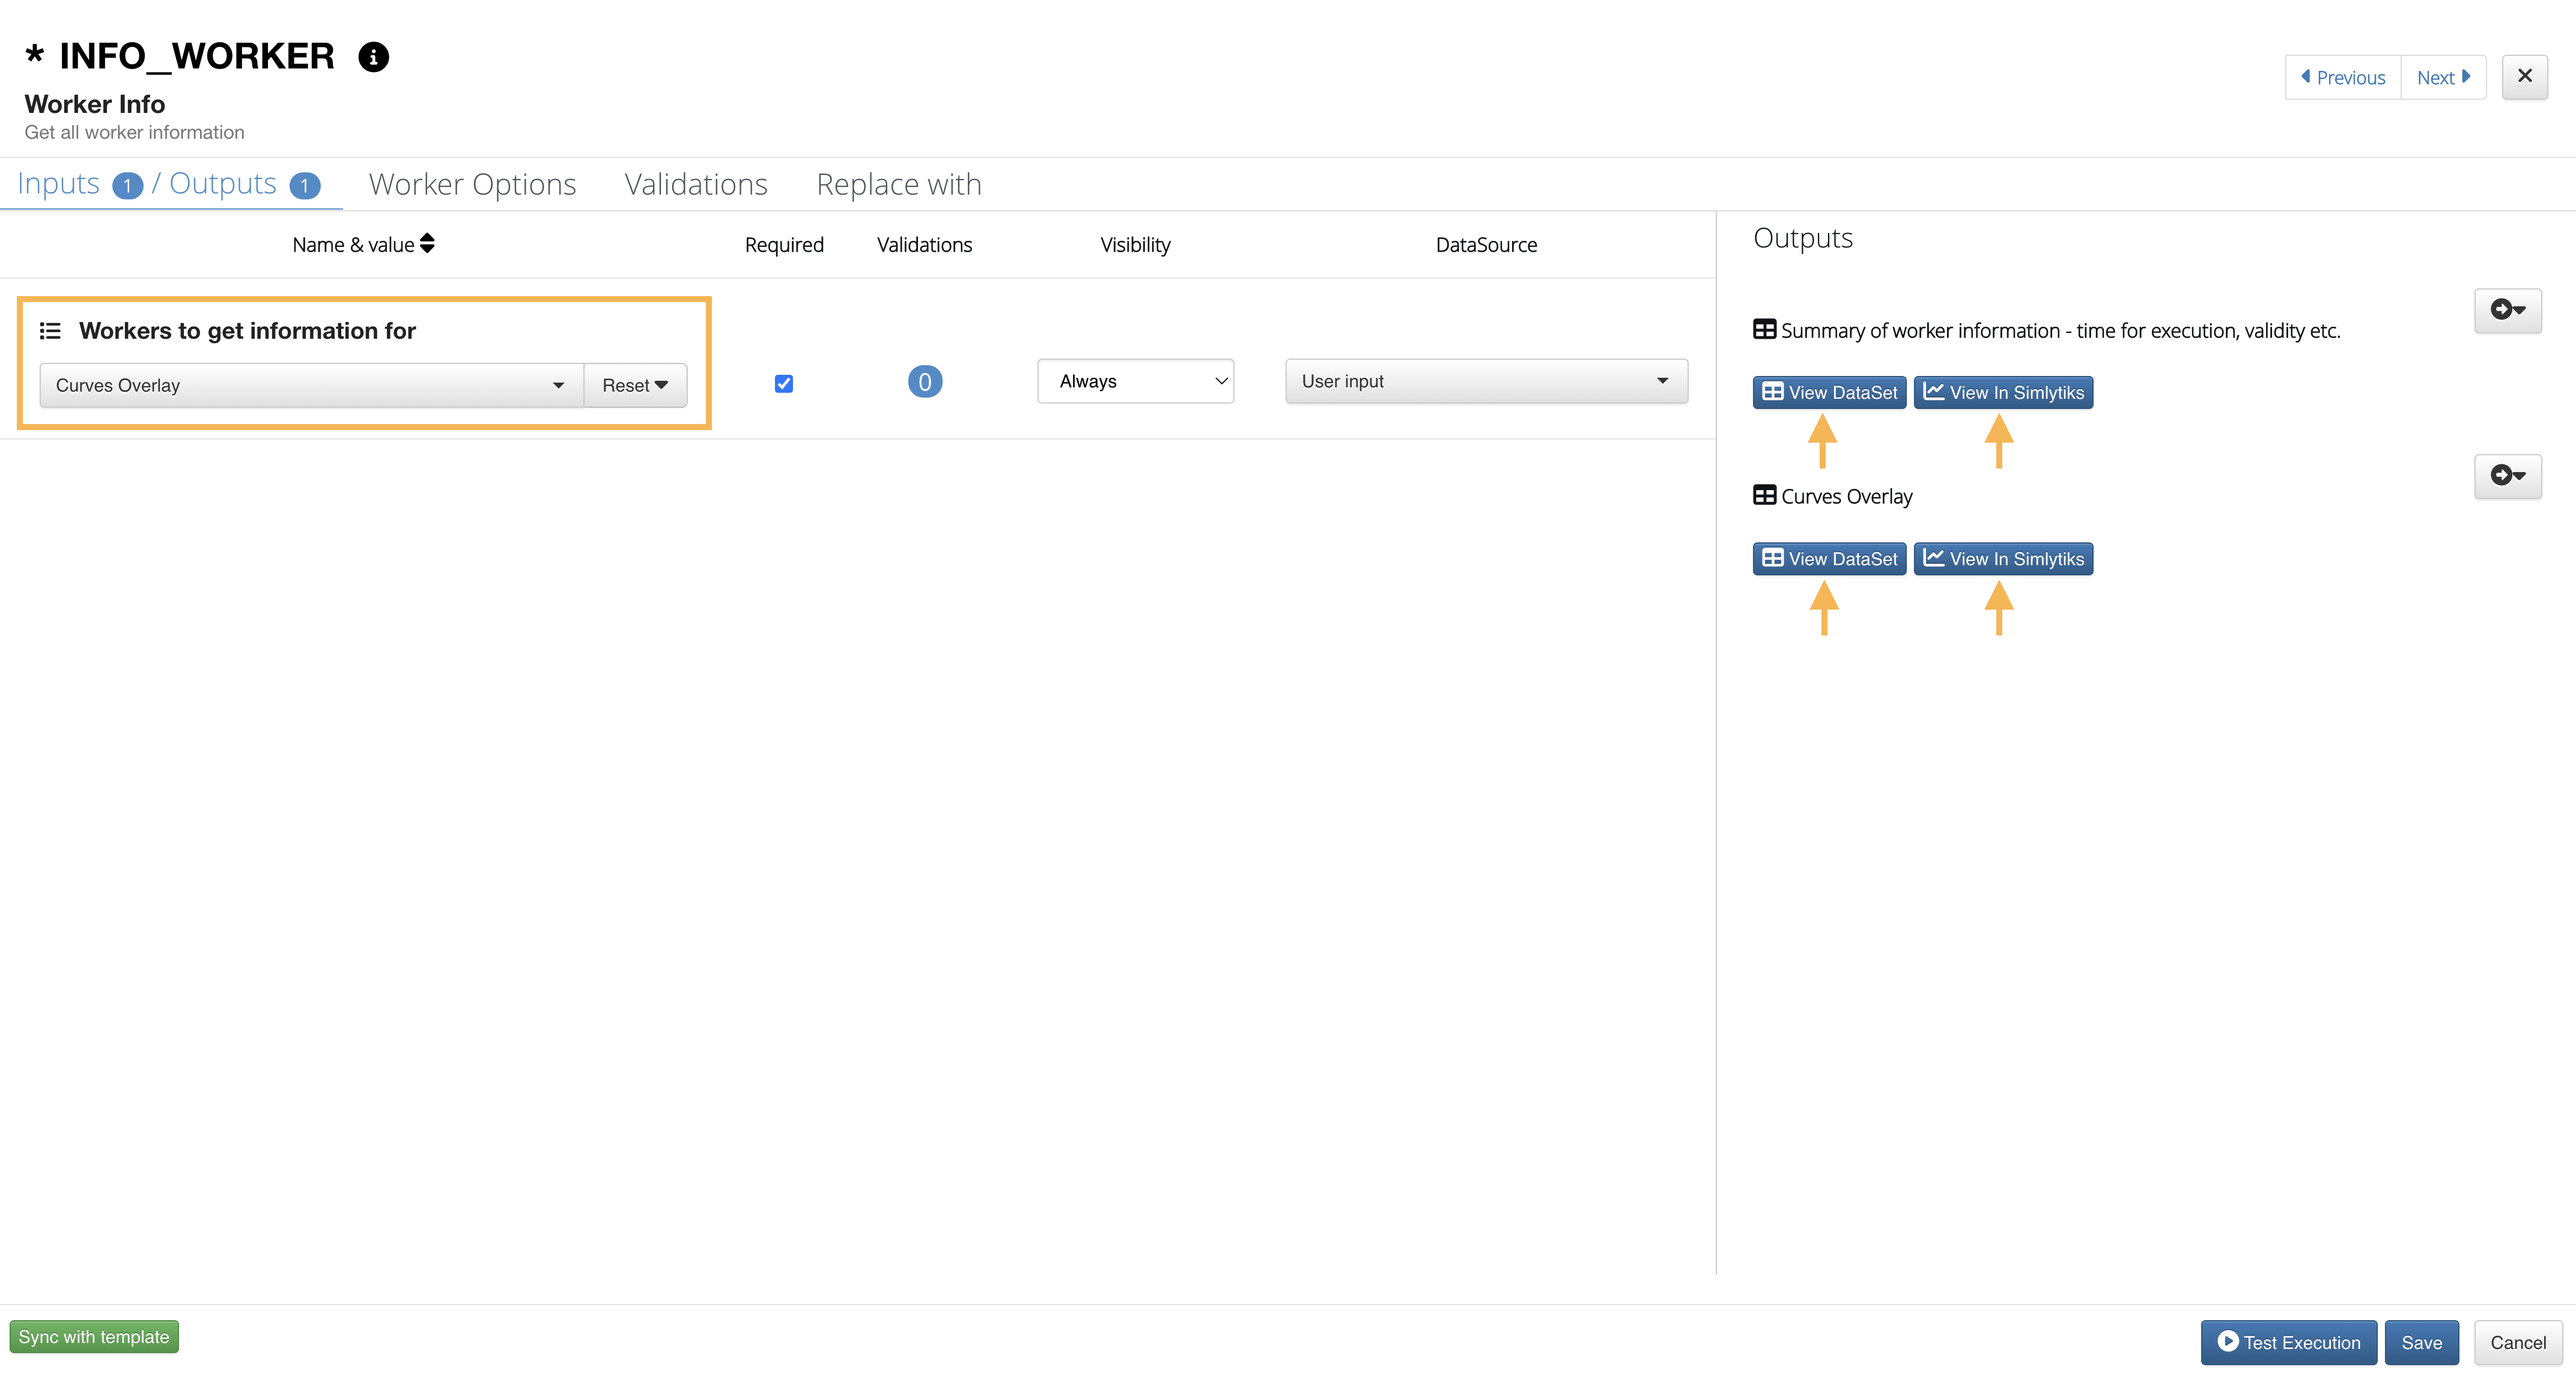
Worker Info
Add Worker Info under shapes to show validity, execution time, etc. for selected parent workers.
Add Worker Info
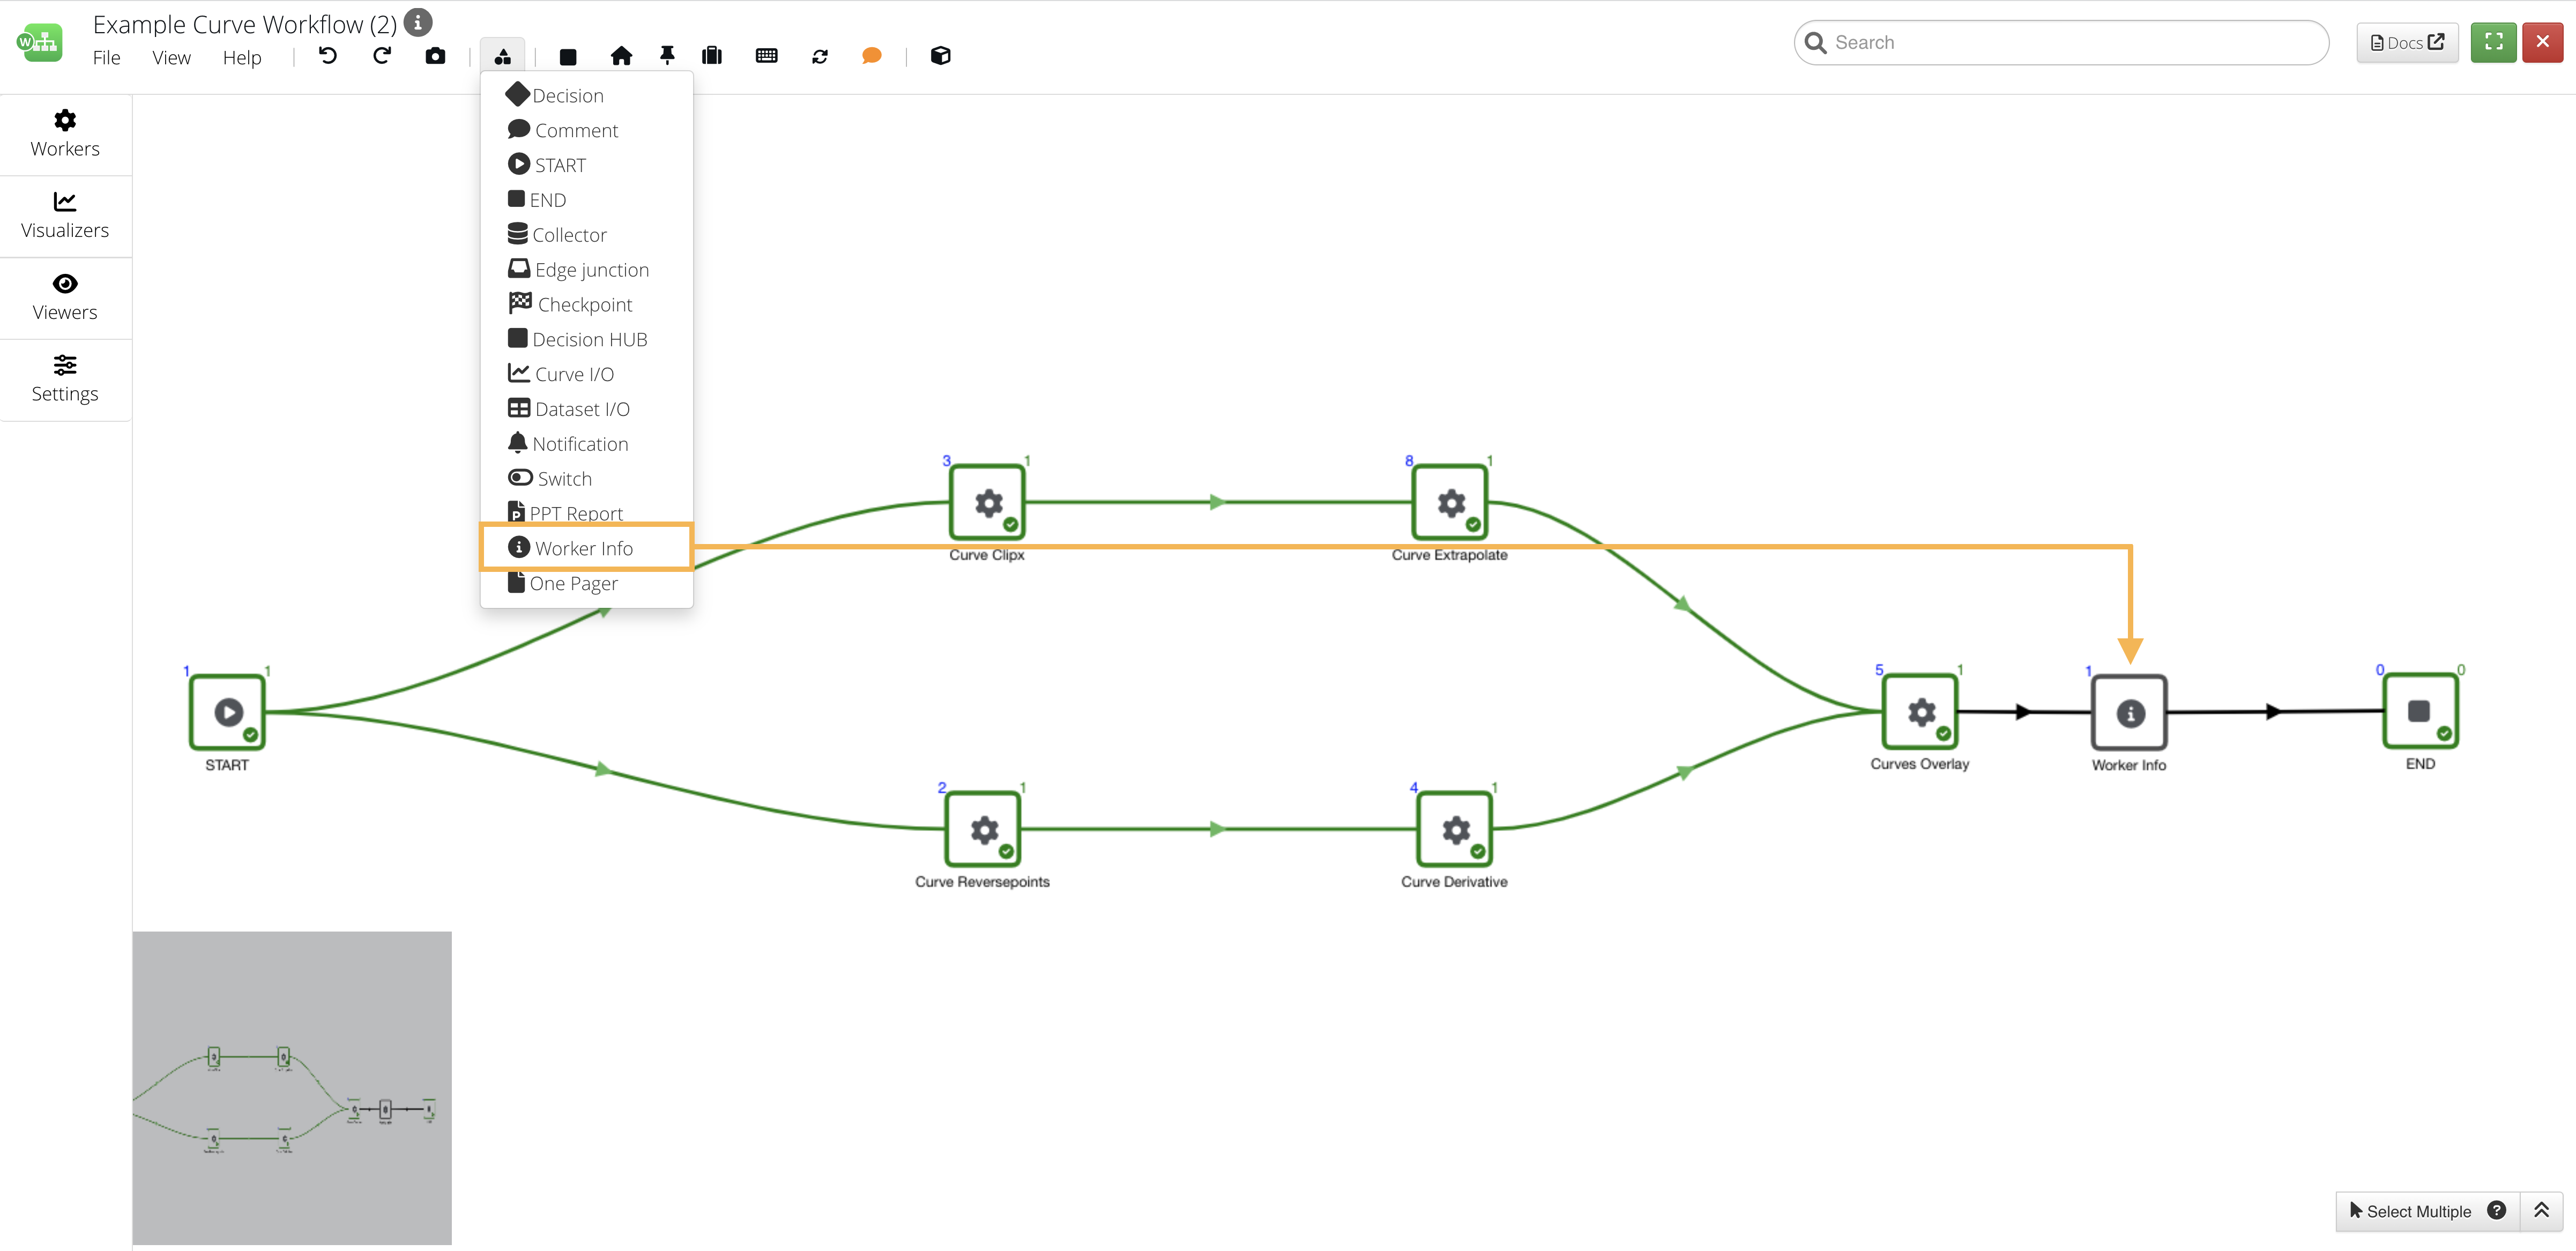
Choose from any of your previous workers in the workflow. You can view the worker information via a dataset or in Simlytiks (shown in following image via Test Execution).
View Worker Information
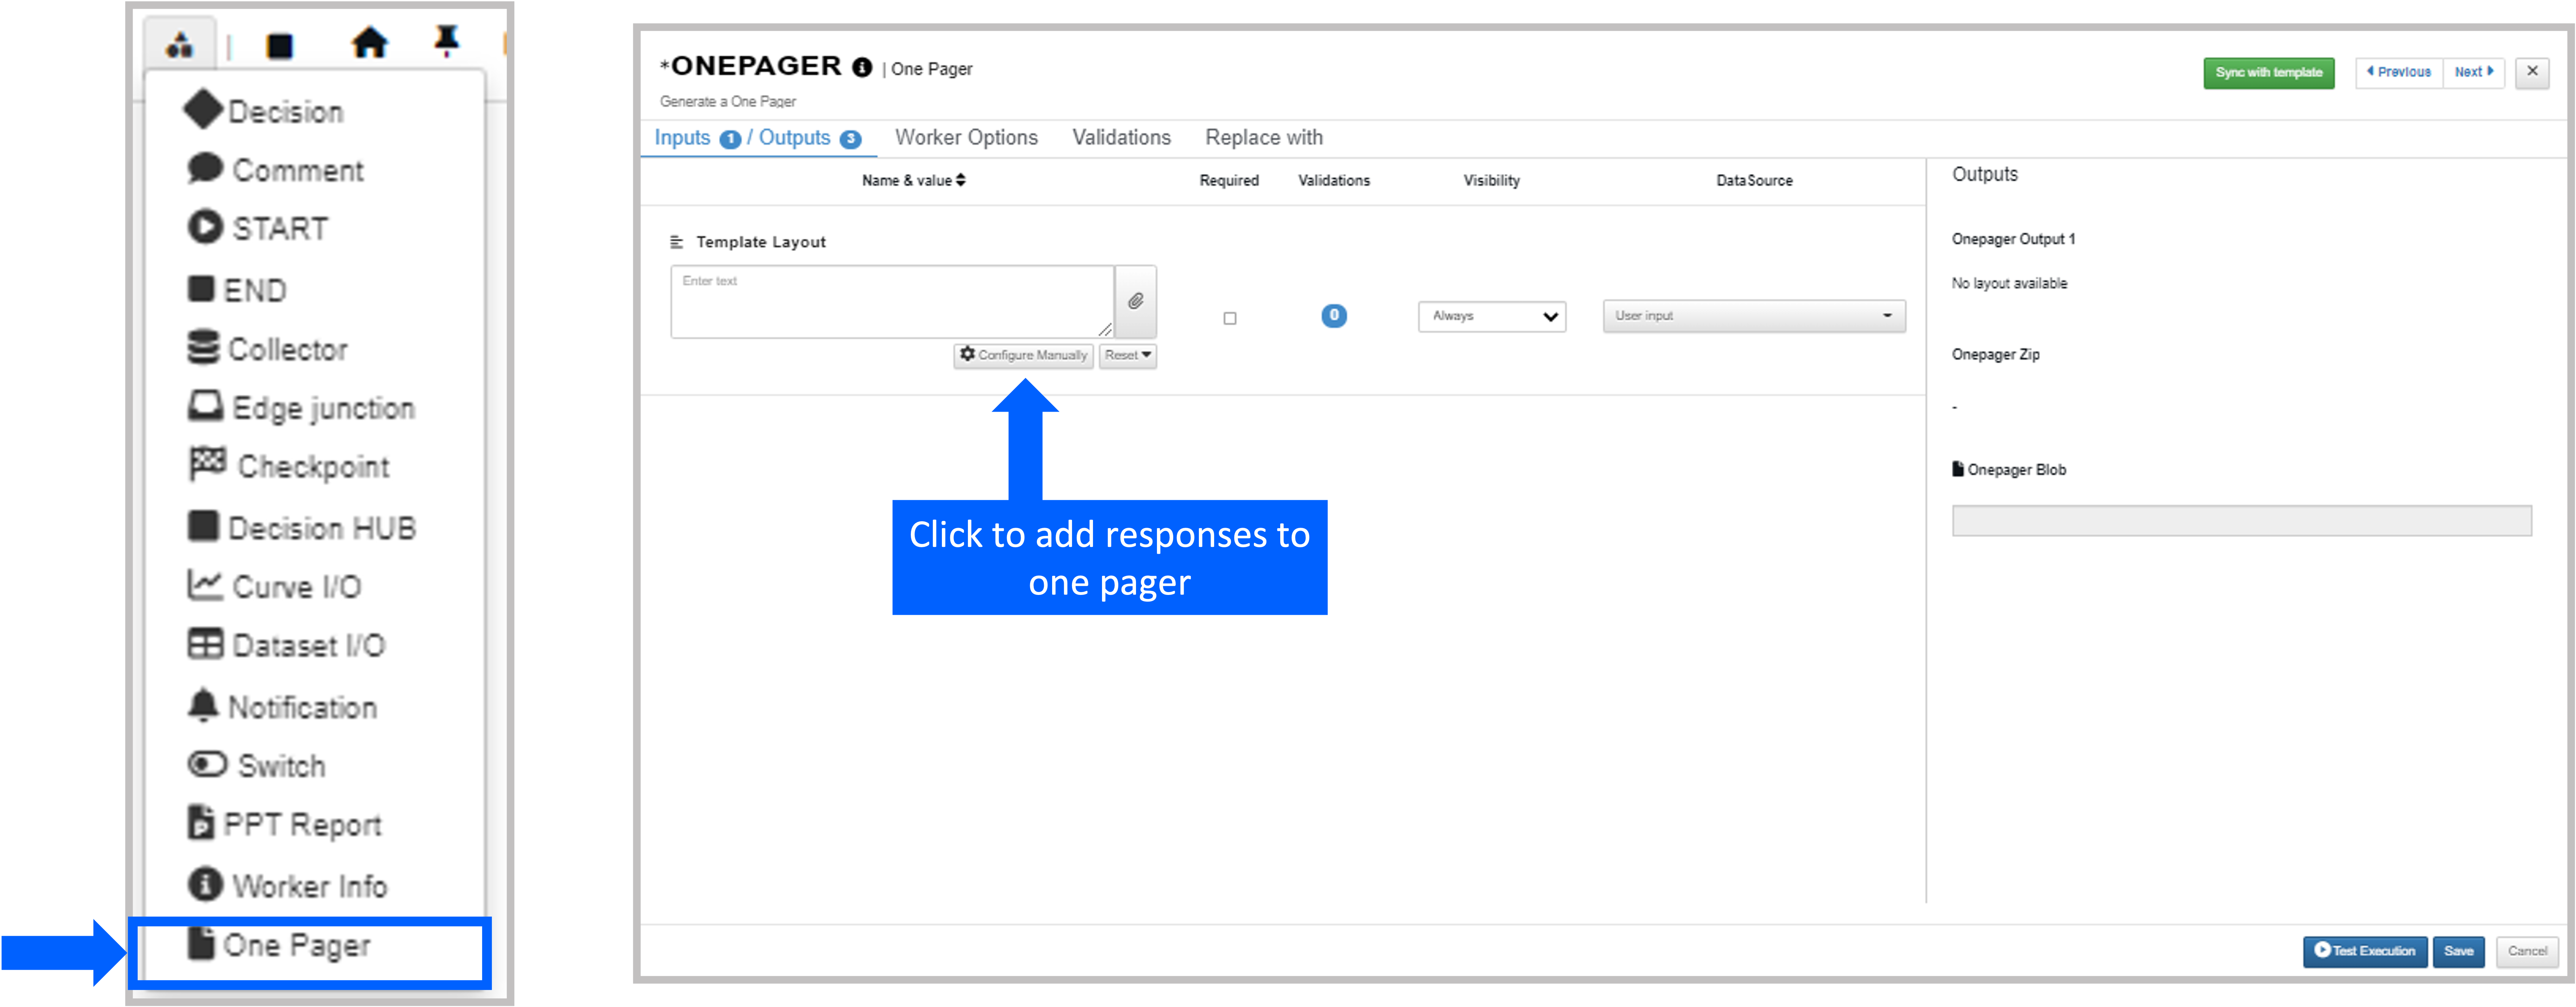
One Pager
The One Pager worker under the Shapes menu is used to create a one page template layout for the workflow.
One Pager Worker
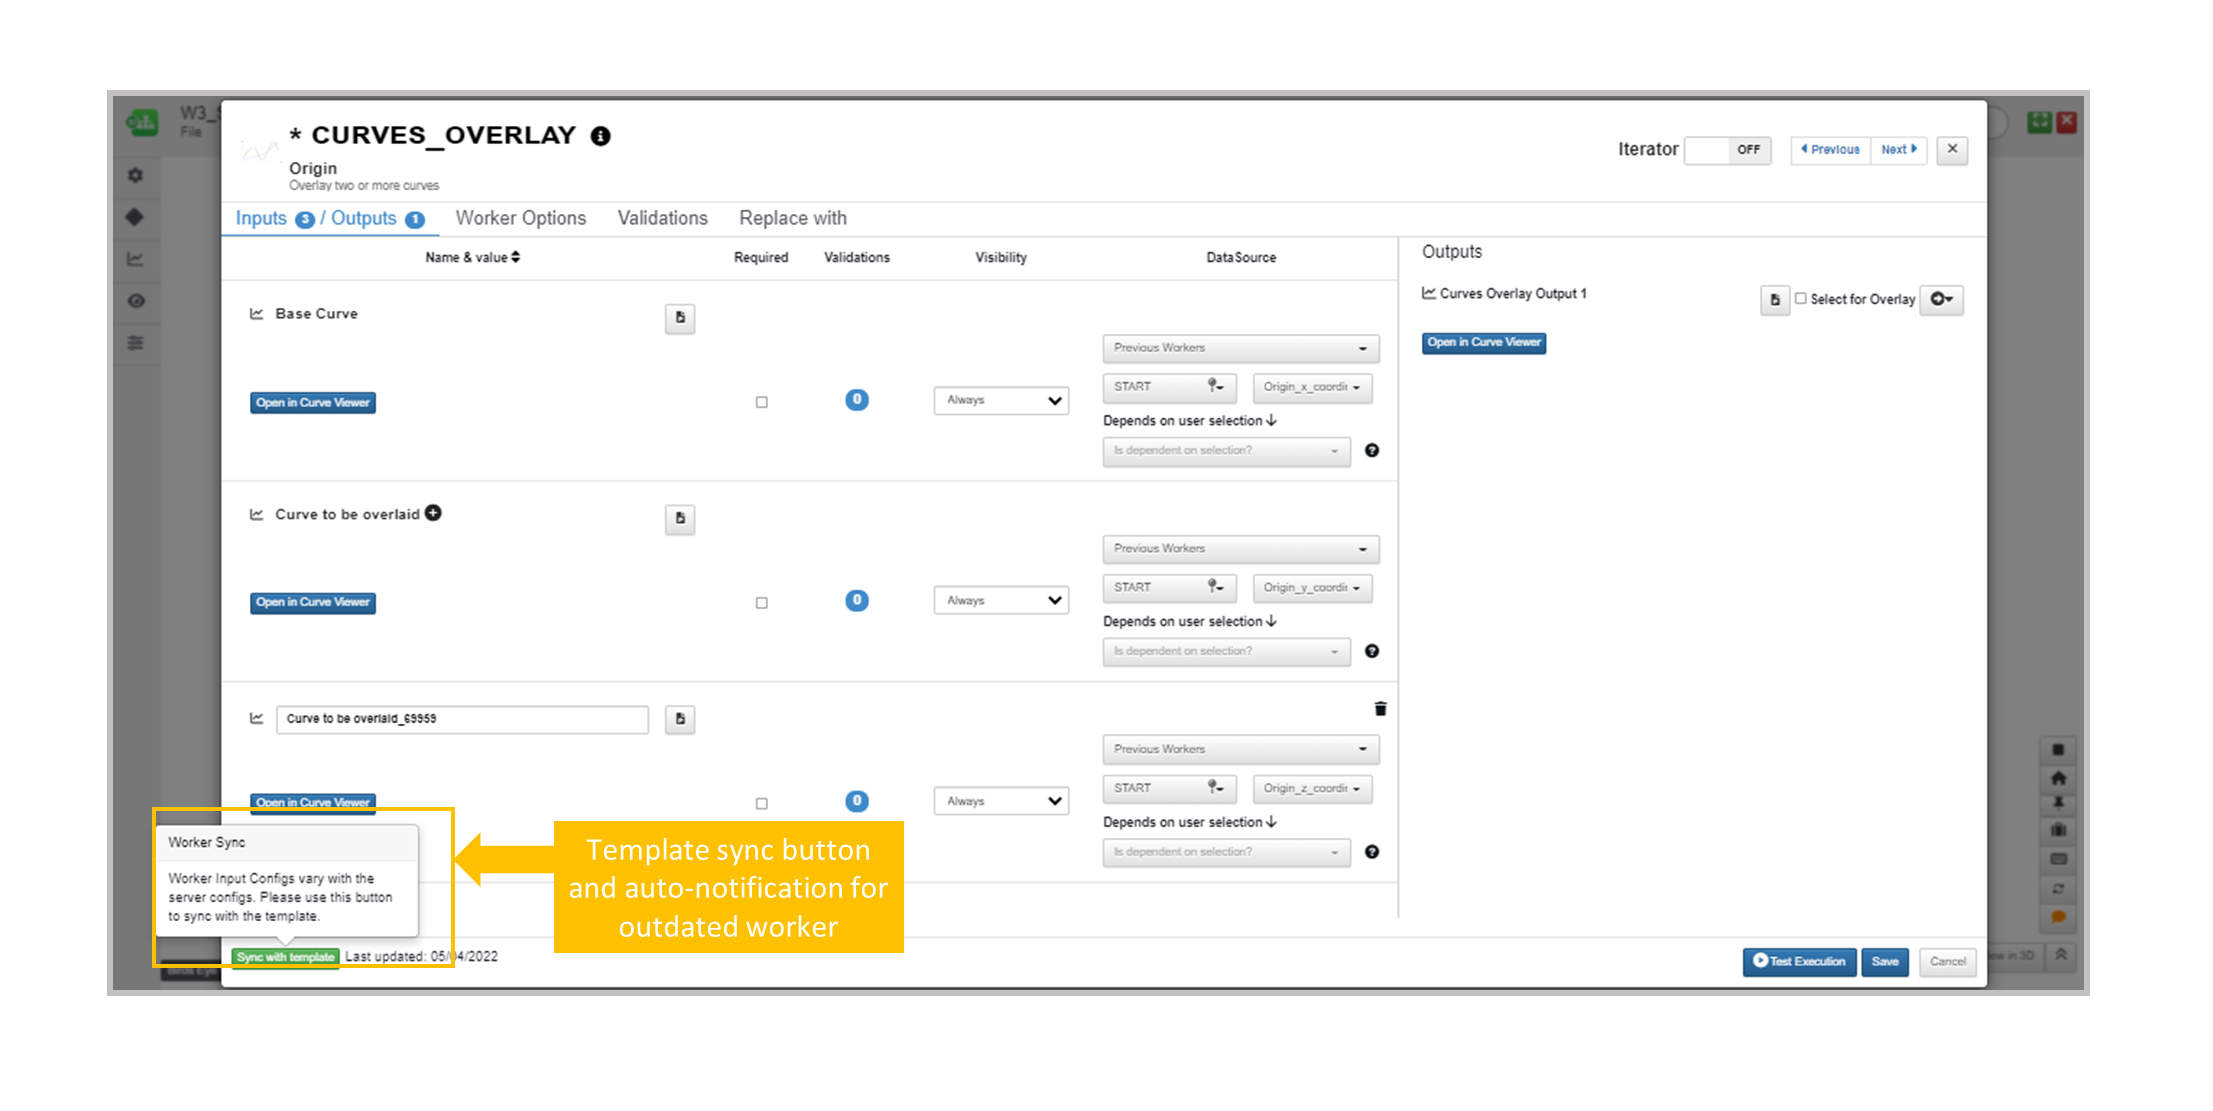
4.7. Template Sync
When configuring a worker, sync templates directly by choosing this option at the bottom left corner of the modal. You will receive an automated notification about out-dated linked templates for workers.
Template Sync