8.  Examples
In this section, we’ll review some workflow examples.
8.1. Workflows Library
The Workflows application has an extensive library of workflows for utilization. Here is a table of what is available with descriptions:
| ID | NAME | Description | Filename | IMAGE |
|---|---|---|---|---|
| 1 | Interpolation Test | Testing the CURVE_INTERPOLATE worker | Interpolation Test_19362.d3wfZip | 
|
| 2 | Smoothing Test | Testing curve smoothers | Smoothing Test_16694.d3wfZip | 
|
| 3 | pDTW Test | TESTING CURVES_MATH worker | pDTW Test_16600.d3wfZip | 
|
| 4 | 21B0169_transformation_all_V1104 | Cycle Detection template | 21B0169_transformation_all_V1104_2022_04_06T10_48_37.d3WfZip | |
| 5 | CURVE_COMPRESS_X | CURVE_COMPRESS_X Testing Workflow | CURVE_COMPRESS_X_2022_03_21T13_47_09.d3wfzip | 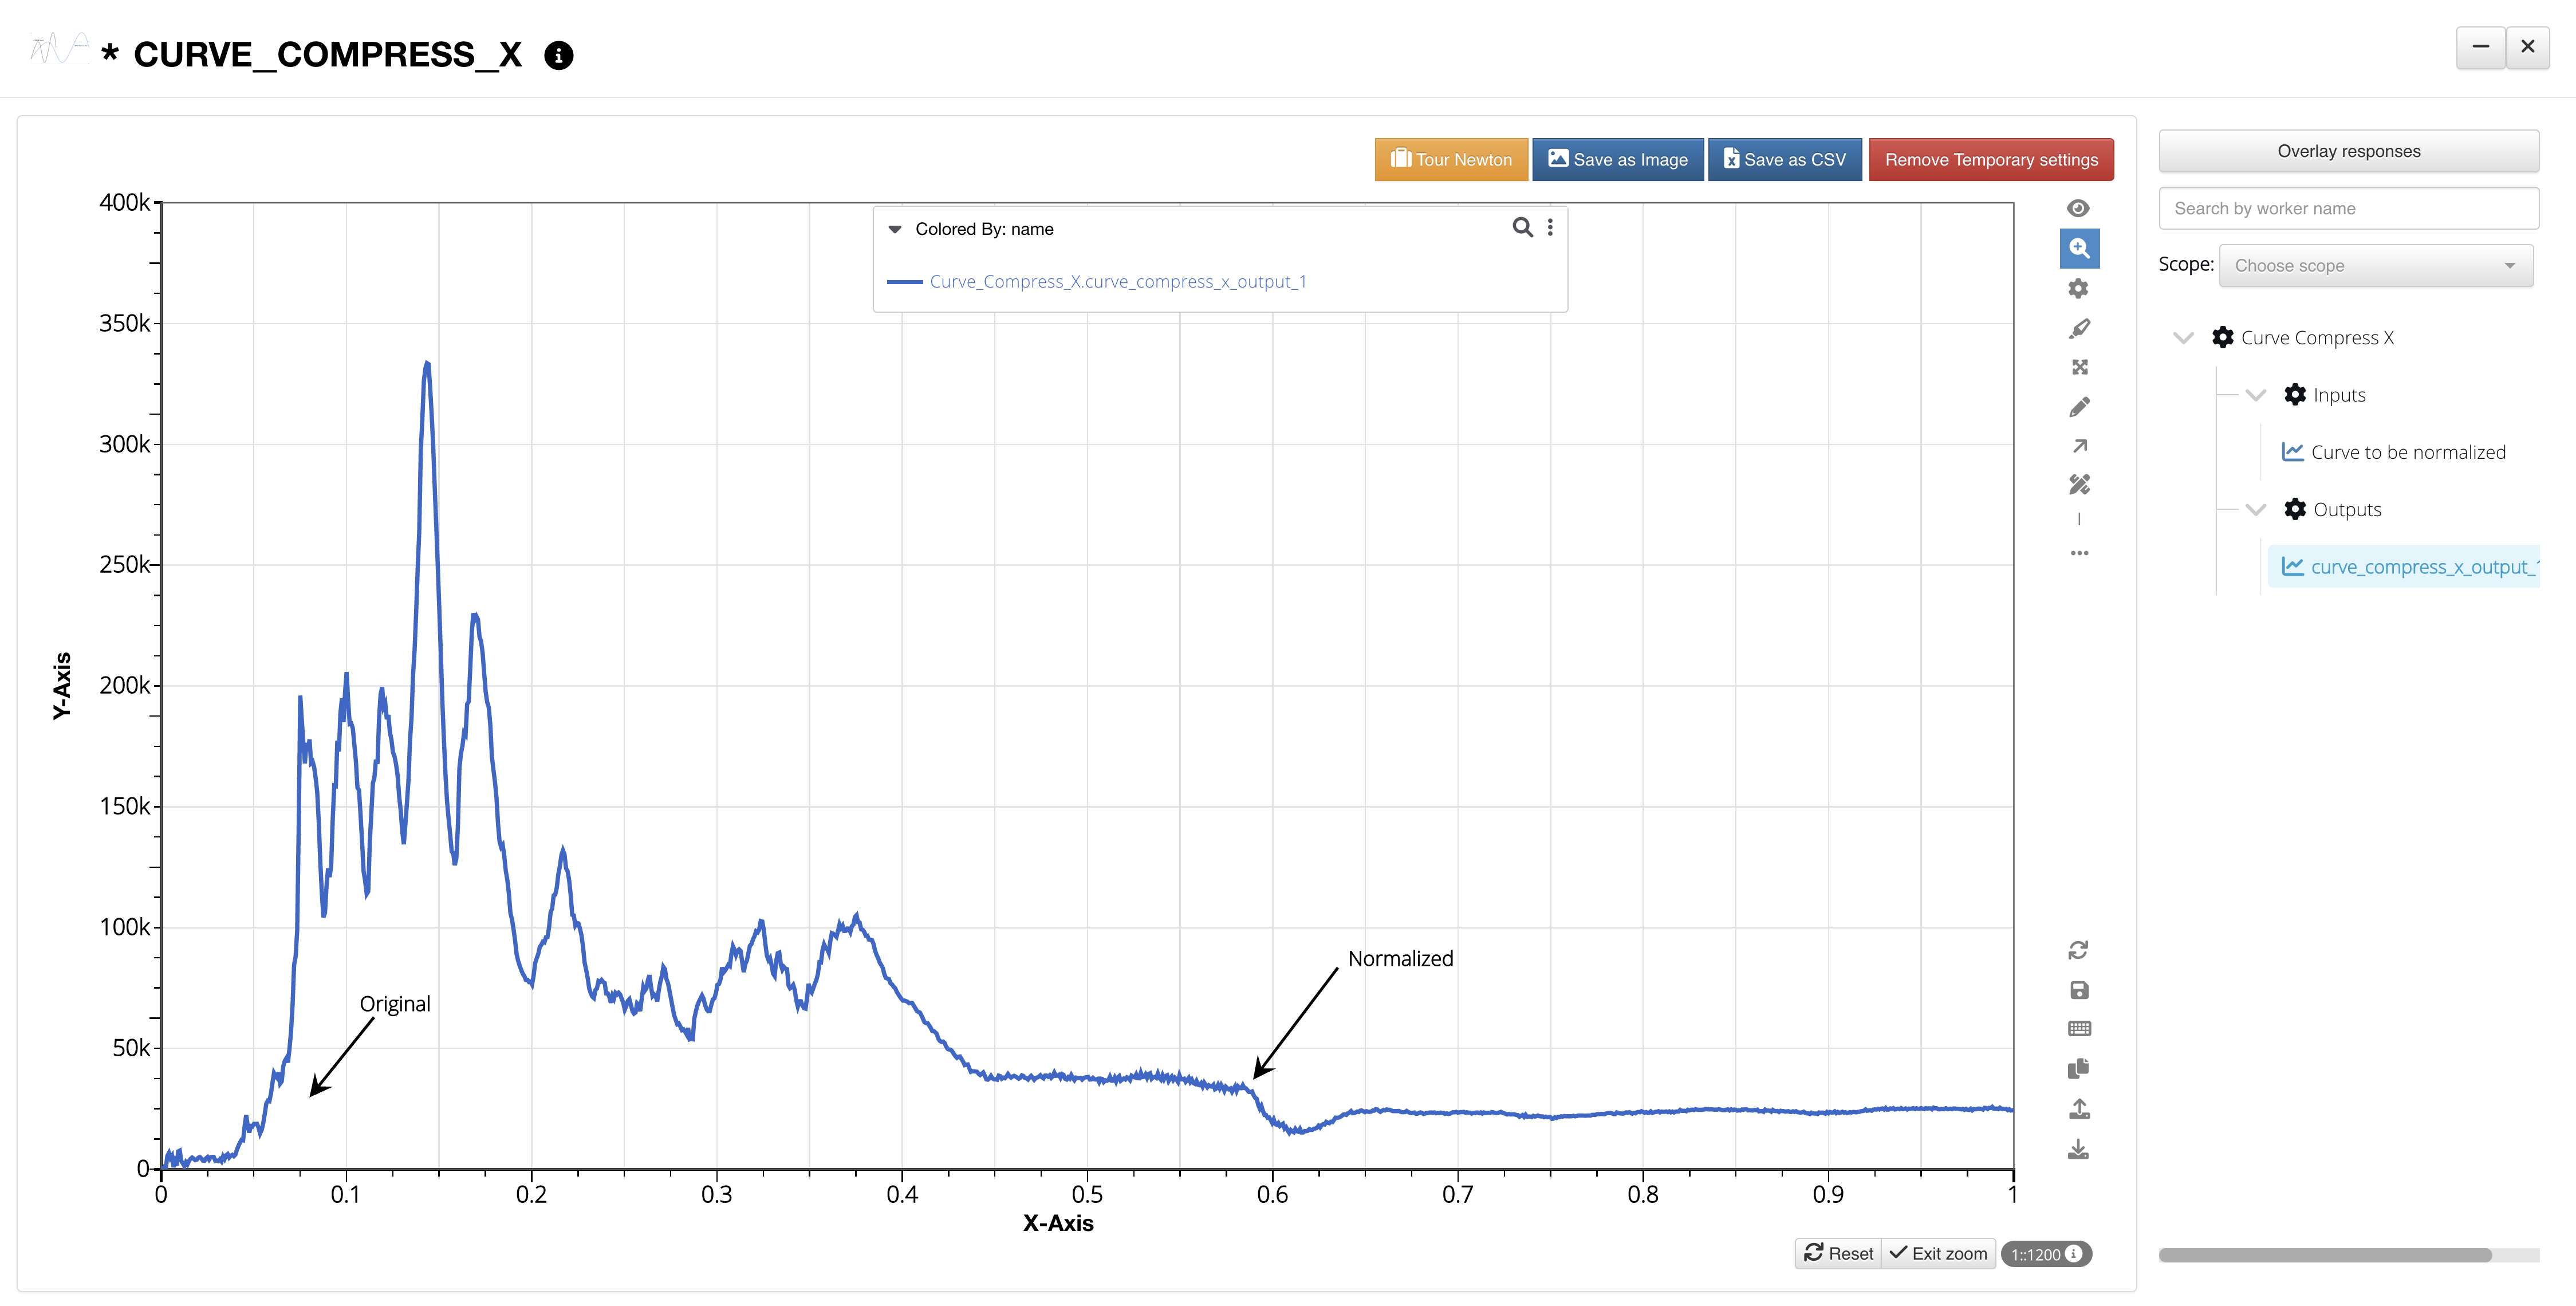
|
| 6 | curve_replace_y_value | curve_replace_y_value Testing Workflow | curve_replace_y_value_2022_03_15T12_21_47.d3wfzip | 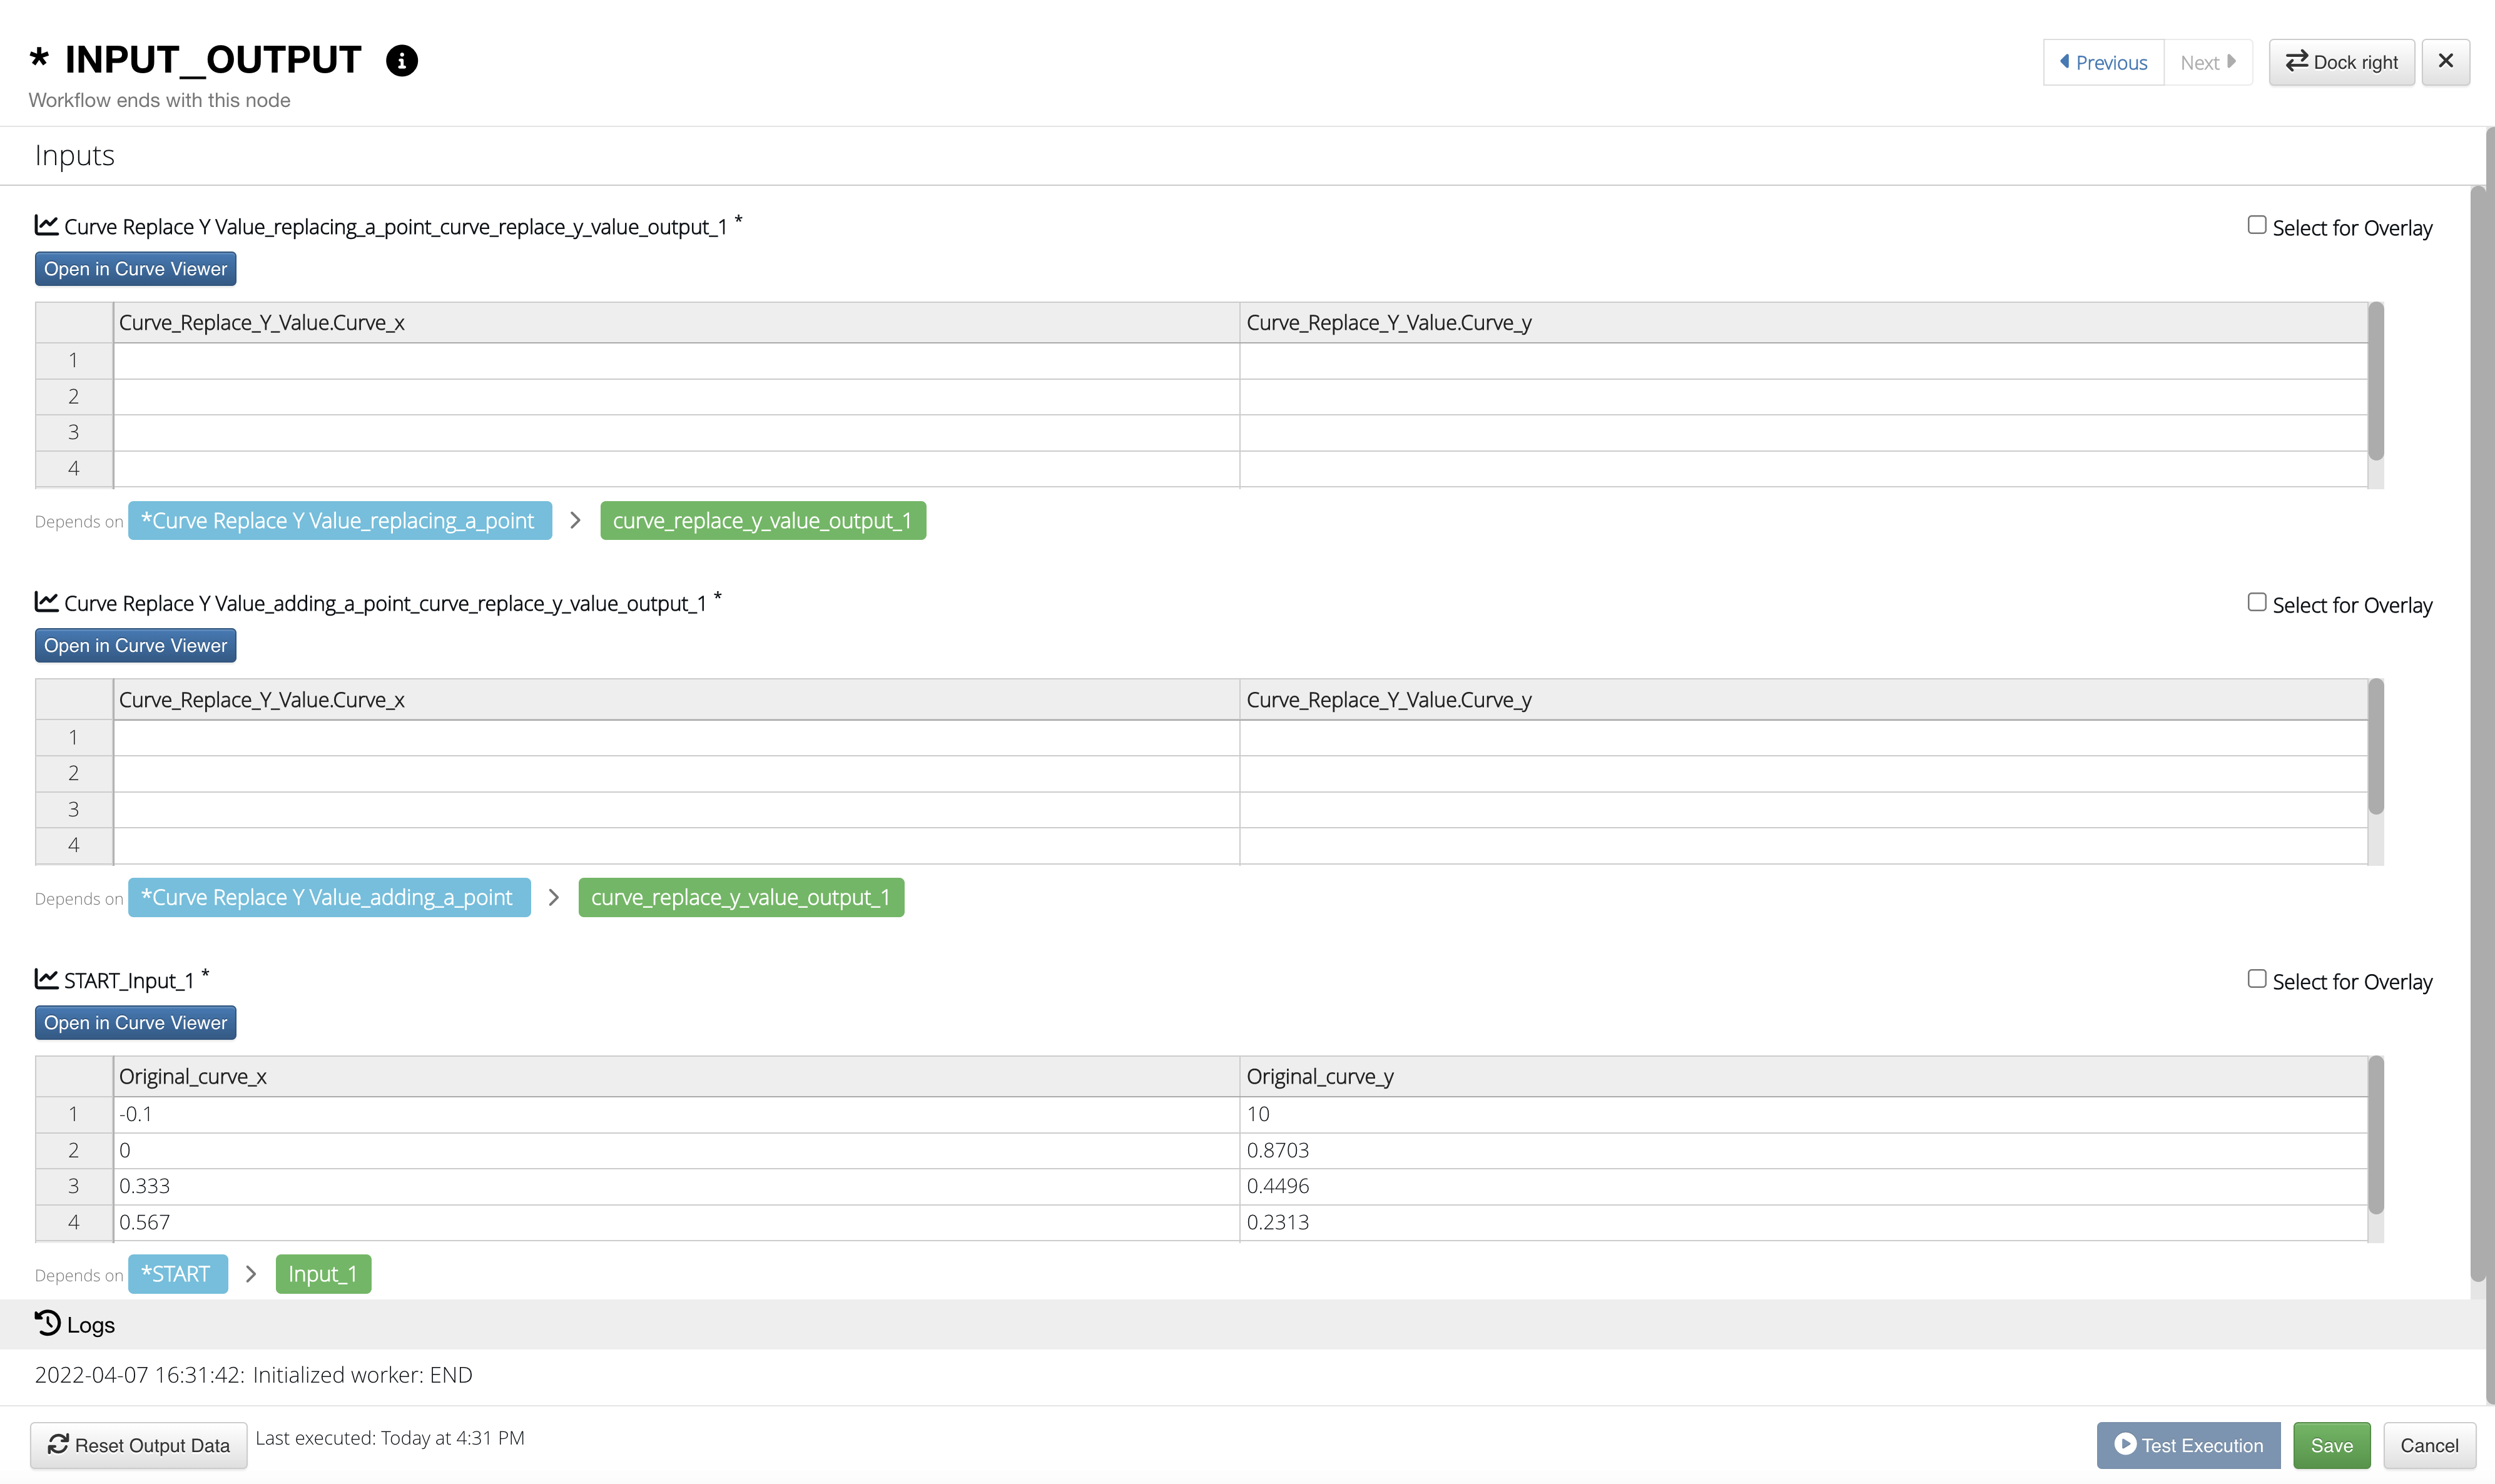
|
| 7 | CURVES_GET_MIN_MAX | CURVES_GET_MIN_MAX Testing Workflow | CURVES_GET_MIN_MAX_1011.d3wfzip | 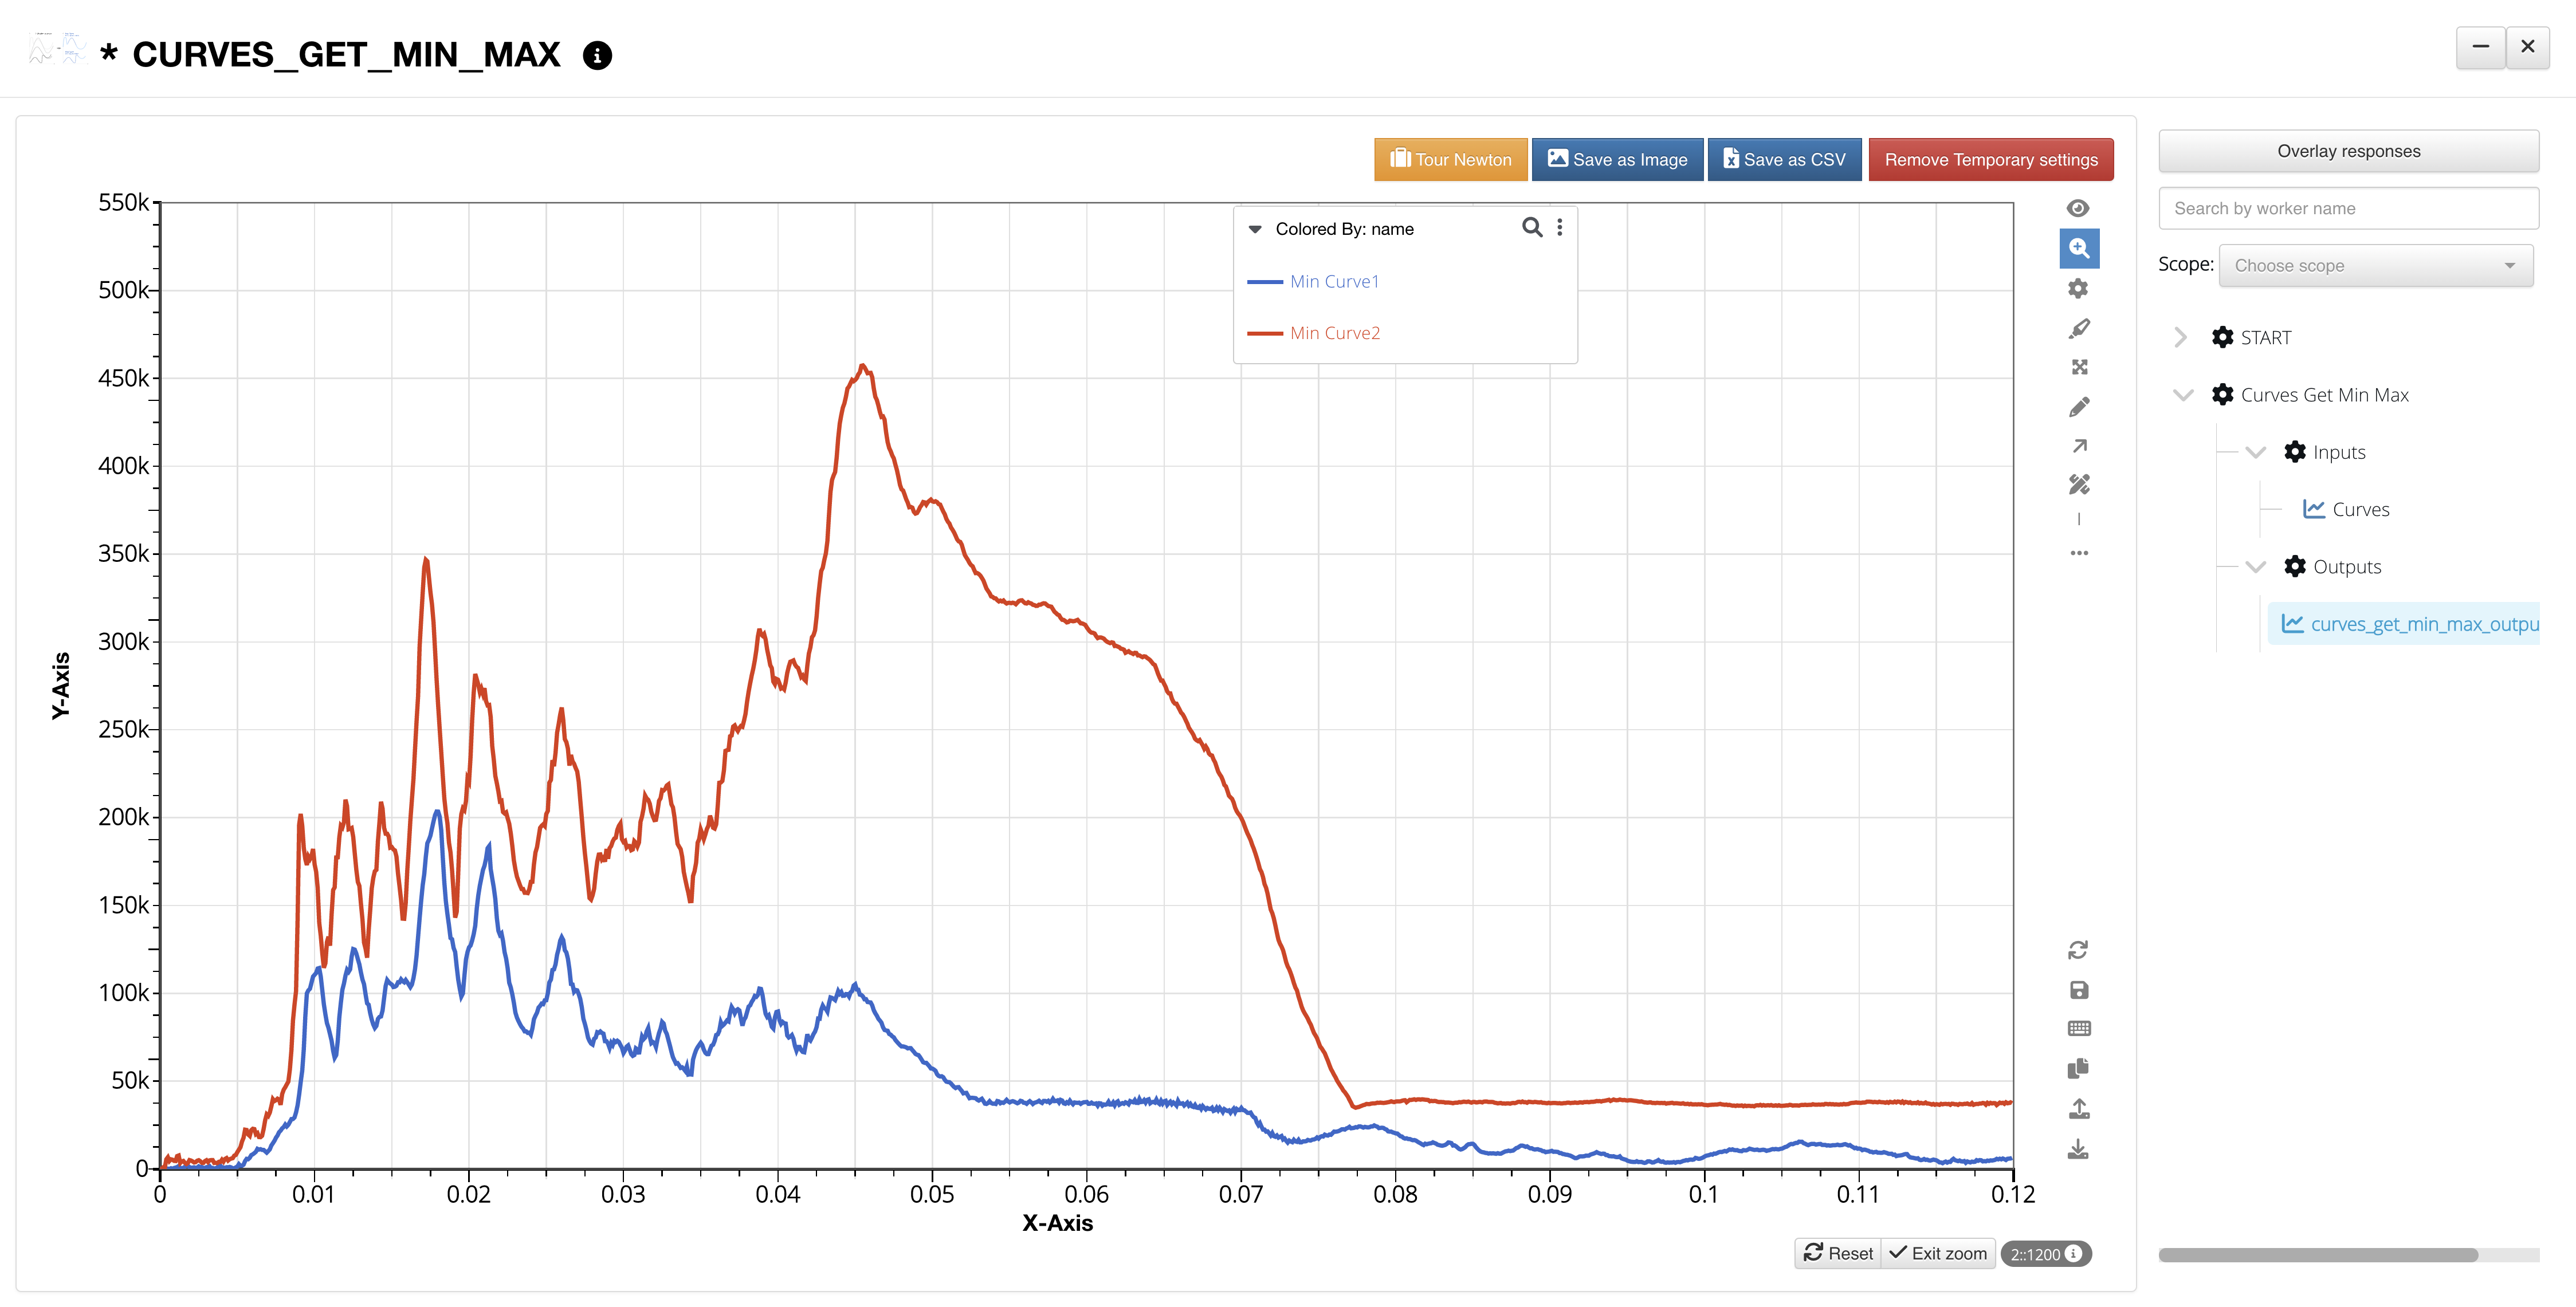
|
| 8 | CURVES_MAP | CURVES_MAP Testing workflow | CURVES_MAP_1009.d3wfzip | 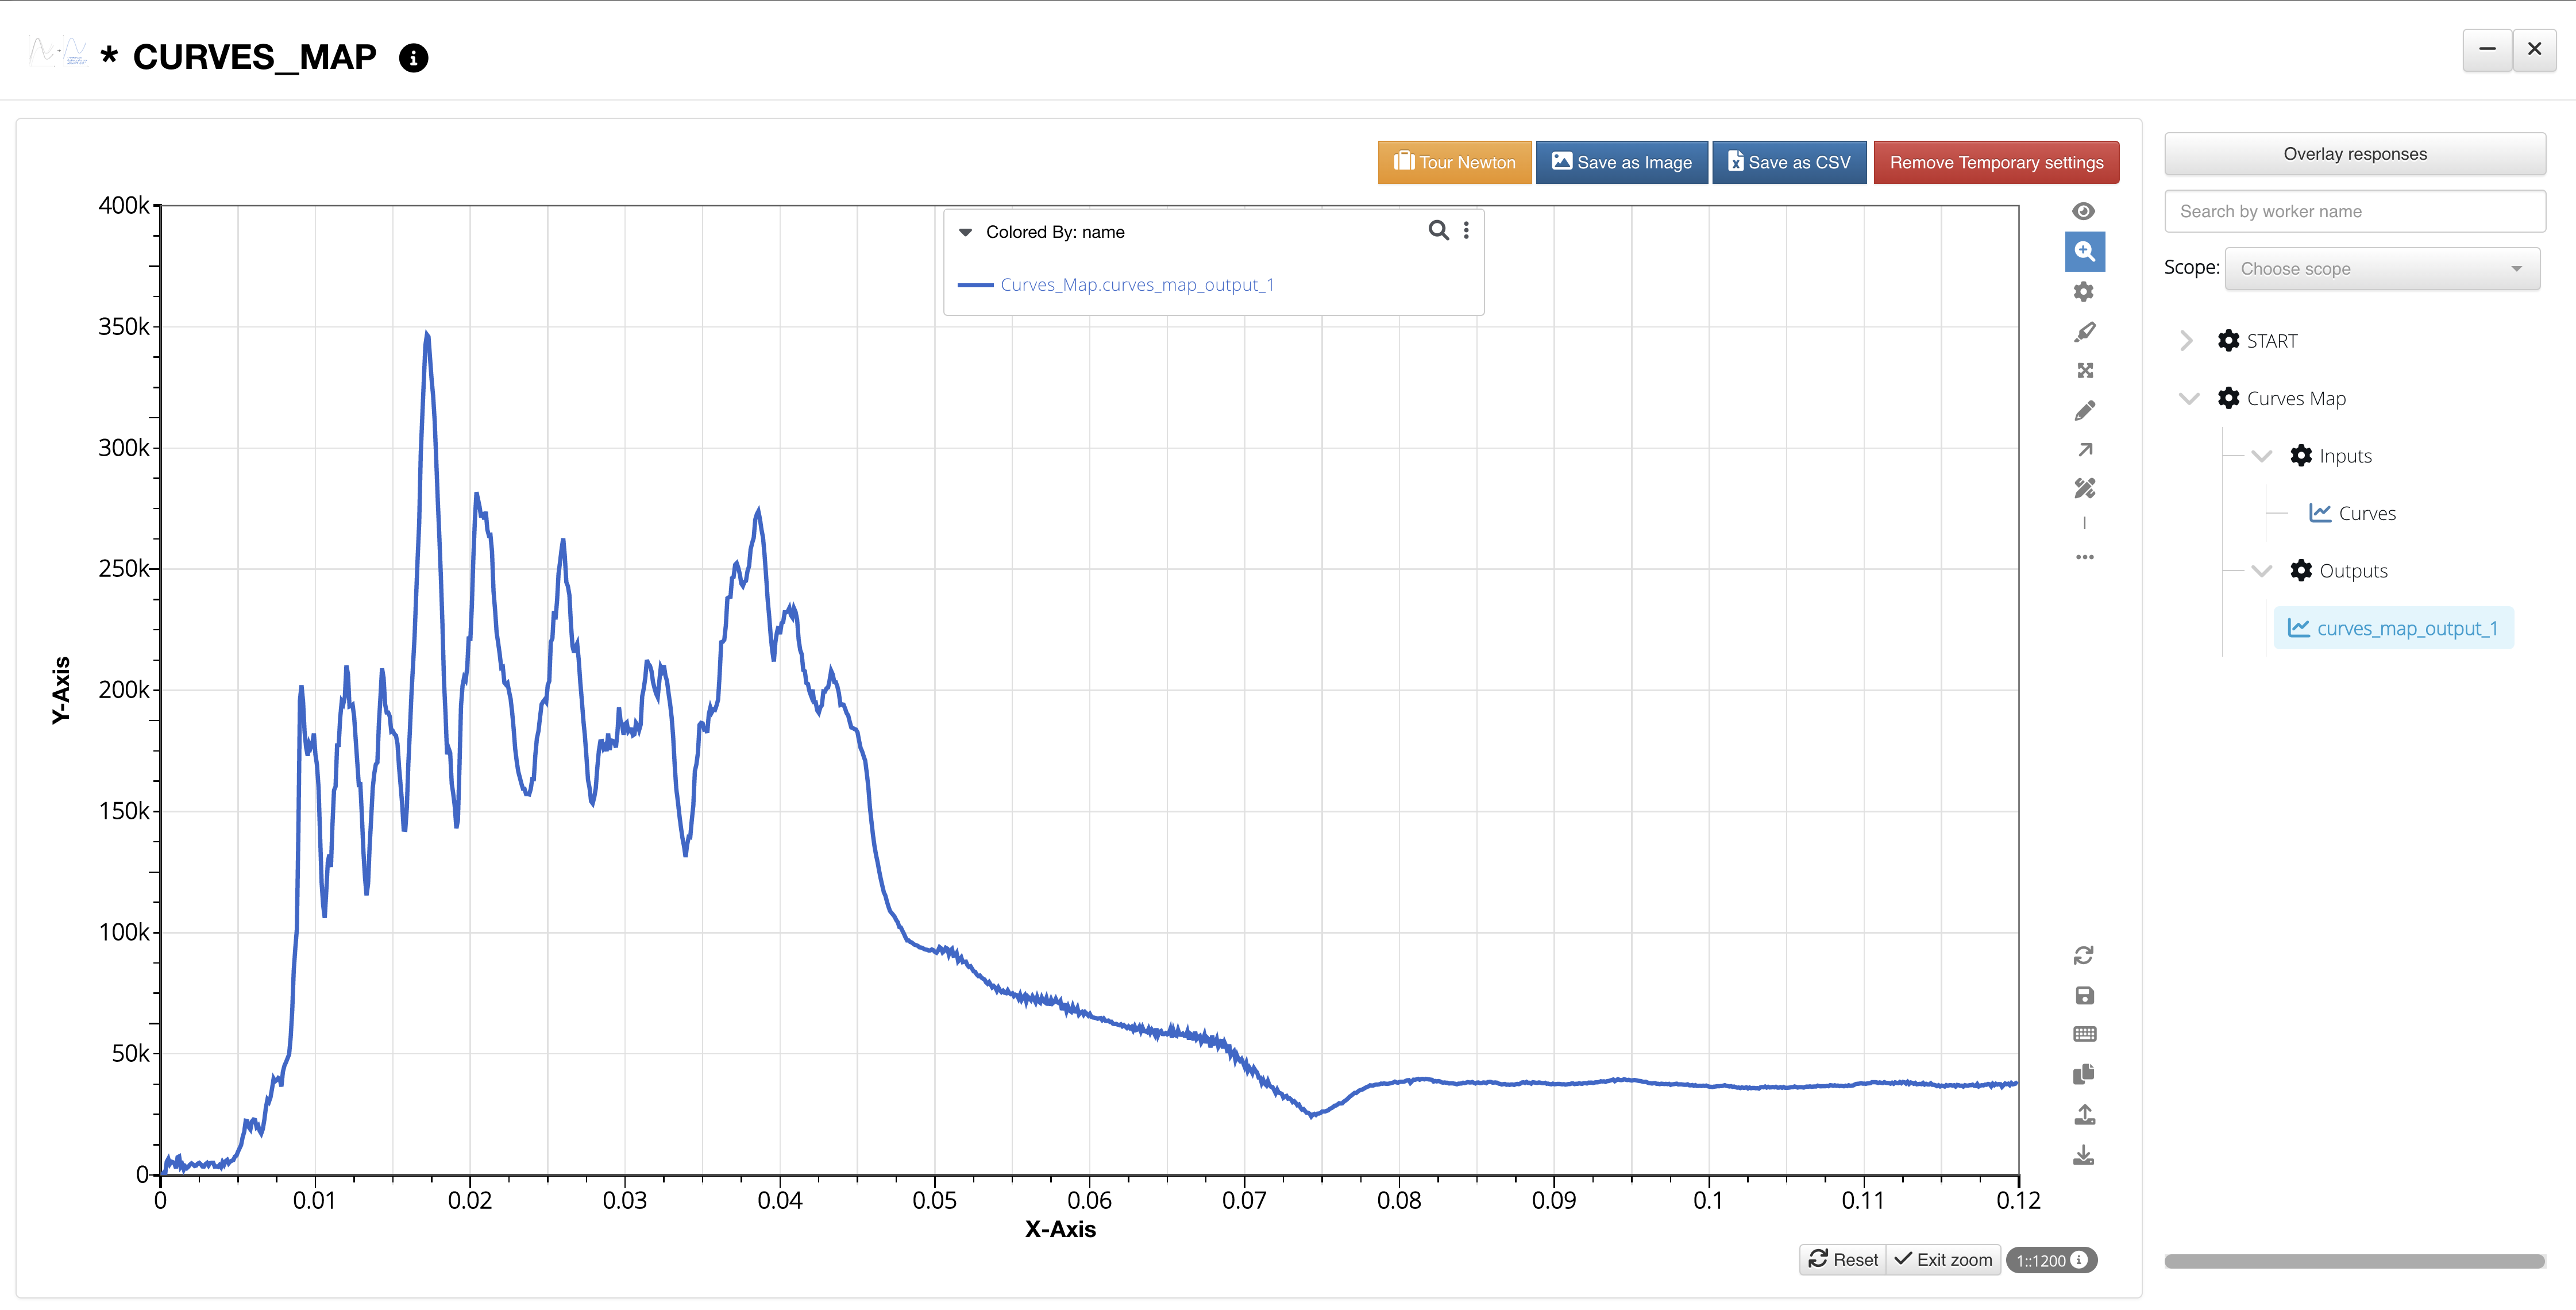
|
| 9 | curves_strain_to_effective | curves_strain_to_effective testing workflow | curves_strain_to_effective_2022_03_15T18_05_46.d3WfZip | 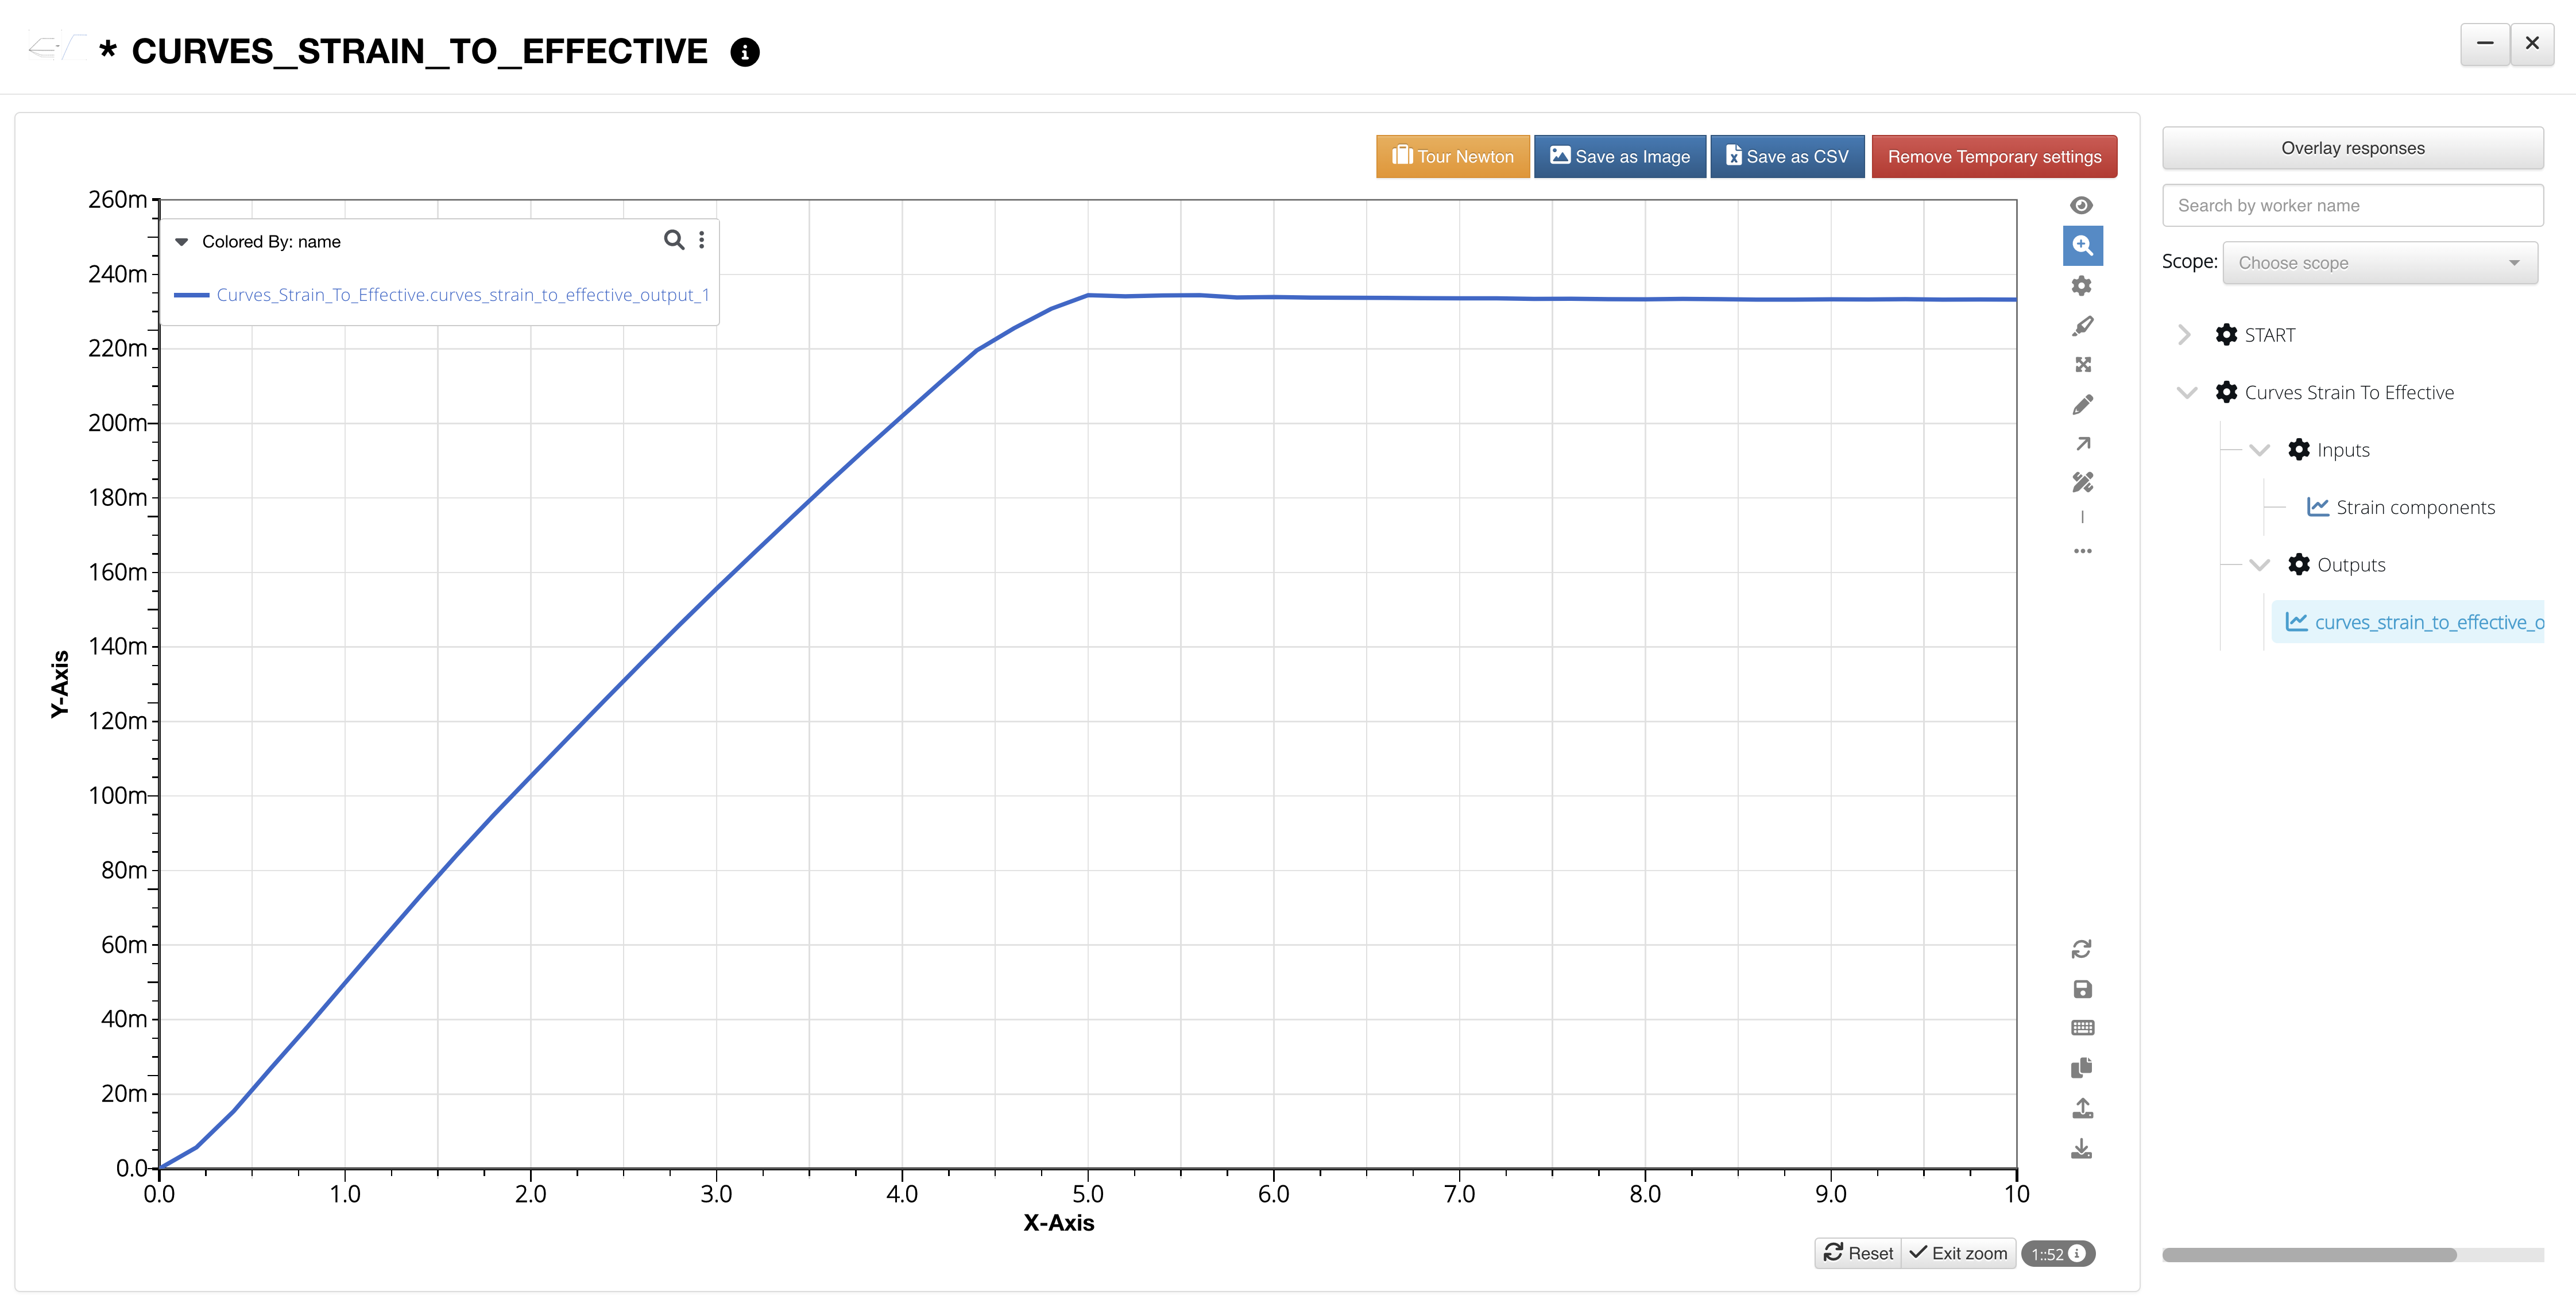
|
| 10 | Triaxiality_v2.2 | Triaxiality Workflow with curves_stress_to_triaxiality, curves_overlay, curves_get_triaxiality_at_failure | Triaxiality_v2_2022_03_15T18_35_03.d3WfZip | 
|
| 11 | curve get cyclic data | curve_get_cyclic_data testing workflow | curve get cyclic data_2022_02_24T11_21_55.d3wfzip | 
|
| 12 | curve_events | Workflow using curve_define_events worker to test the Newton events | curve_events_2022_02_17T15_47_58.d3wfzip | 
|
| 13 | Curve_threems_clip | Curve_threems_clip testing workflow | Curve_threems_clip_2022_02_01T15_29_20.d3WfZip | 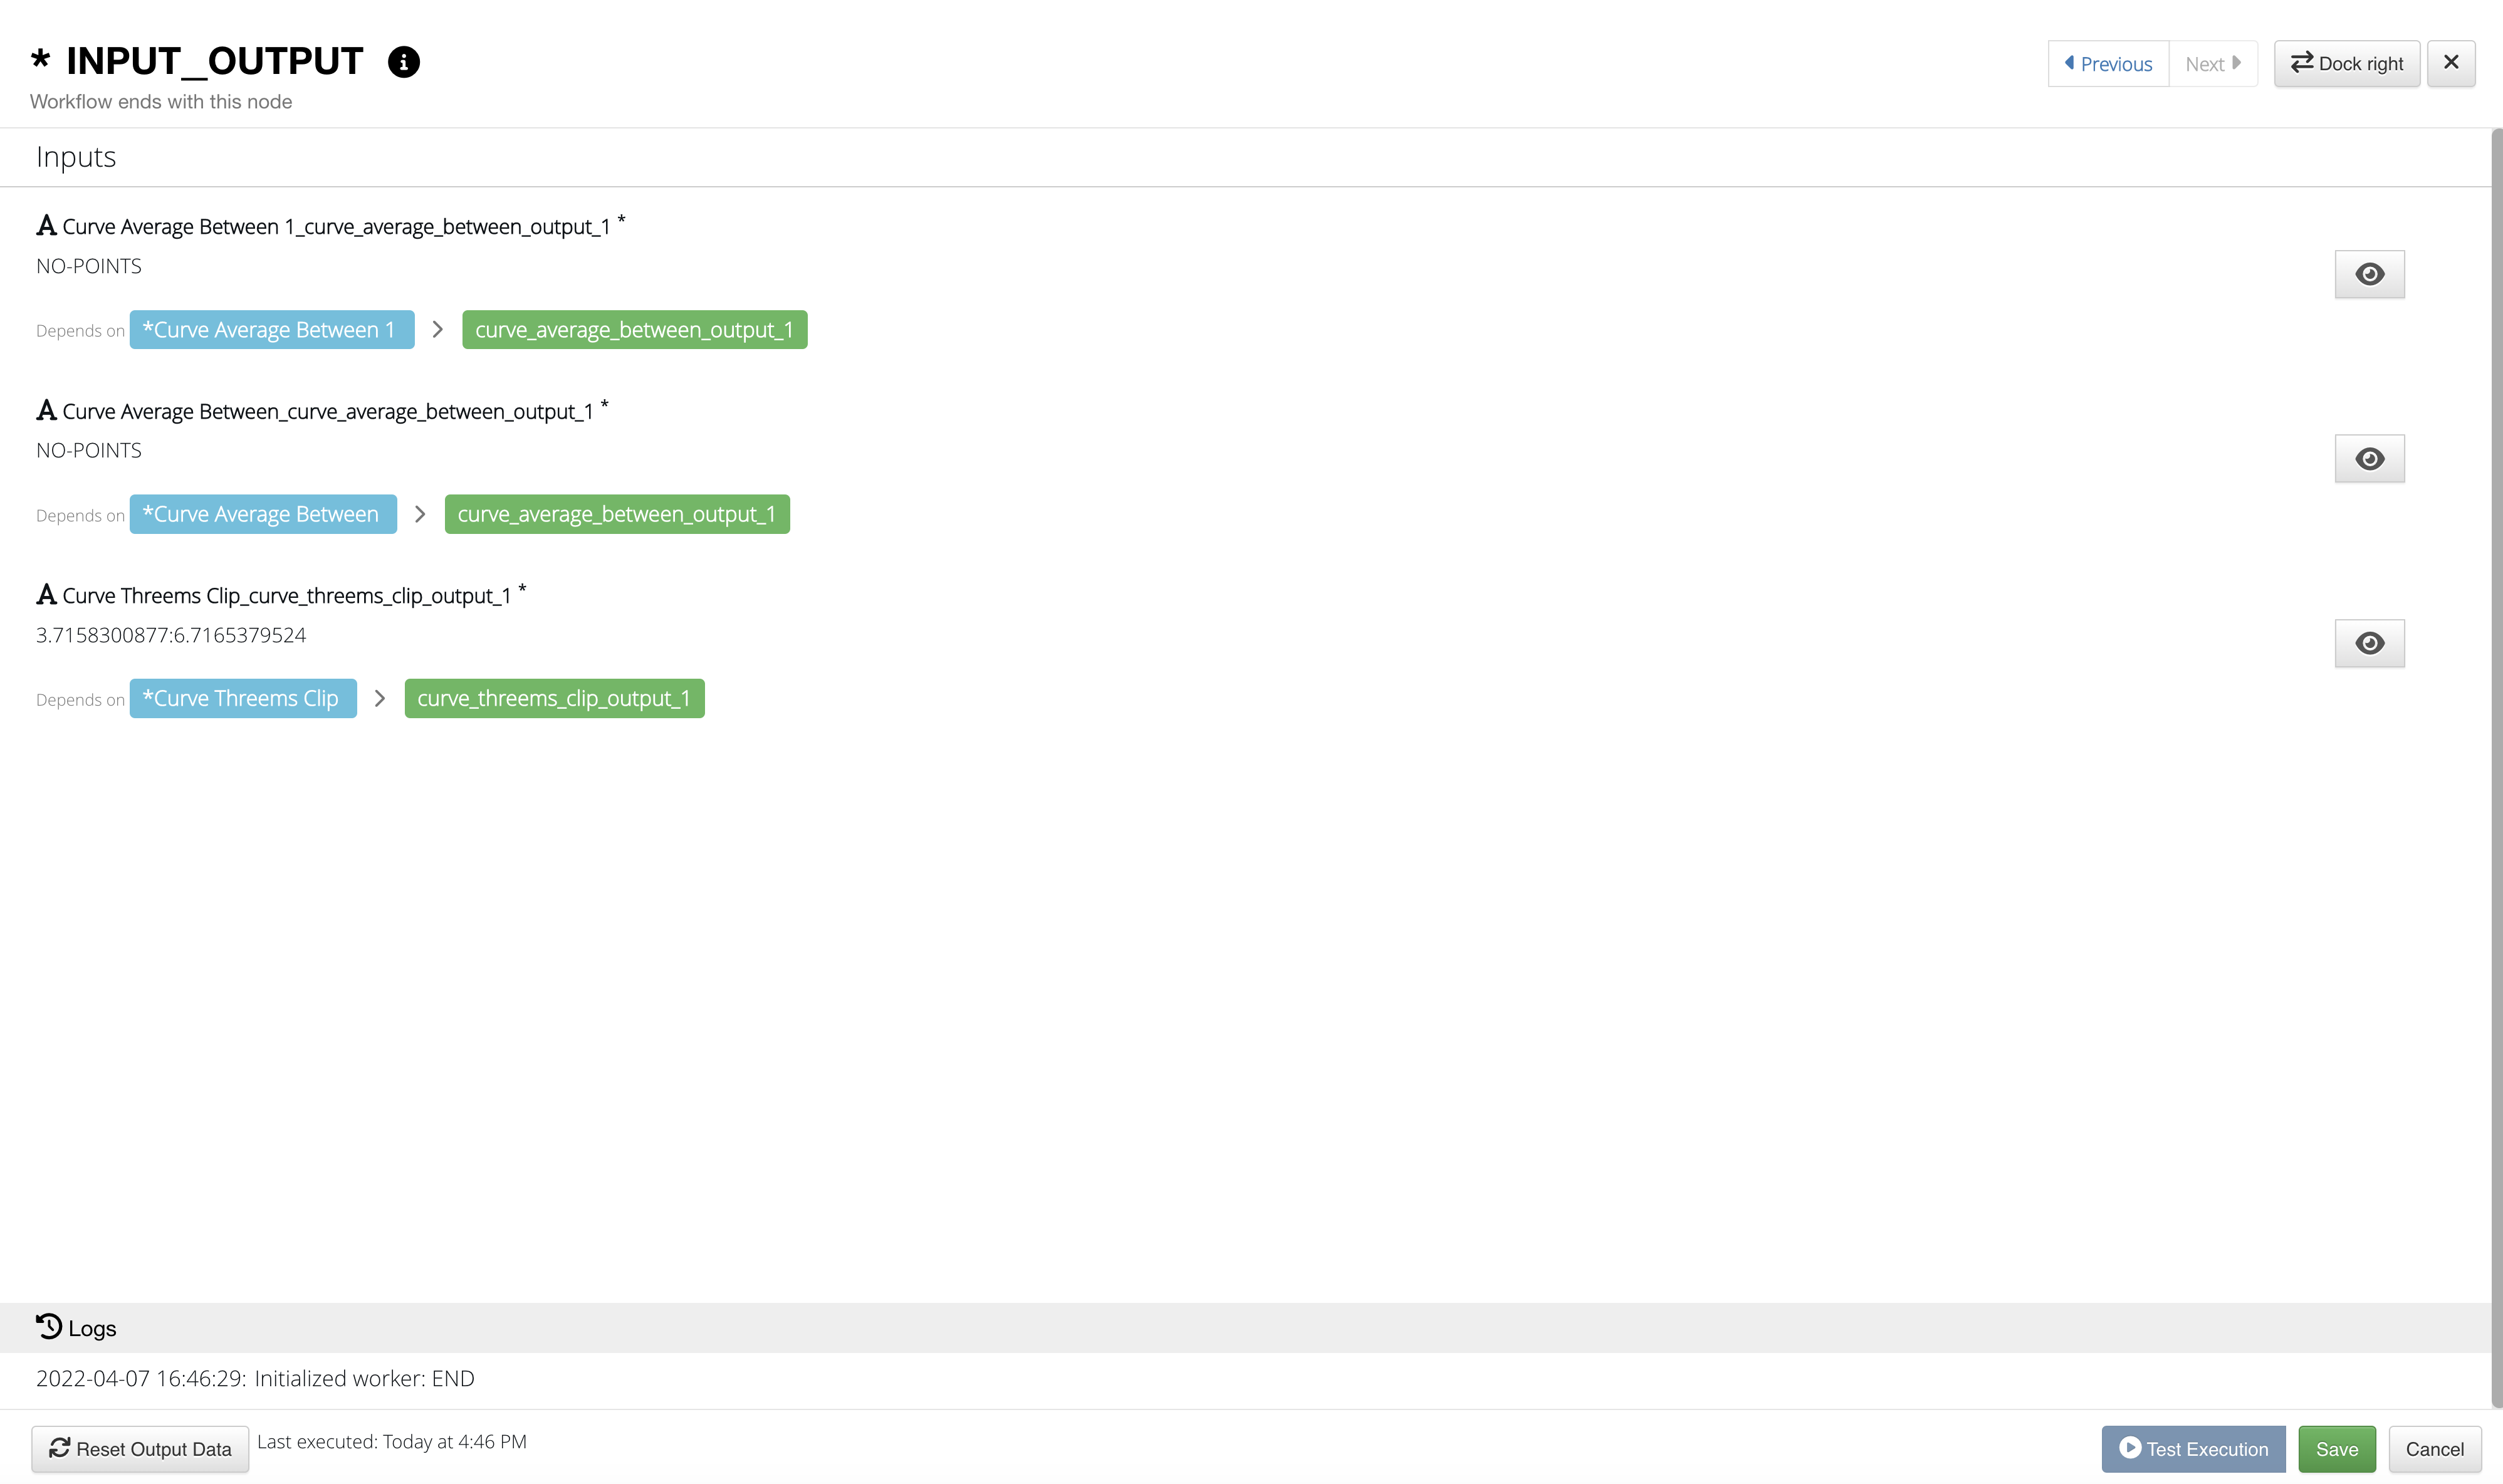
|
| 14 | Coordinate_transform_input_curves | IIHS Coordinate Transform parallel workflow | Coordinate_transform_input_curves_2021_06_30T16_38_31.d3WfZip | |
| 15 | Curve Check Tolerance | Curve Check Tolerance testing workflow | Curve Check Tolerance_2021_06_17T08_55_11.d3wfzip | 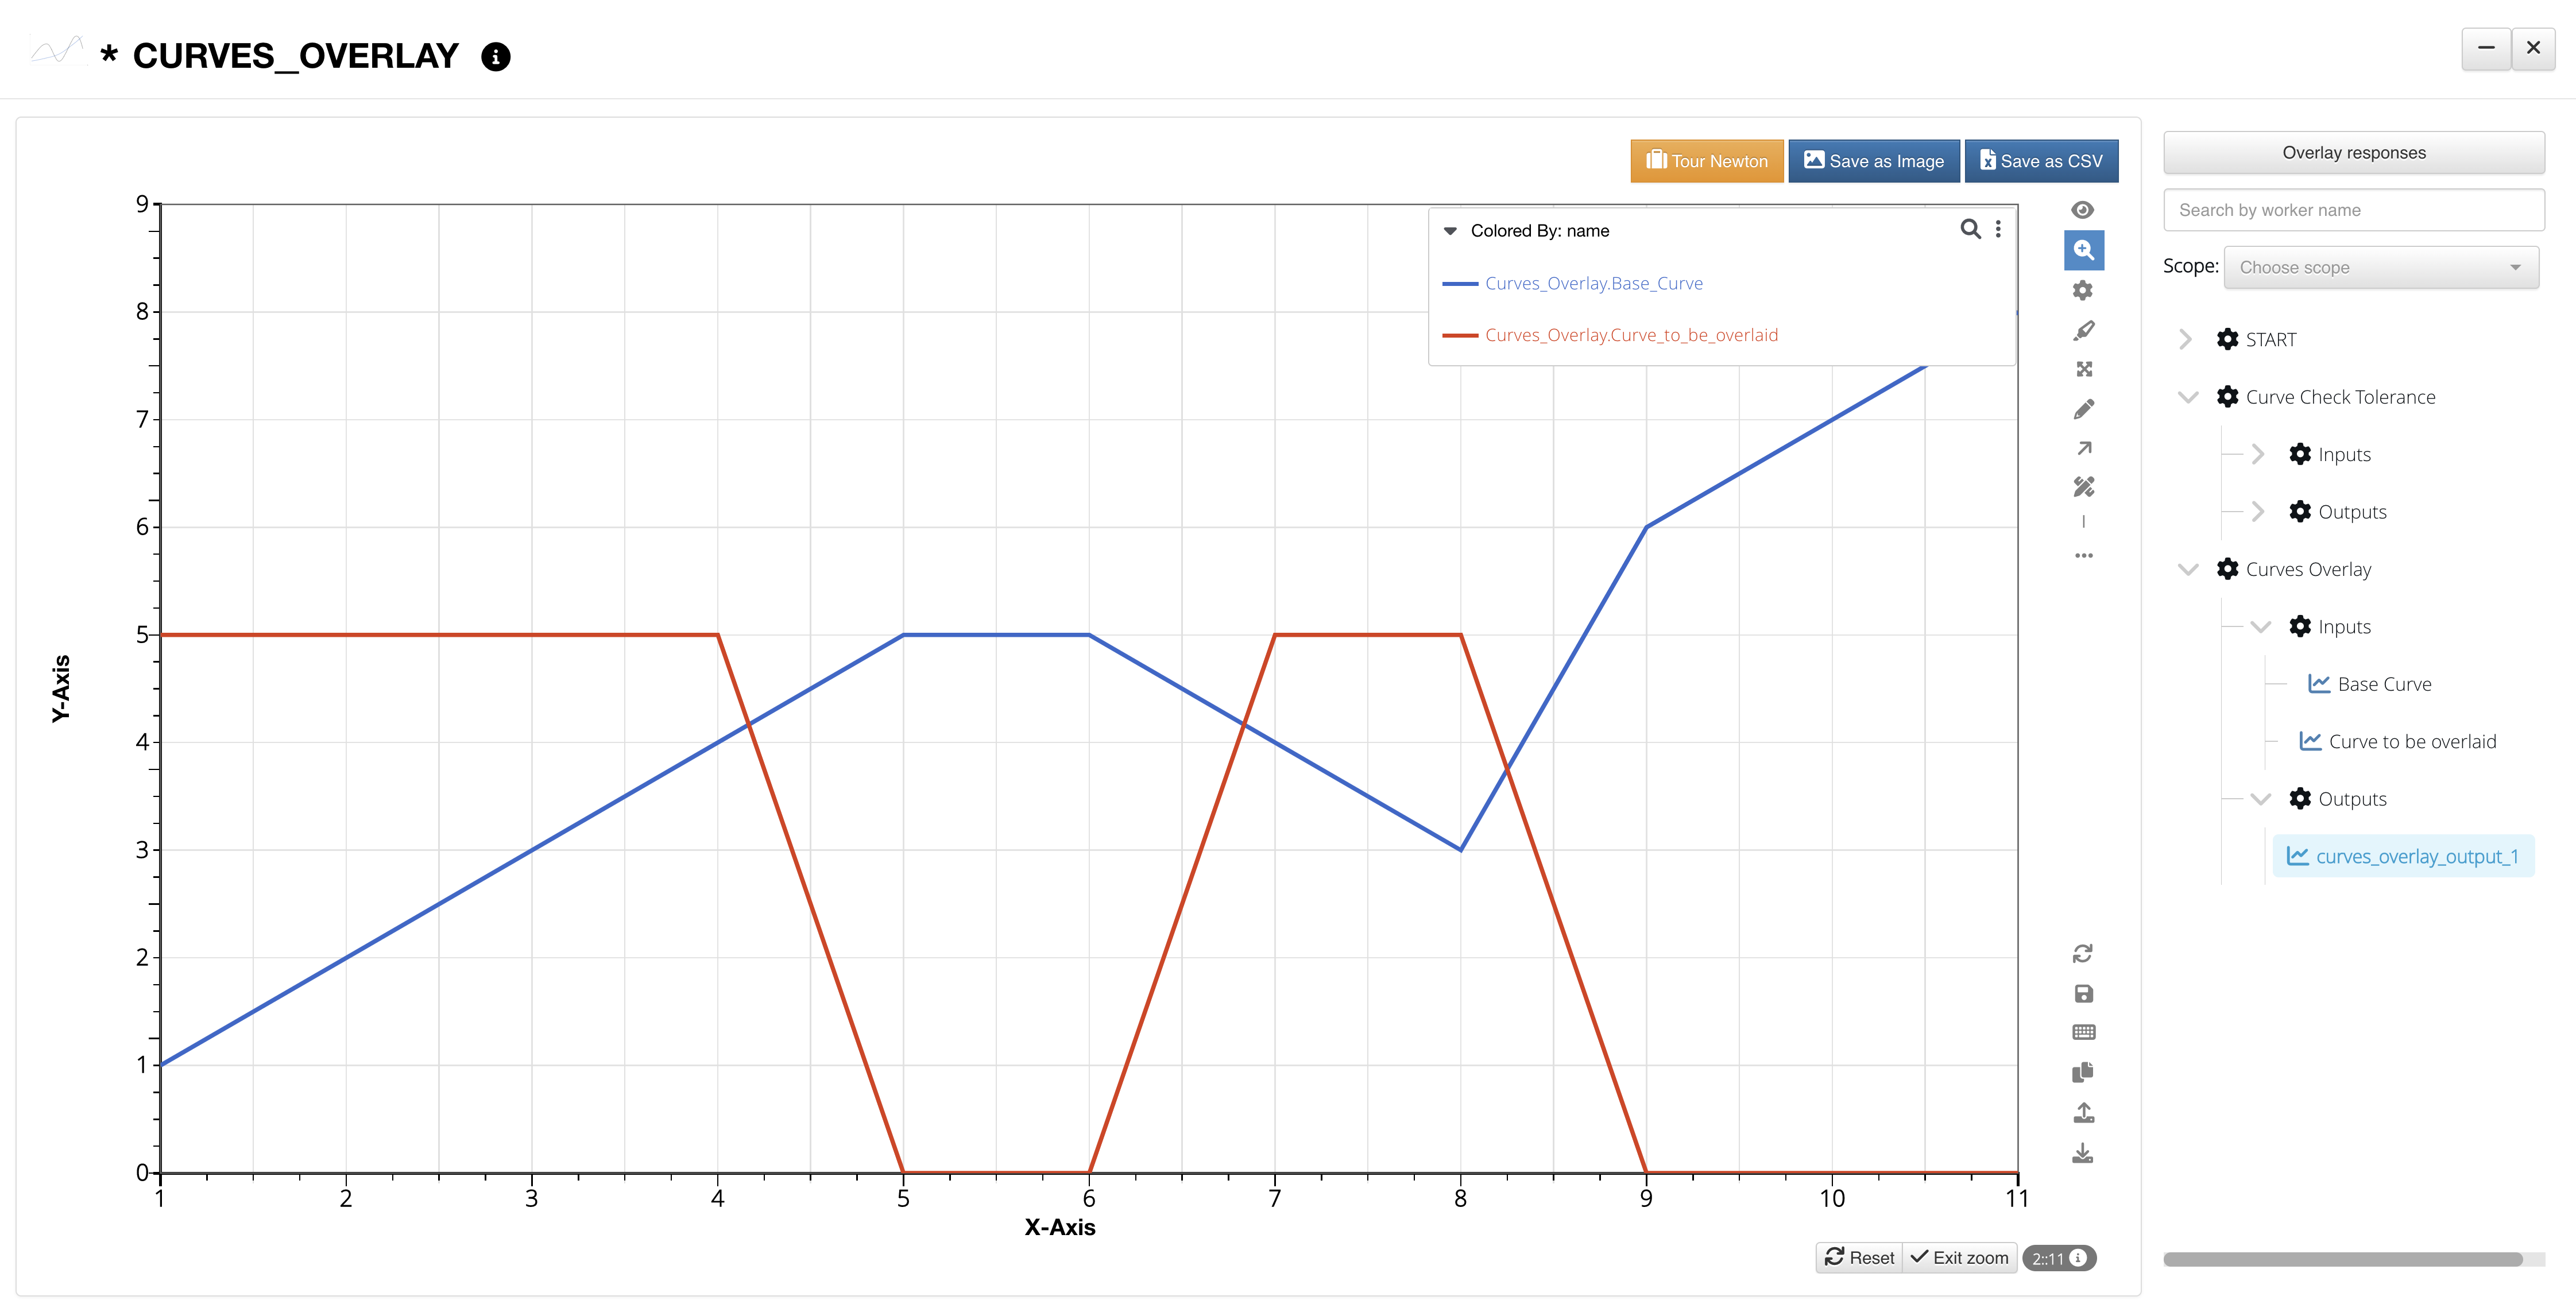
|
| 16 | Curve Get Resting Times | Curve Get Resting Times testing workflow | Curve Get Resting Times_2021_07_27T11_31_30.d3wfzip | 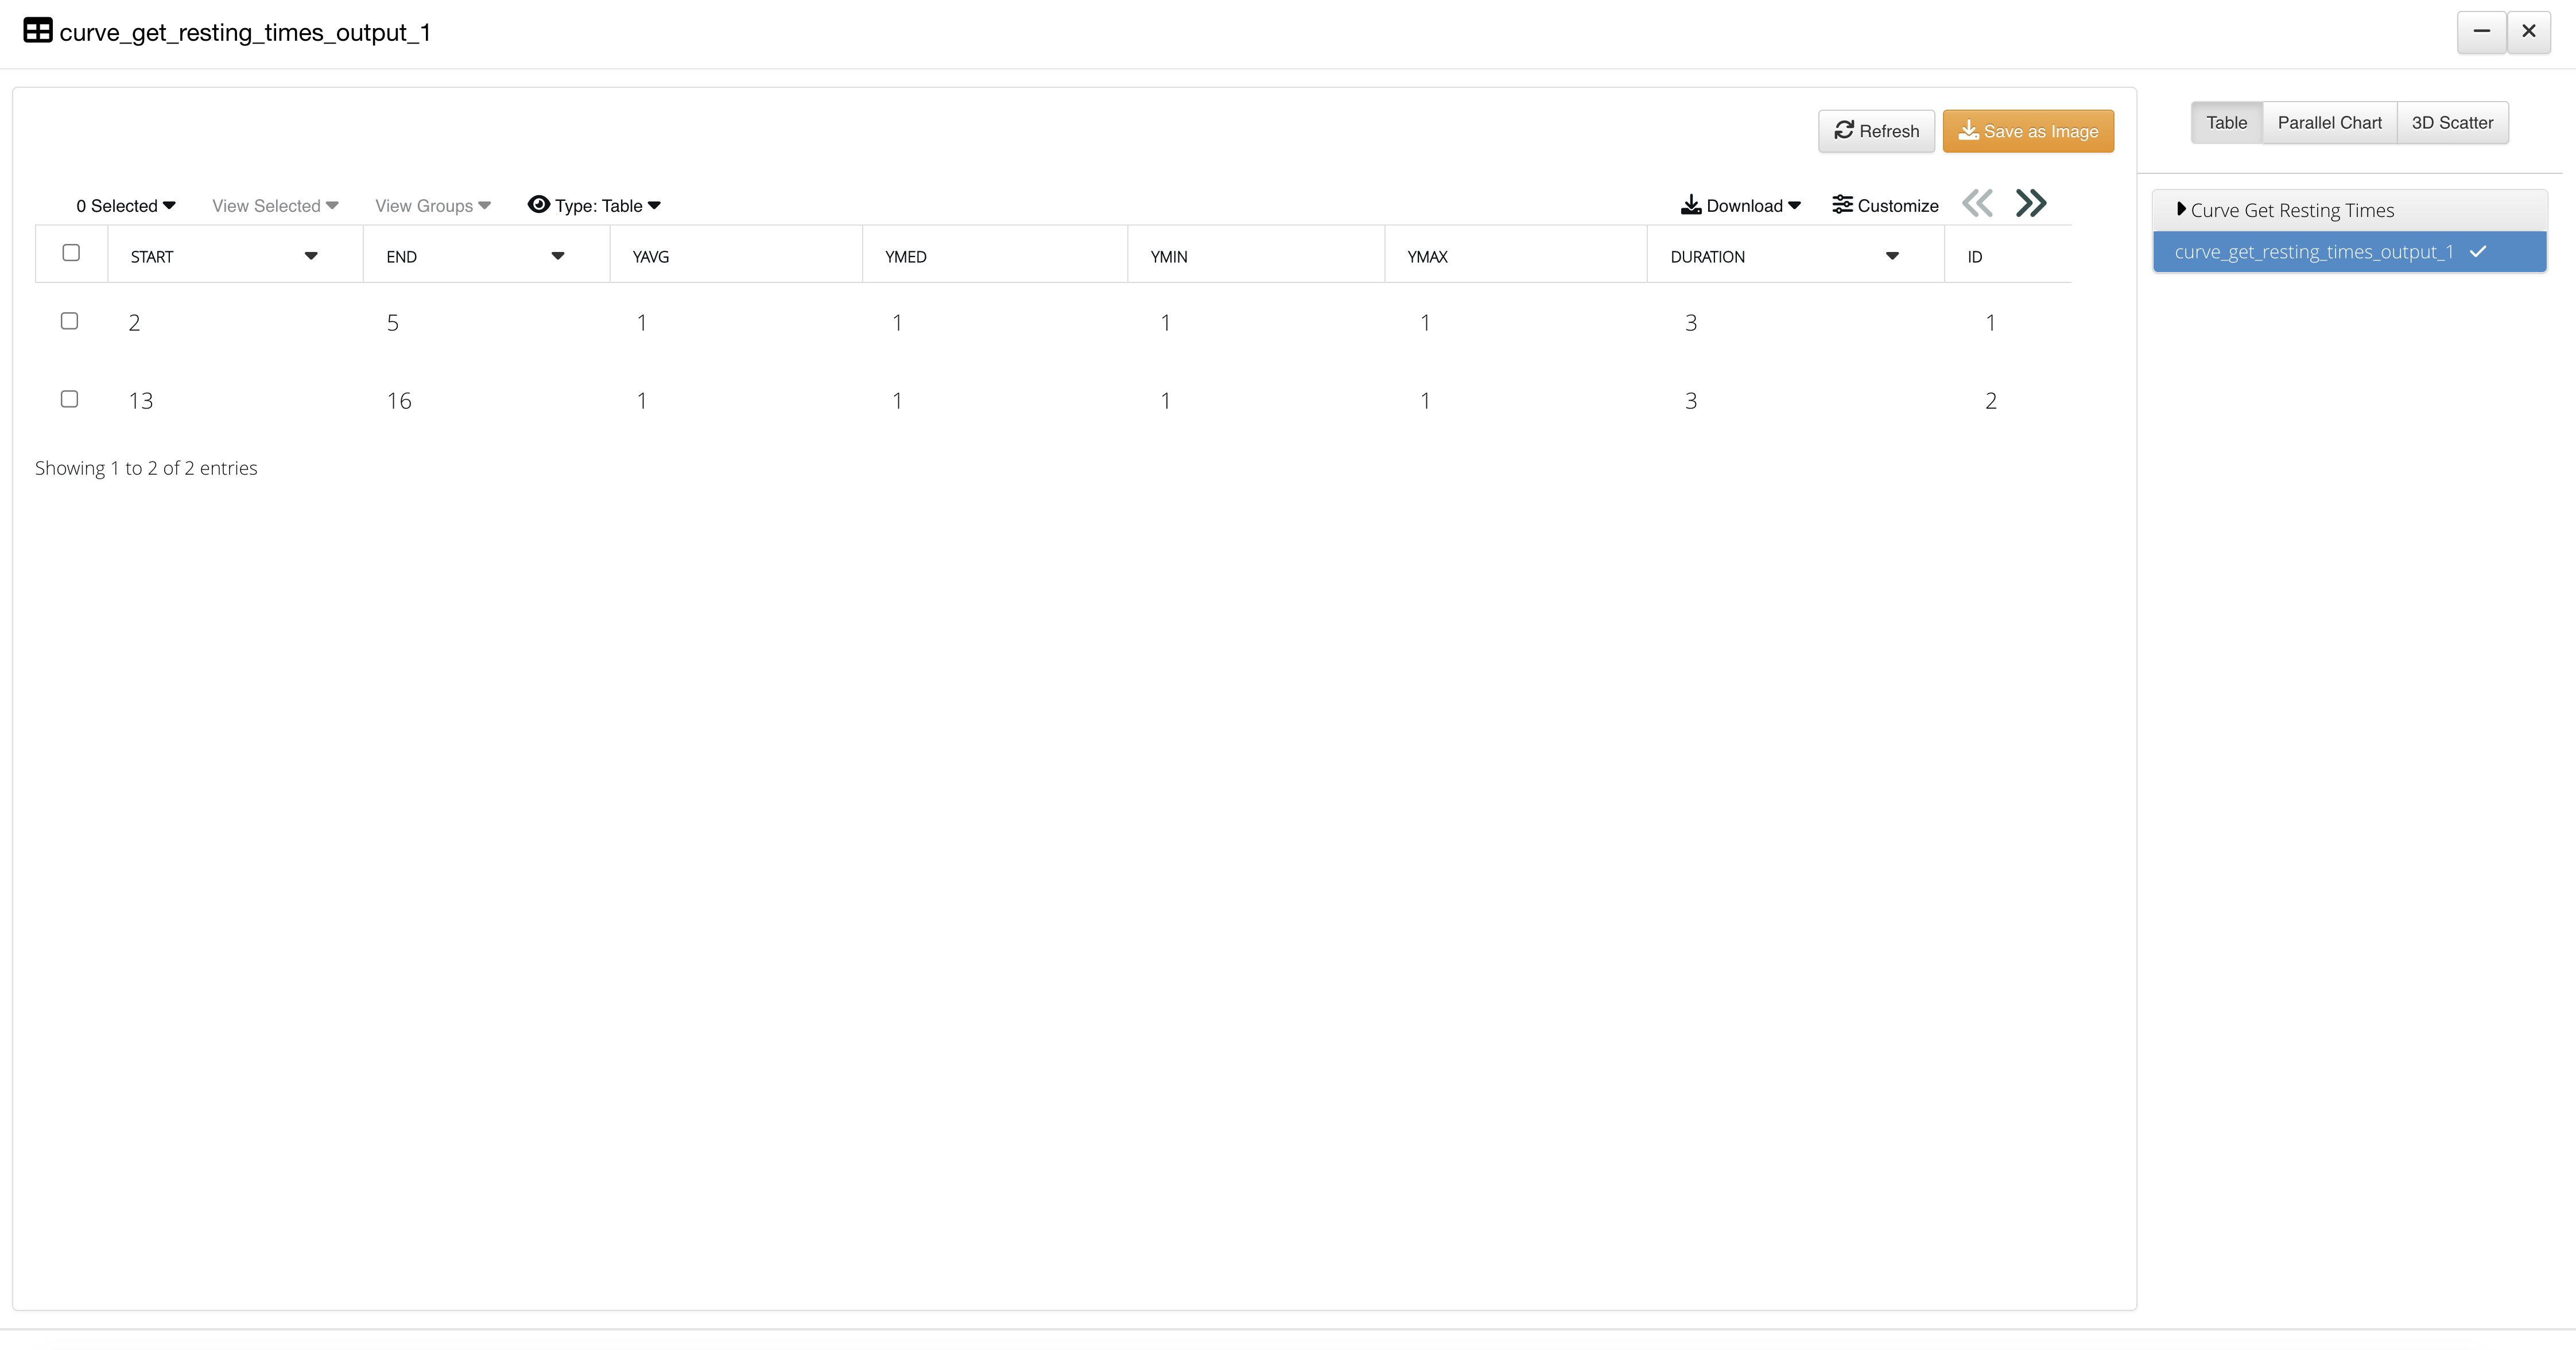
|
| 17 | Curve Points at X axis | curve_add_points_at_intersections_with_xaxis testing workflow | Curve Points at X axis_2021_06_24T12_02_56.d3wfzip | 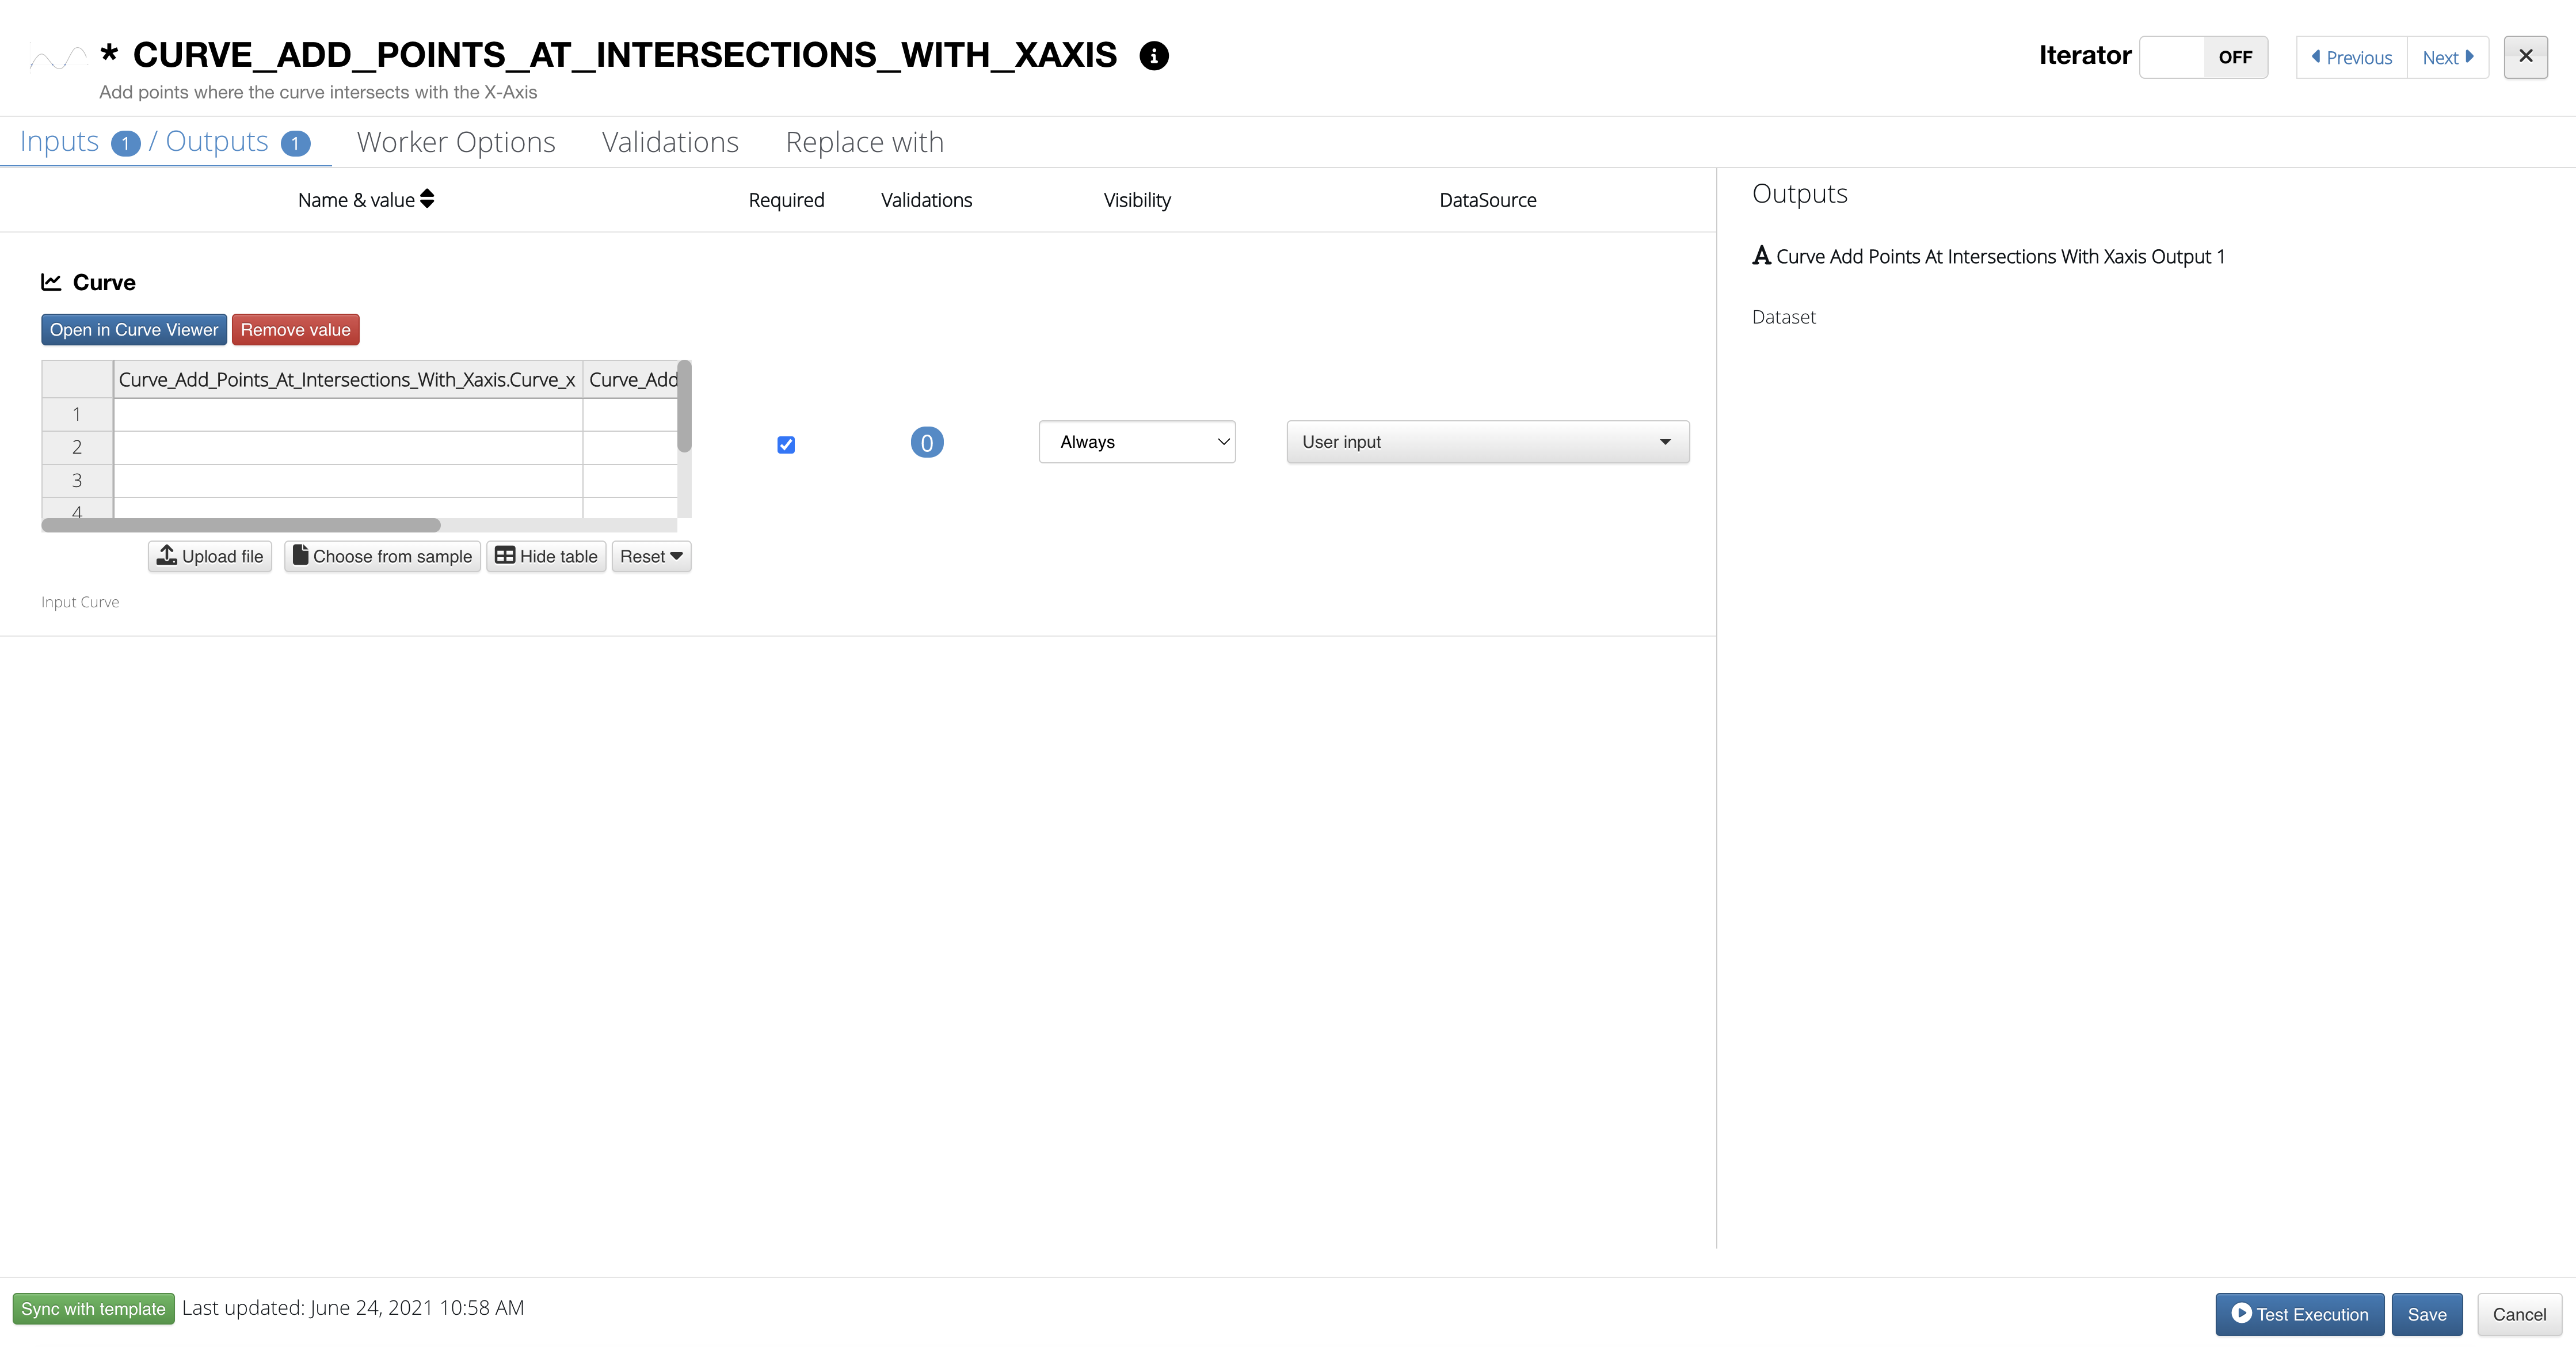
|
| 18 | Curve Split Event | curve_split_based_on_events testing workflow | Curve Split Event _2021_06_10T11_21_03.d3wfzip | 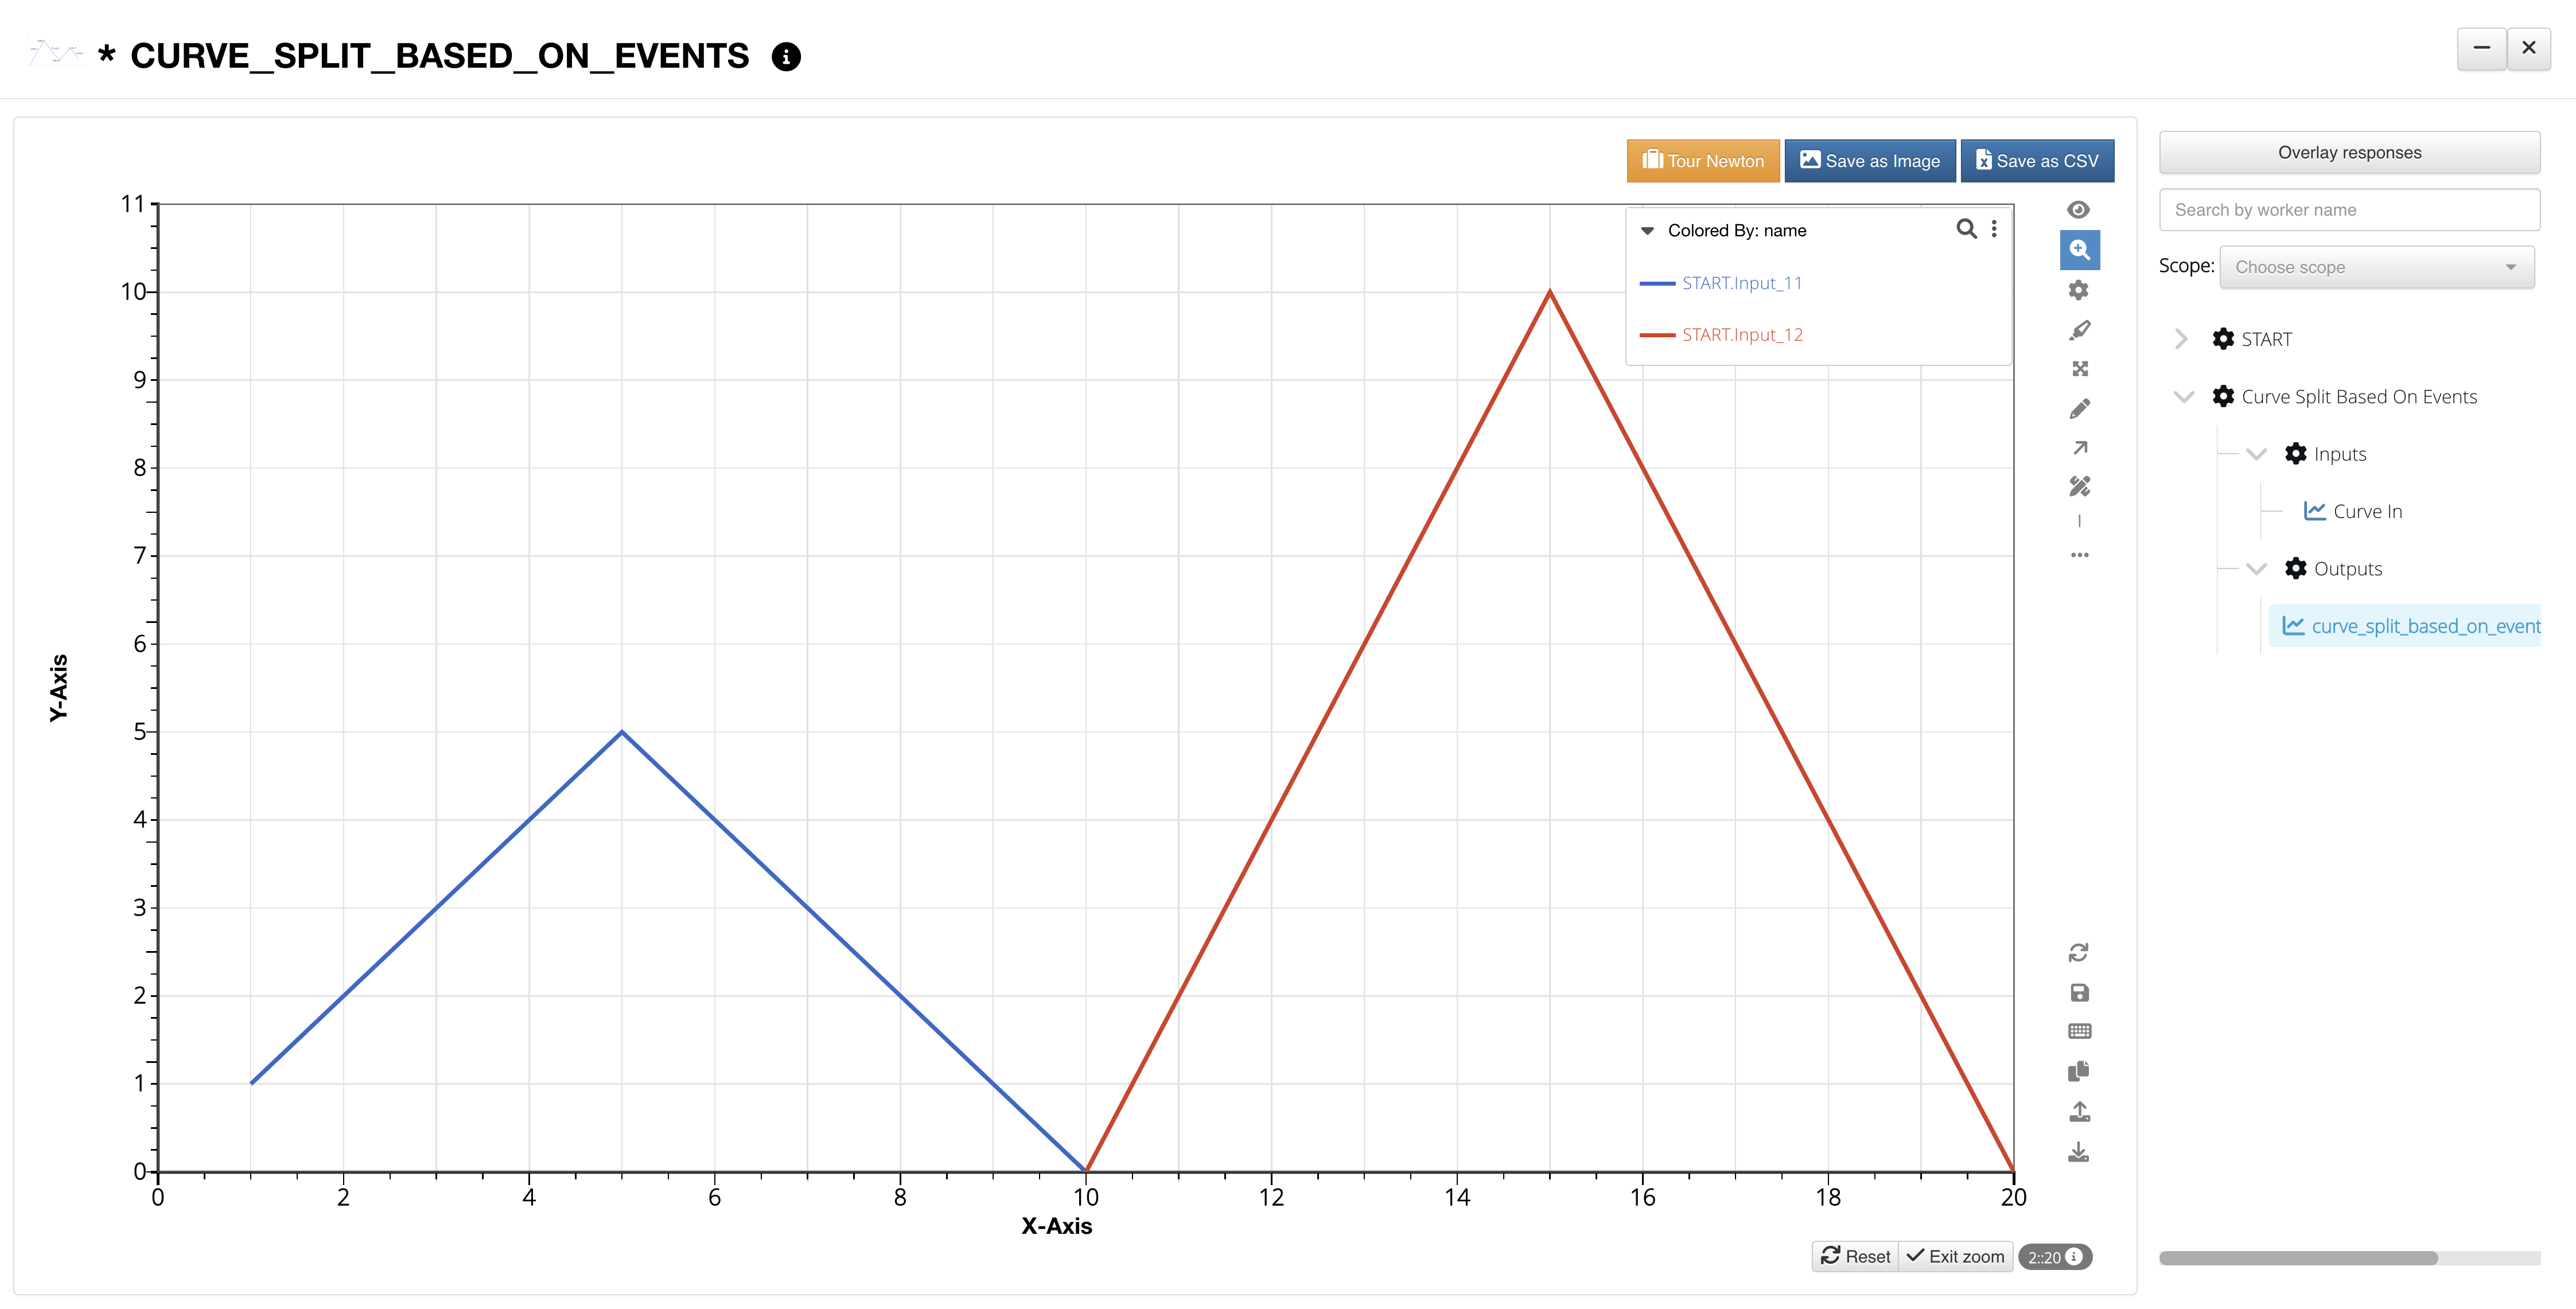
|
| 19 | Curve Sustained Max | curve_sustained_ymax testing workflow | Curve Sustained Max_2021_09_24T09_50_31.d3wfzip | 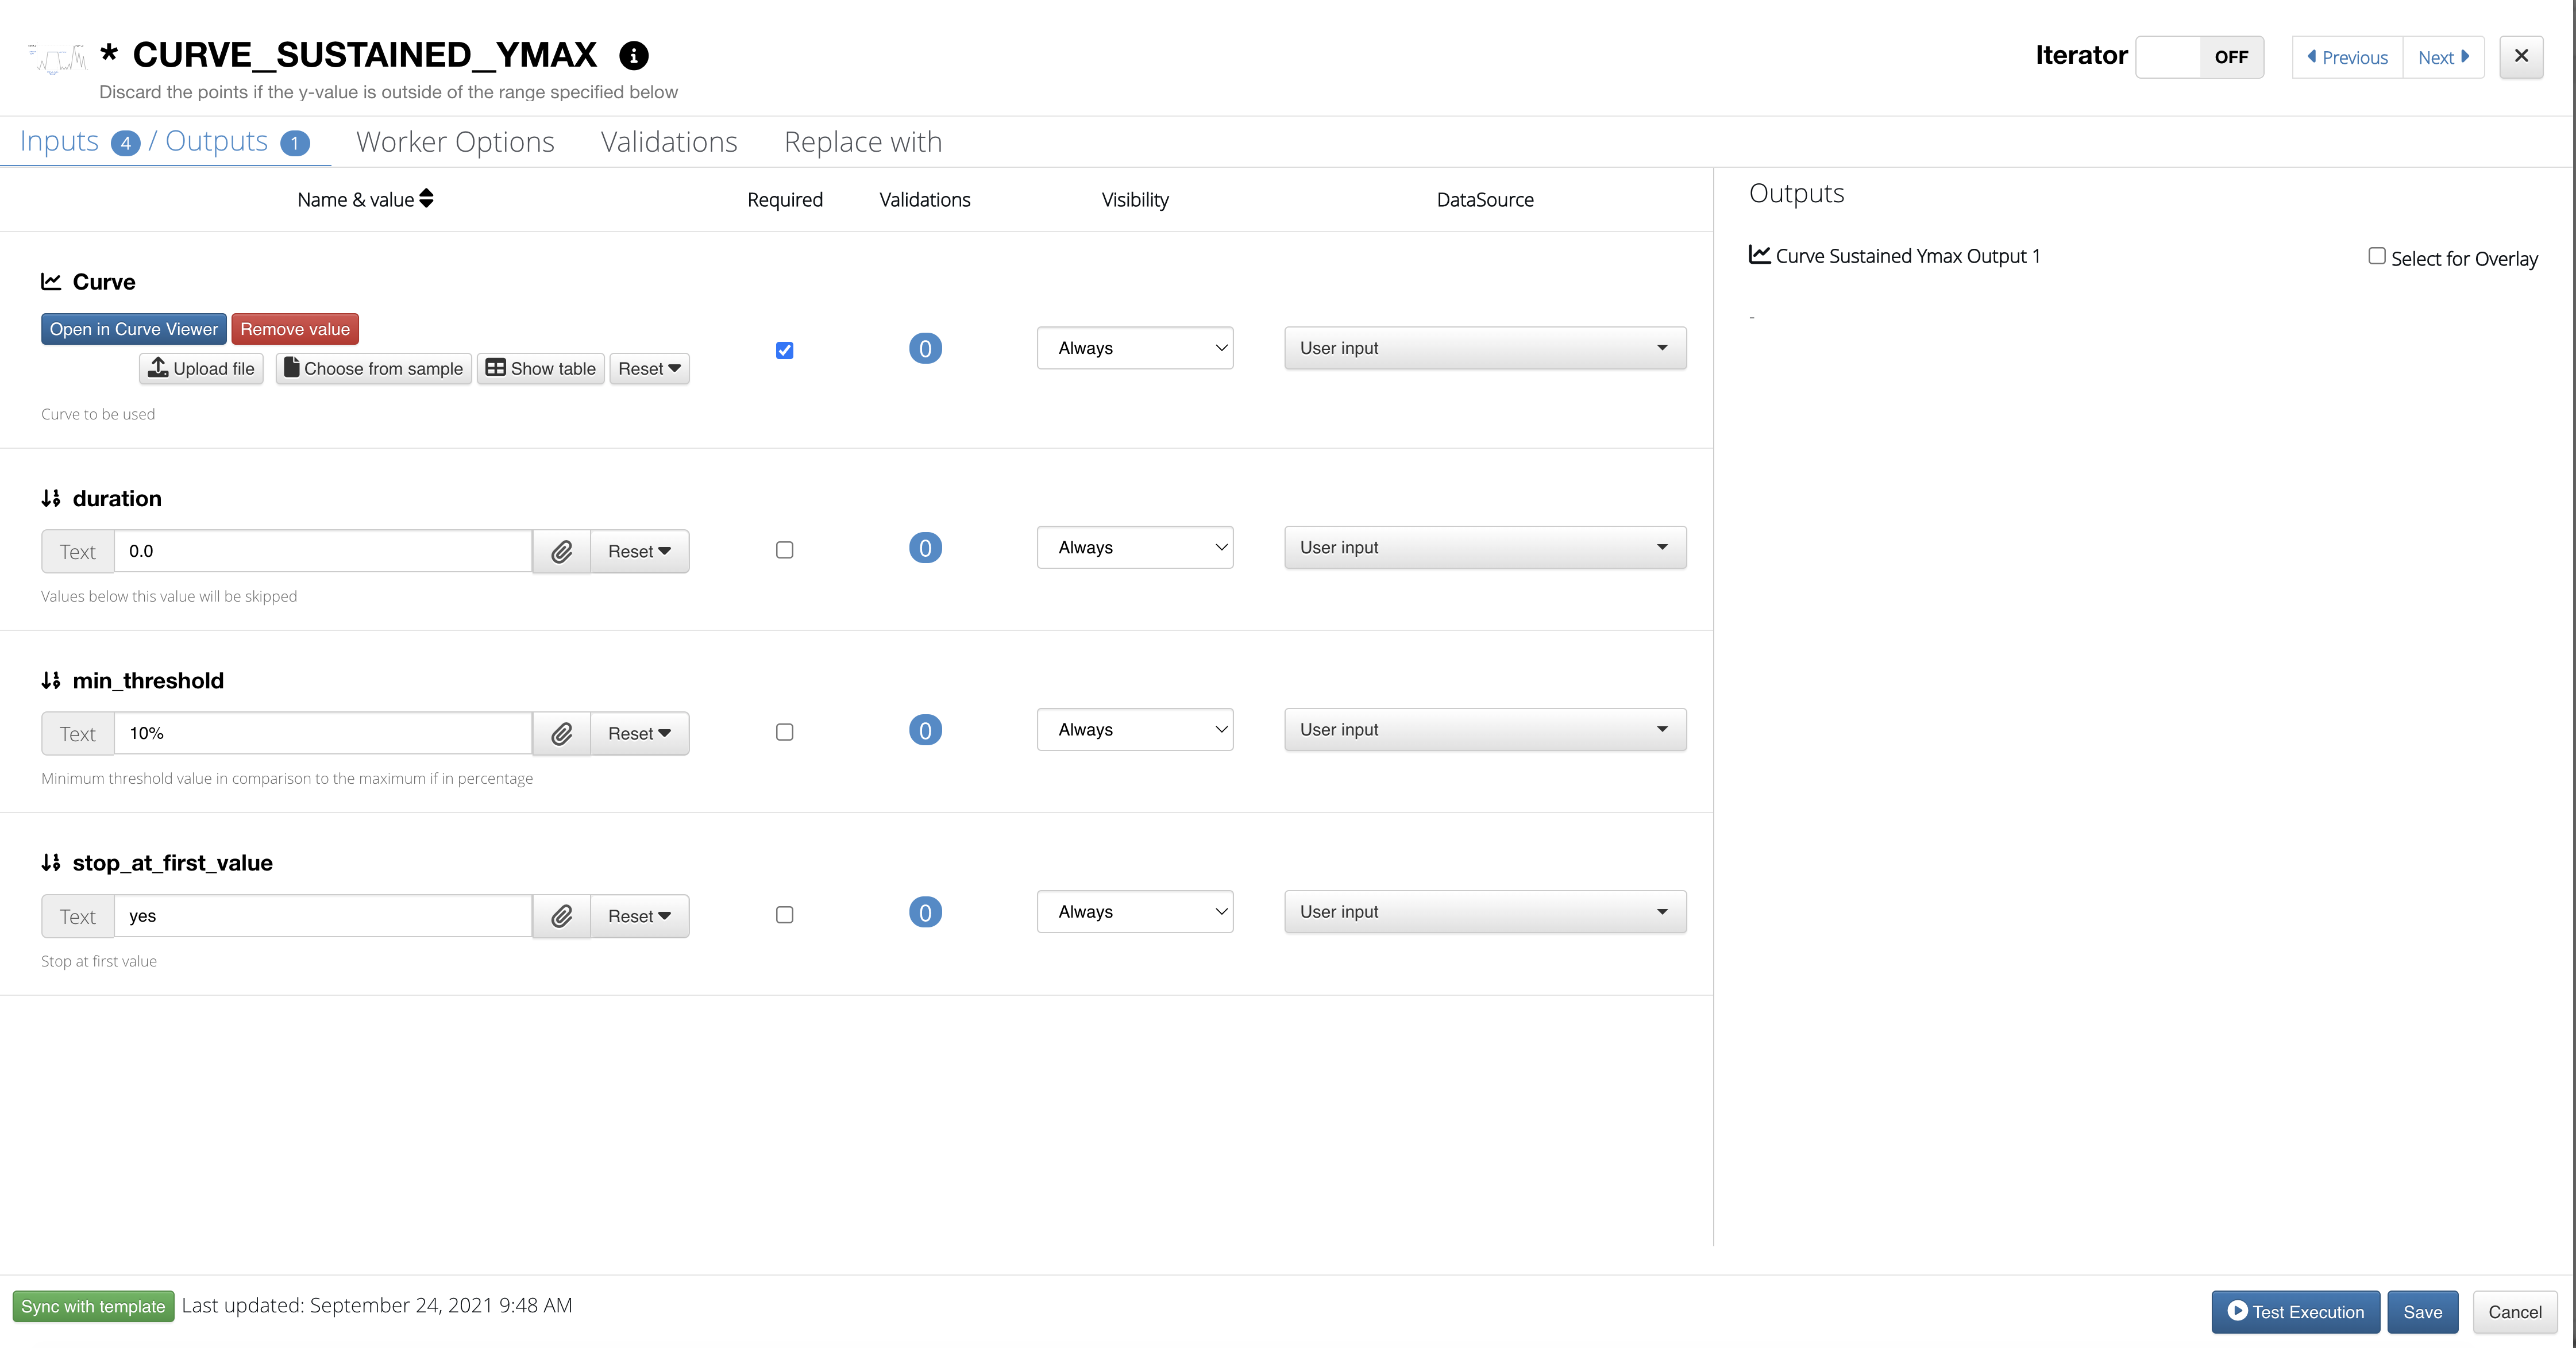
|
| 20 | Curve Vary & Set | curve_vary_y_at_x, curve_vary_xy_at_x and curve_set_y_at_x workflow | Curve Vary & Set_2021_06_24T09_54_03.d3wfzip | 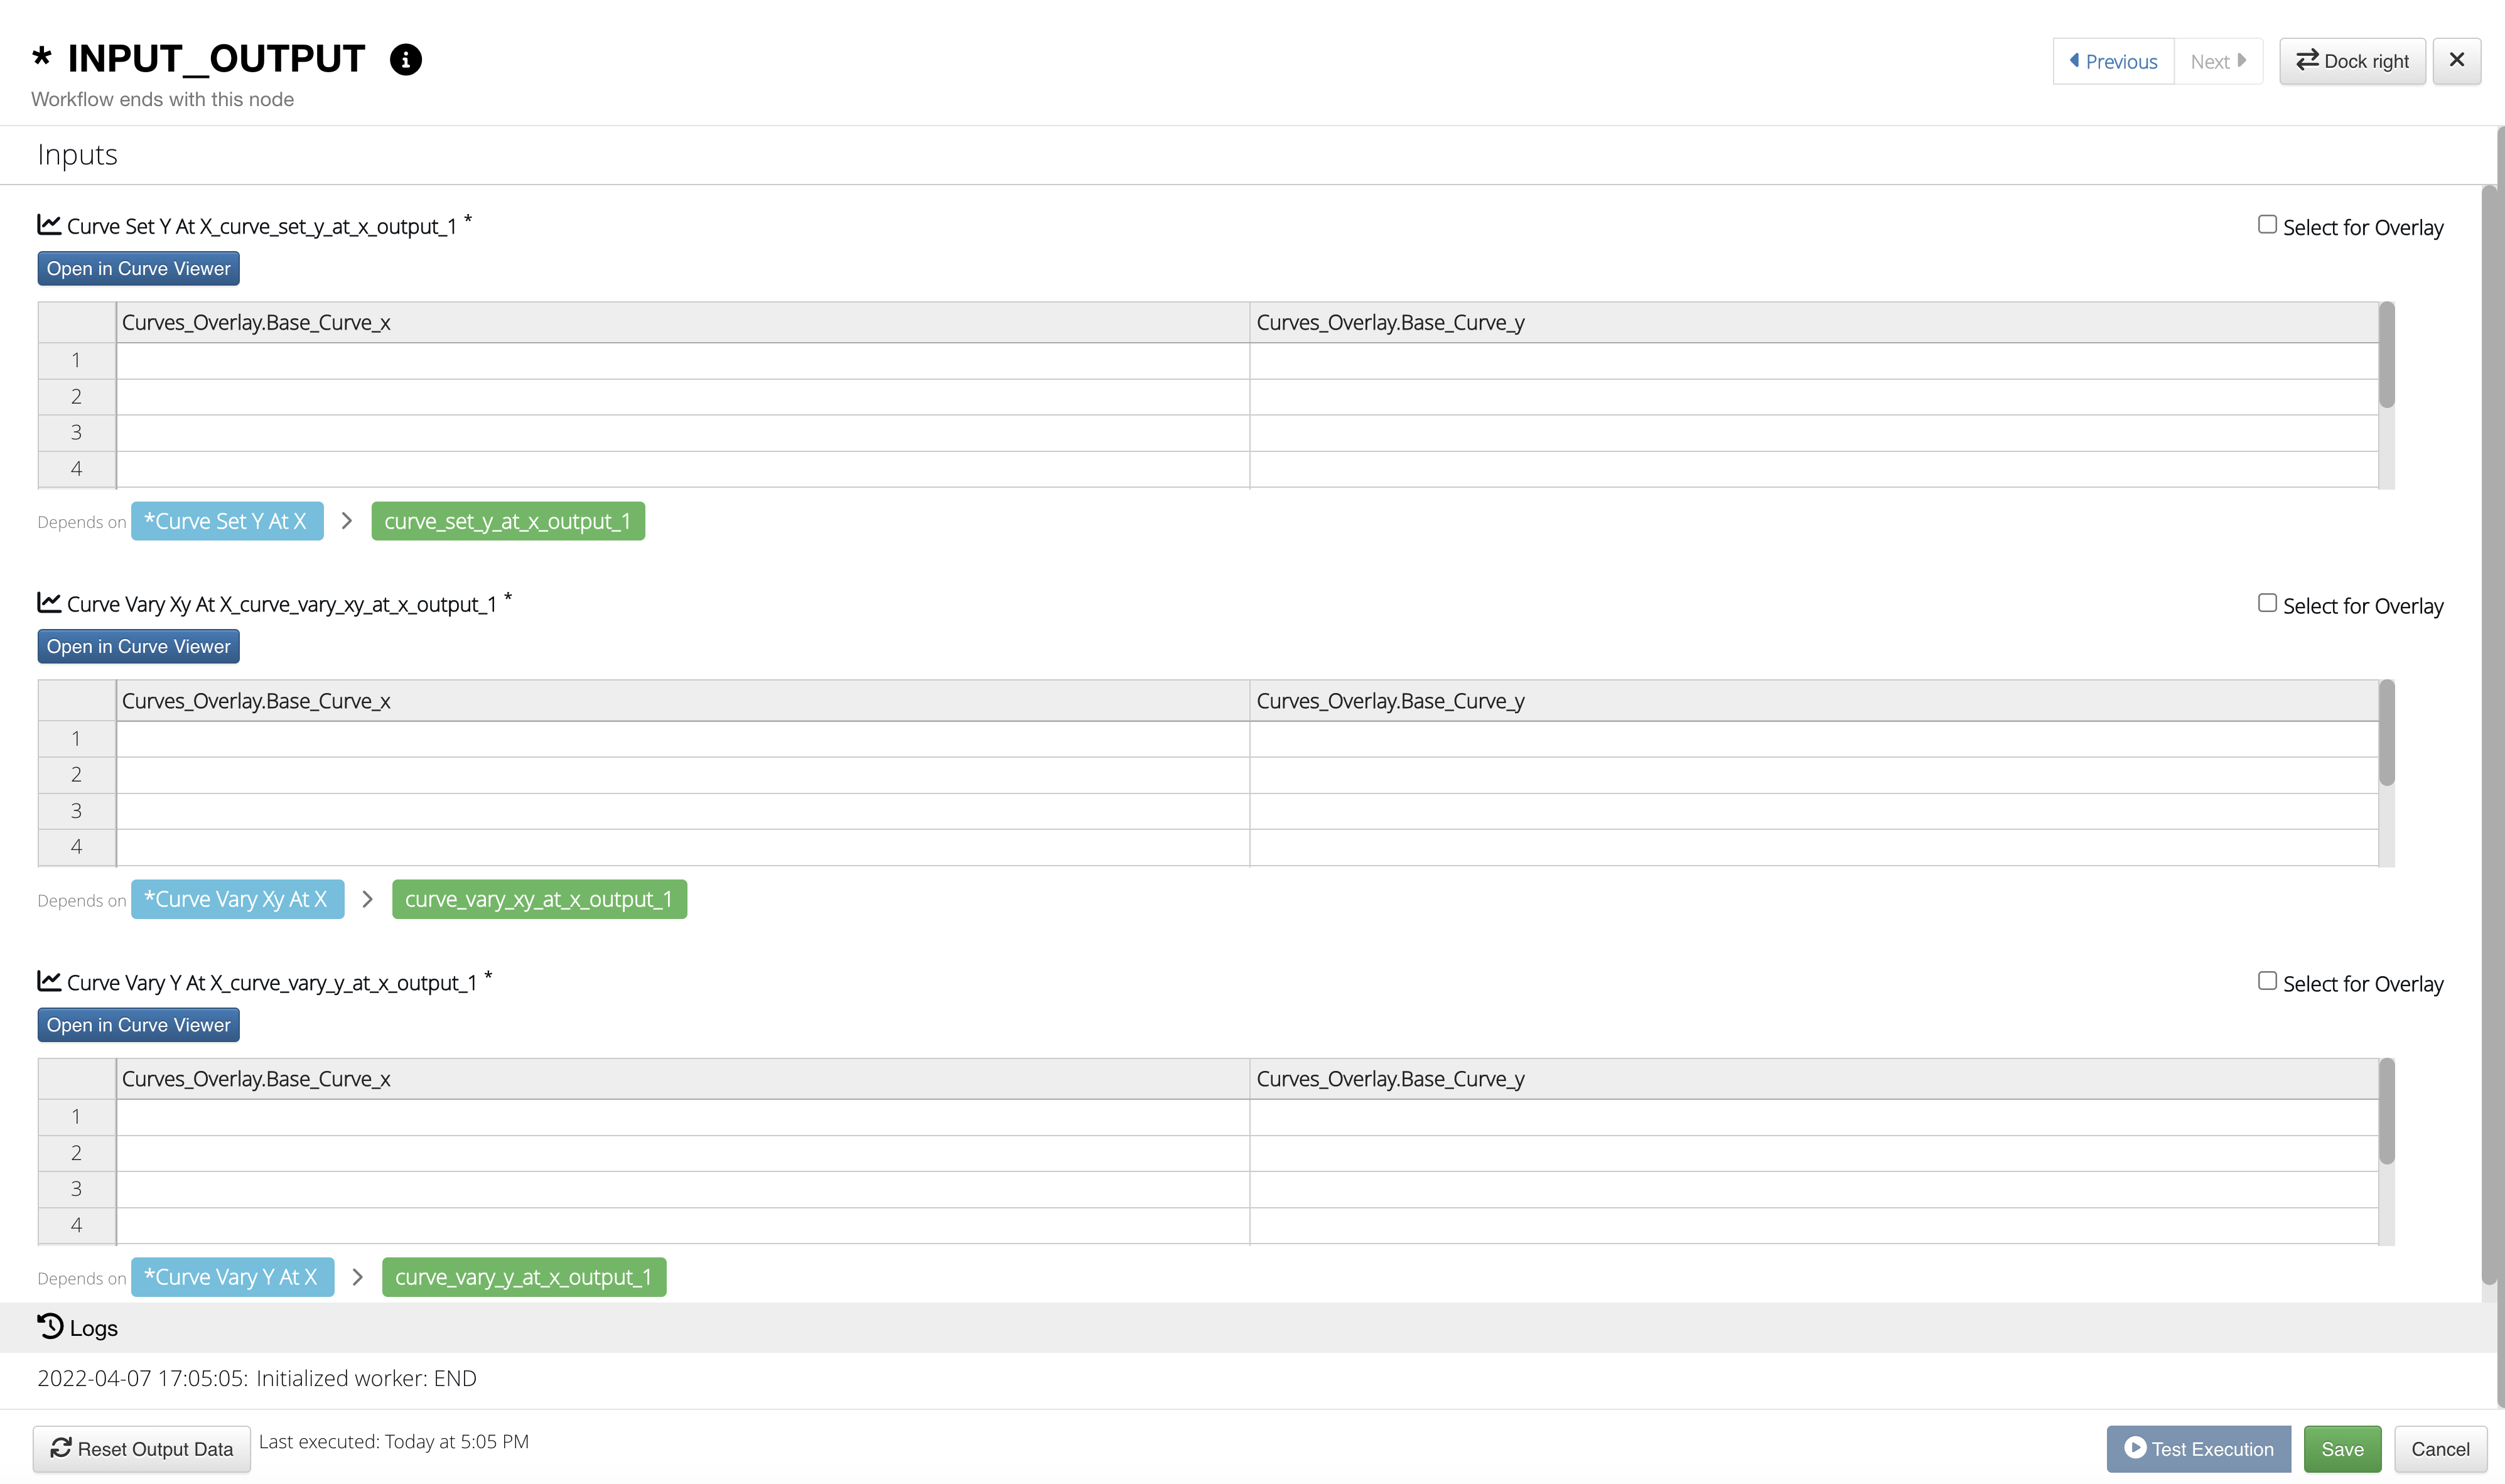
|
8.2. Simple Curve Workflow Example
Let’s go over building and executing a basic Workflow.
Create a New Workflow
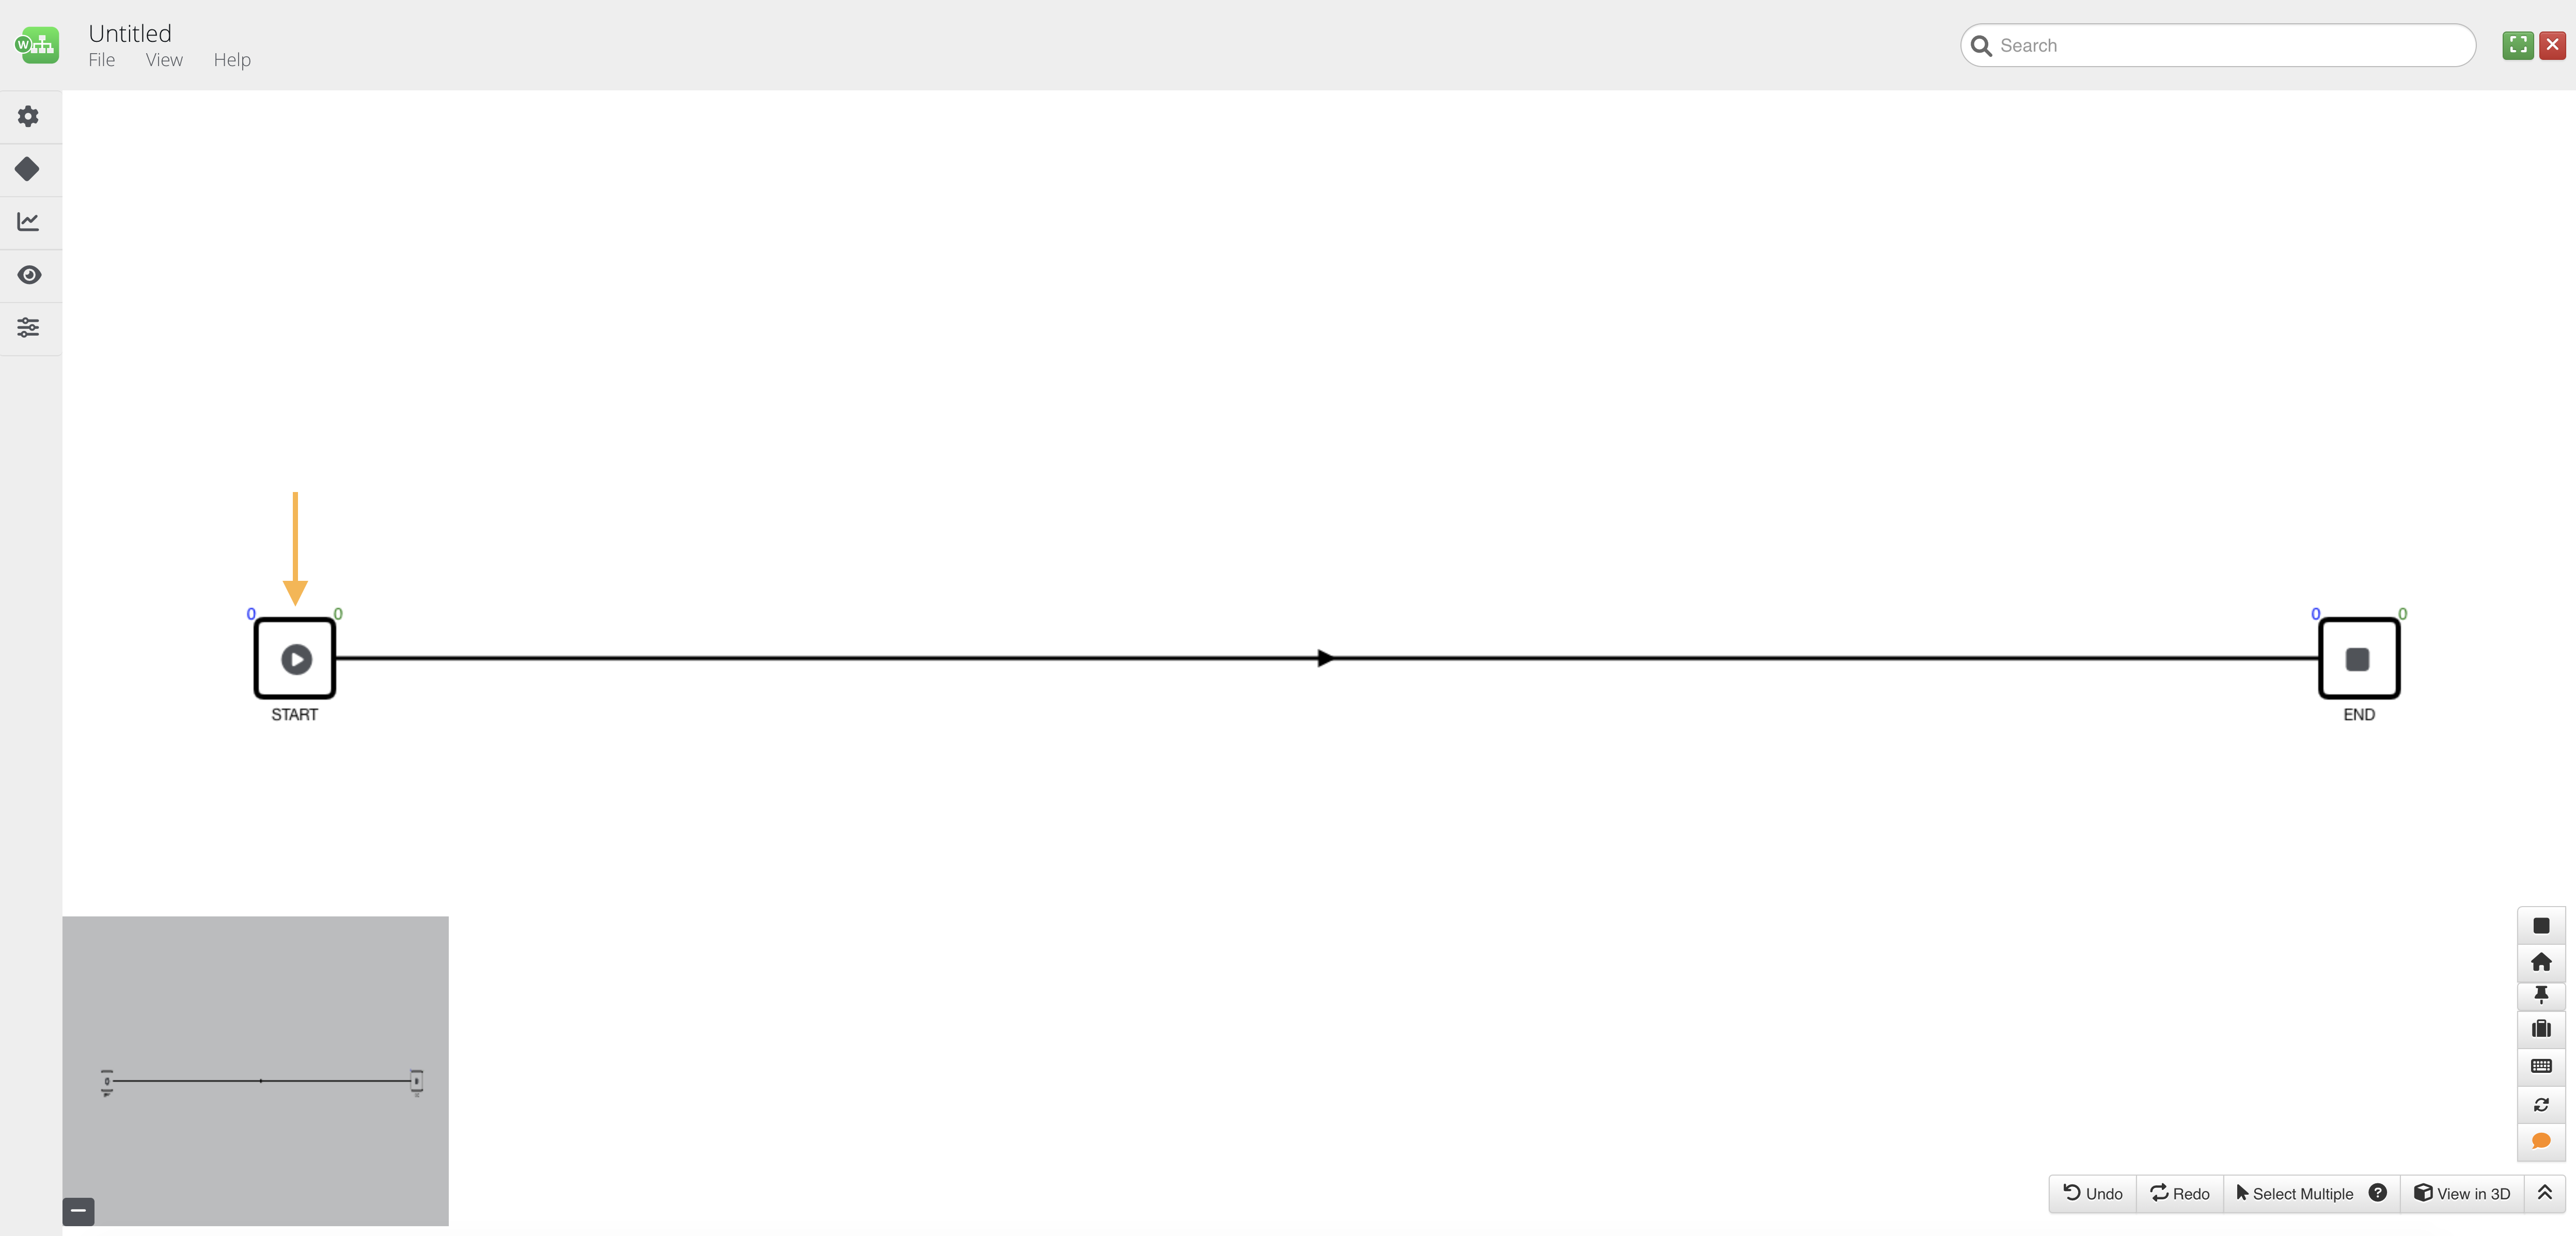
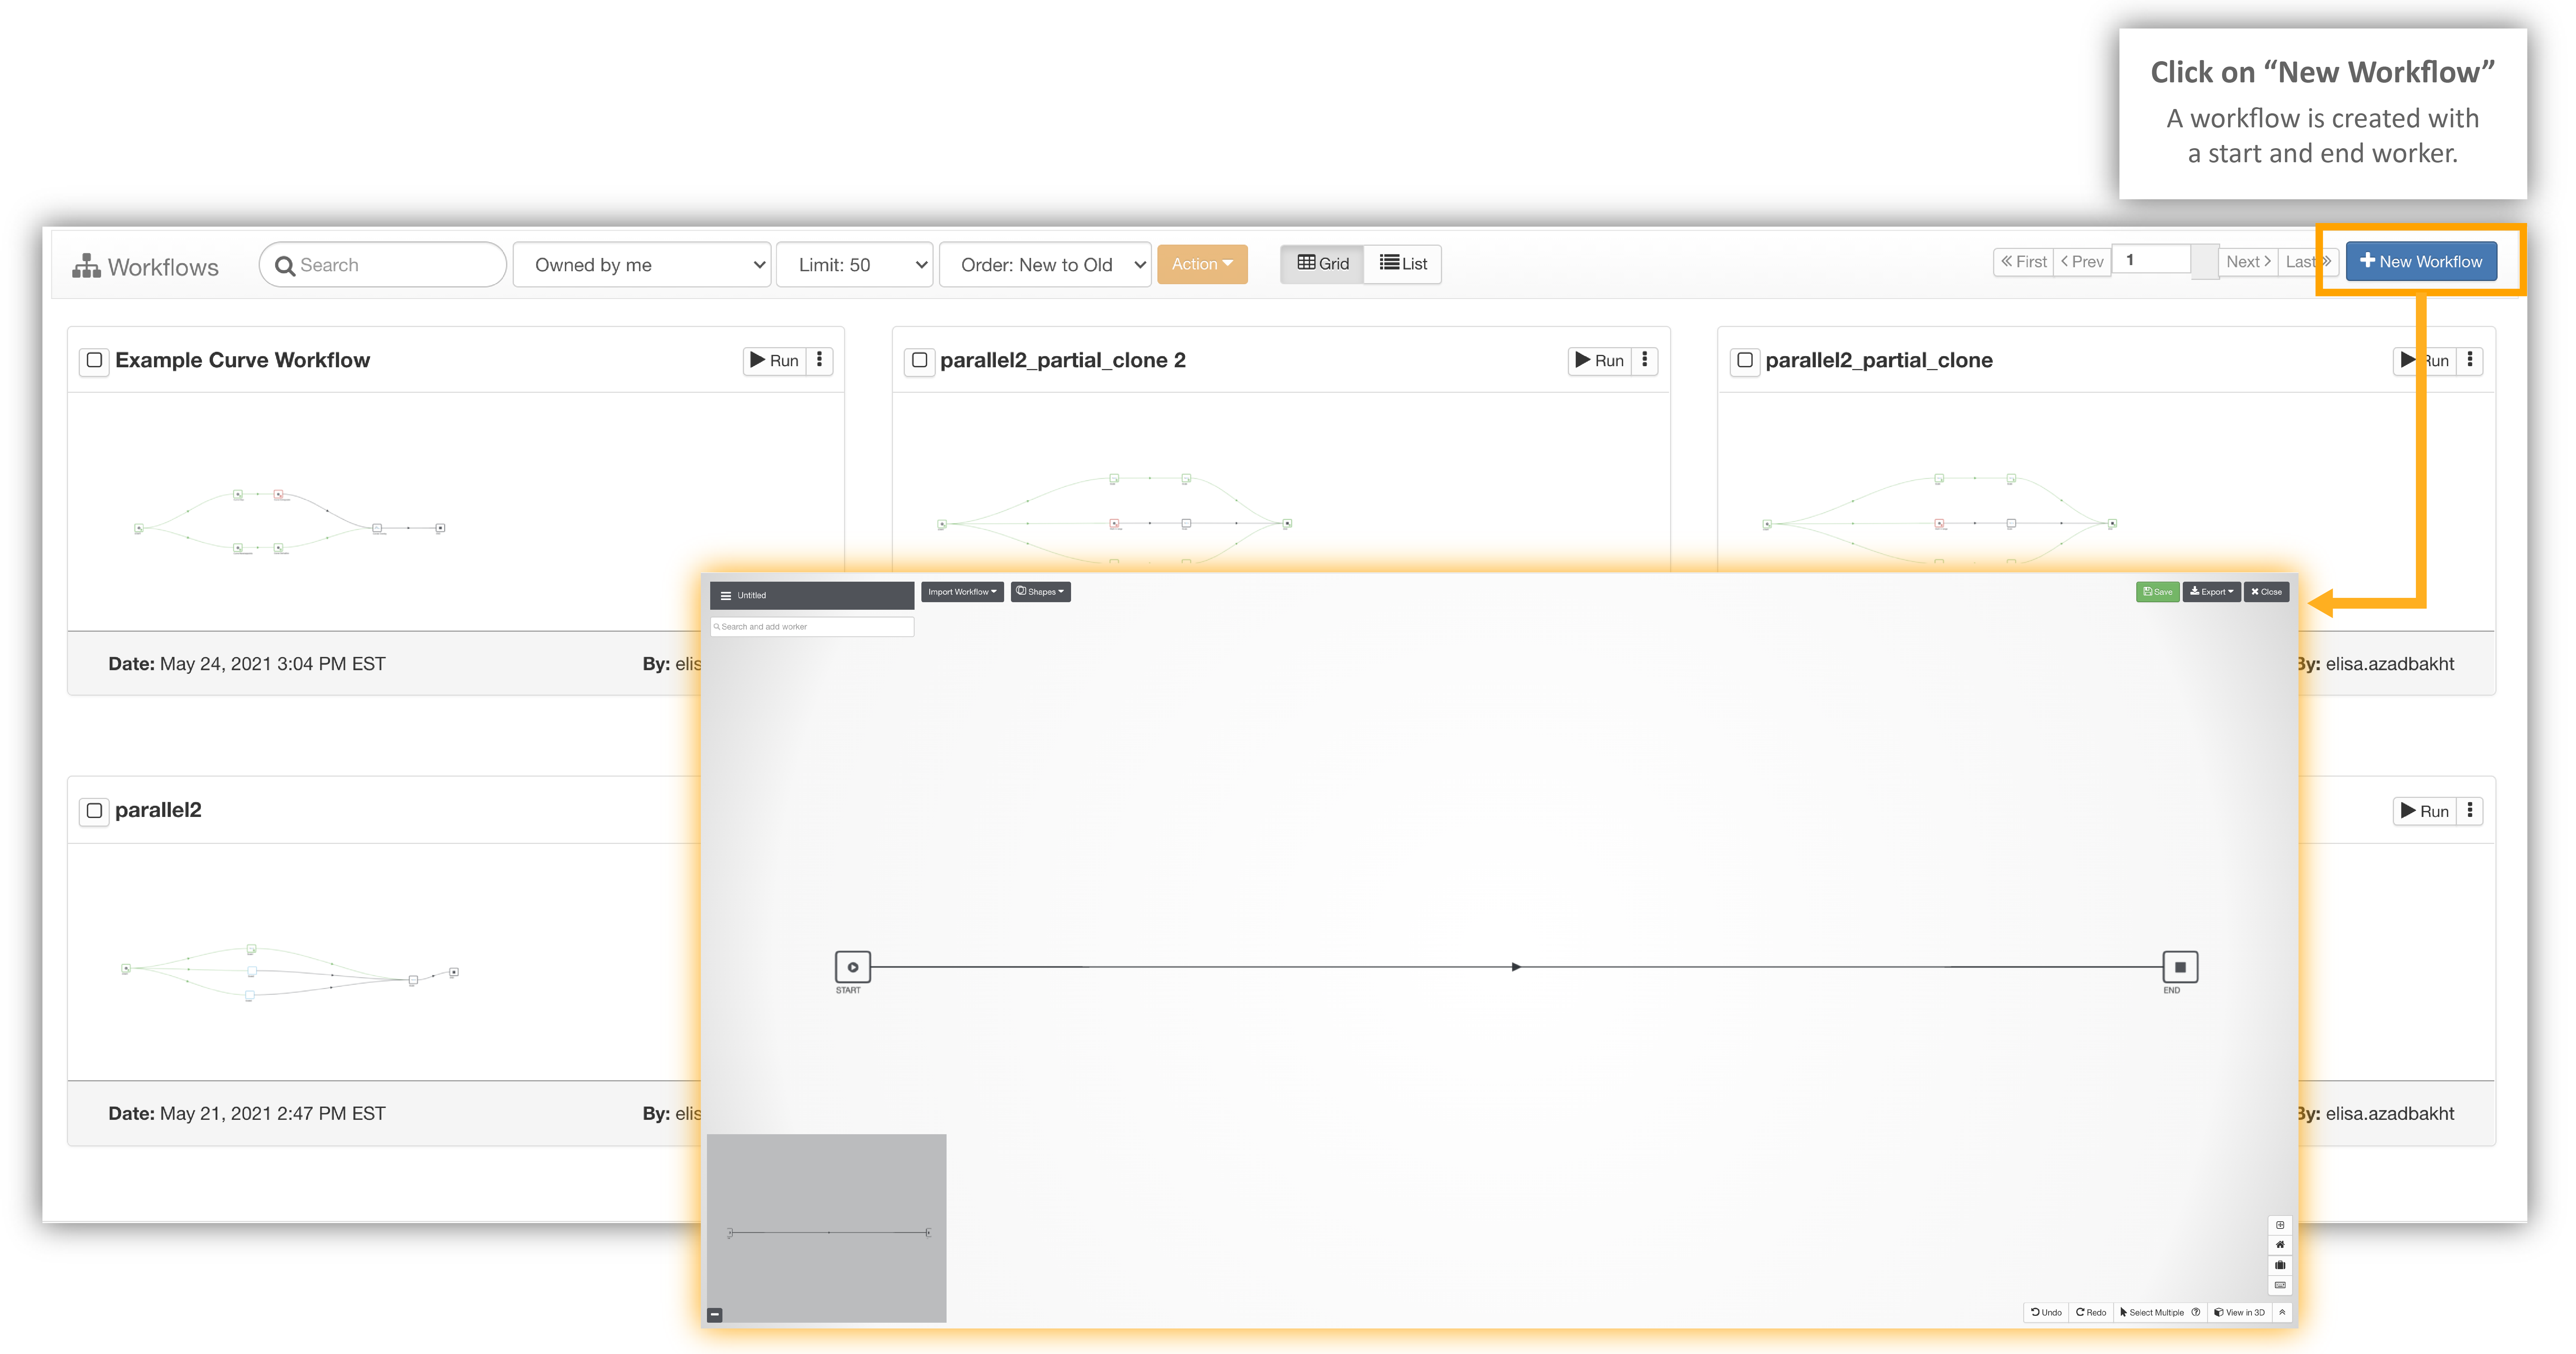
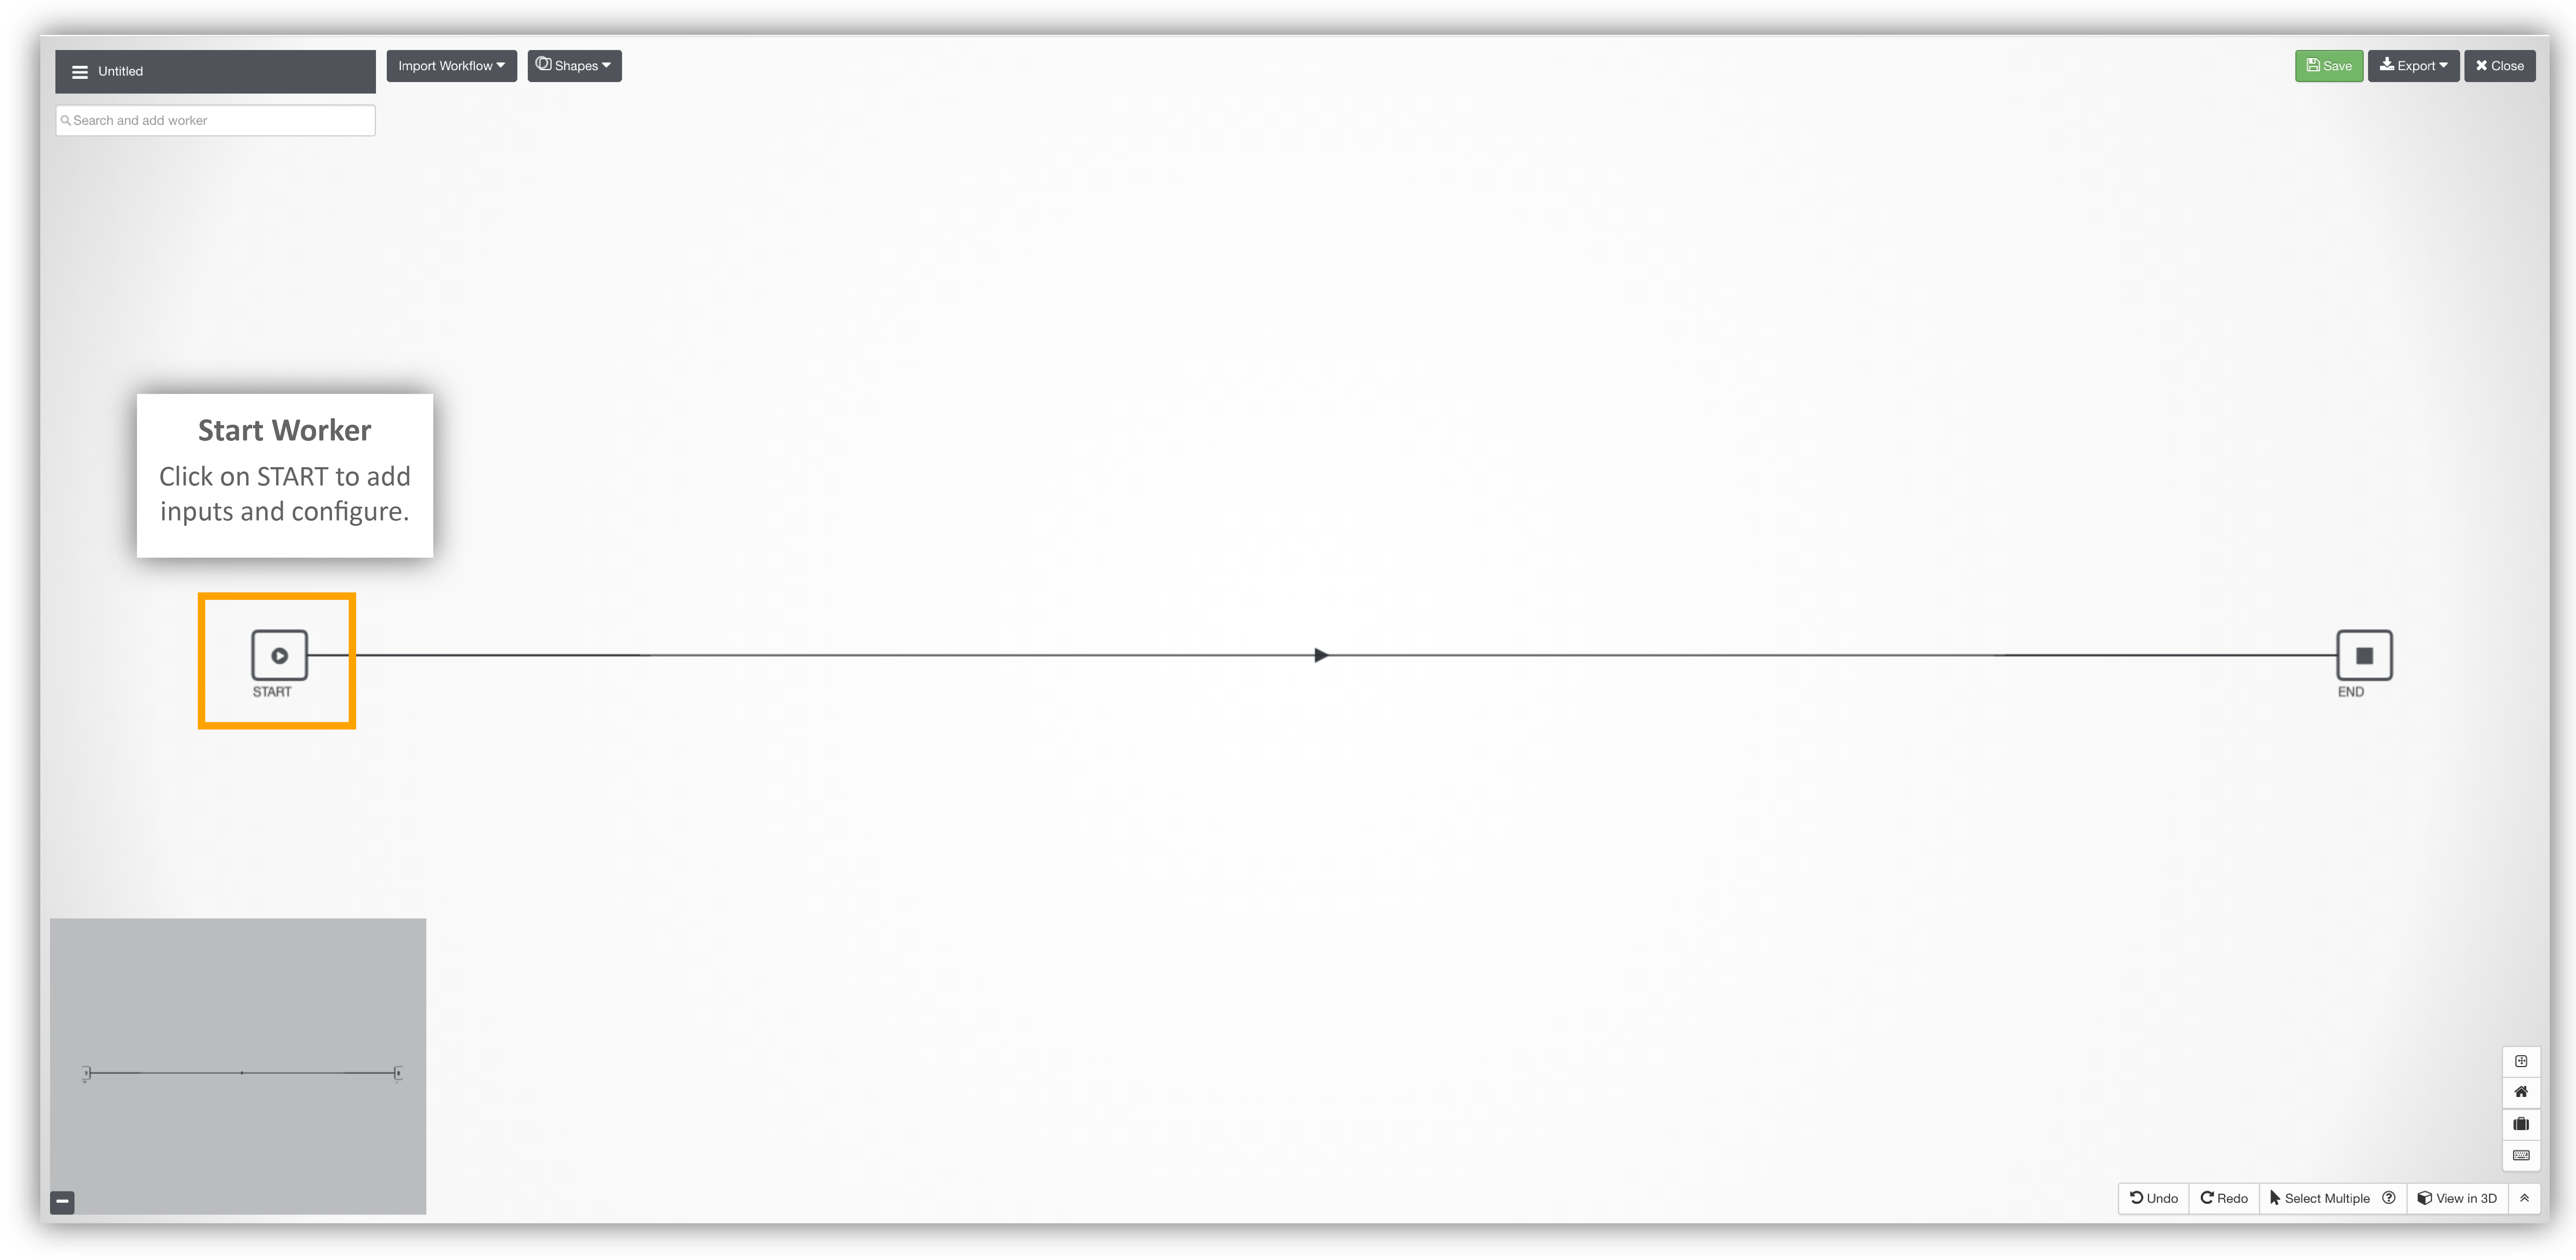
Create a New workflow by clicking on the ‘New Workflow’ icon at the top of the Workflows page. A Canvas will open with the start and the end worker.
Create New Workflow
START worker configuration
Click on the START worker to configure it.
Click on Start Worker
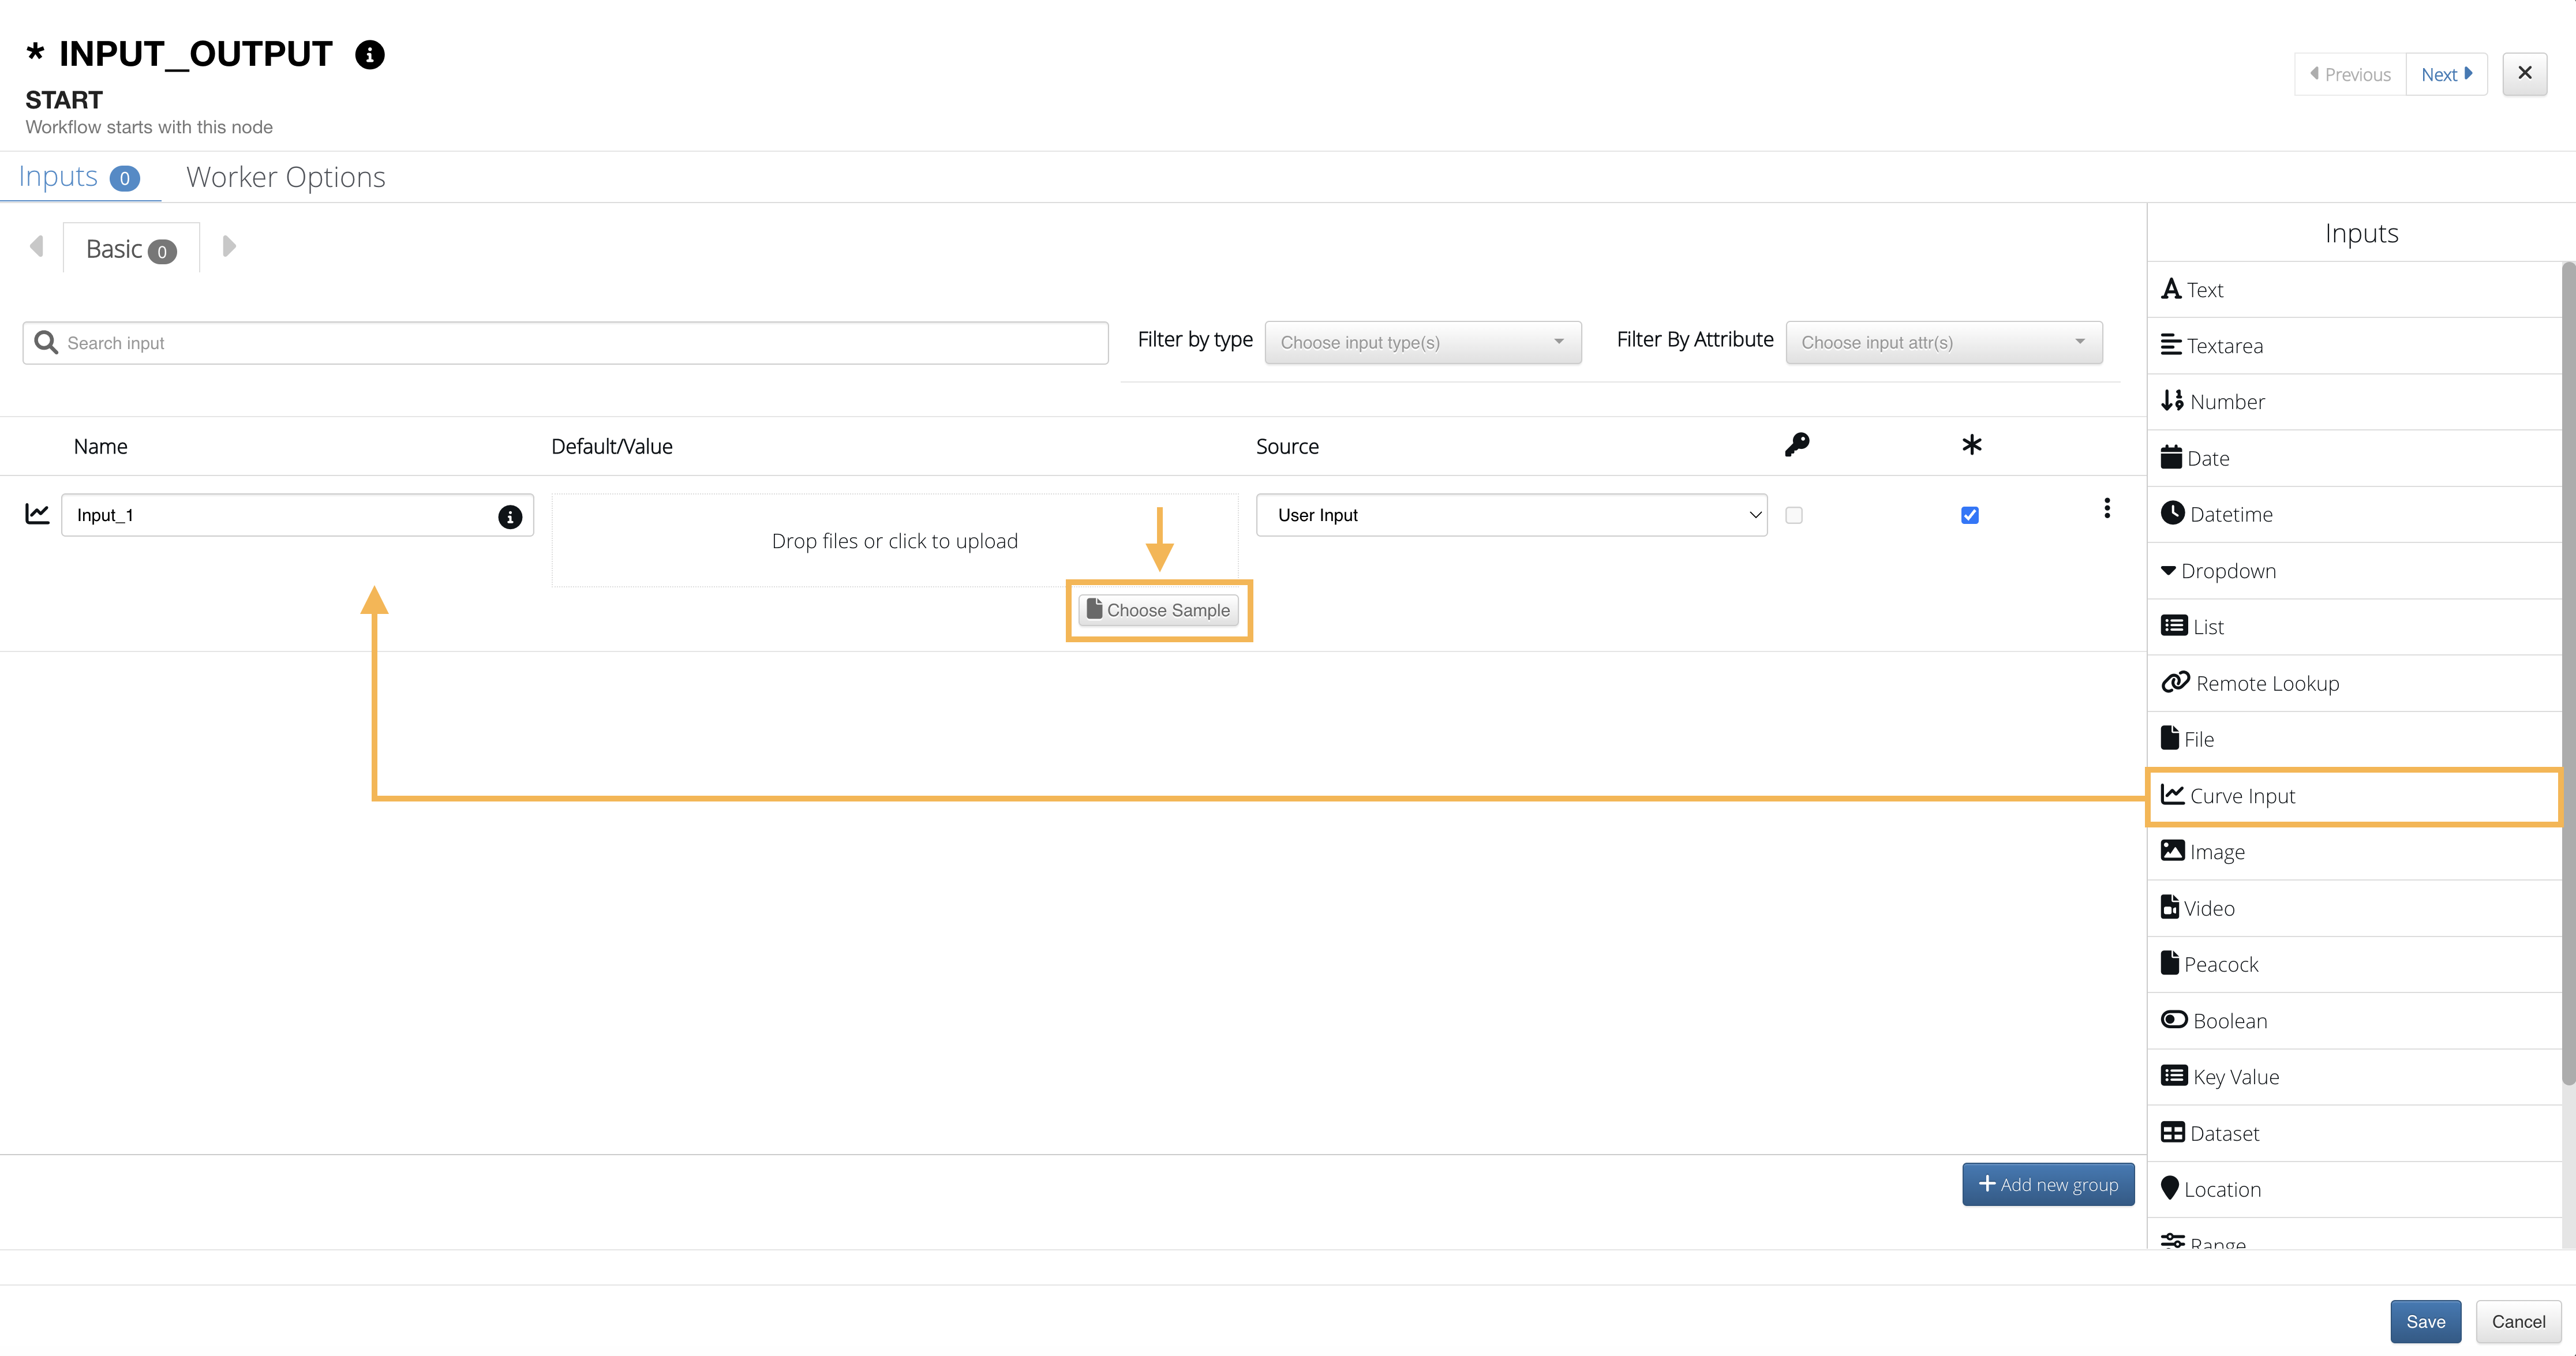
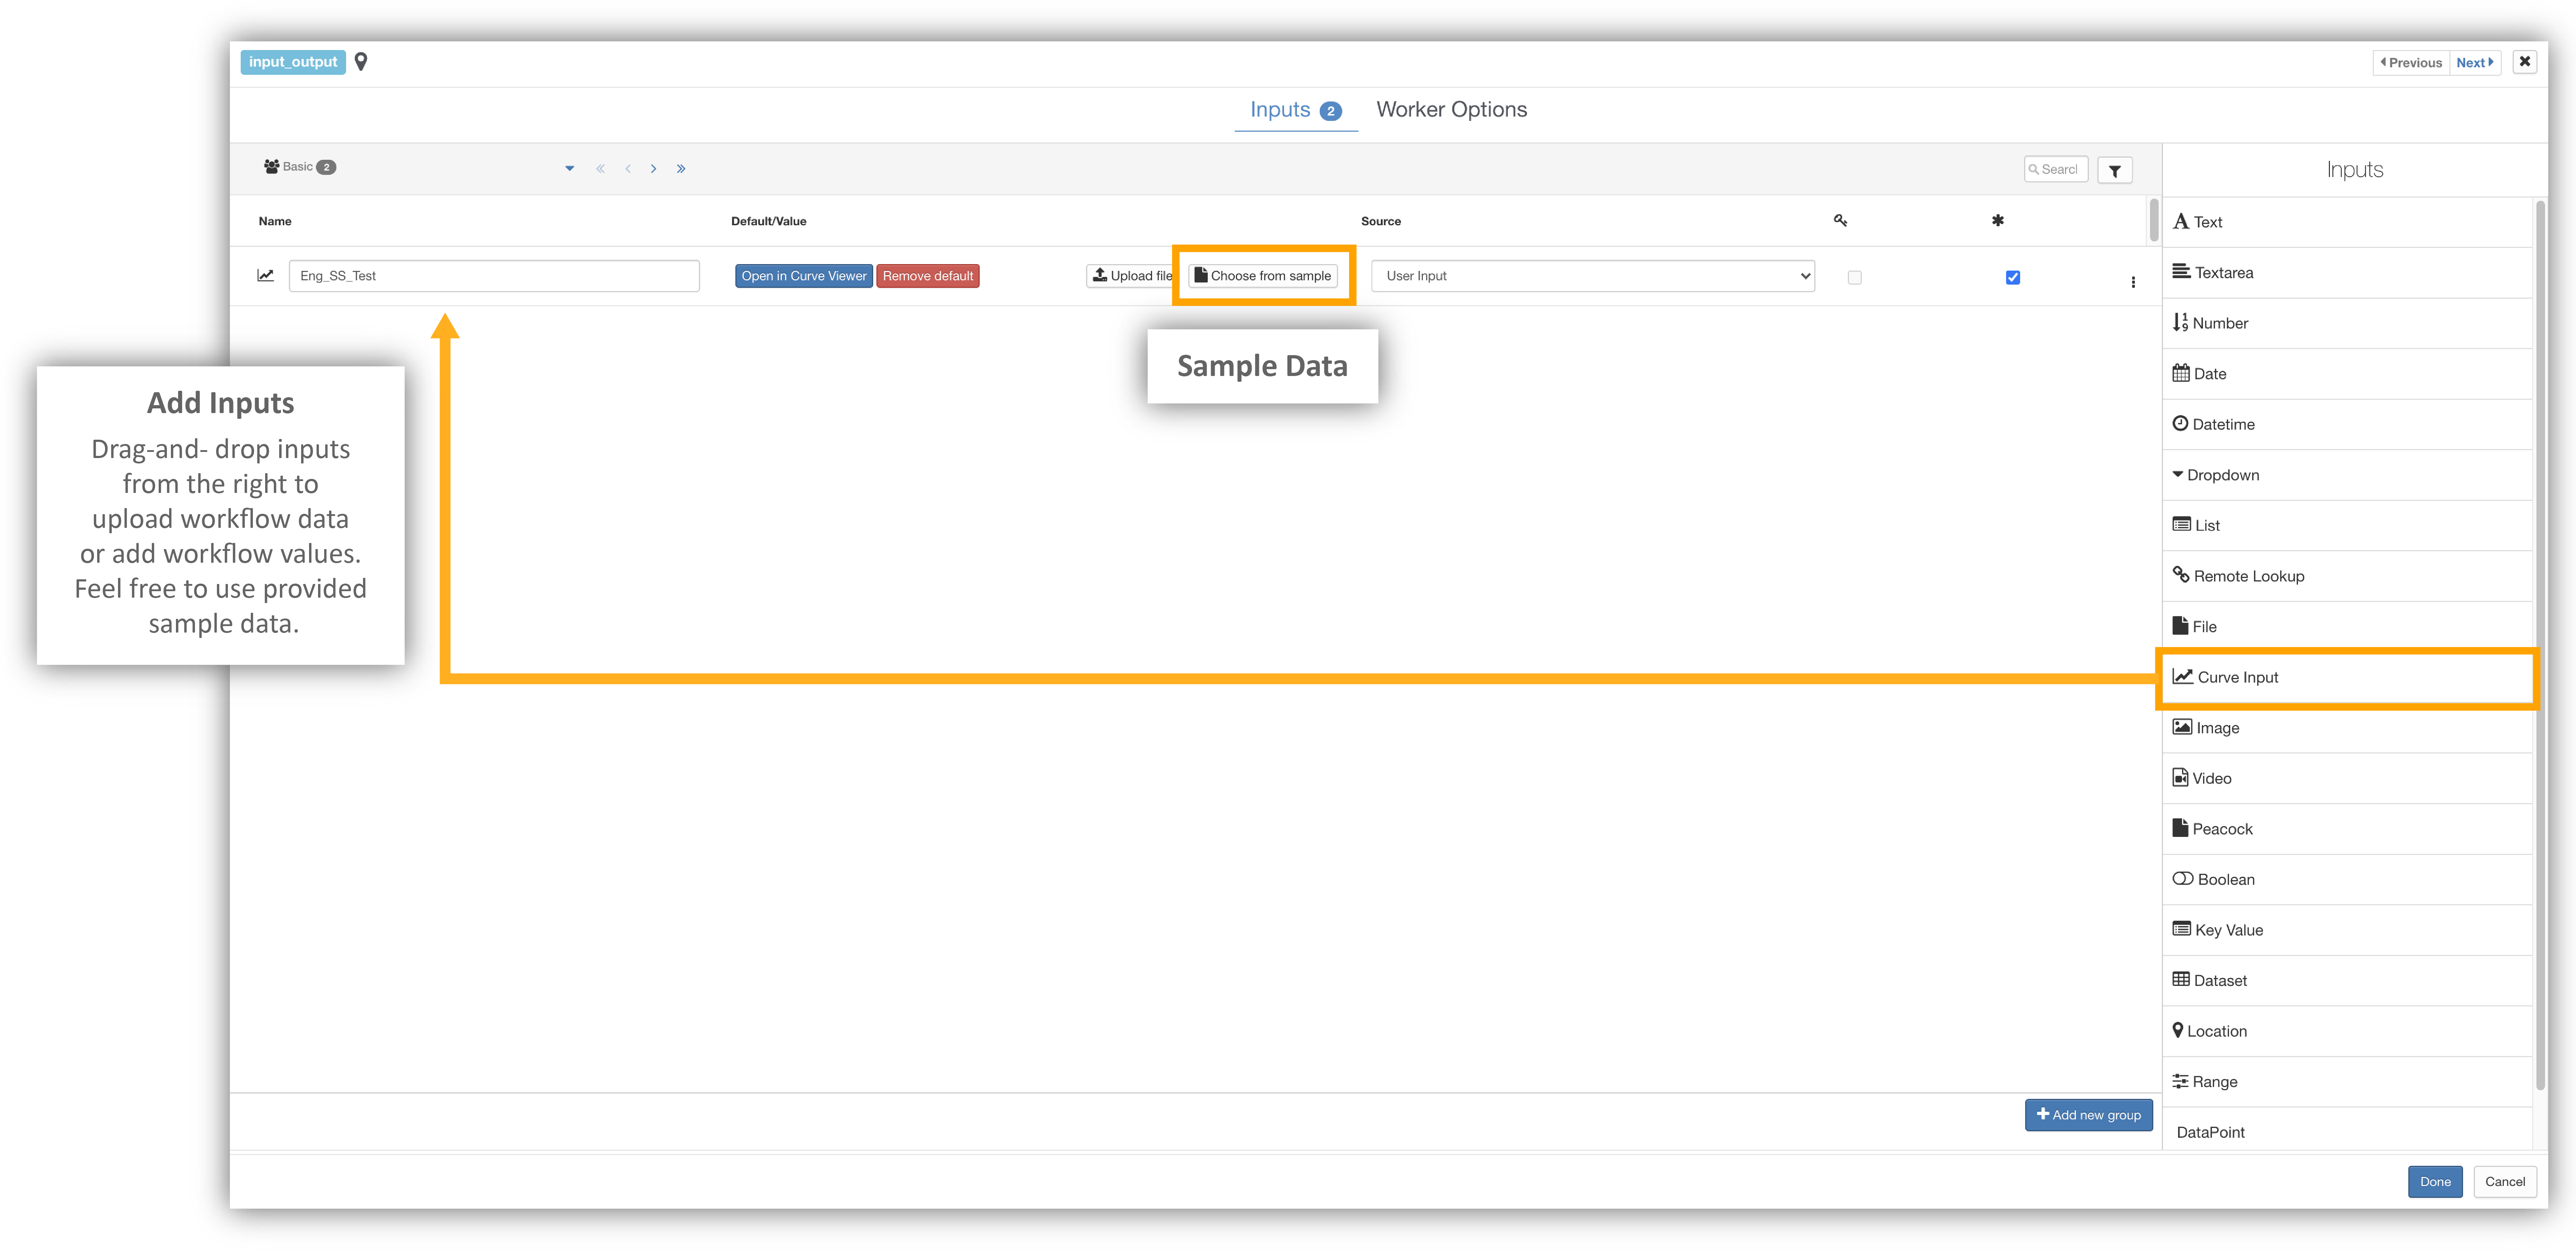
We’ll drag-and-drop a curve input from the right, and choose from sample.
Add Curve Input
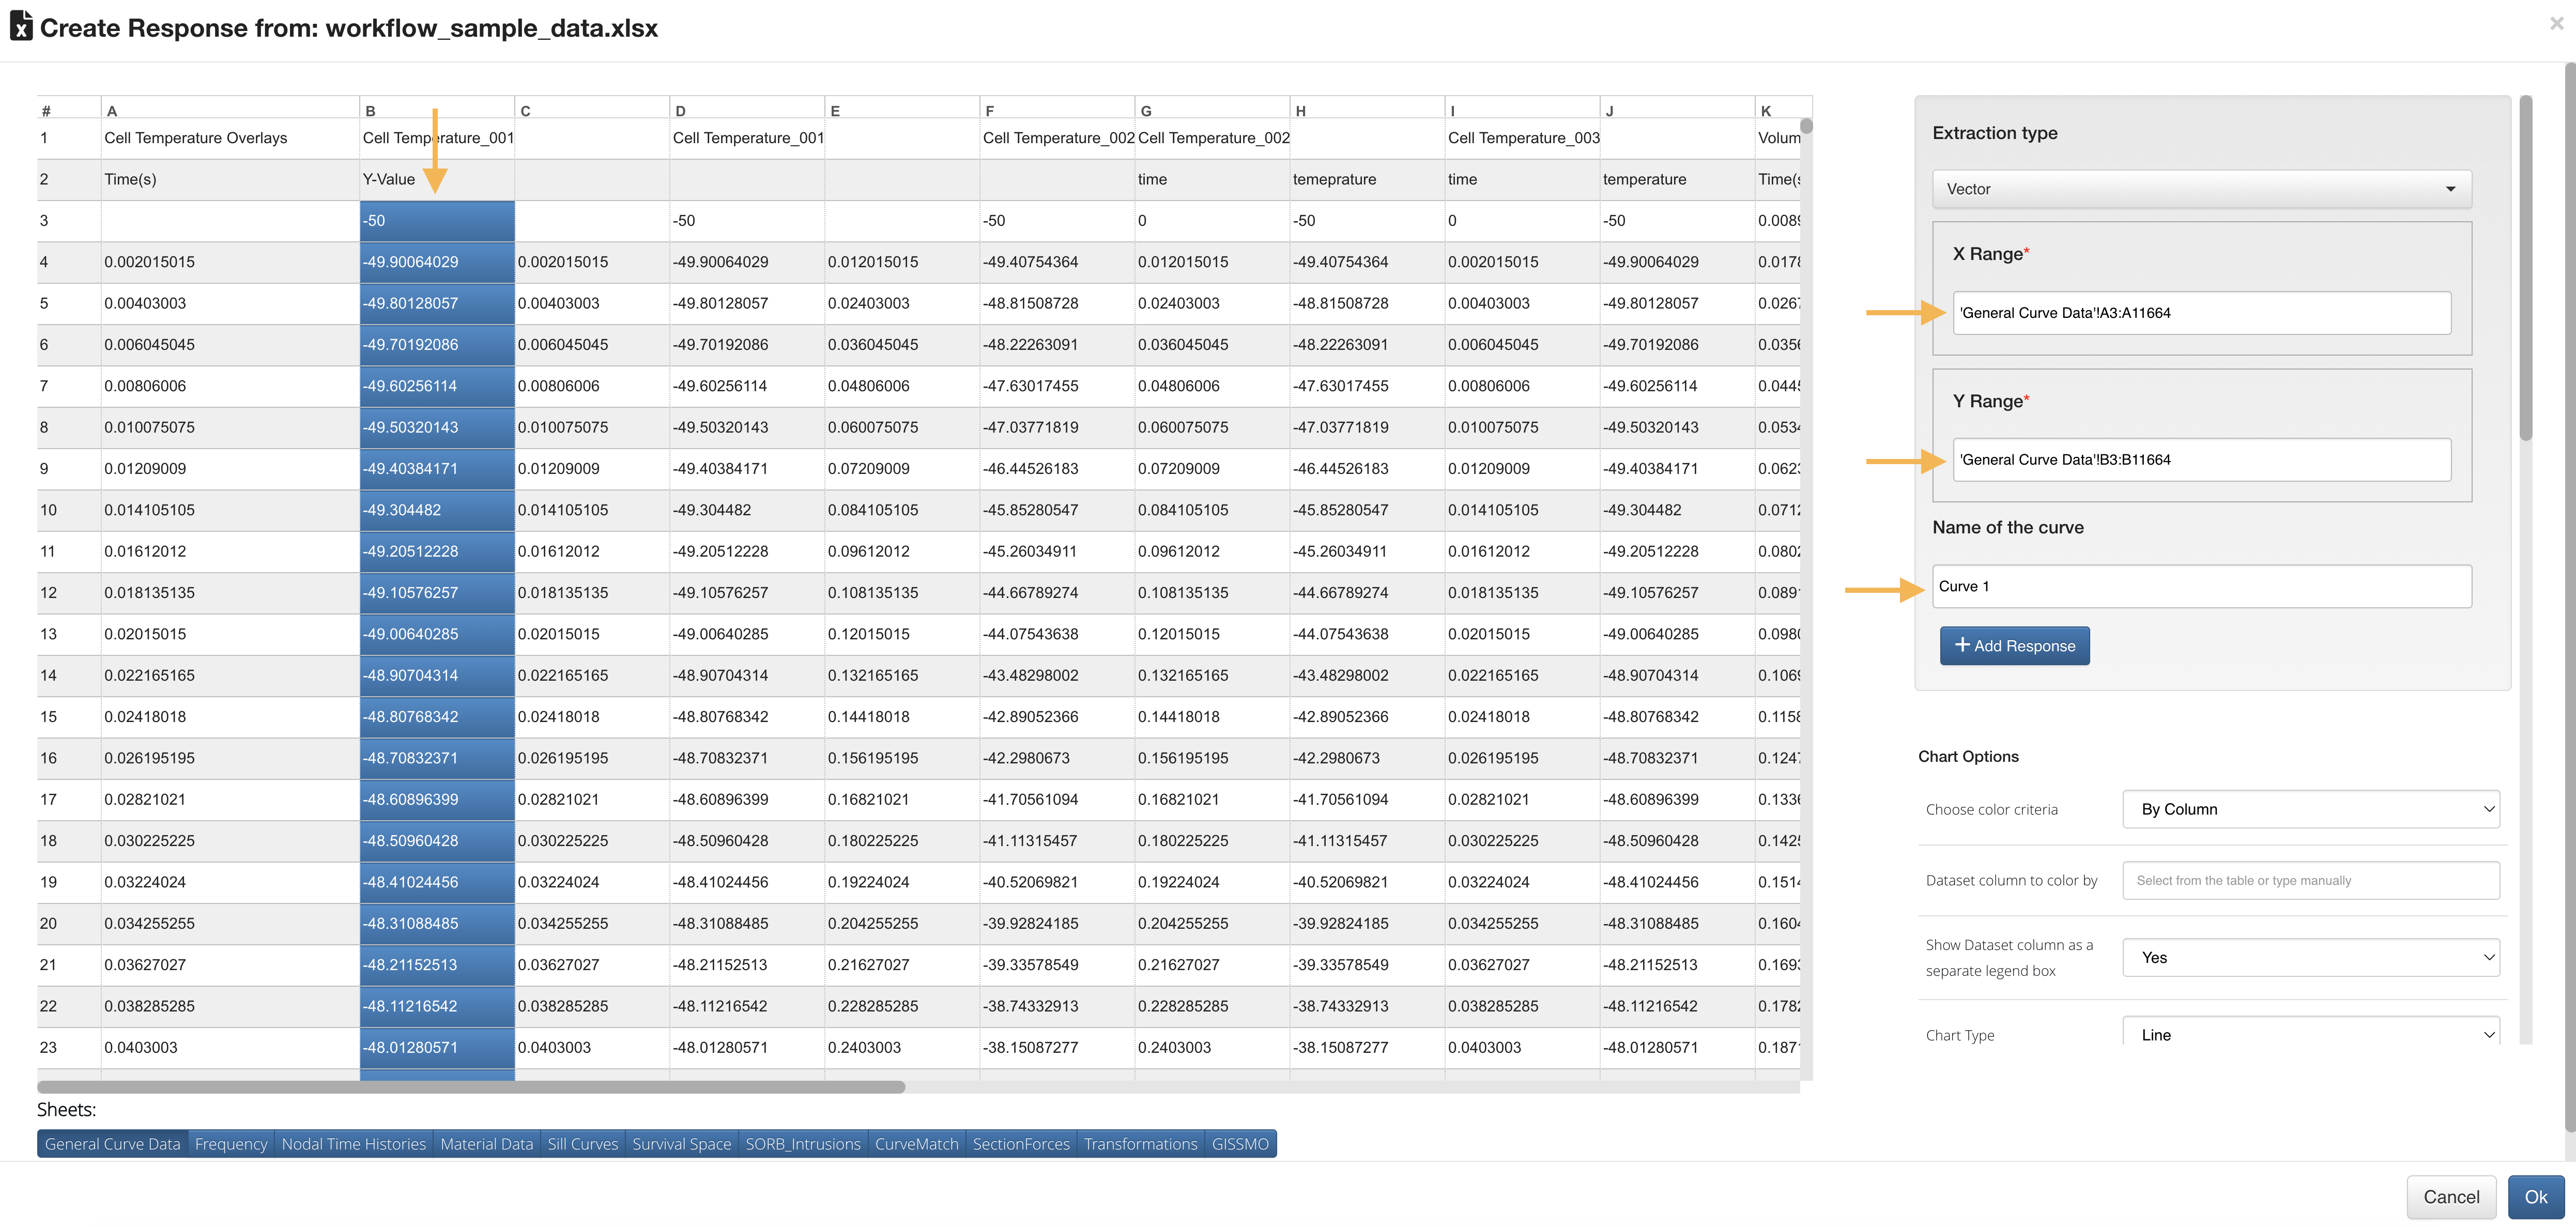
Double click on a column to add it as the x points and do the same for the y points. Make sure to name the Curve.
Choose Sample Curve Points
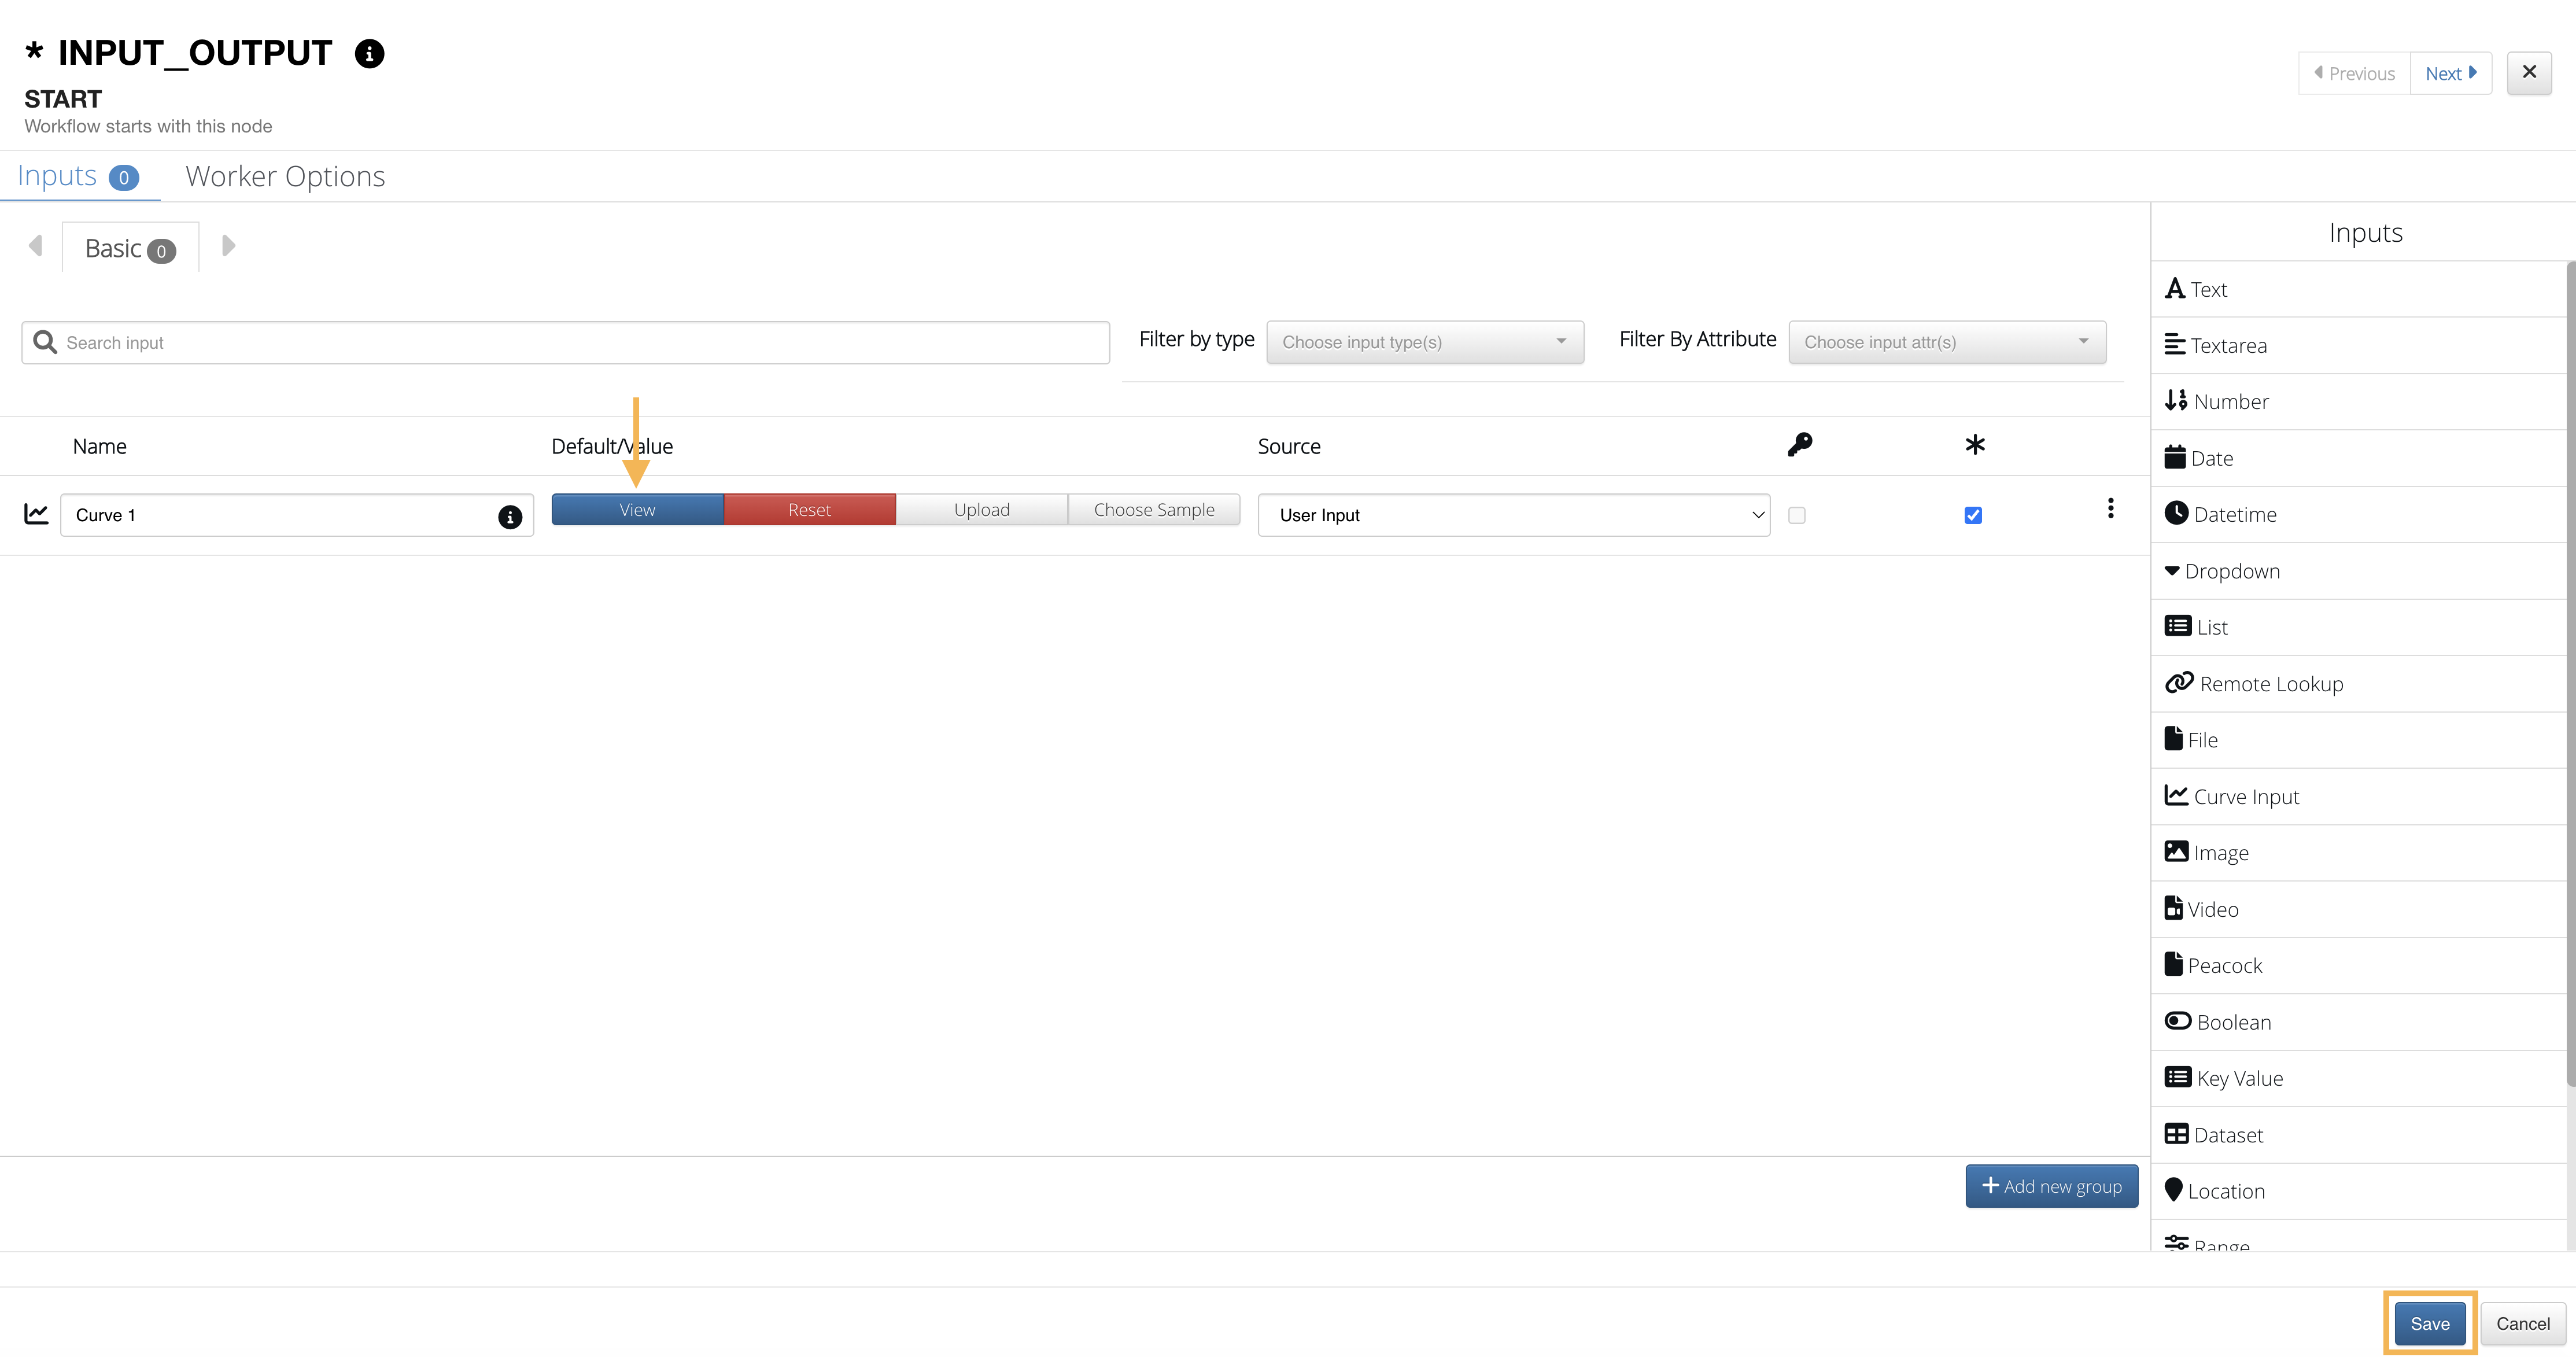
We can view the curve to make sure it’s what we want to use. Finish configuring the START worker by clicking Save.
Save Configuration
Adding Workers
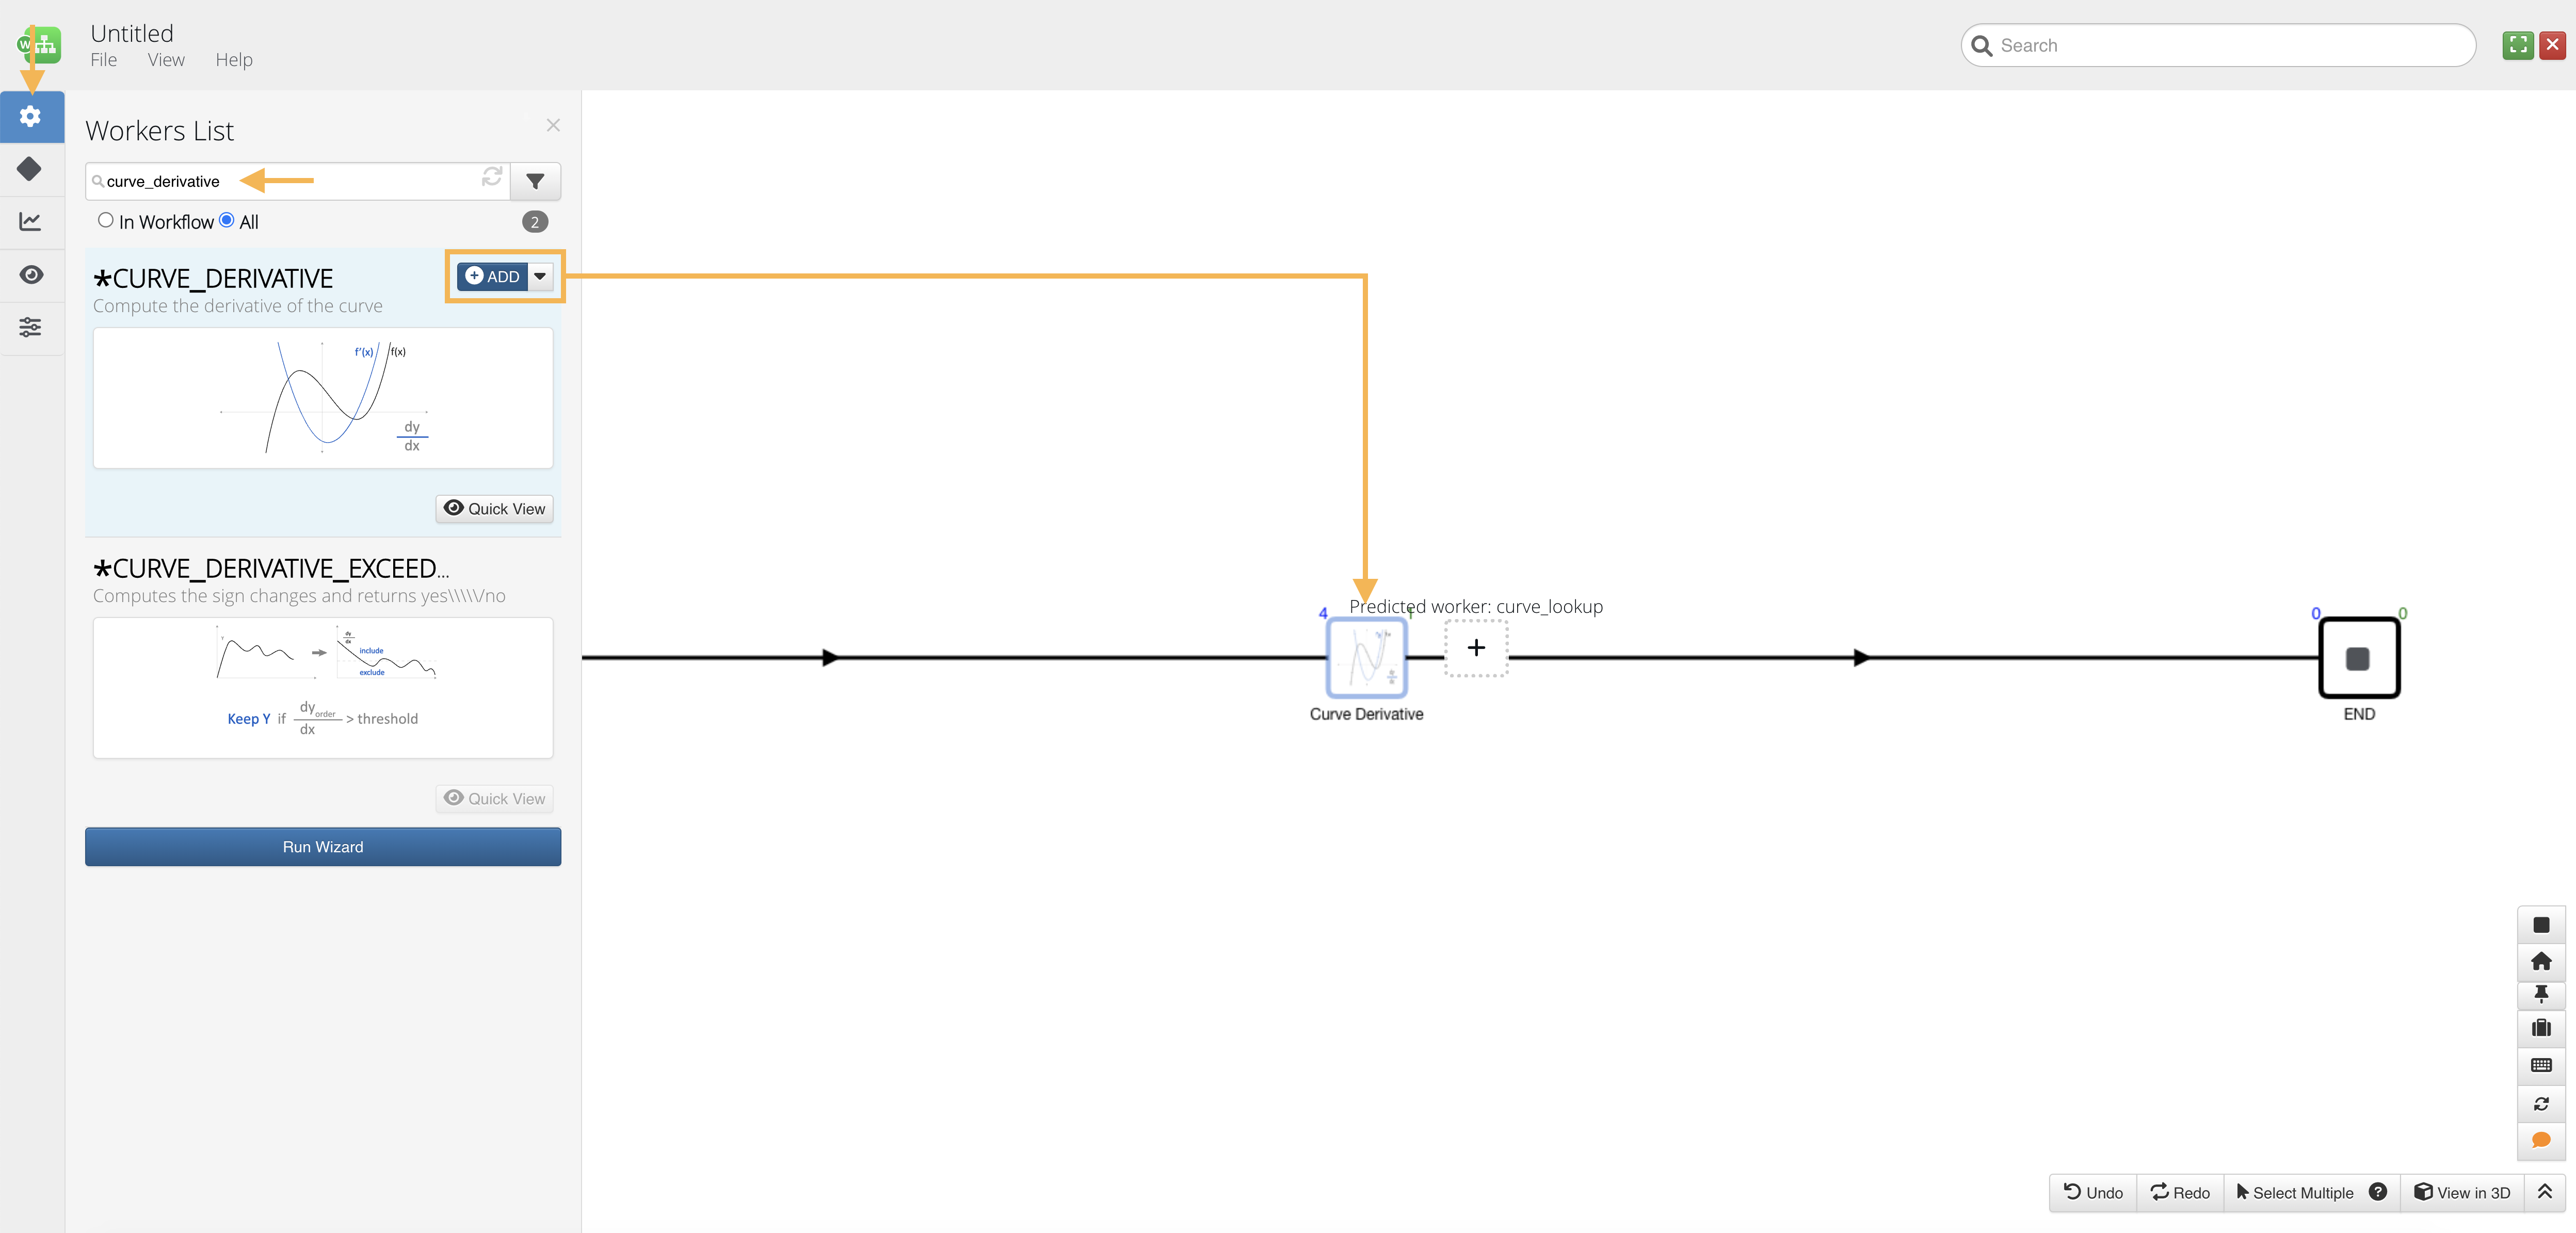
Let’s open the worker library (cog icon on the left side panel), search for CURVE_DERIVATIVE and add it to the canvas.
Add CURVE_DERIVATIVE
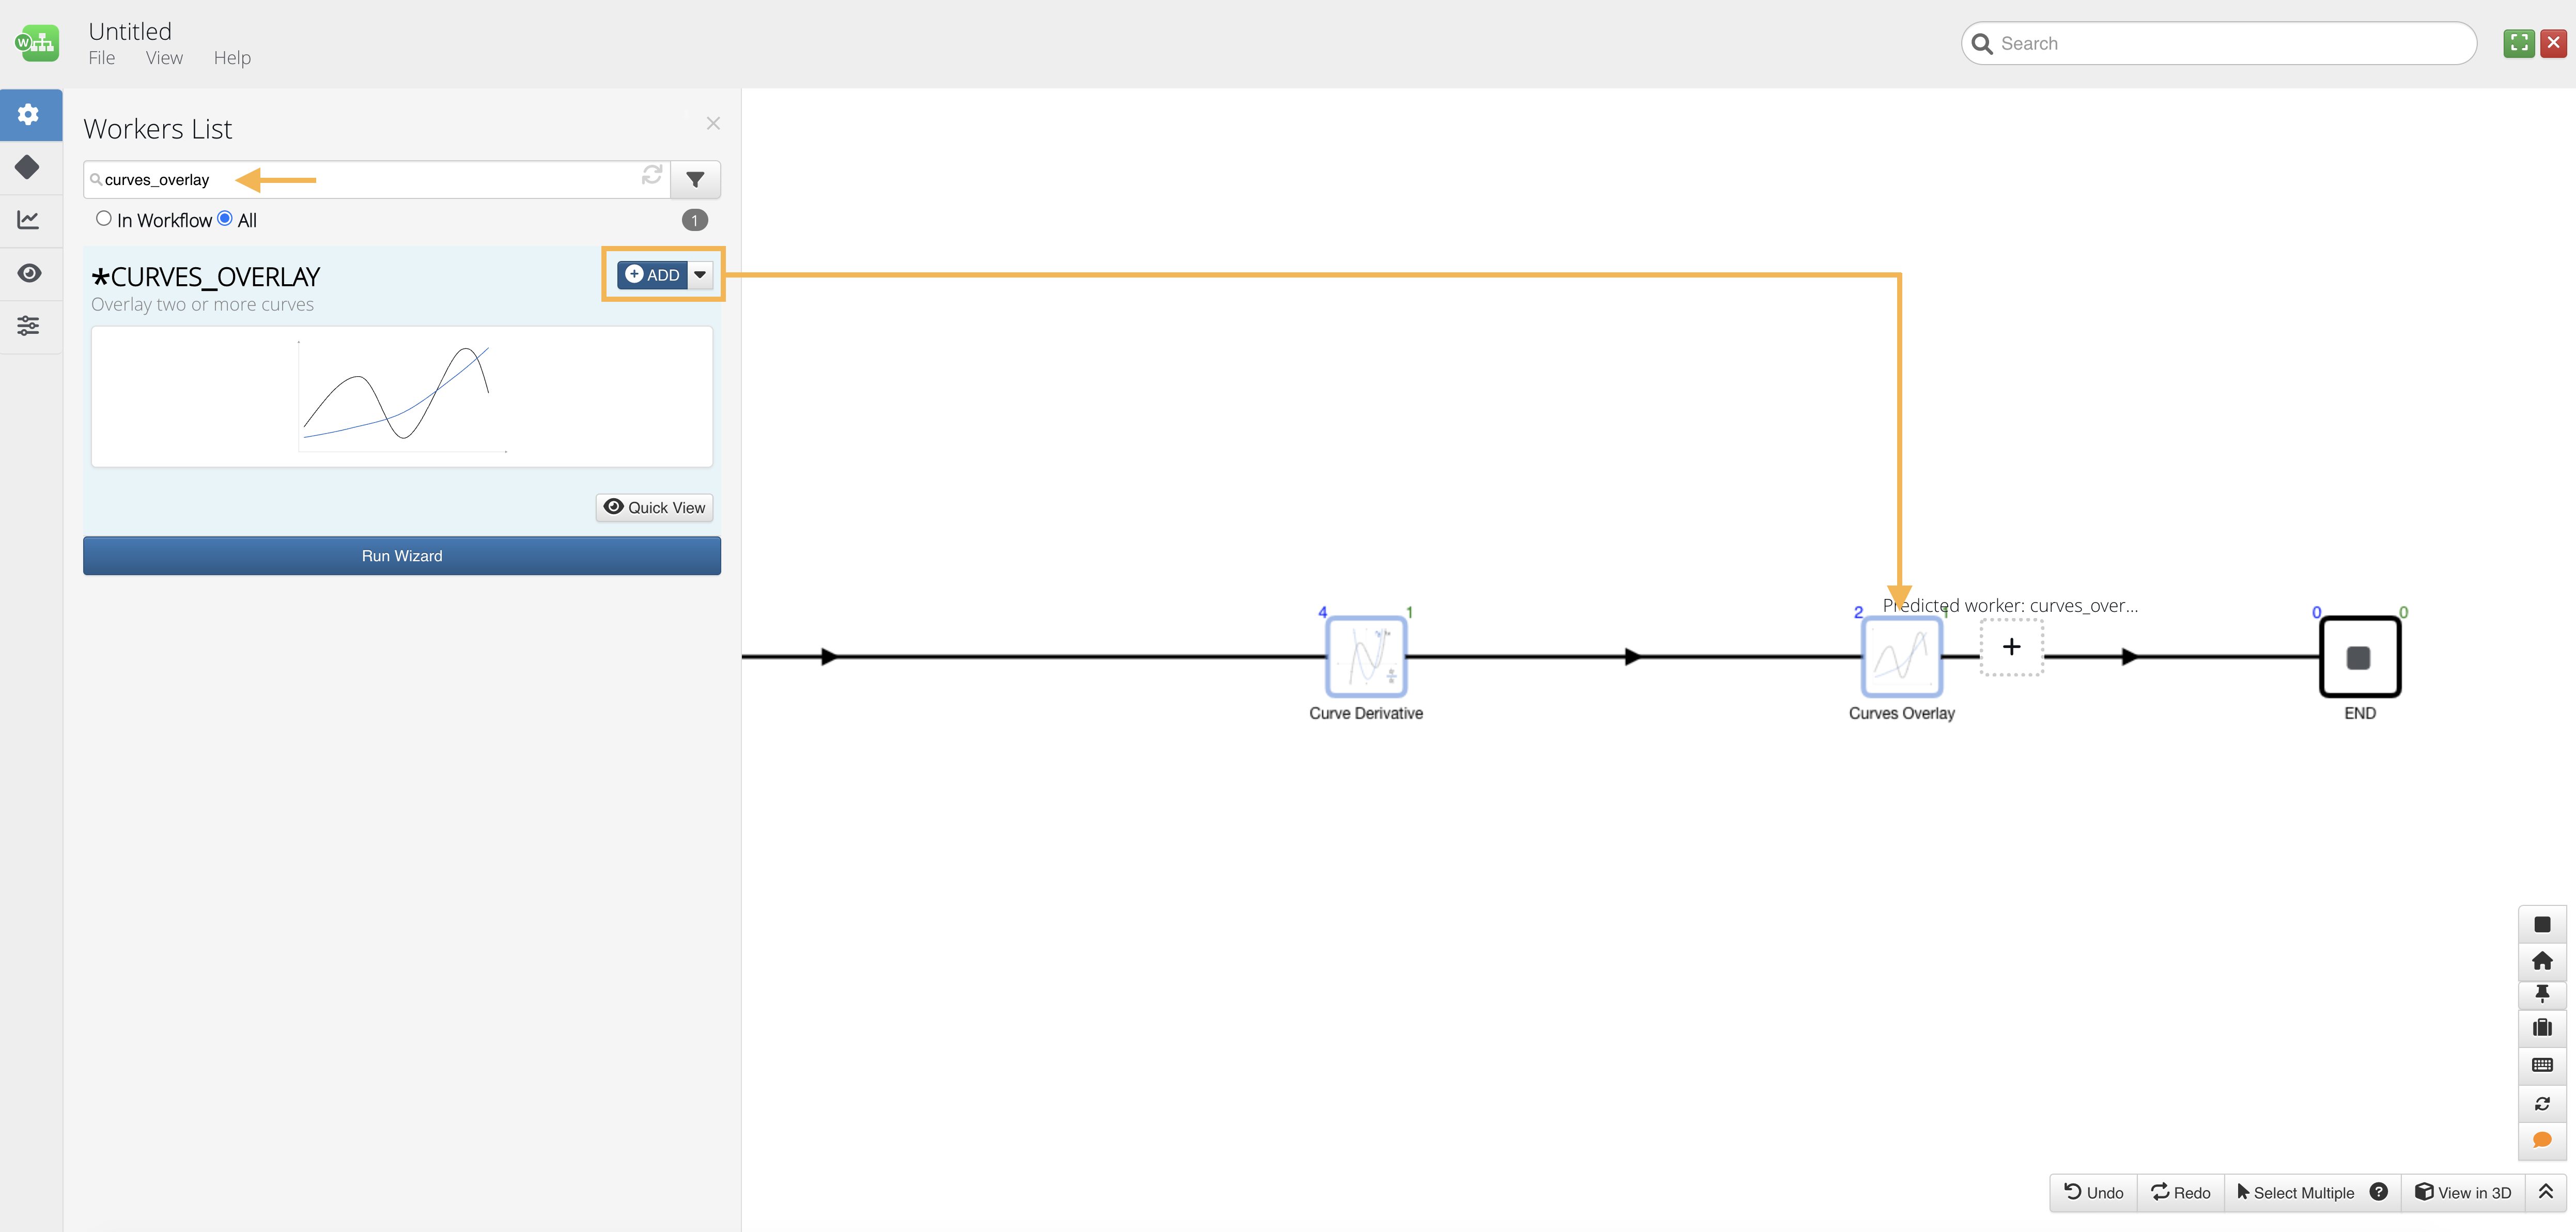
We’ll do the same with CURVES_OVERLAY, making sure it adds after CURVE_DERIVATIVE.
Add CURVES_OVERLAY
Configuring Workers
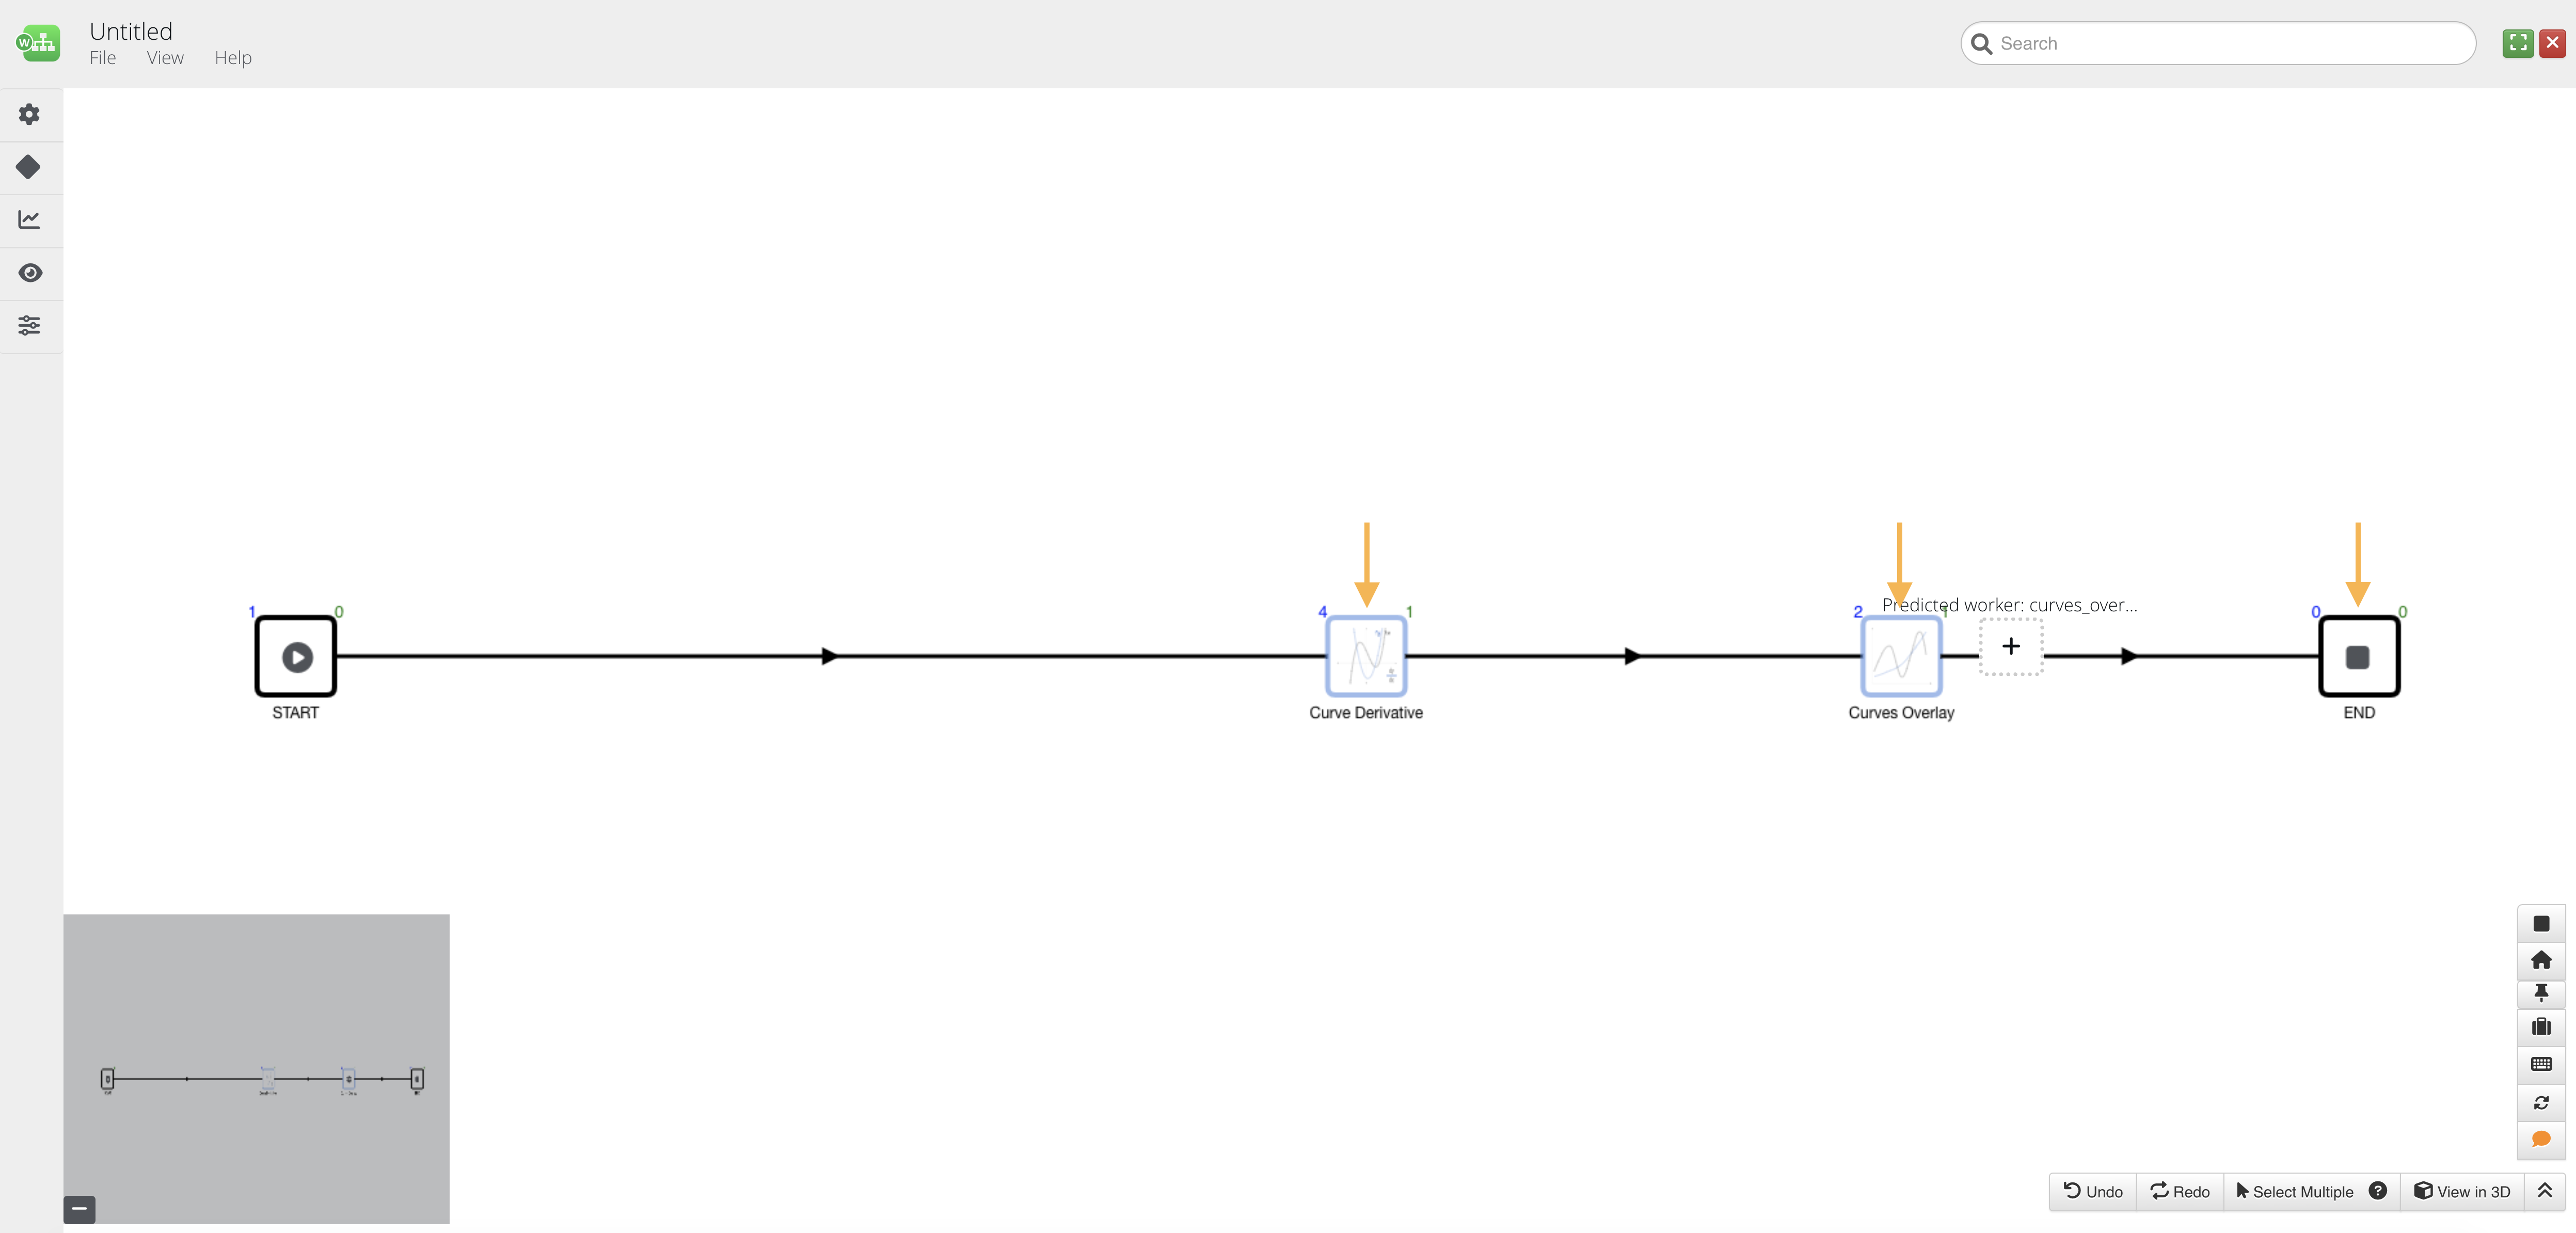
Click on a worker to configure it.
Click on a Worker to Configure
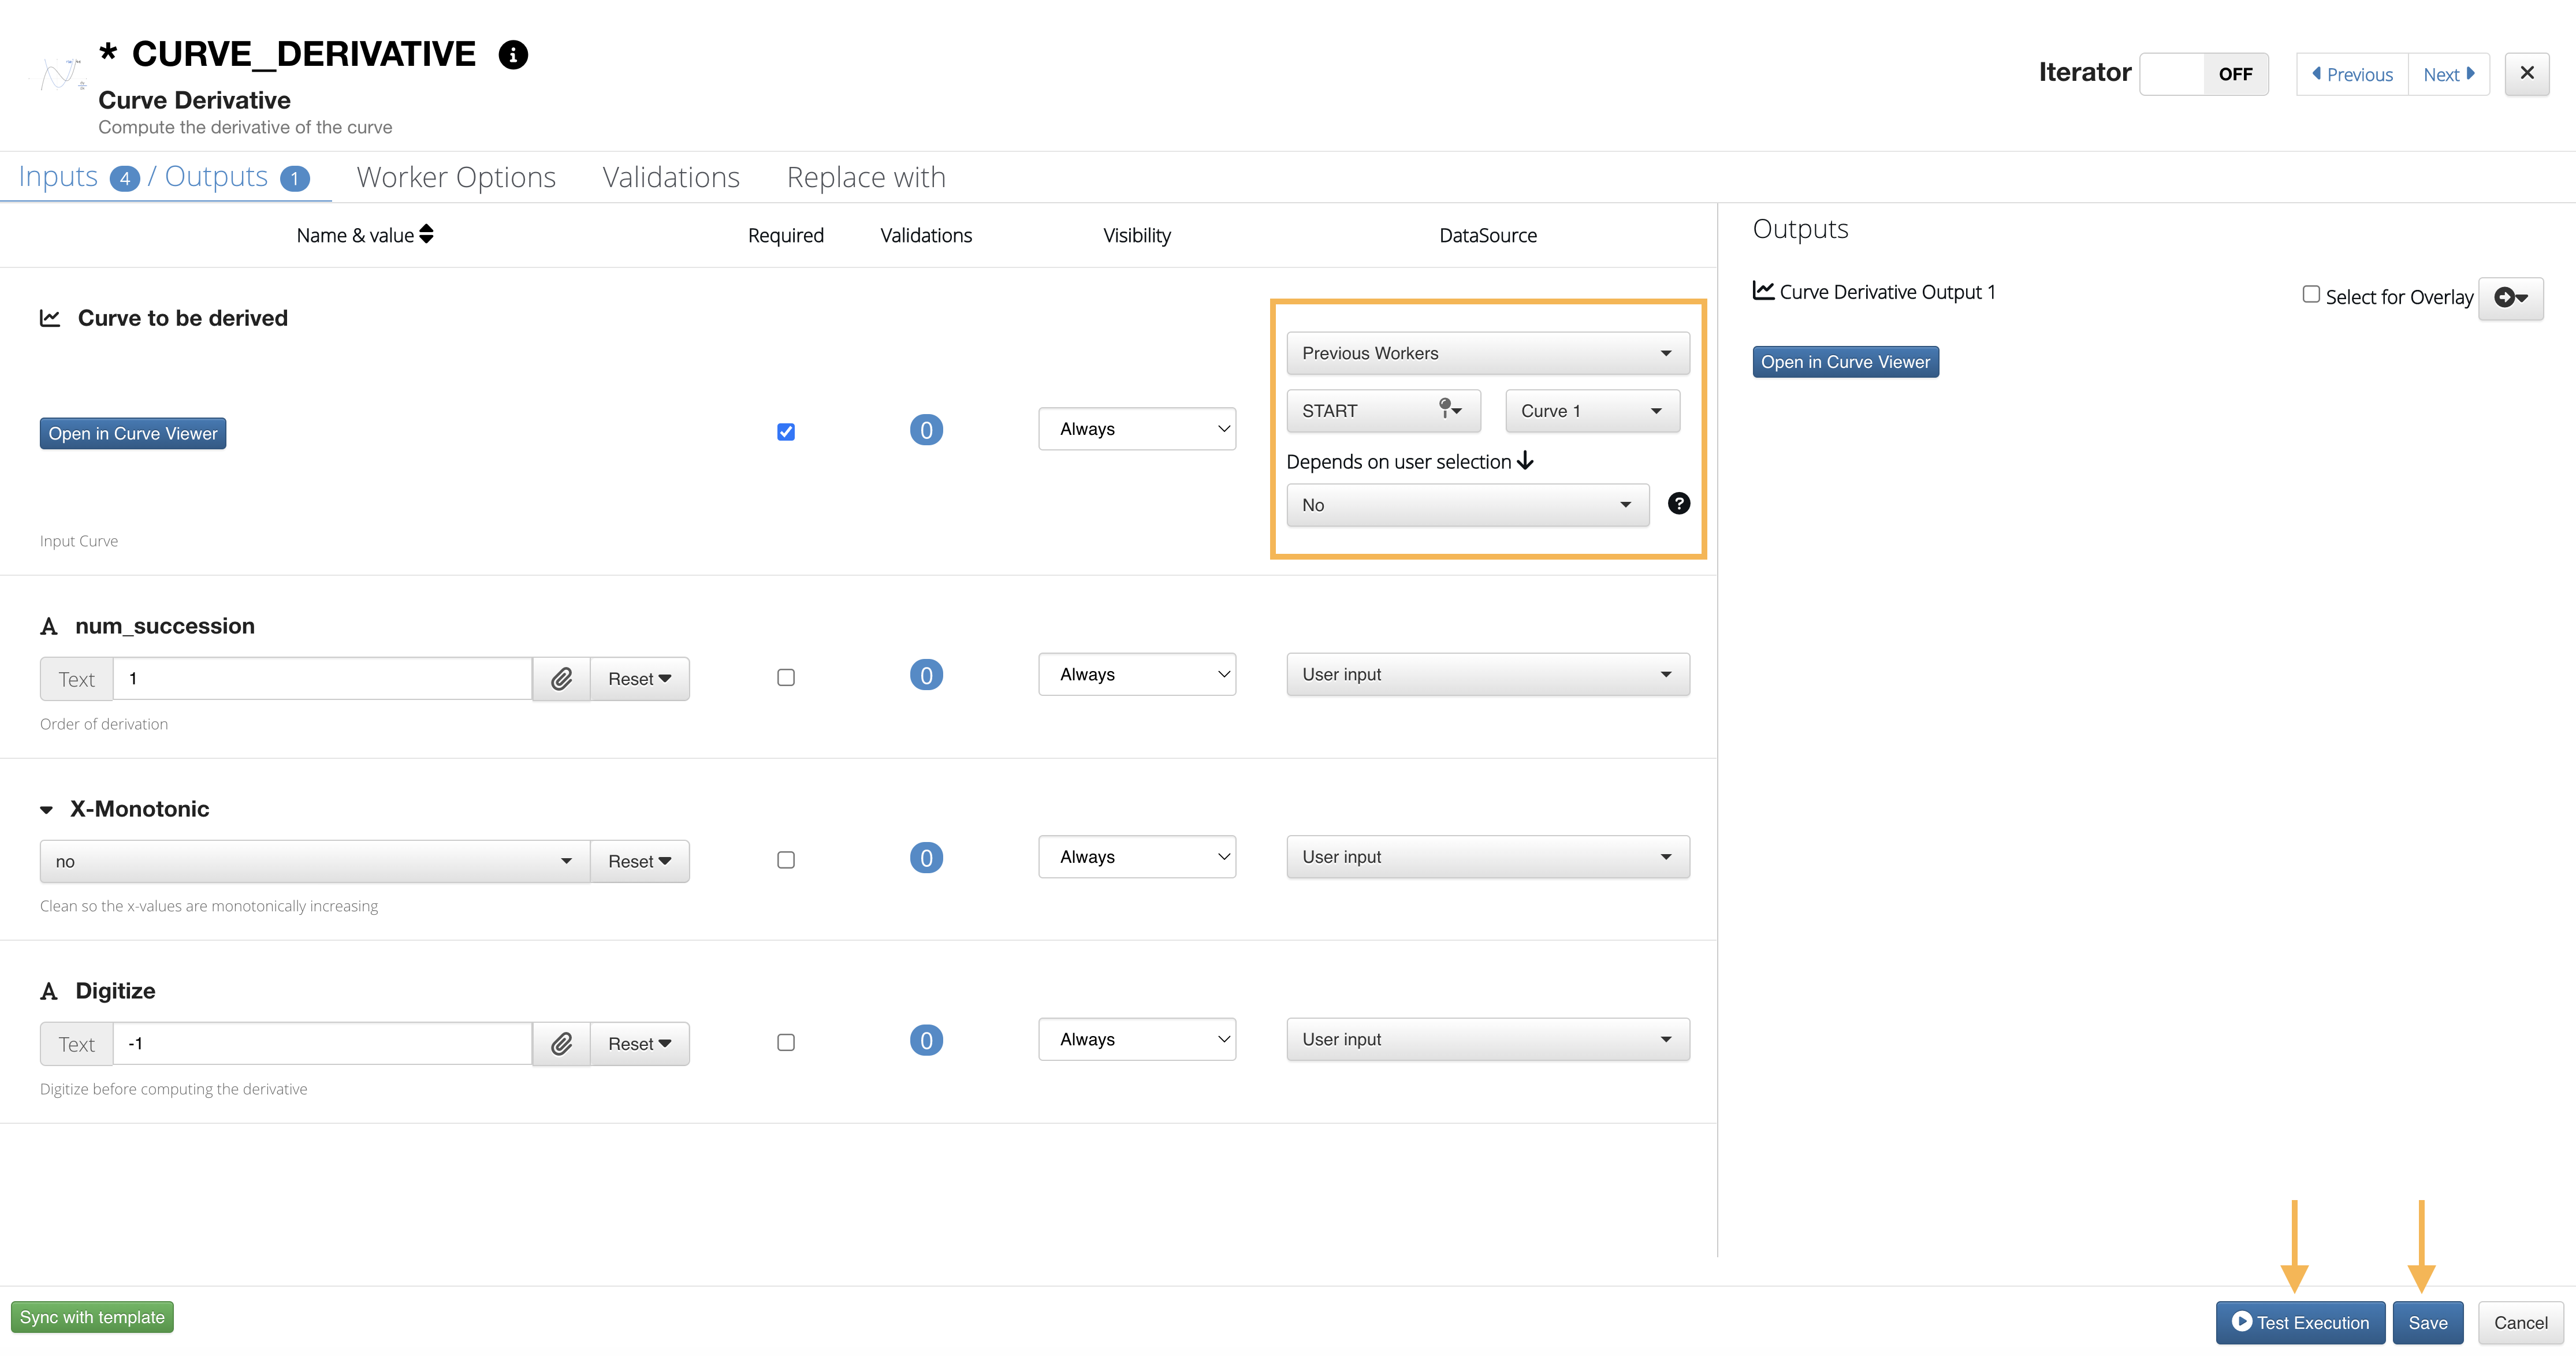
Let’s start with CURVE_DERIVATIVE. For the Curve to be derived, we’ll choose Previous Workers > START > Curve 1 (our START worker curve input) > No (for Depends on user selection). Feel free to test the execution at the bottom right corner before clicking Save.
Configure CURVE_DERIVATIVE
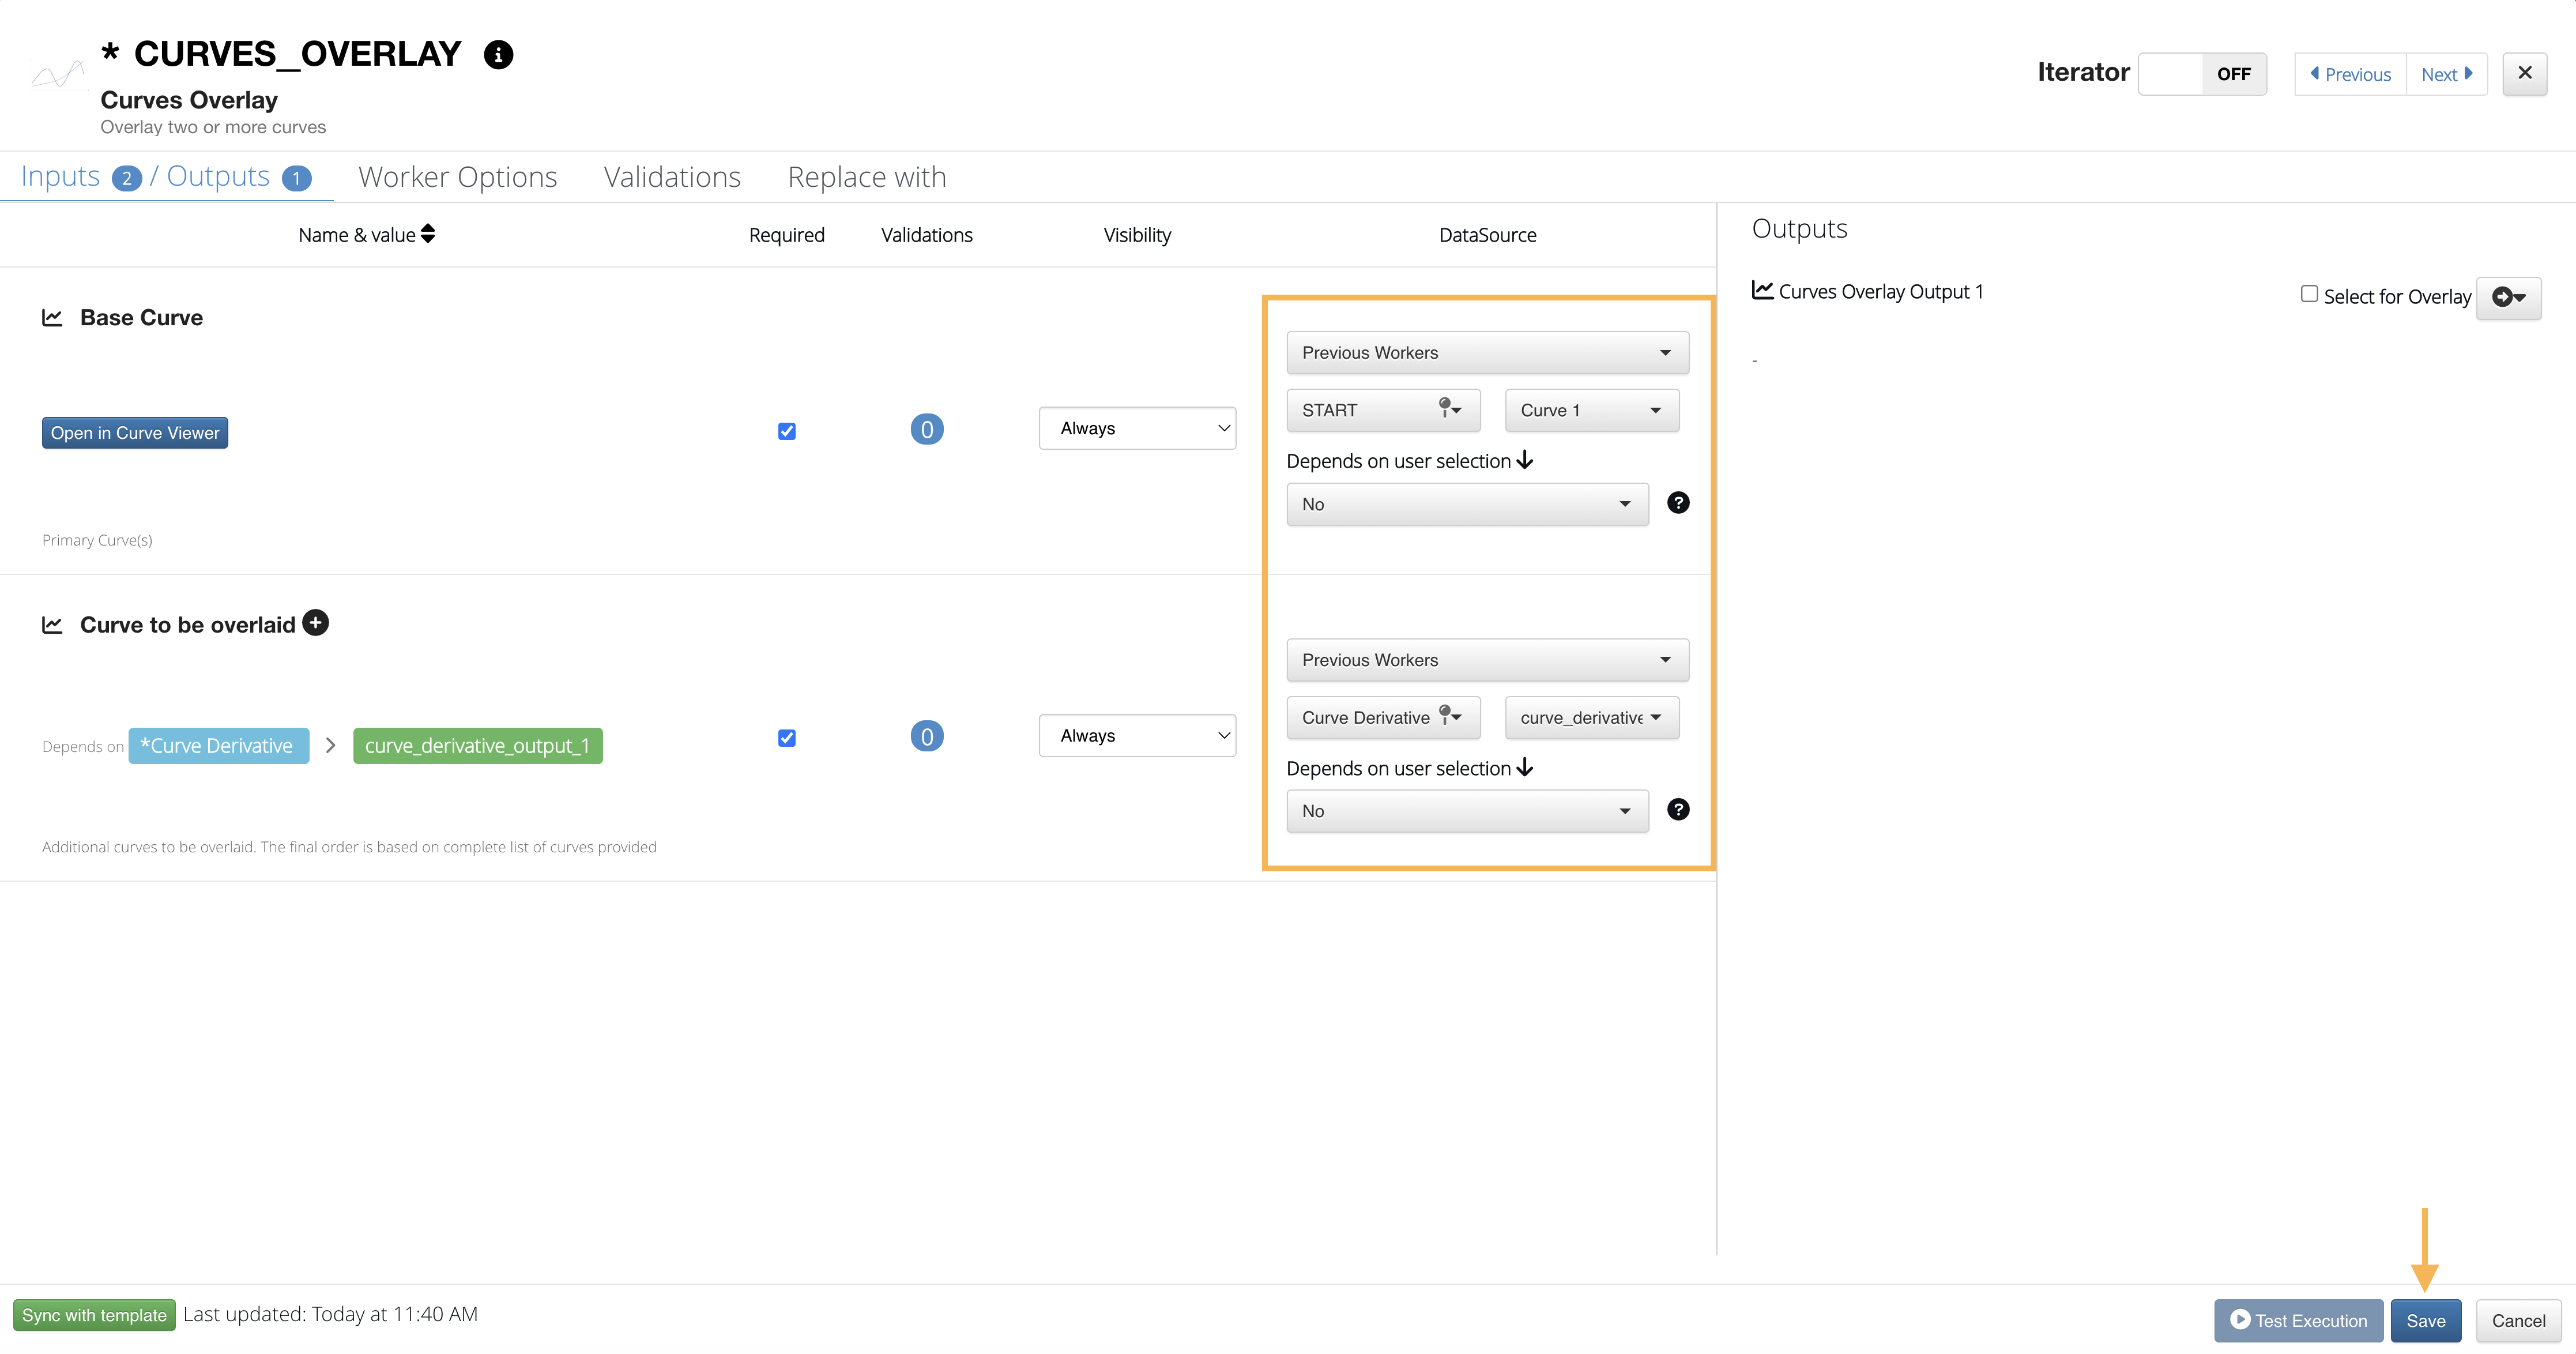
For CURVES_OVERLAY, the Base Curve input will be Previous Workers > START > Curve 1 (our START worker curve input) > No (for Depends on user selection). The Curve to be overlaid input will be Previous Workers > Curve Derivative > curve_derivative_output_1 > No (for Depends on user selection).
Configure CURVES_OVERLAY
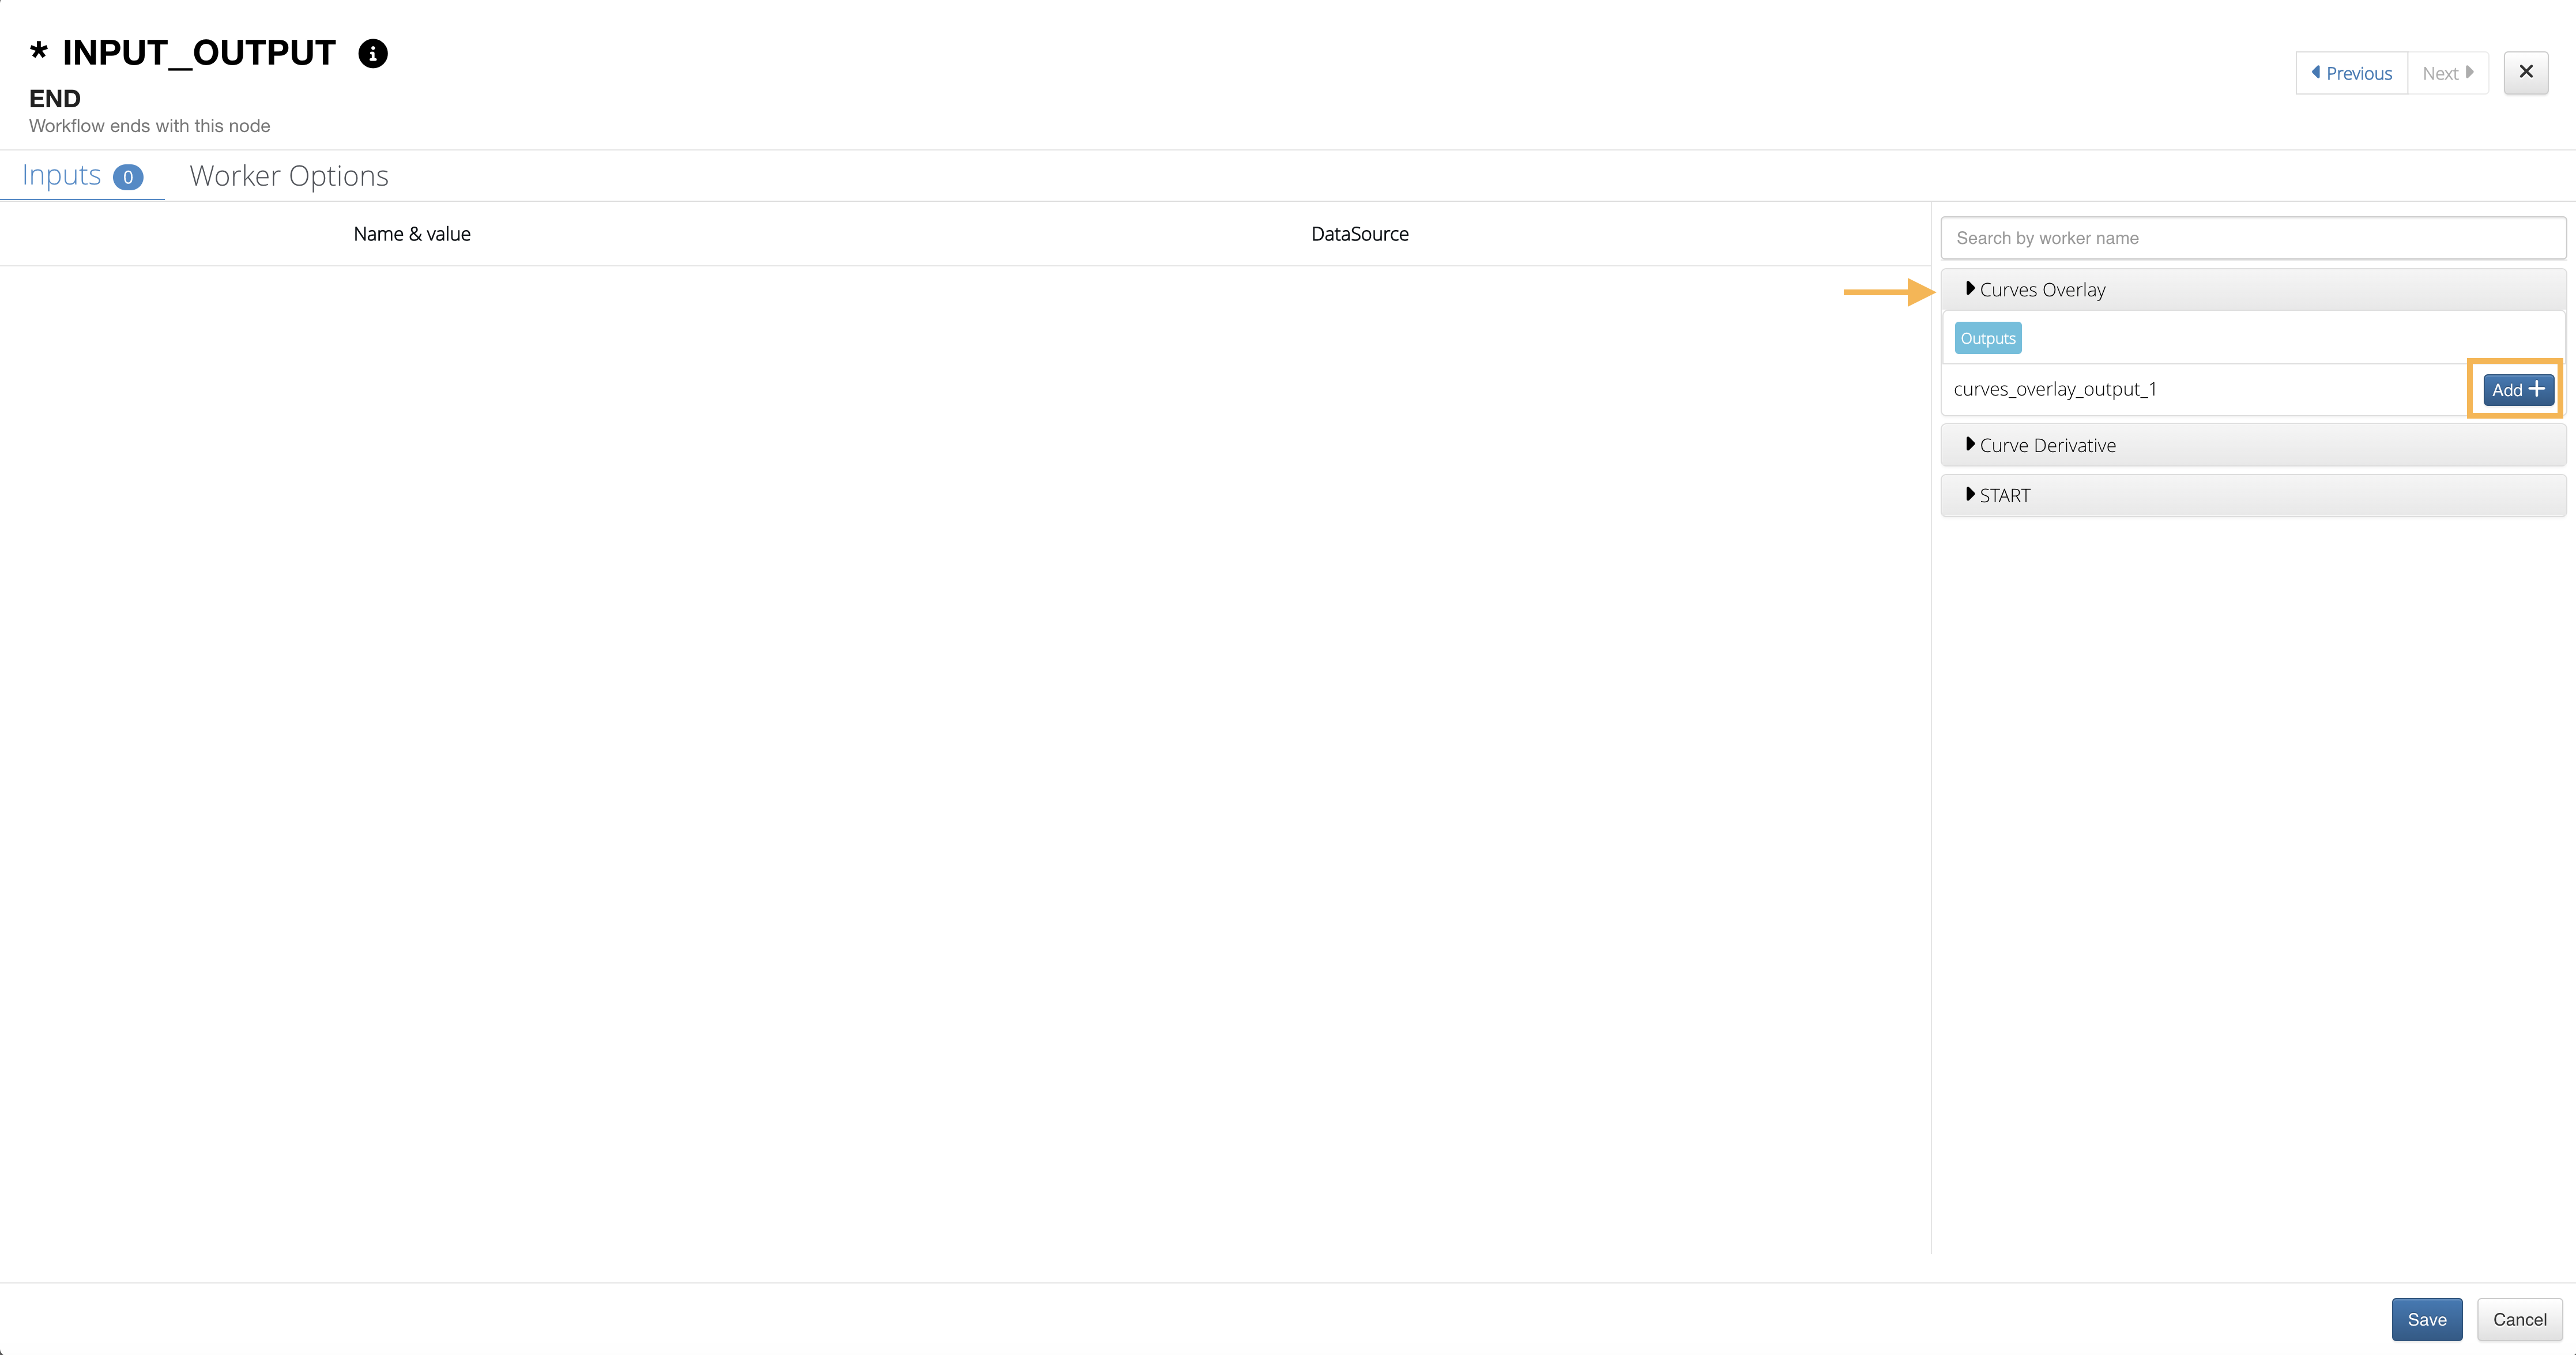
For the END worker, let’s add the CURVES_OVERLAY output to be shown under this worker after execution.
Configure END Worker Add Output
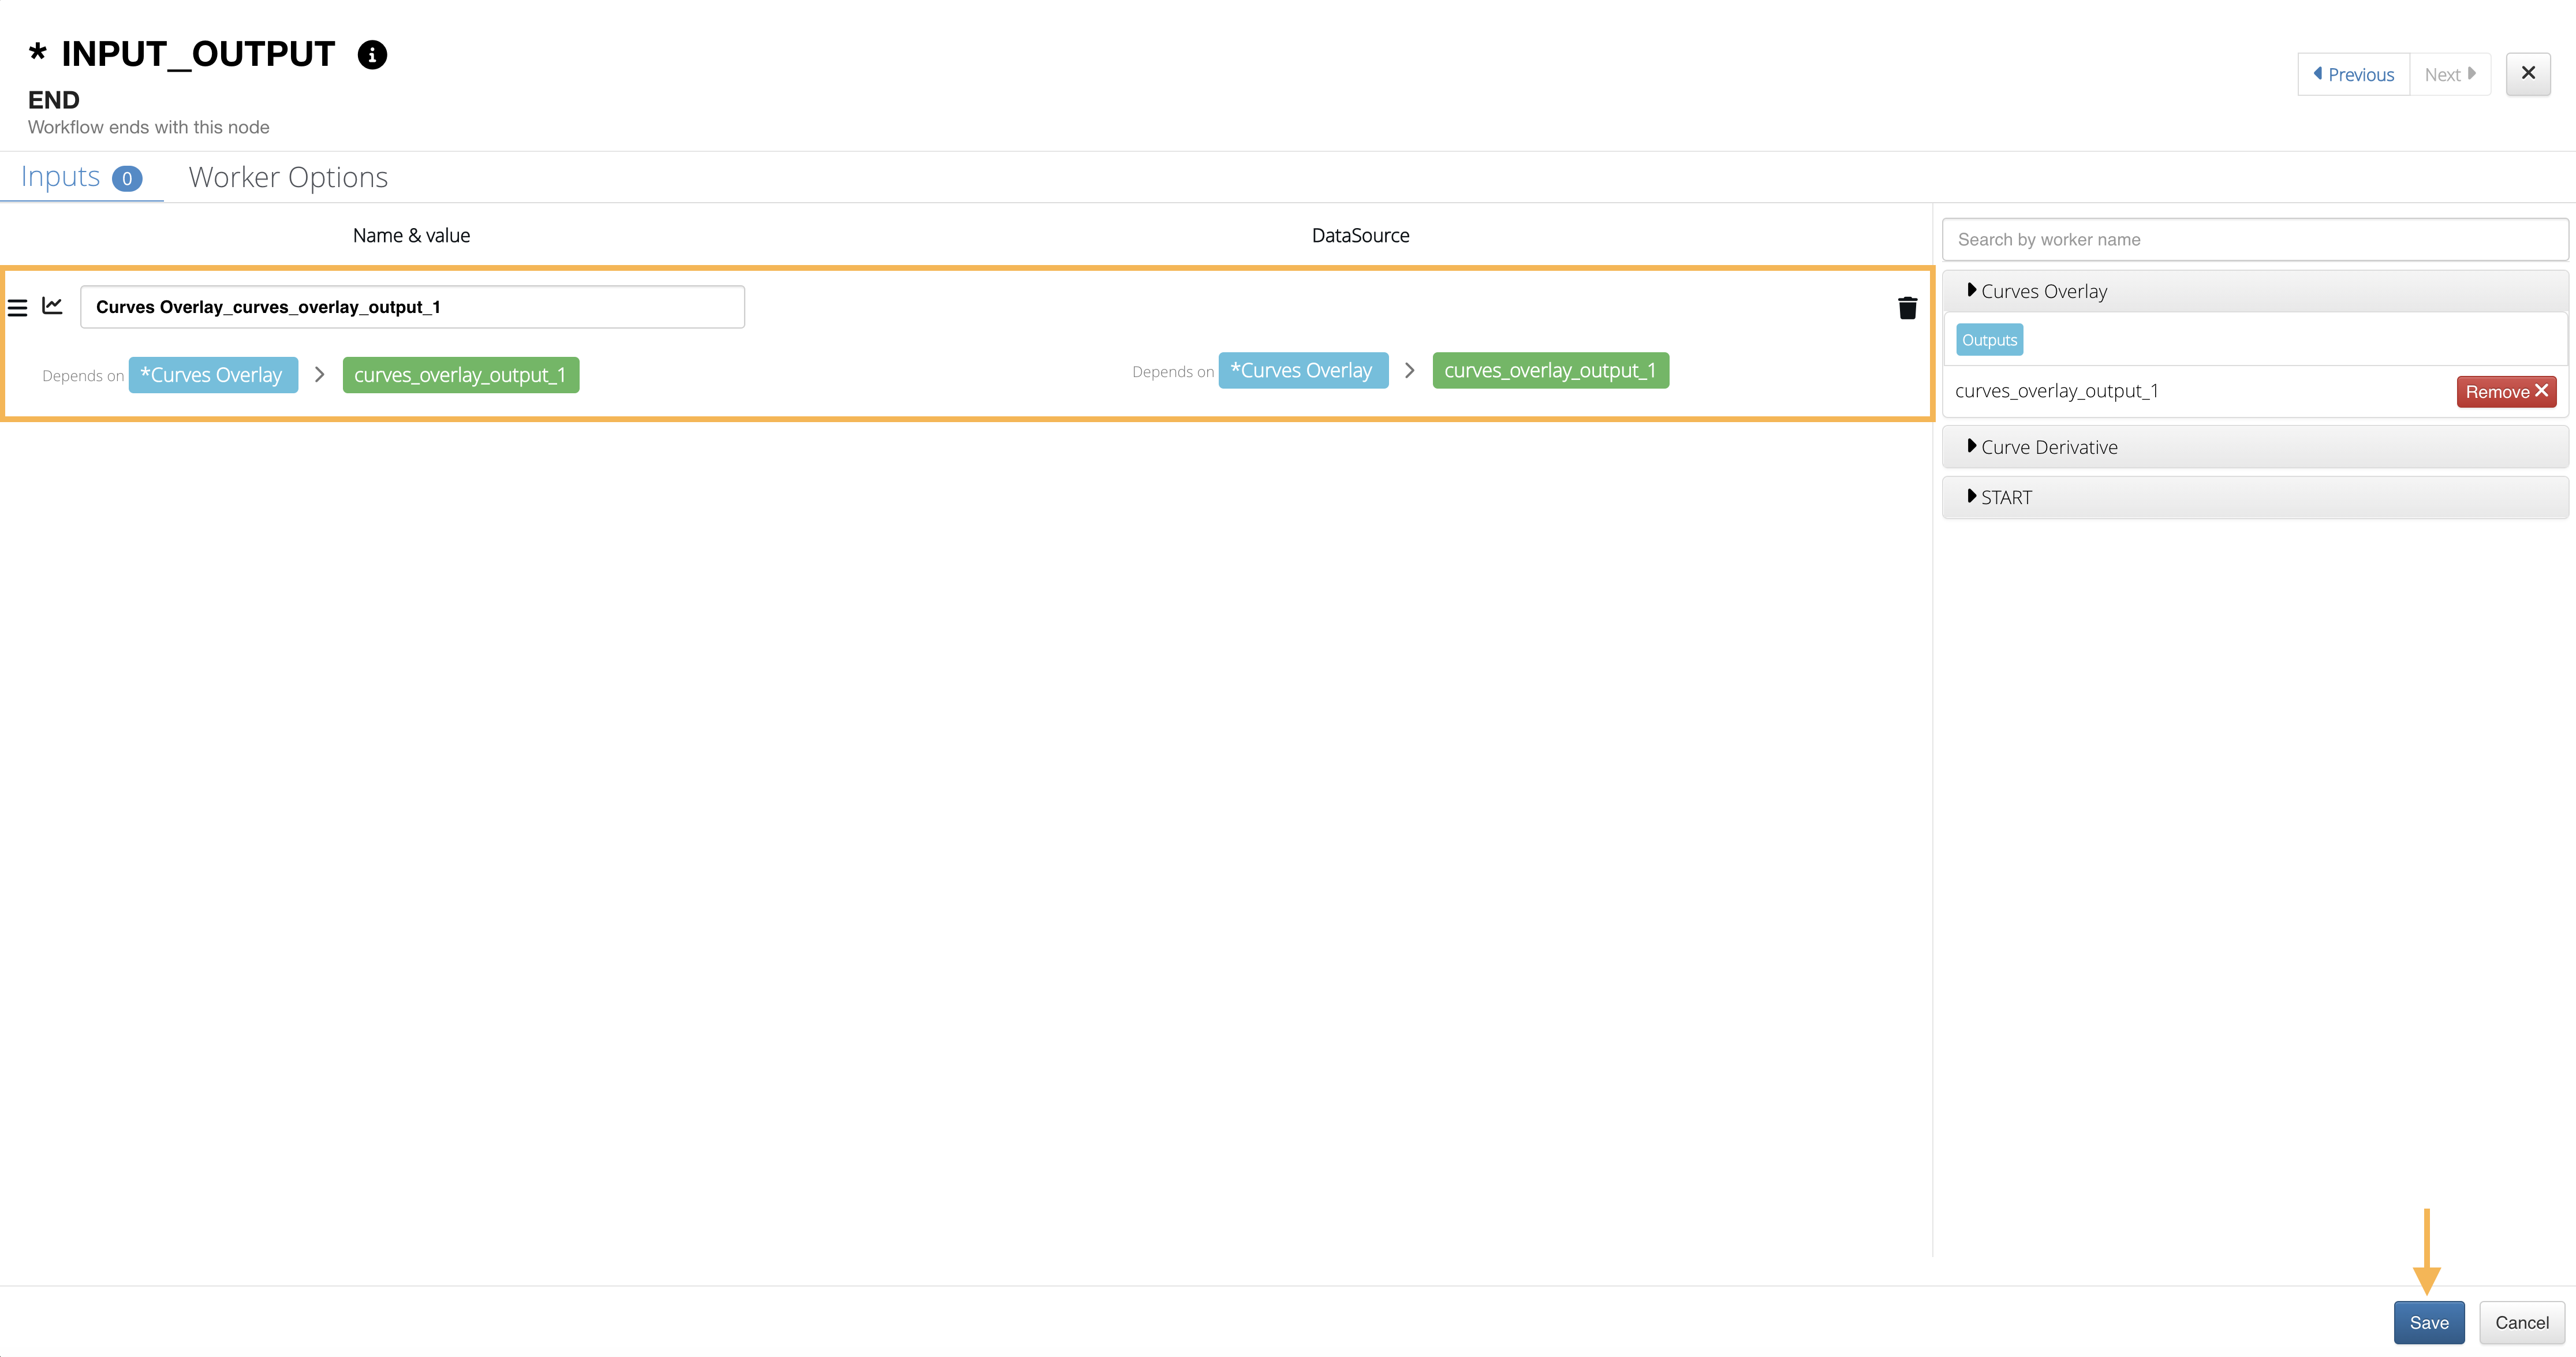
Here is how the output is added to the worker configuration. Hit Save to finish.
Configure END Worker
Saving
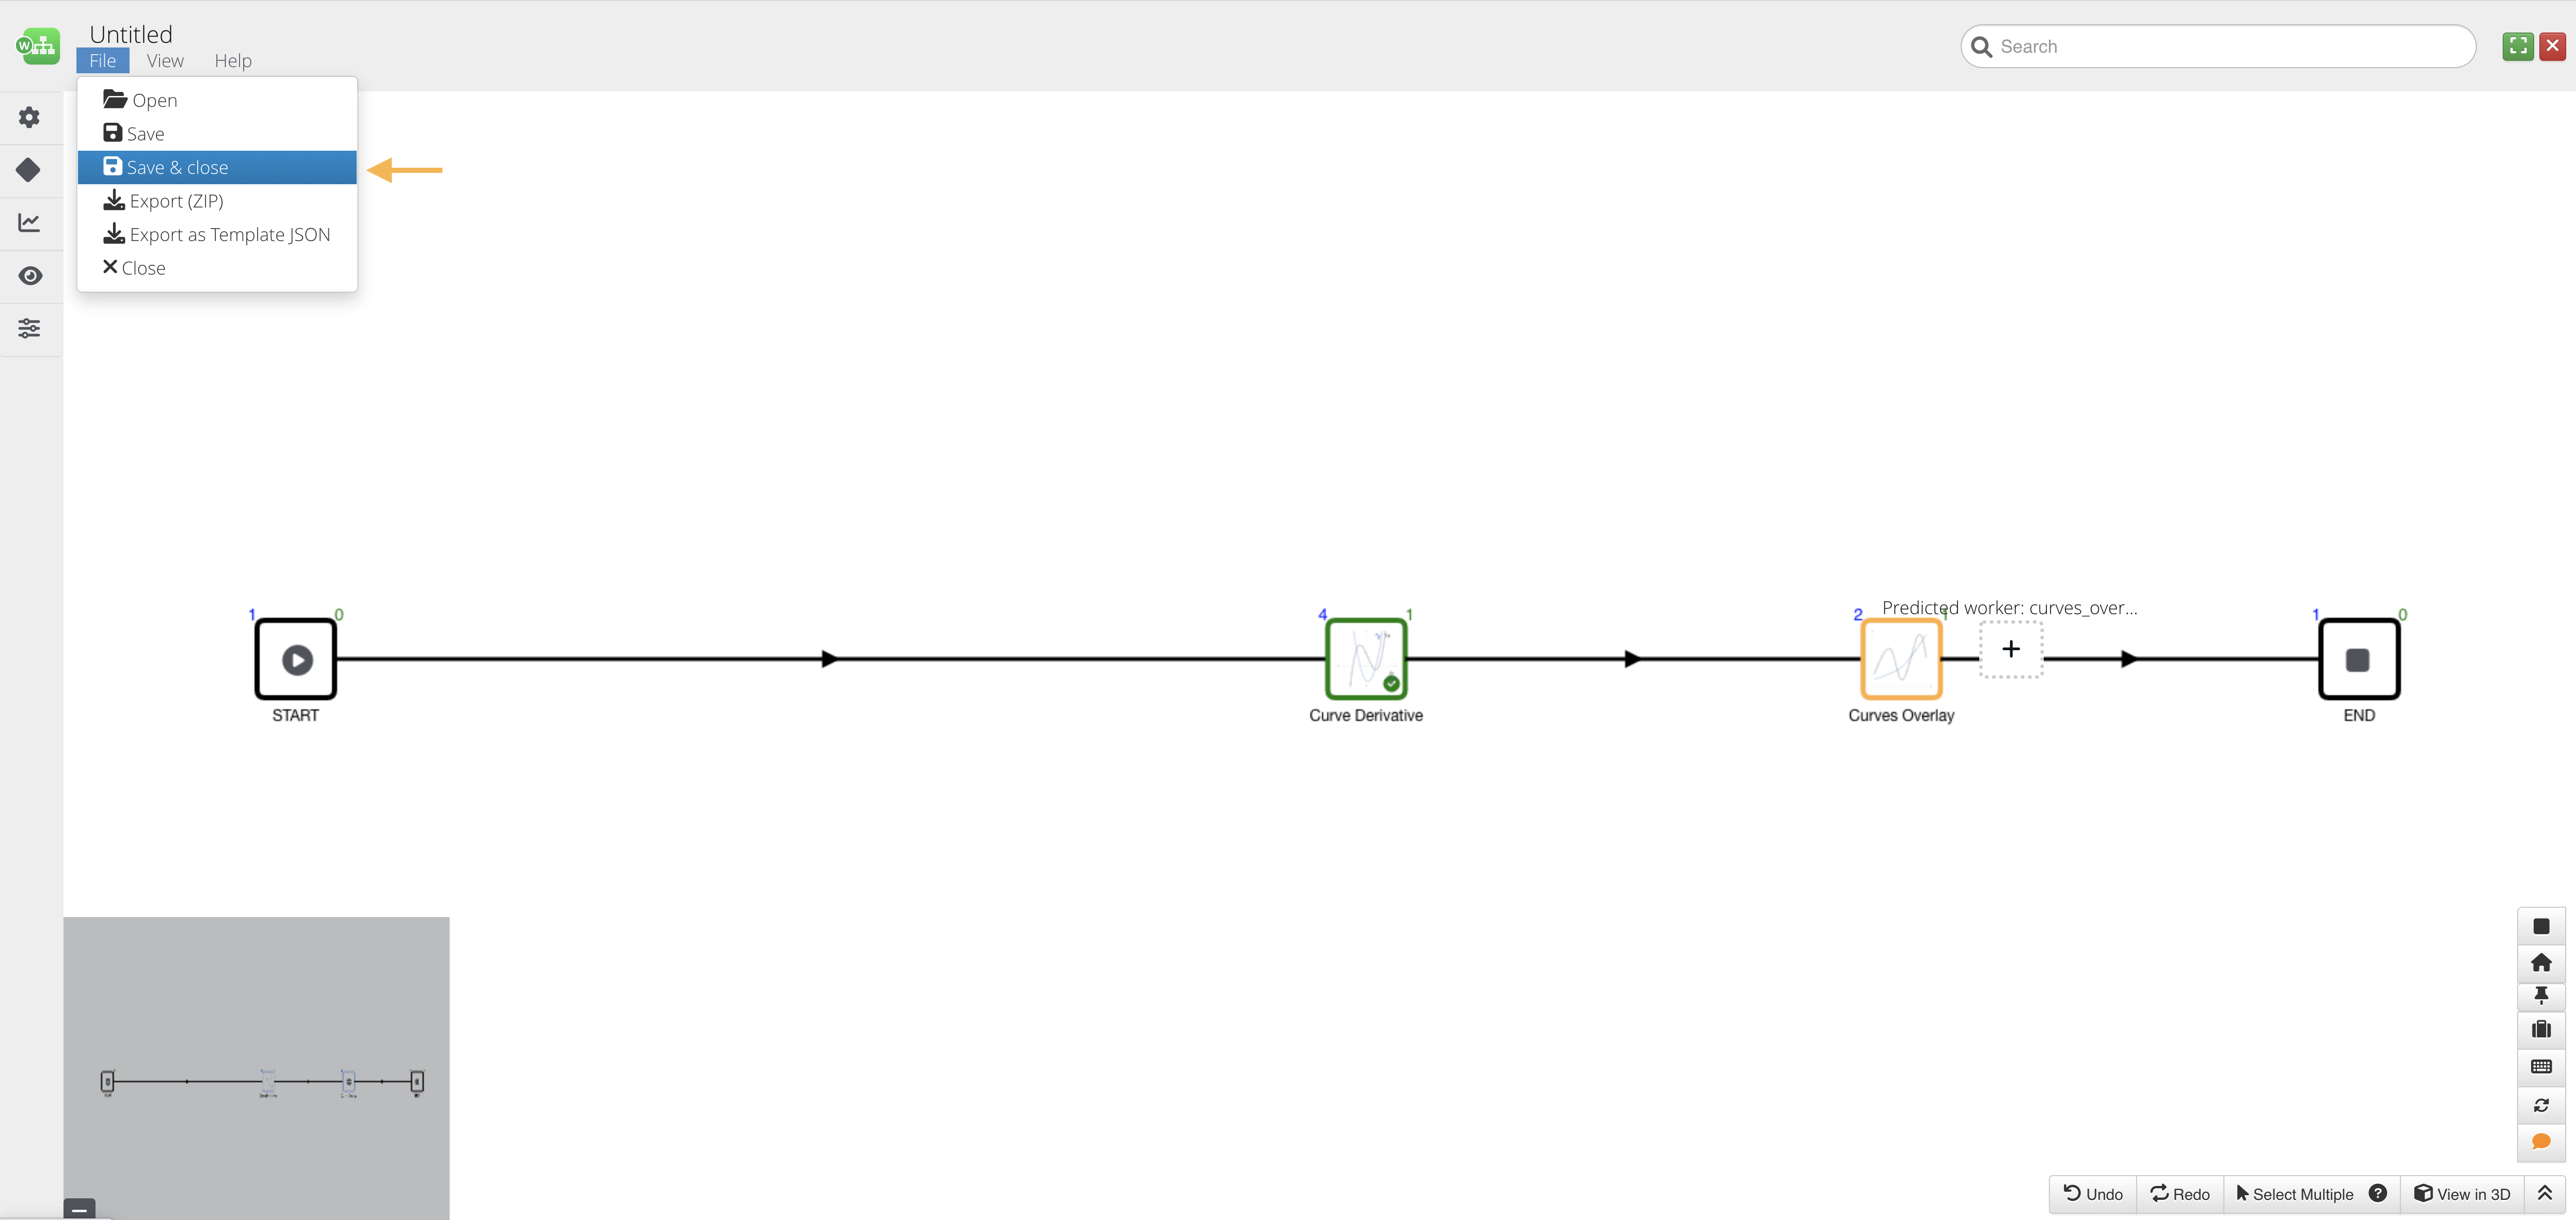
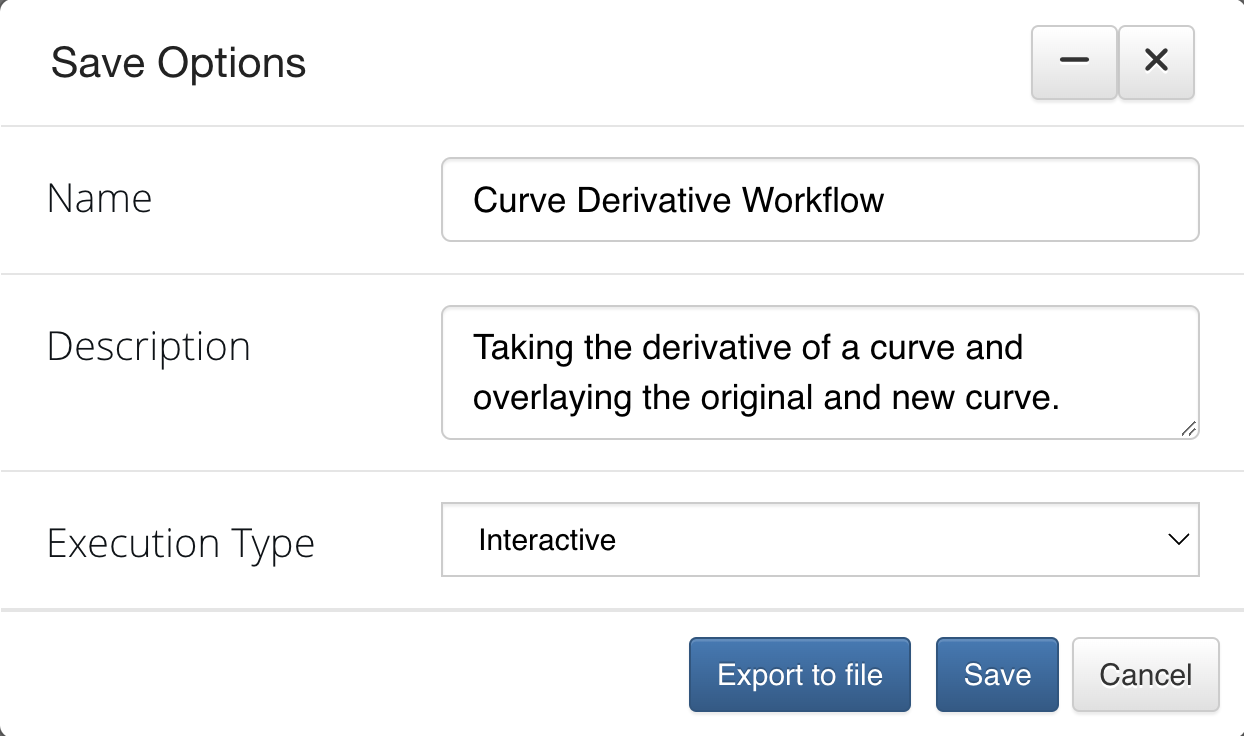
To save the workflow for execution, let’s choose the Save and Close option under the File Menu.
File: Save and Close
Give the workflow a suitable name and description, and hit Save.
Name Workflow and Save
Executing
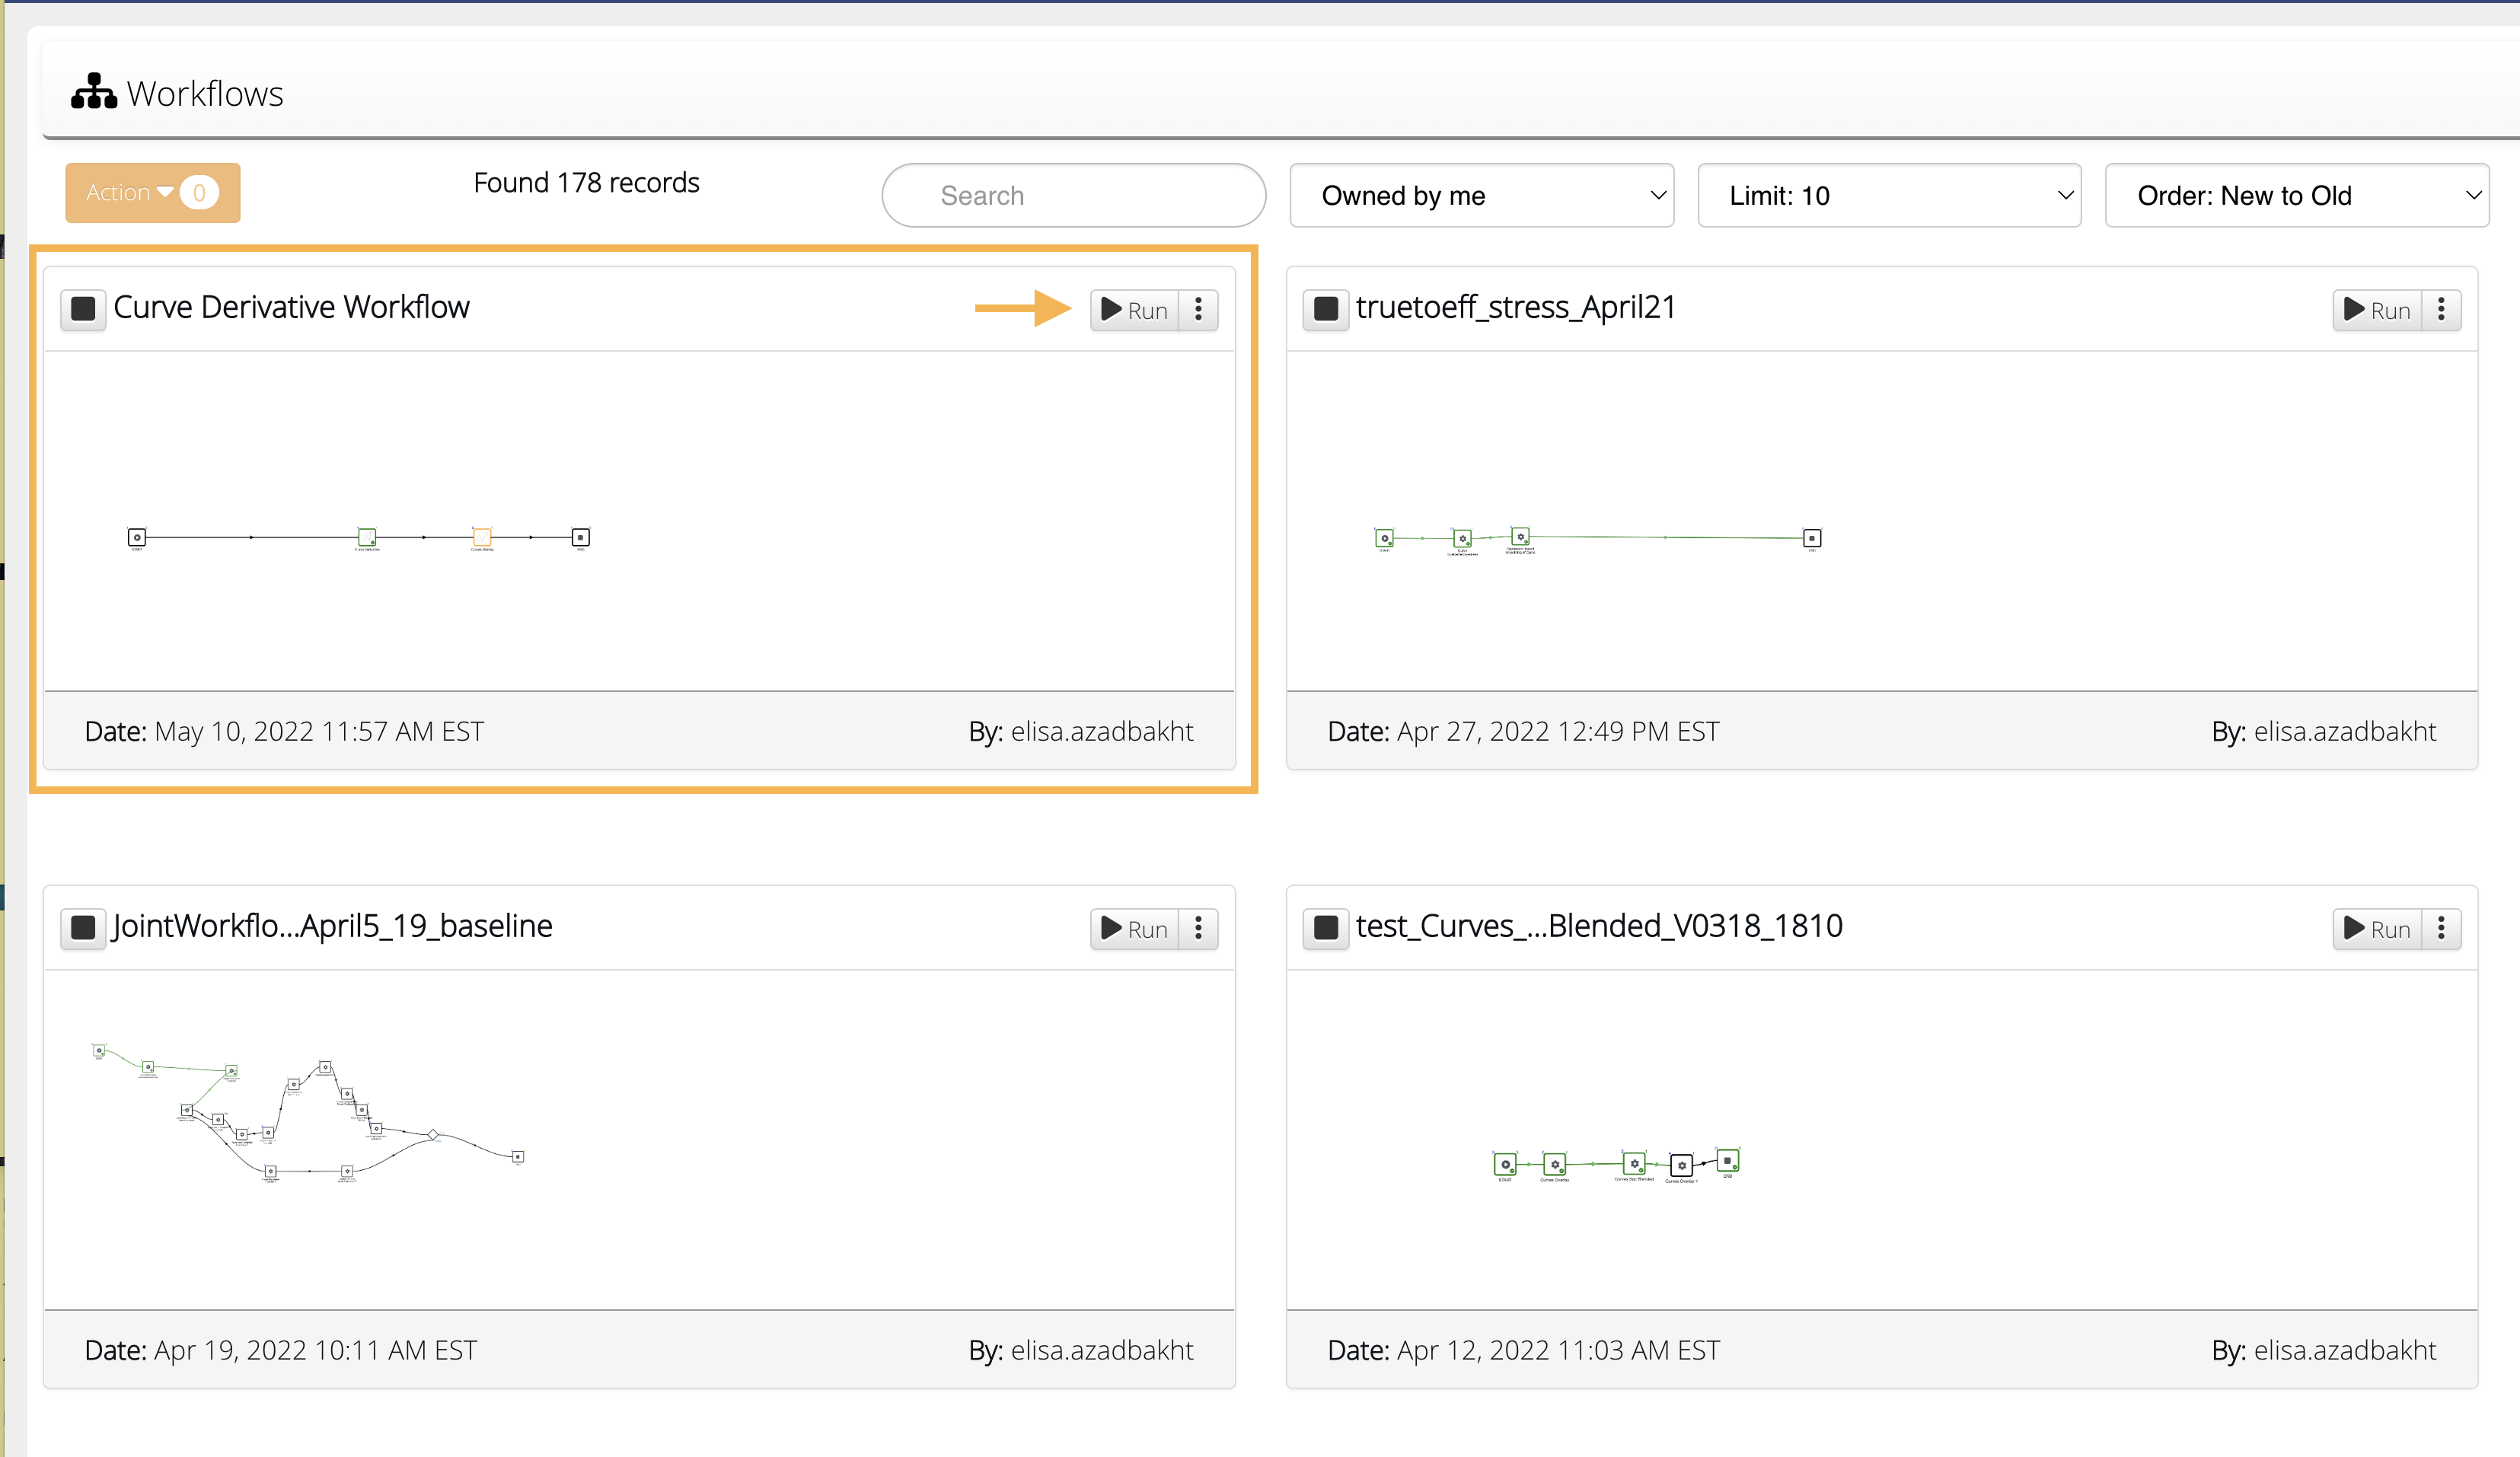
The new workflow should appear first in the Workflows main page. Click on Run to open in execution mode.
Open in Execution Mode
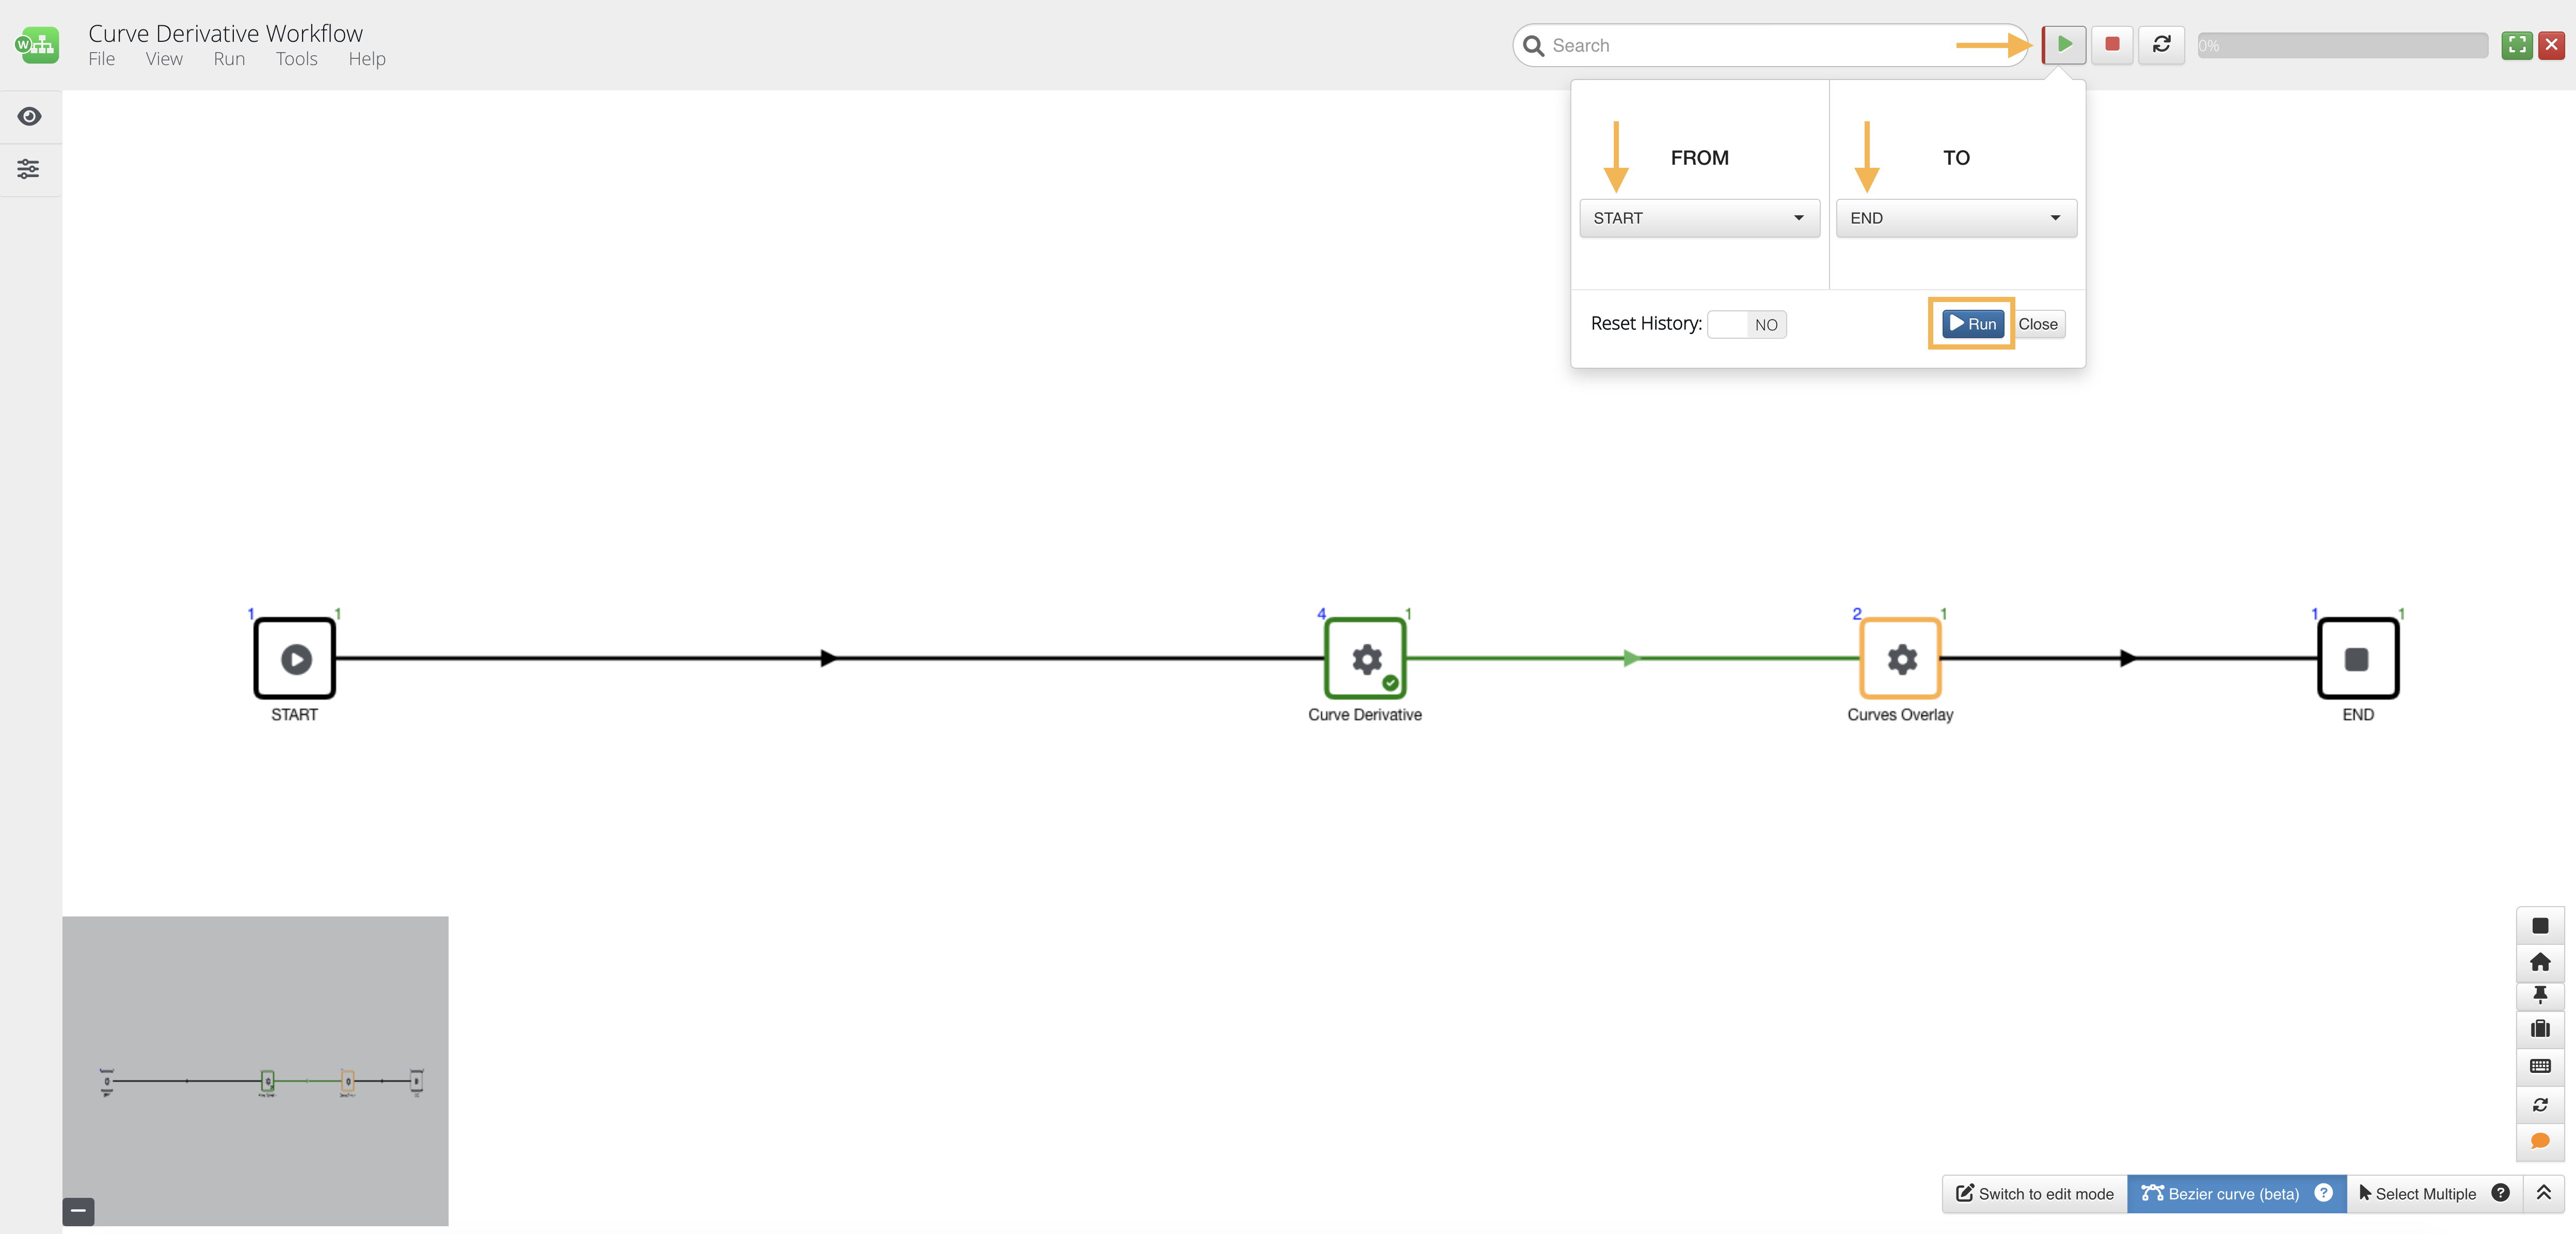
Under the Play icon at the top right, we’ll choose our execution parameters to be from START to END worker, then click Run.
Execution Parameters
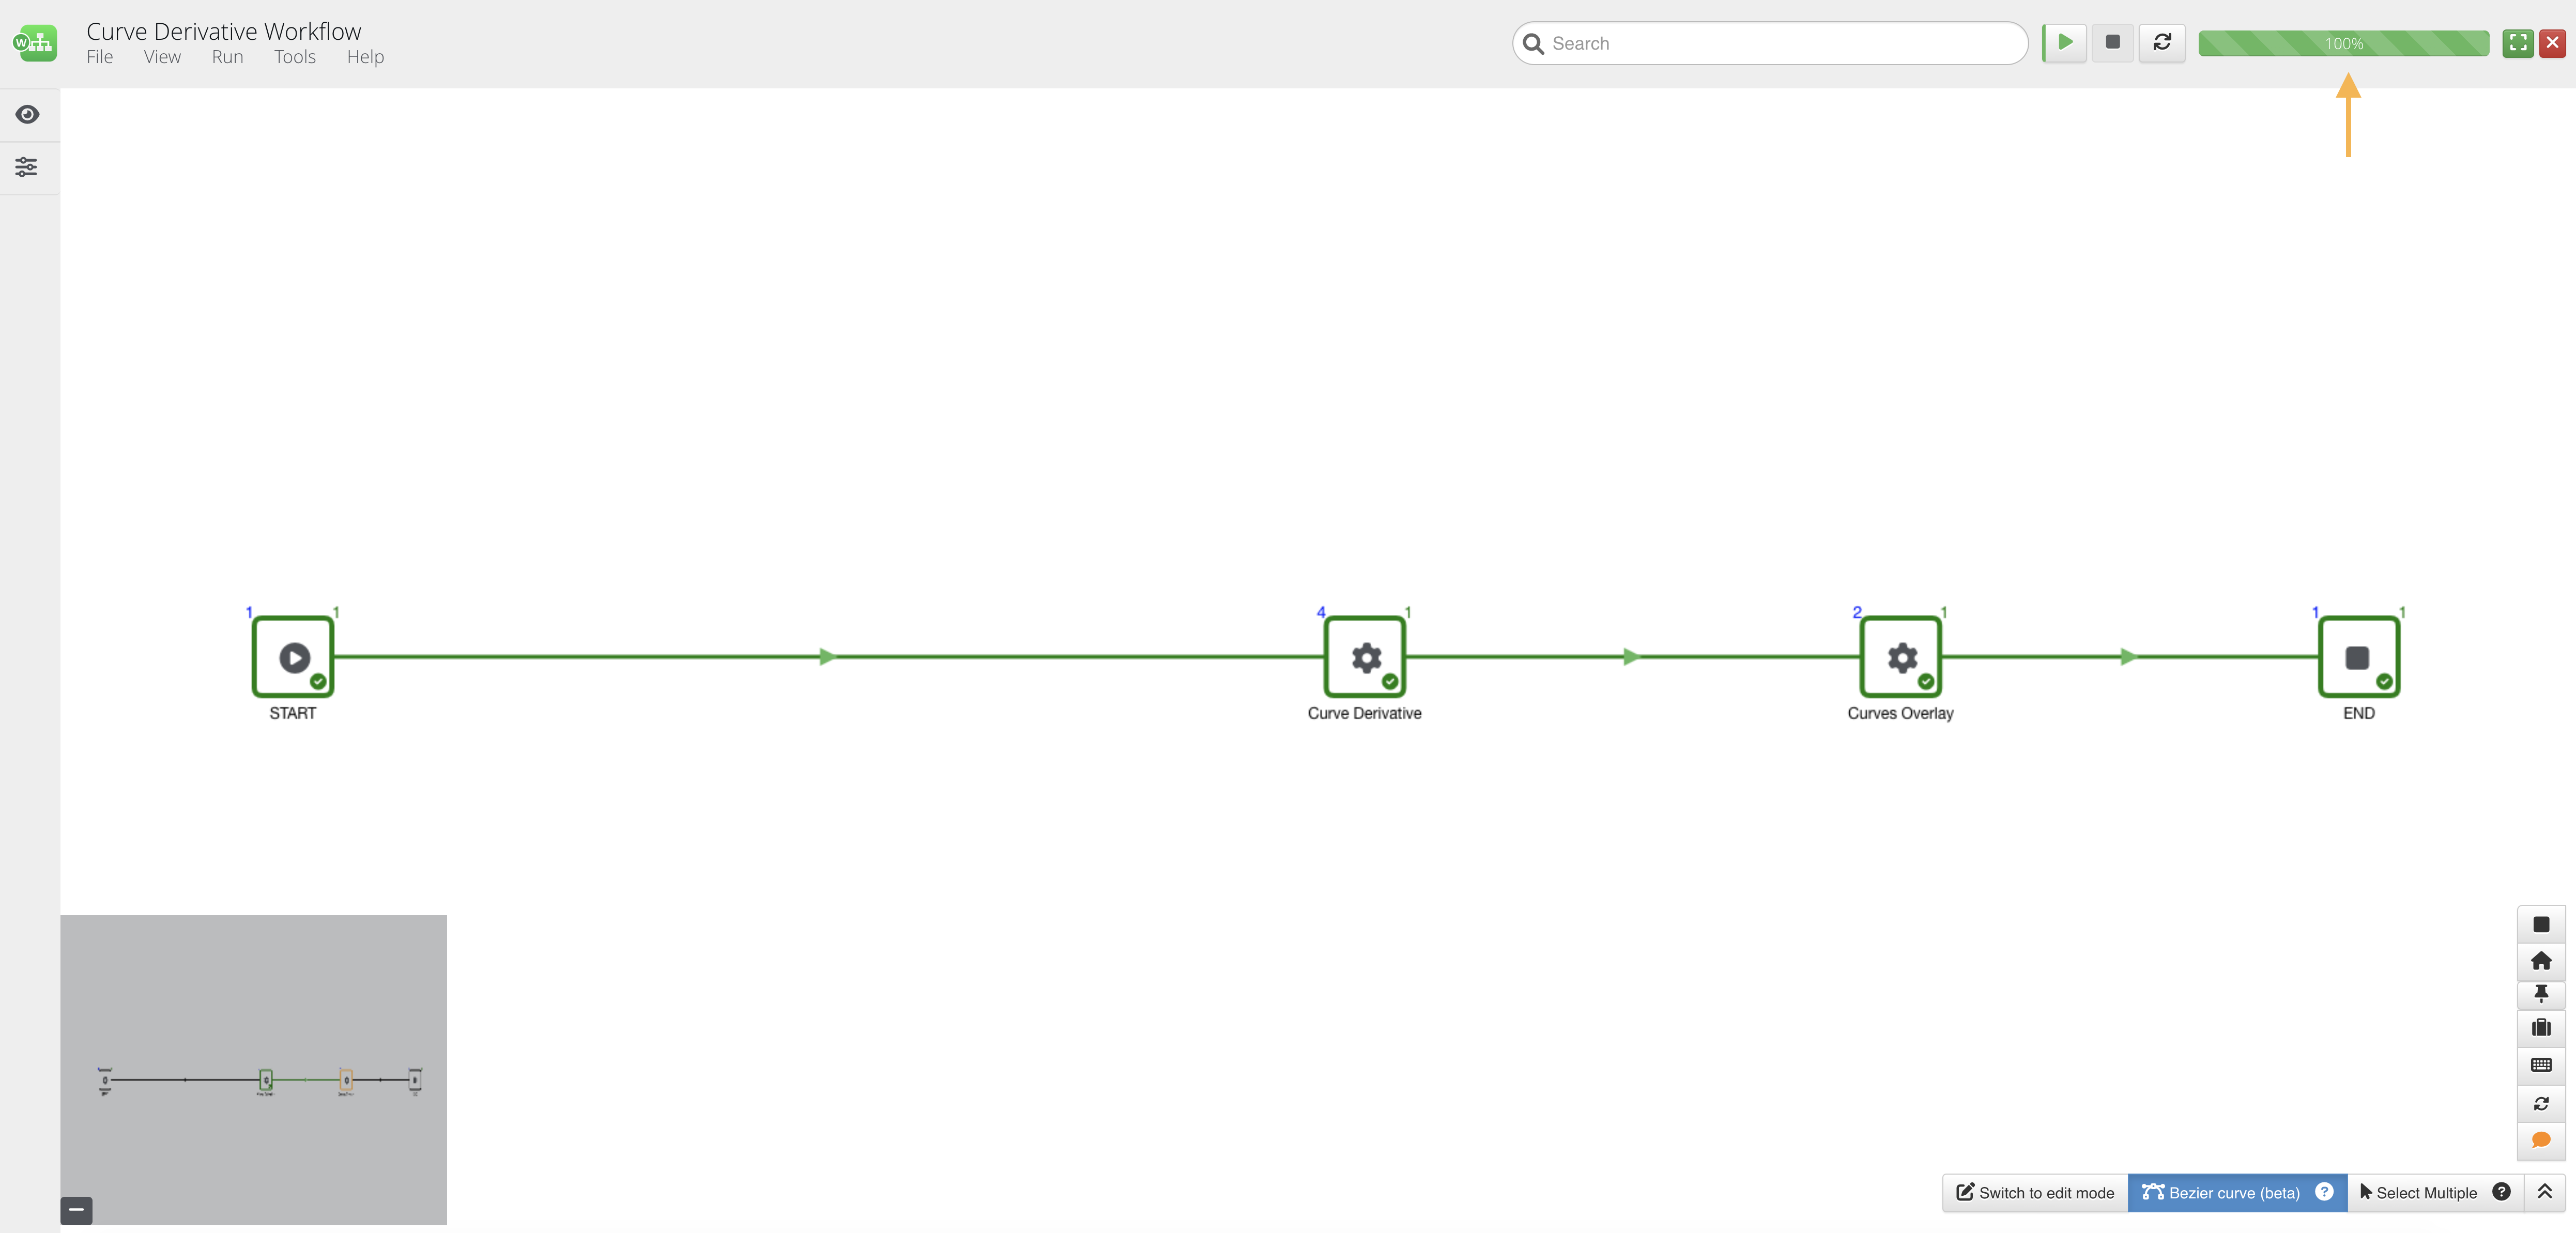
The status bar will show 100% once the execution is complete.
Succesfull Execution
Reviewing Results
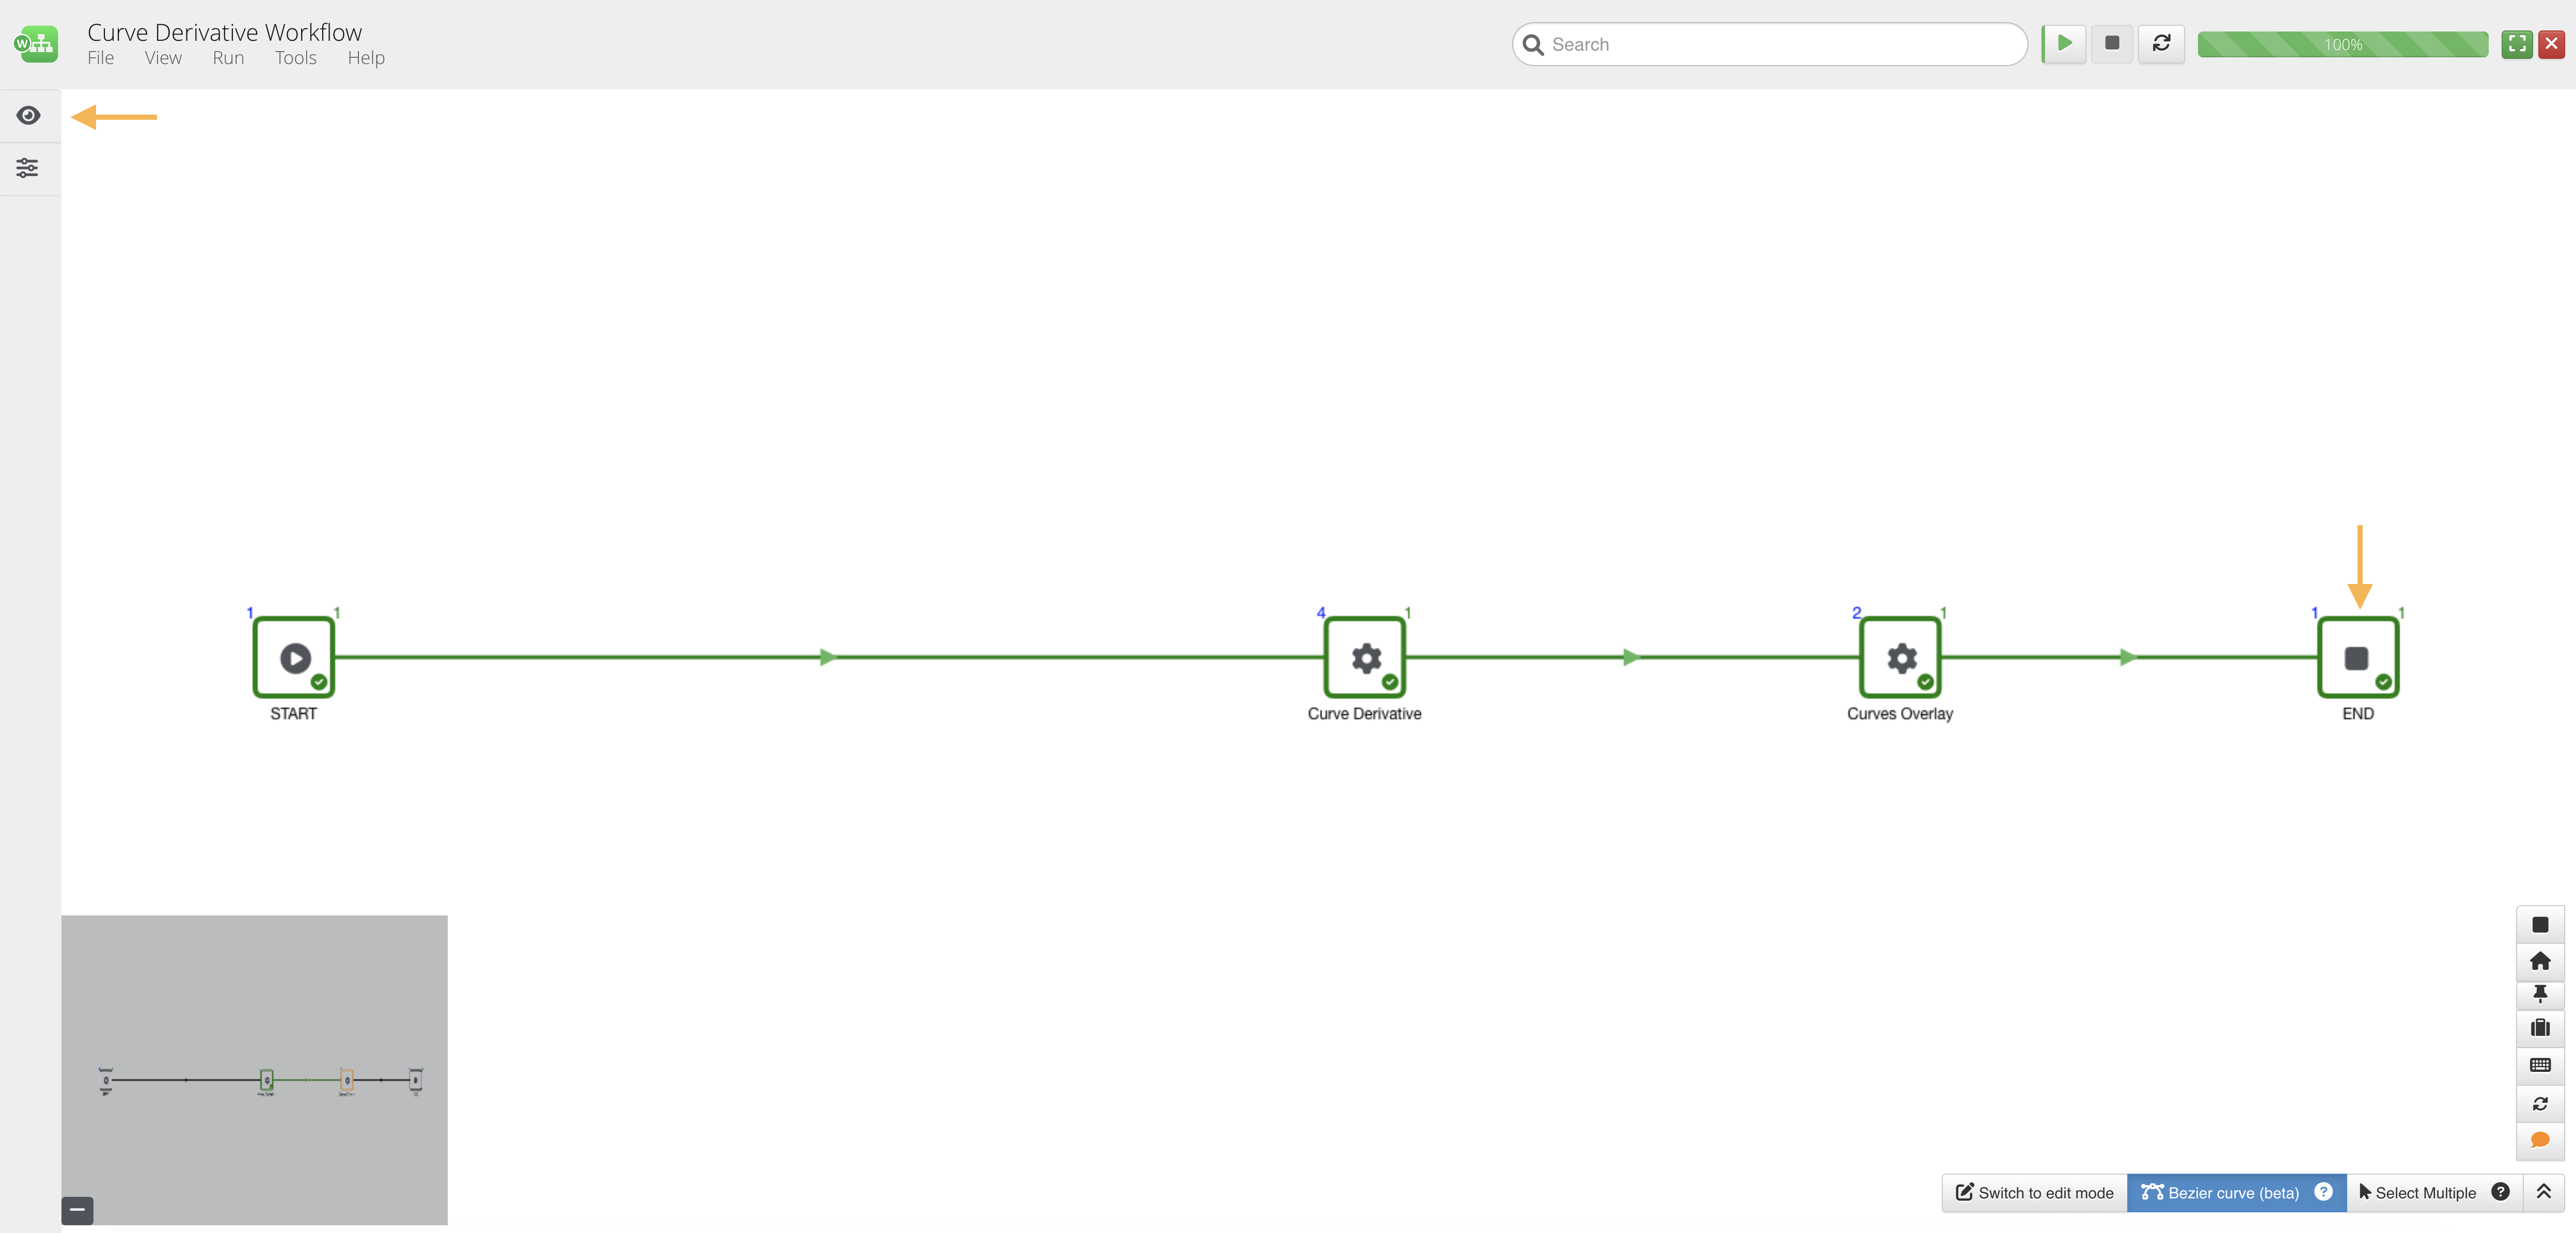
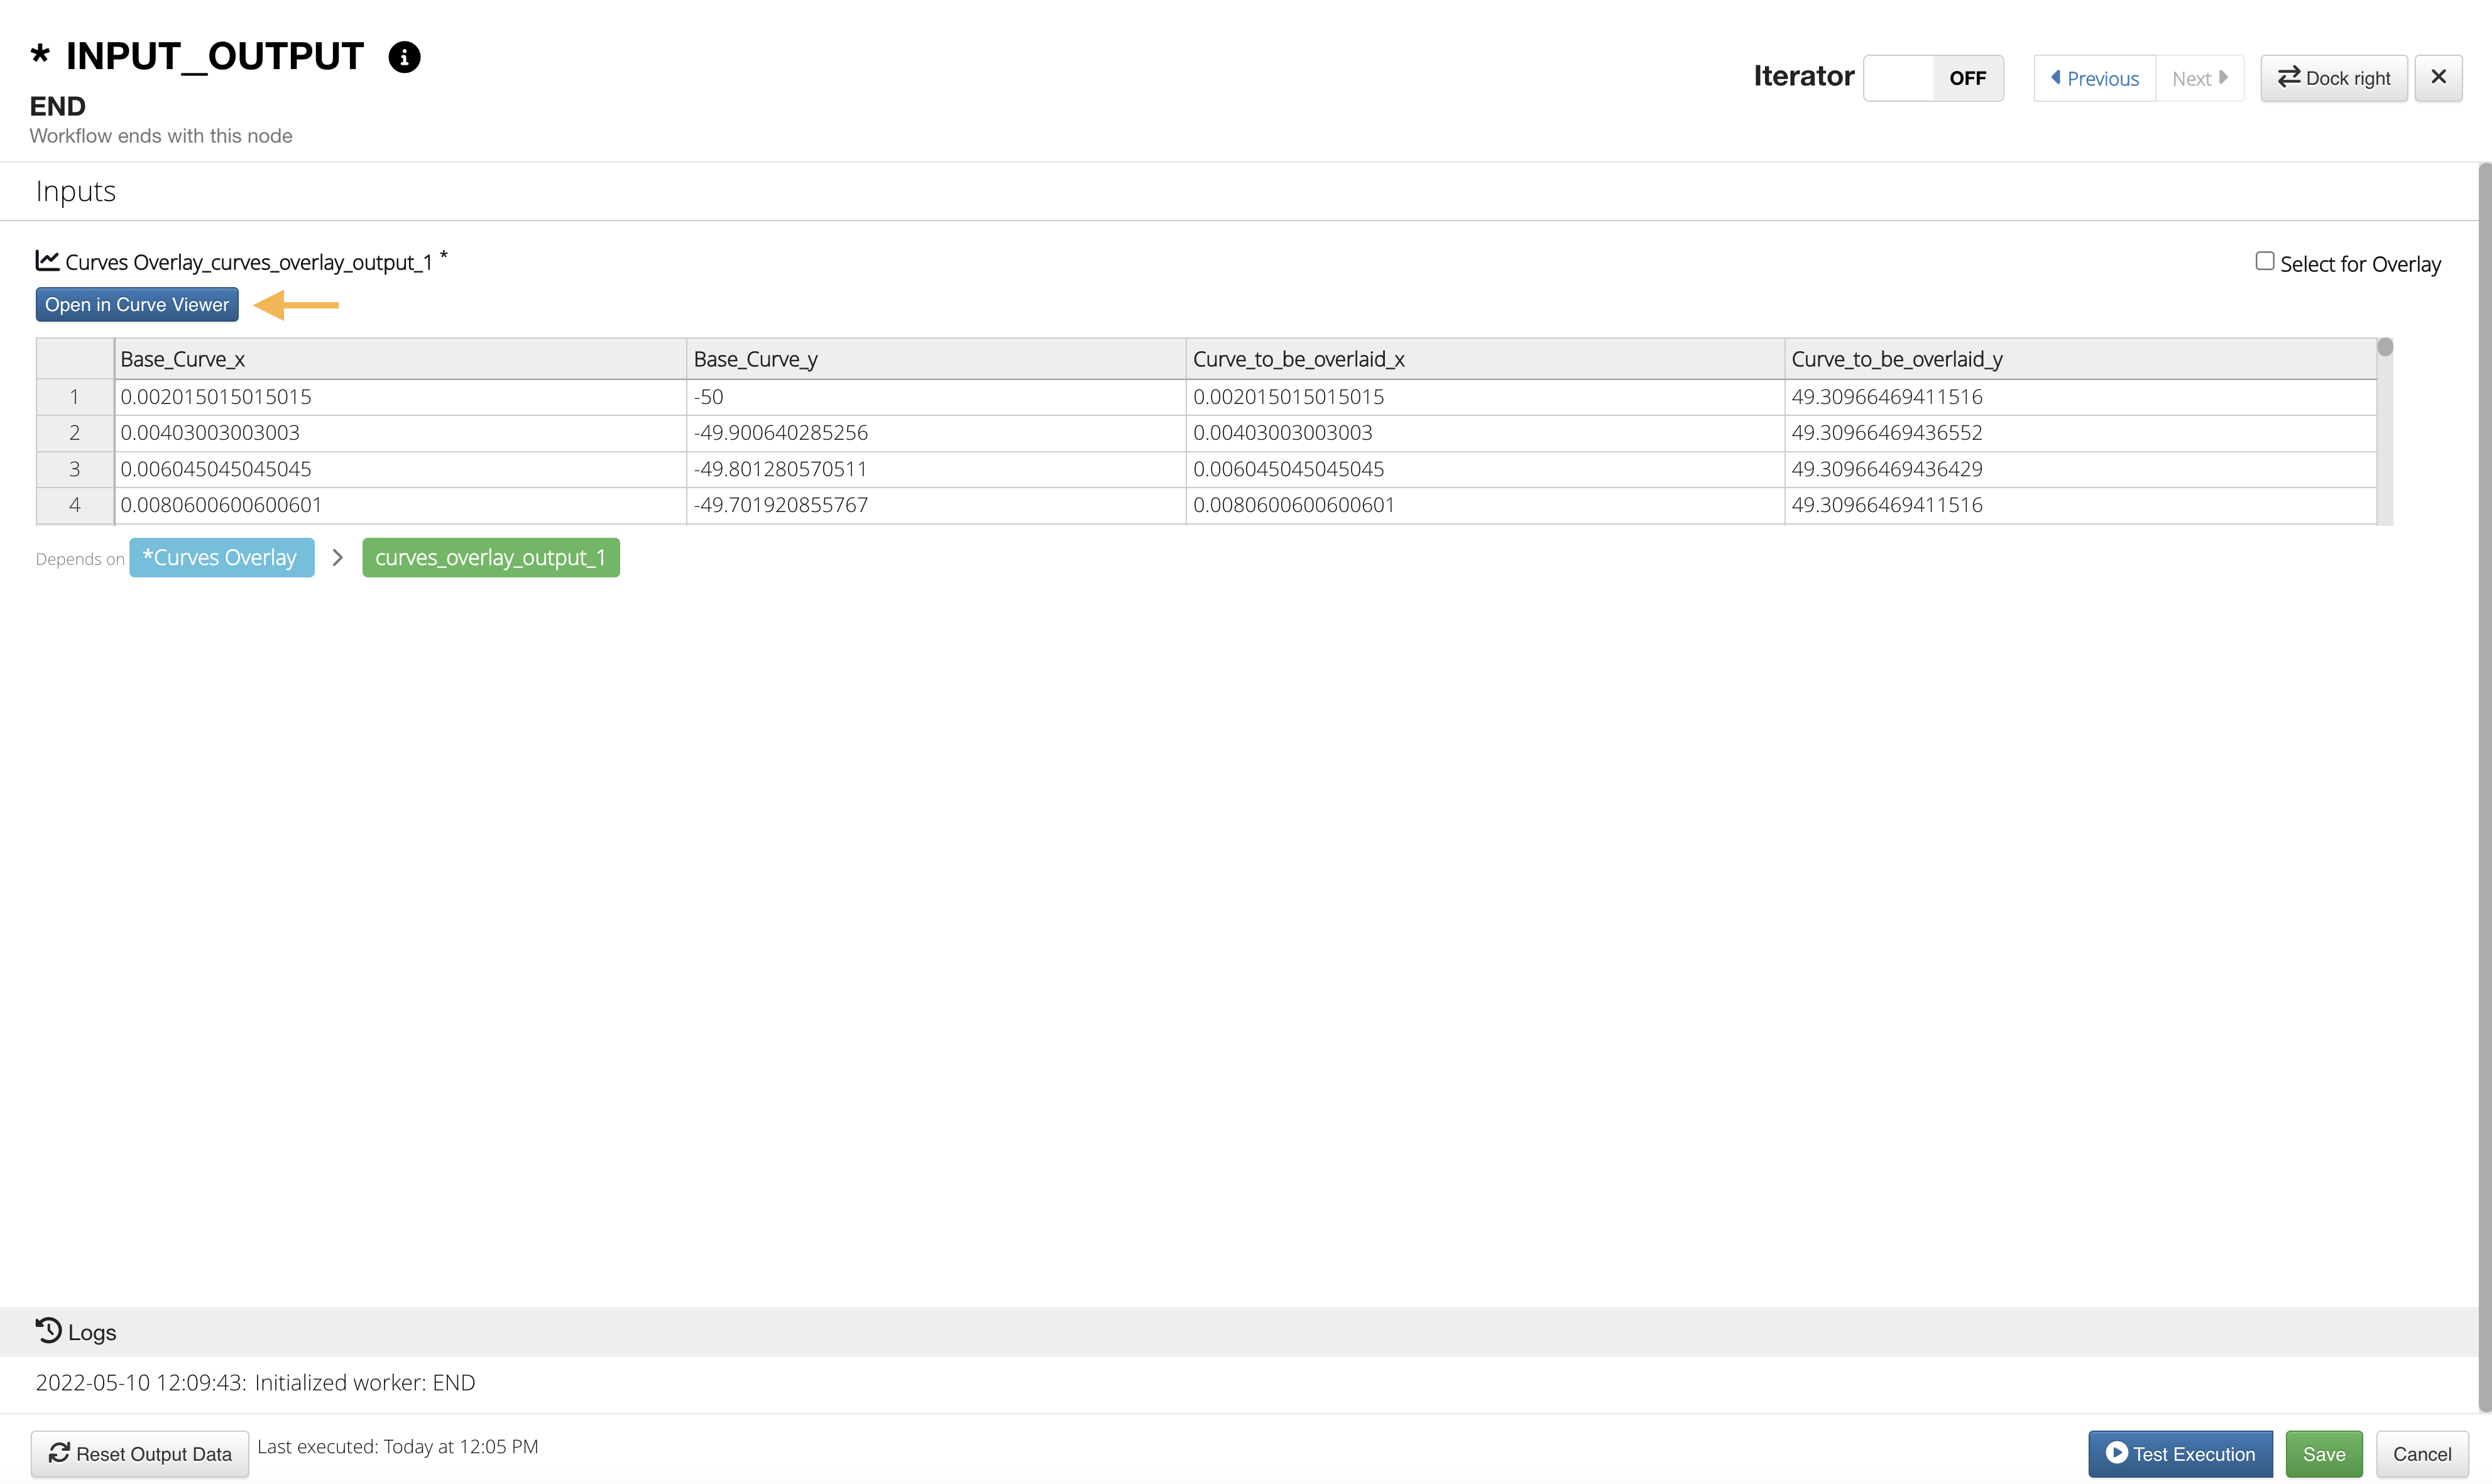
Let’s click on the END worker to review our CURVES_OVERLAY results. We can also view results under the eye icon in the left side panel.
View Results
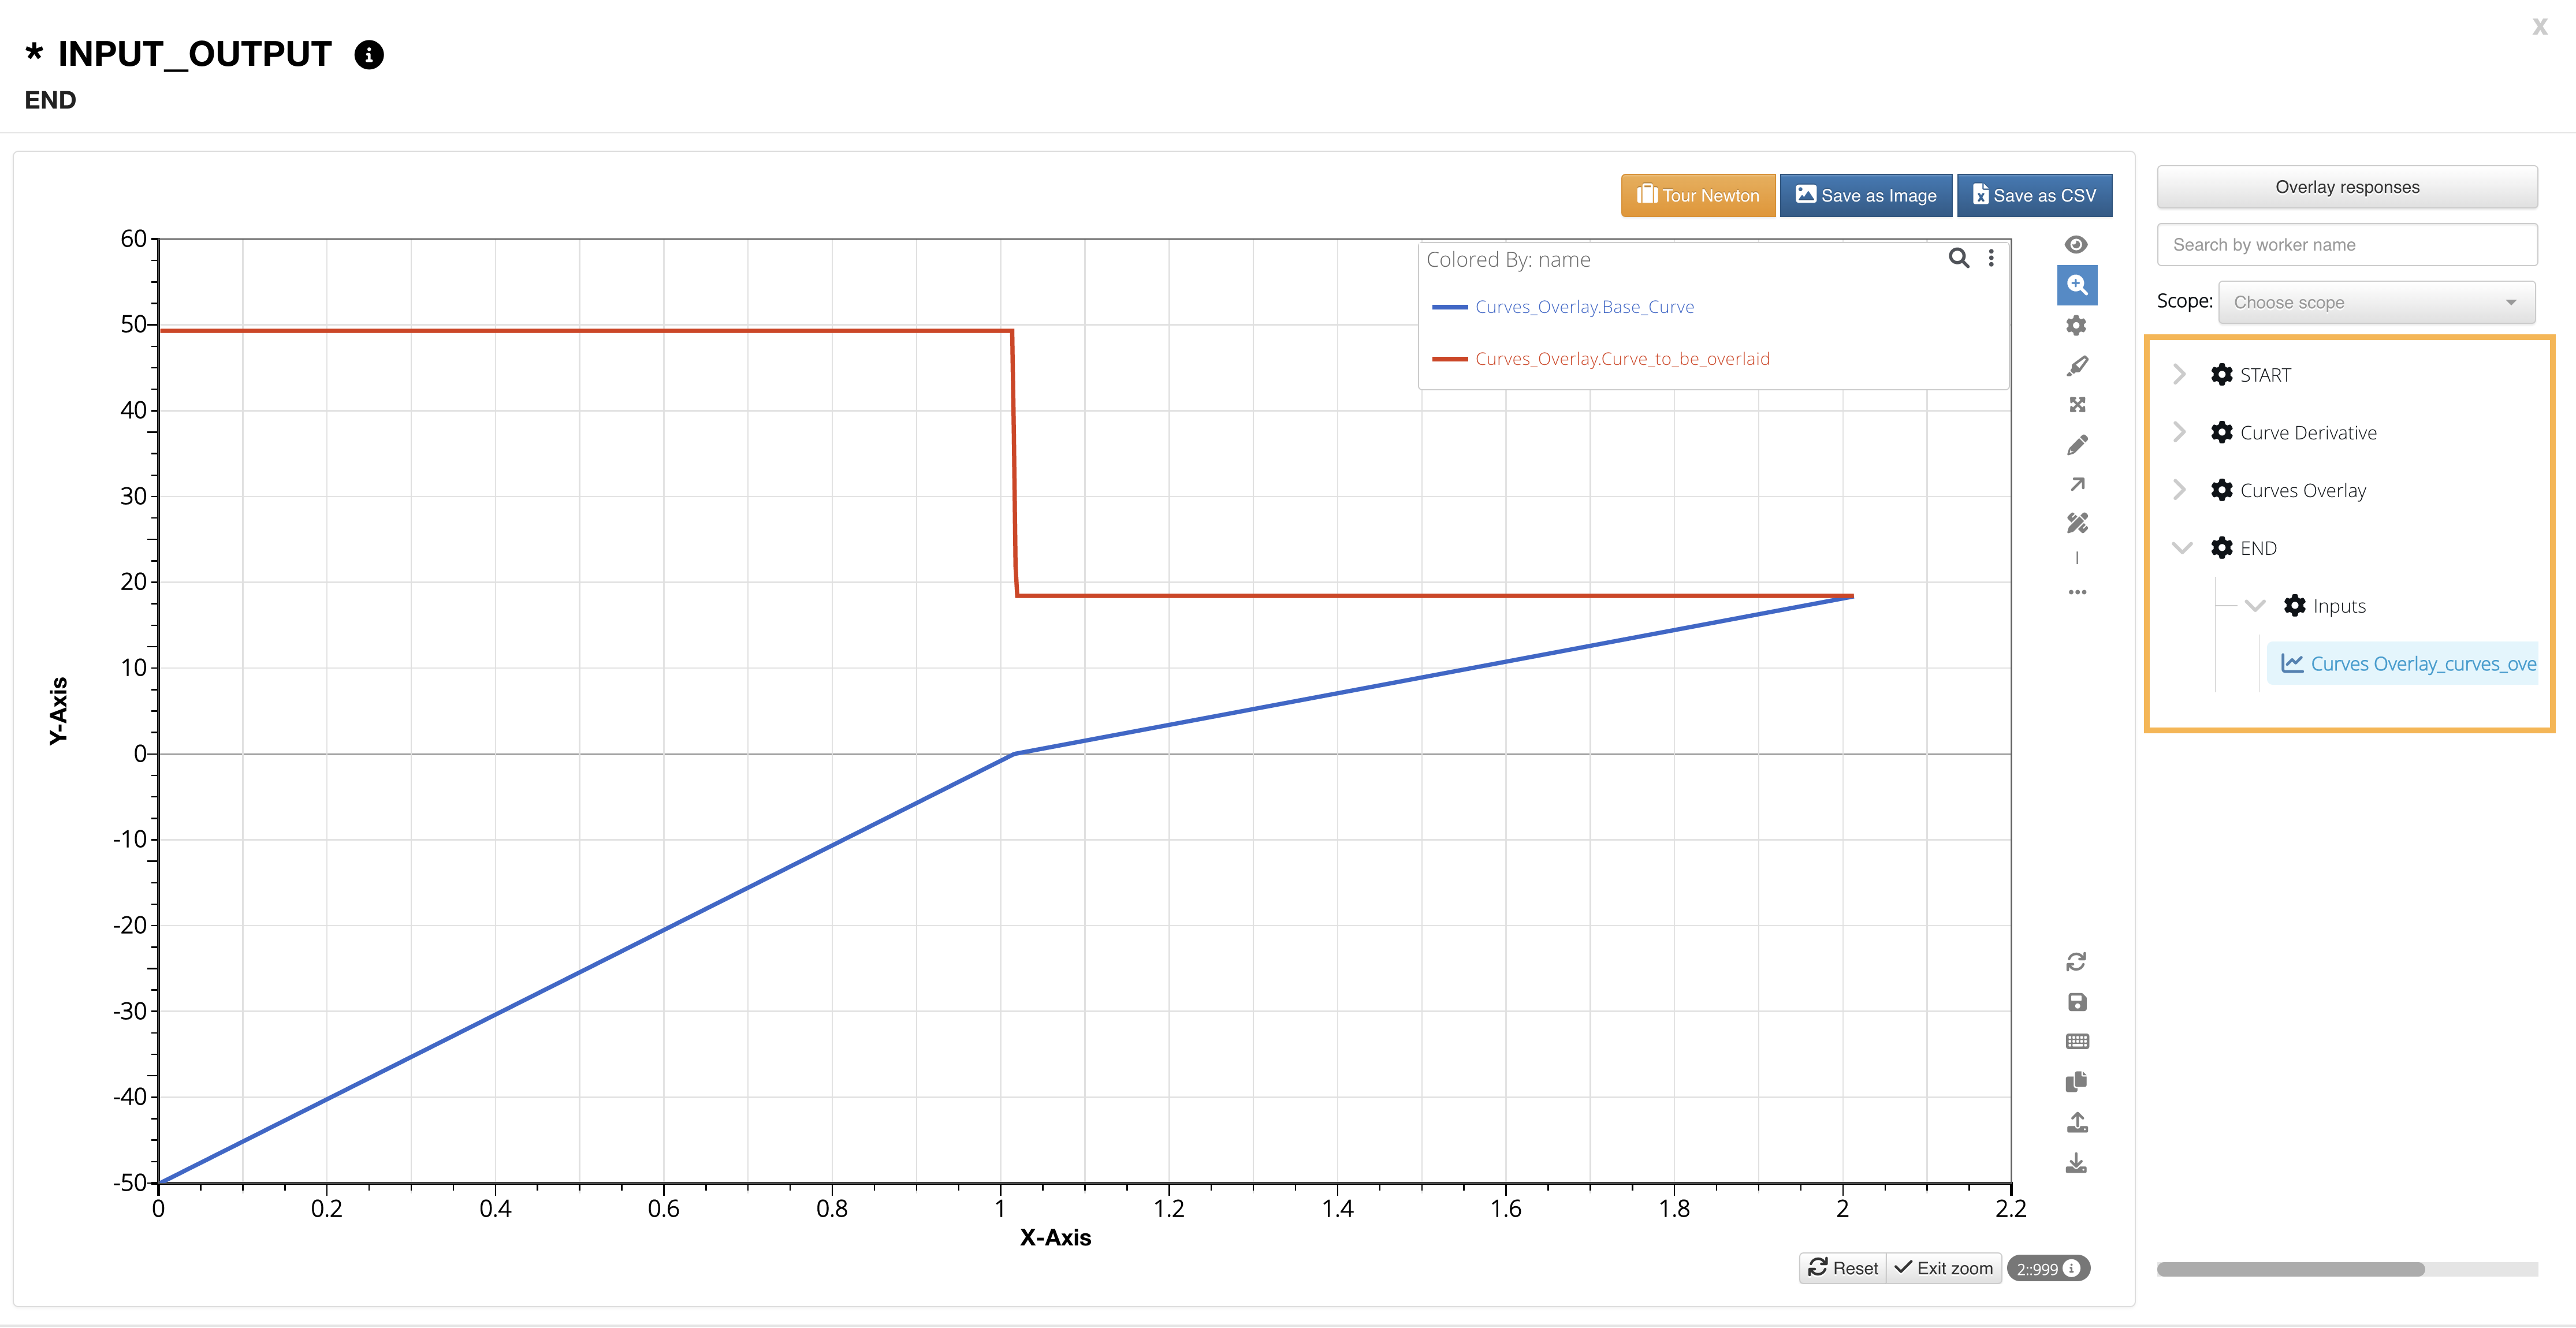
Here, we’ll open the curves in the Curve Viewer.
Open in Curve Viewer
Feel free to sift through other curve inputs/outputs in the workflow using the right side navigation.
Review Curve Inputs/Outputs
8.3. Material Test Card Workflow
In this section, we’ll go over creating a sample workflow for generating a material card from an excel file with Engineering Stress Strain Test data.
The entire process can be divided into 5 steps:
- Creating a New Workflow
- START worker configuration
- Adding and Configuring Workers
- Saving and Execution
- Reviewing Results
Create a New Workflow
Create a New workflow by clicking on the ‘New Workflow’ icon at the top of the Workflows page. A Canvas will open with the start and the end worker.
New Workflow
START worker configuration
- Click on the START worker to configure it.
Click on Start Worker
- Drag and drop the curve input to the left to add the Curve Input
- Click on ‘Drag files or click to upload’ to upload the curve from excel file. Double click on the first cell of each column to upload the xy points from the entire column.
- You can edit the input name and view the curve after it is uploaded. Lets call it ‘Eng SS Test’
- Click ‘Done’.
Configure Start Worker
Adding More Workers
- Click on add worker icon to open the library drop-down of all available workers.
Add Worker Library
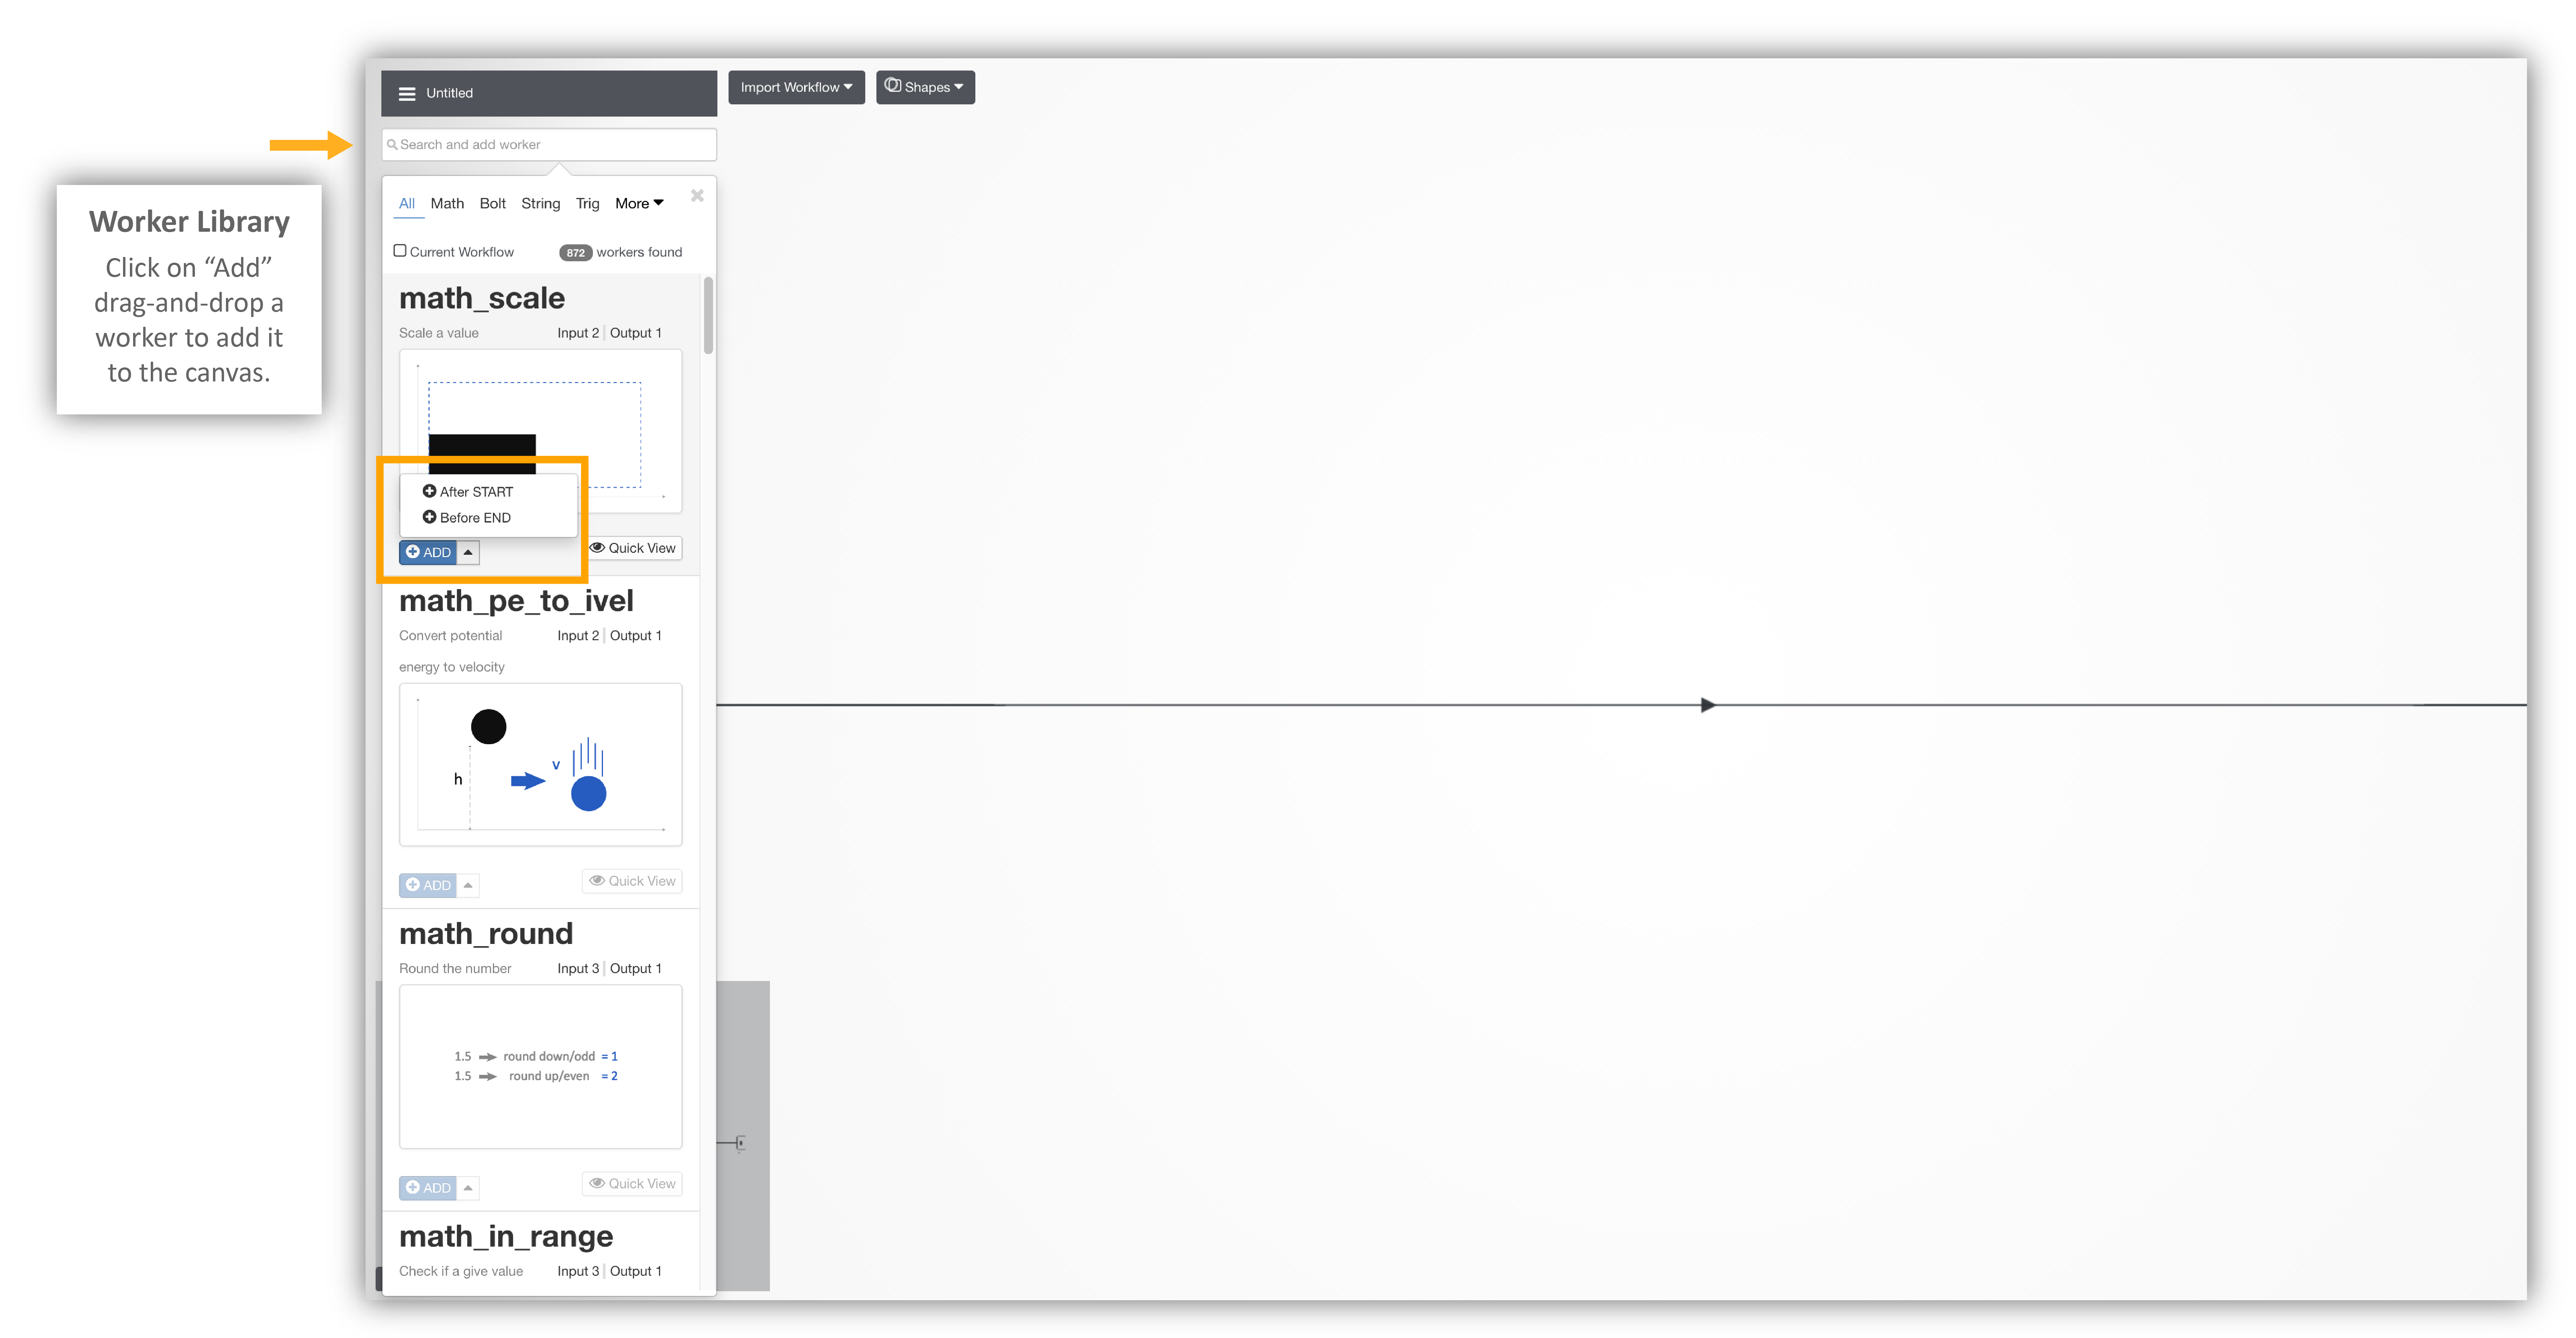
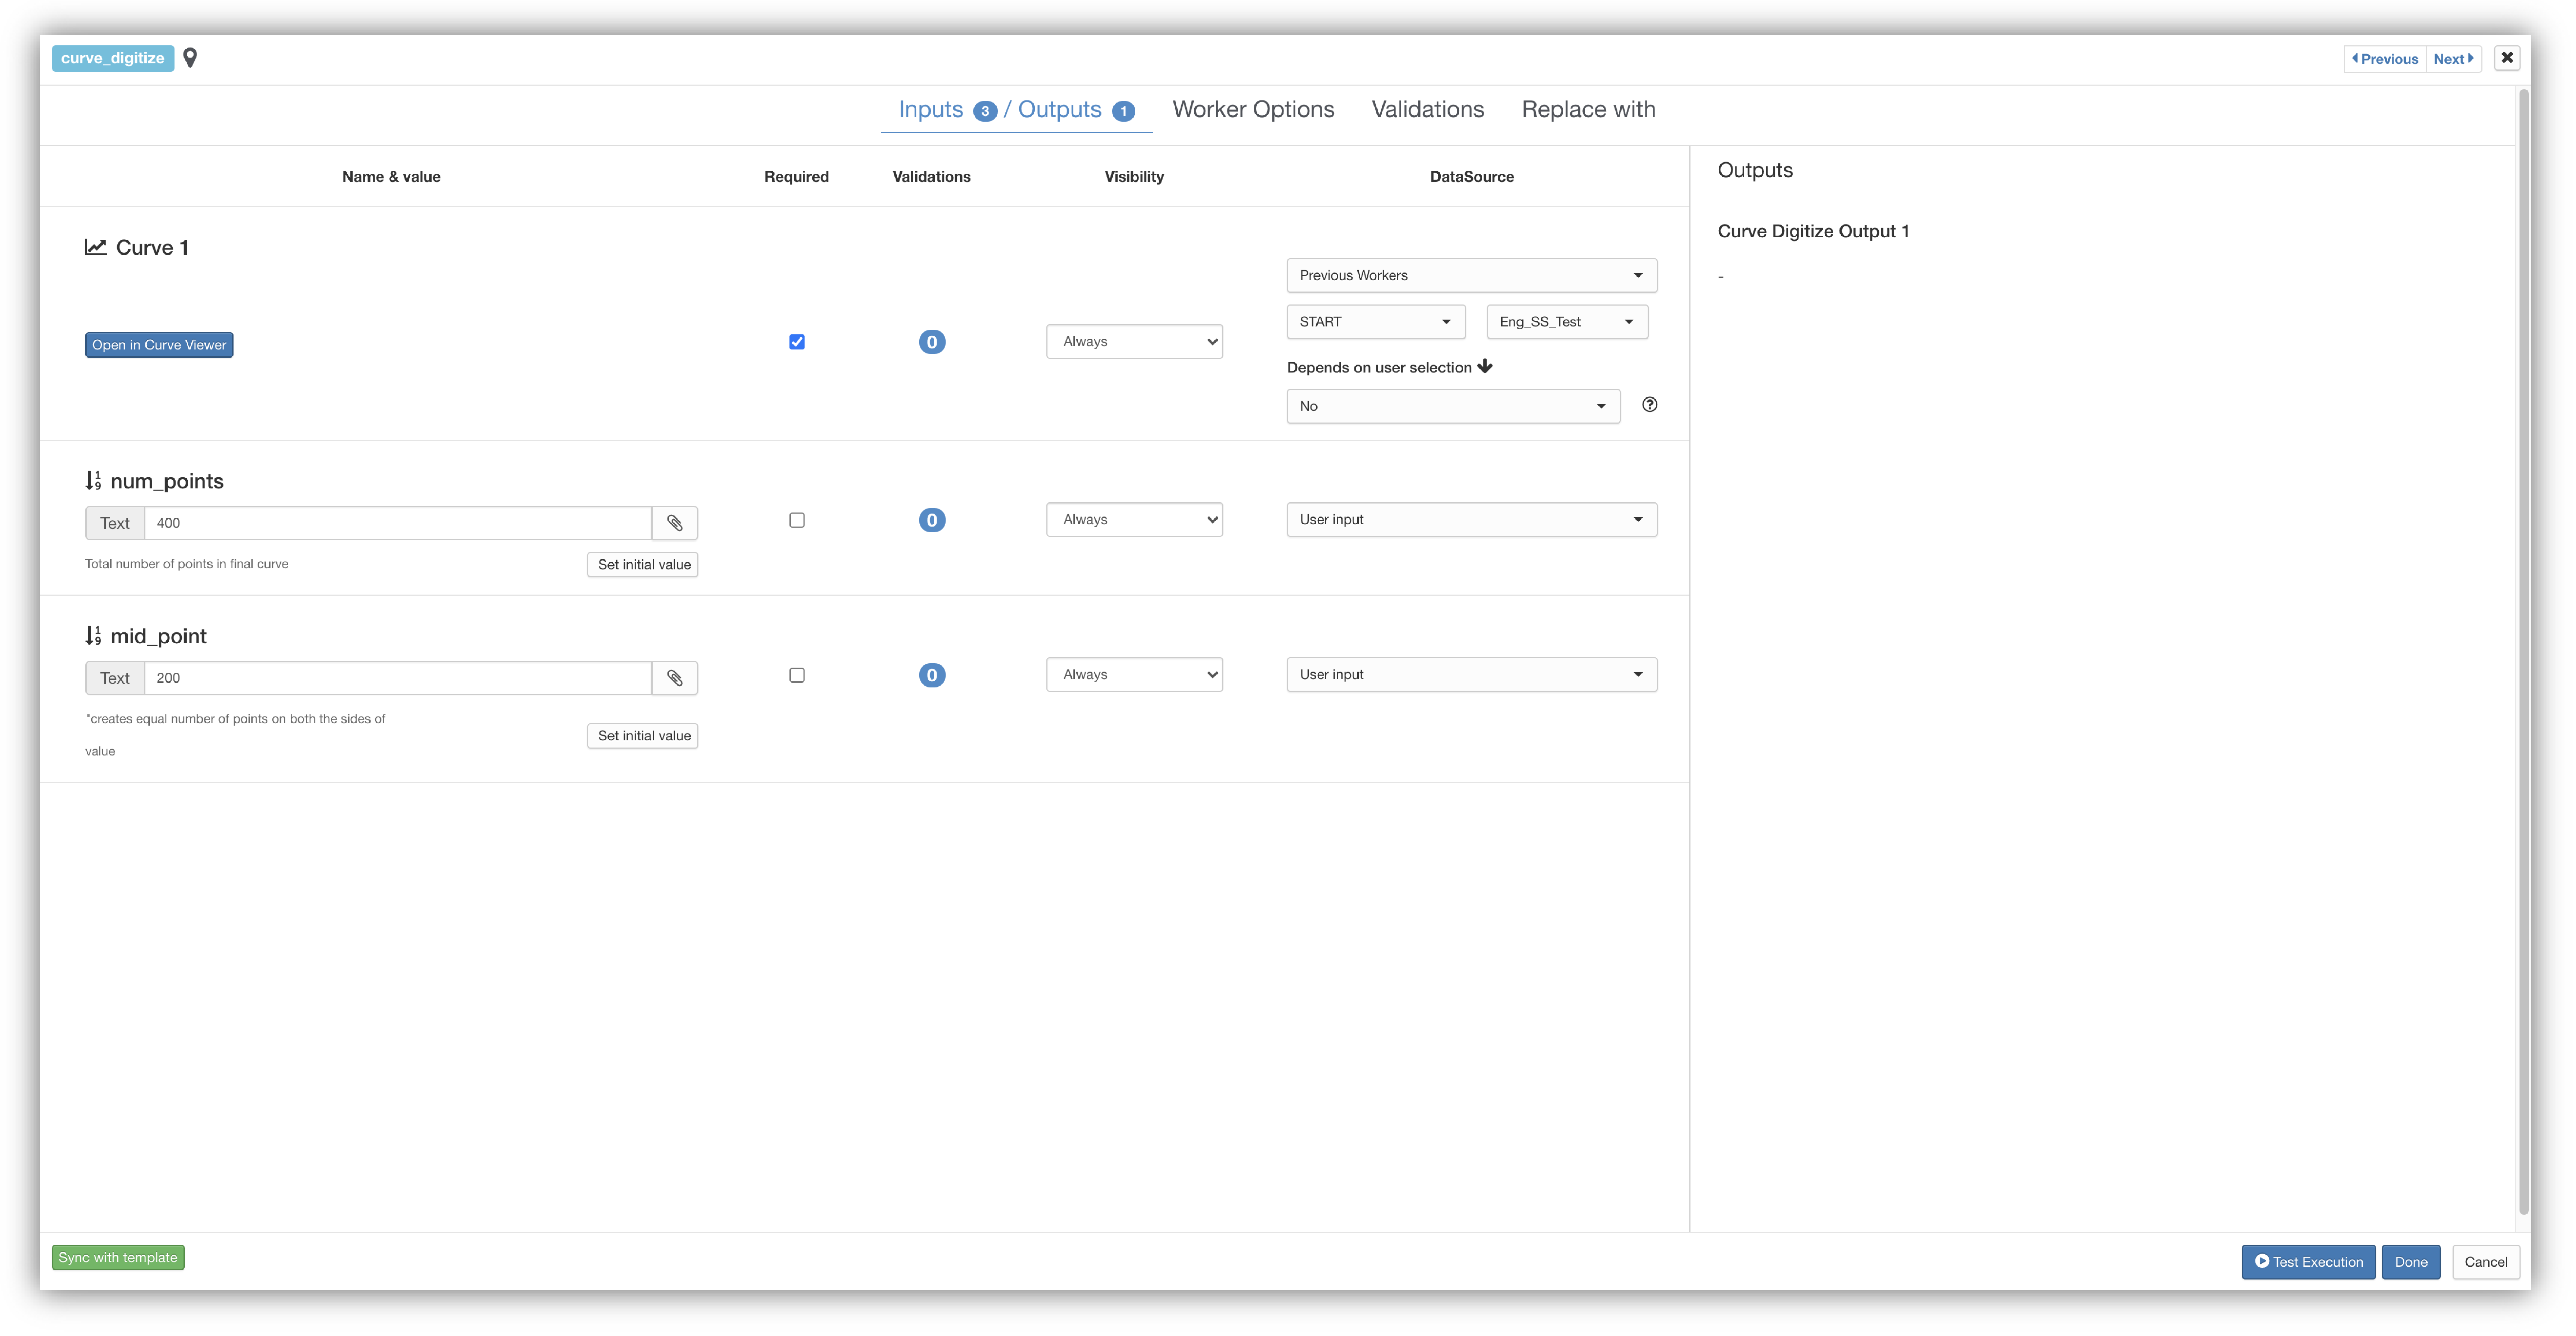
- In the text box, type ‘Curve Digitize’(curve_digitize), and then click on the worker name. The worker will appear between the start and the end worker.
- Click on the worker to edit the inputs. Select DataSource for the Curves input as Previous worker>Start>name of the curve (in this case Eng SS Test)
- In the num_points (number of digitized points), we’ll go with 400.
- The worker configuration looks something like this:
Curve Digitize
- Click Done. Similarly, we will add more workers to clean the test data and generate hardening curve.
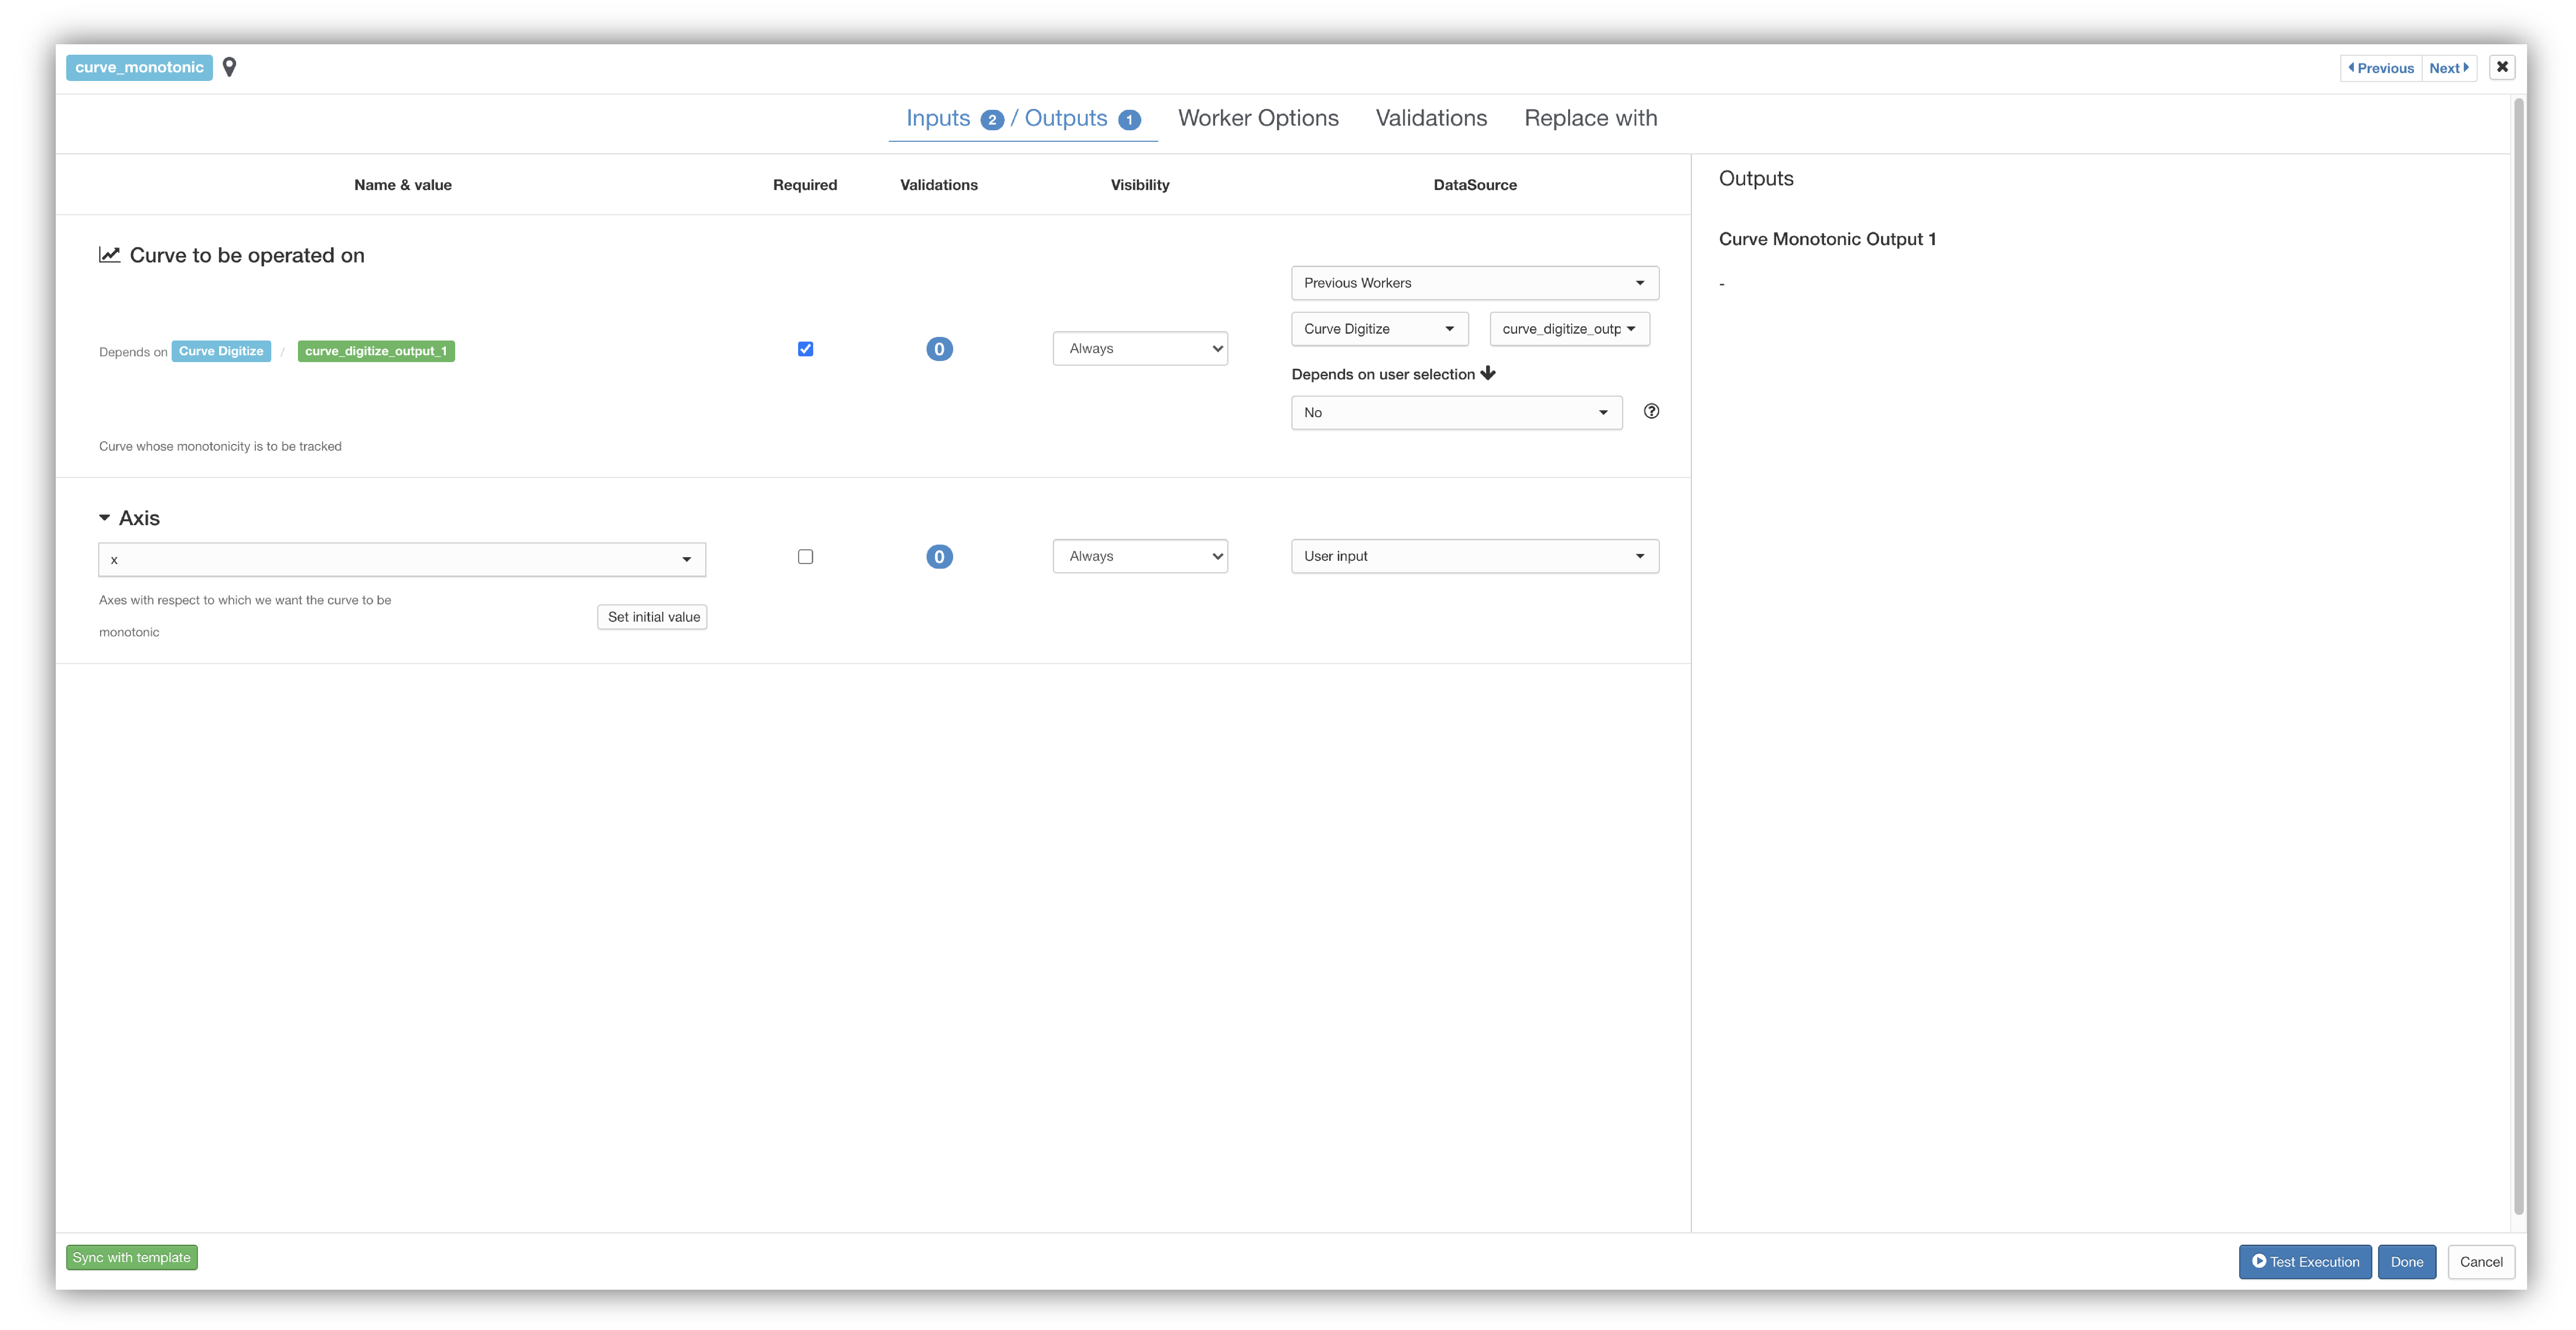
- For the next worker, choose ‘Curve Monotonic’(curve_monotonic) to place it on the canvas. Click on the worker in the timeline and add the following inputs:
- Curve to be operated on: Previous Workers > Curve Digitize > curve_digitize_output_1
- Axis: x
- Click Done. The worker configuration for Monotonic should look this this:
Curve Monotonic
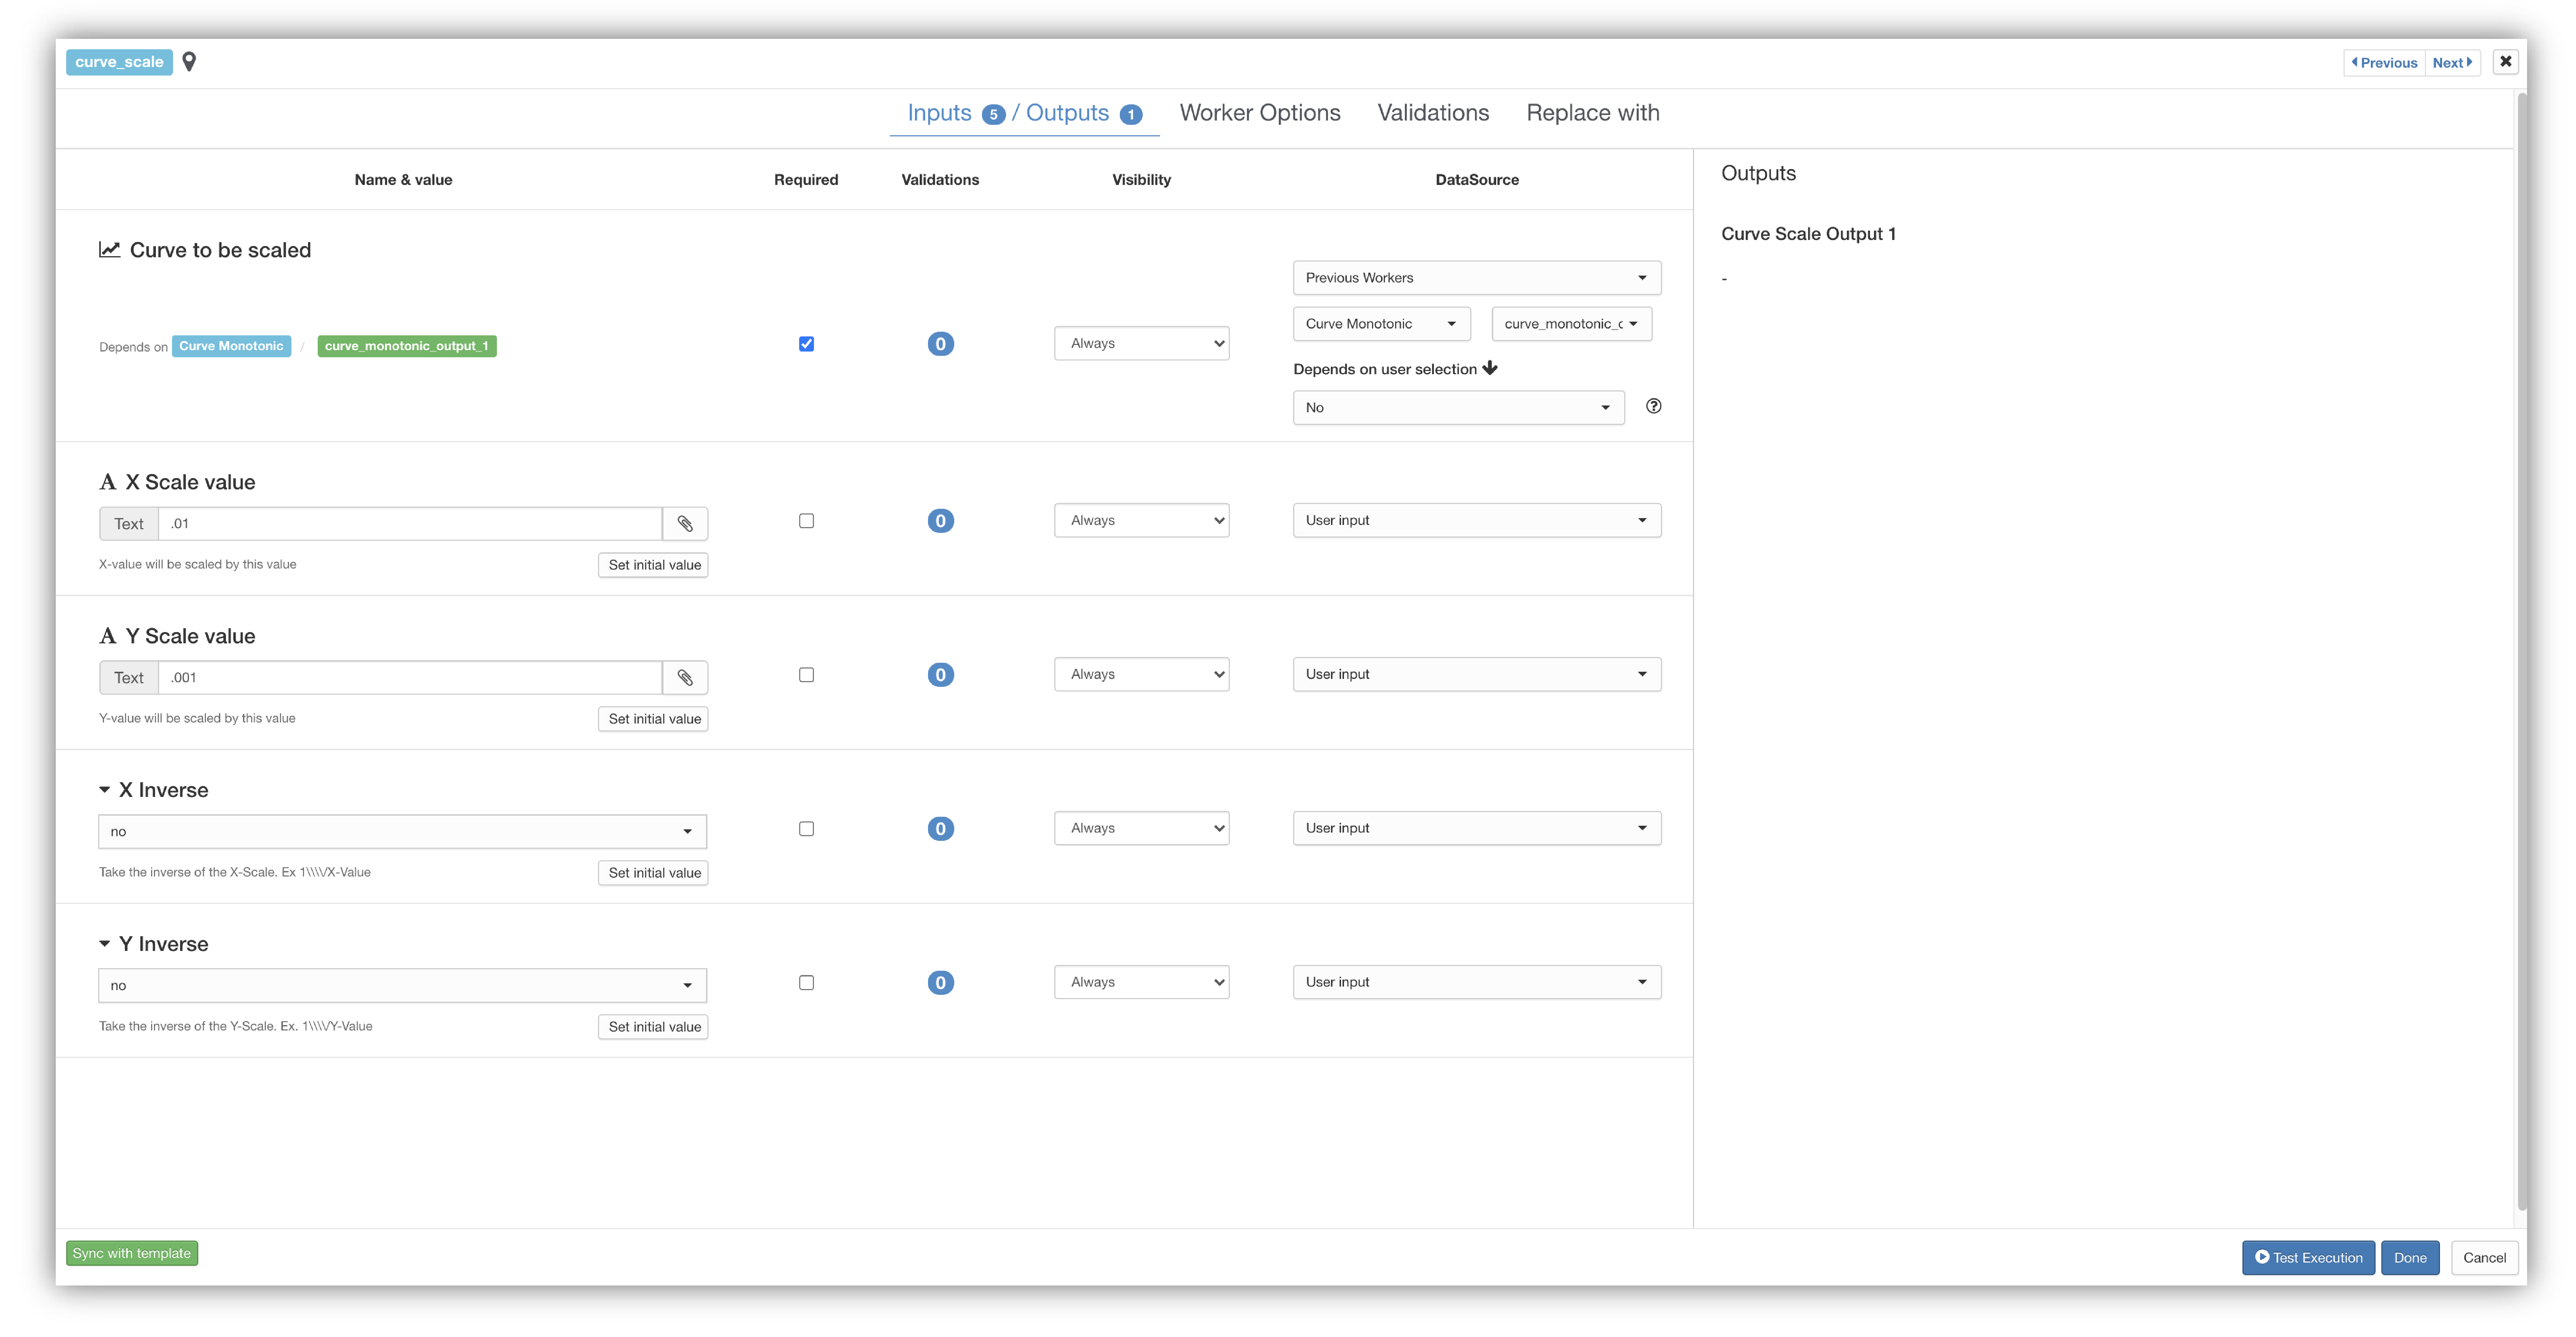
- Add the ‘Curve Scale’ (curve_scale) worker for scaling the Engineering stress strain curve to GPa-(mm/mm) units. The inputs are:
- Curves to be scaled: Previous worker> Curve Monotonic > curve_monotonic_output_1
- X scale value: 0.01
- Y scale value: 0.001
- X inverse: no
- Y inverse: no
- Click Done. Scale’s configuration should look this this:
Curve Scale
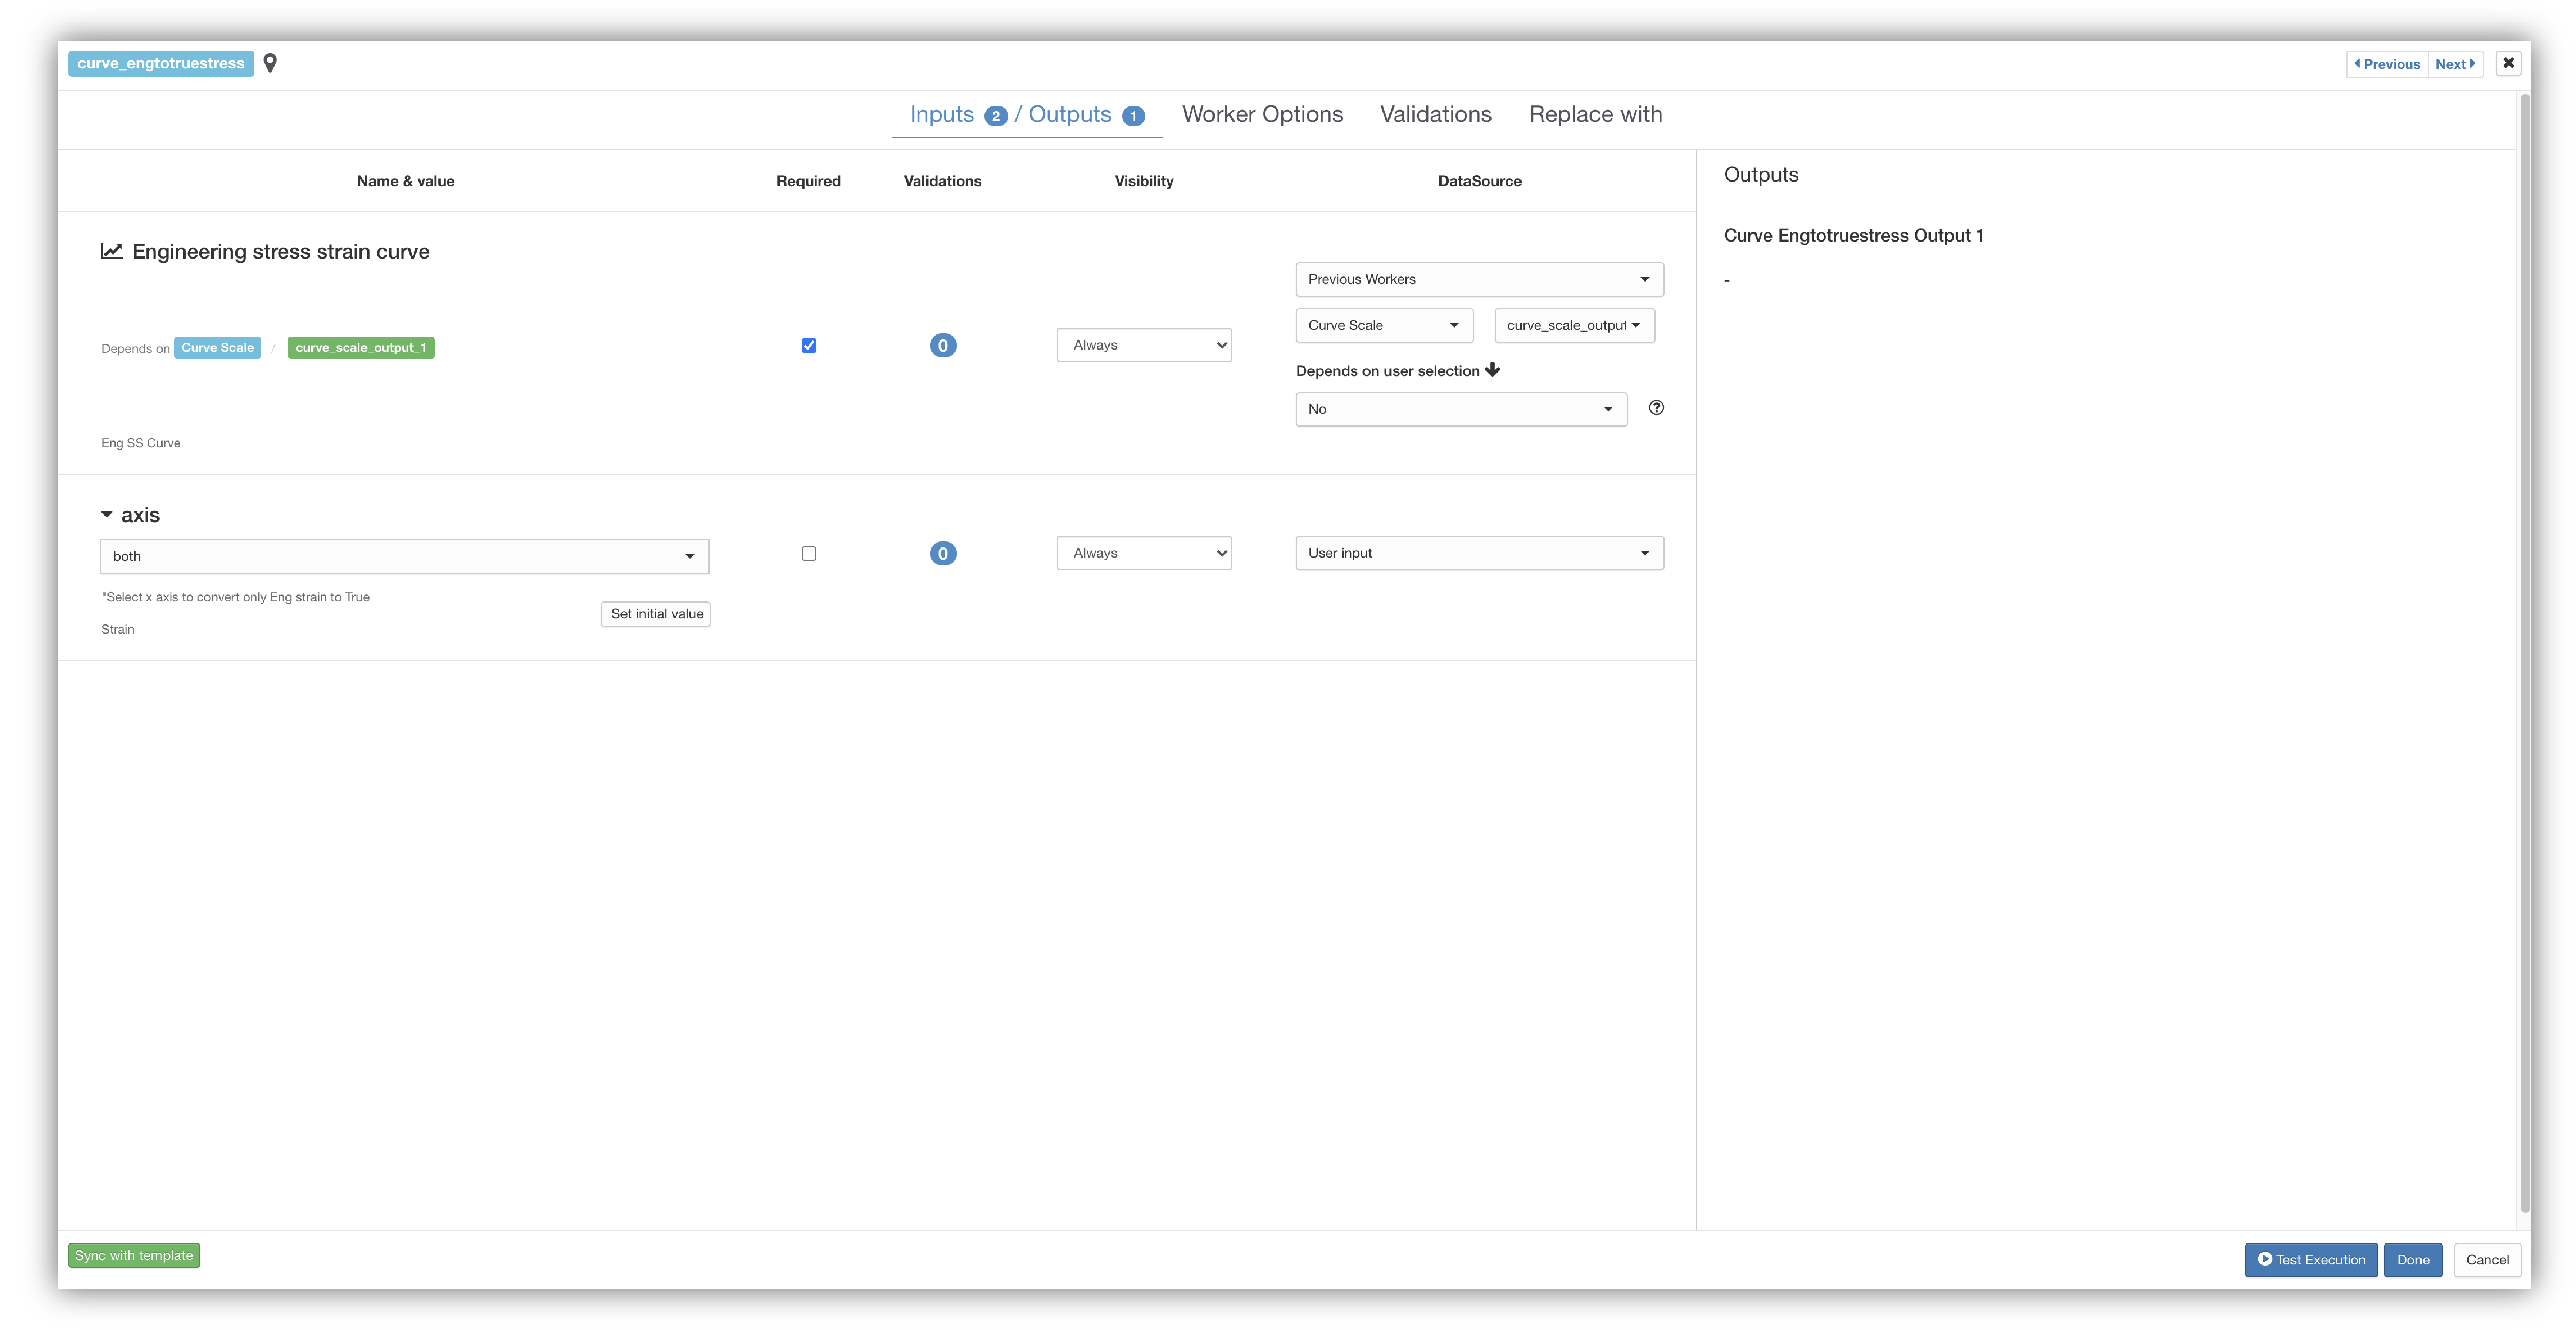
- Next, add the ‘Curve Eng to True Stress’ (curve_engtotruestress) worker and input:
- Curve: Dependent on previous workers (curve scale) output
- Axis: both
Curve Eng to True Stress
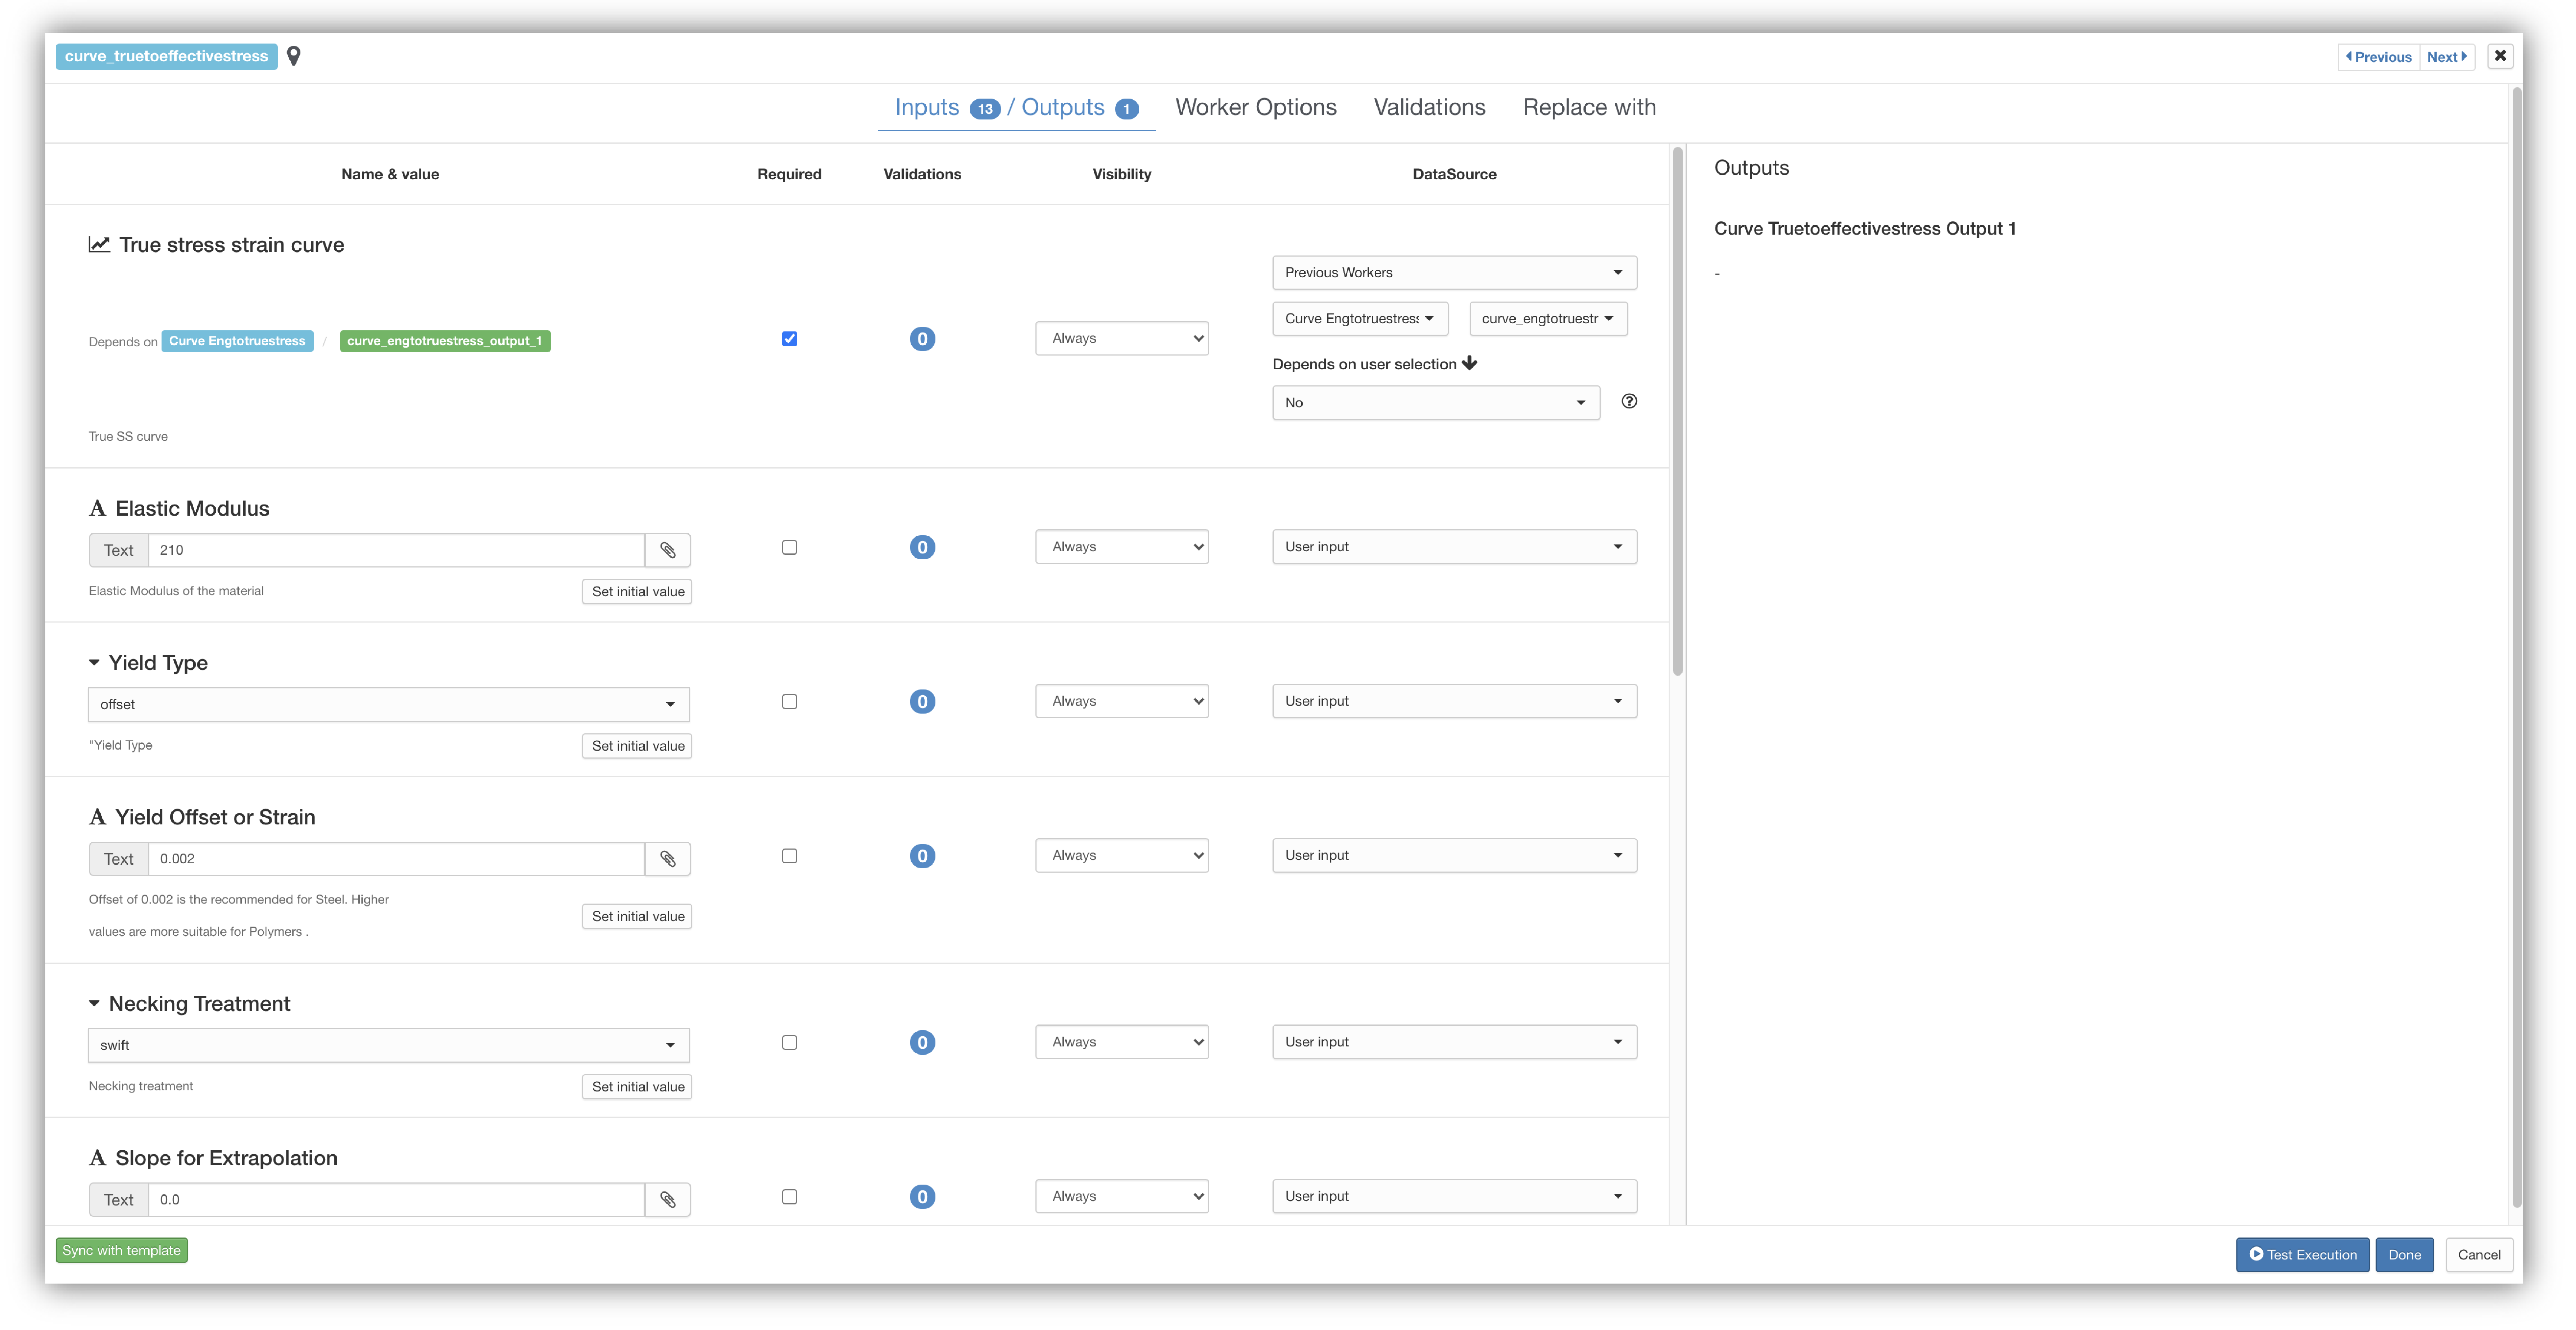
- Add the ‘Curve True to Effective Stress’ (curve_truetoeffectivestress) worker and input:
- True SS curve : previous worker output (Eng to True SS)
- Elastic Modulus: 210
- Yield Type: offset
- Yield Offset or Strain: 0.002
- Necking Treatment: swift
- Slope of Extrapolation: 0.0
- Last Strain: 1.0
- Digitize: 400
- Saturation Strain: 0
- Saturation Percentage: 0
- Click Done. The worker configuration should look like this:
Curve True to Effective Stress
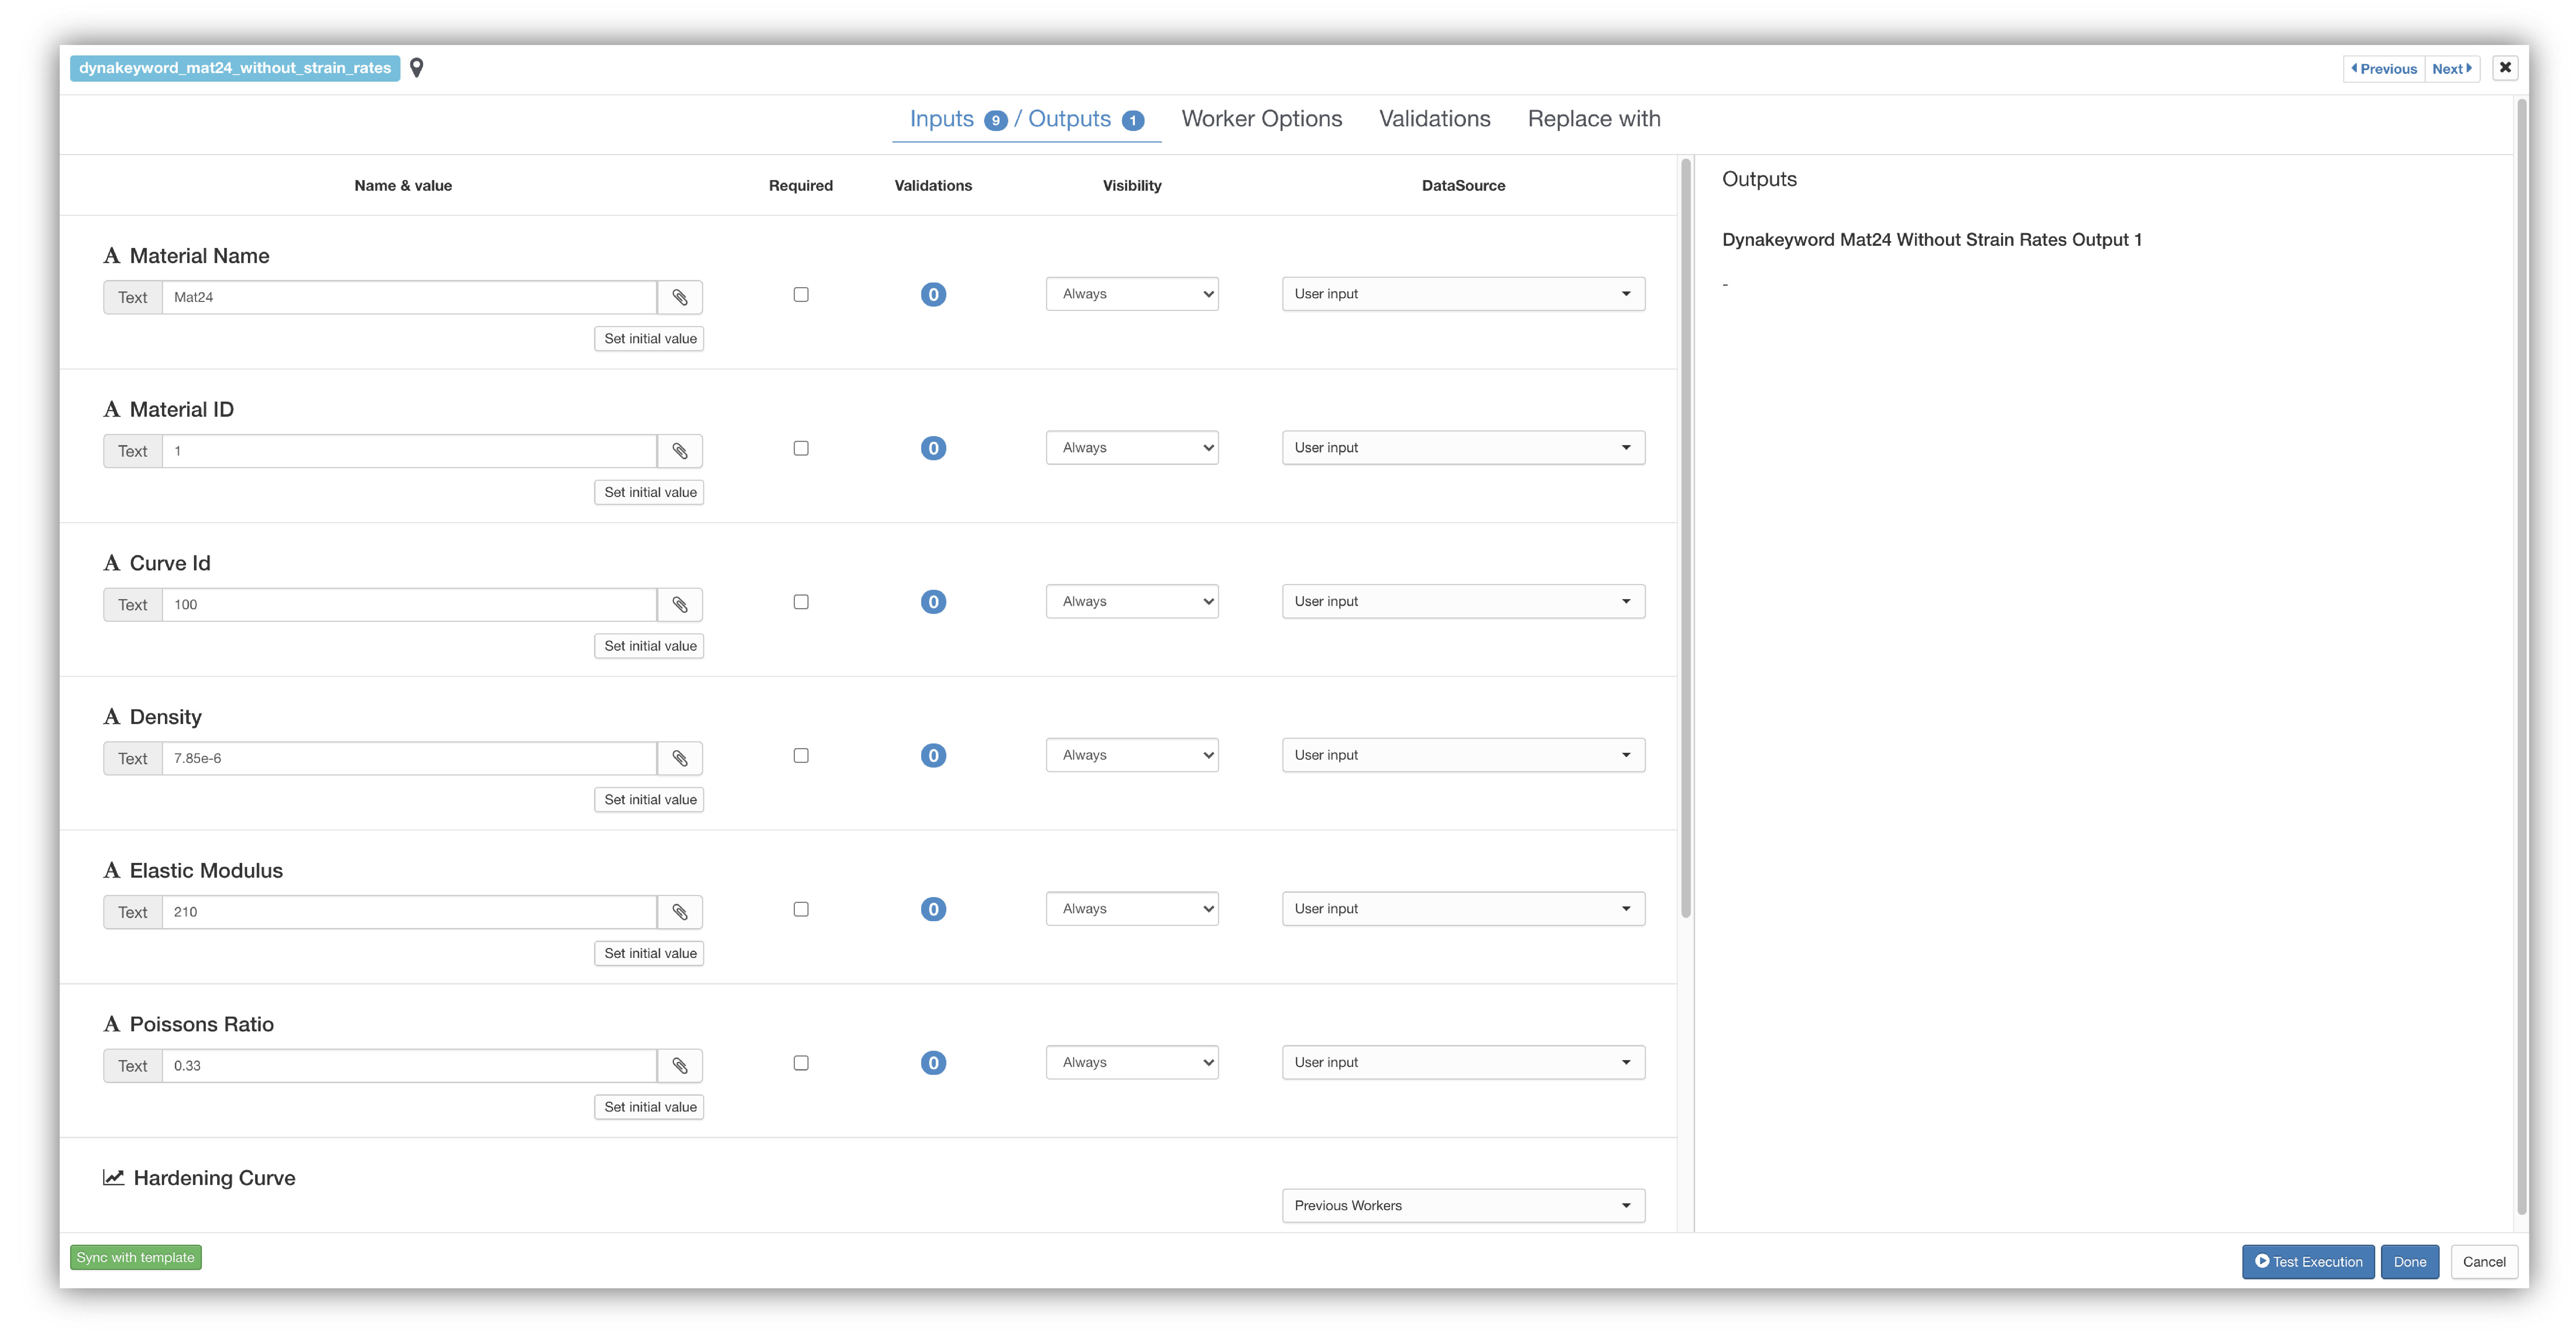
- Finally, add the ‘Dynakeyword Mat24 Without Strain Rates’ (dynakeyword_mat24_without_strain_rates) worker. Set the inputs for the Material card generator as:
- Material name: Mat 24
- Material ID: 1
- Curve Id: 100
- Density: 7.85e-6
- Elastic Modulus: 210
- Poisson’s Ratio: 0.33
- Hardening Curve: Previous worker (True to Effective)
- Failure Strain: 0.0
- Number of Dig Points: 400
The worker configuration looks like this:
Dynakeyword Mat24 Without Strain Rates
Saving
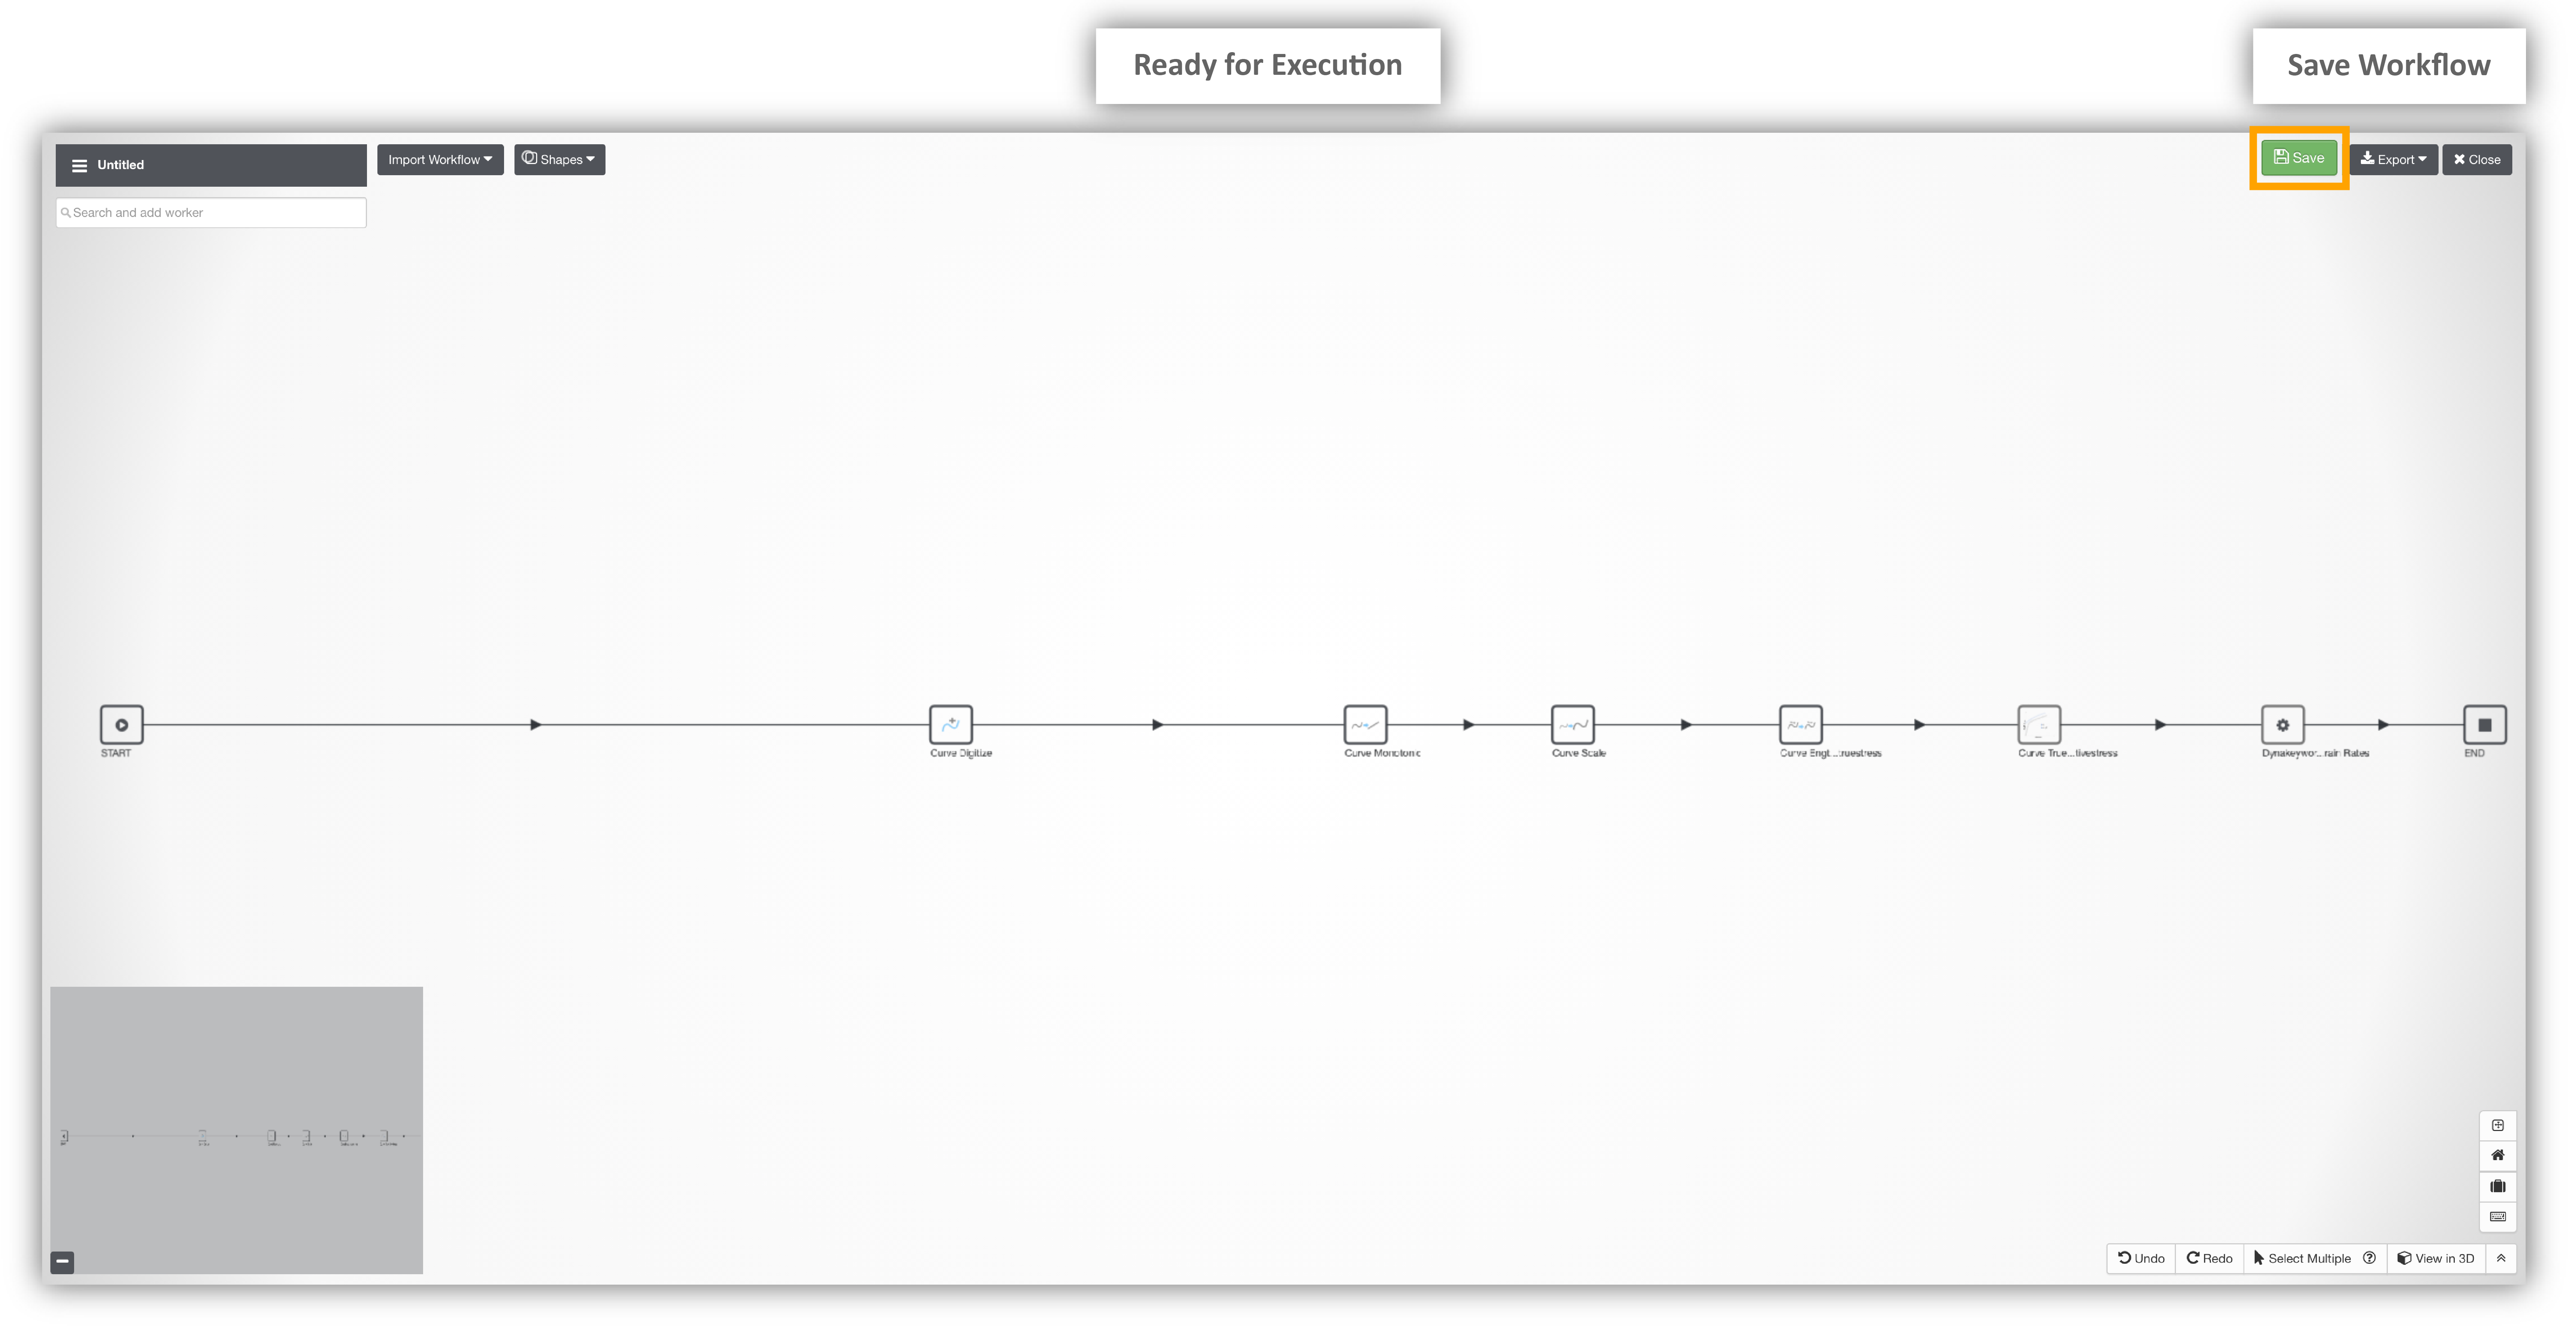
After adding all the above workers, the canvas should look similar to the image shown below. You can move the workers by clicking and dragging them. To save your workflow, click on the respected button in the upper right corner.
Workflow Ready for Execution
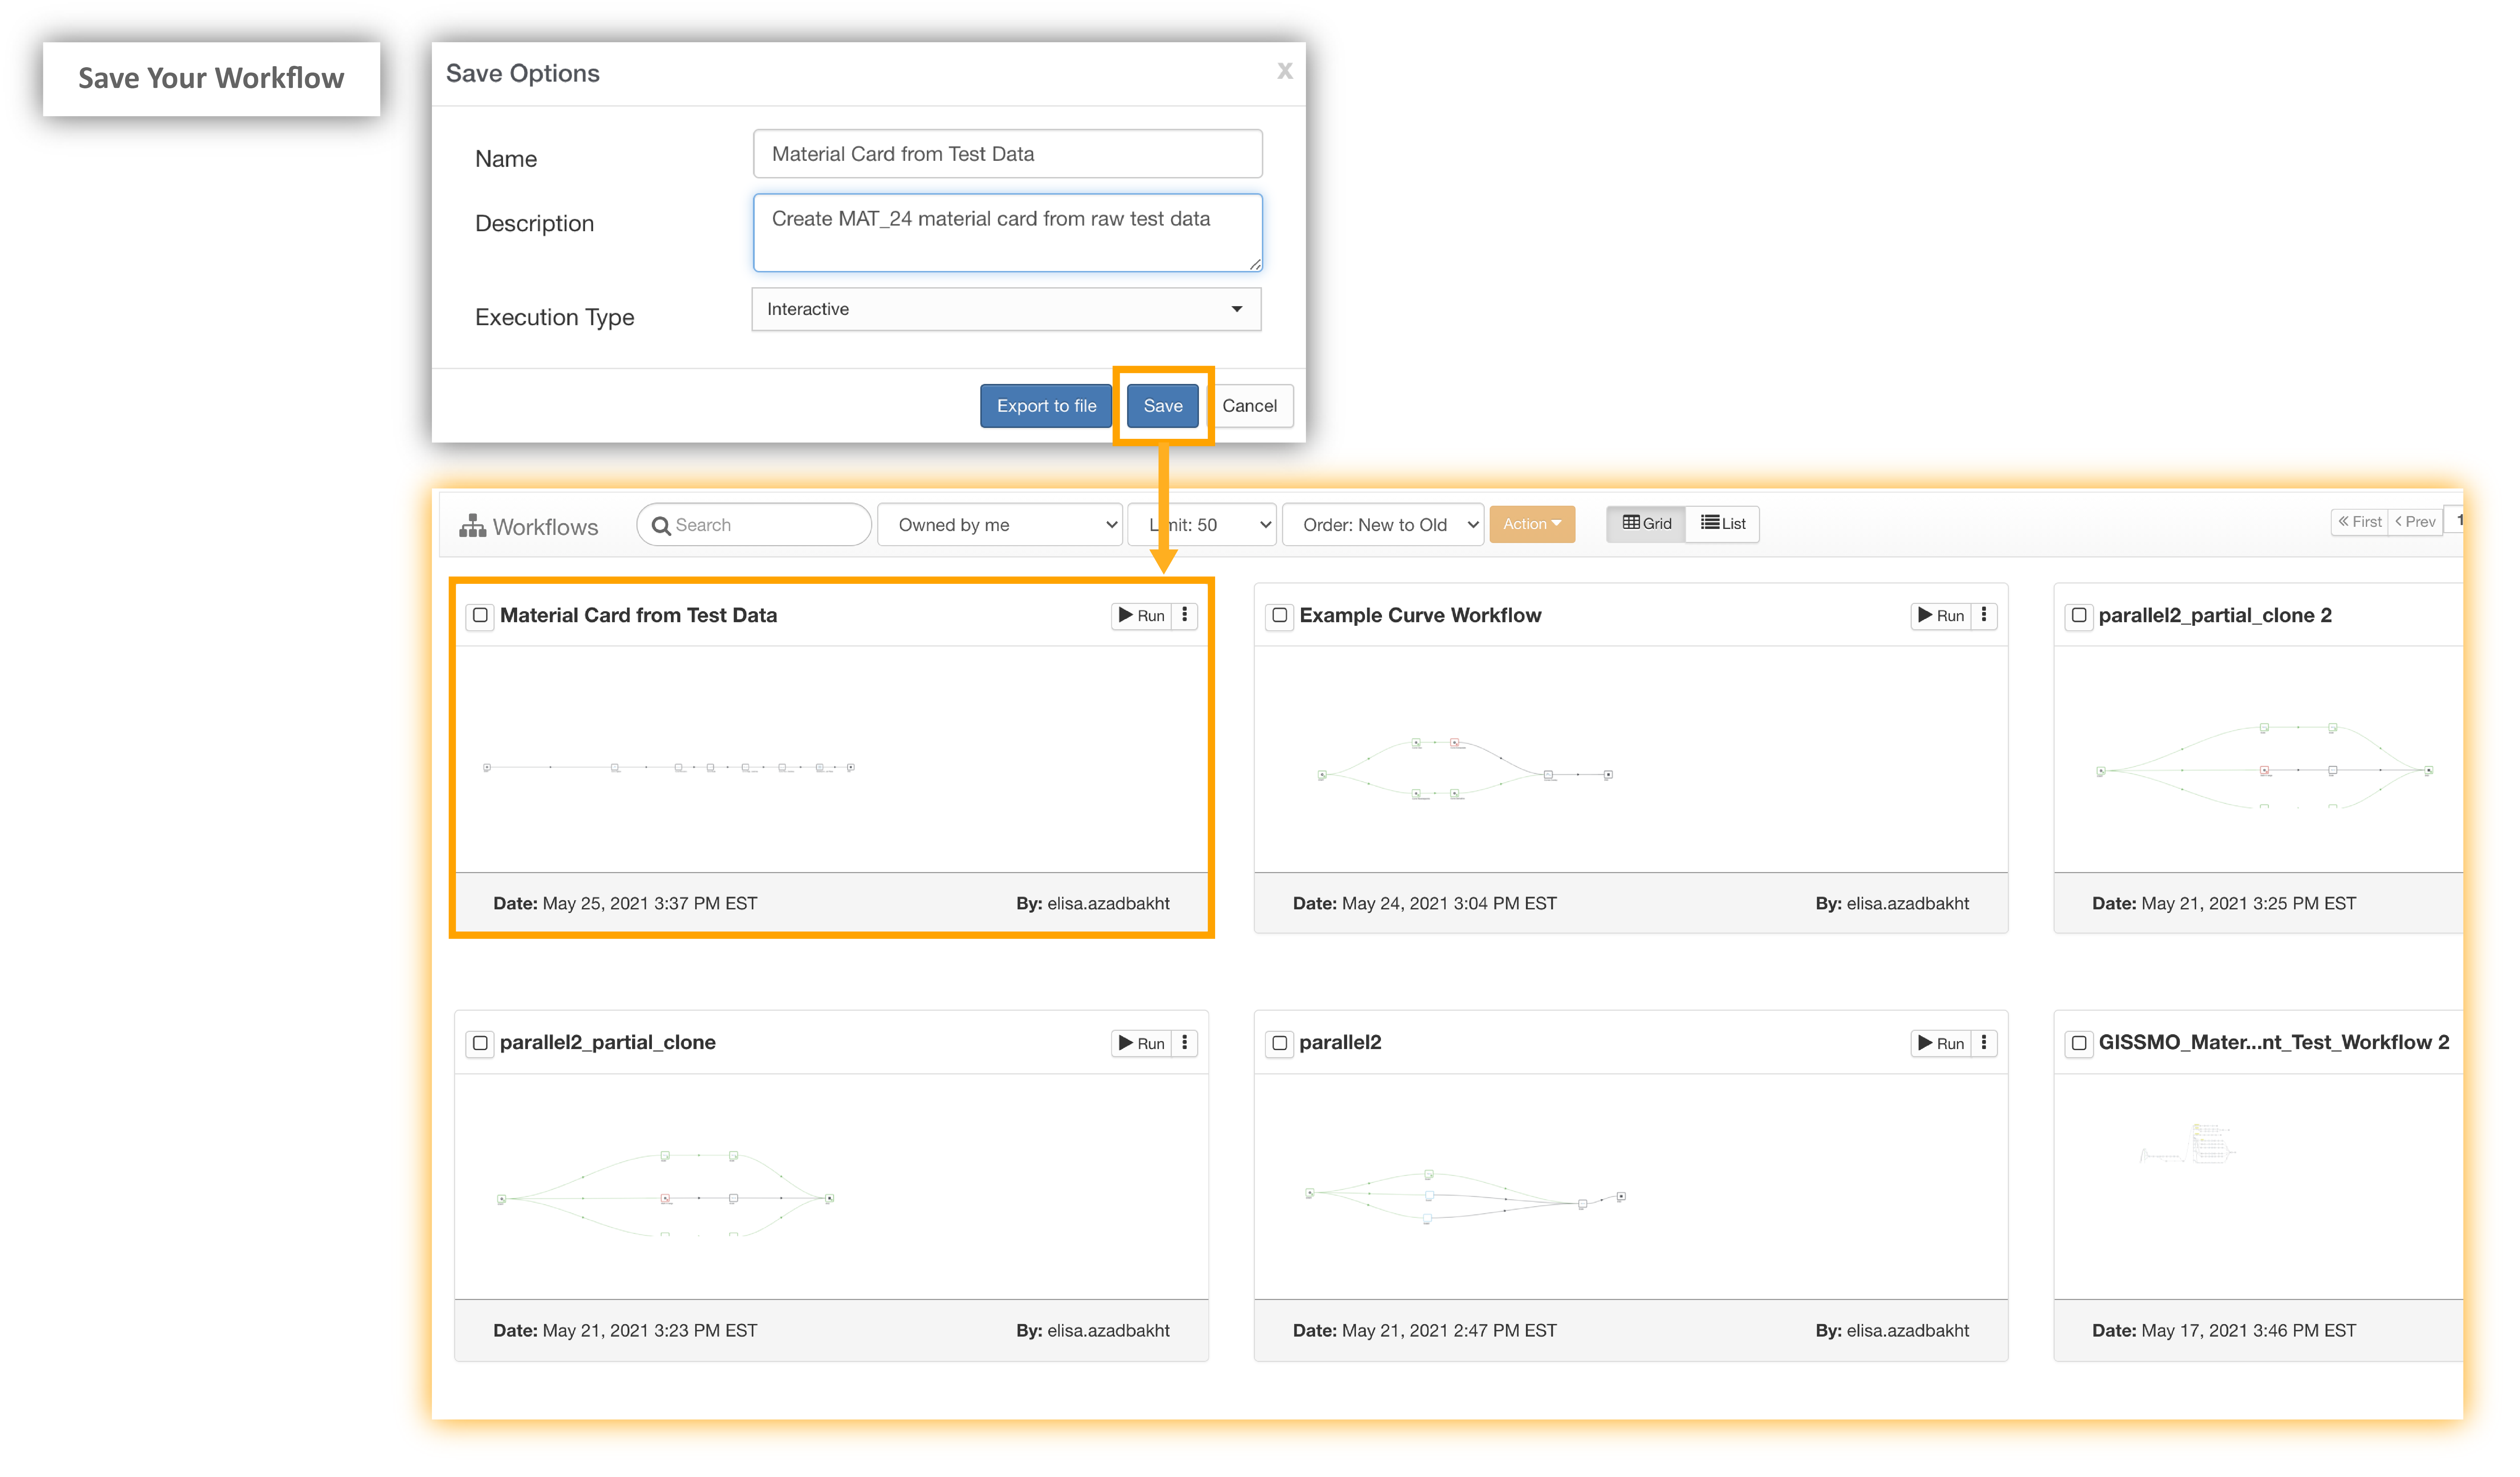
Give a suitable name and description for the workflow, and then click ‘Save’ again. Your workflow will be visible in the workflows page for viewing, editing and running.
Save Your Workflow
Executing
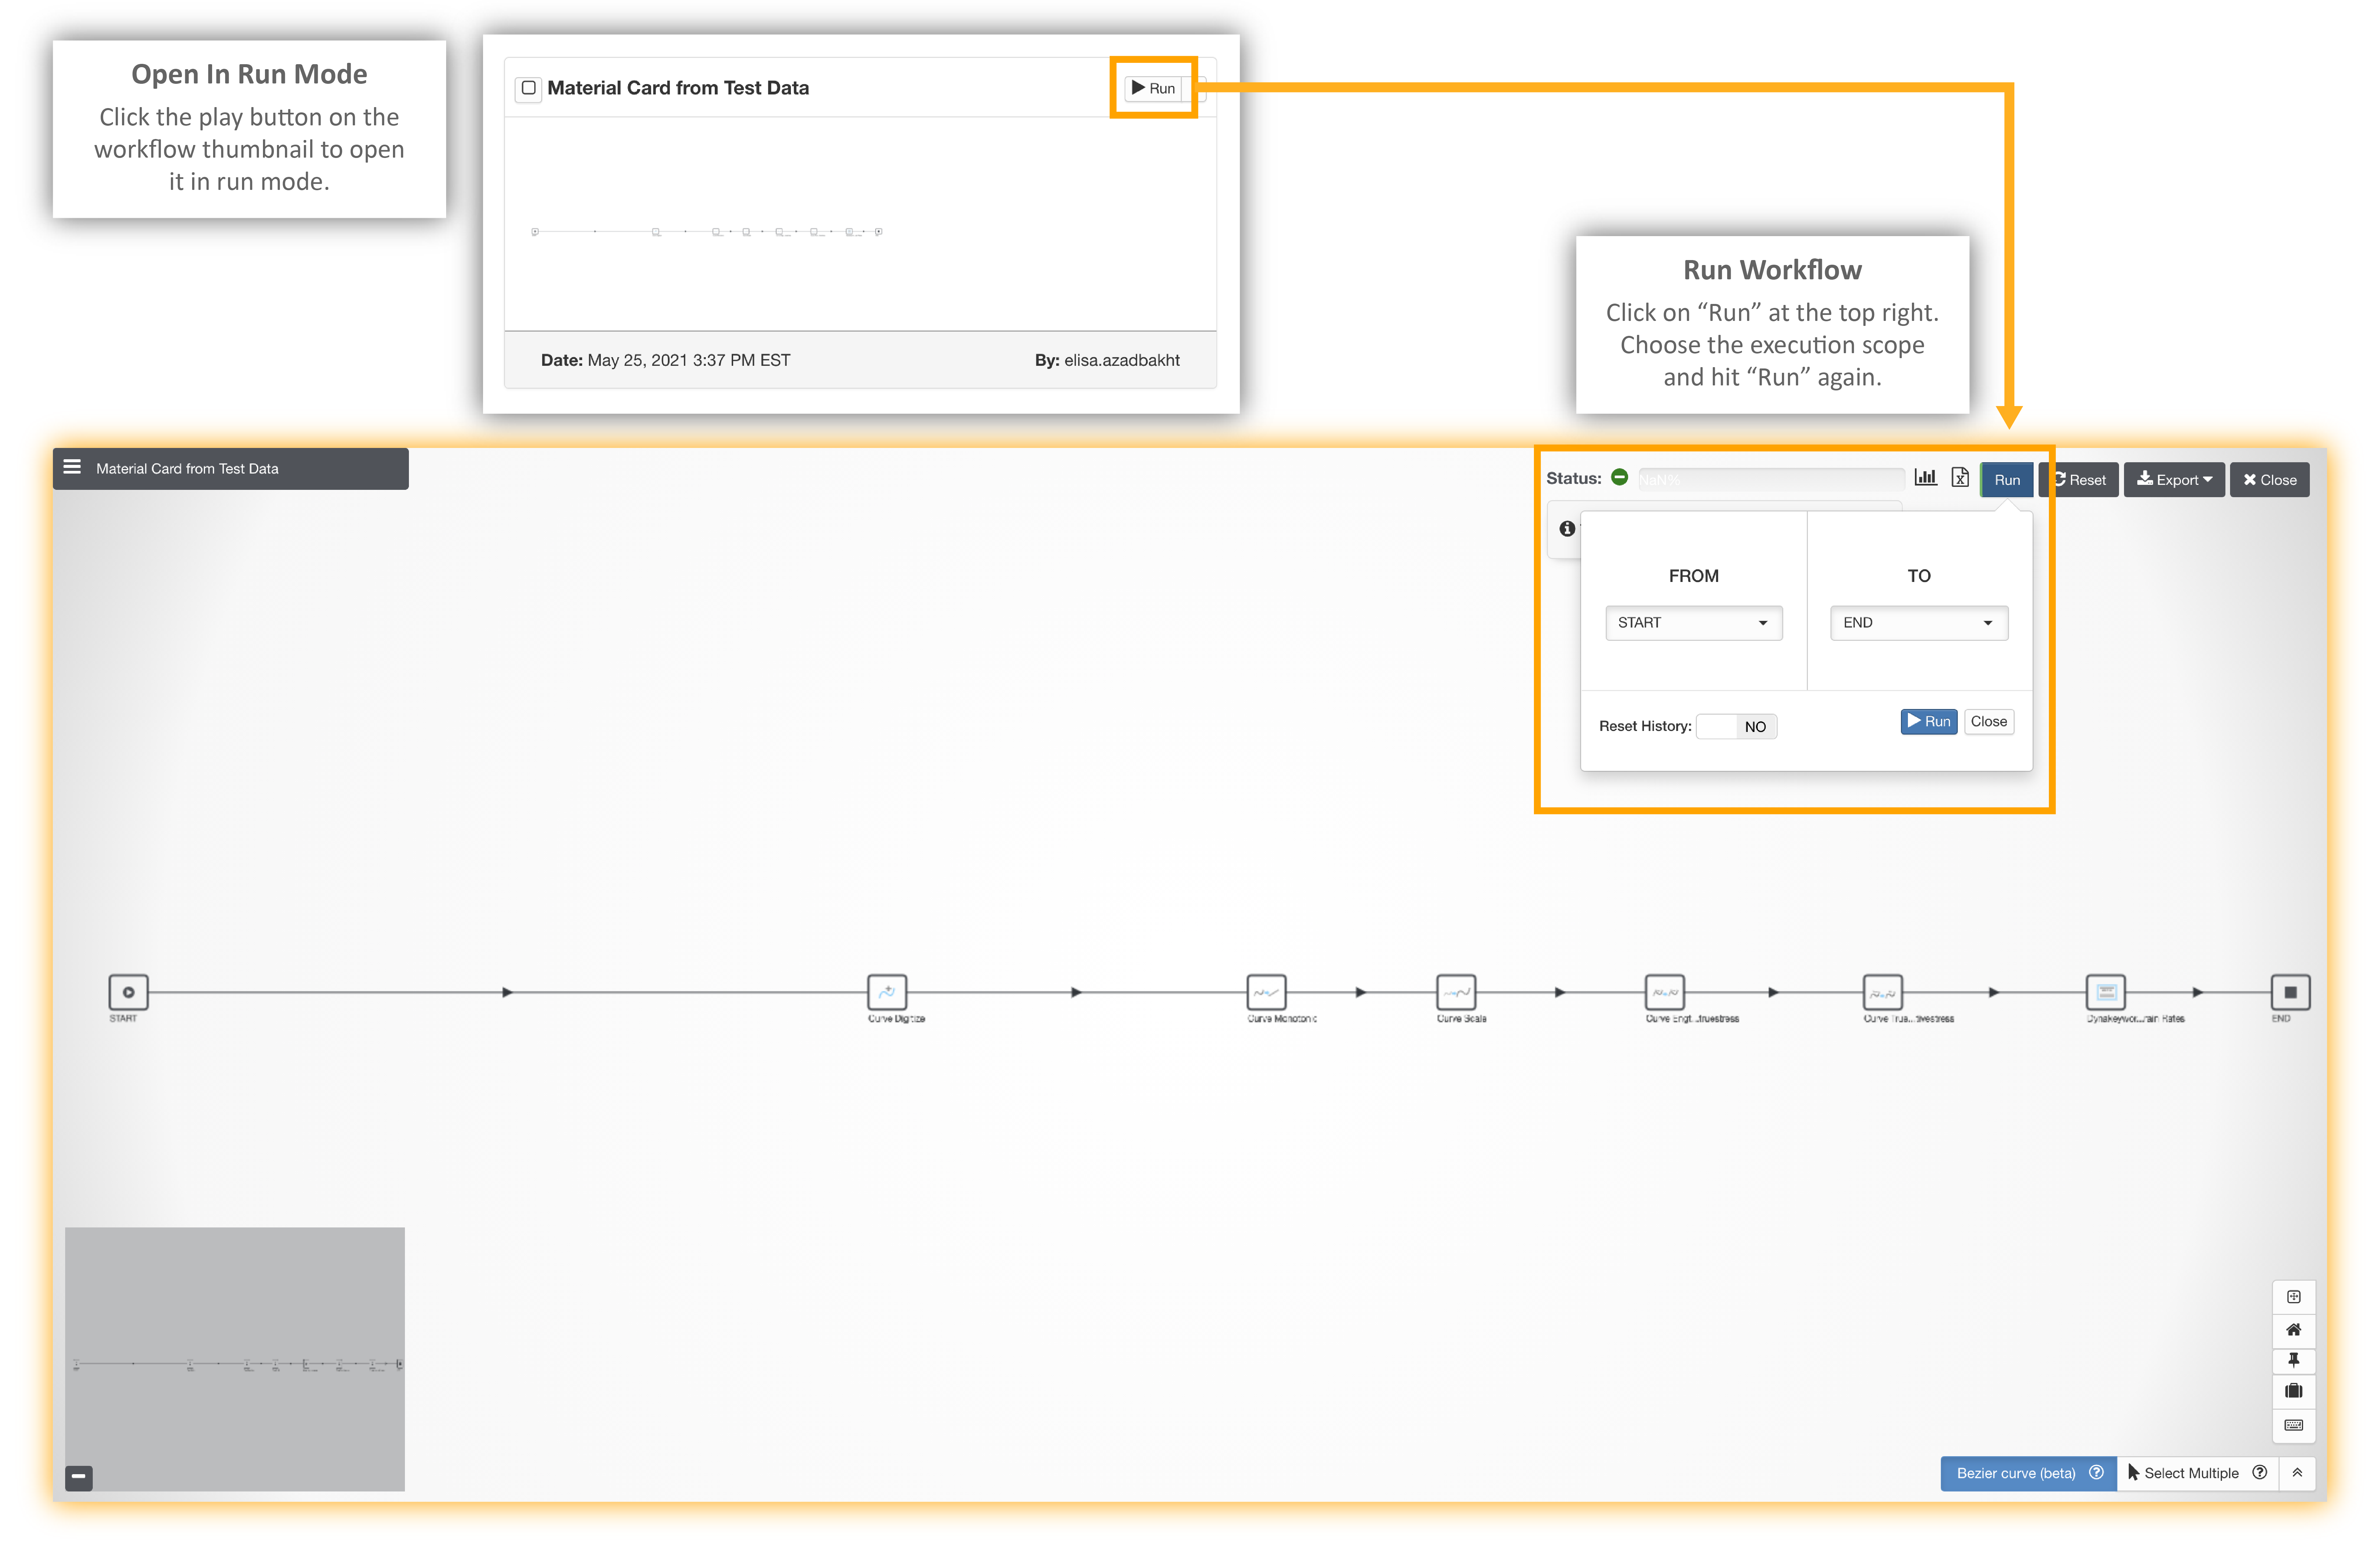
To execute your workflow, open it in run mode after saving and hit ‘Run’ on the top right. Make sure the Workflow is performing from START to END and click ‘Run’ again.
Executing Your Workflow
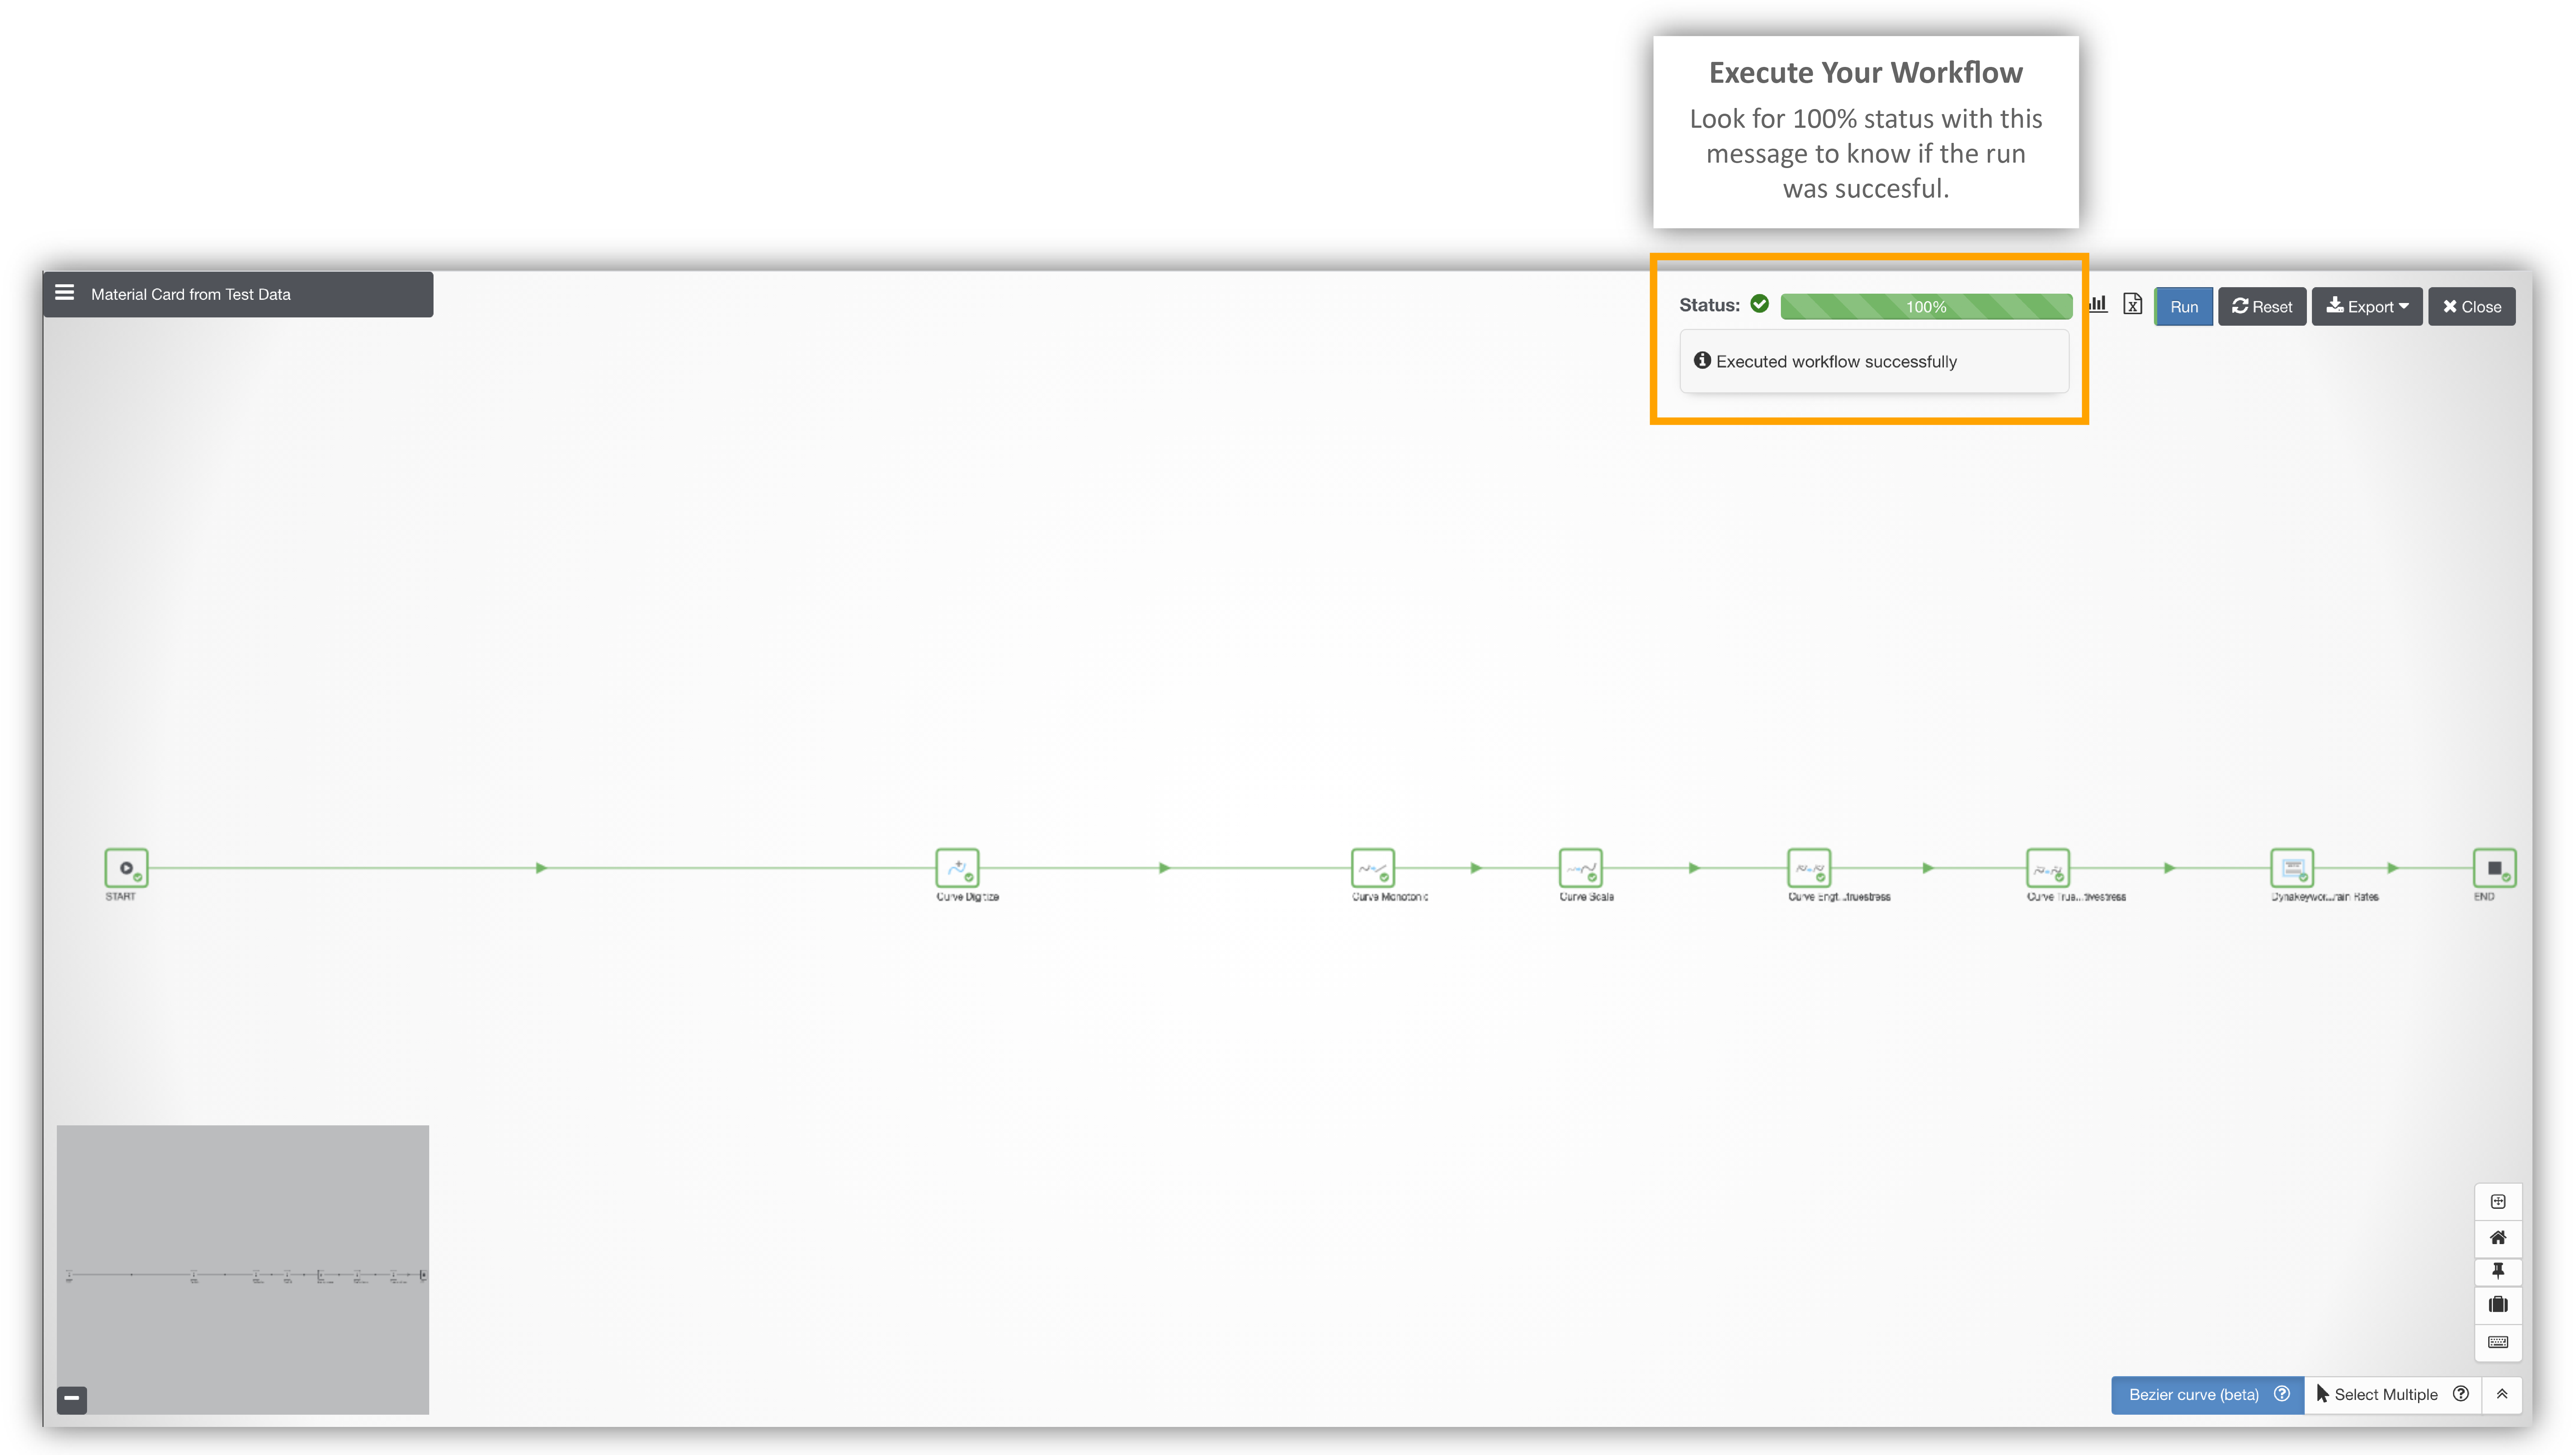
Upon successful execution, the status will be at 100% with the message ‘Executed END successfully’.
Executed Workflow
Reviewing Results
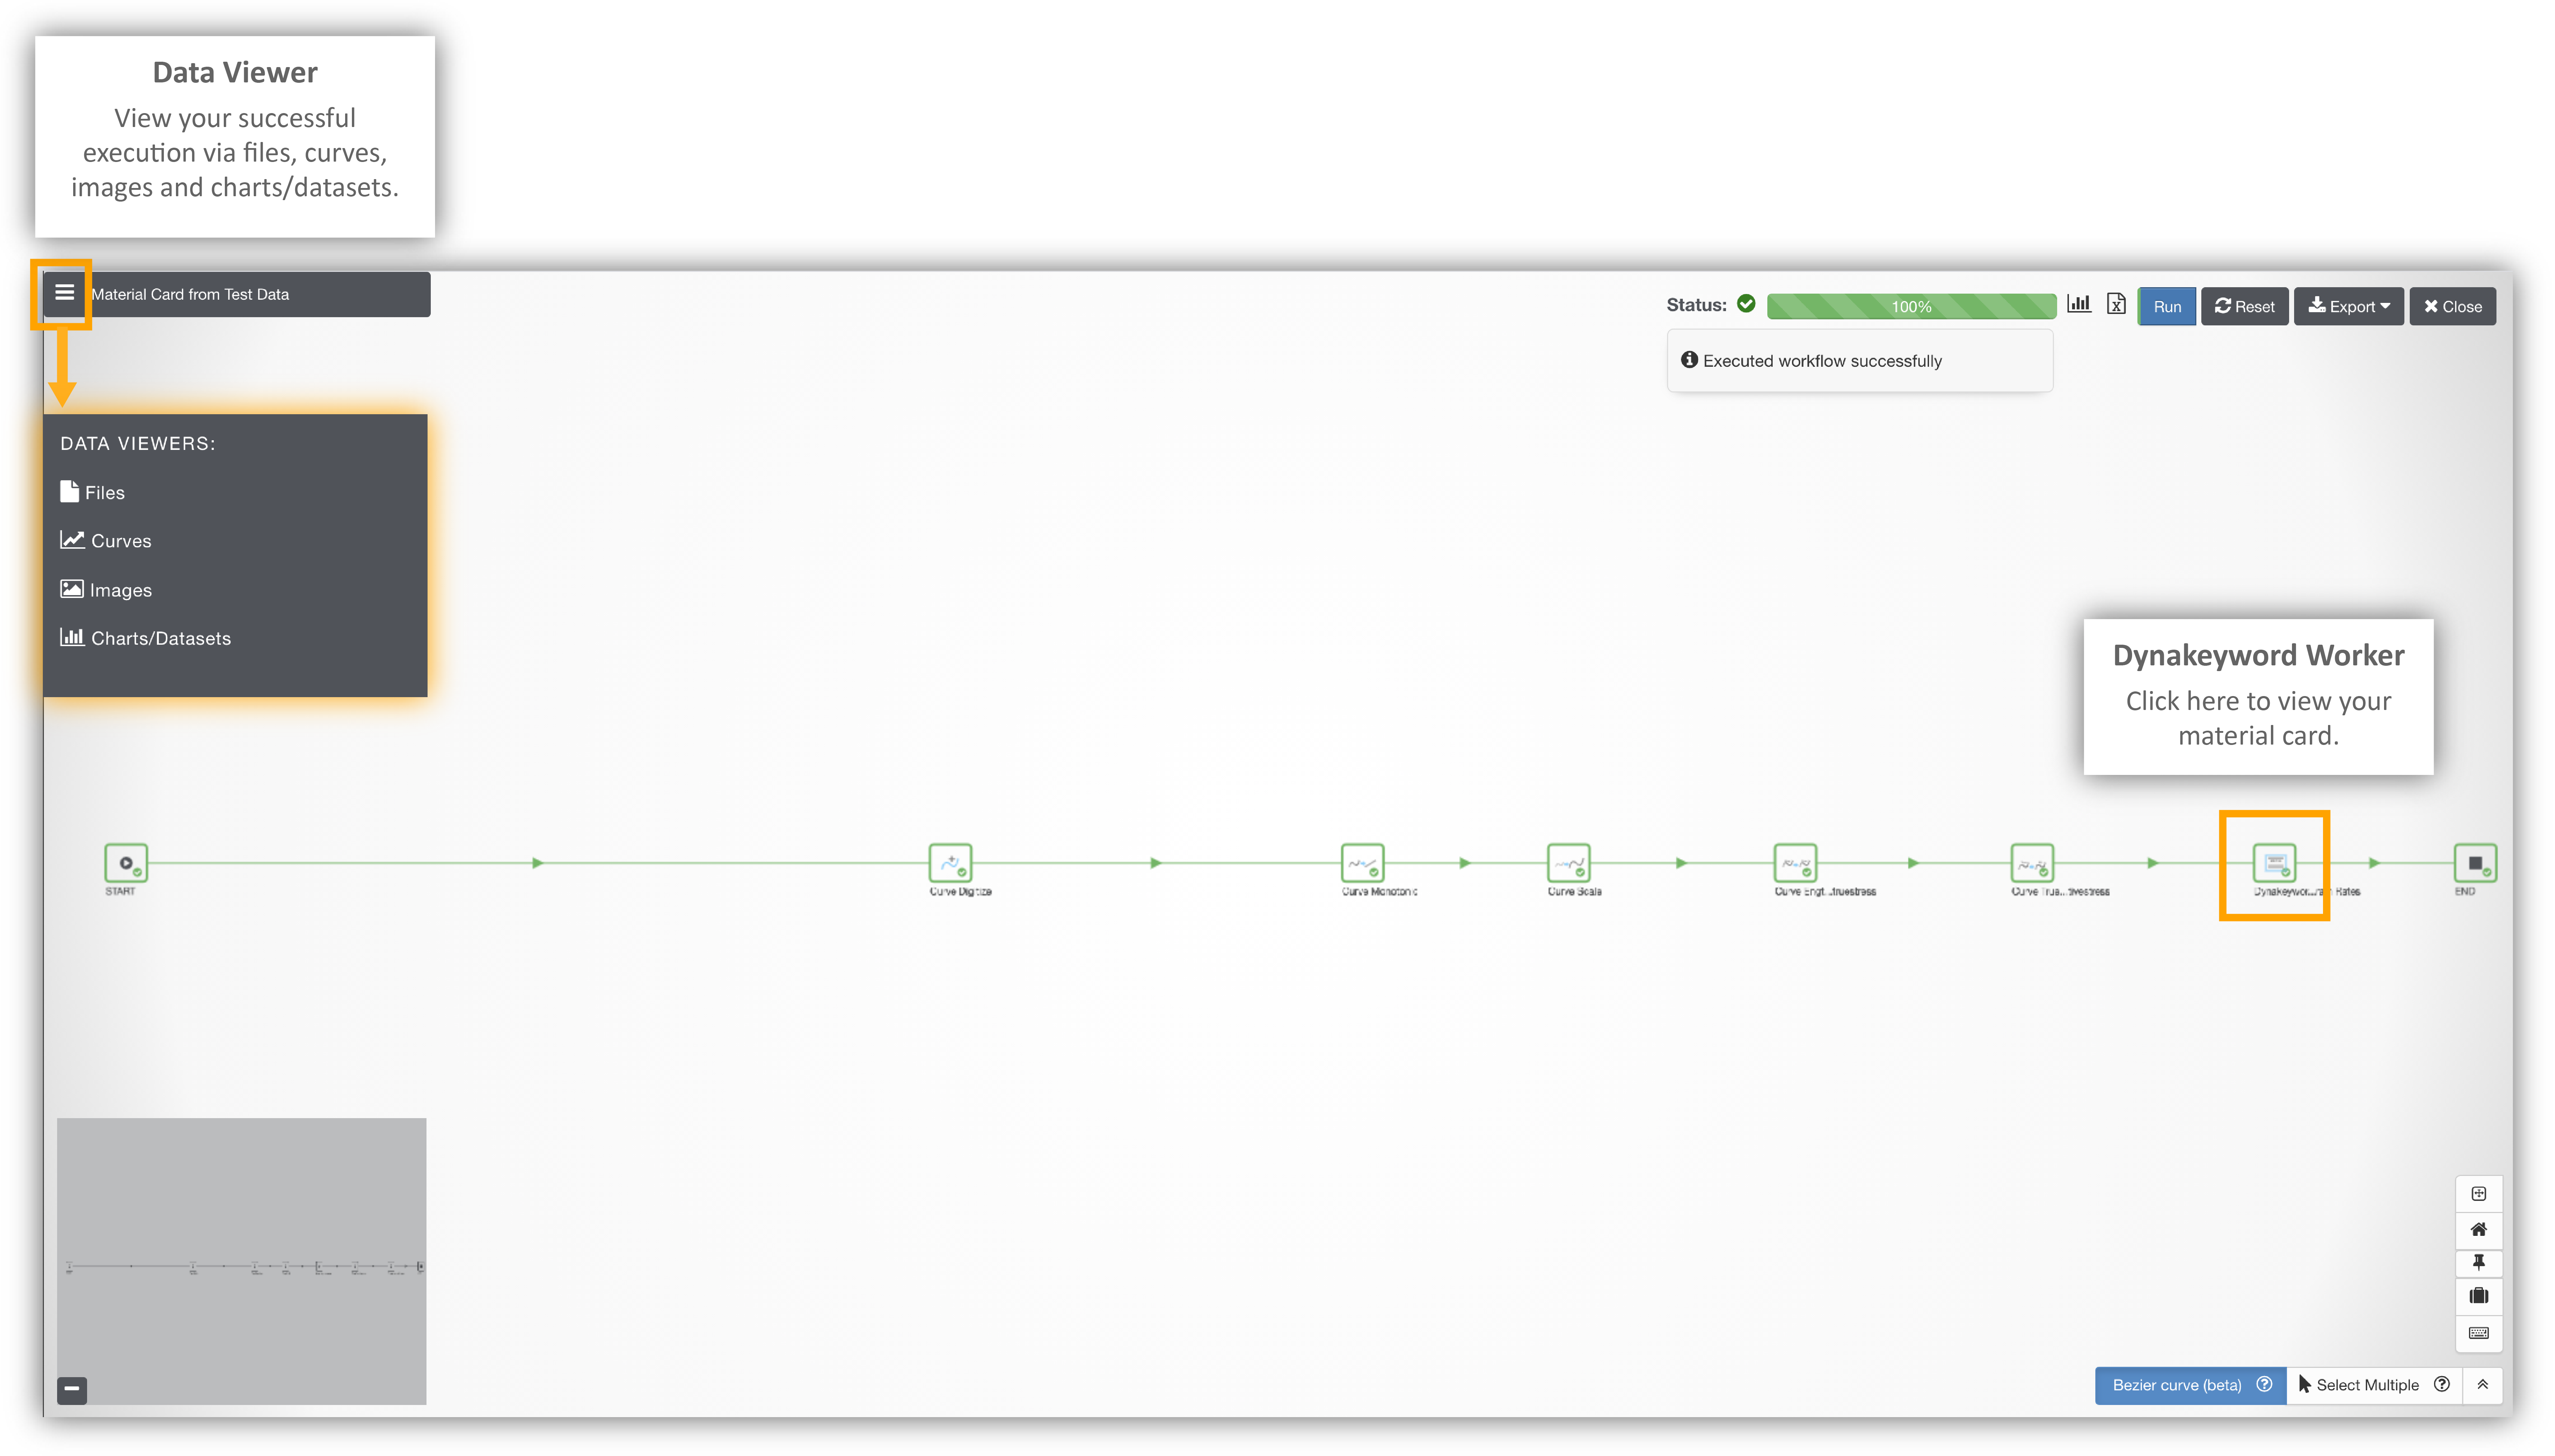
Congratulations on successful execution of this workflow! View or download the material card by opening the Dynakeyword worker. You can also view your data in multiple ways under the navigation menu in the upper right hand corner.
Results
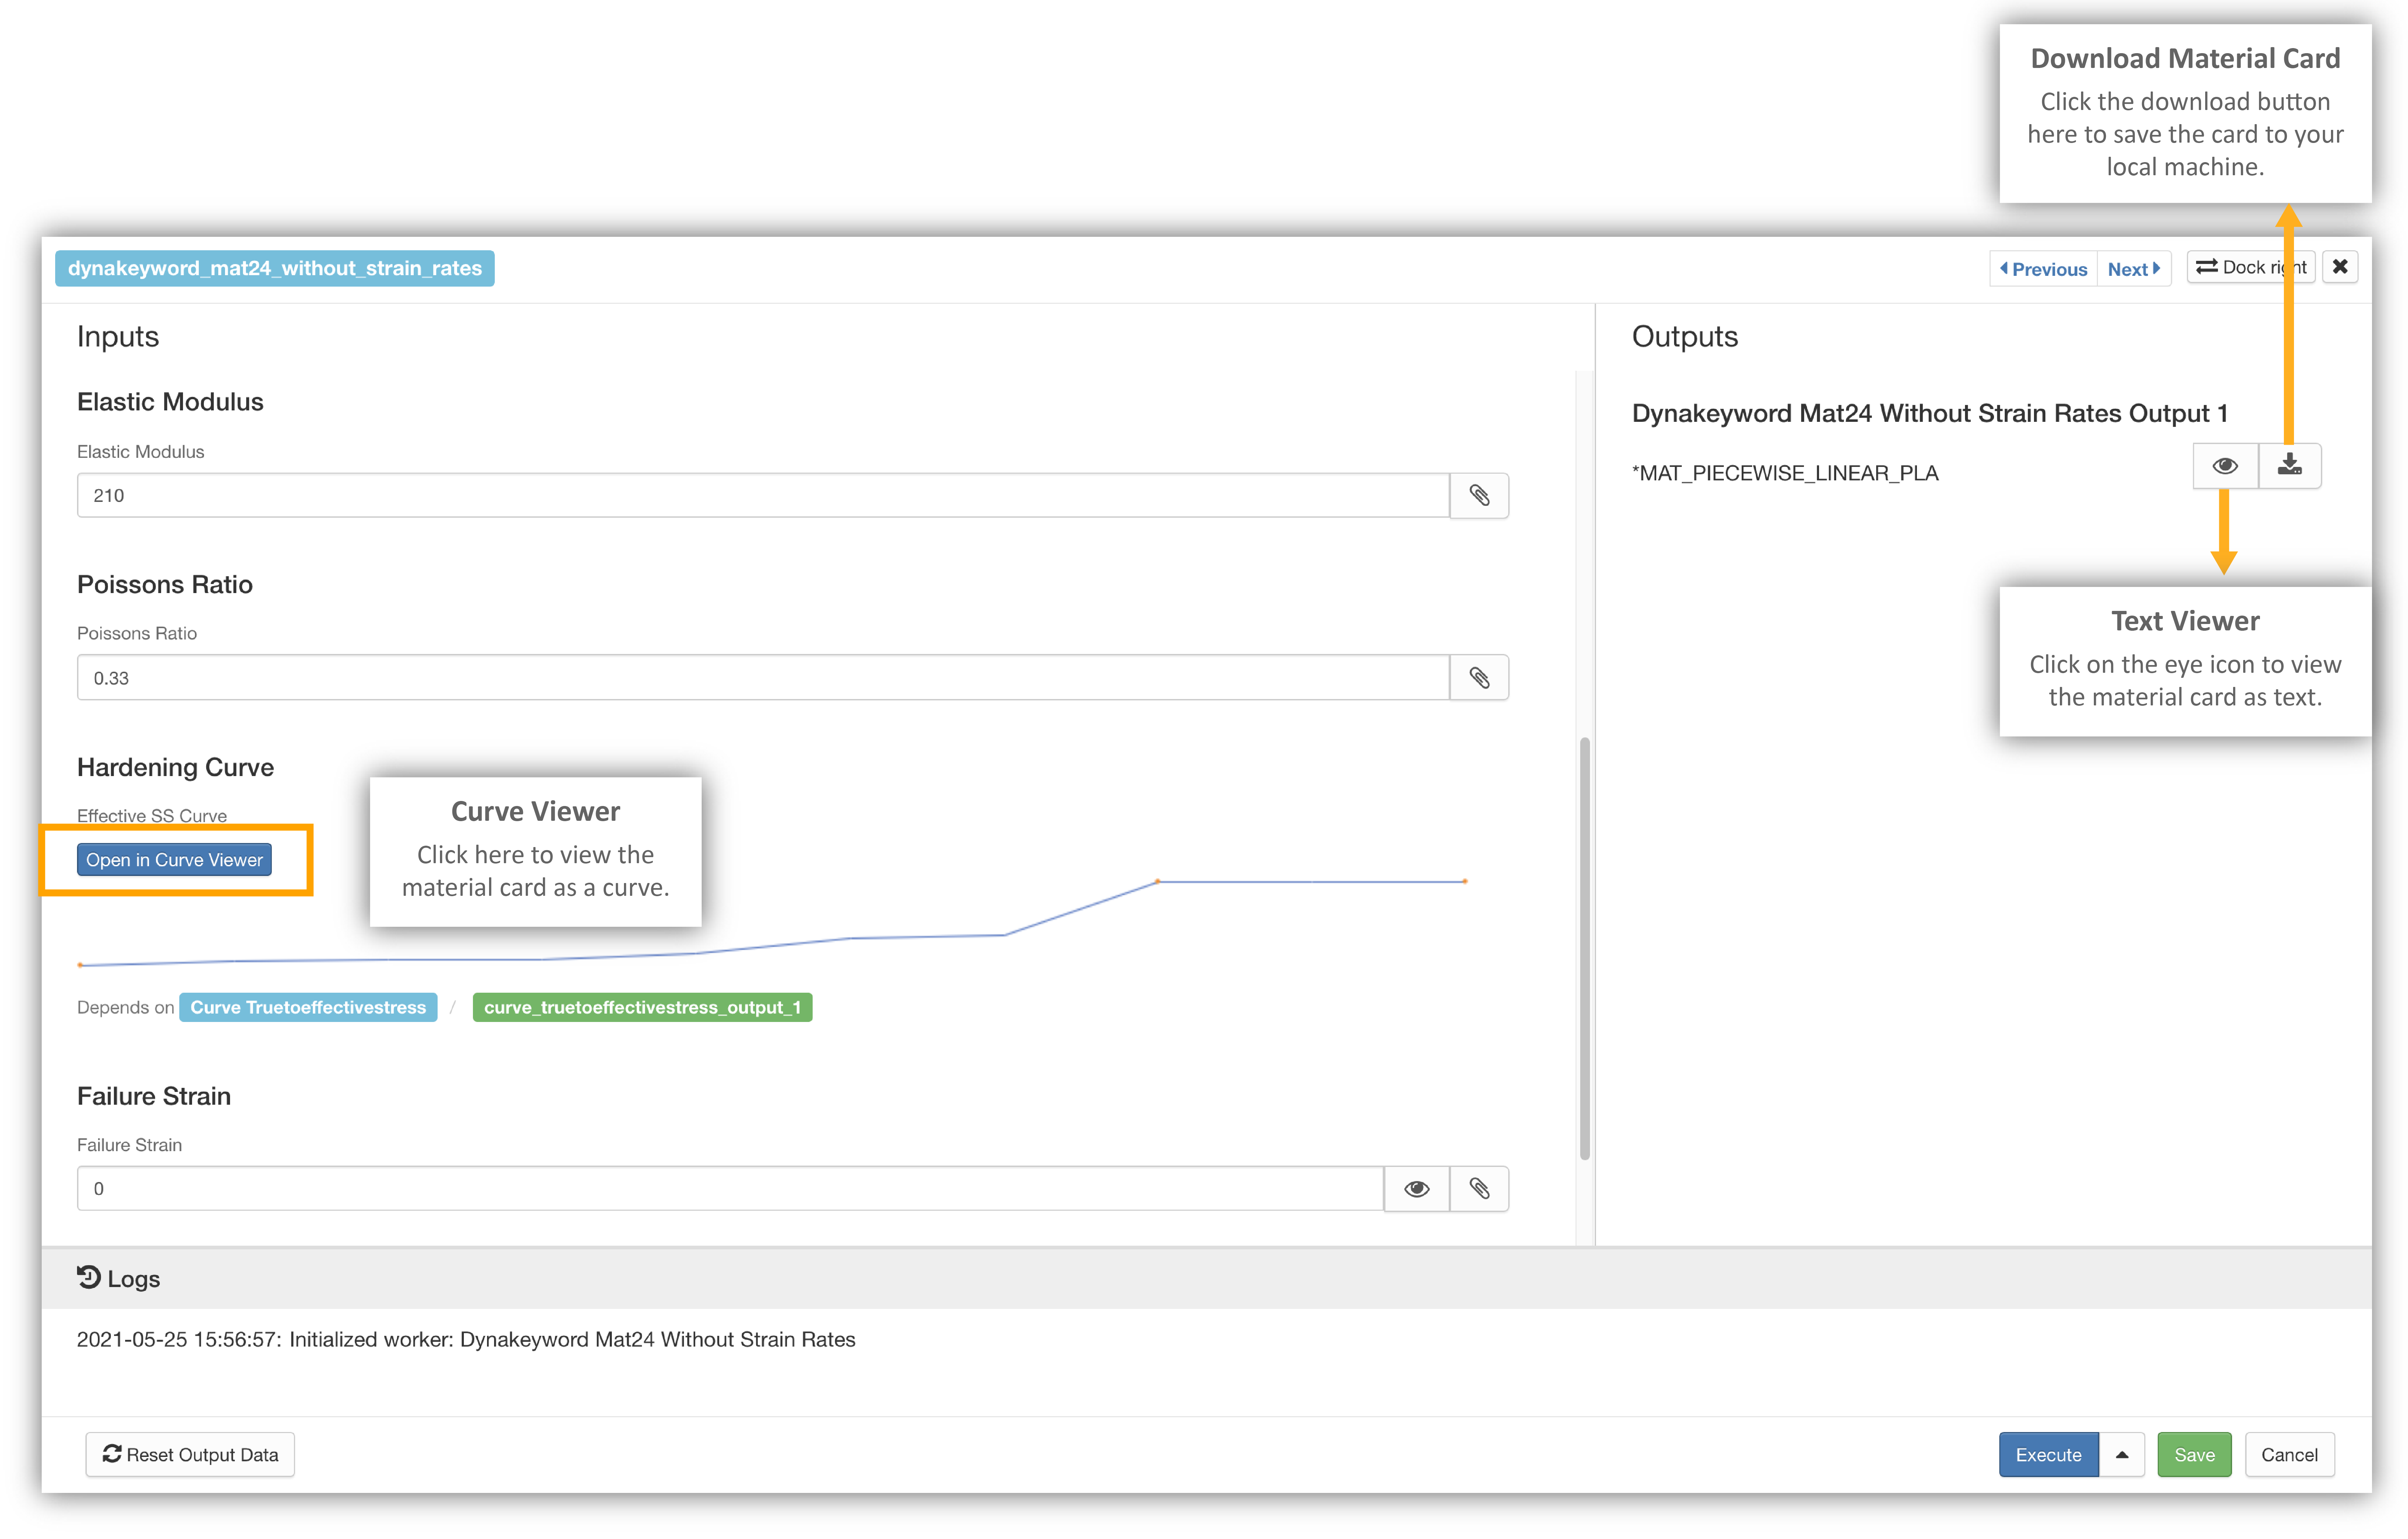
When reviewing your material card under the Dynakeyword worker, view the card as a curve by clicking the respected button towards the bottom of the window. Additionally, click on the eye button on the left to view the card as text. You can download the material card here by clicking the download symbol right new to the eye.
View Material Card
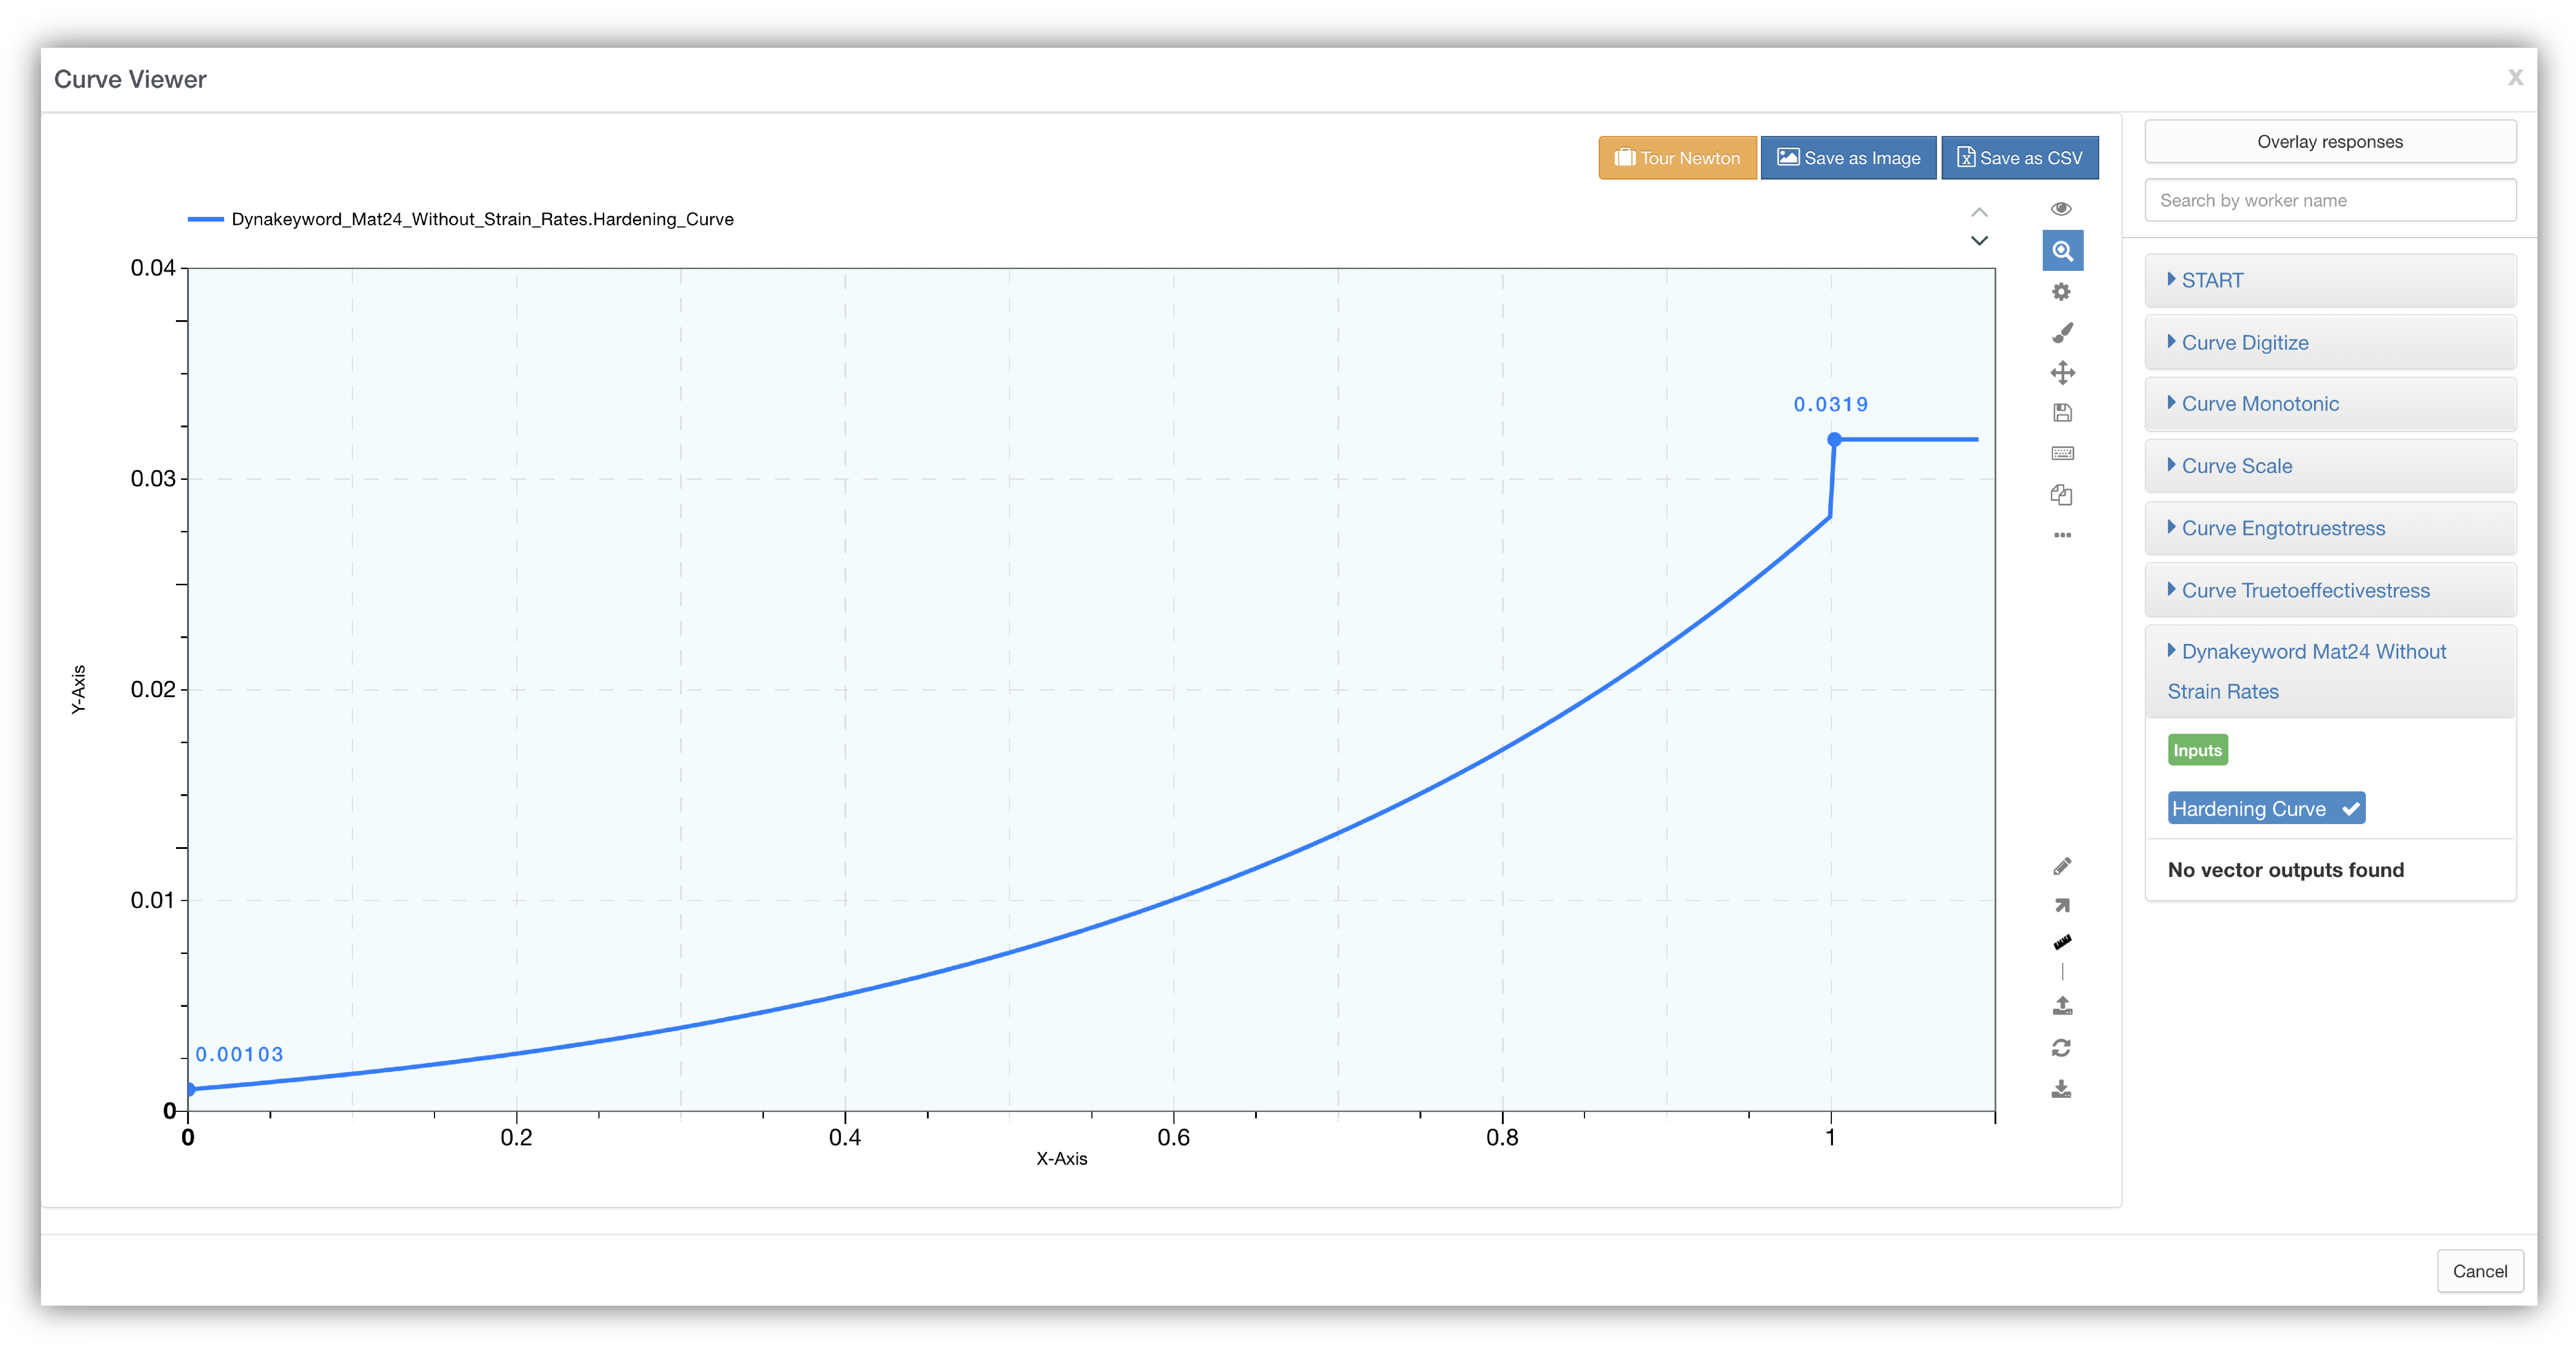
Here is how curve viewer window appears when clicking on the Open Curve Viewer button:
Curve Viewer
Here is how the text viewer window appears when clicking on the eye icon:
Text Viewer

8.4. Material Database Workflow
Here, we’ll go over how to create an LS-DYNA Material Databases using Workflows. If you need more information on Databases, please make your way to that section in this Tutorial Documentation.
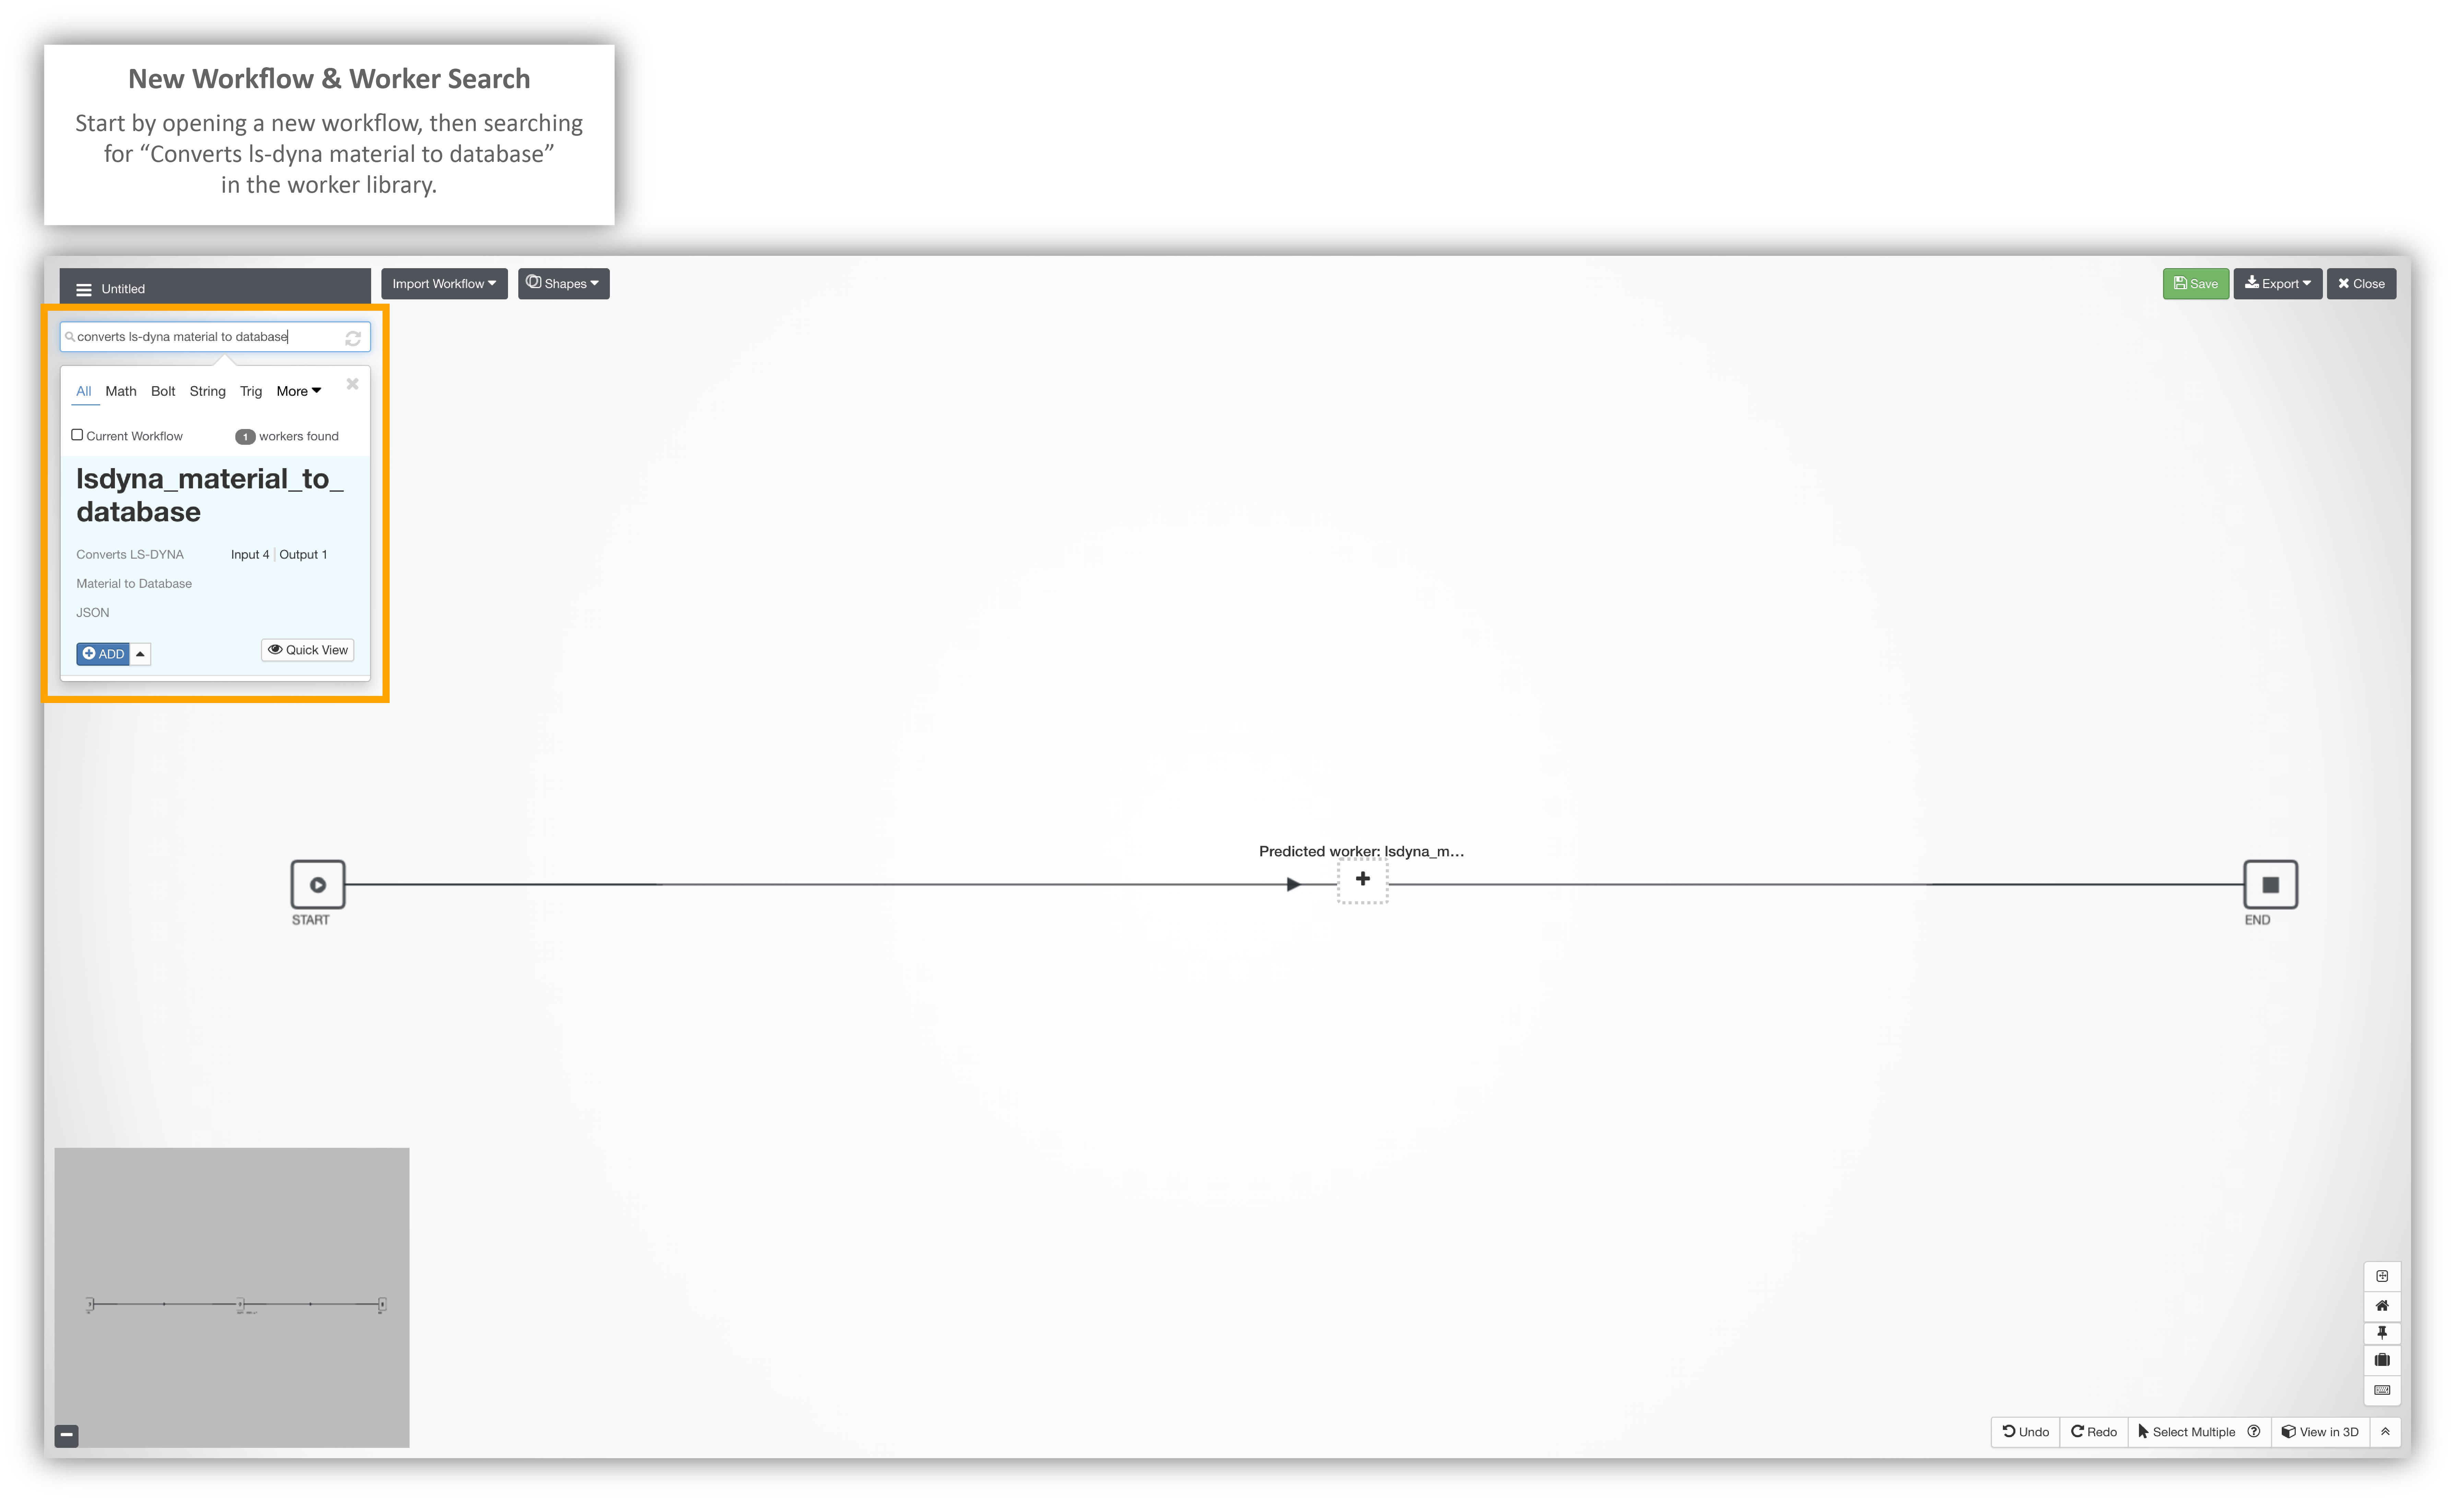
Start by creating a new Workflow. From here, search for “Converts ls-dyna material to database” in the worker library on the upper right of the workflow drafting board.
Starting a New Workflow
Once you find the worker in the library, click to add it to the workflow. It should appear as a worker in between the start and end worker. Now, click on its gear icon to open up the worker specifications.
Add Worker and Open Specifications
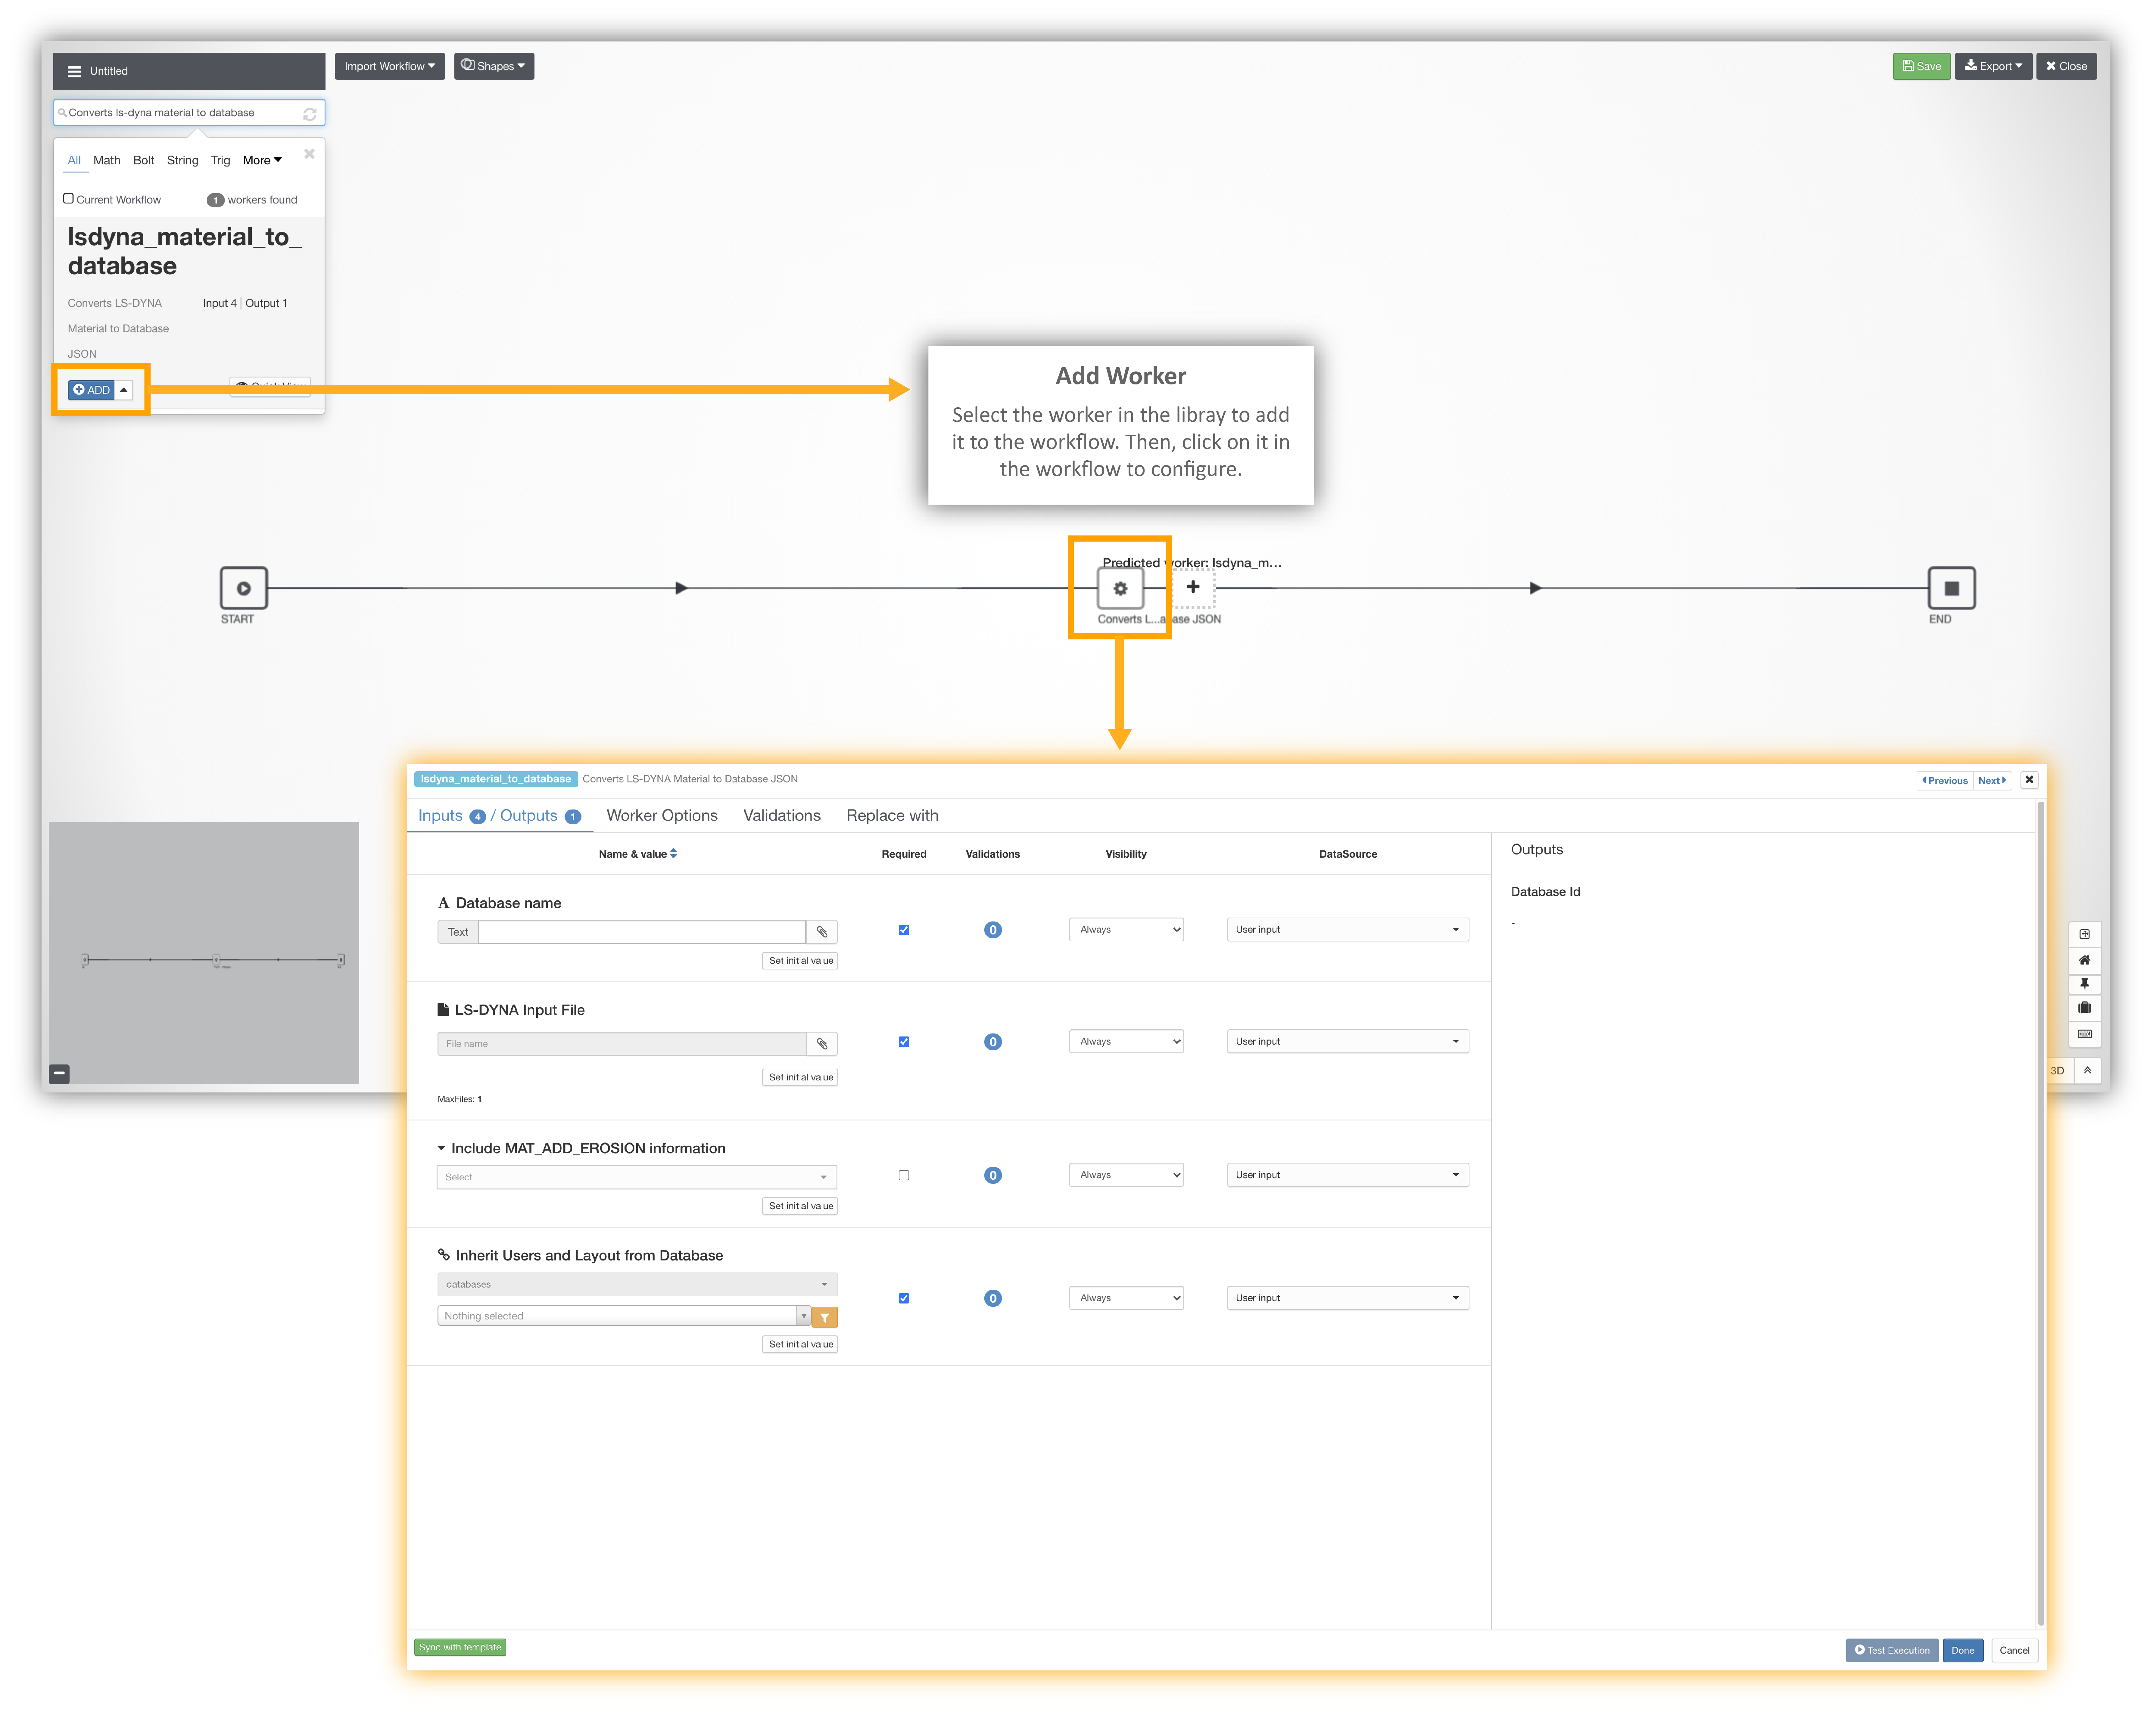
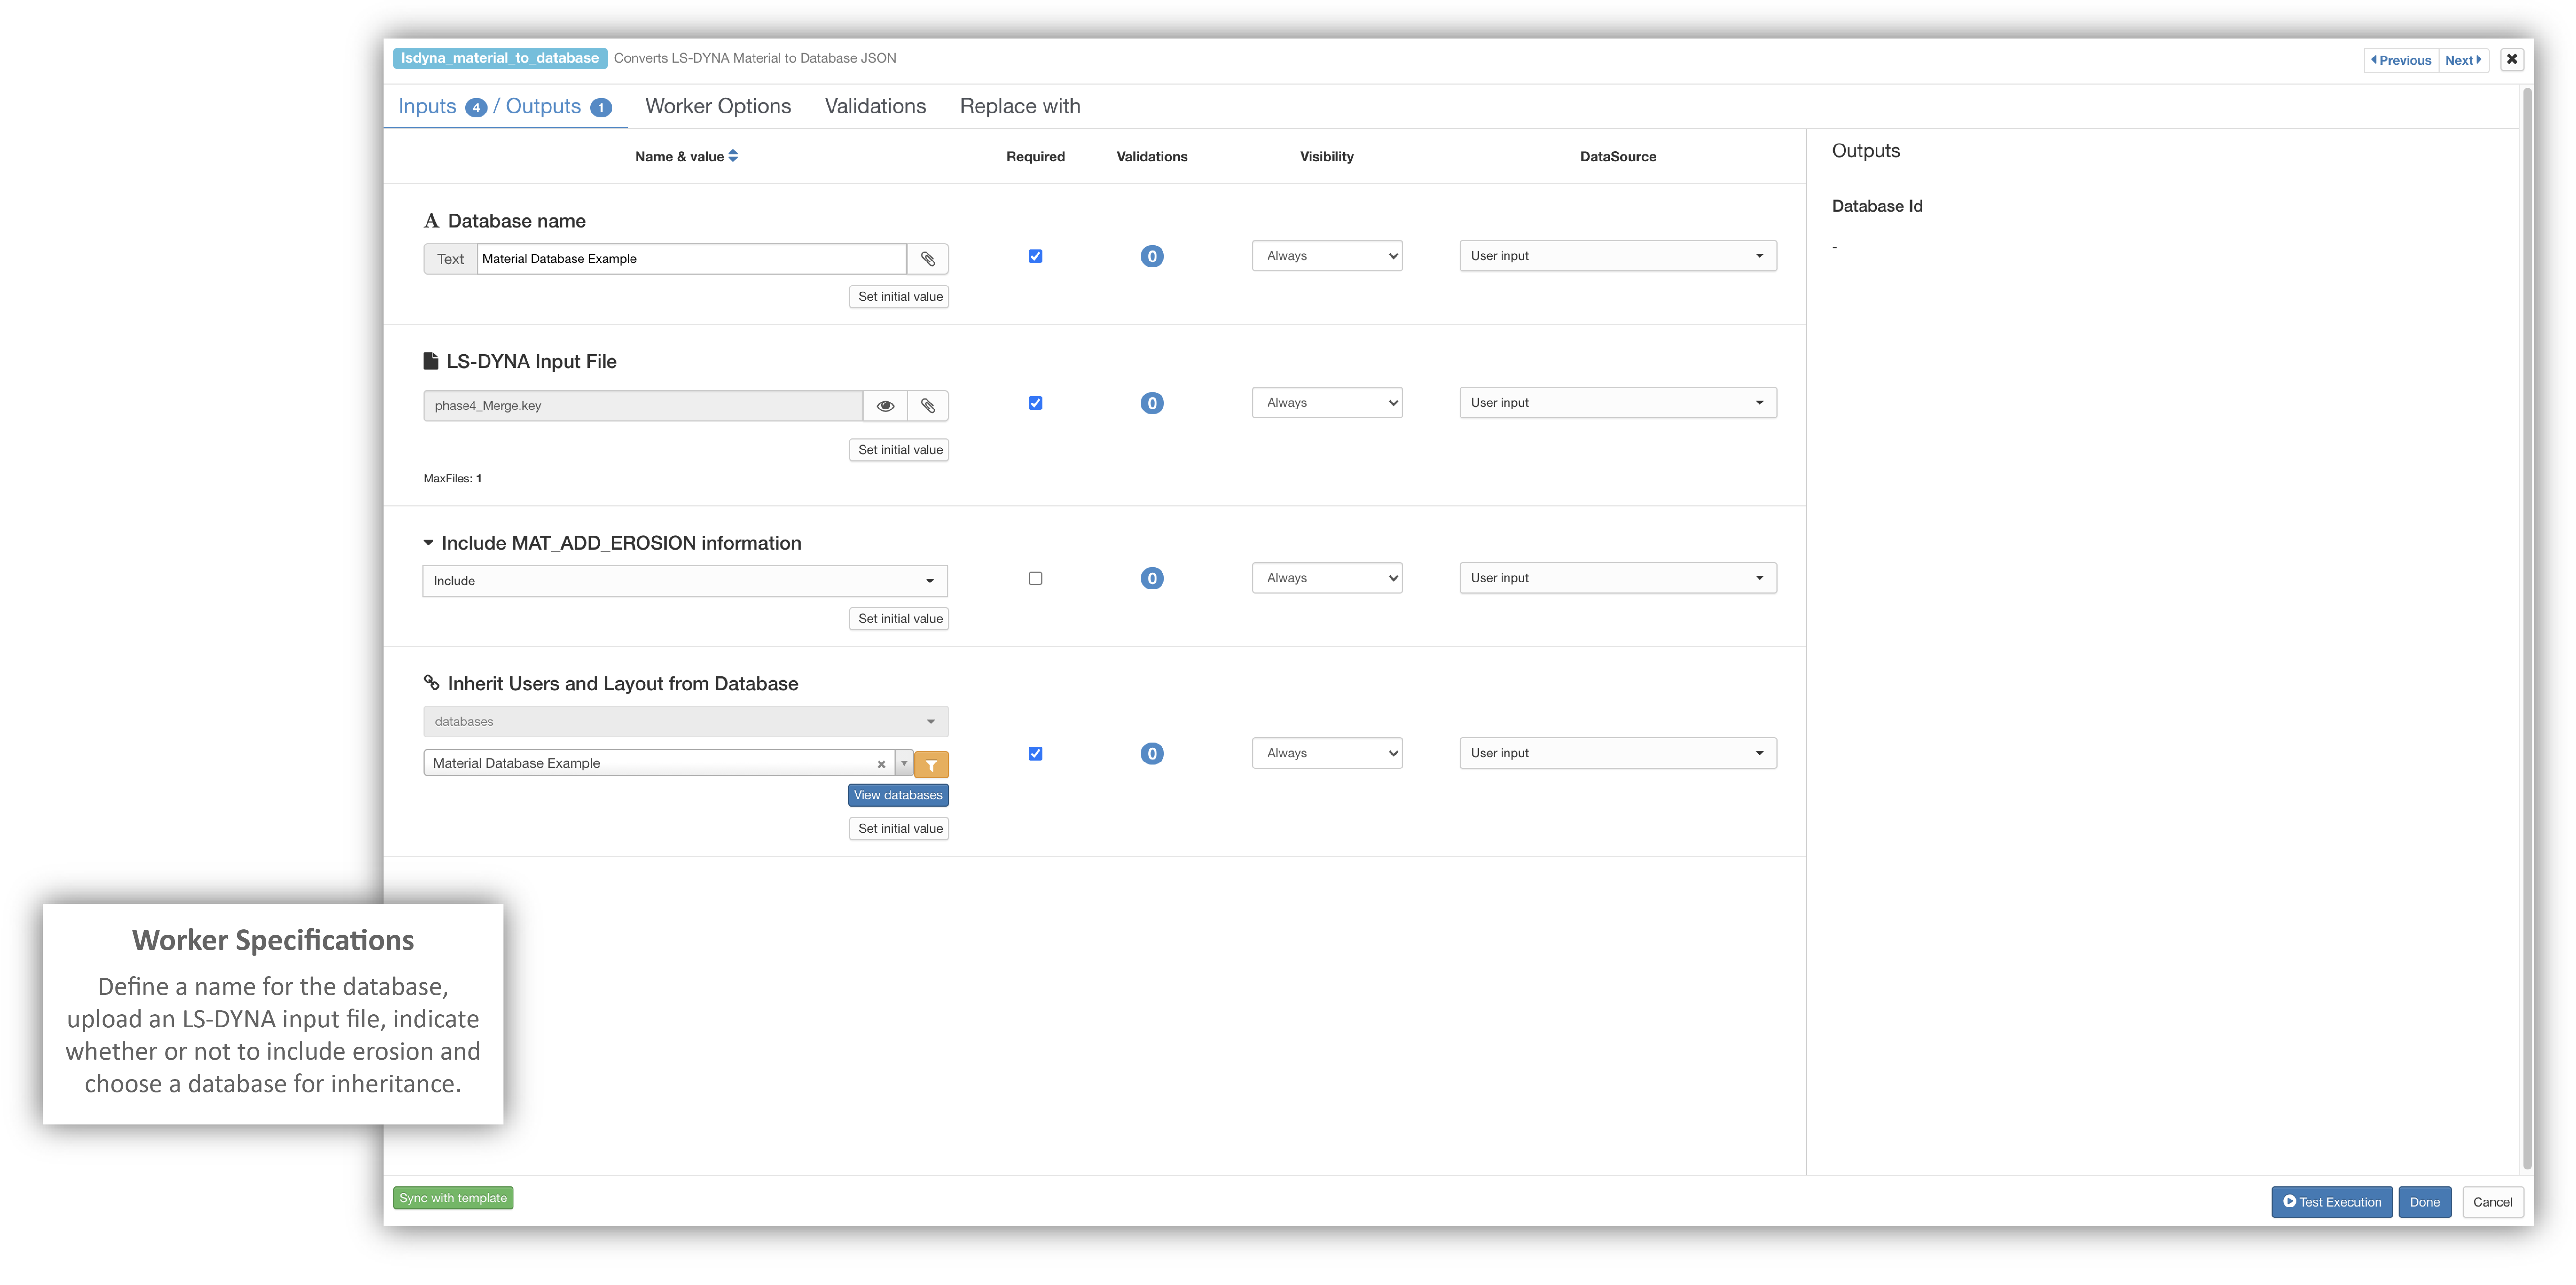
Make sure to define the name of the database, upload your LS-DYNA input file, decide whether or not to include erosion and choose a parent database of which to inherit users and layout. Feel free to uncheck this last option as a requirement if you wish not to use this feature. Here is how a configuration may look like:
Worker Configuration
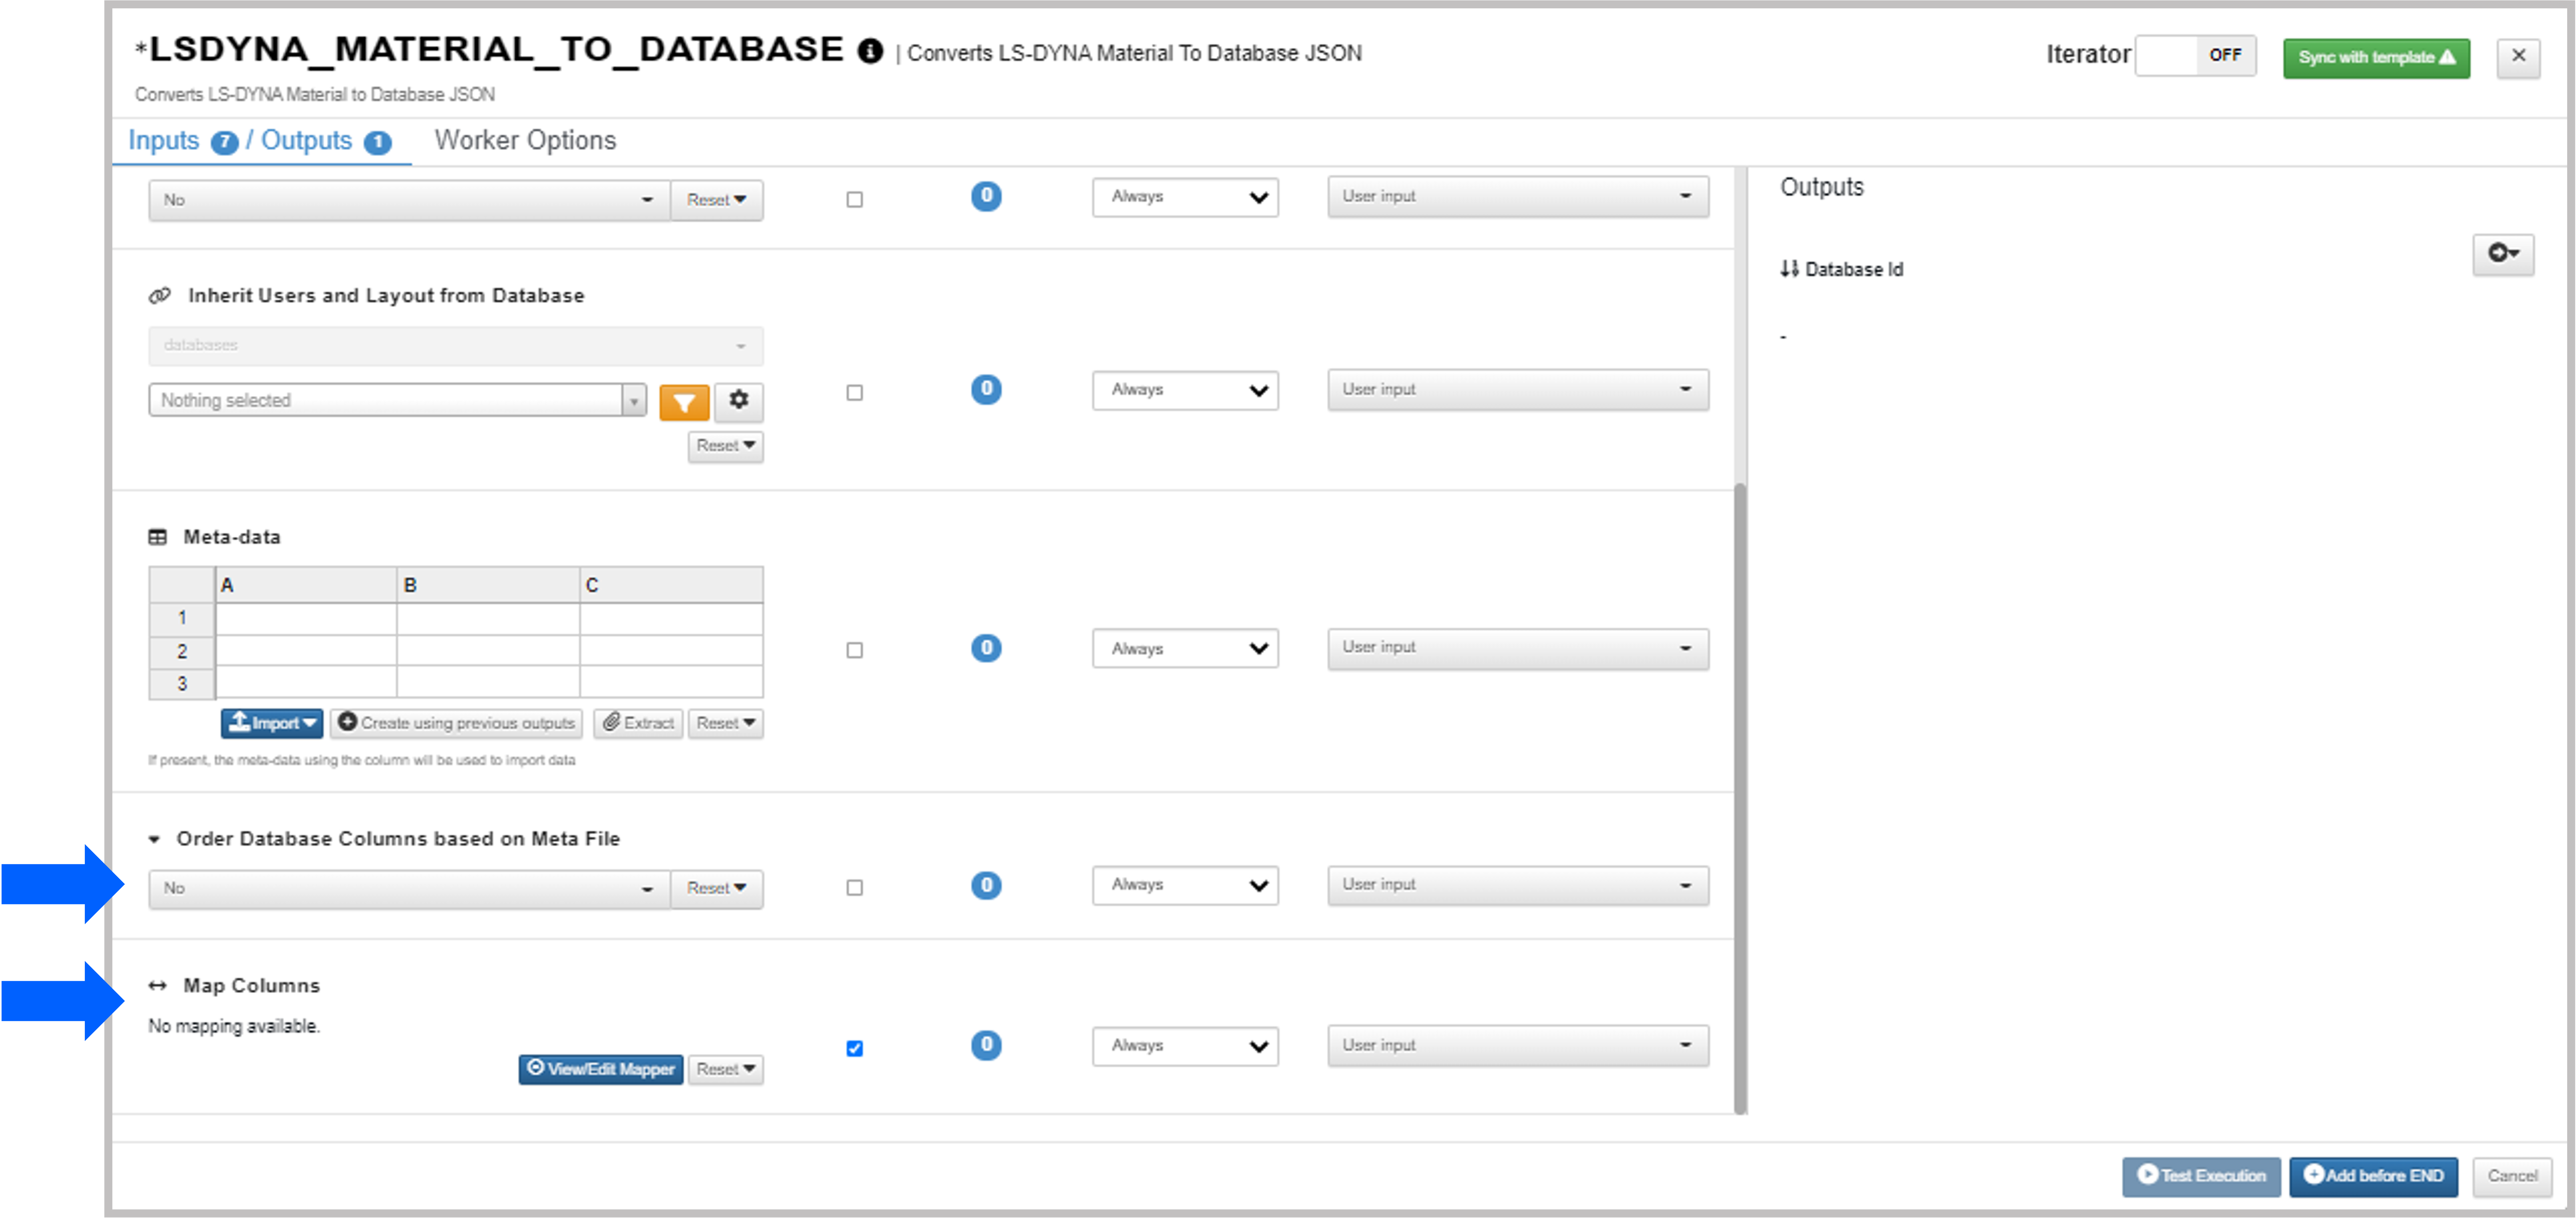
New as of June, 2022, there is now support for ordering and mapping database columns in the LS-DYNA to material database worker.
Mapping Database Columns
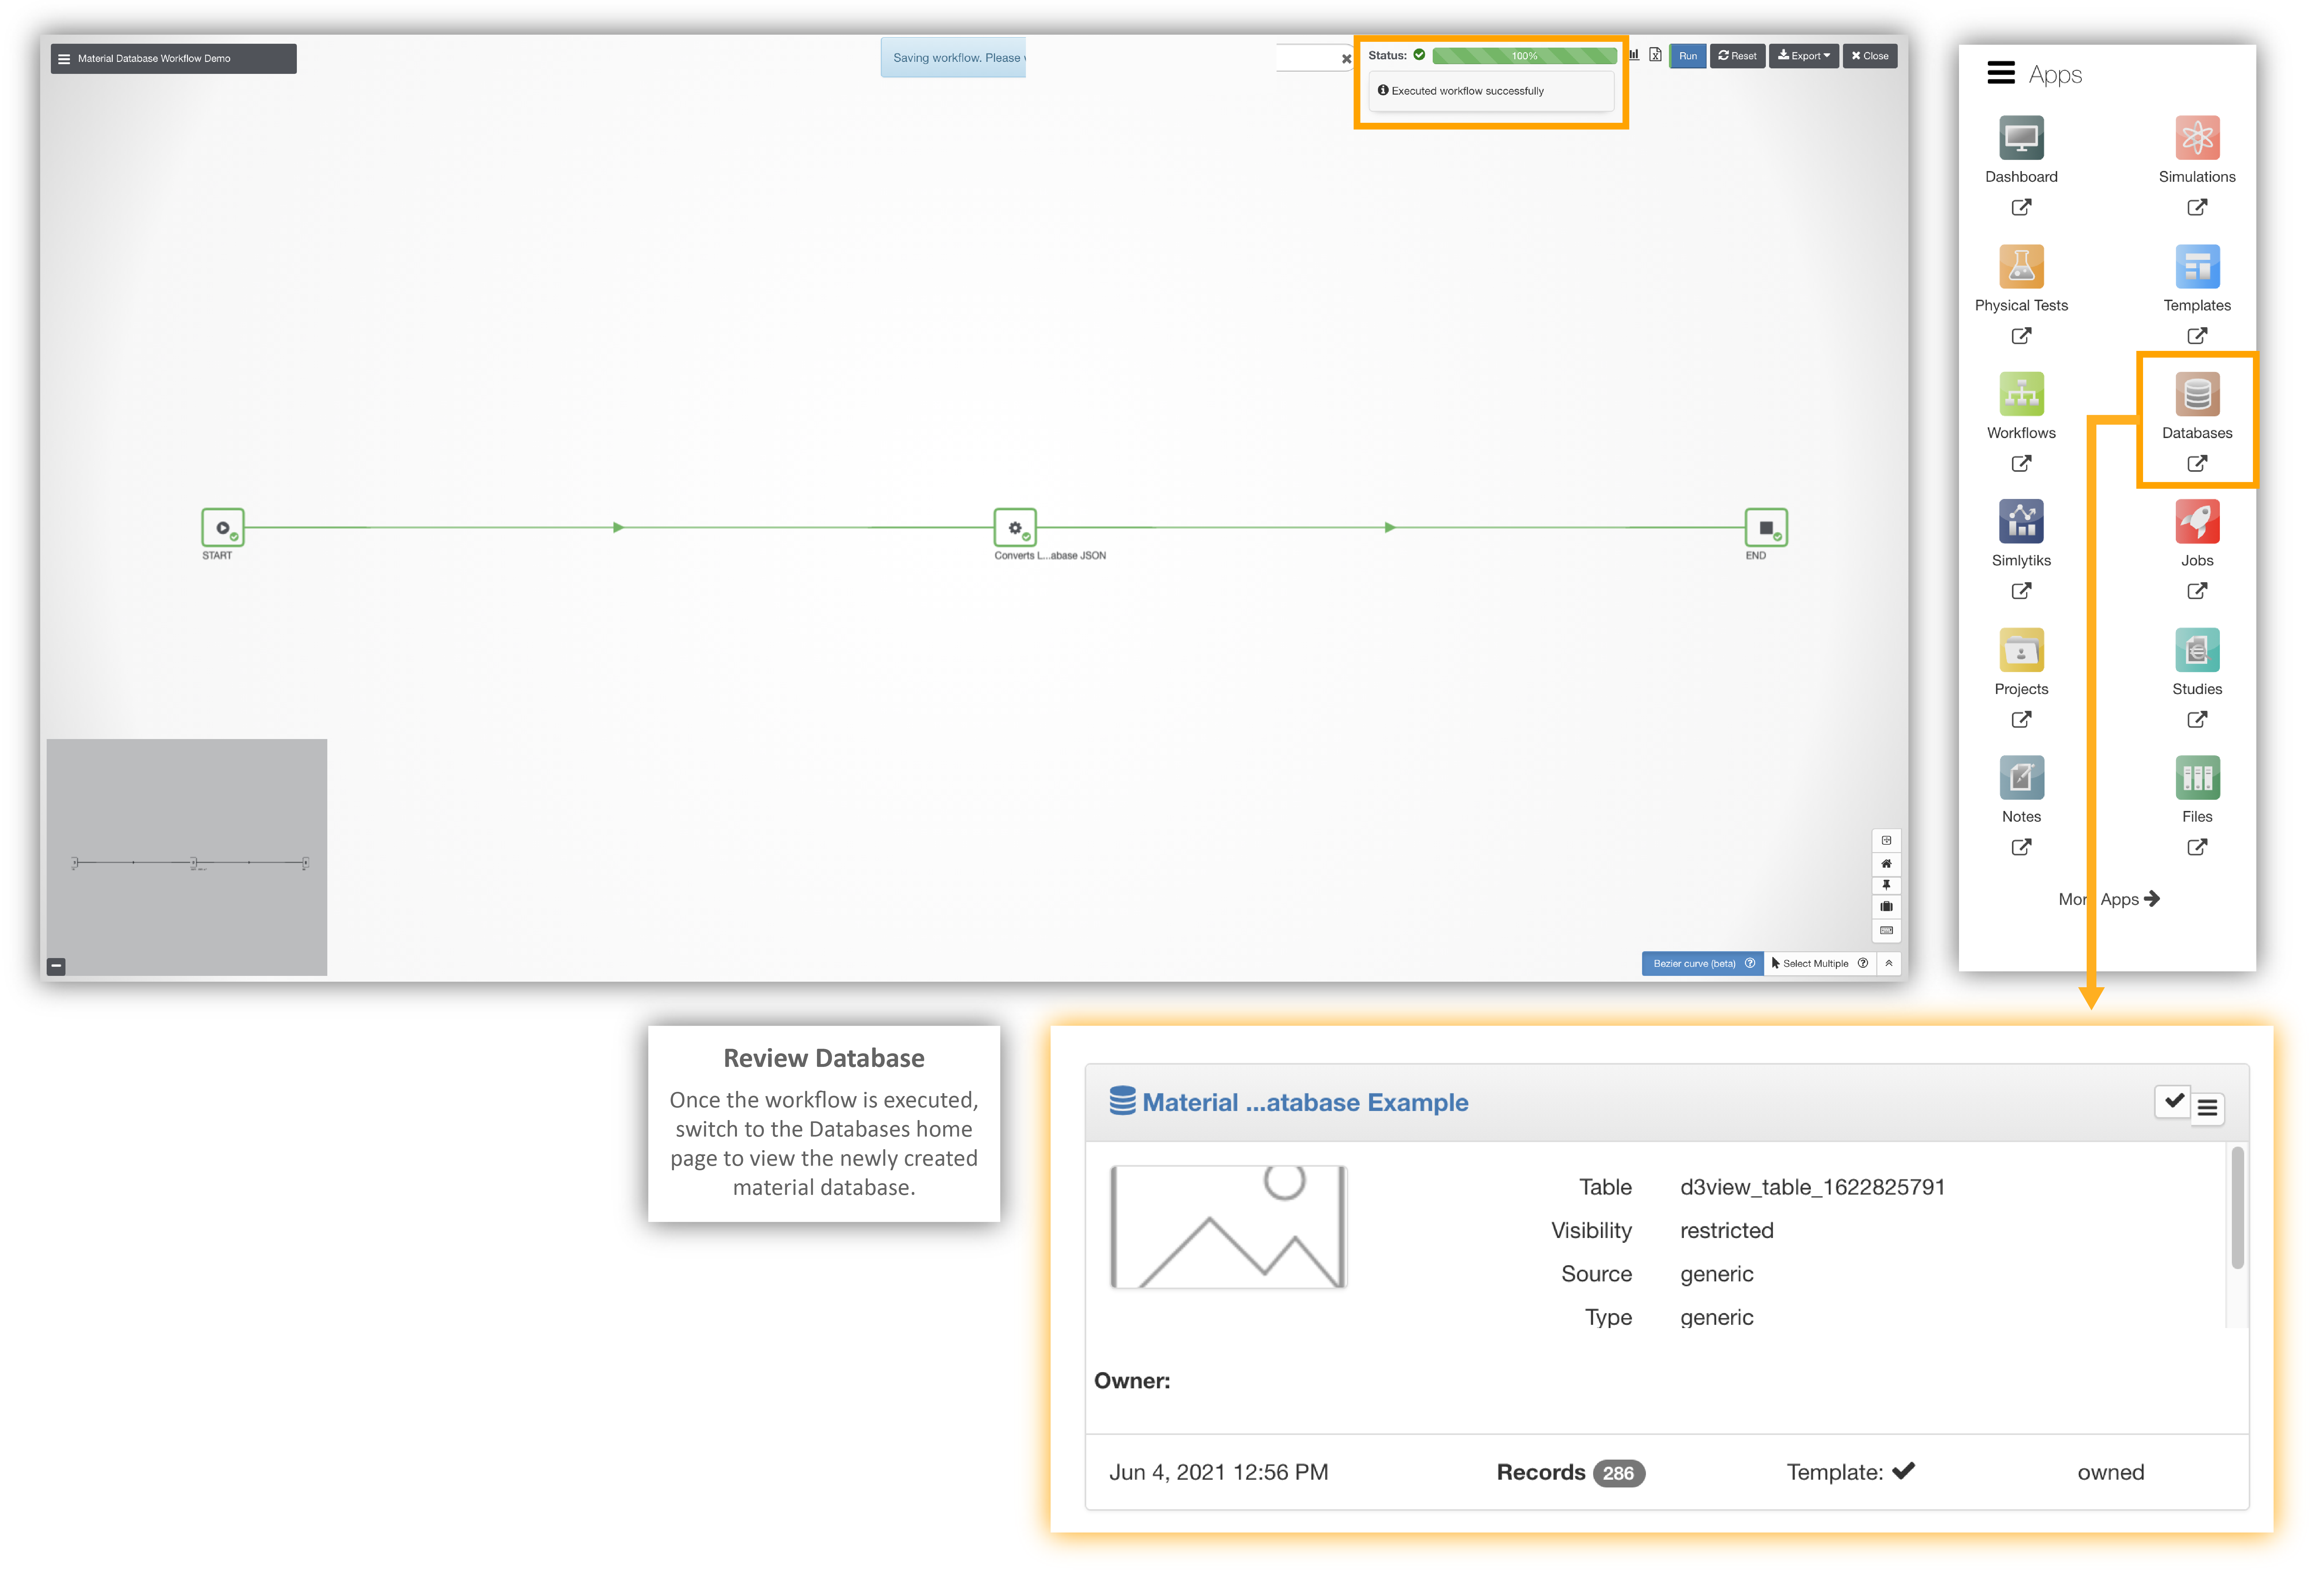
After setting up your worker configuration, save the workflow by clicking the save button at the top right and entering at least a name for it in the prompt box. After hitting “Save” again and refreshing back to Workflows Home, click on the play button on the workflow thumbnail to open it in execution mode.
Save Workflow
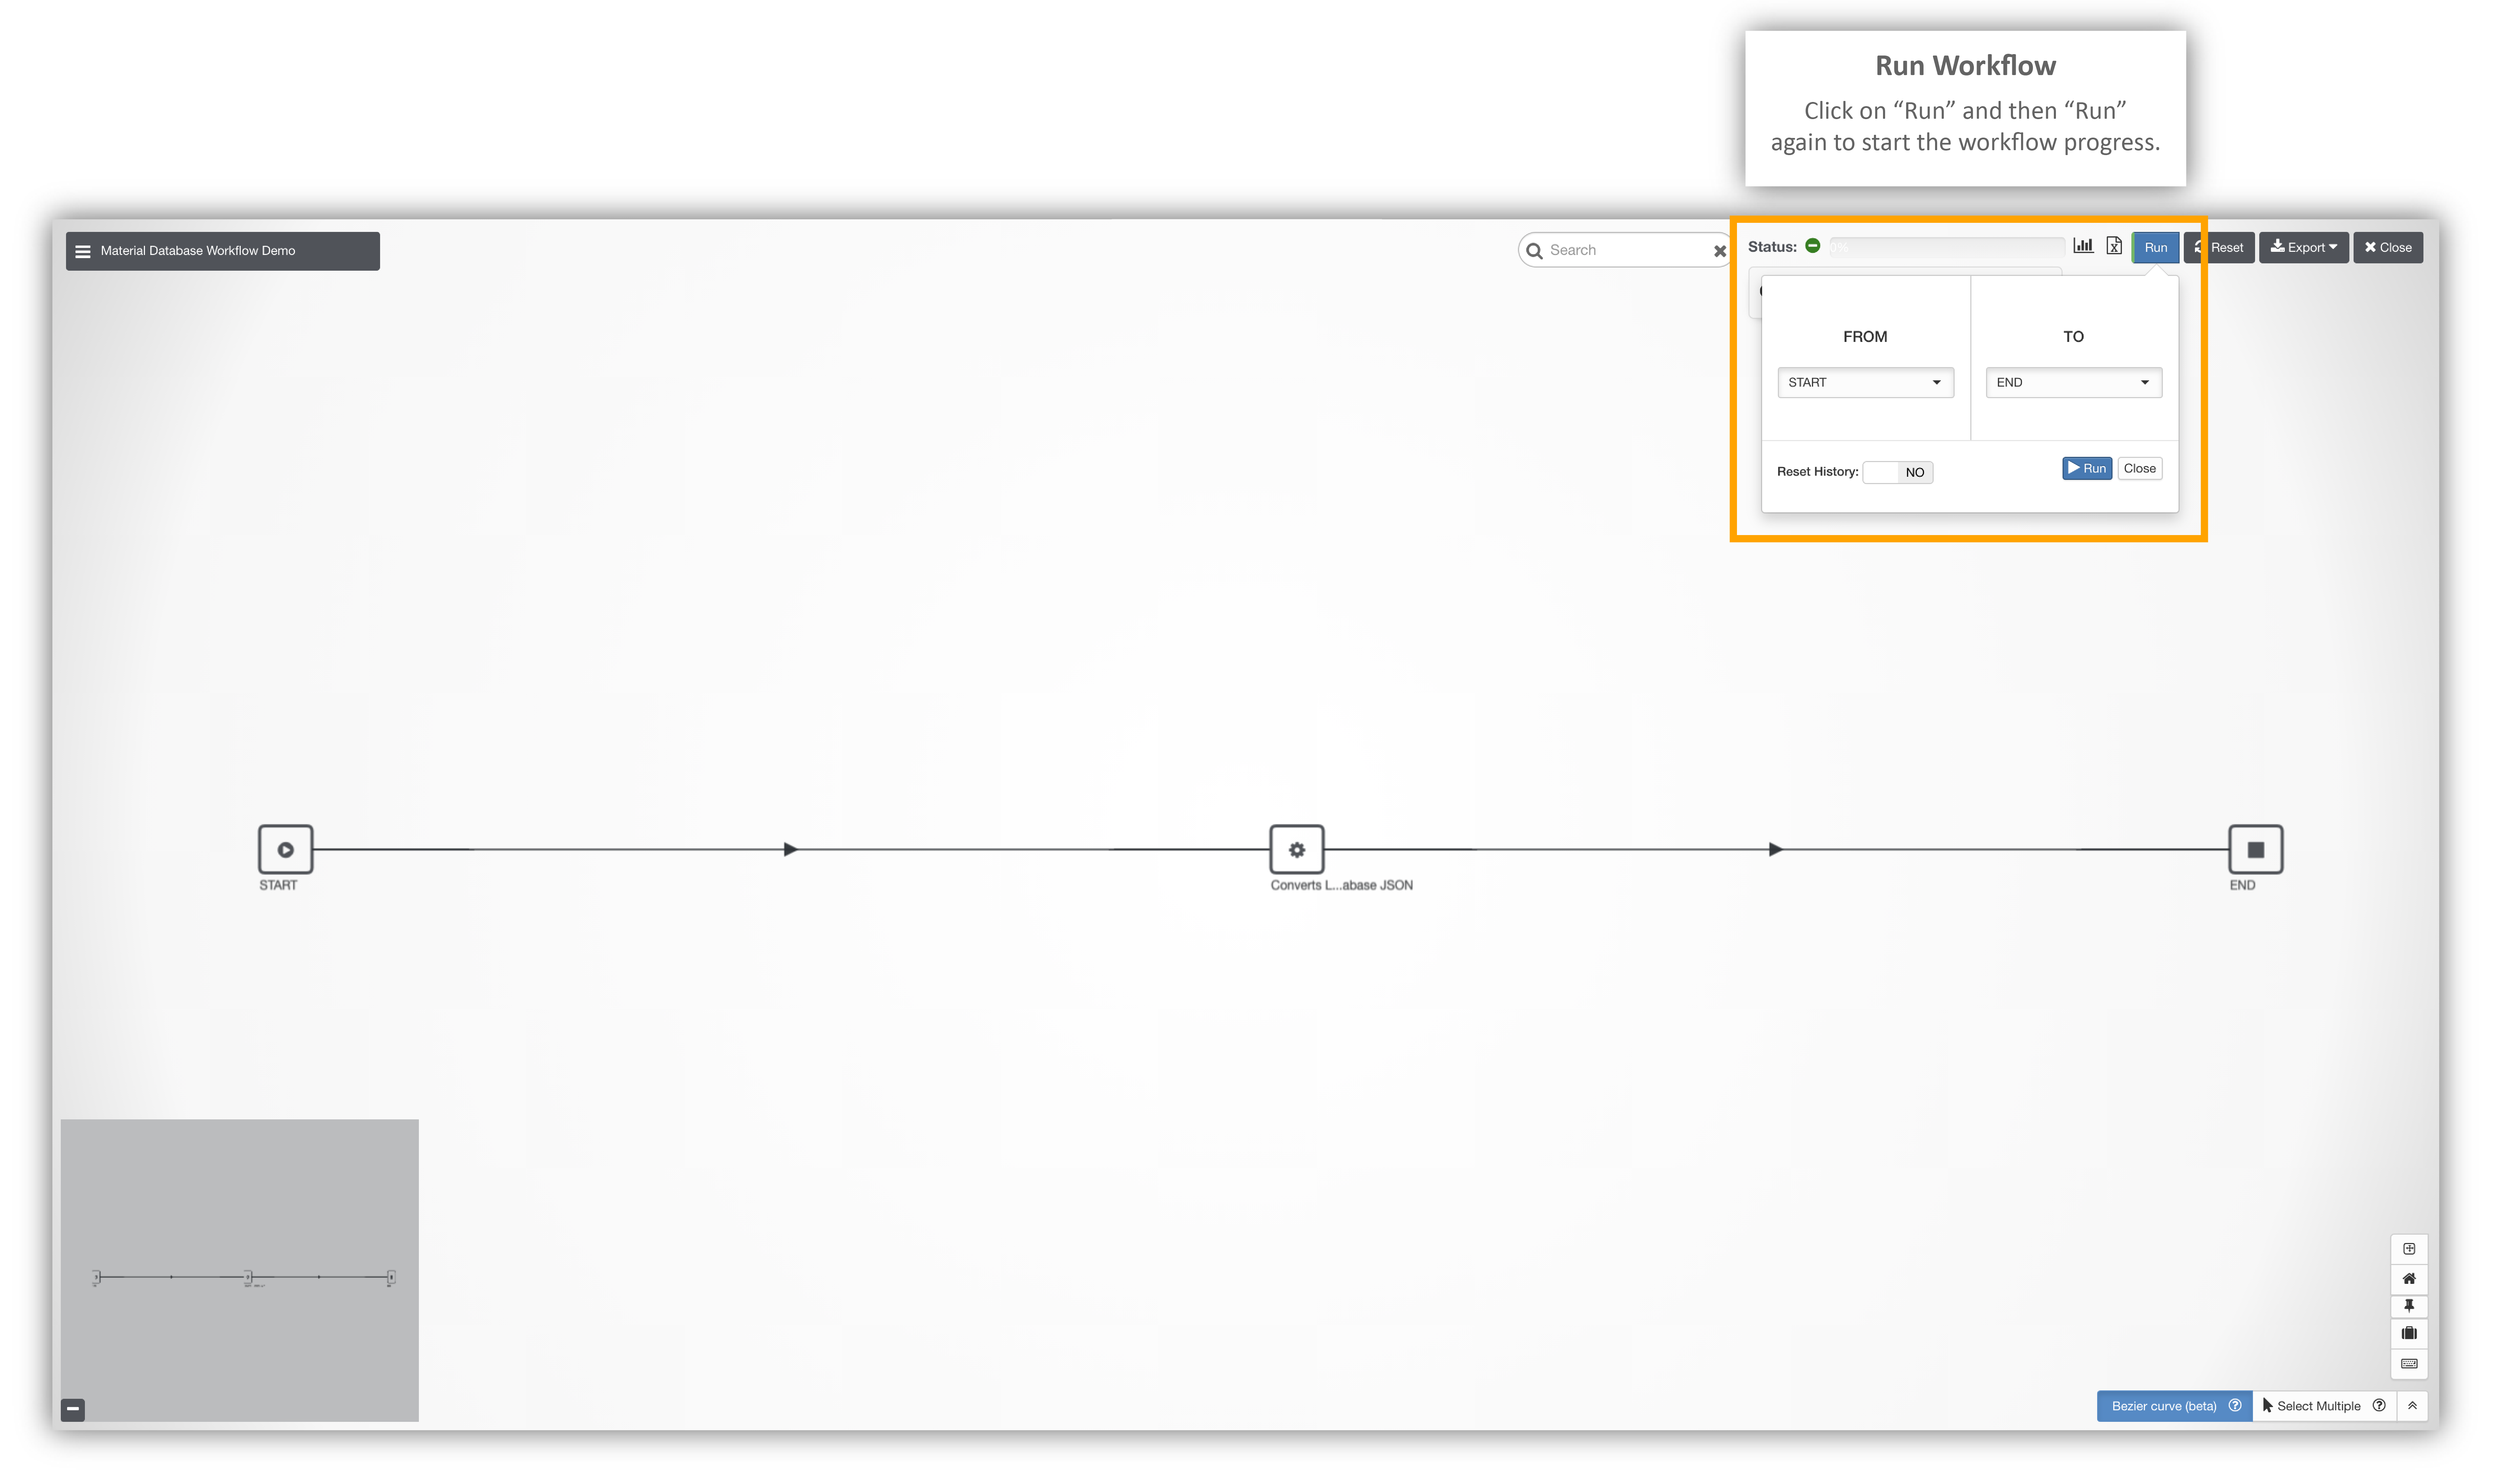
From here, click on “Run” at the top right of the execution board and then “Run” again in dialog box, first making sure the workflow will be processing from the start to end worker.
Execute the Workflow
You can observe the Workflow process with the green line moving down the workflow structure or the status bar at the top. Once the workflow executes successfully, close out of the execution board. You can save the board as is or reset the workflow, the latter being more beneficial if for any reason you need to execute this workflow again. From here, go to your Dashboards Application to make sure the run created your Database successfully. The database should present as the most recently added thumbnail with the name you specified as the owner.
Review Successful Material Database Execution