10.  Executing
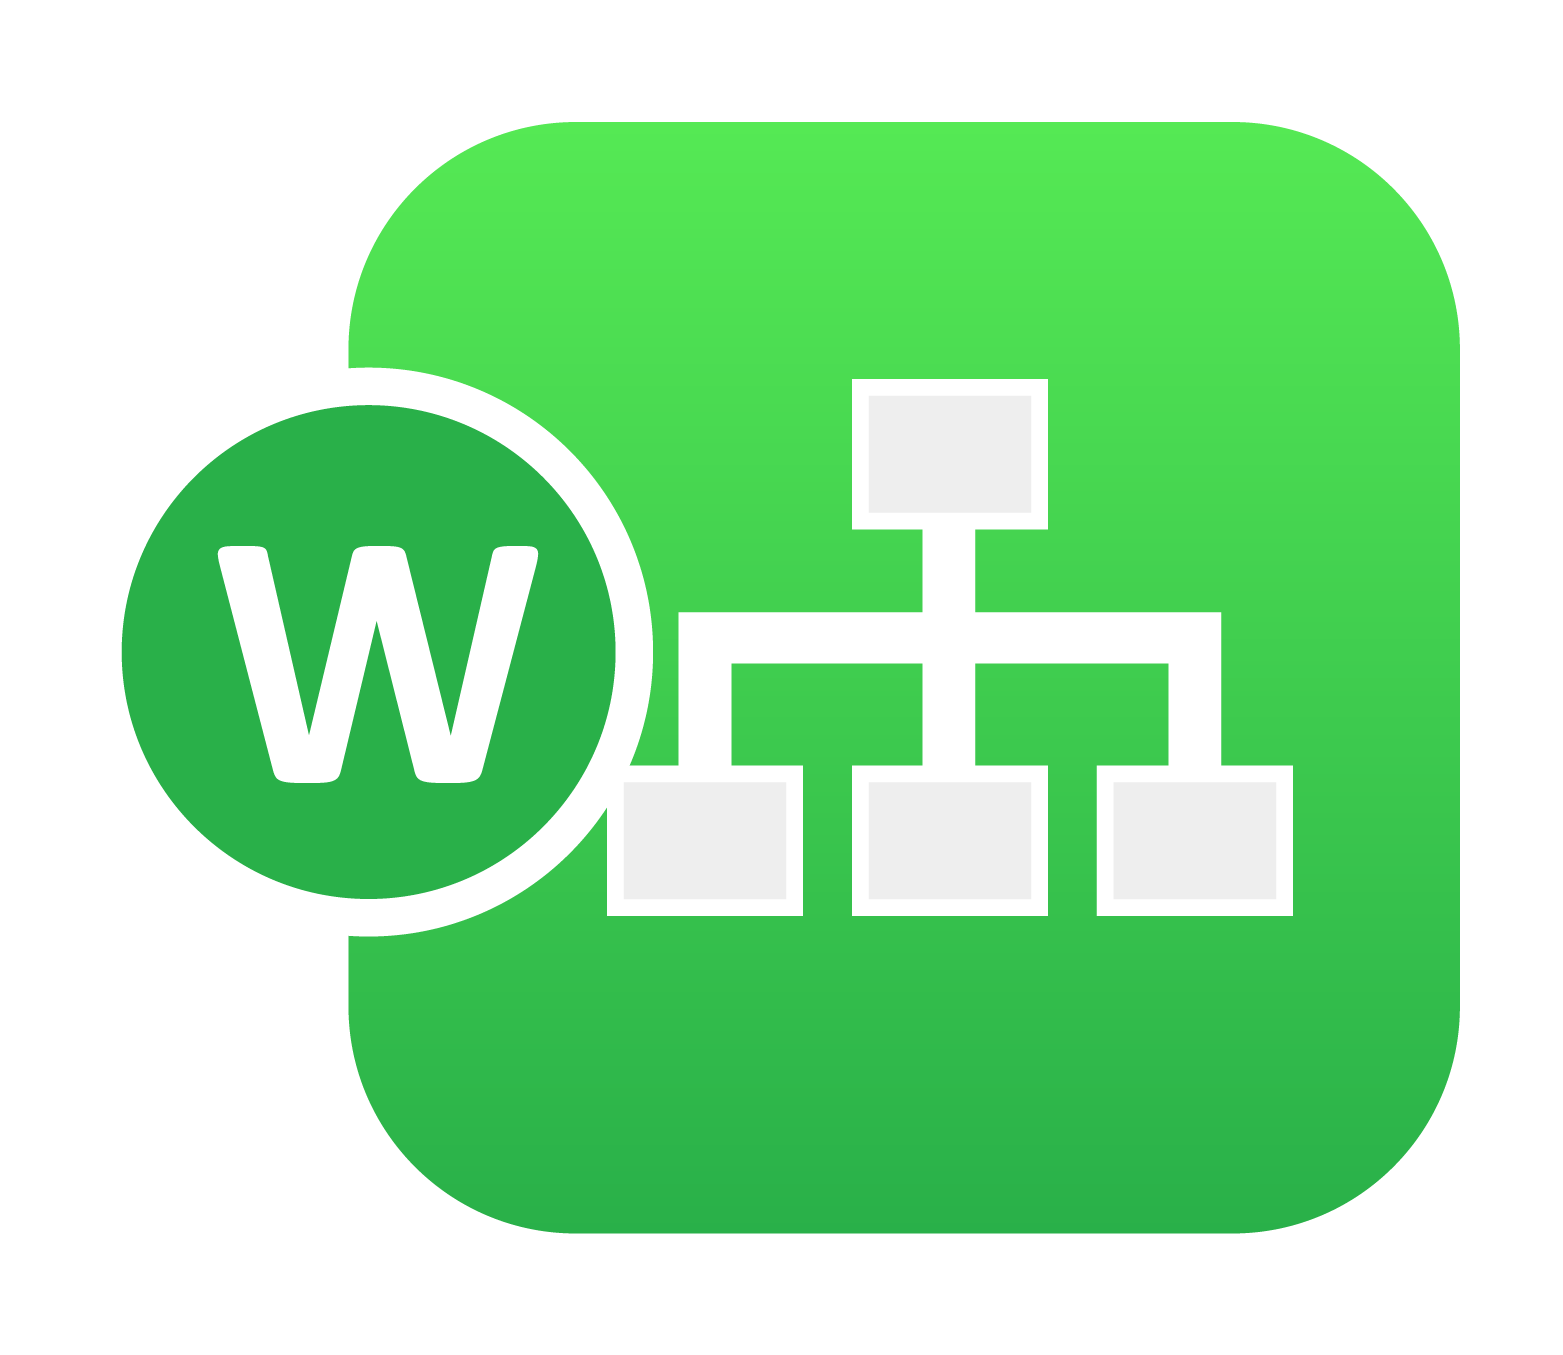
In this section, we’ll go over the ways we can execute our workflow.
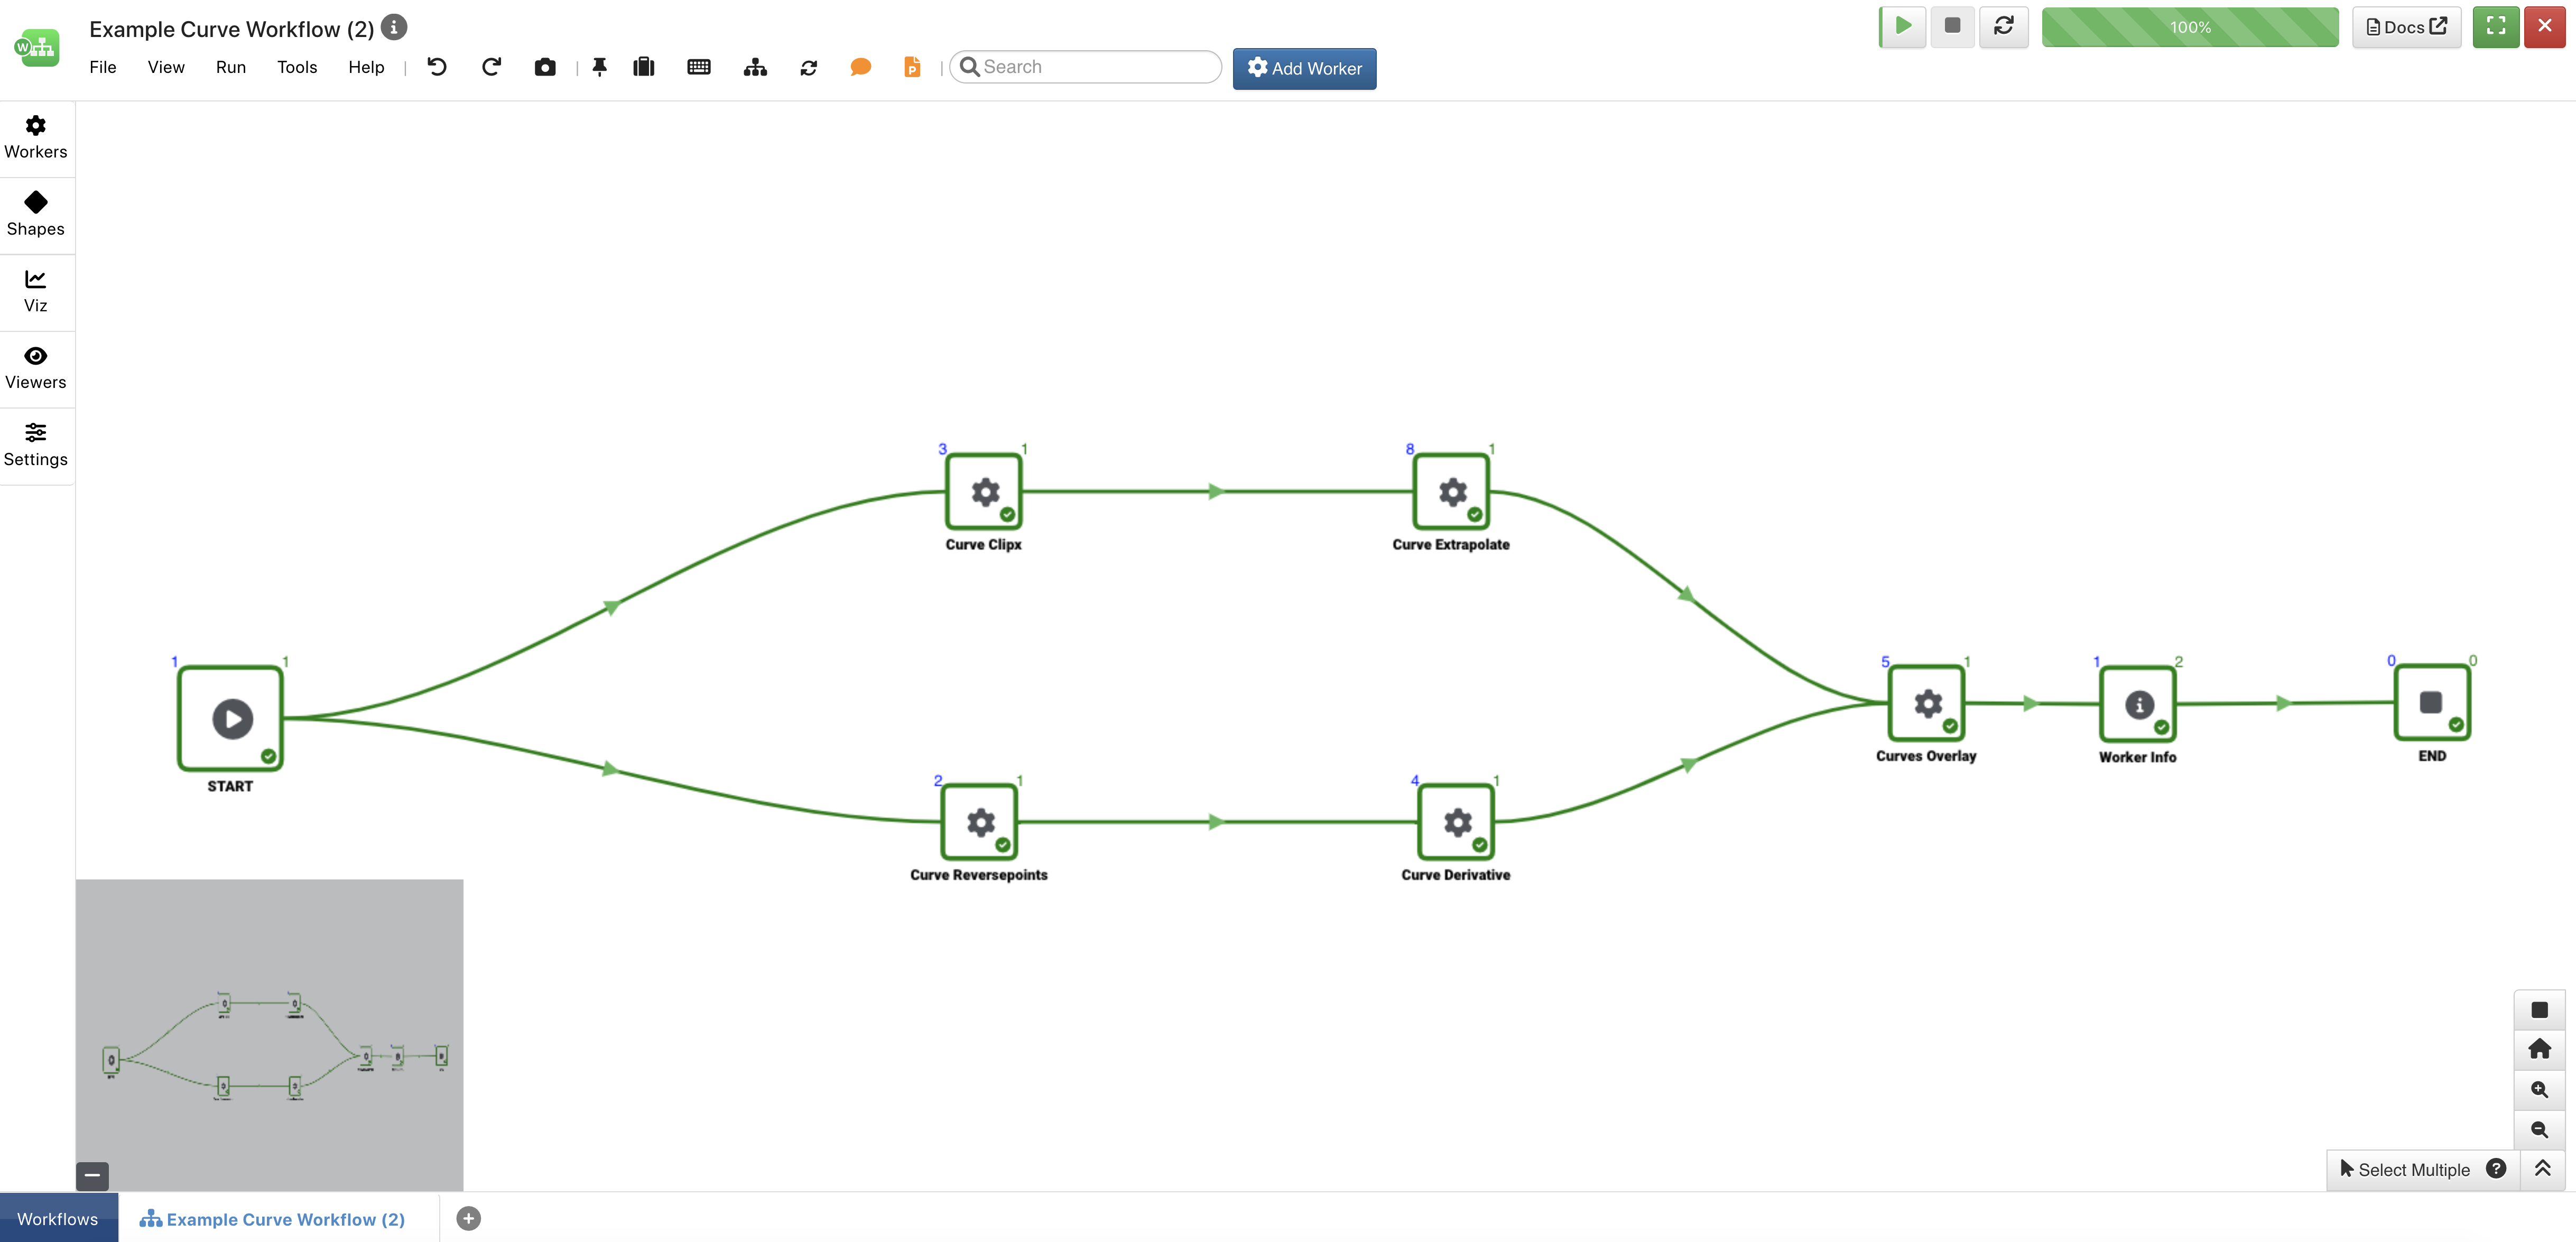
Figure 1: Executed Workflow Example
10.1. |play-circle| Basic Execution
To start execution, hit ‘Run’ (1) on the play controls that appear towards the bottom of the canvas on mouse hover. Make sure the Workflow is performing from START to END and click ‘Run’ (2) again.
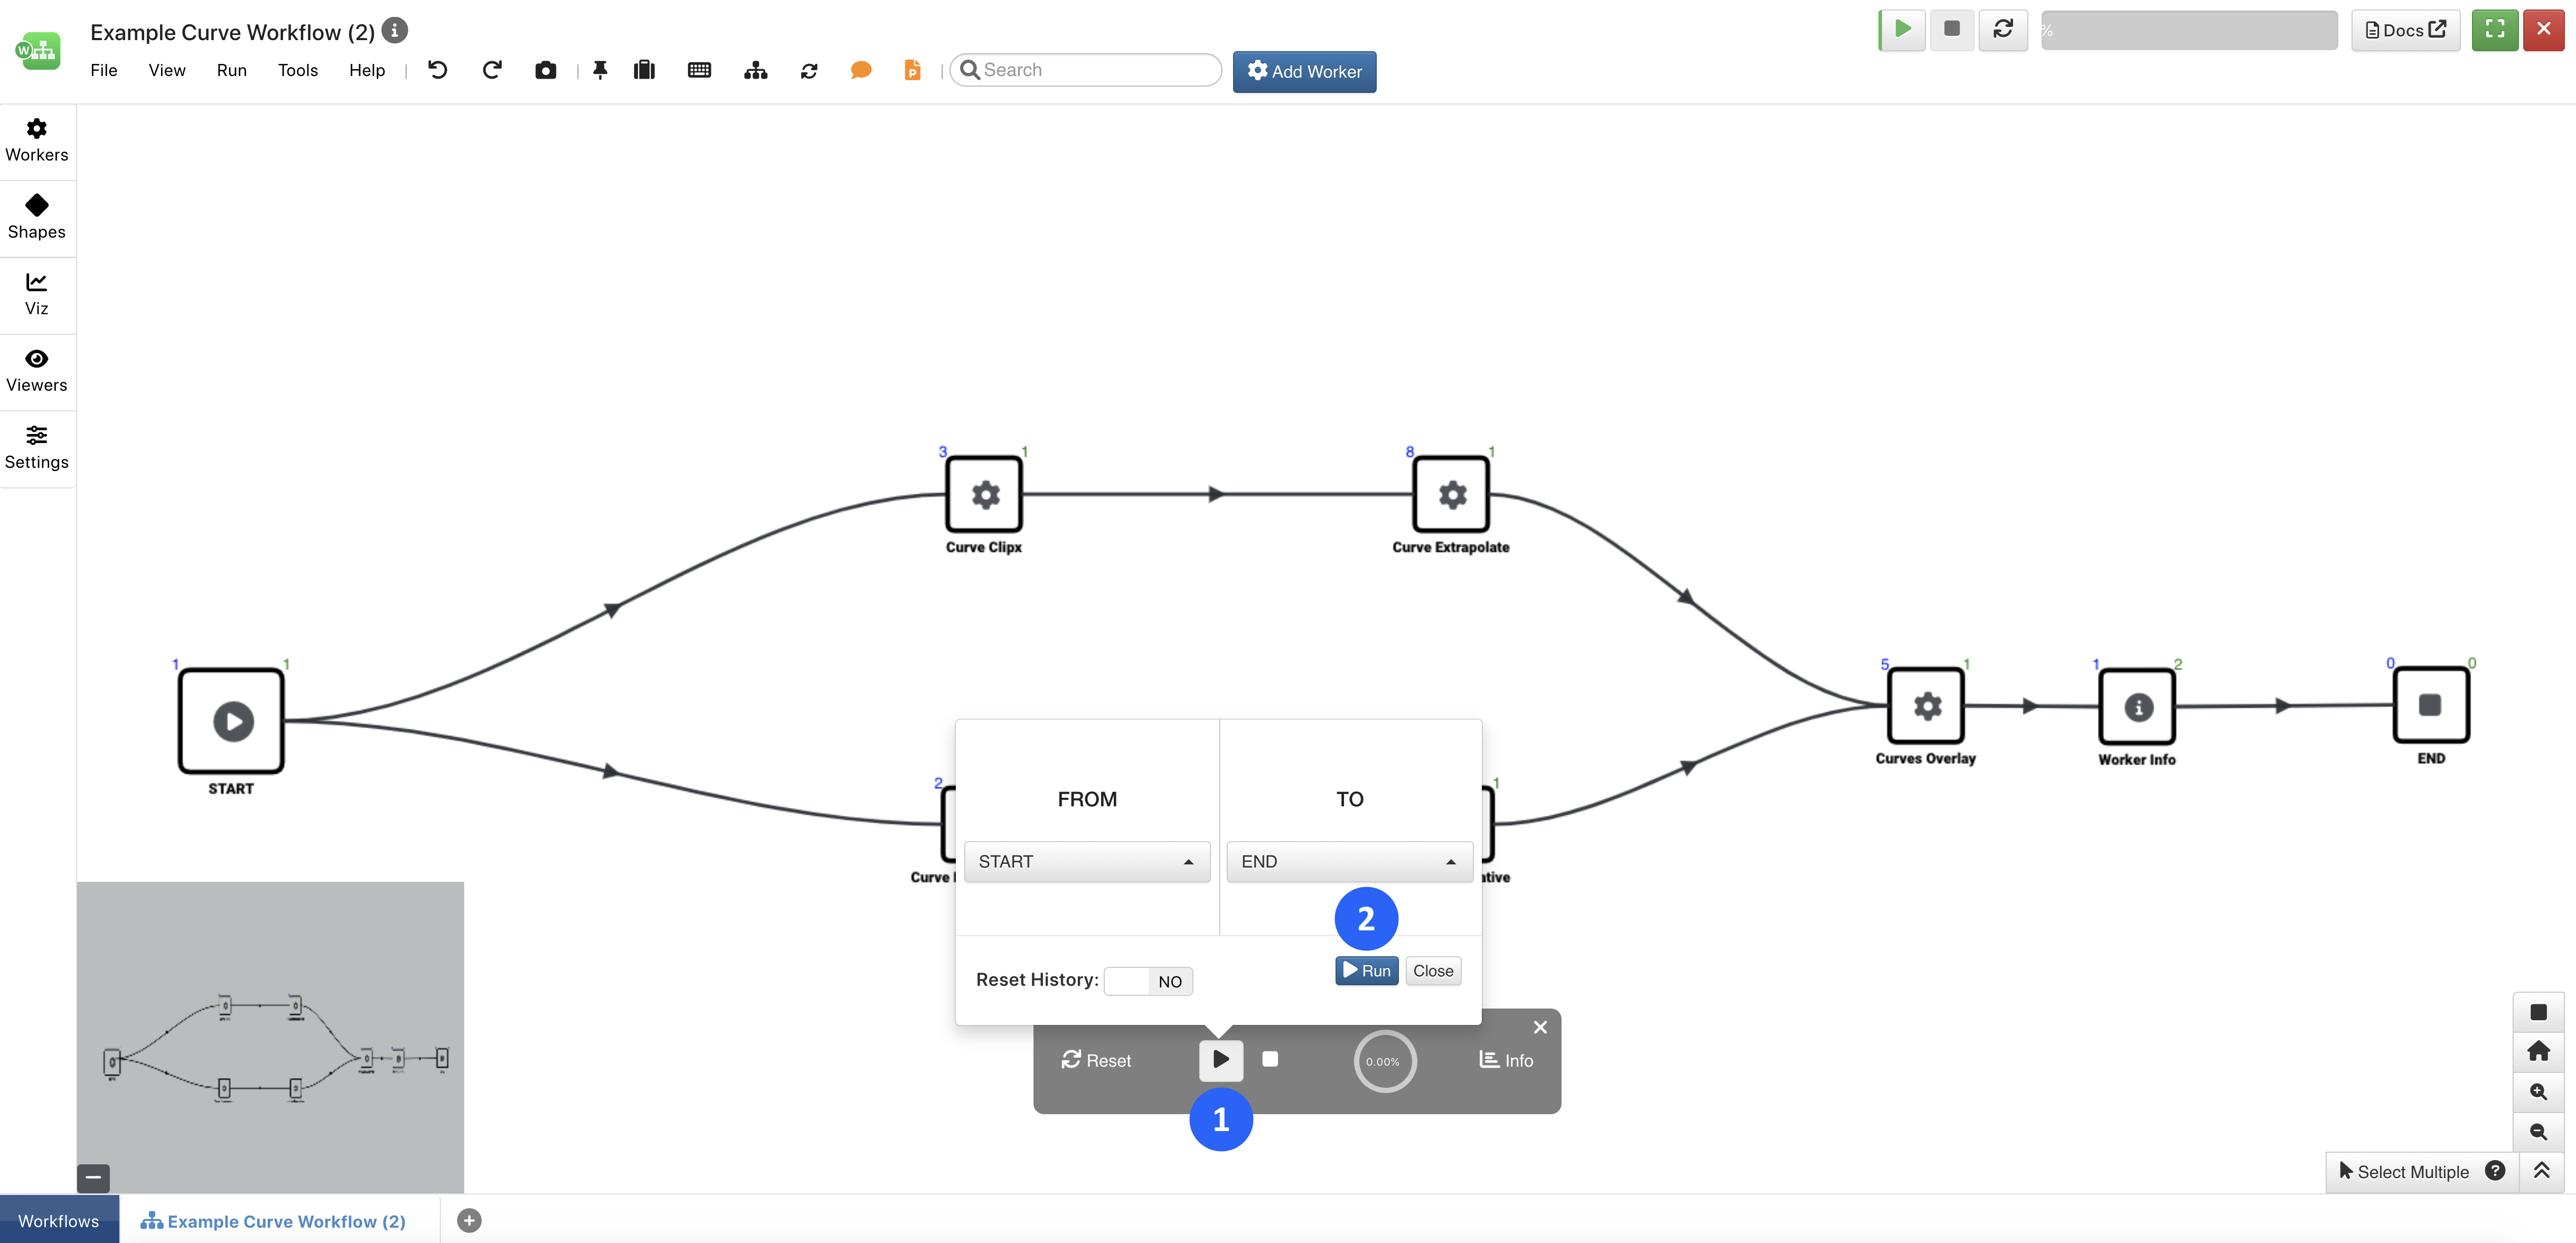
Figure 2: Executing Your Workflow
Upon successful execution, the status bar and circle will be at 100% with the message ‘Executed END successfully’.
Figure 3: Executed Workflow
Check out the following video see how it’s done:
10.2. |plus-circle| Other Execution Options
We are not required to use the play options at the top to execute our workers or workflow. We can also find execution options when right-clicking on a worker node or opening a worker modal when in execution mode.
The following image illustrates the execution options when right-clicking on a worker in the canvas. Make sure to click on the play tab at the bottom of the menu to see these options.
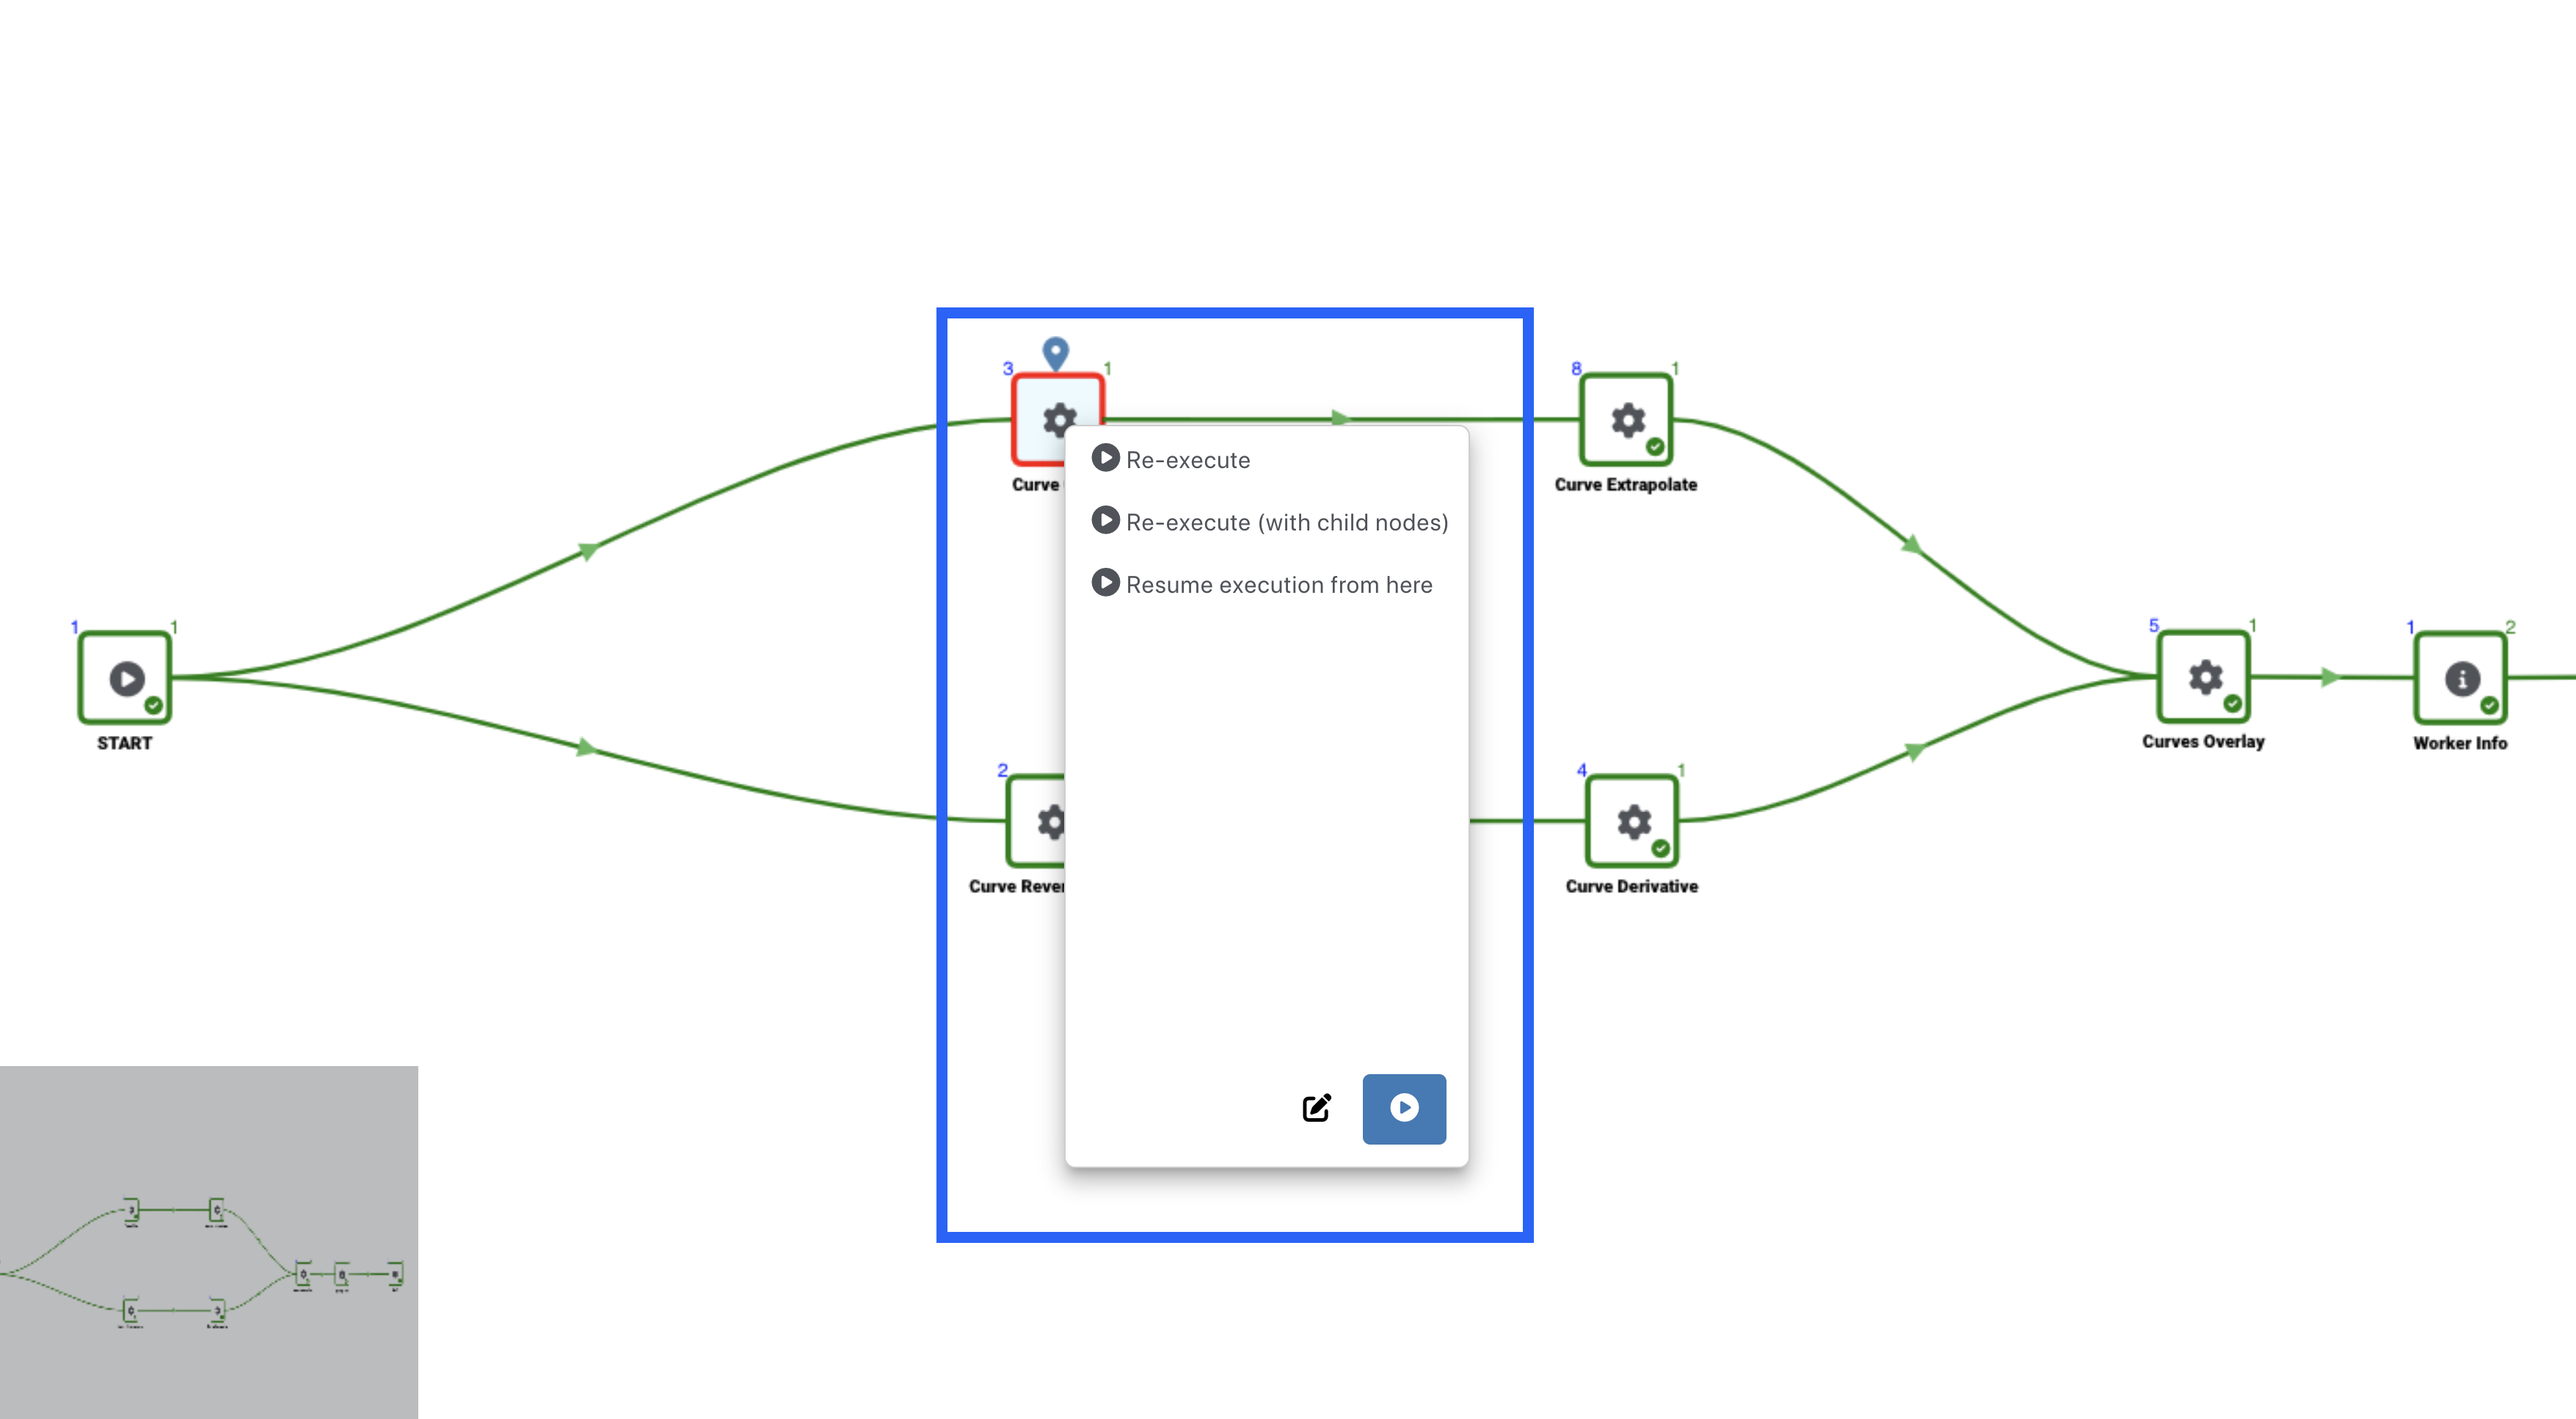
Figure 4: Worker Right-Click Execution Options
To execute from a worker modal, click on the worker node in the canvas to open the window. Then, click the arrow at the bottom right corner next to “Test Execution” and choose “Current & Child Nodes”. We can also just execute the worker by simply clicking “Test Execution”.
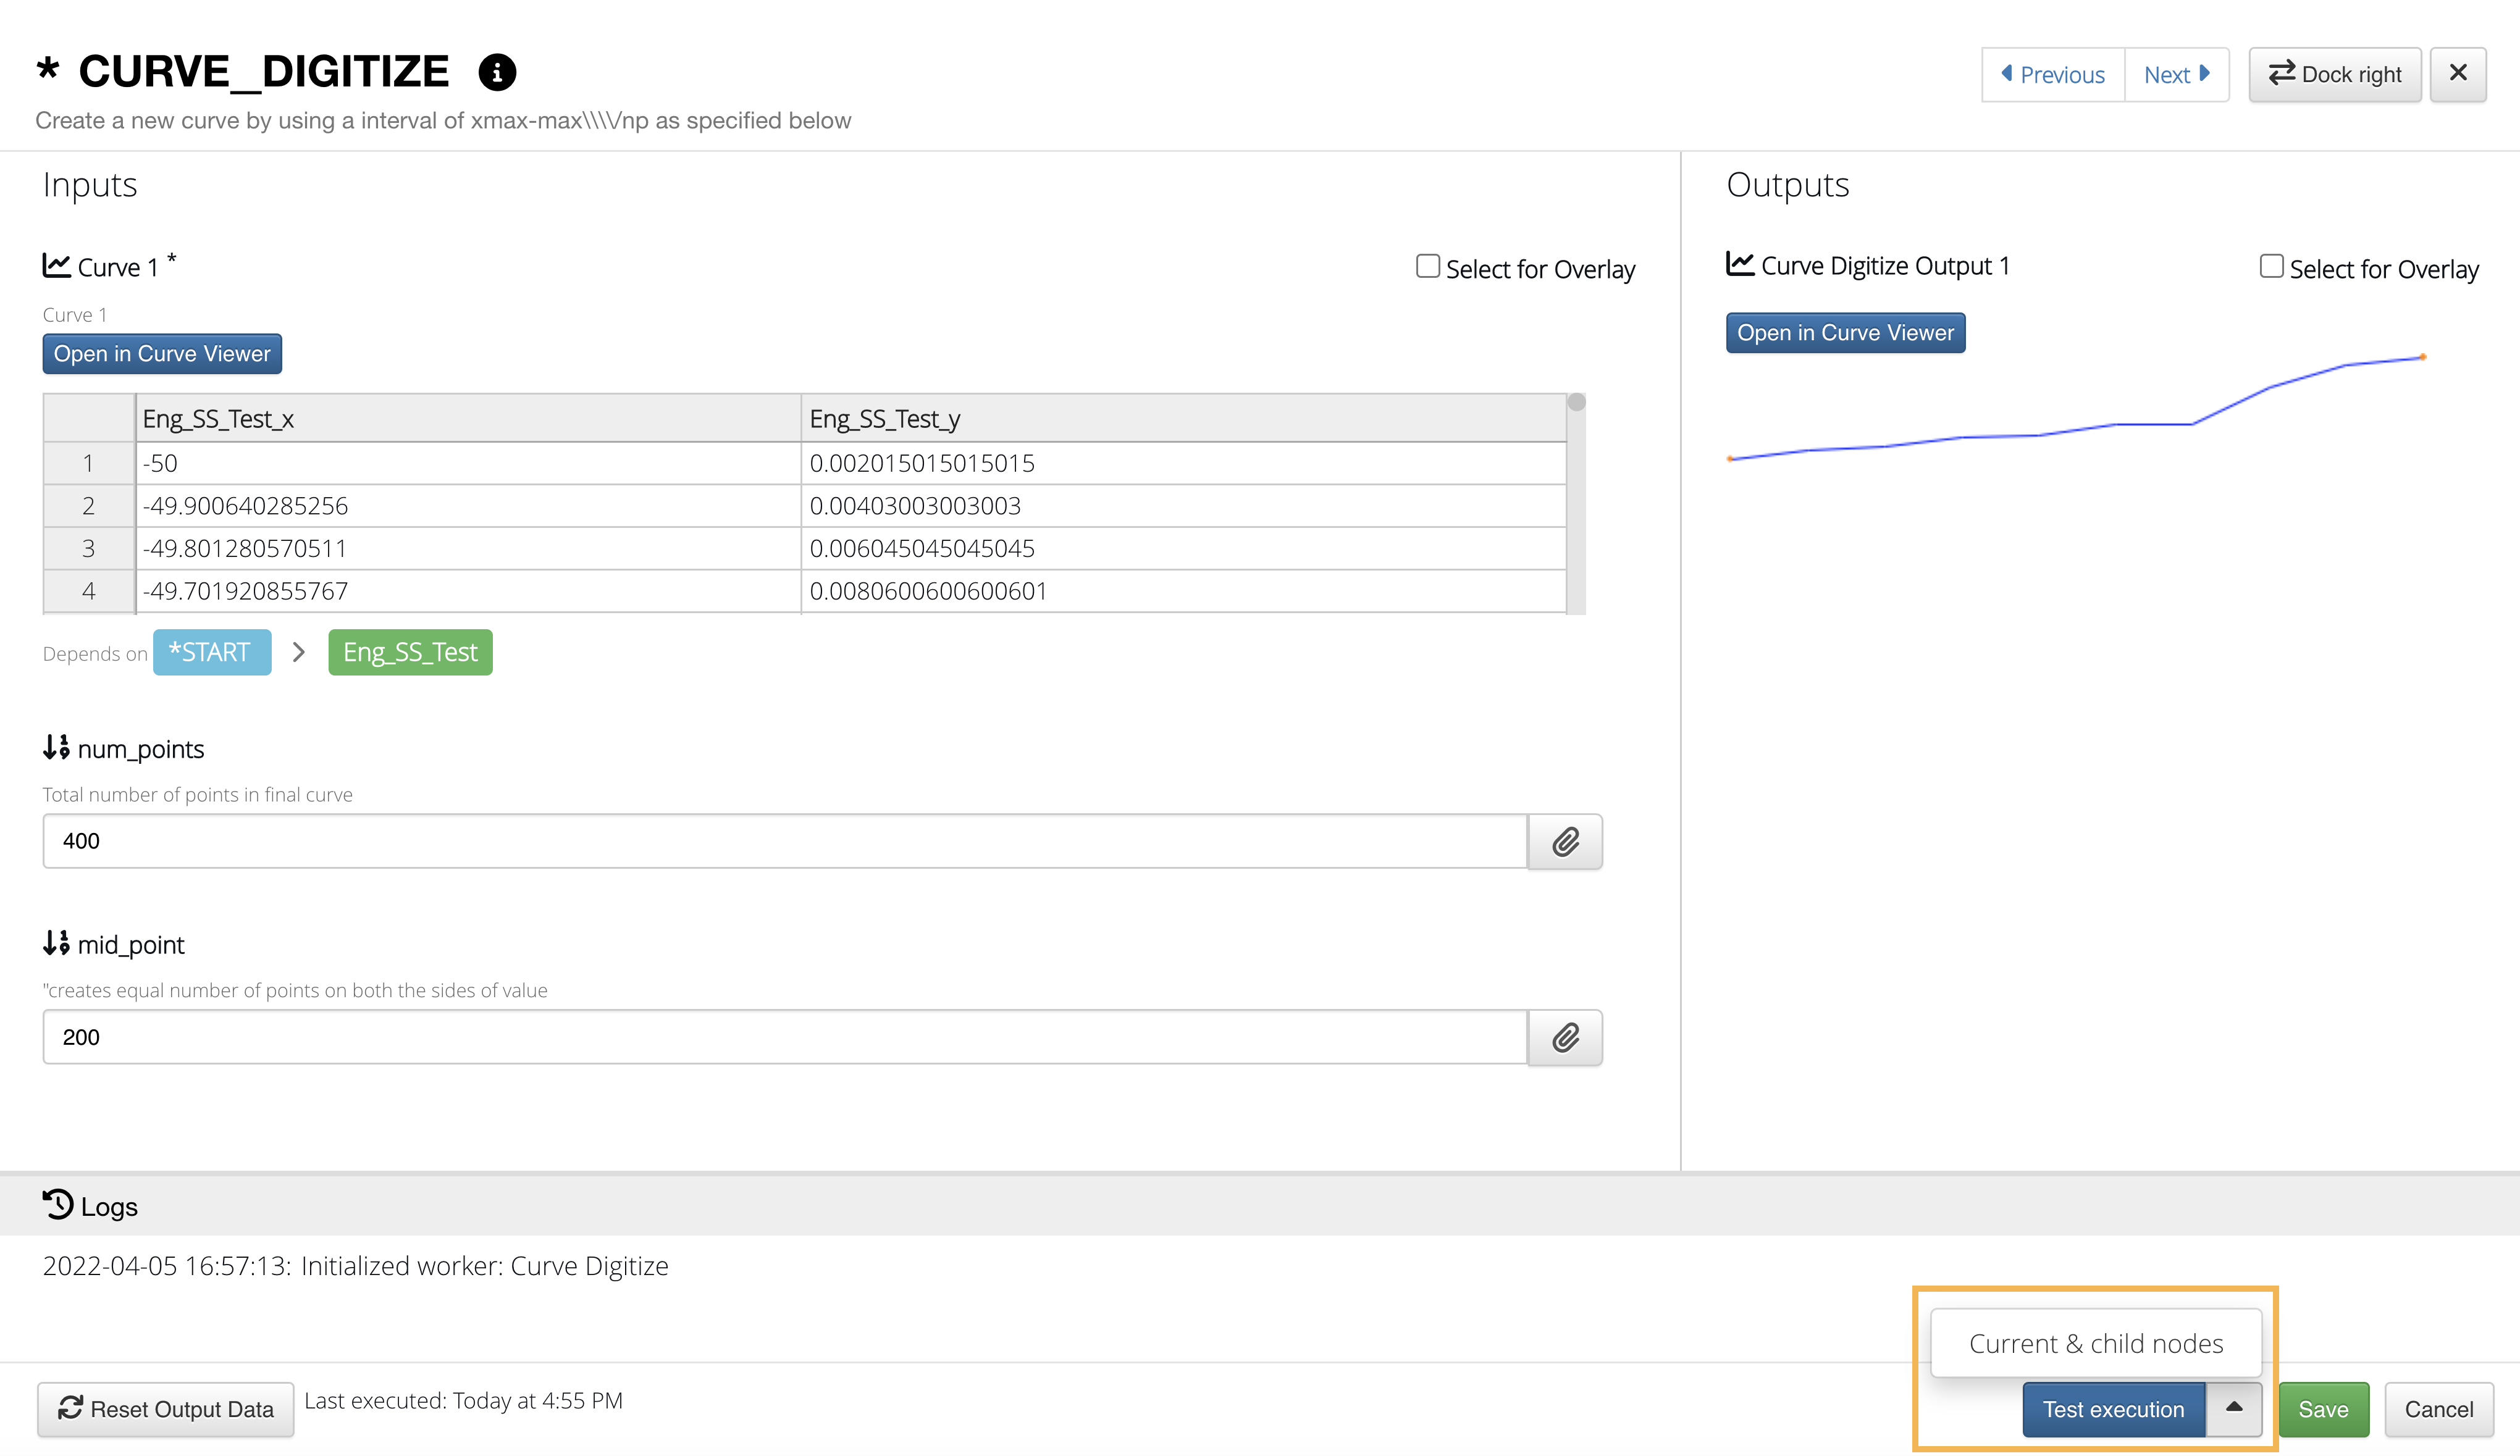
Figure 5: Execute Worker and Child Nodes From Worker Modal
Check out the following video see to two options for executing just one worker:
10.3. |asterisk| |flask| Run Simulation and Physical Tests
You can run simulation and physical tests responses through saved workflows. Do this by navigating to the simulation or physical test you would like to run on the respected application page. Then, right click on the simulation or physical test and choose “Run Workflow”.
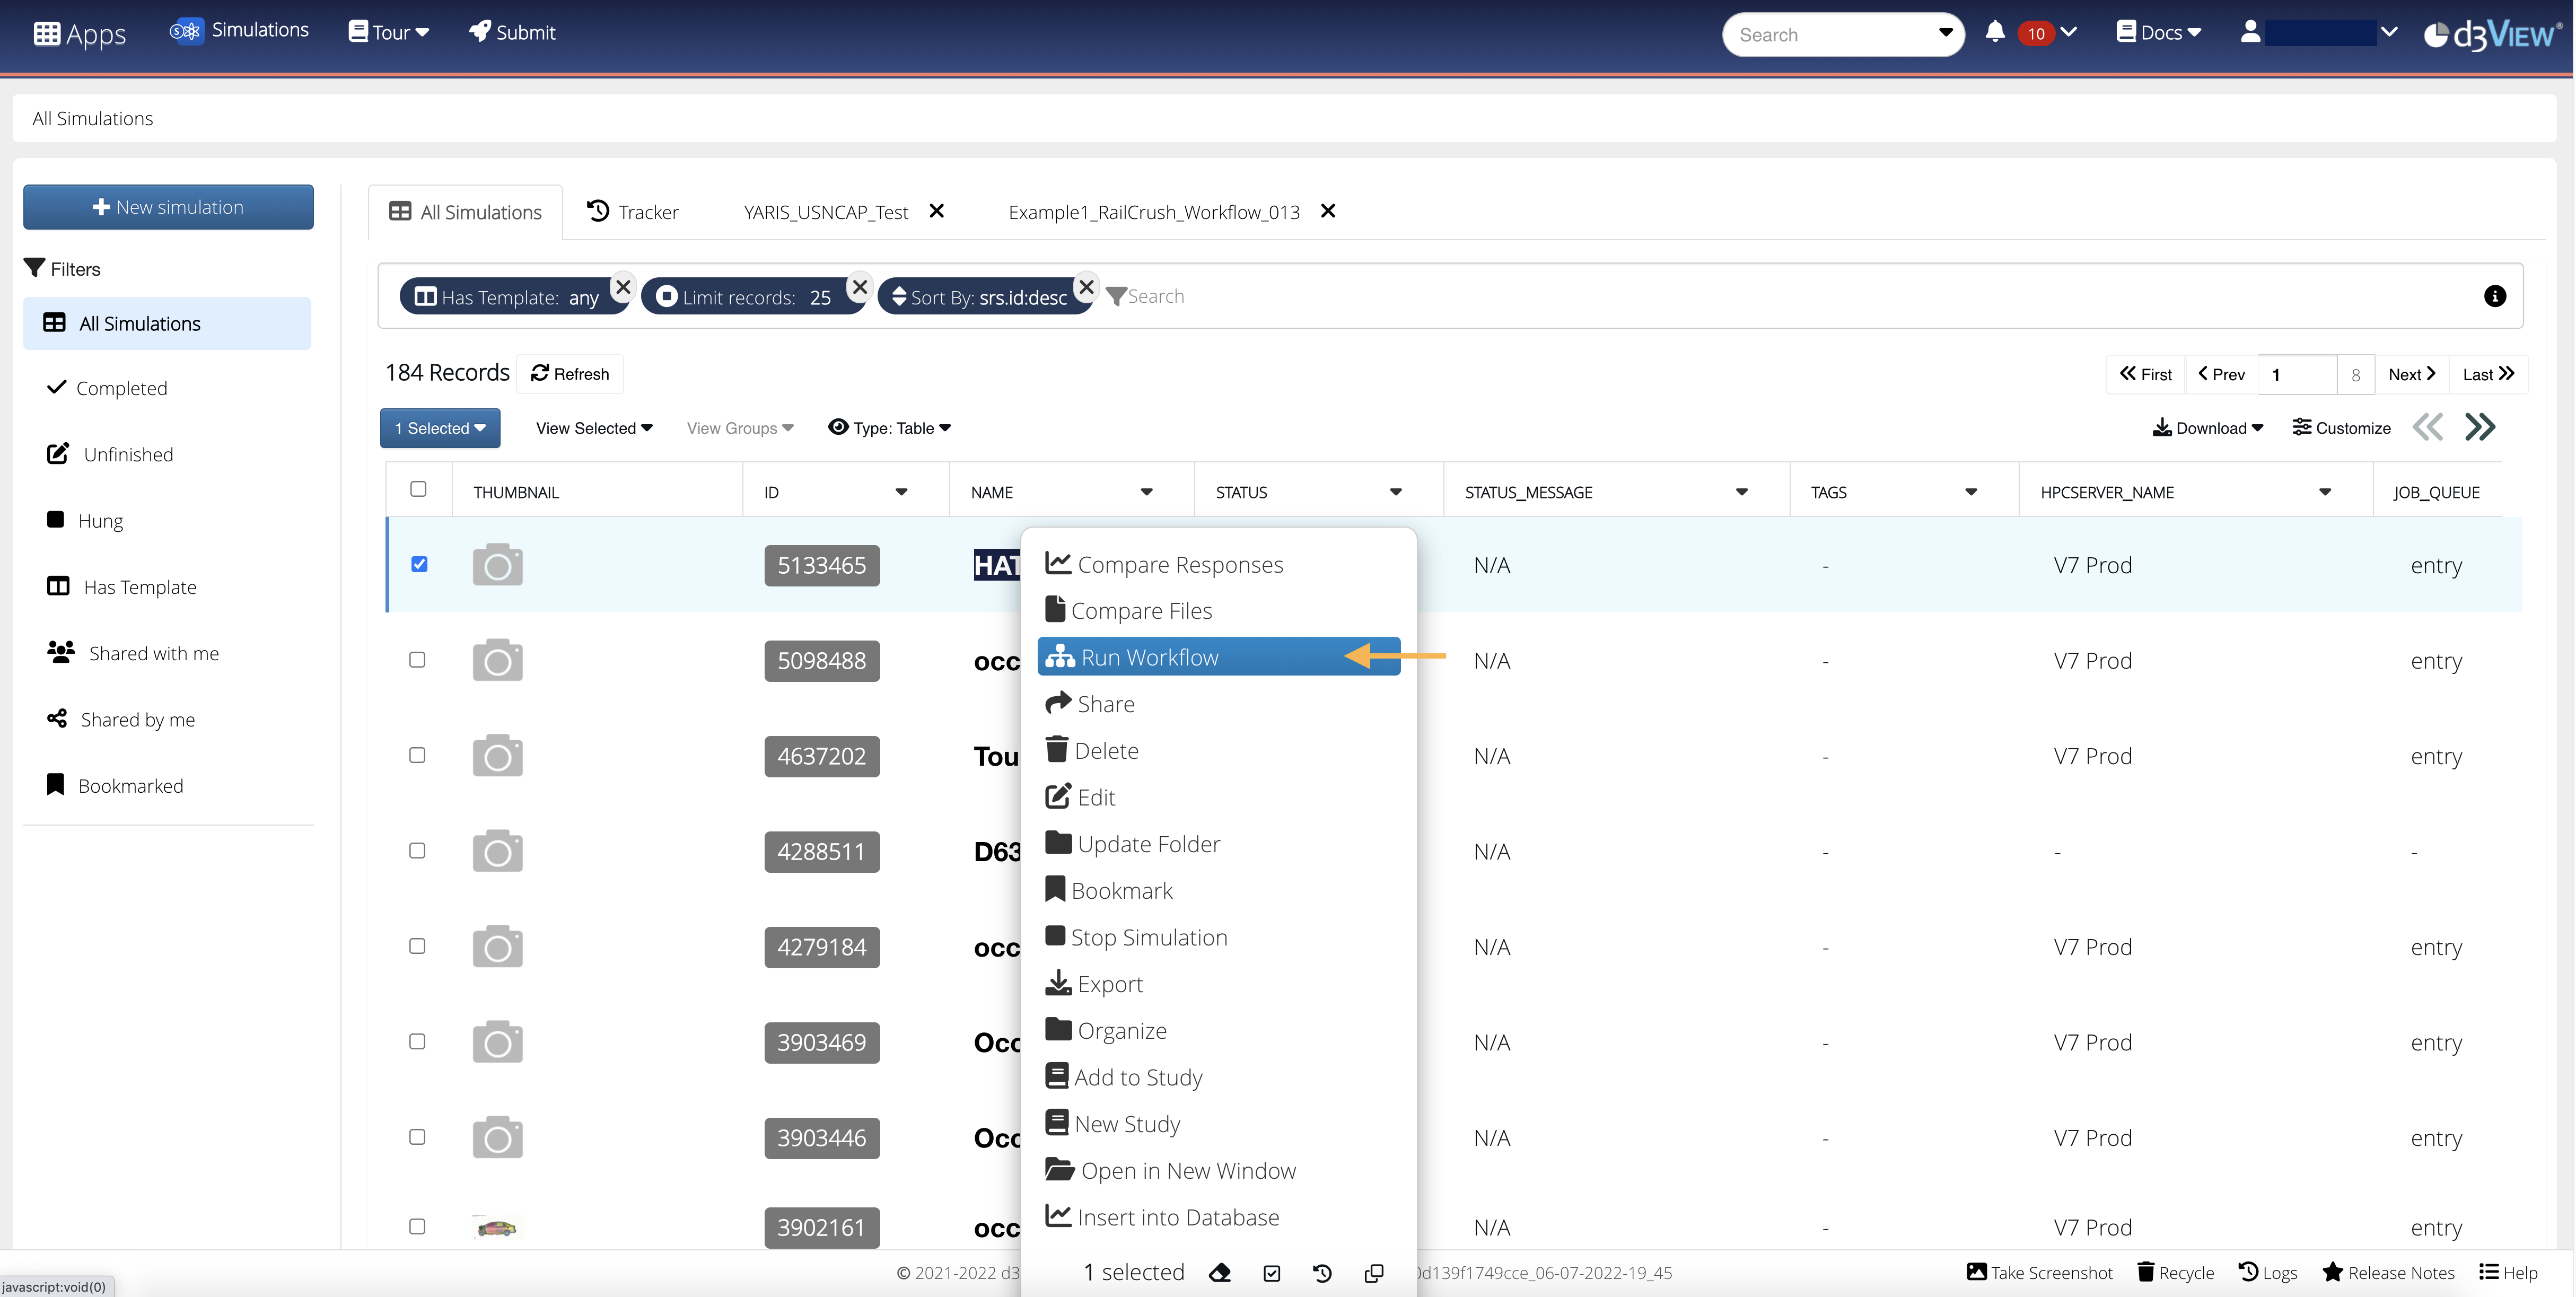
Figure 6: Run Workflow from Simulation
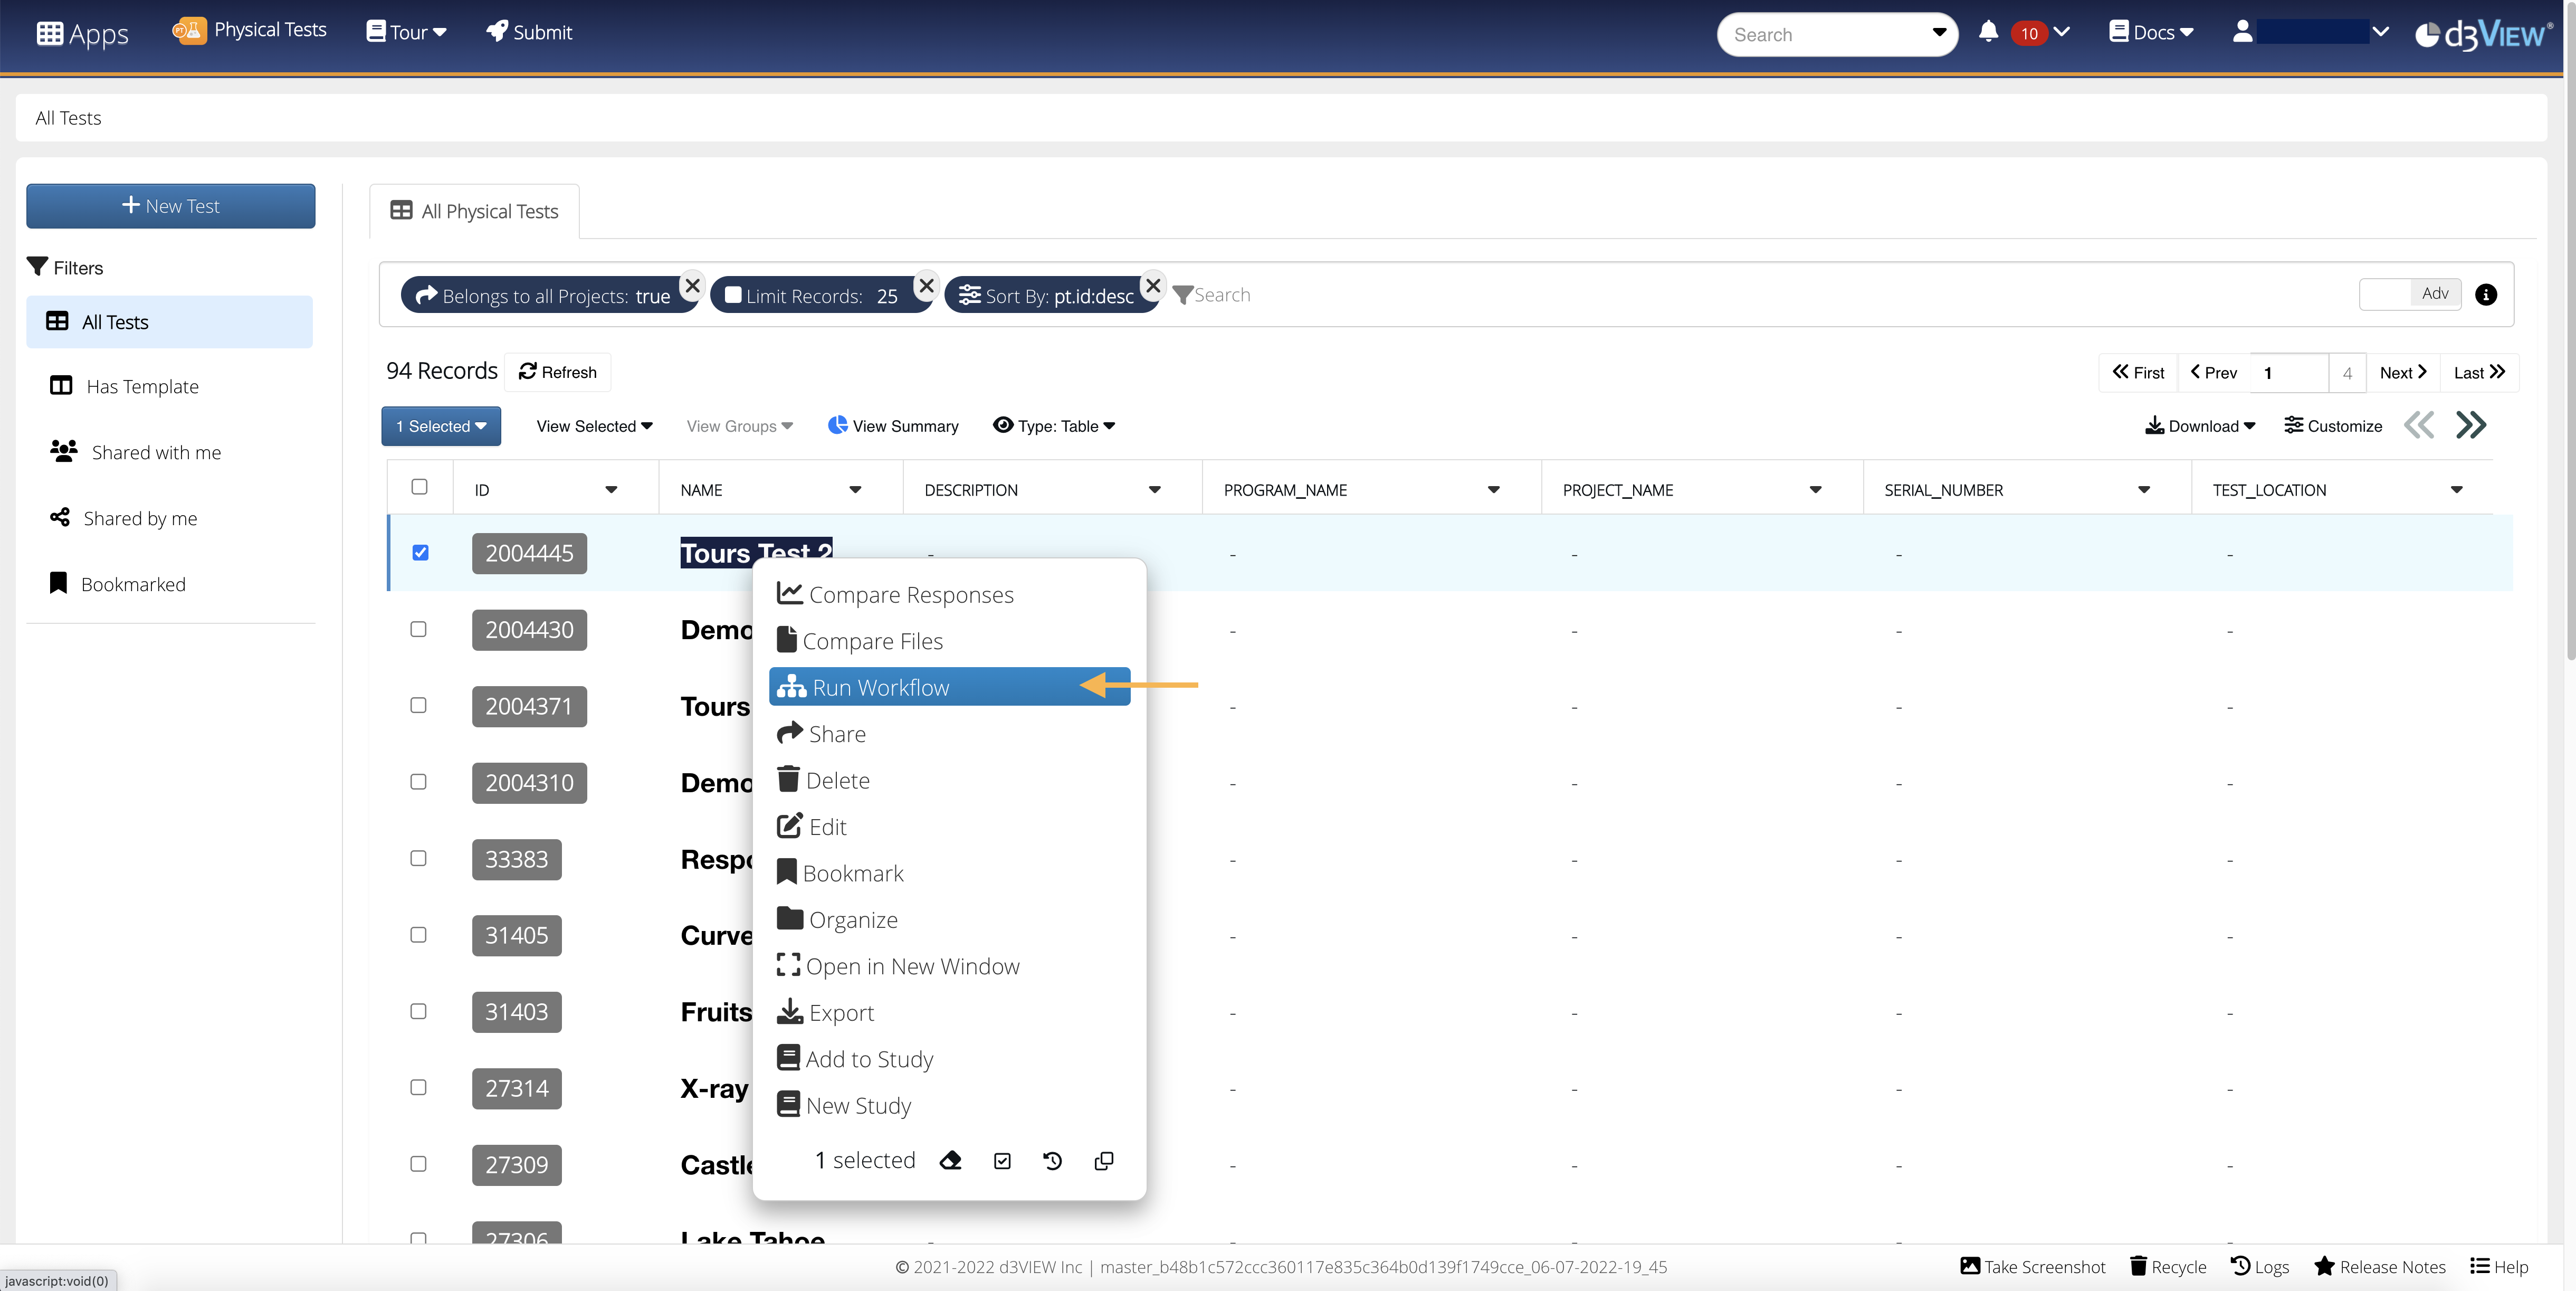
Figure 7: Run Workflow from Physical Test
In the next window, choose Workflow as the Parent and then which workflow you would like to run the responses through. Click “Apply” to open the workflow with linked responses in the Workflow application.
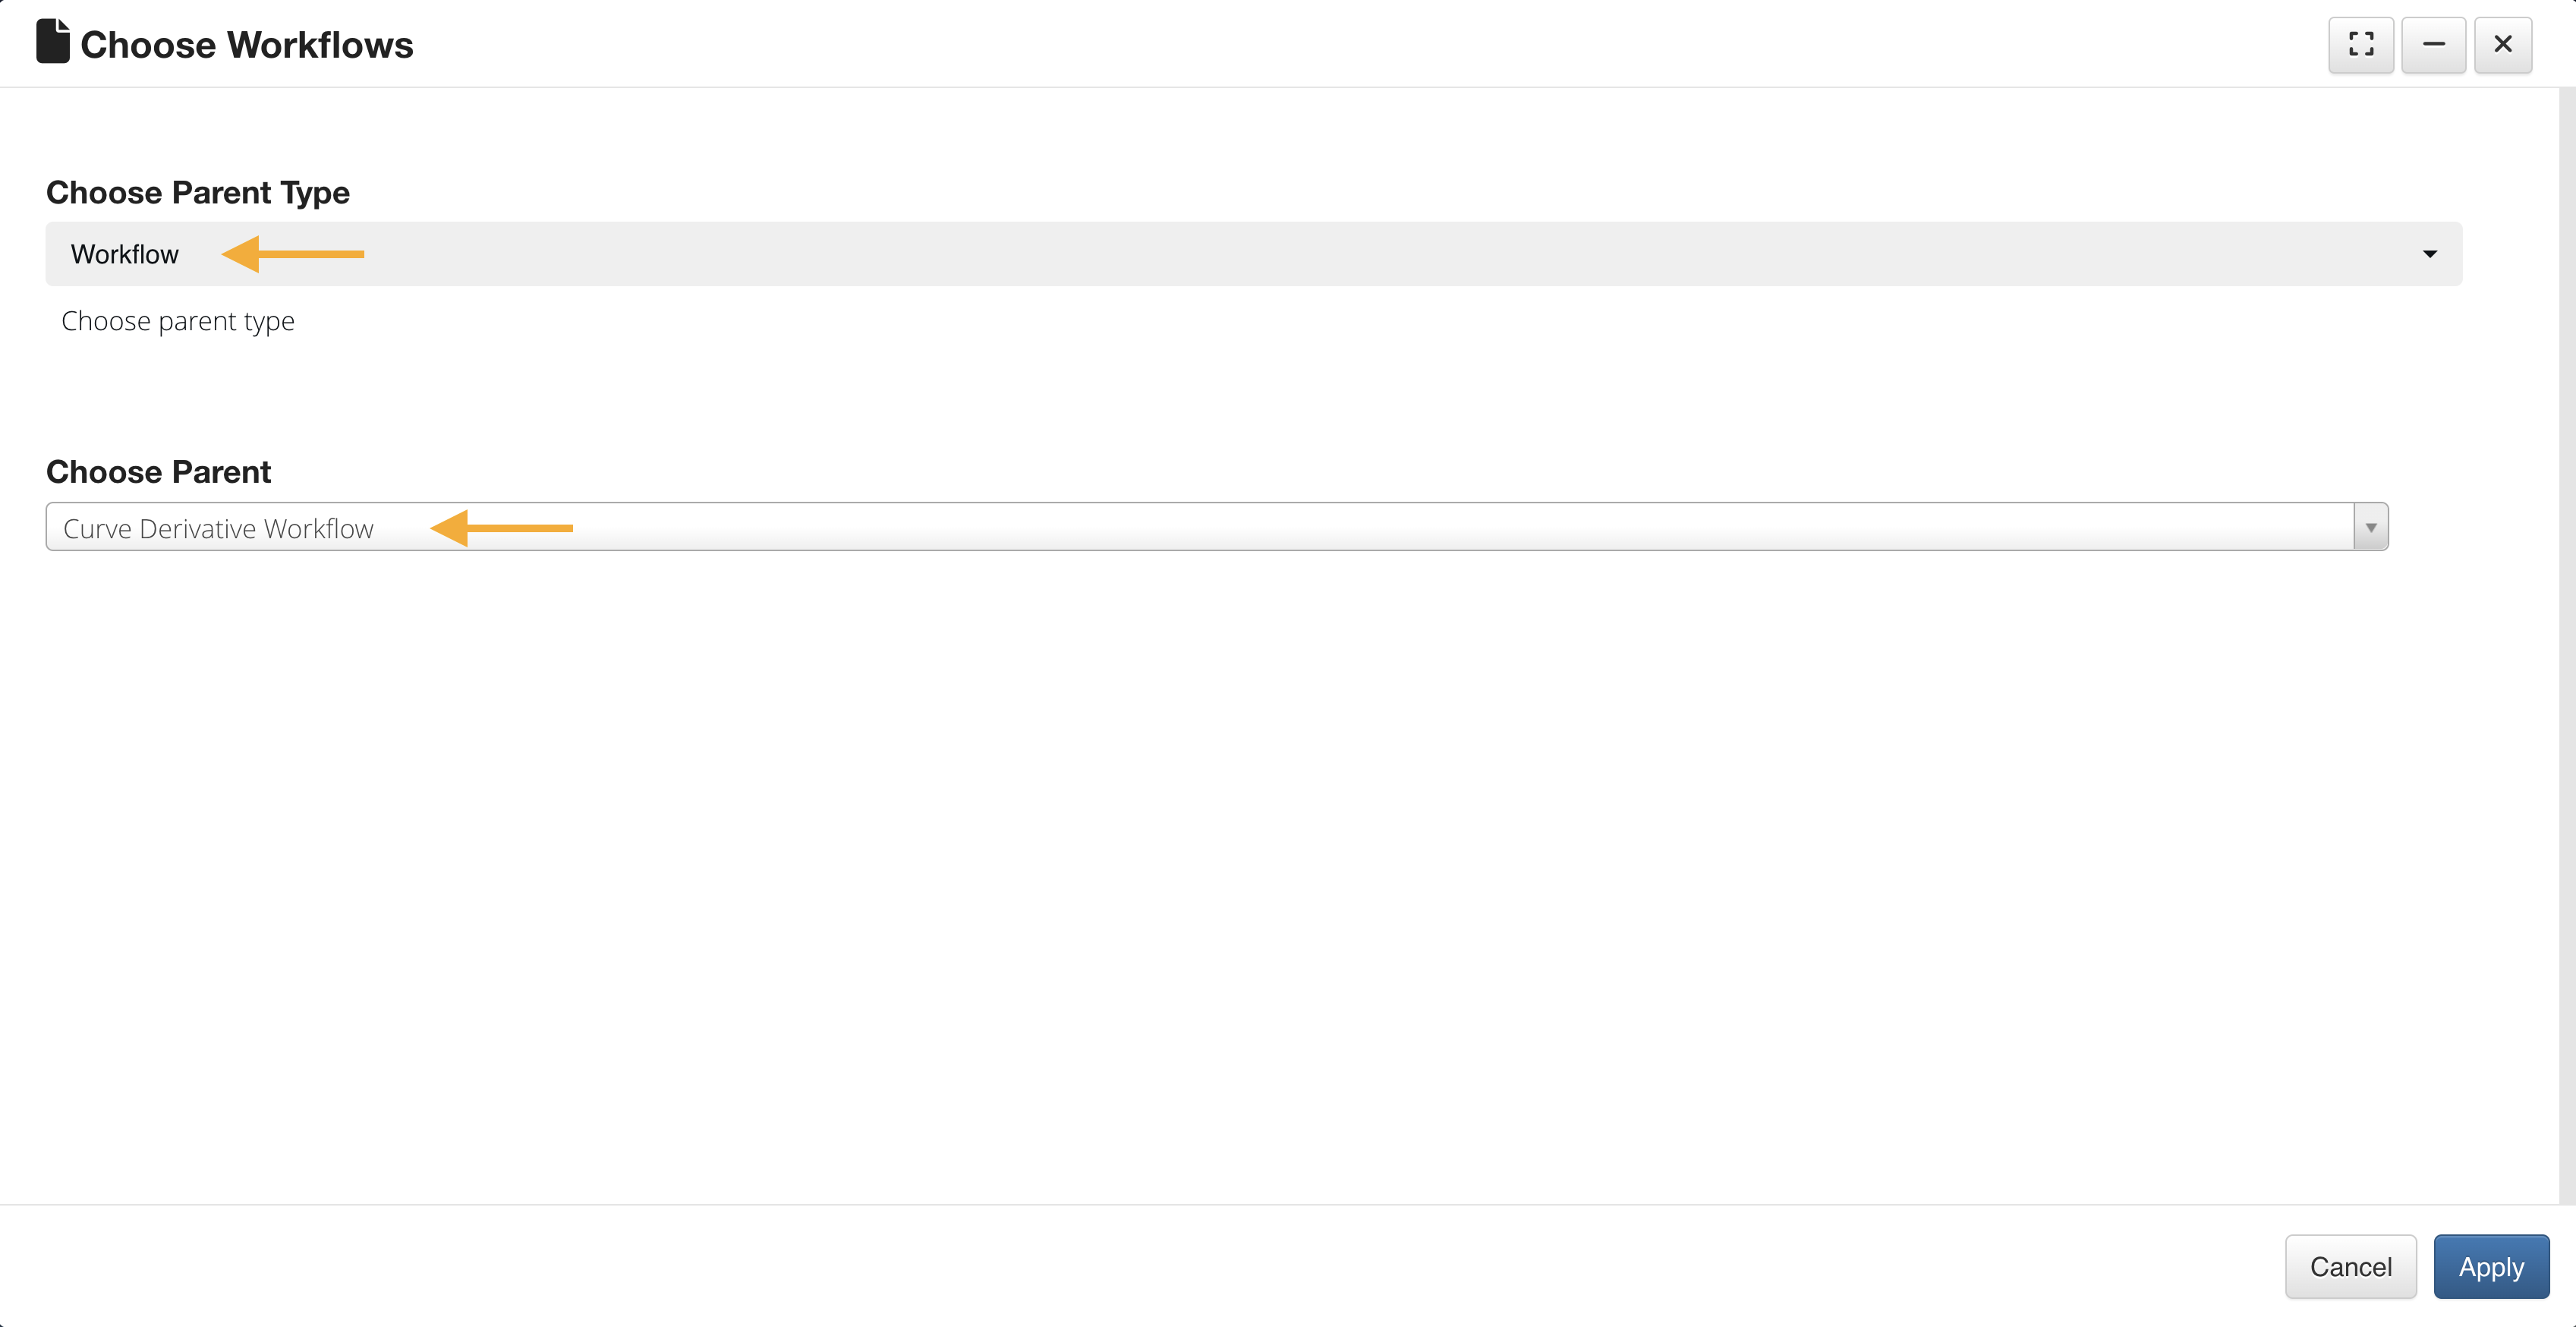
Figure 8: Choose Workflow
Match Maker
Assign start worker inputs based on your simulation or physical test using the Match-Maker by choosing Yes when prompted.
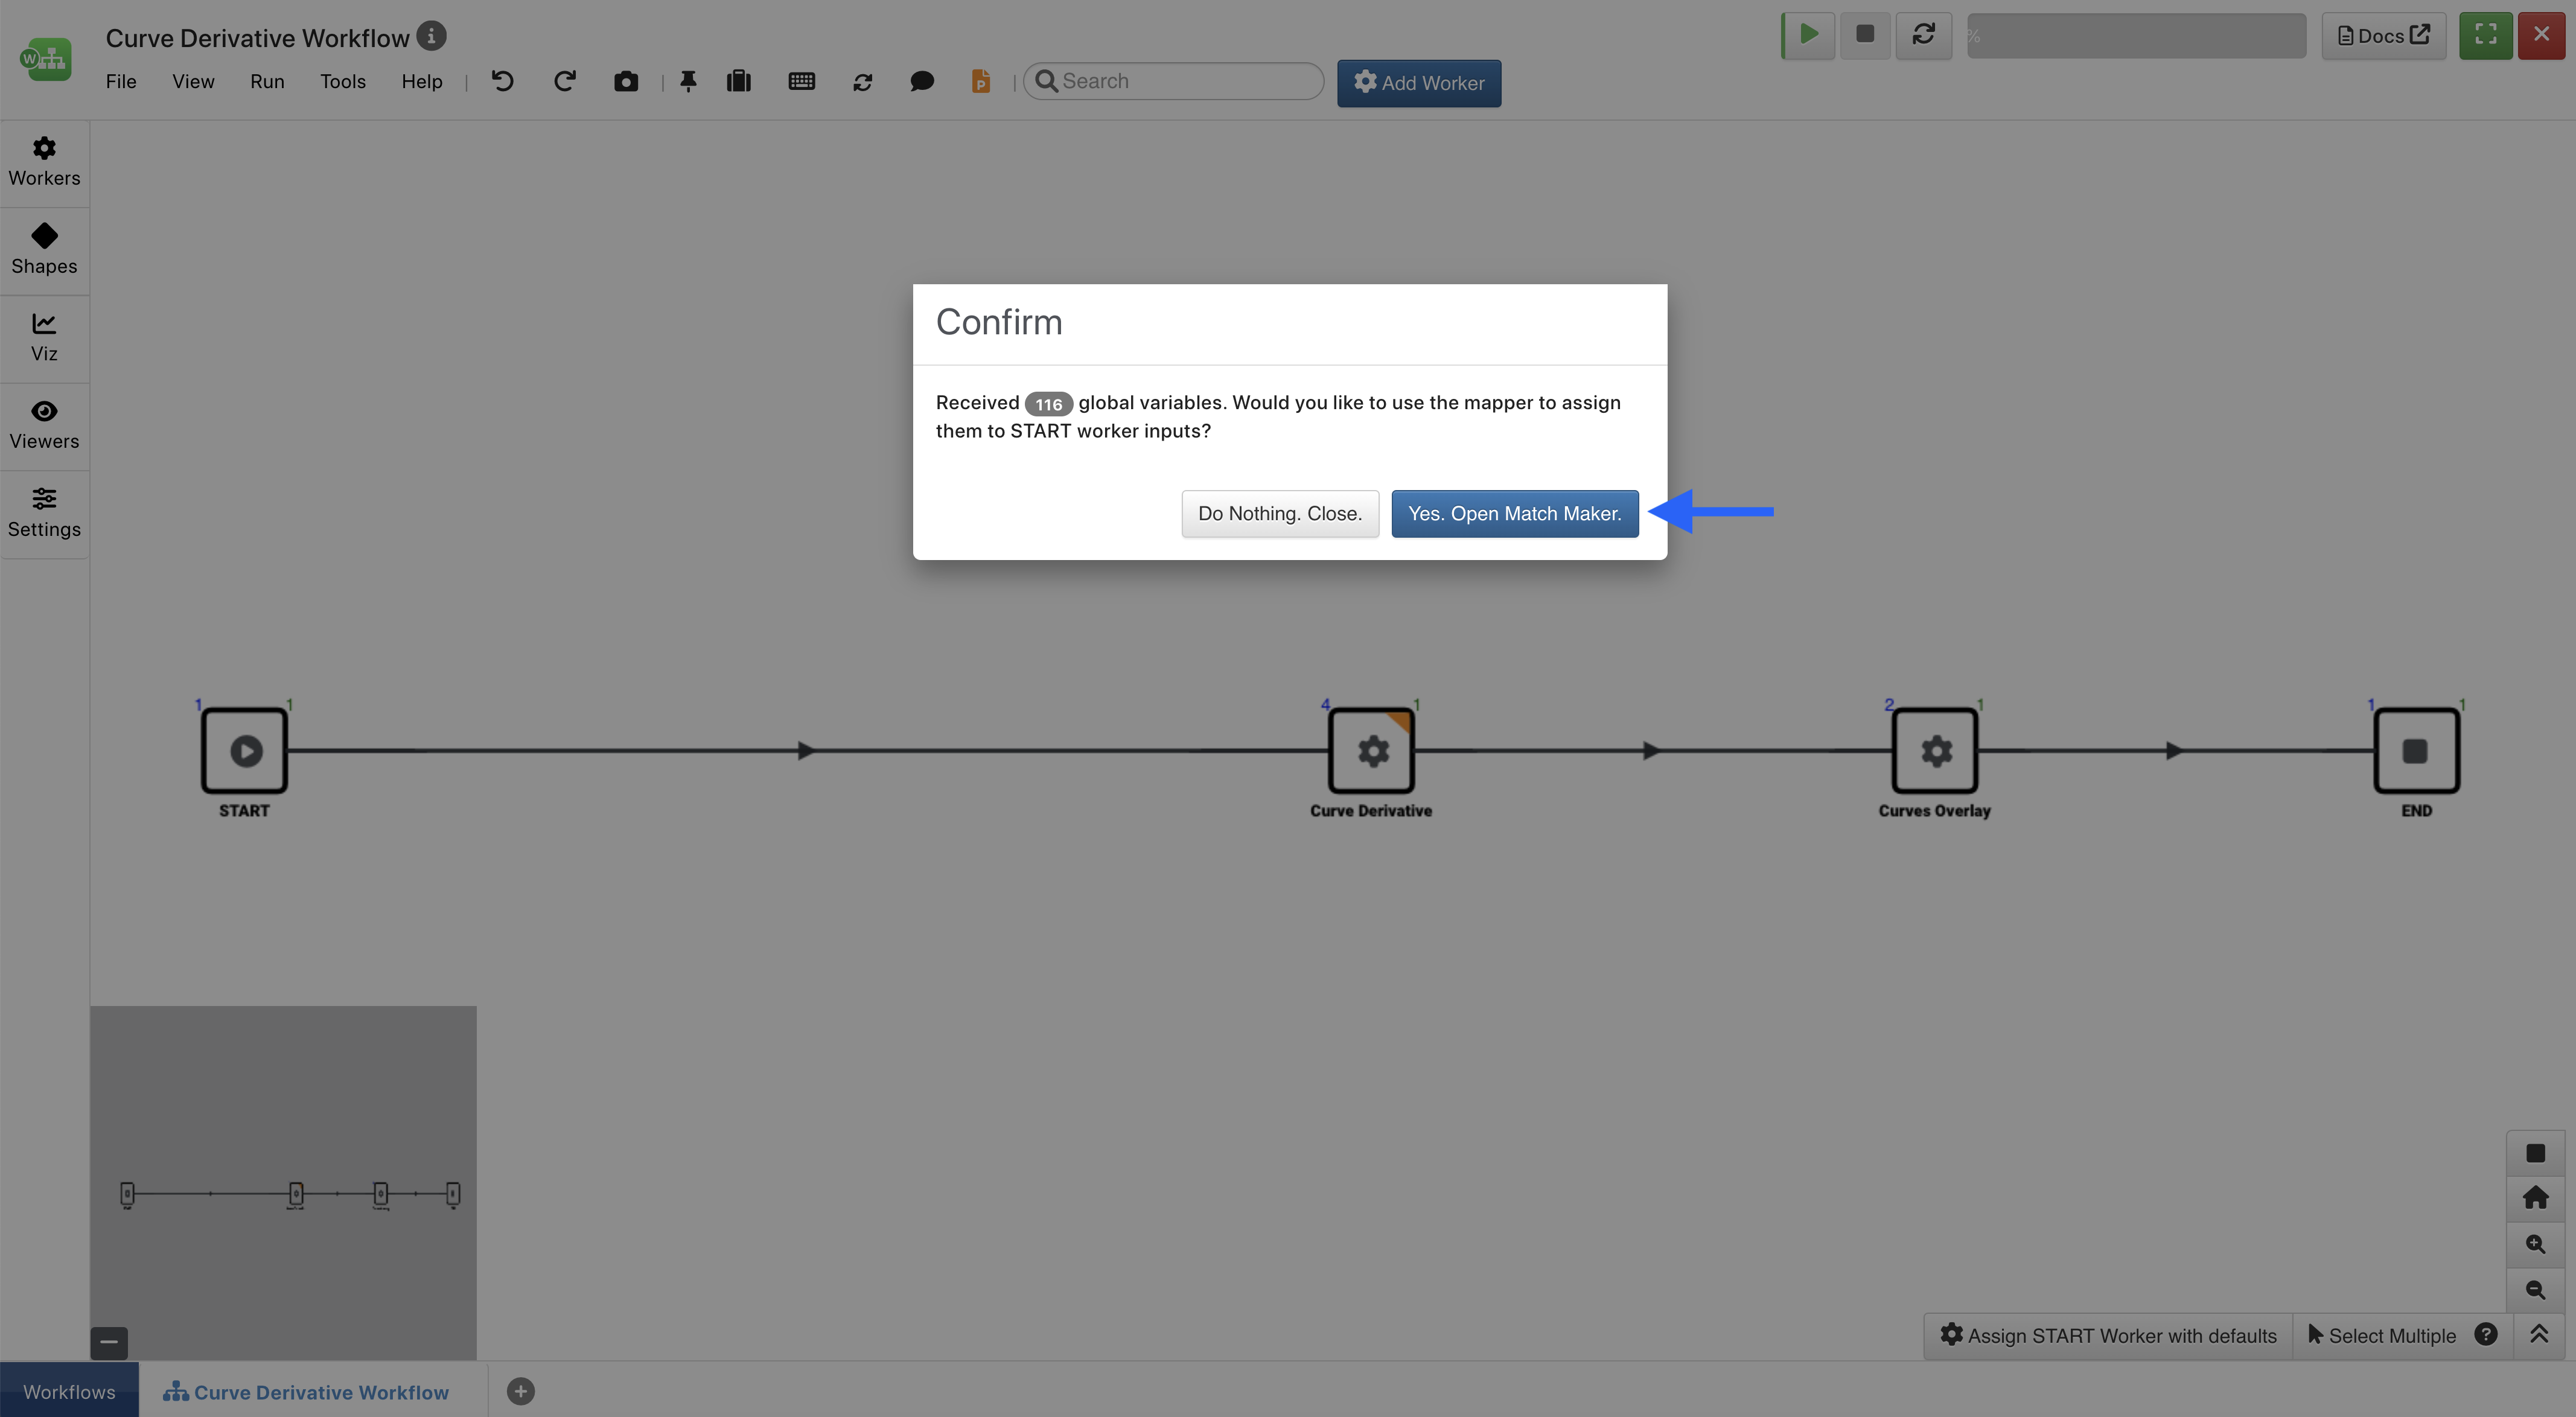
Figure 9: Yes. Open Match Maker
We can also click the button at the bottom of the workflow canvas to open Match Maker.
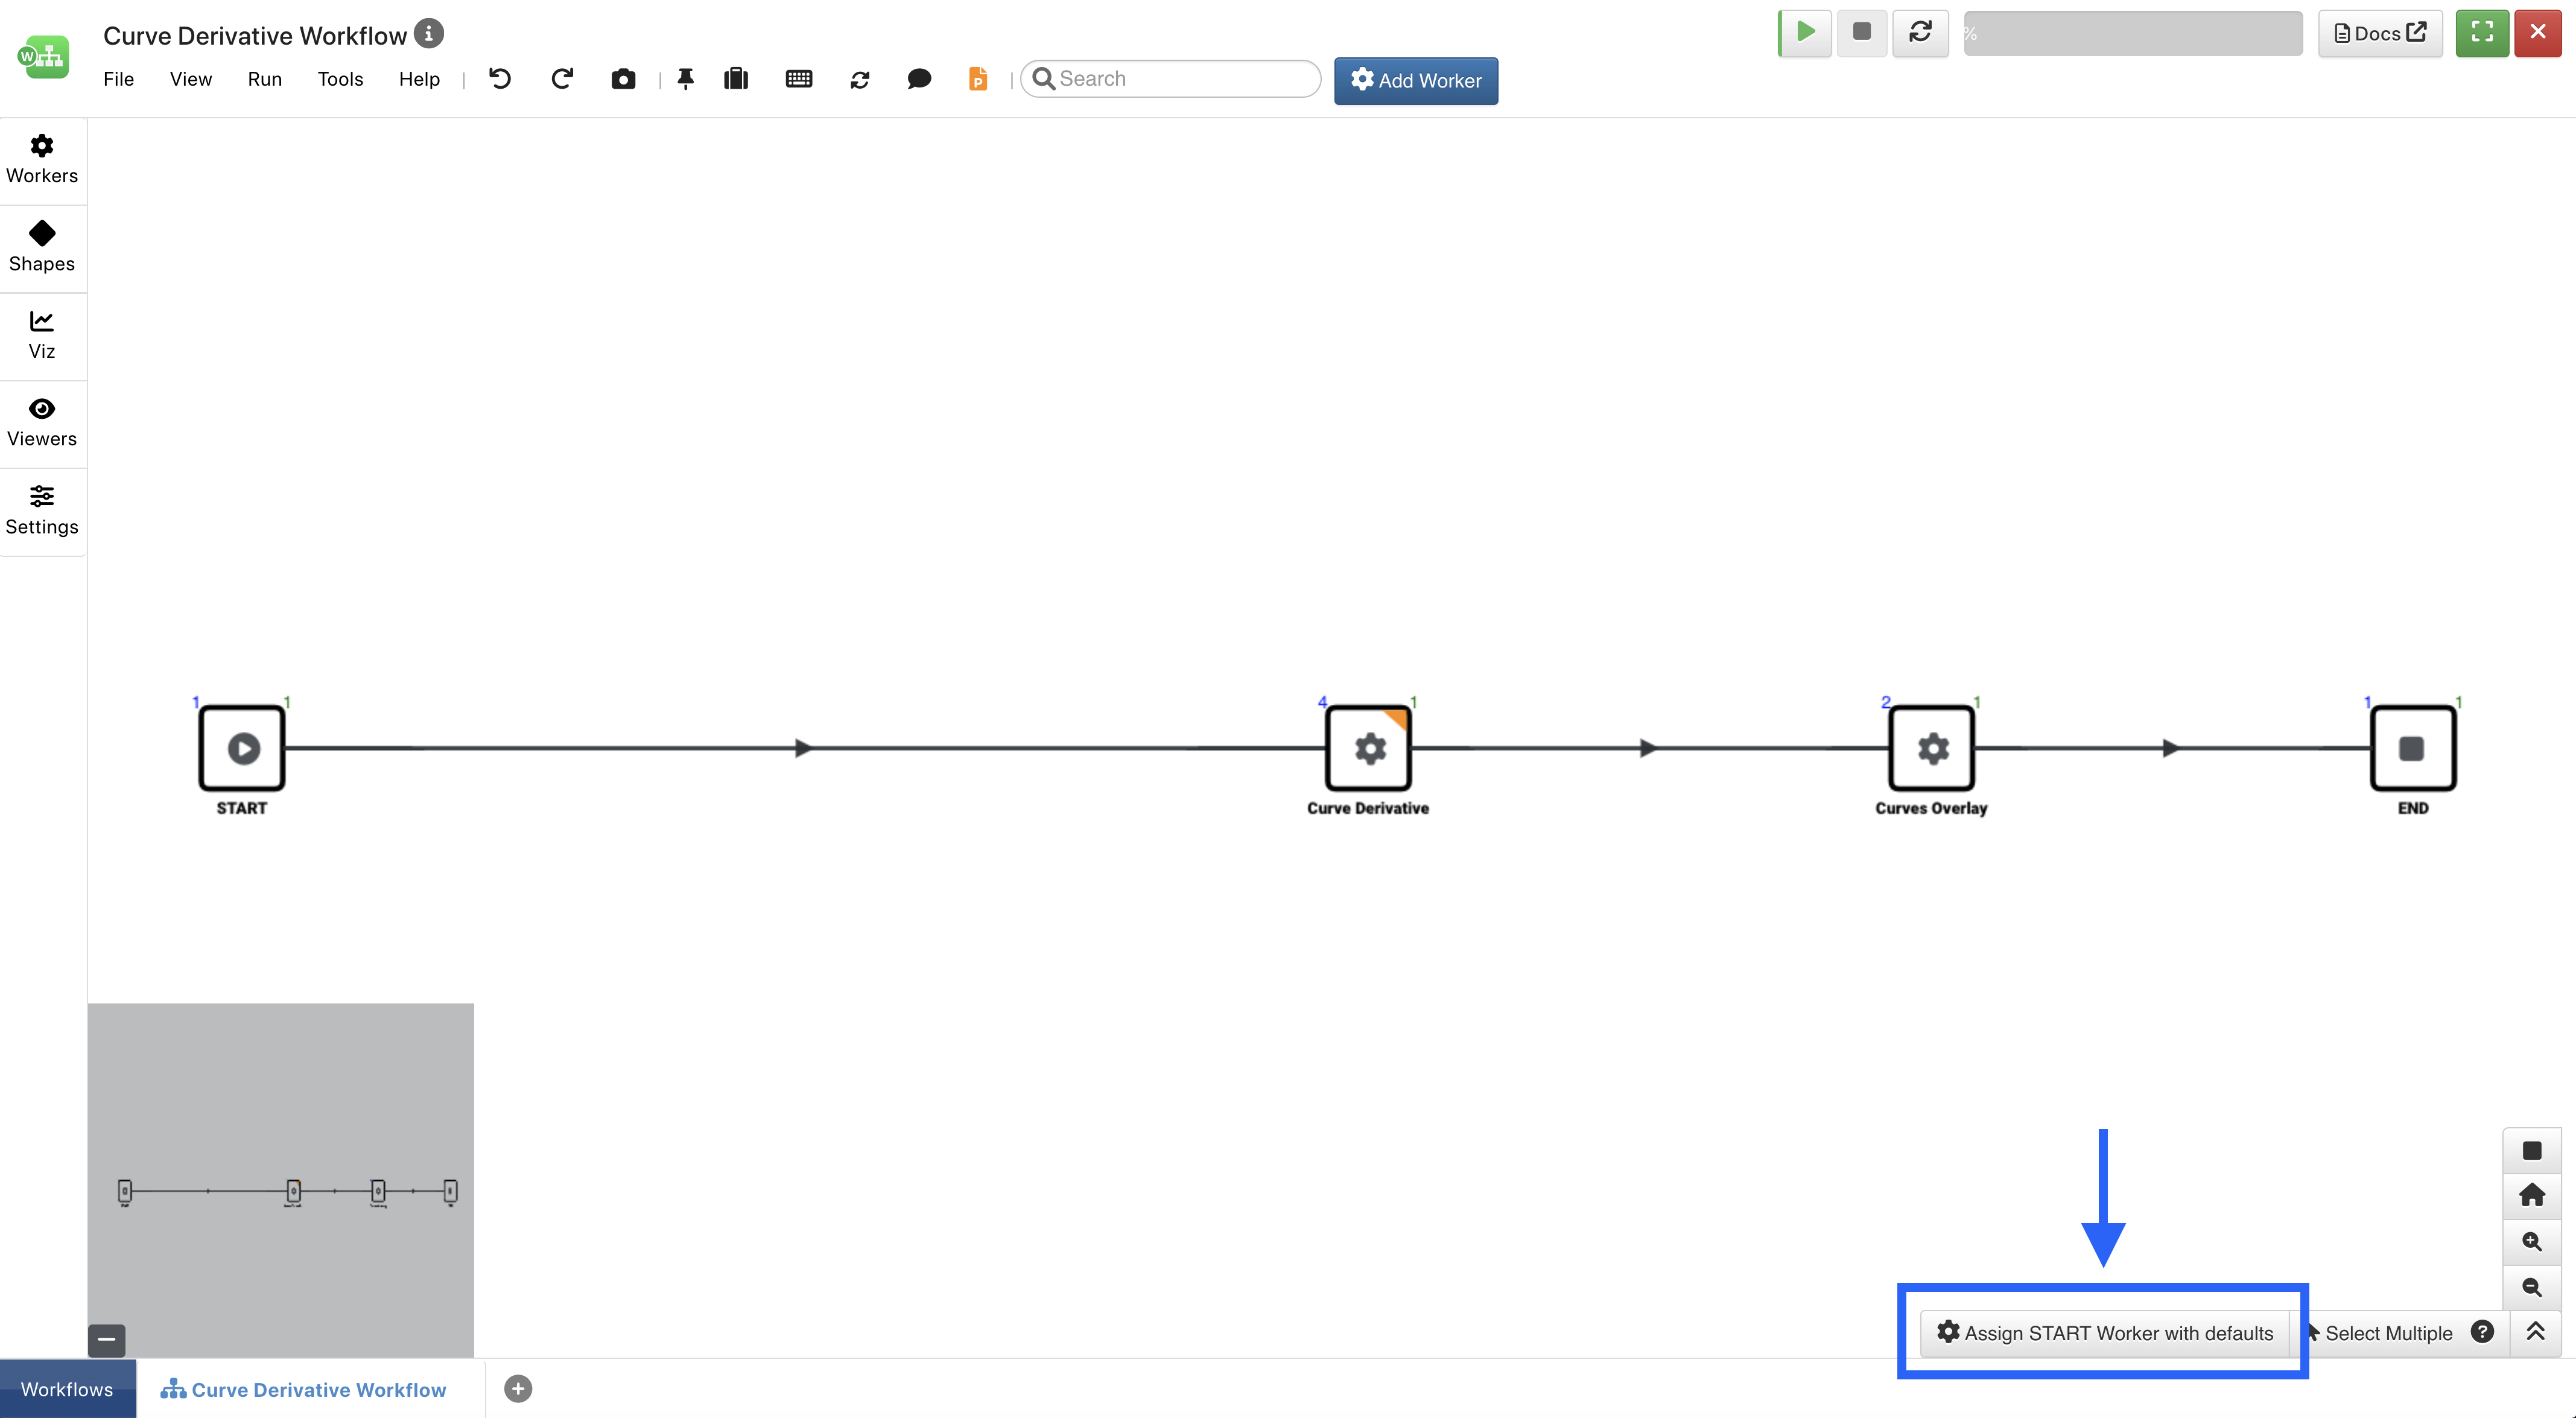
Figure 10: Assign START Worker Defaults
Then, drag-and-drop data in the next window from the right next to the START worker inputs on the left. If you aren’t seeing any START worker inputs, you’ll need to go into your START worker and add them.

Figure 11: Drag-and Drop Inputs