
7.  Importing Data
In this section, we’ll go over ways we import and add data into our workflow for successful execution.
7.1. |play-circle| START Worker Configuration
Let’s go over the basics of how to configure the START worker as well as some useful START worker features. Check out the following video for a full example of configuring a START worker and make sure to read on for more information.
Basic Configuration
Click on the START worker to configure it.
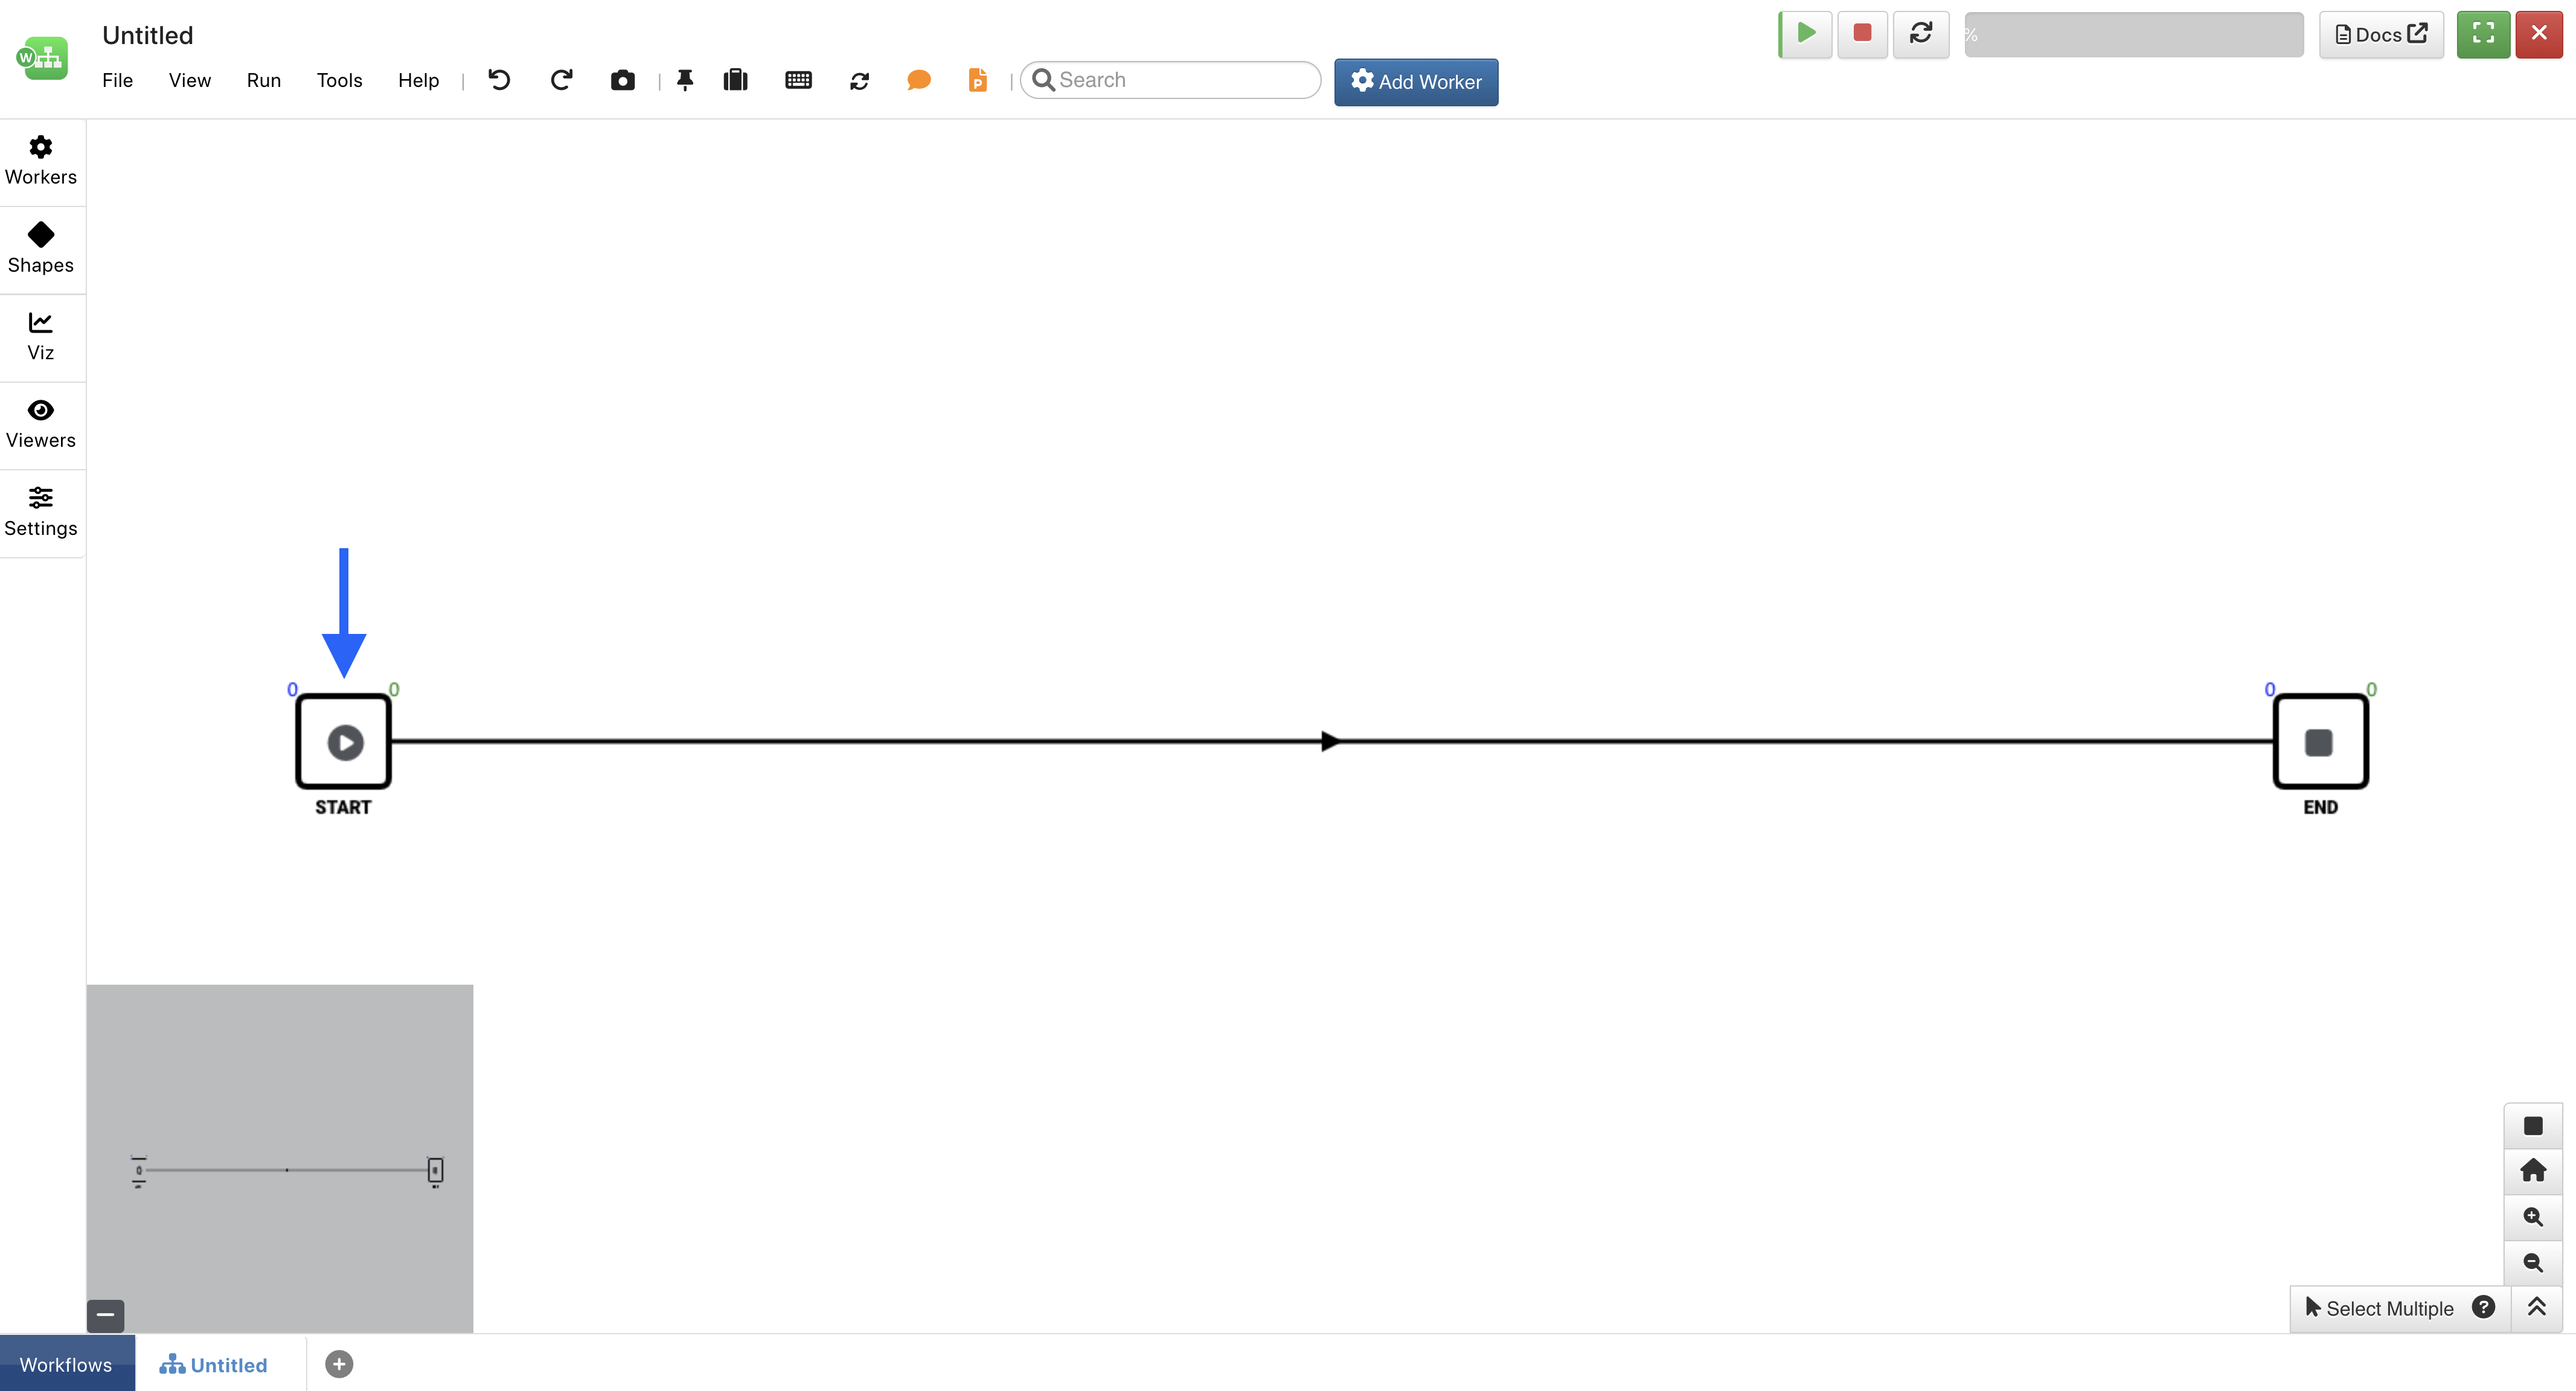
Figure 1: Click on Start Worker
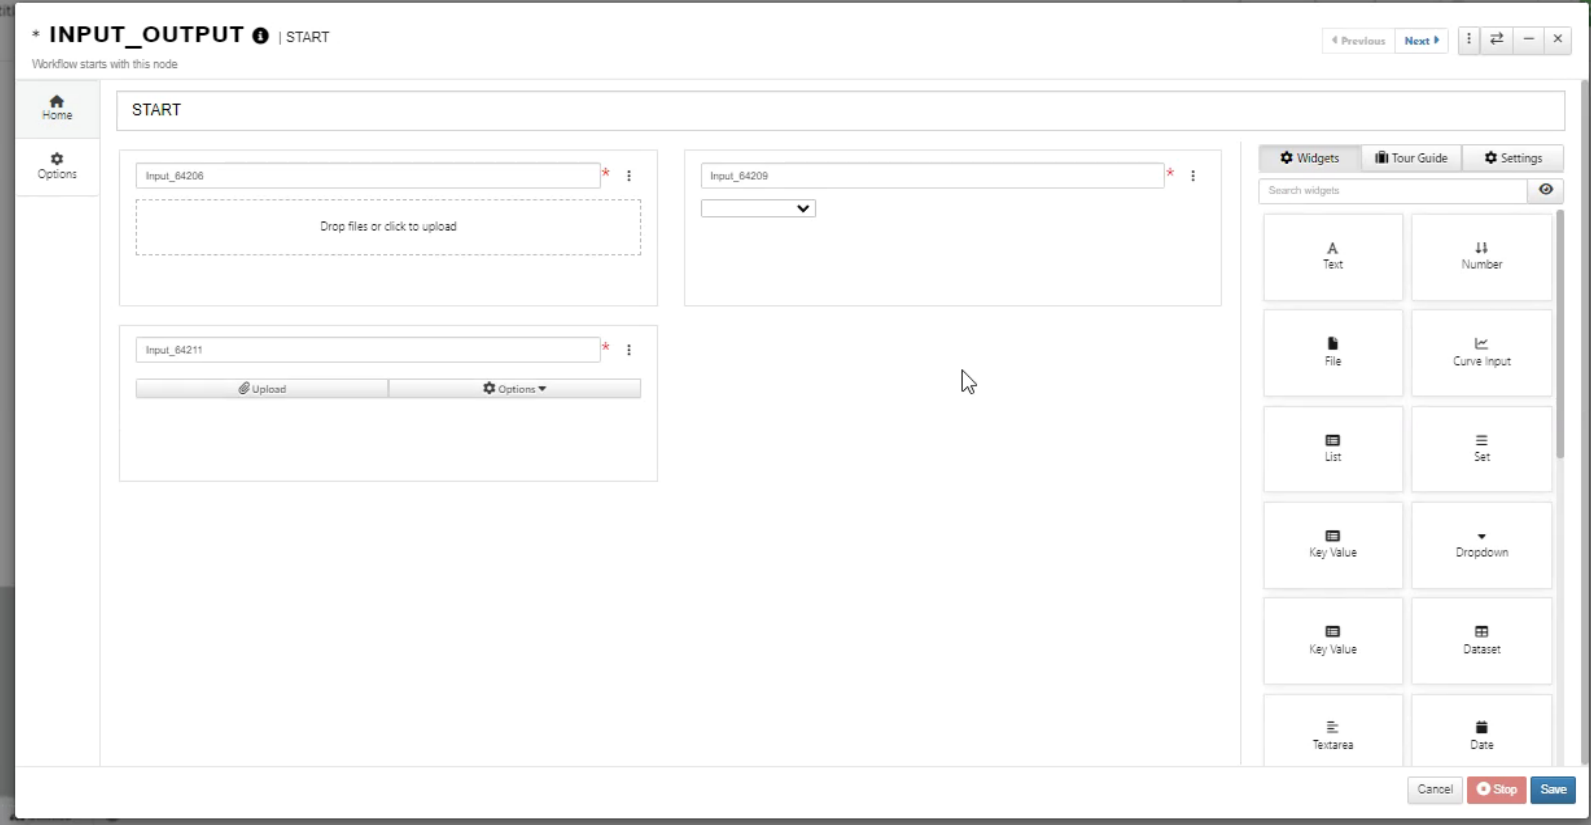
Drag-and-drop inputs from the left onto the form-builder.
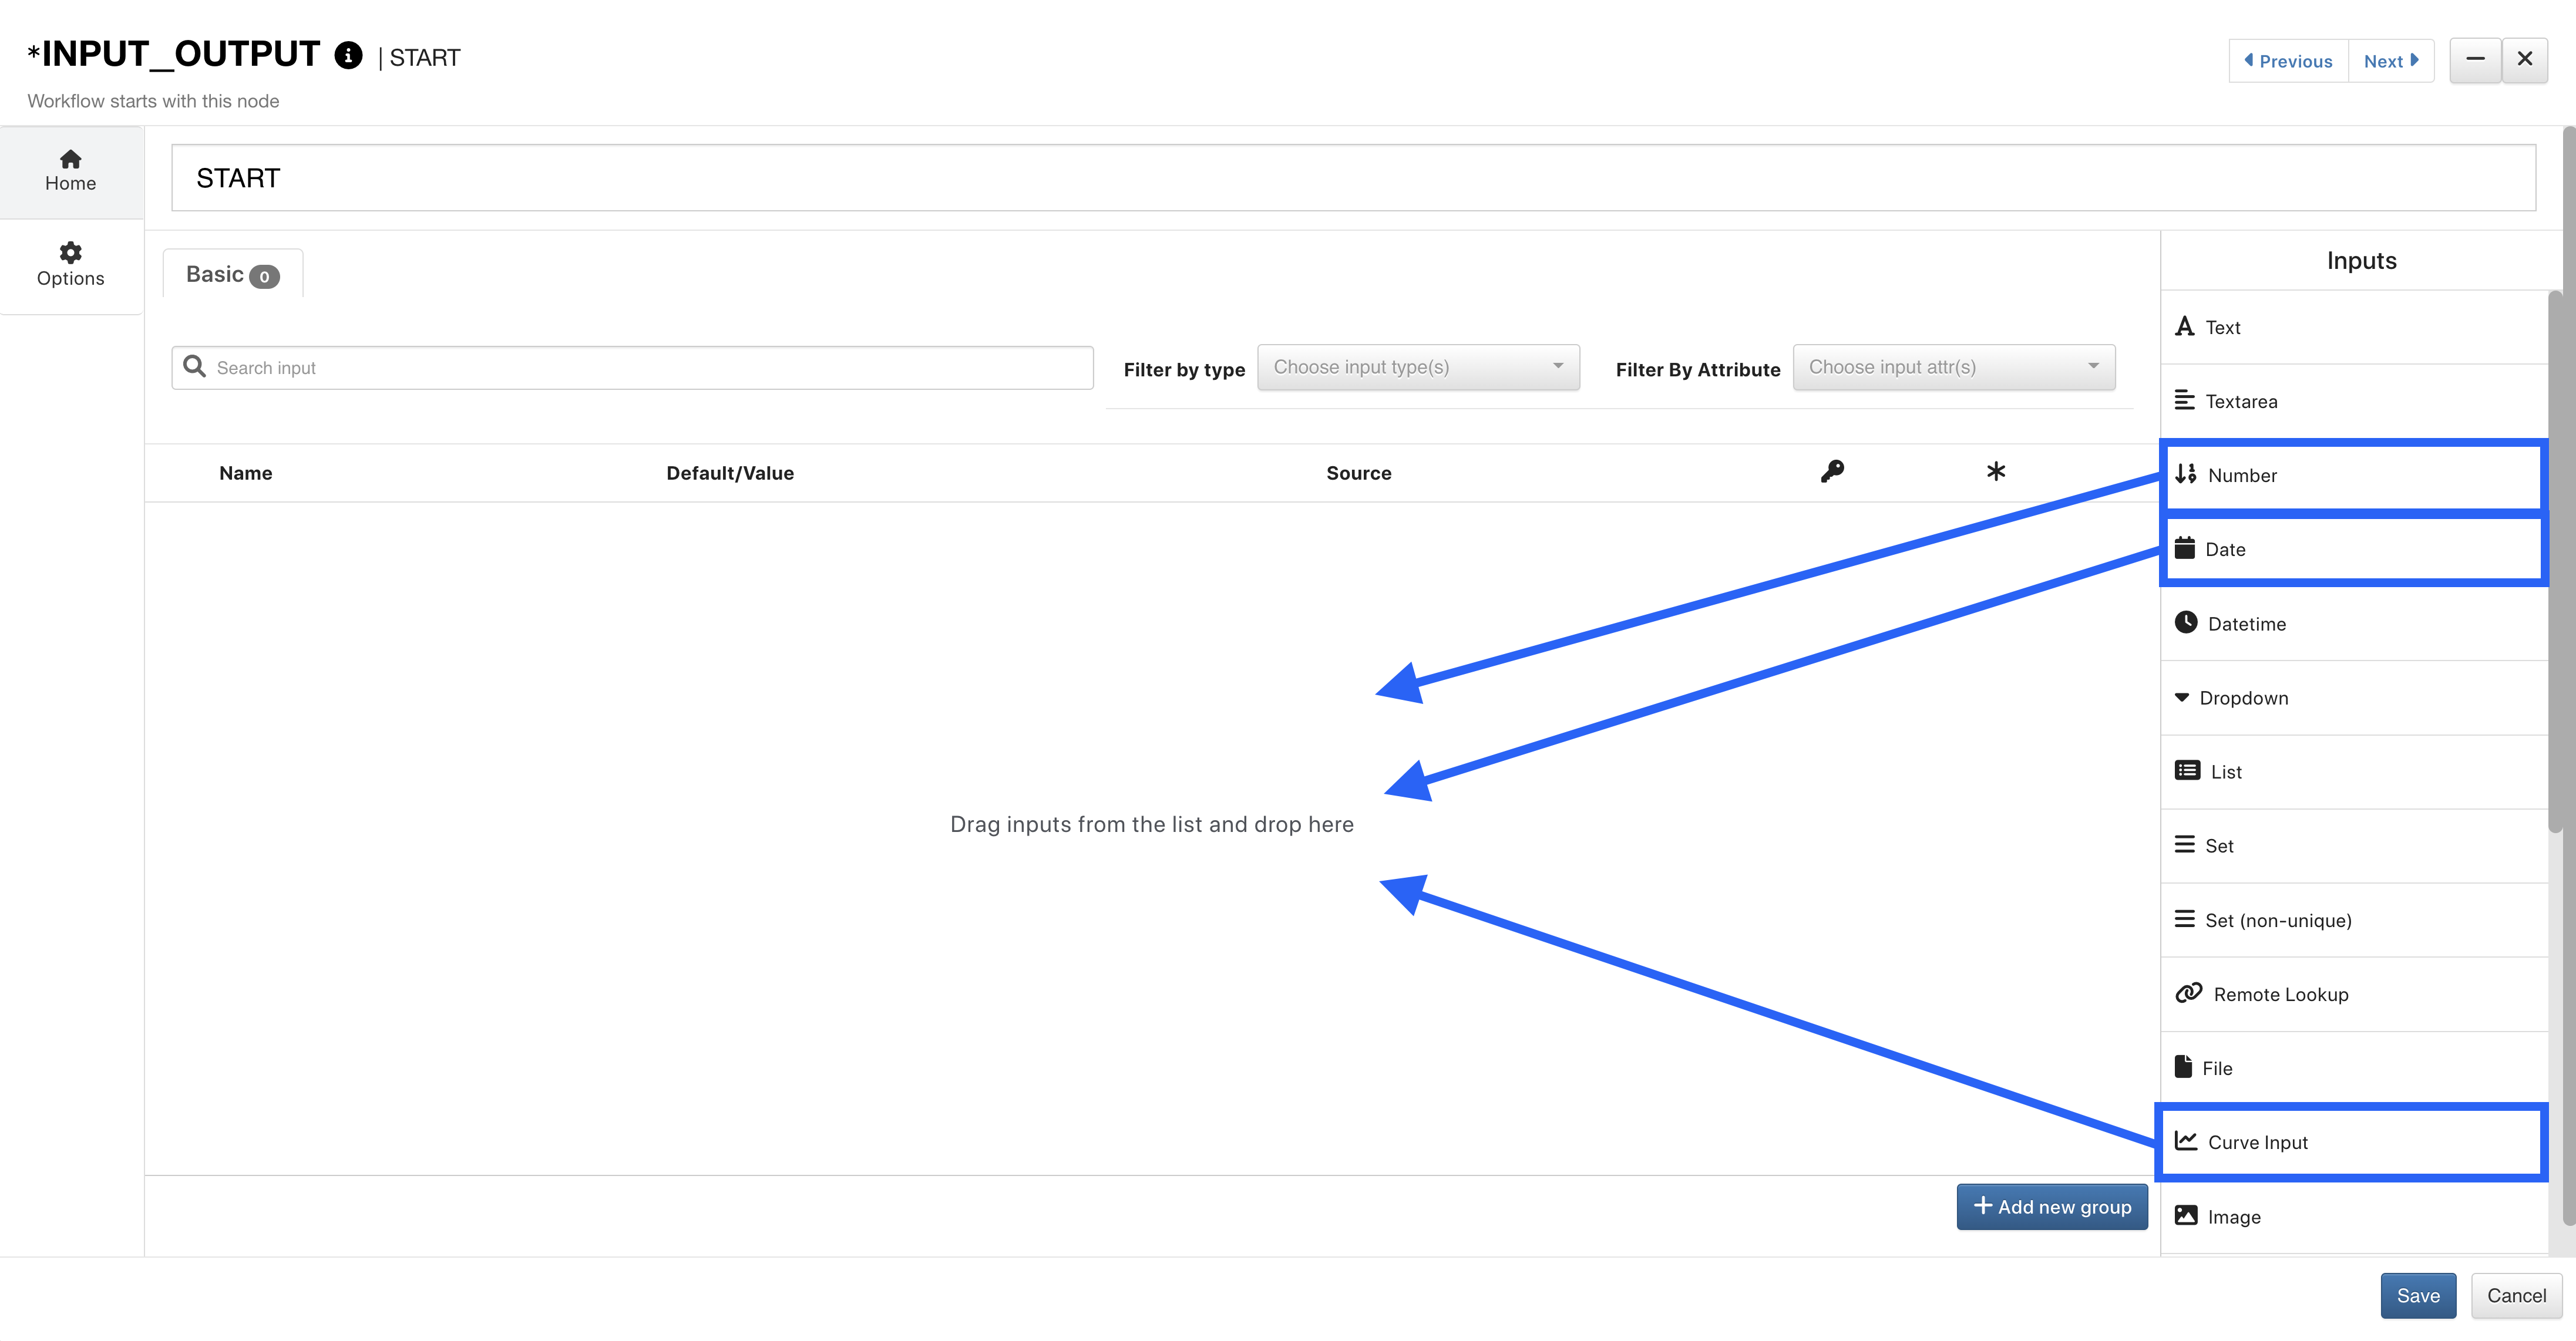
Figure 2: Drag-and-drop Inputs
Then, add data for each input manually, using sample data or uploading local files.
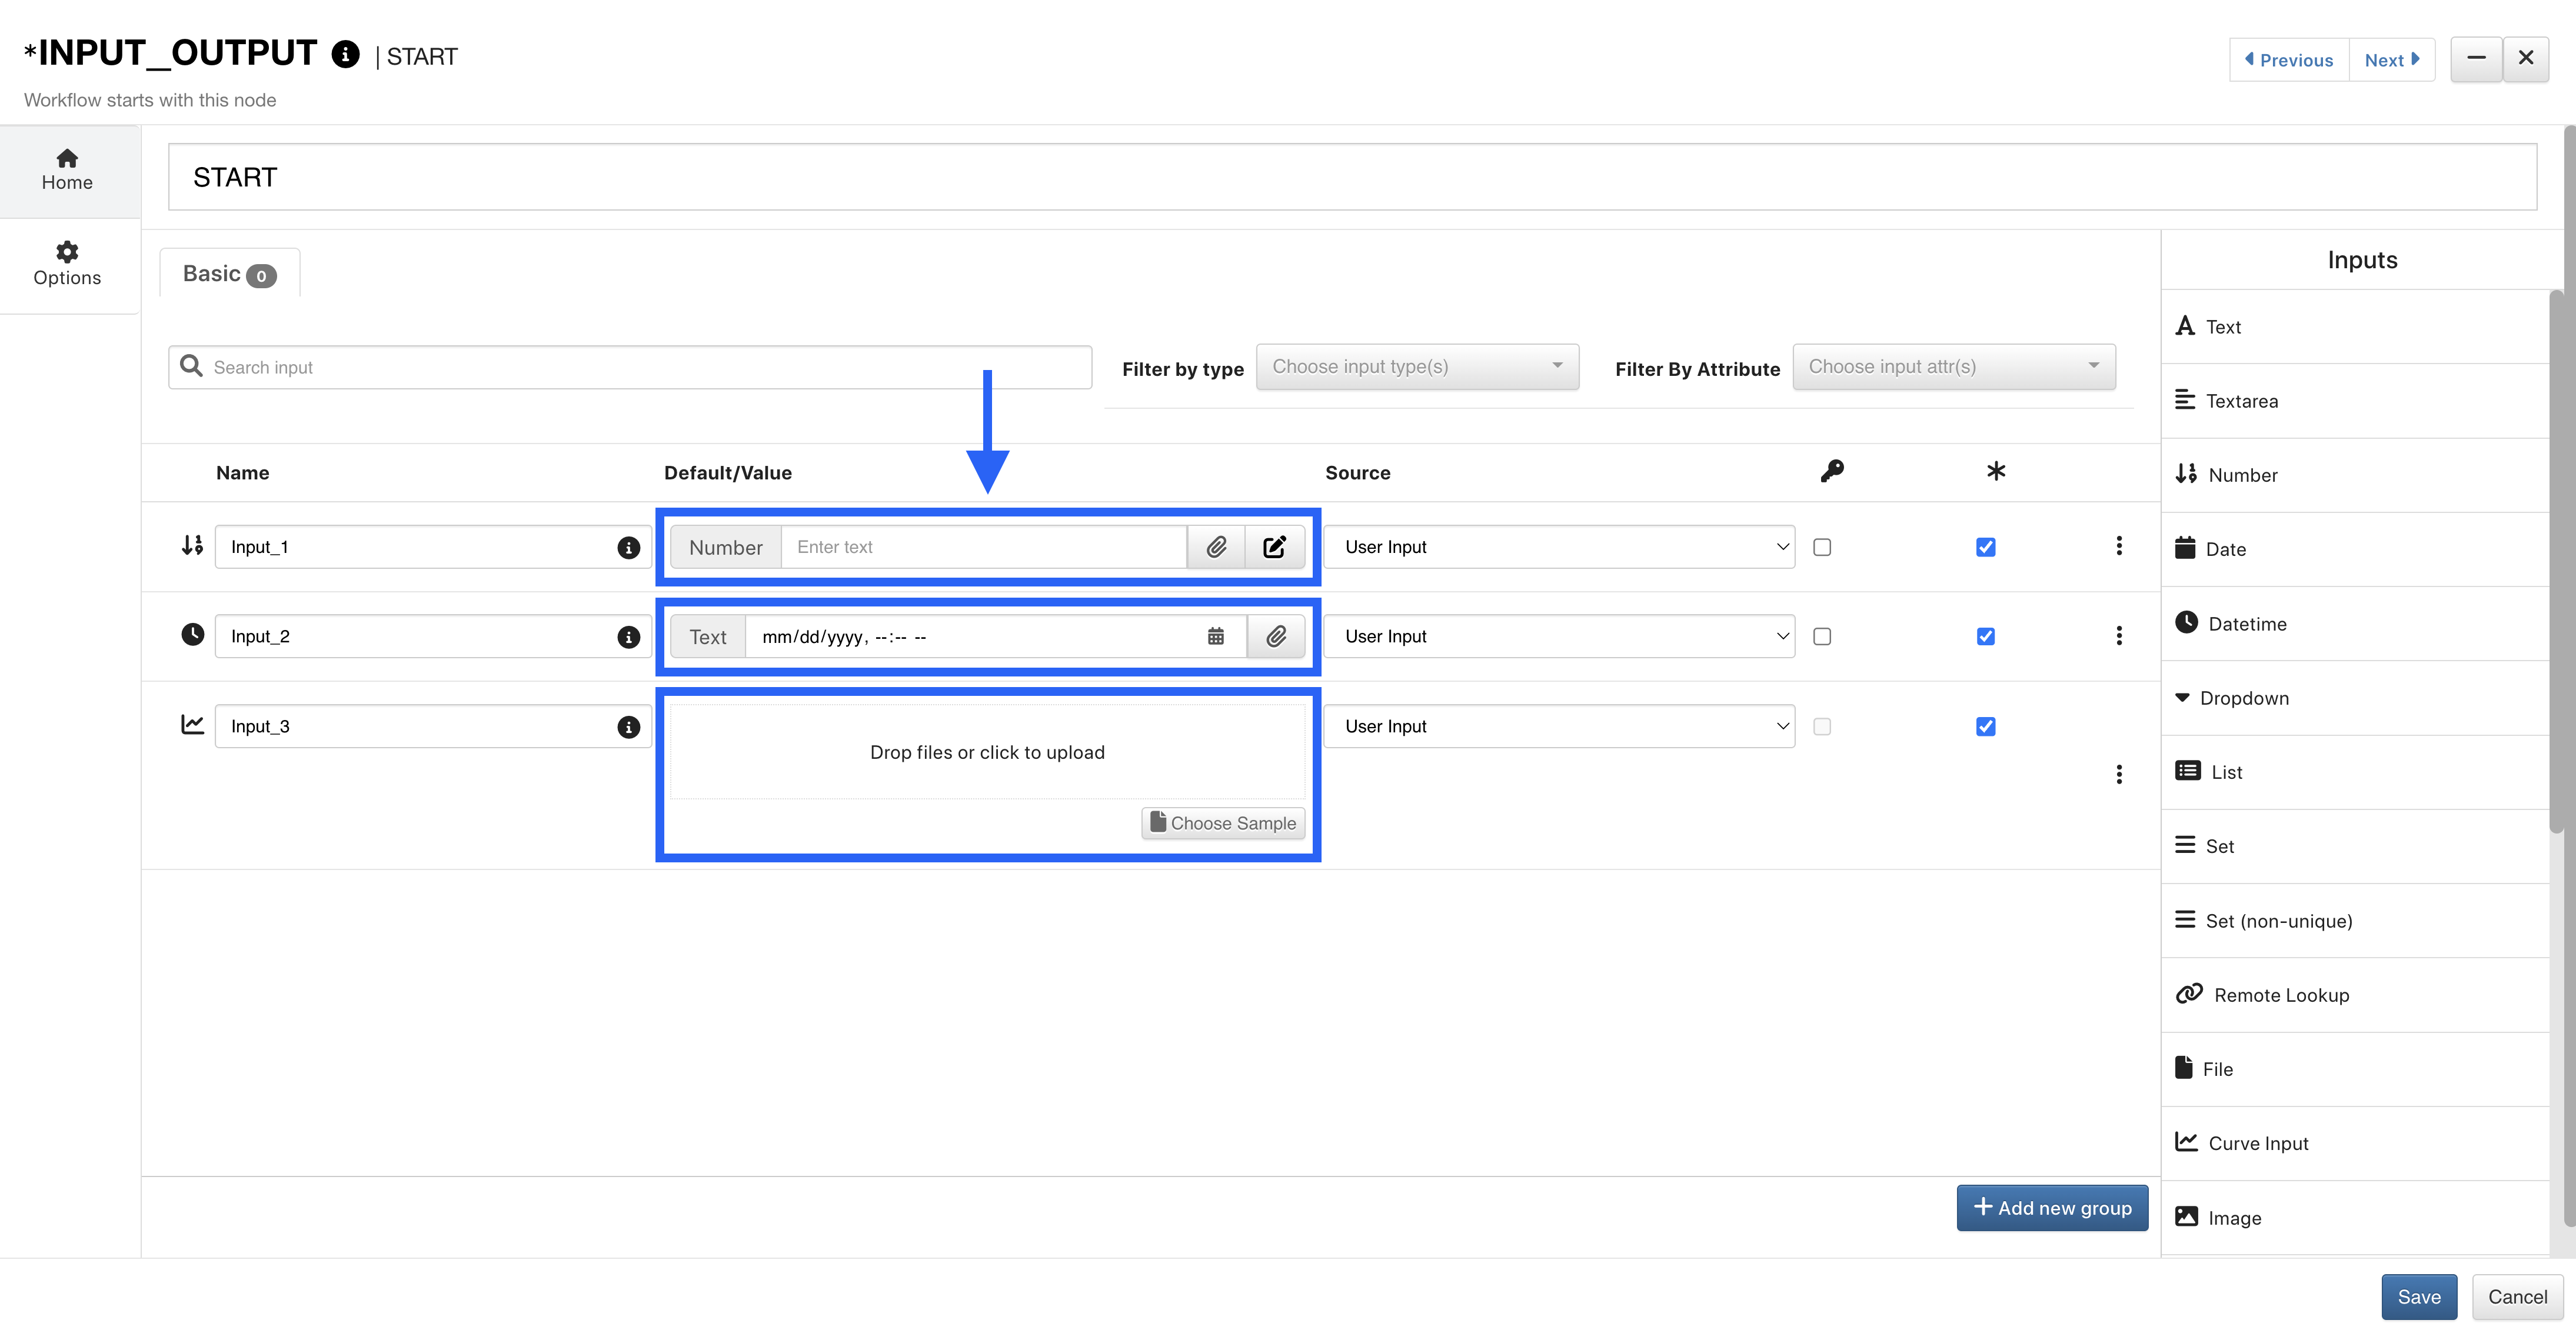
Figure 3: Add Input Data
Groups
Add an input group by choosing this option at the bottom. Groups are a way to organize inputs into categories and are most useful for large workflows with a lot of inputs.
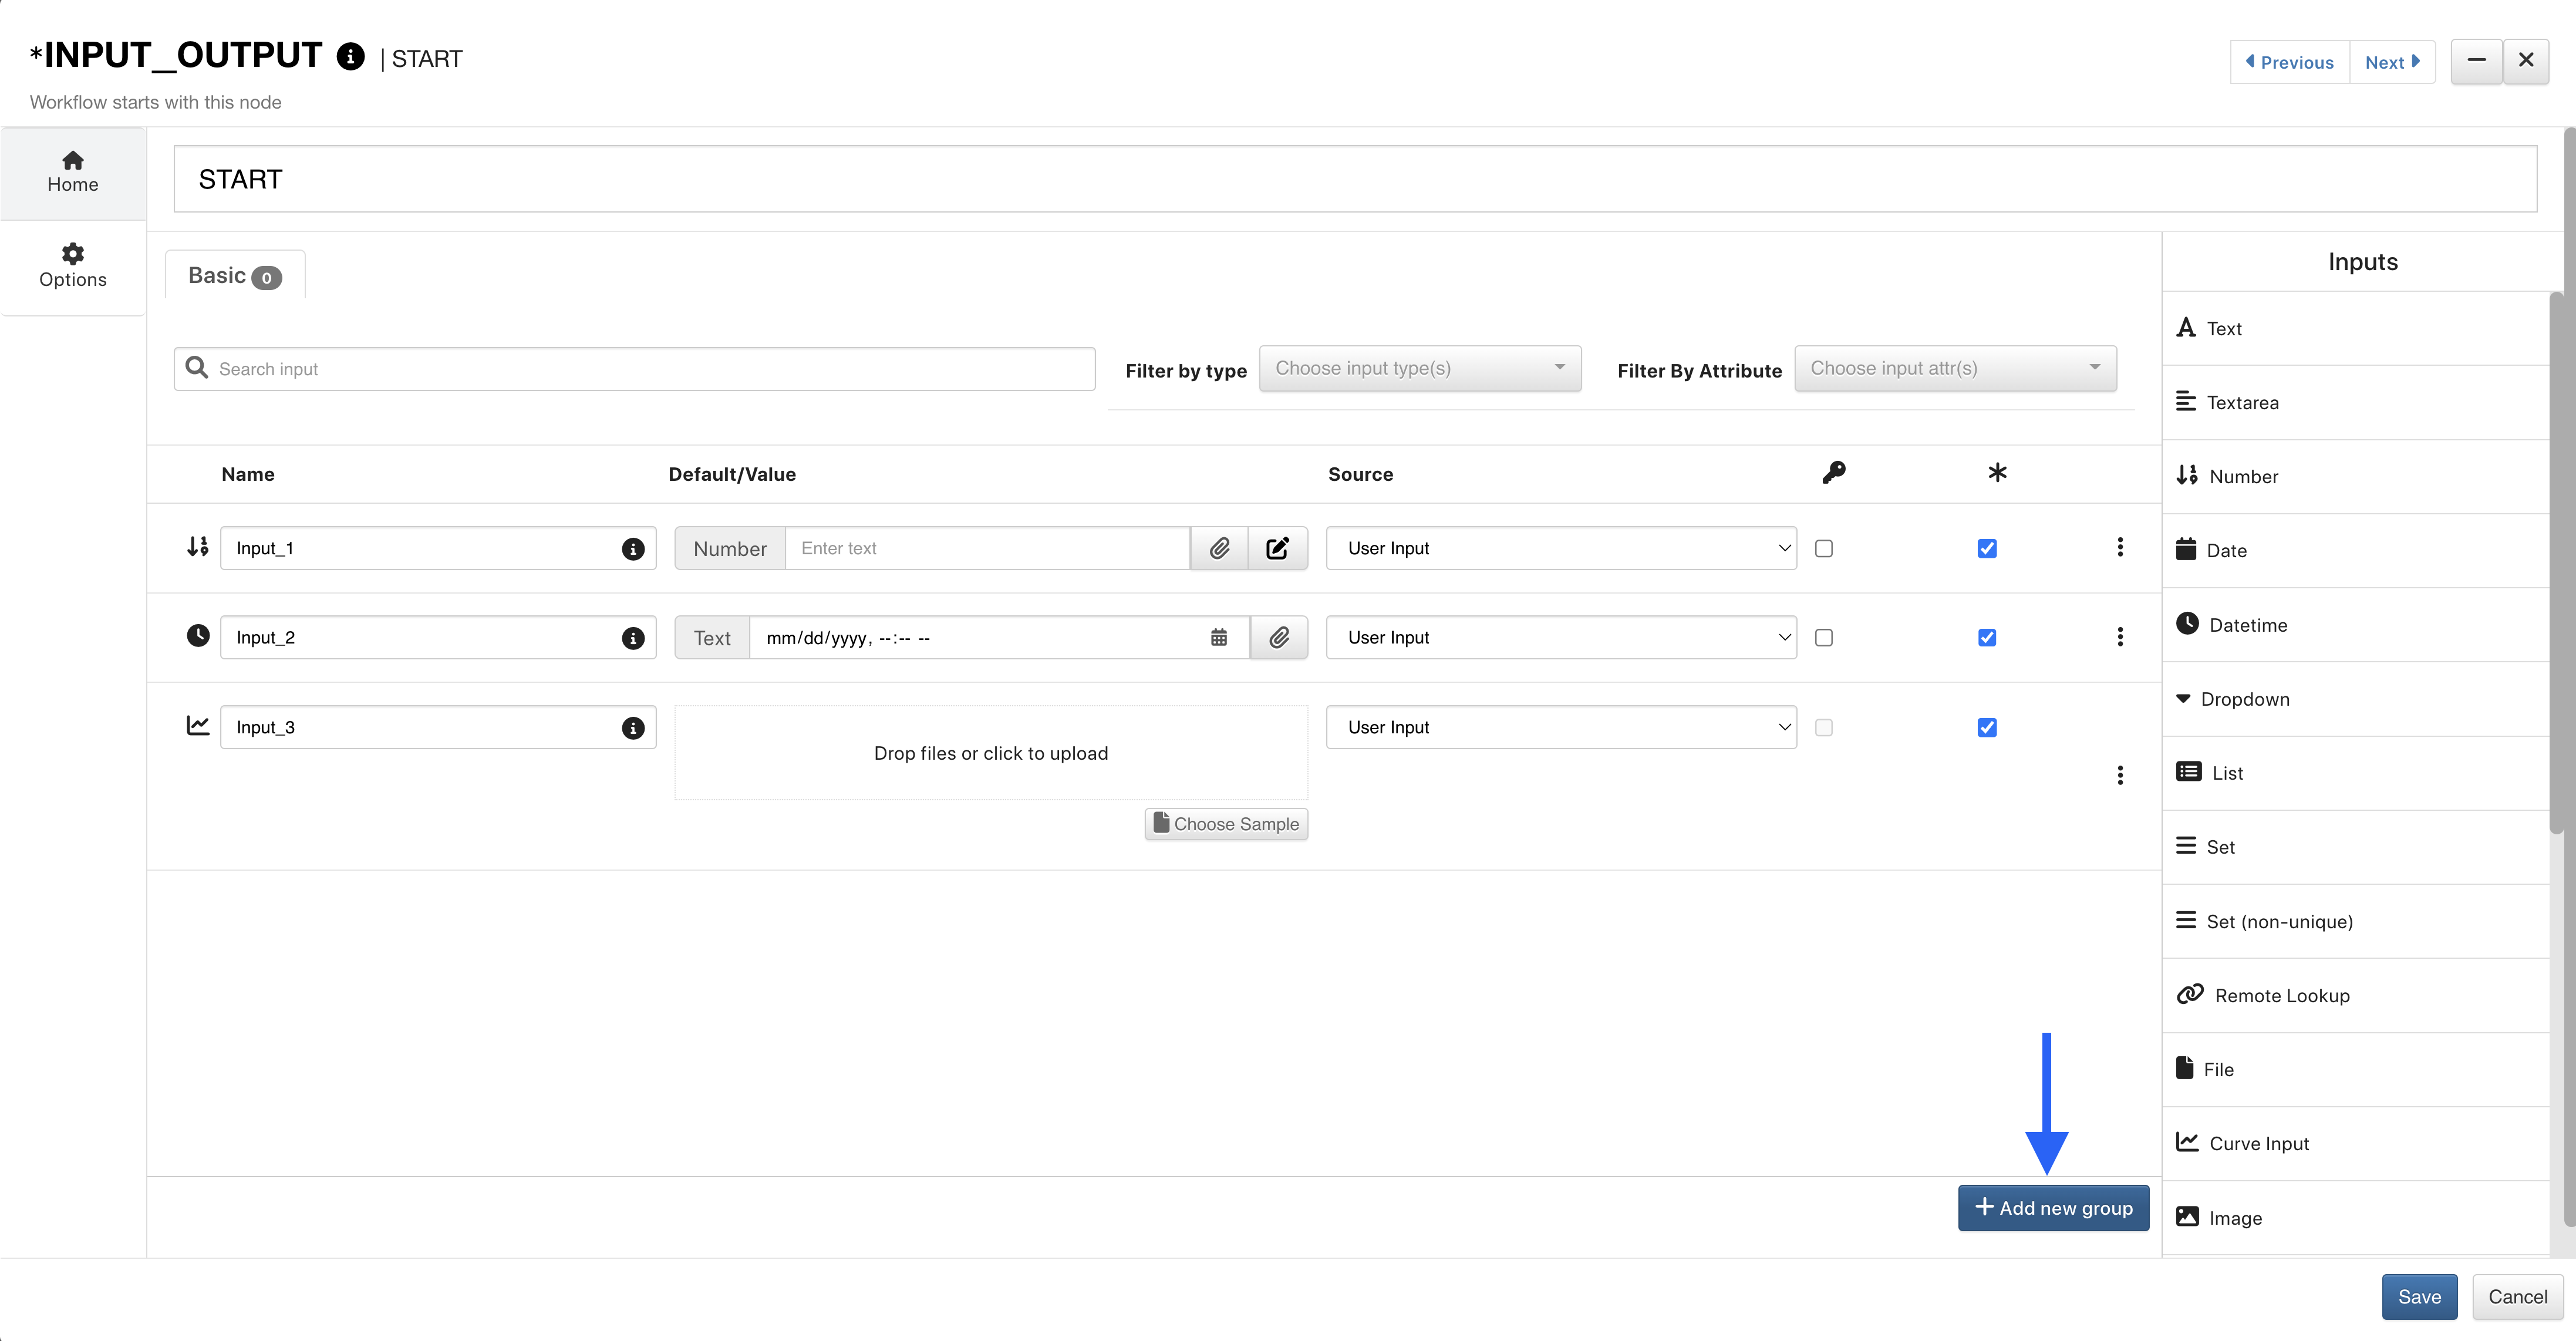
Figure 4: Add Group
Click on the tabs (1) at the top or the “Go to group” menu (2) at the bottom to navigate between them.
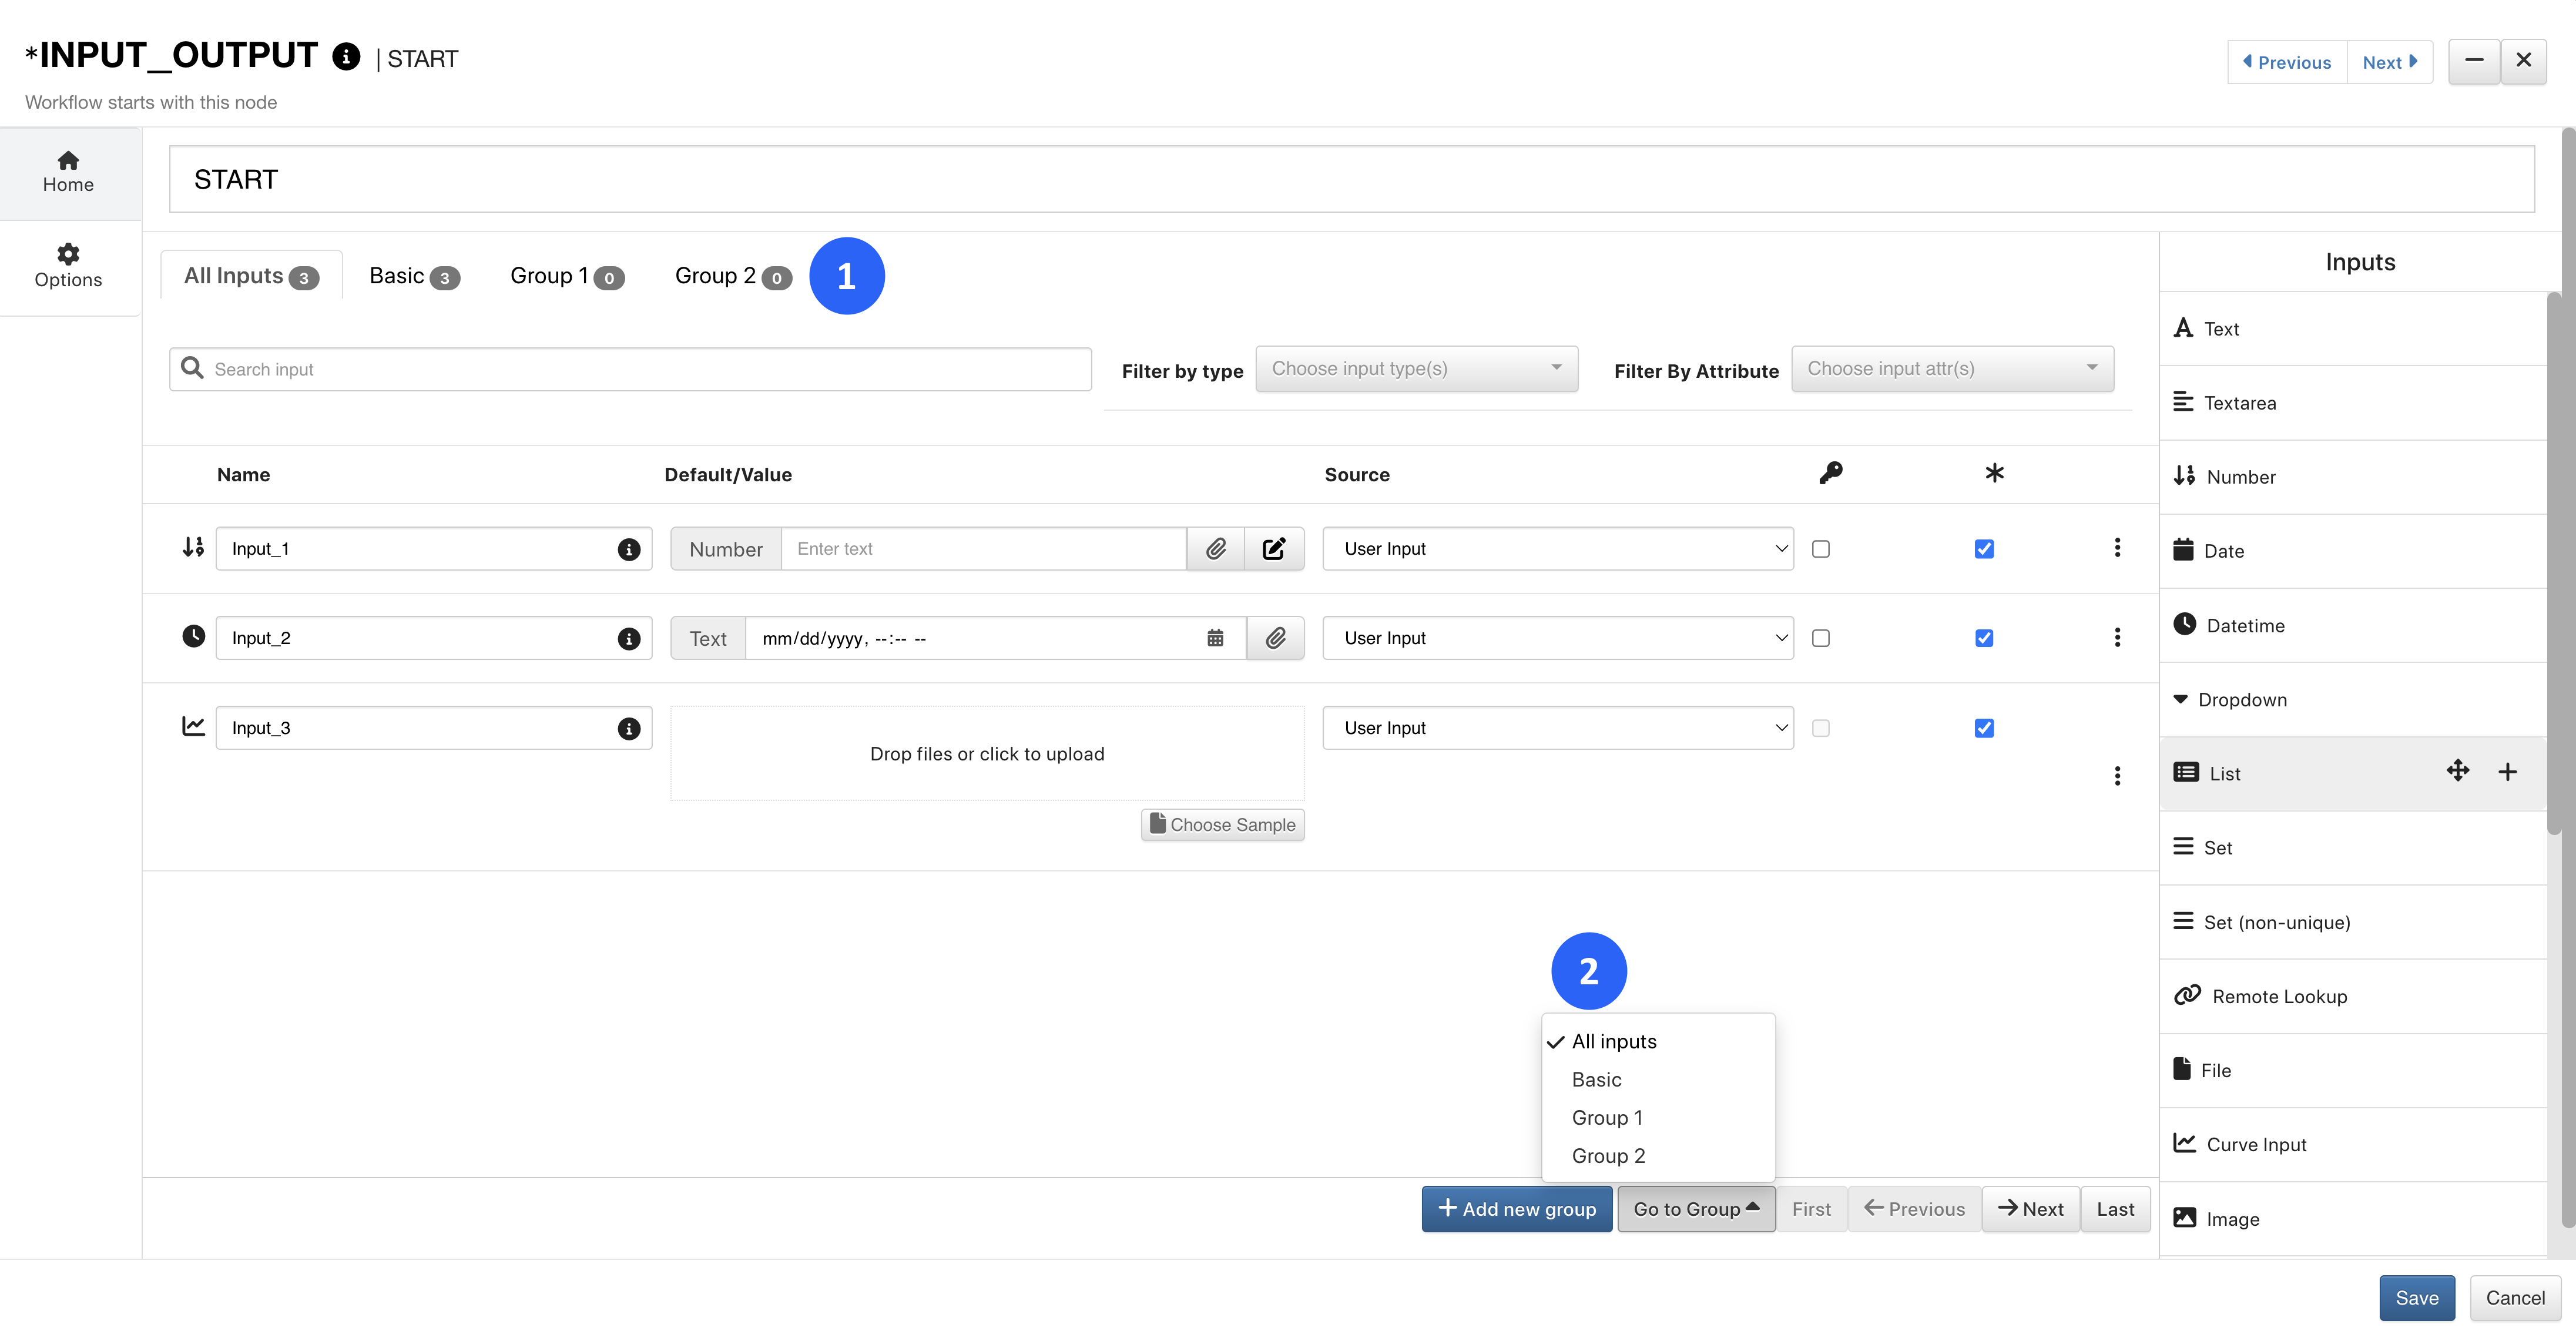
Figure 5: Go to Groups
NEW as of Jan 25, 2022: By default, inputs added in different groups are now available in All inputs tab of Start worker. Number of inputs in each tab of Start worker are now specified.
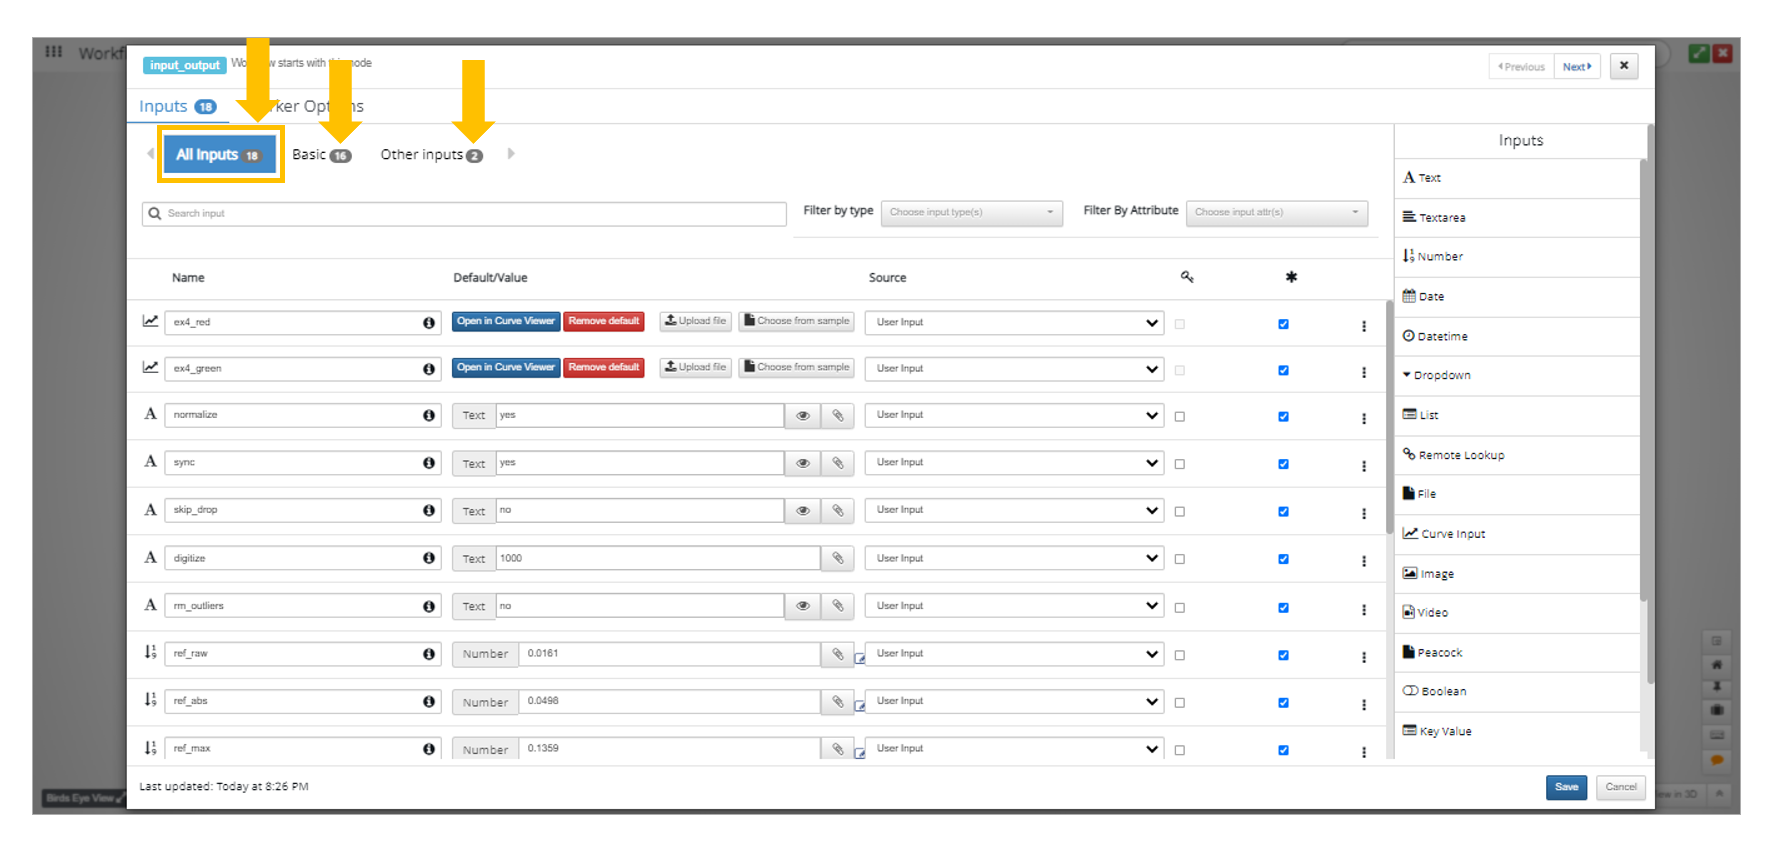
Figure 6: All Inputs Tab and Input Counts
Also NEW as of Jan 25, 2022: You can now right-click on the tab to remove with no inputs. You can also search for inputs in a search bar or add filtered drop-downs in the Start worker.
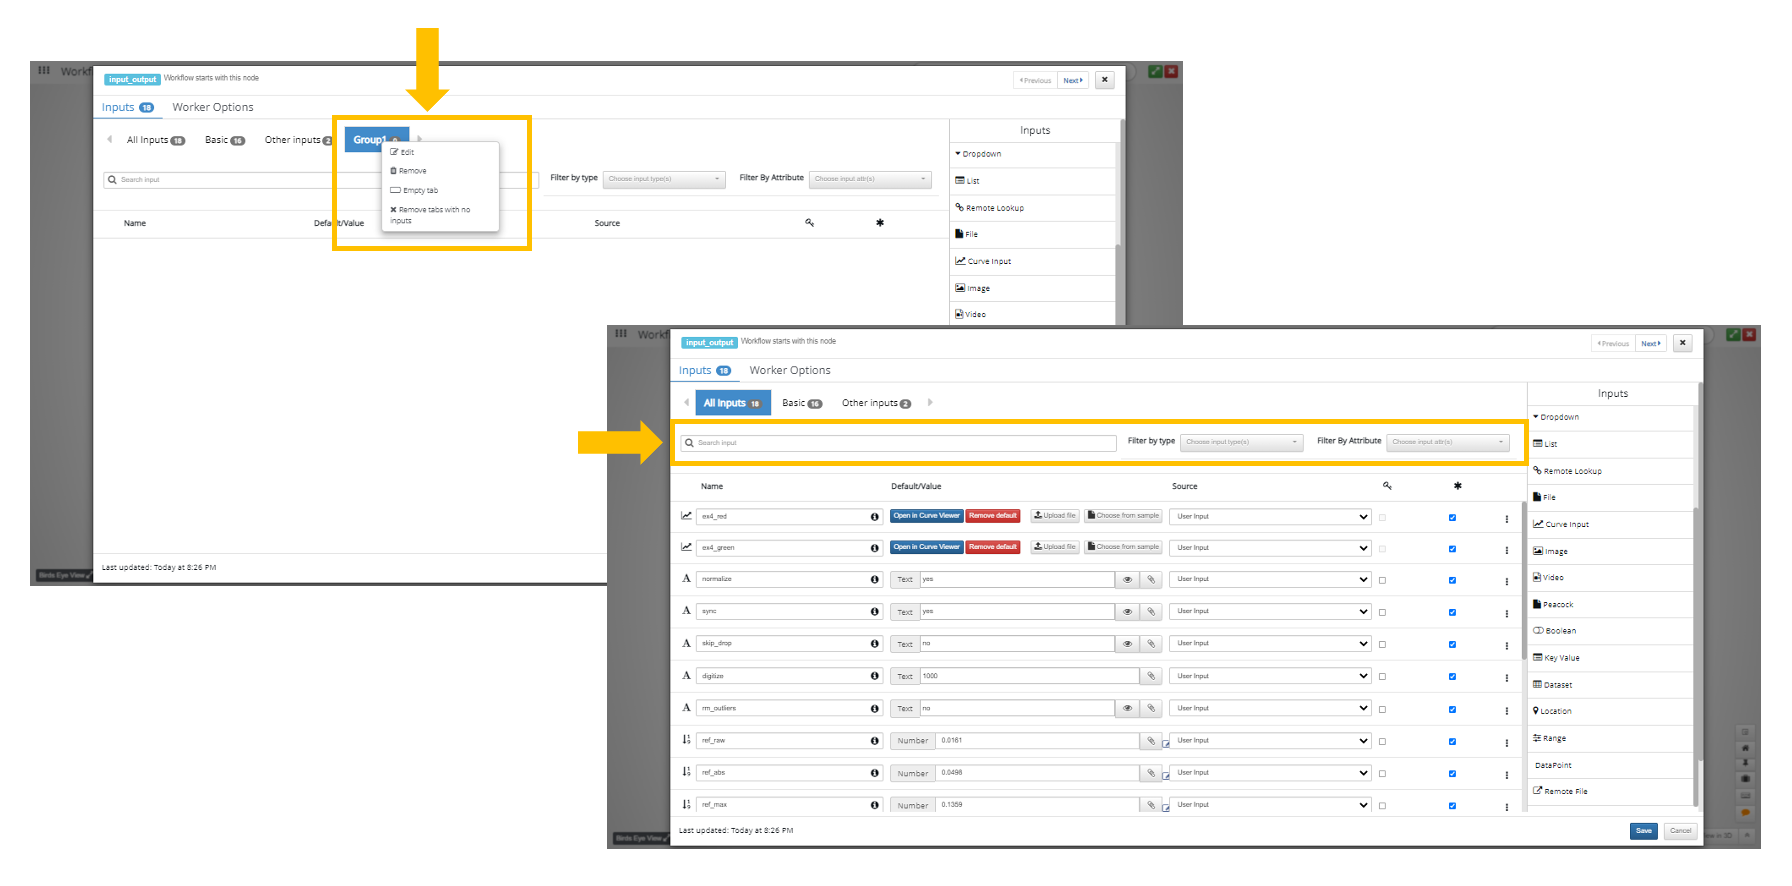
Figure 7: Auto Remove Tabs, Search Inputs and Filter Drop-downs
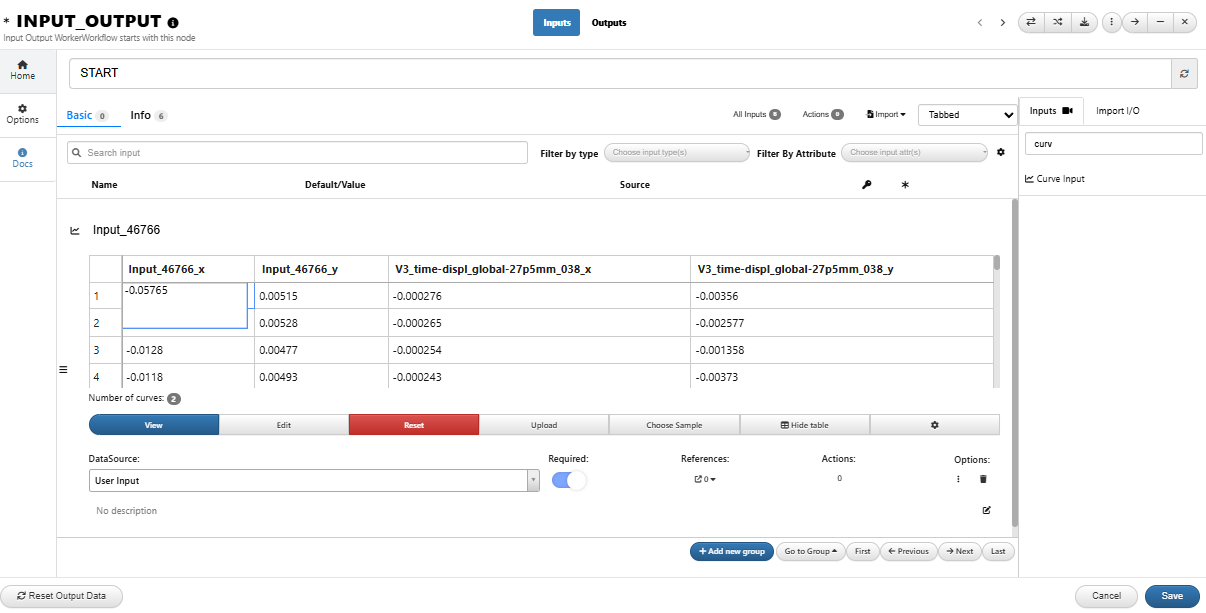
Updating Inputs for Large Workflows
When we have large workflows with a variety of START inputs, sometimes we’ll want to change or update these inputs. Certain workflows, such as ones used for Material Calibration, will be set up with changeable input options so we can run different processes with the same or different data. As of September 2022, the structure of the input connections has been improved so saving doesn’t take long for our START worker when changing these inputs. The following video shows a large and intricate GISSMO workflow which in which we change some START worker inputs around. Saving the START worker is quicker now with this update:
We’ll get a notification at the bottom that execution could not be updated which is normal. We’ll have to re-execute when we update START worker inputs to see our new results. More on Executing here.
7.2. Custom worker input configuration
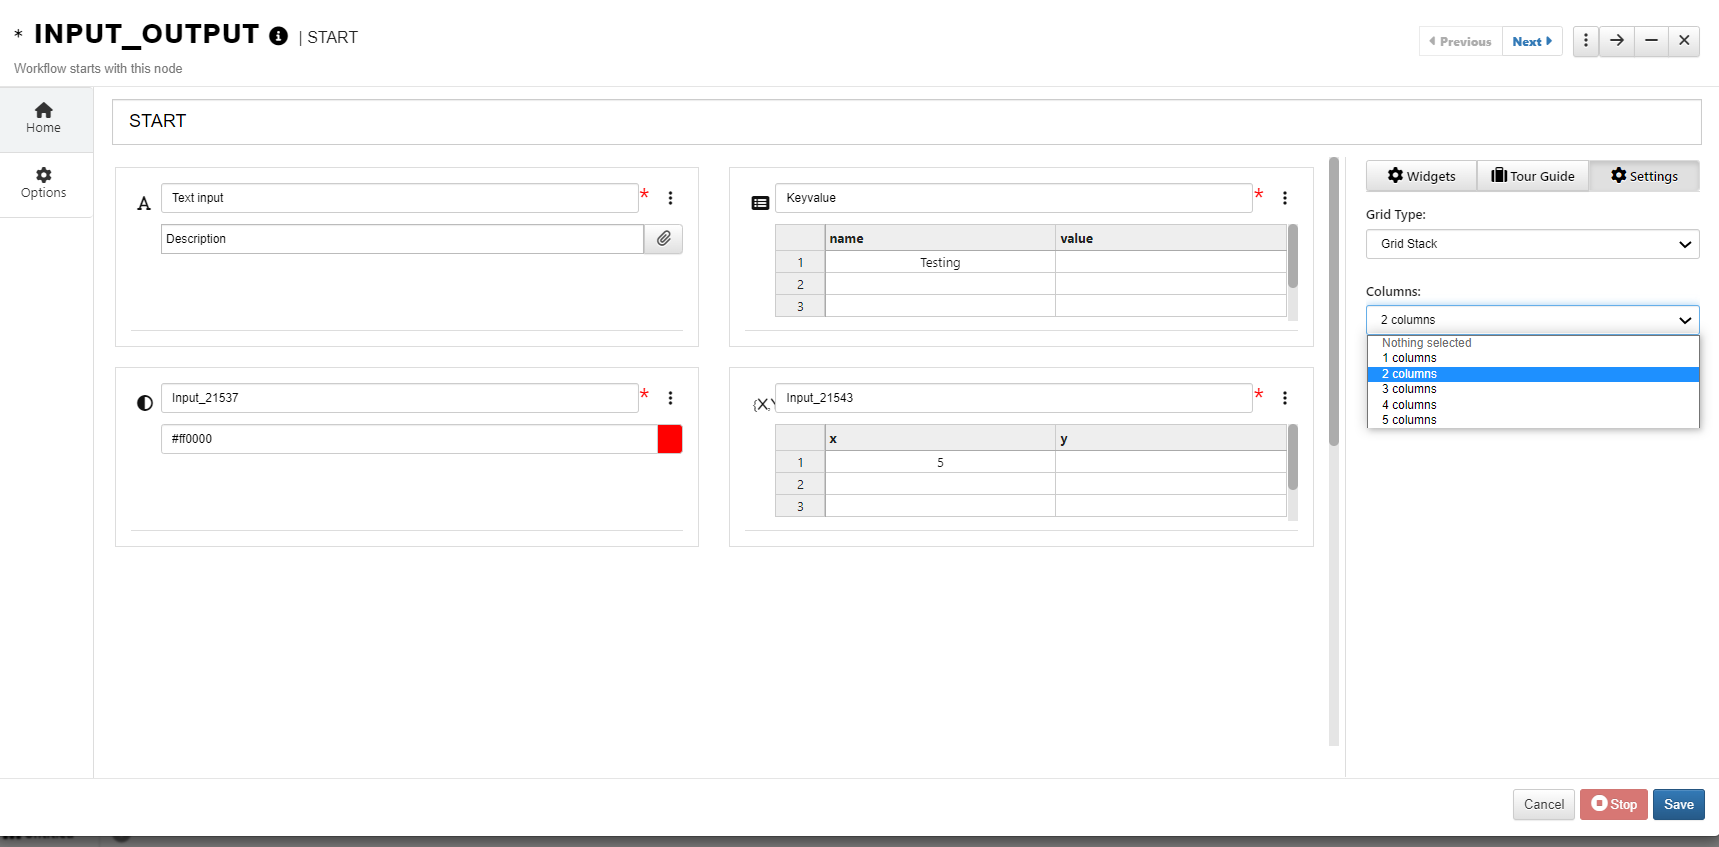
In the start worker, the default view is a list view where we can drag the inputs and build the workflow inputs in a list whose order is defined by us. To provide more flexibility, we now can build the start WORKER INPUTS in a widget-style where we can custom size the worker inputs in any order and in any size. To further provide separation of the inputs, we can add dividers and provide links etc to introduce the worker inputs.
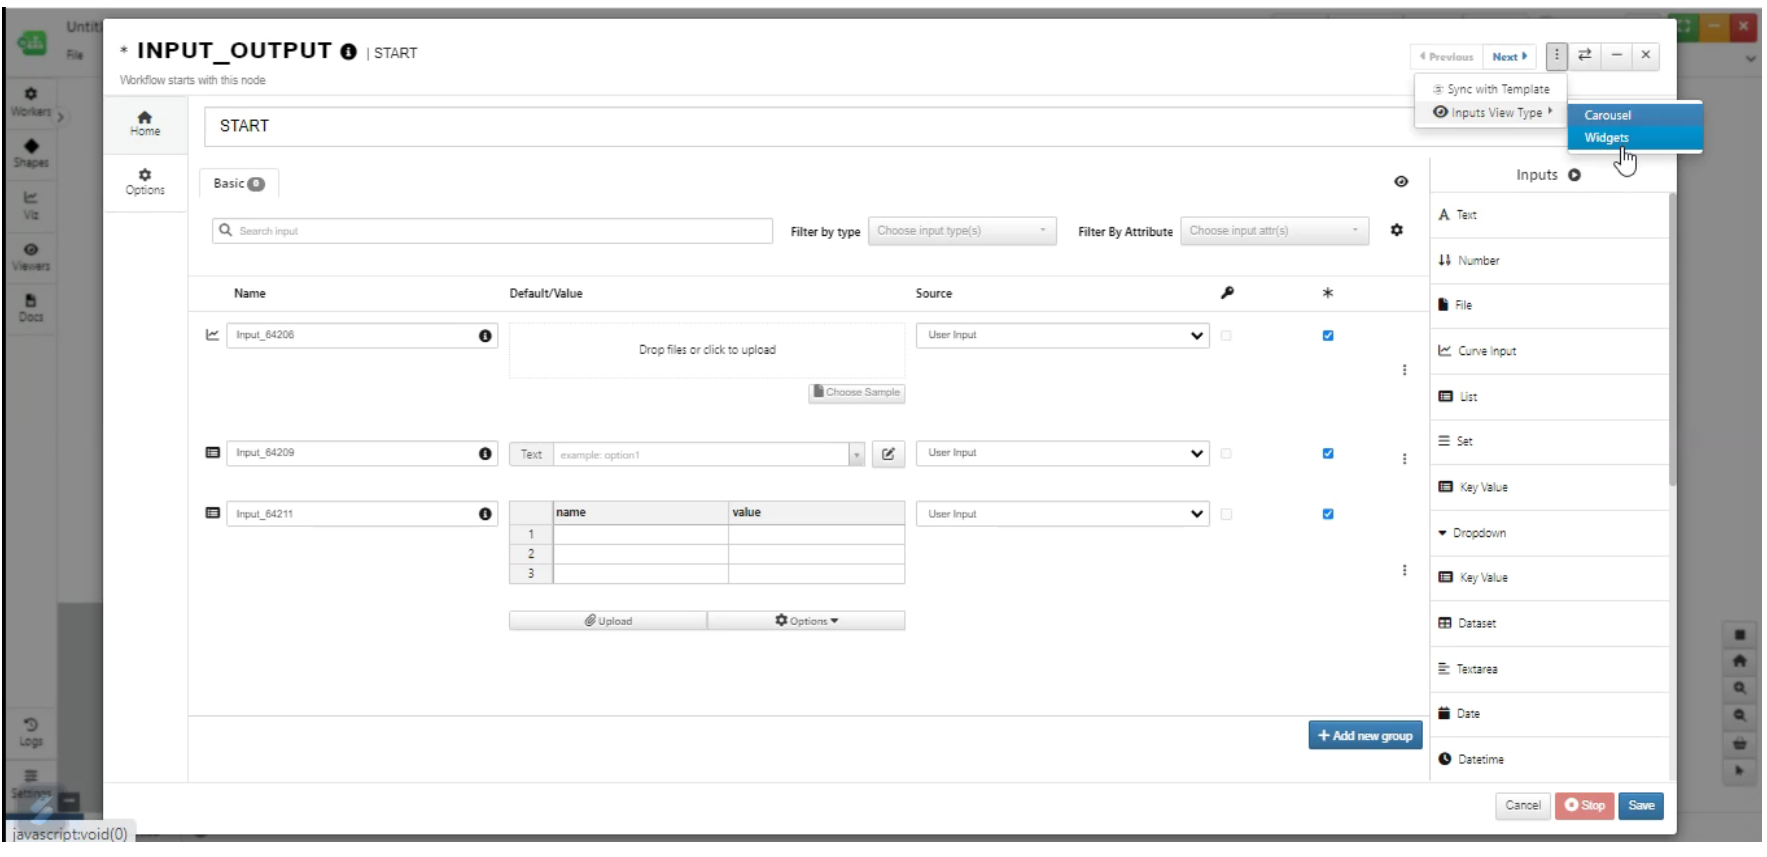
Default View
Widget View
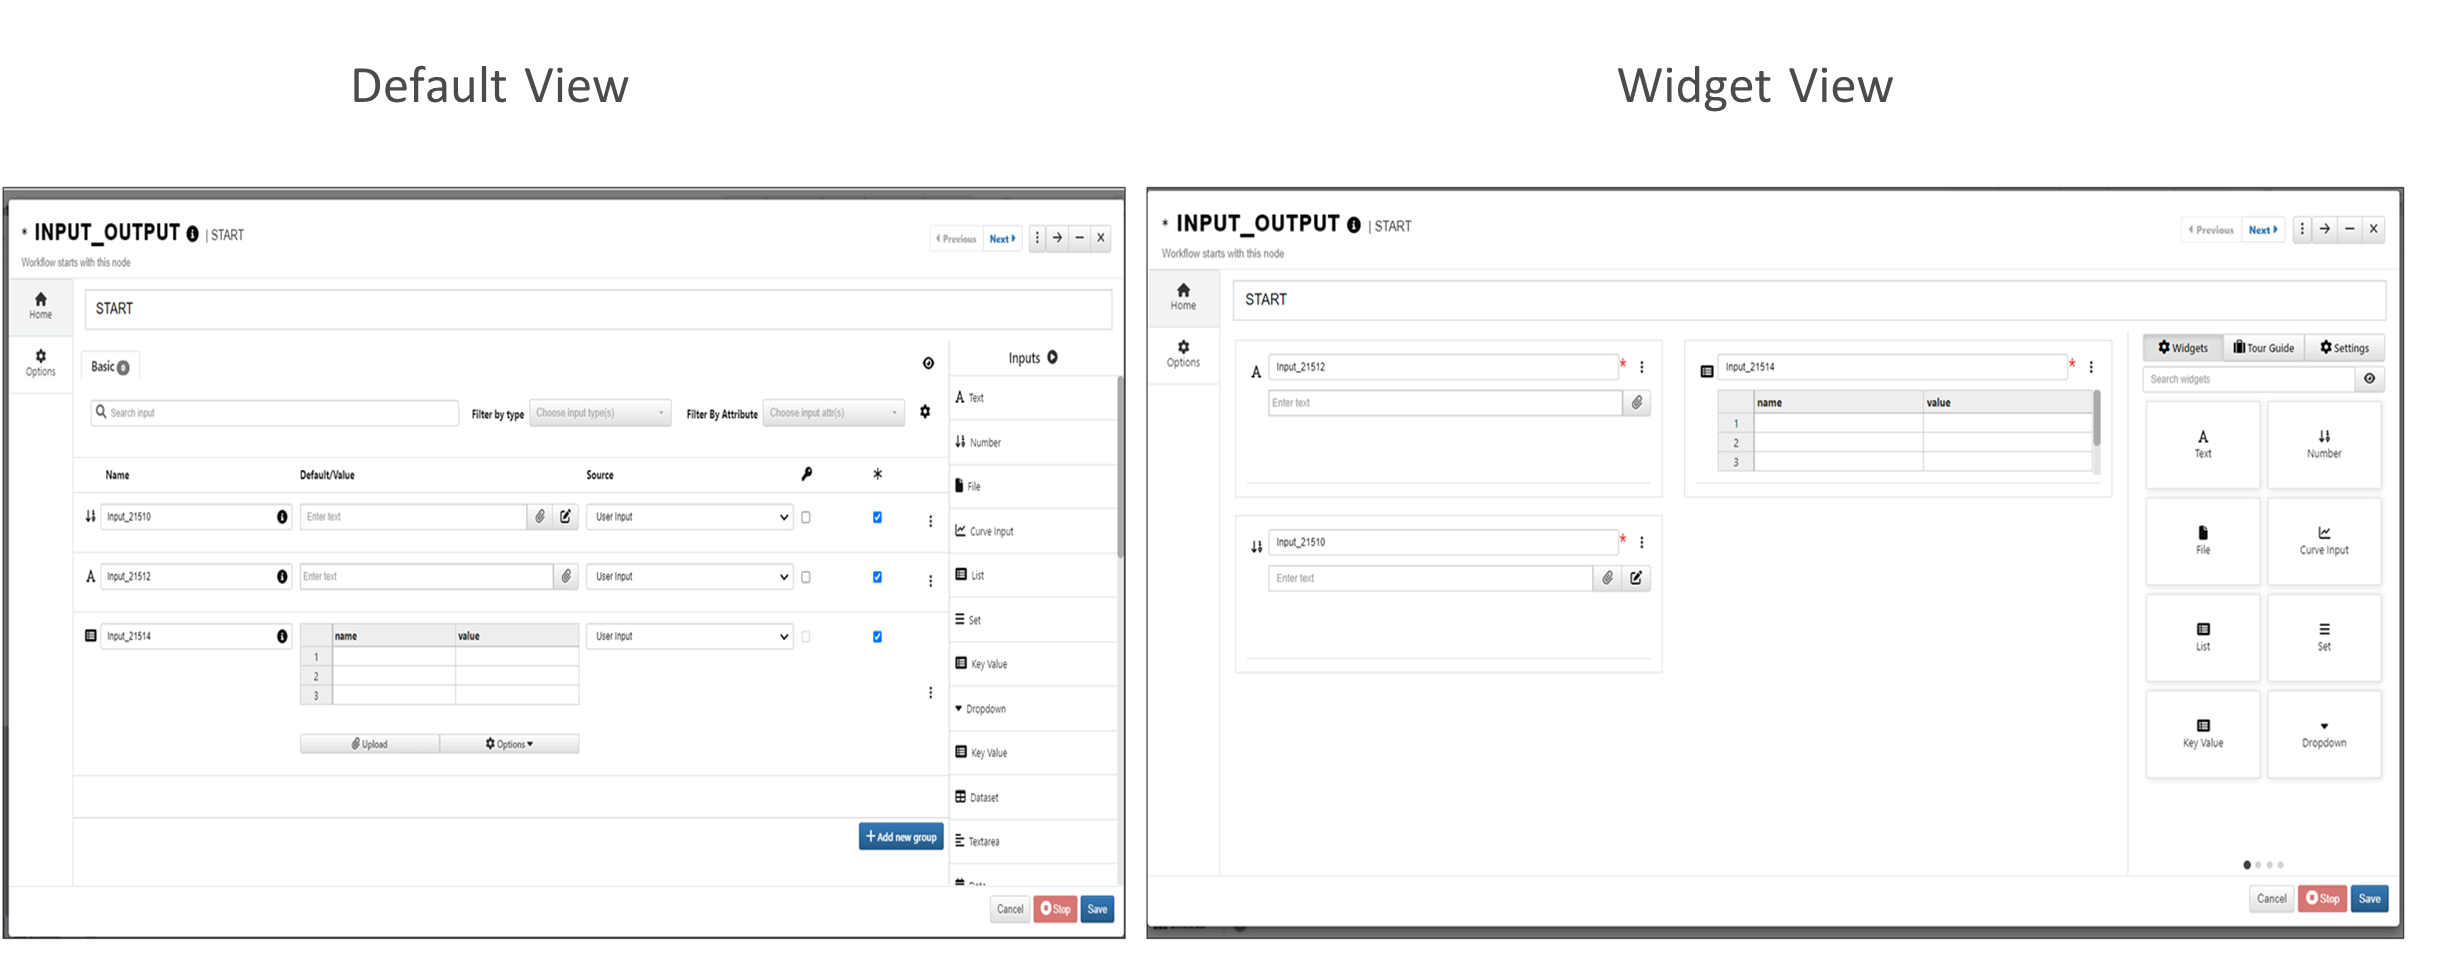
Default and Widgets view
Example1: In this Example, we will build a simple workflow inputs and arrangee them in a two-column format.
Example1
Examples 2: In this Example, we will build a simple workflow with Image annotator.
Example 3 : In this example, we will look at the execution model once we build a widget view.
Tour Guide support for Widgets view
Tour guide support is added to Inputs in Start worker for Widget view where we can add messages or Instructions for the Input Widgets and Guide me button is available to view the tour guide. Guide me button helps us to read the messages on the Widget Inputs.
7.3. |table| Using Sample Data
Workflows has built-in sample data for curve inputs for learning and testing purposes. We can find this option anytime we have a curve input either in the START worker or a curve worker configuration.
|plus| Add Sample in START Worker
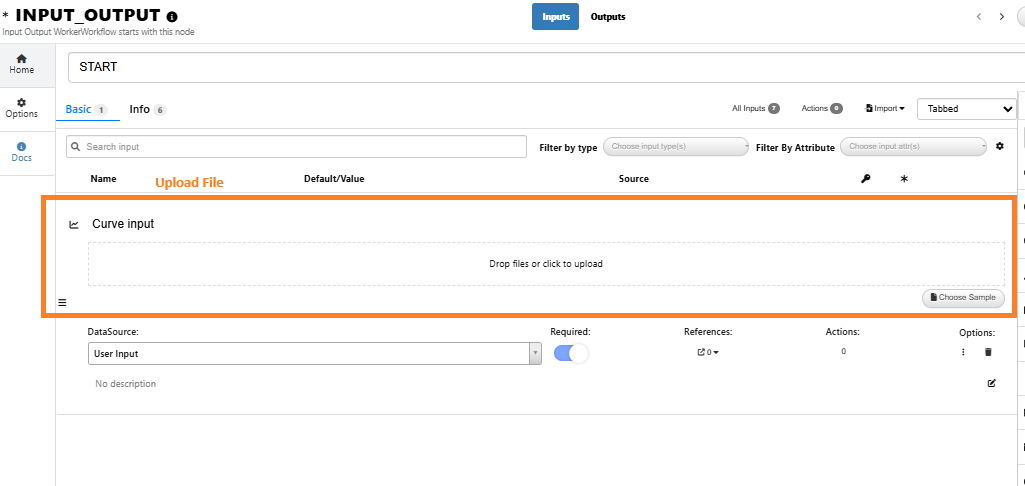
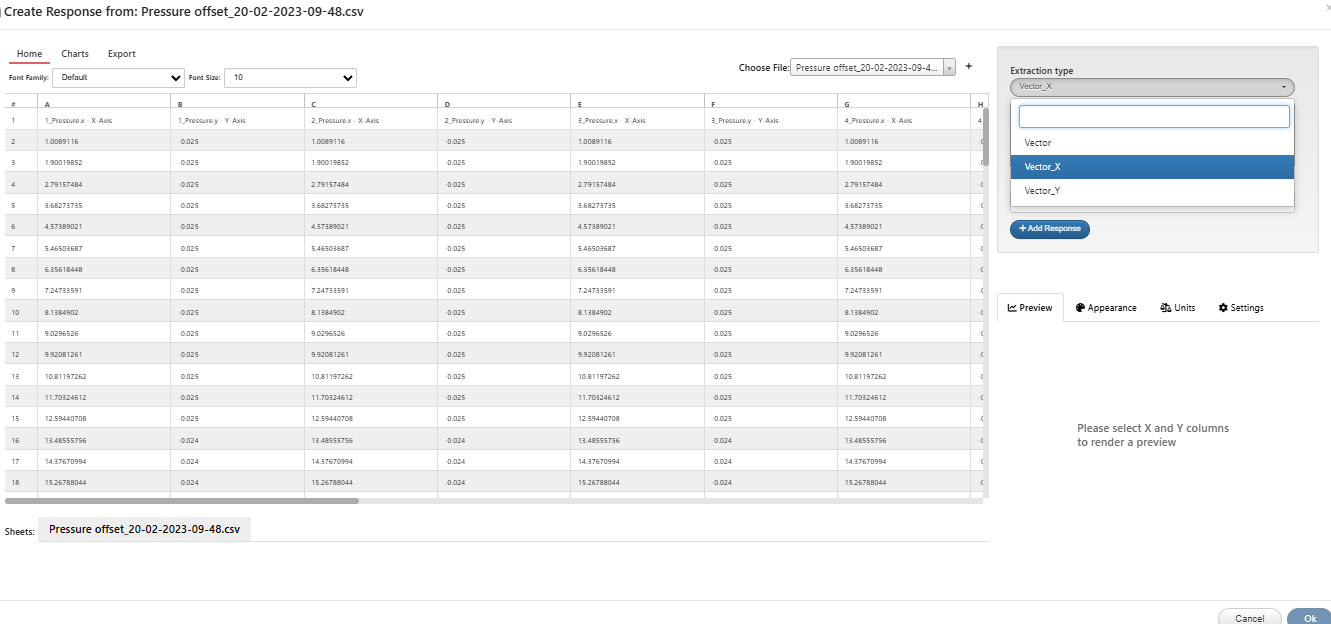
Under the START worker, we can drag-and-drop a curve input into the form-builder. Then, we’ll click on “Choose Sample” to add from the an excel of sample curves.
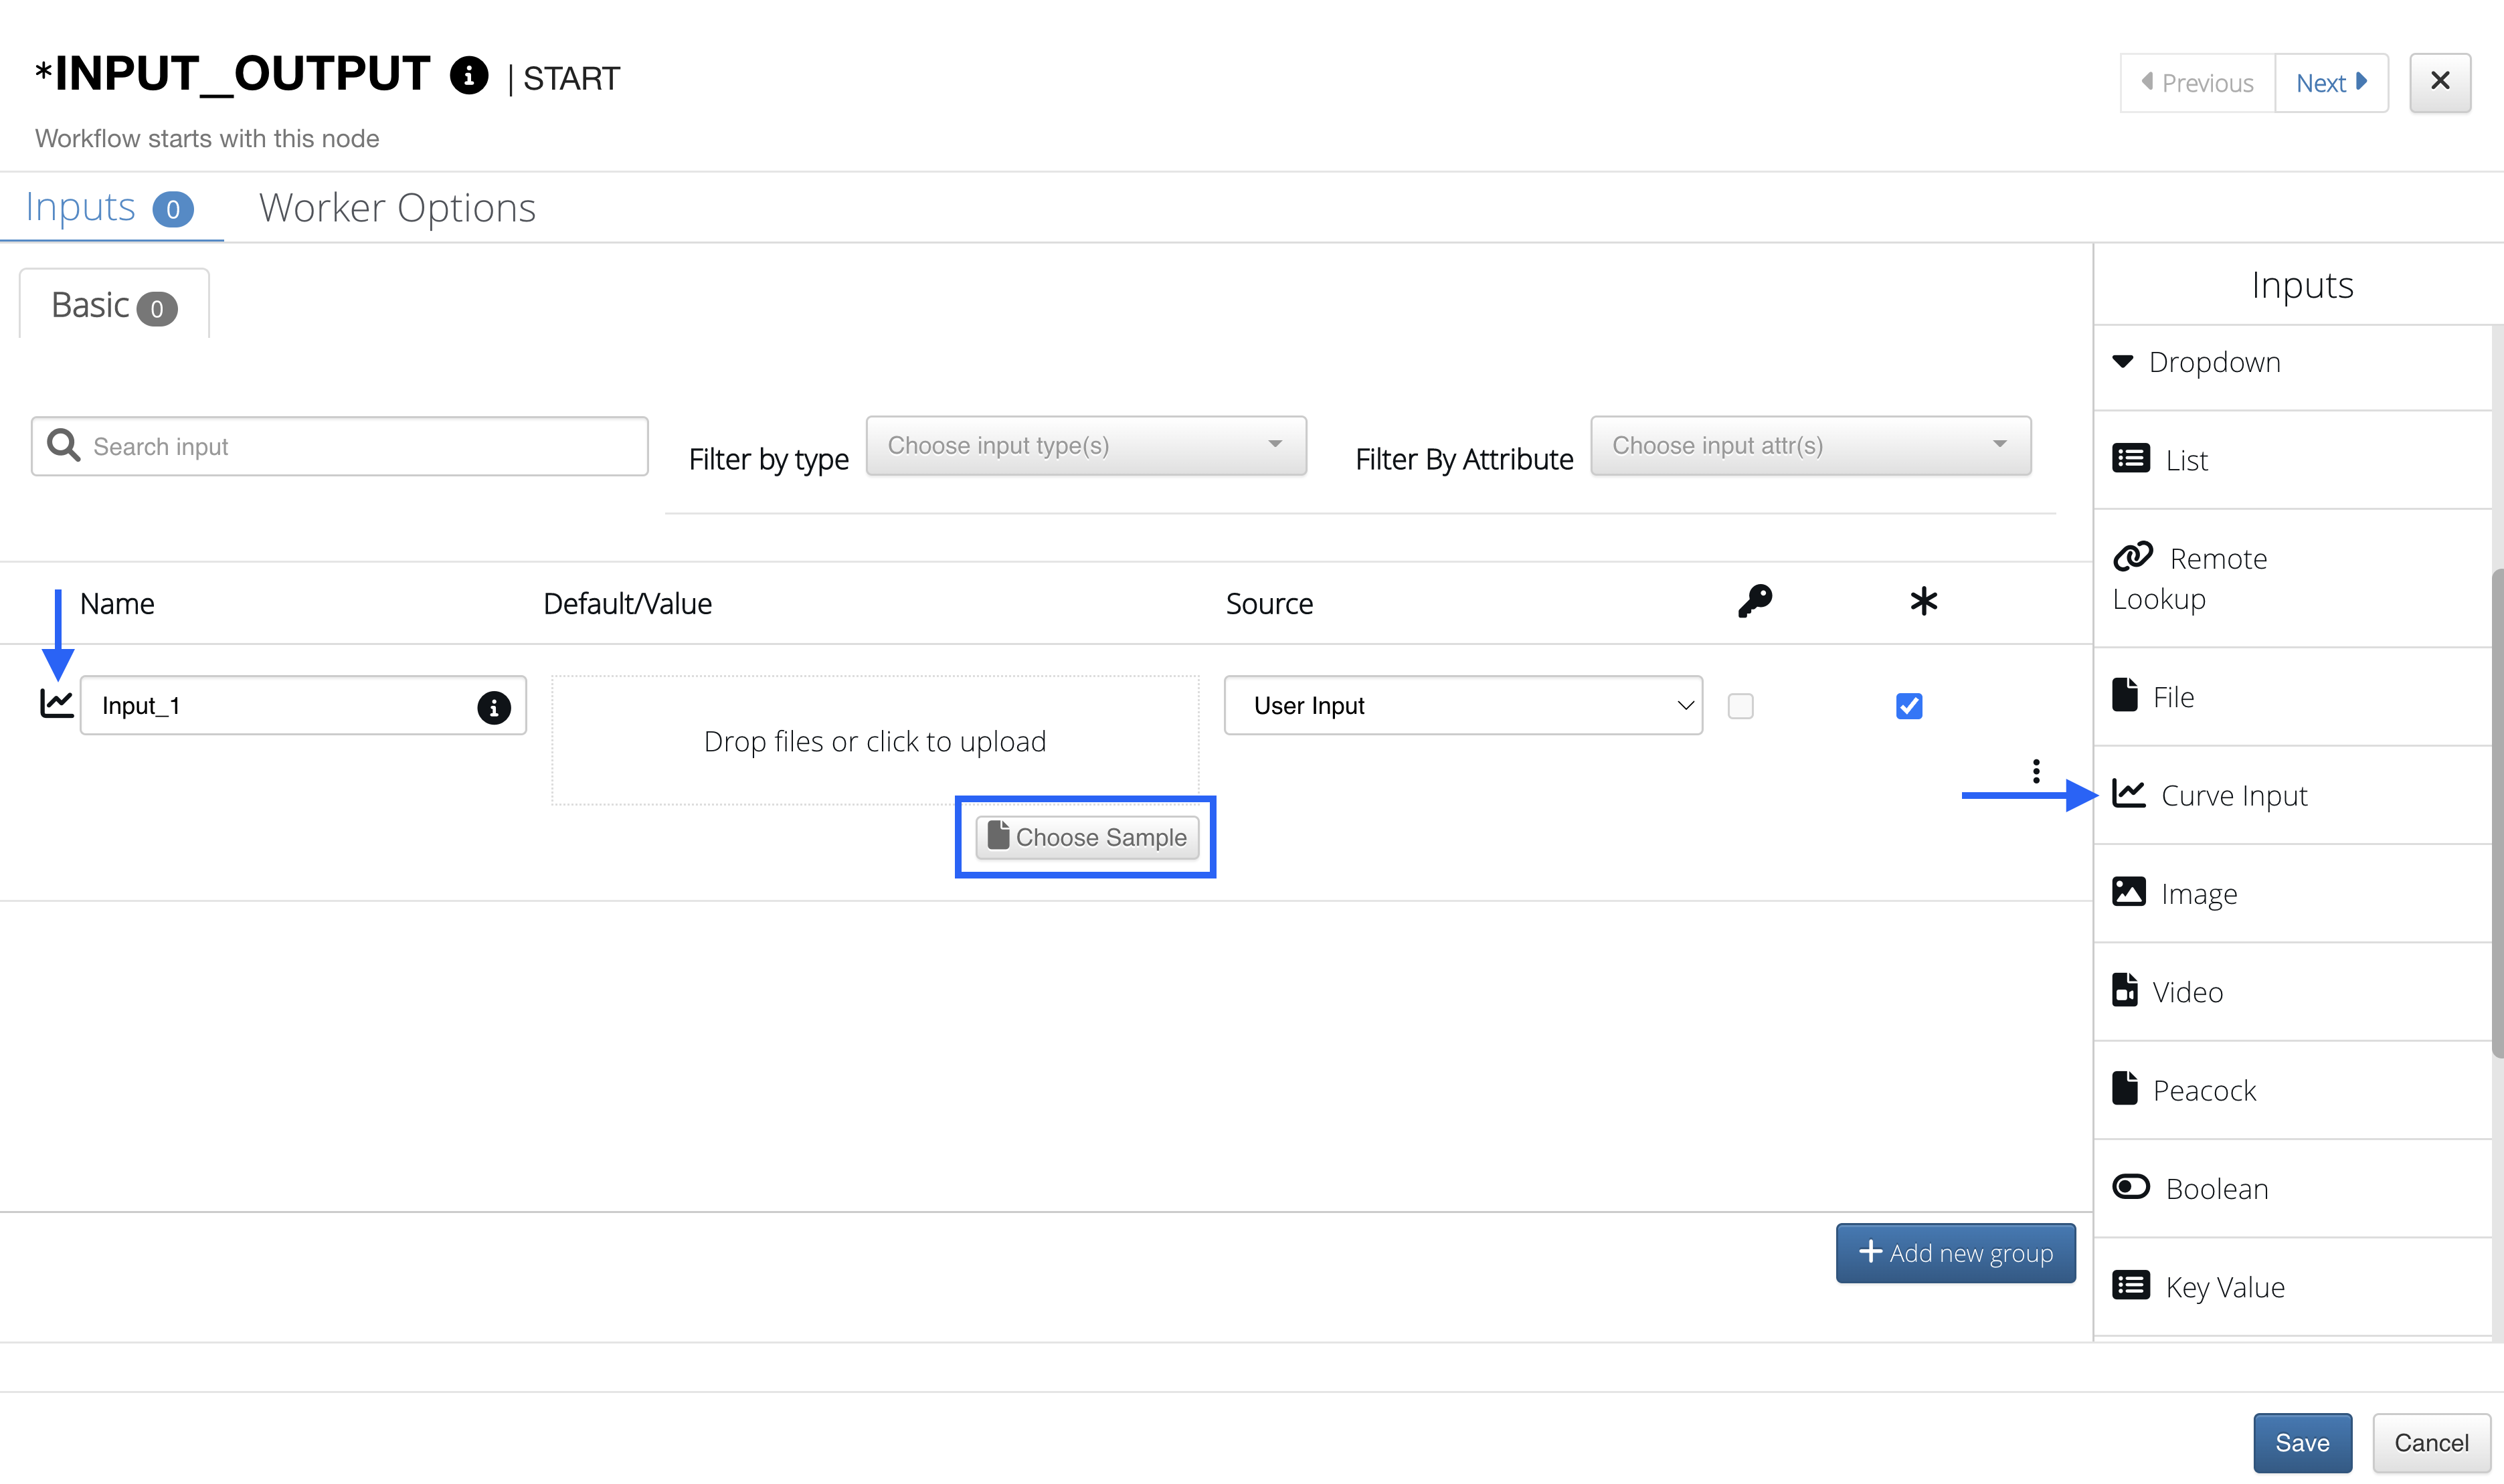
Figure 8: START Worker Choose Sample Data
Here, we can sift through the sheets for a particular type of curve. Double click the stop of a column to add as an x-range, and do the same for the y-range. In this example, we’ve chosen the first cell temperature curve in the general sheet.
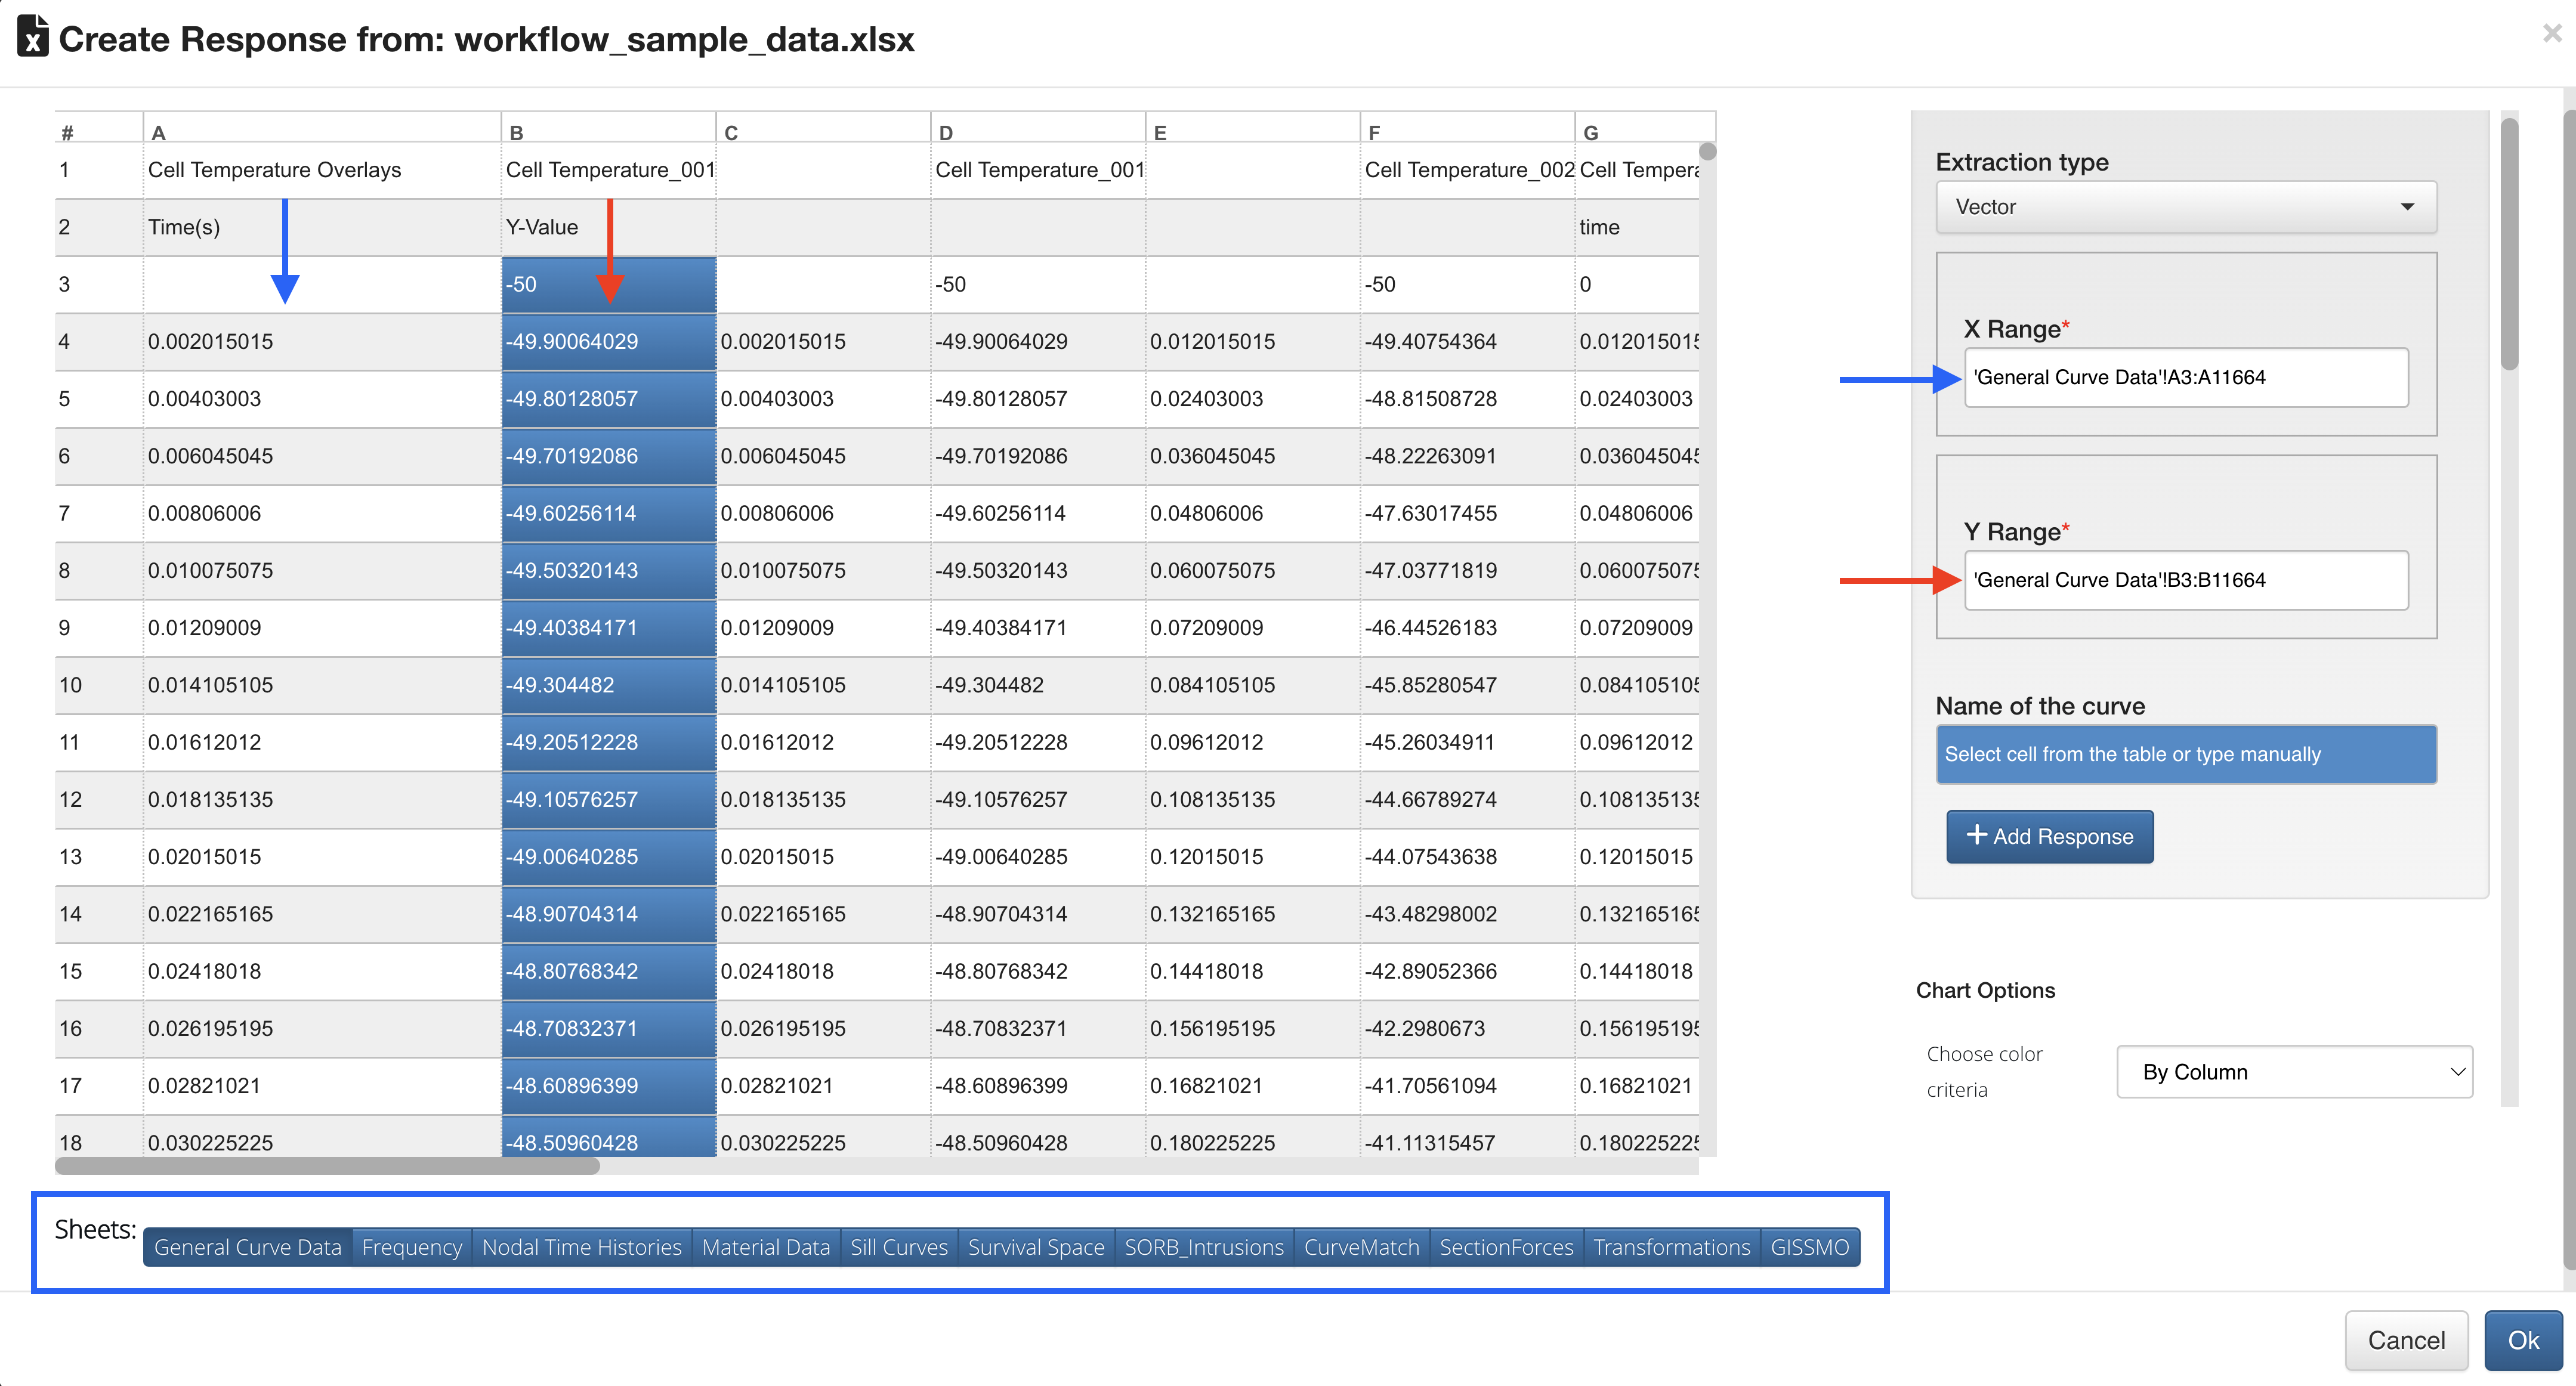
Figure 9: Choose X and Y Range in Excel Viewer
|plus| Add Sample in Curve Worker
Adding sample data to a curve worker requires us to add it to the canvas and open it for configuration. Learn how to do that under Building and Configuring.
After we open our curve worker, we can add sample data by clicking on “Choose from sample” under the drop box for the curve input.
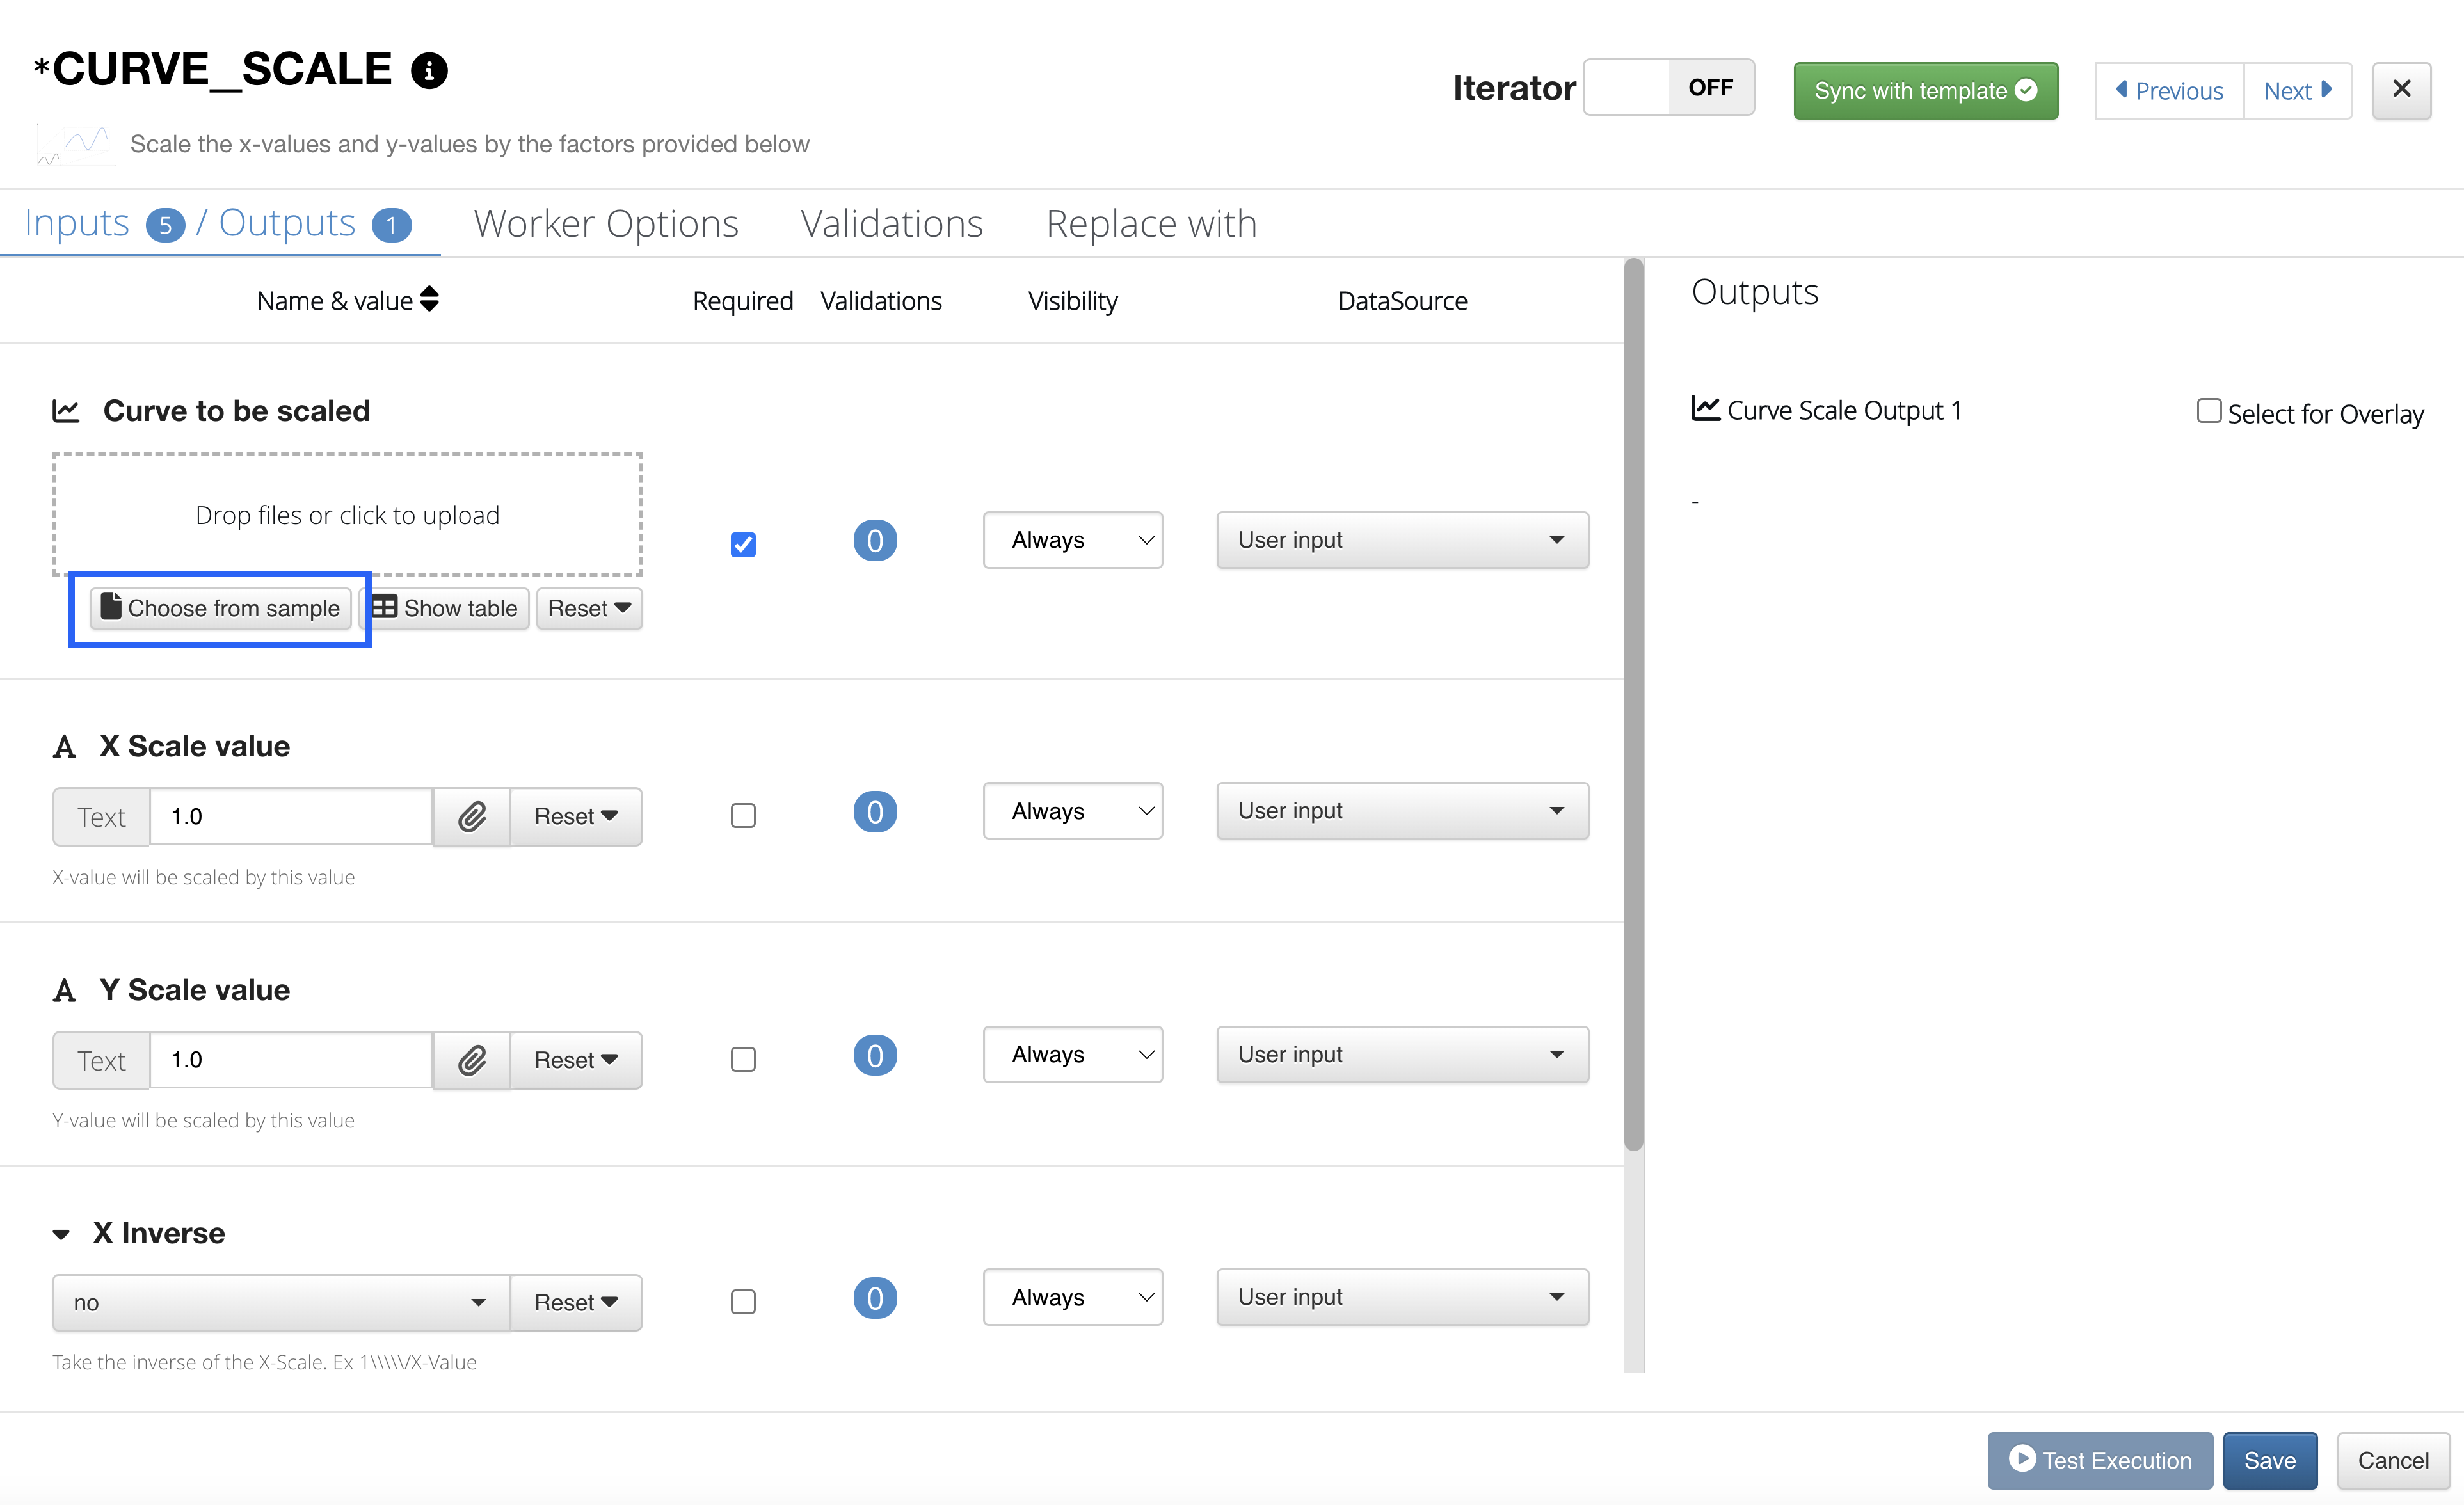
Figure 10: Curve Worker Choose Sample Data
Similarly to adding via the START worker, we’ll pick our x and y ranges for our curve in the excel viewer.
Figure 11: Choose X and Y Range in Excel Viewer
Here is how our sample curve looks in the curve viewer.
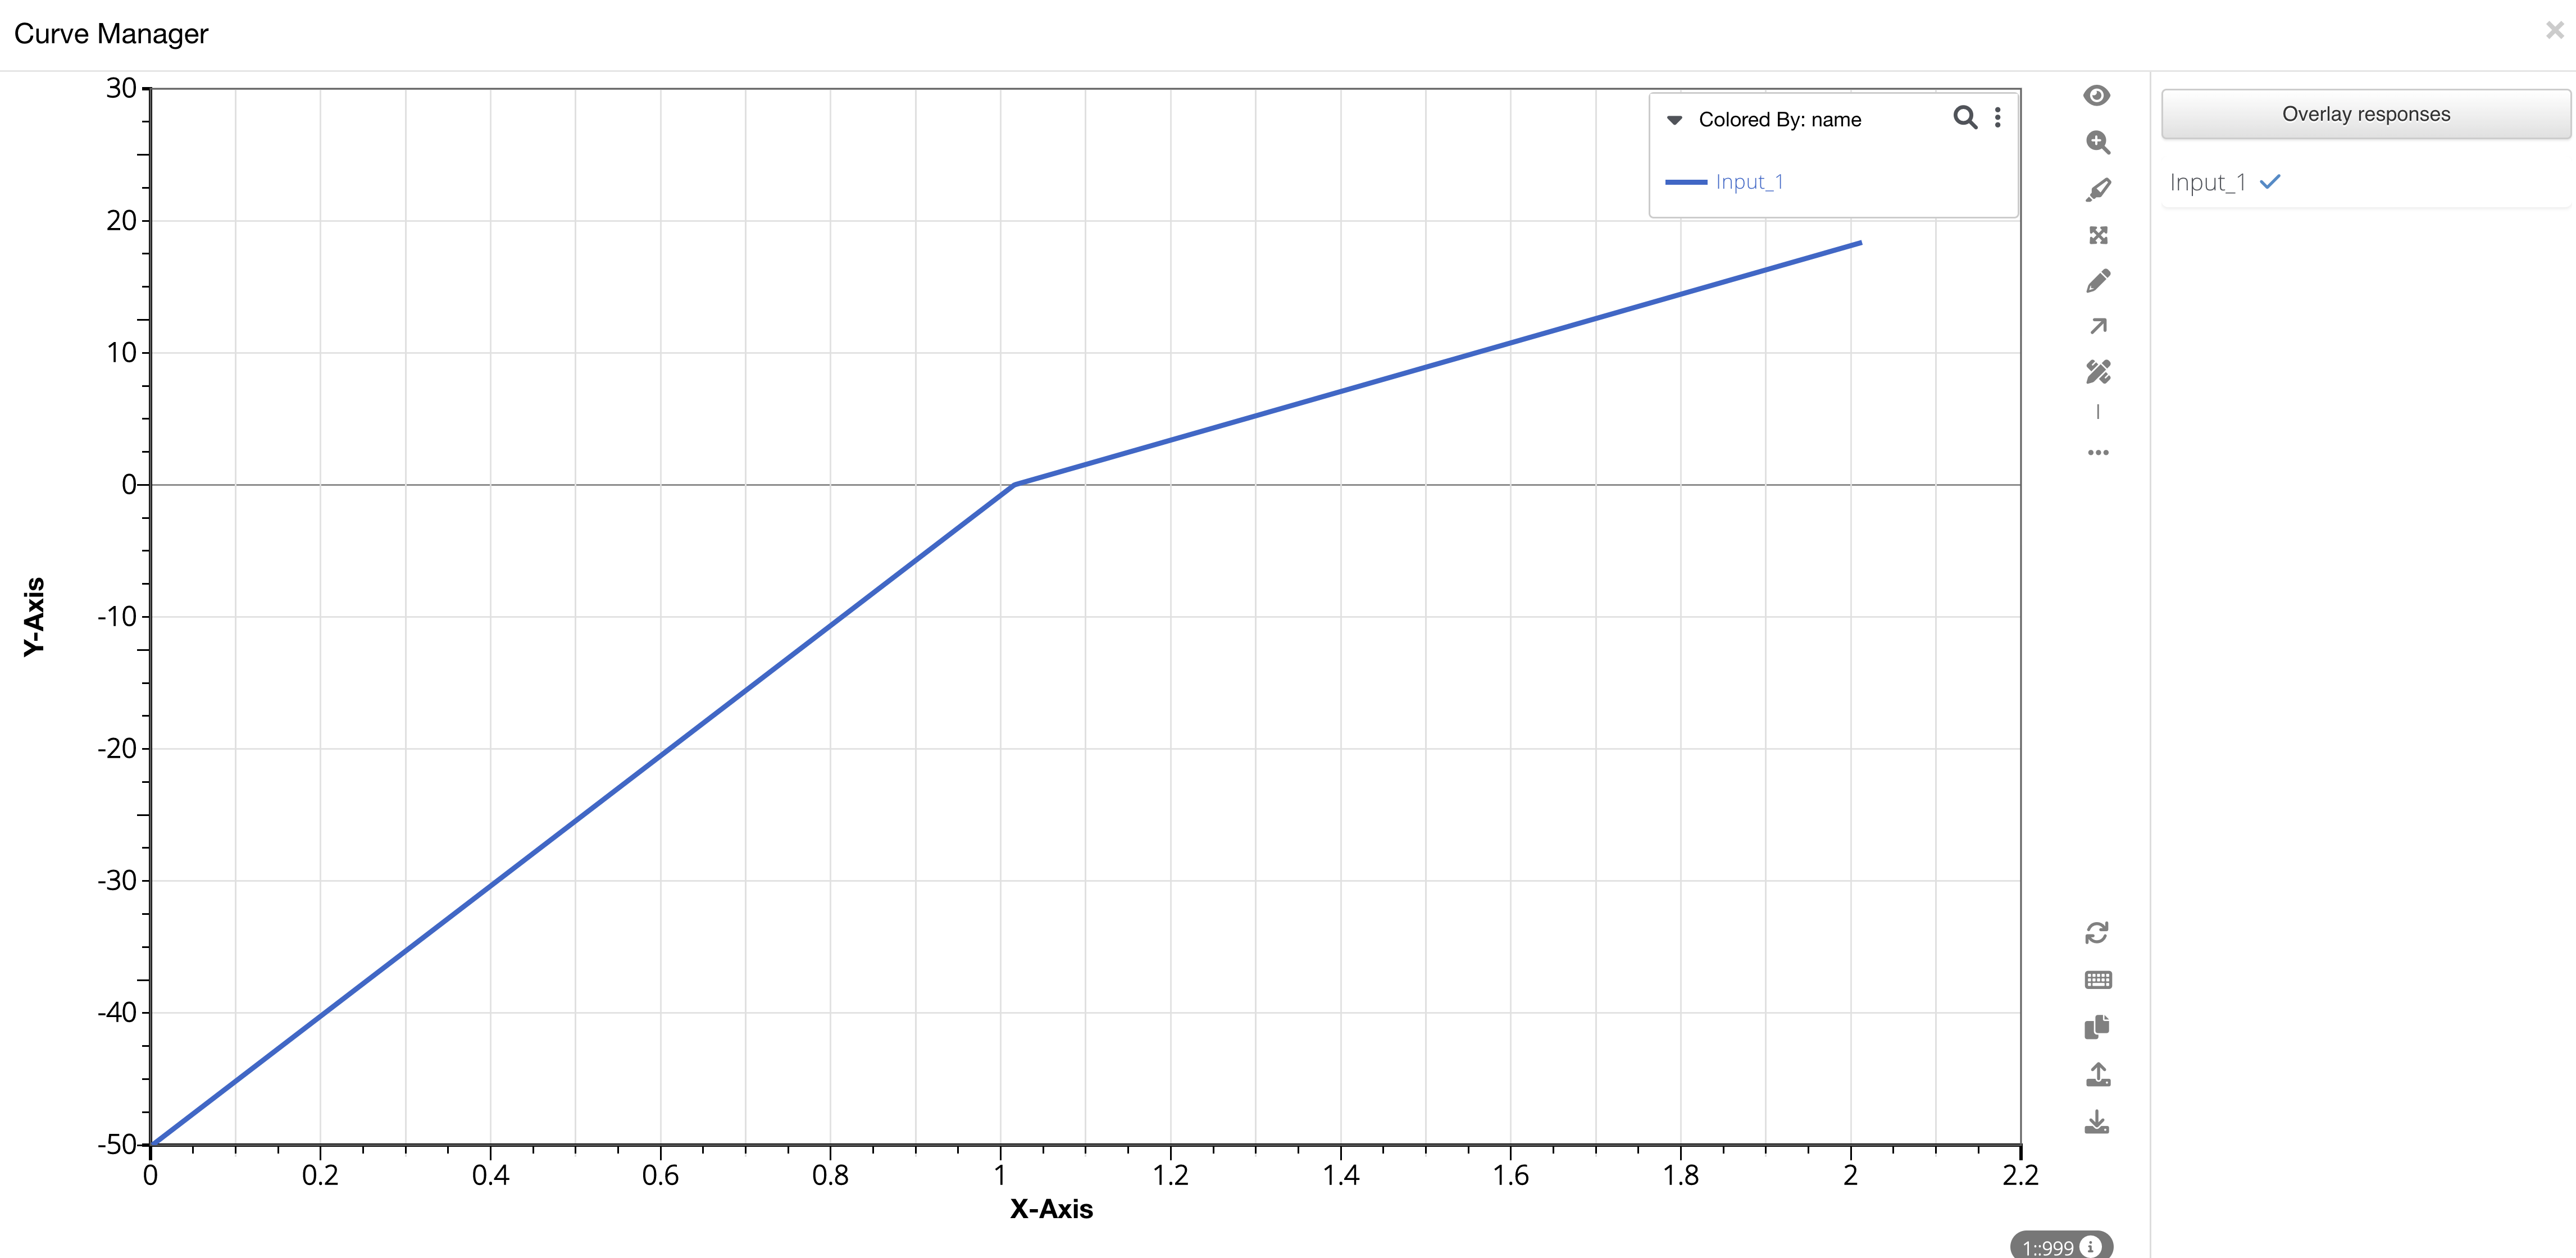
Figure 12: Sample Curve
Watch the following to see the full process in action:
7.4. Impoering Curve
Curves can be manually created by adding points or from importing CSV/TSV/Excel files. we will now go over different options available to import a curve.
1/ Import a single curve from a single CSV file or Excel file
We have to upload a CSV or Excel file and import a Curve.
Below are the screenshots and the video for the Importing of Curve.
Upload File
Select X range and Y range in the curve data parser and click on Apply.
Select X and Y
Watch the following to see the full process :
2/ Import a single curve from a single text file using Comma as a separator.
We have to upload a text file and import a Curve.
Below are the screenshots and the video for the Importing of Curve.

Upload File
Select the text file if uploaded from ZIP.
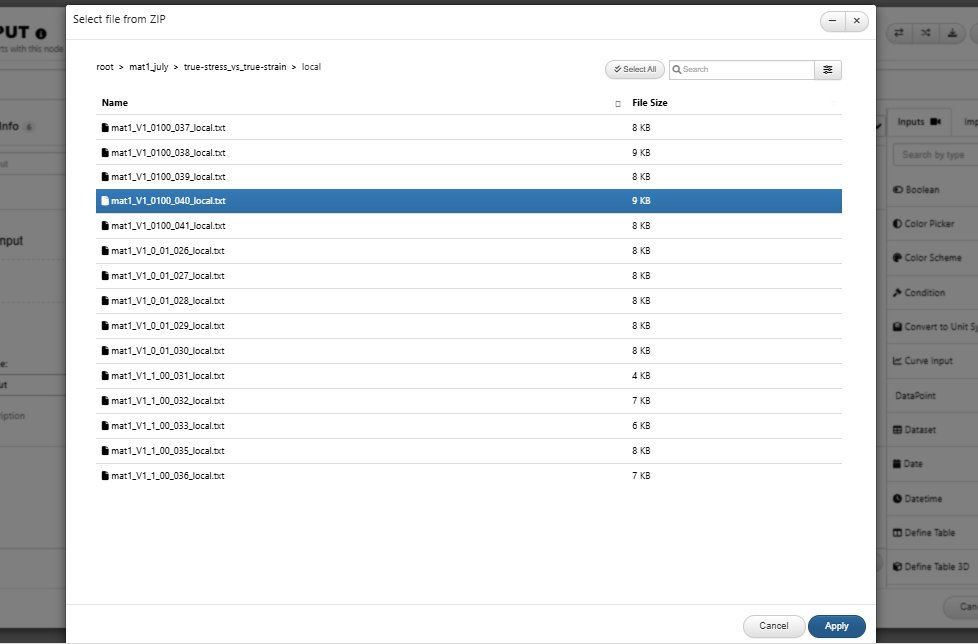
Select text file
Select the delimiter and the Curve parser will be opened for curve selection
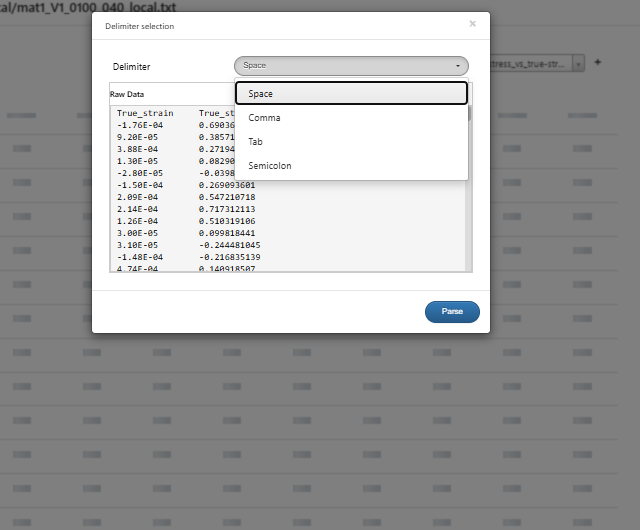
Select seperator
Watch the following to see the full process :
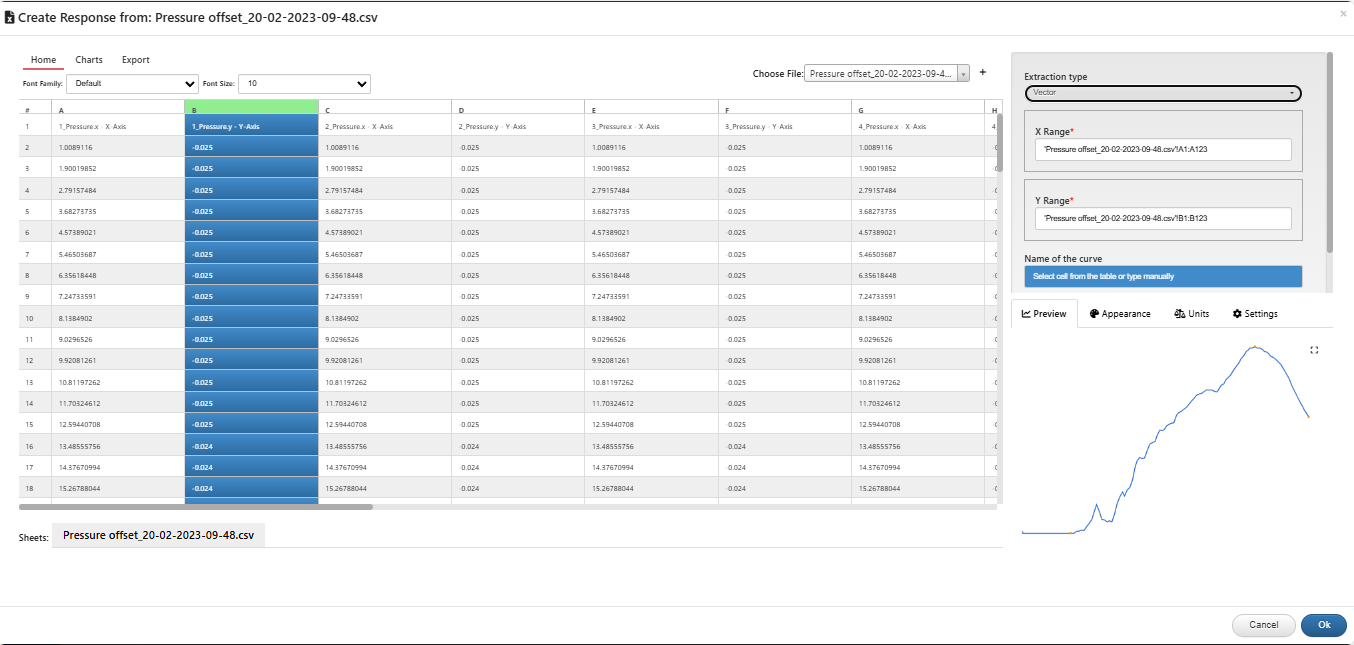
3/ Import multiple curves from a single CSV file
We can select multiple curve from a single file to the Curve input. We have to upload a CSV/EXCEL file and import a Curve.
Below are the screenshots and the video for the Importing of Curves.

Upload File
Select X and Y range for one curve and click on add response option below name of the curve. Repeat this for multiple curves.
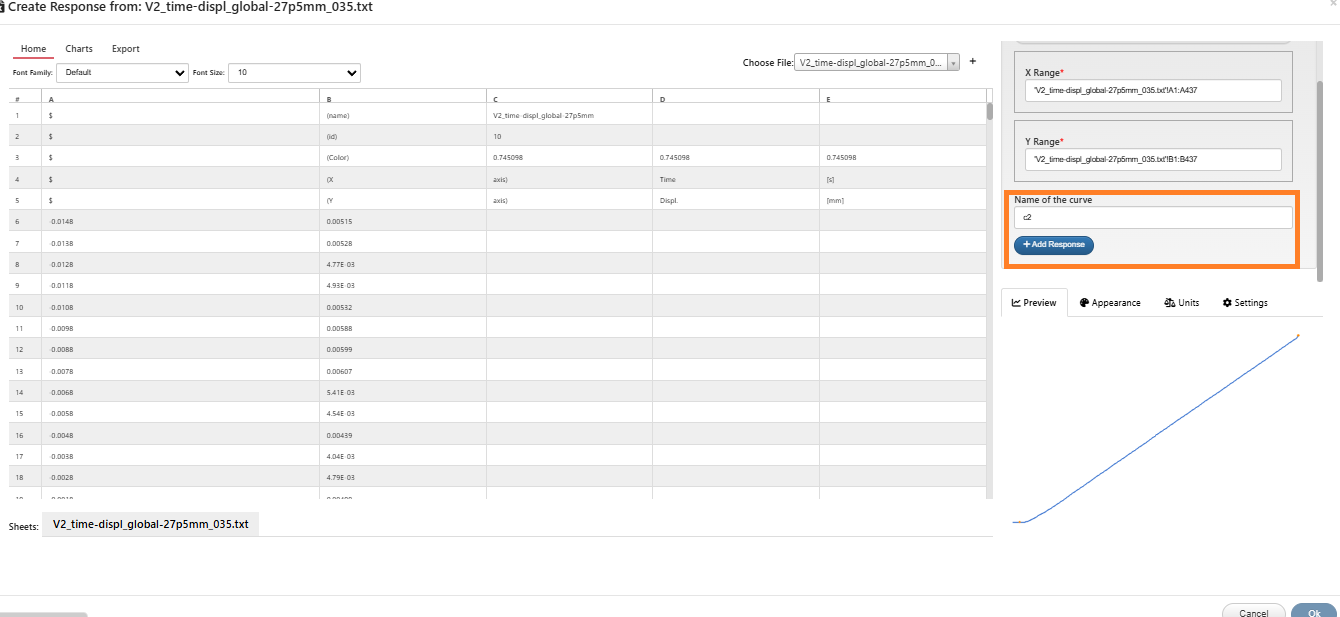
Multiple Curves
Watch the following video to see the full process :
4/ Import a single curve from multiple files by choosing X and Y from two different files.
We can Import X and Y columns of the curve seperately from differnet files.
Firstly,we have to upload a CSV/EXCEL file and import a Curve.
Below are the screenshots and the video for the Importing of Curves.

Upload File
Select X and Y factor seperately and save to the curve.
X and Y
Watch the following video to see the full process :
5/ Import a file from a single file and remember the columns to import a new curve from a different file by saving the rules of extraction.
Using the option save rules of extraction , we can add multiple files and import the curve. The below video shows how to save the rules of extraction in the curve parser.
6/ Manually edit table view of the curve.
We can also manually edit the values in the table of Curve extracted and these are appilied to the curves in the input.
Edit manually
7.5. |paperclip| Generic Parser
Generic Parser helps us import data from our local files into worker inputs. Learn how to add workers to the canvas for configuration under Building and Configuring. For example, we can import data from a .txt file for our worker inputs.
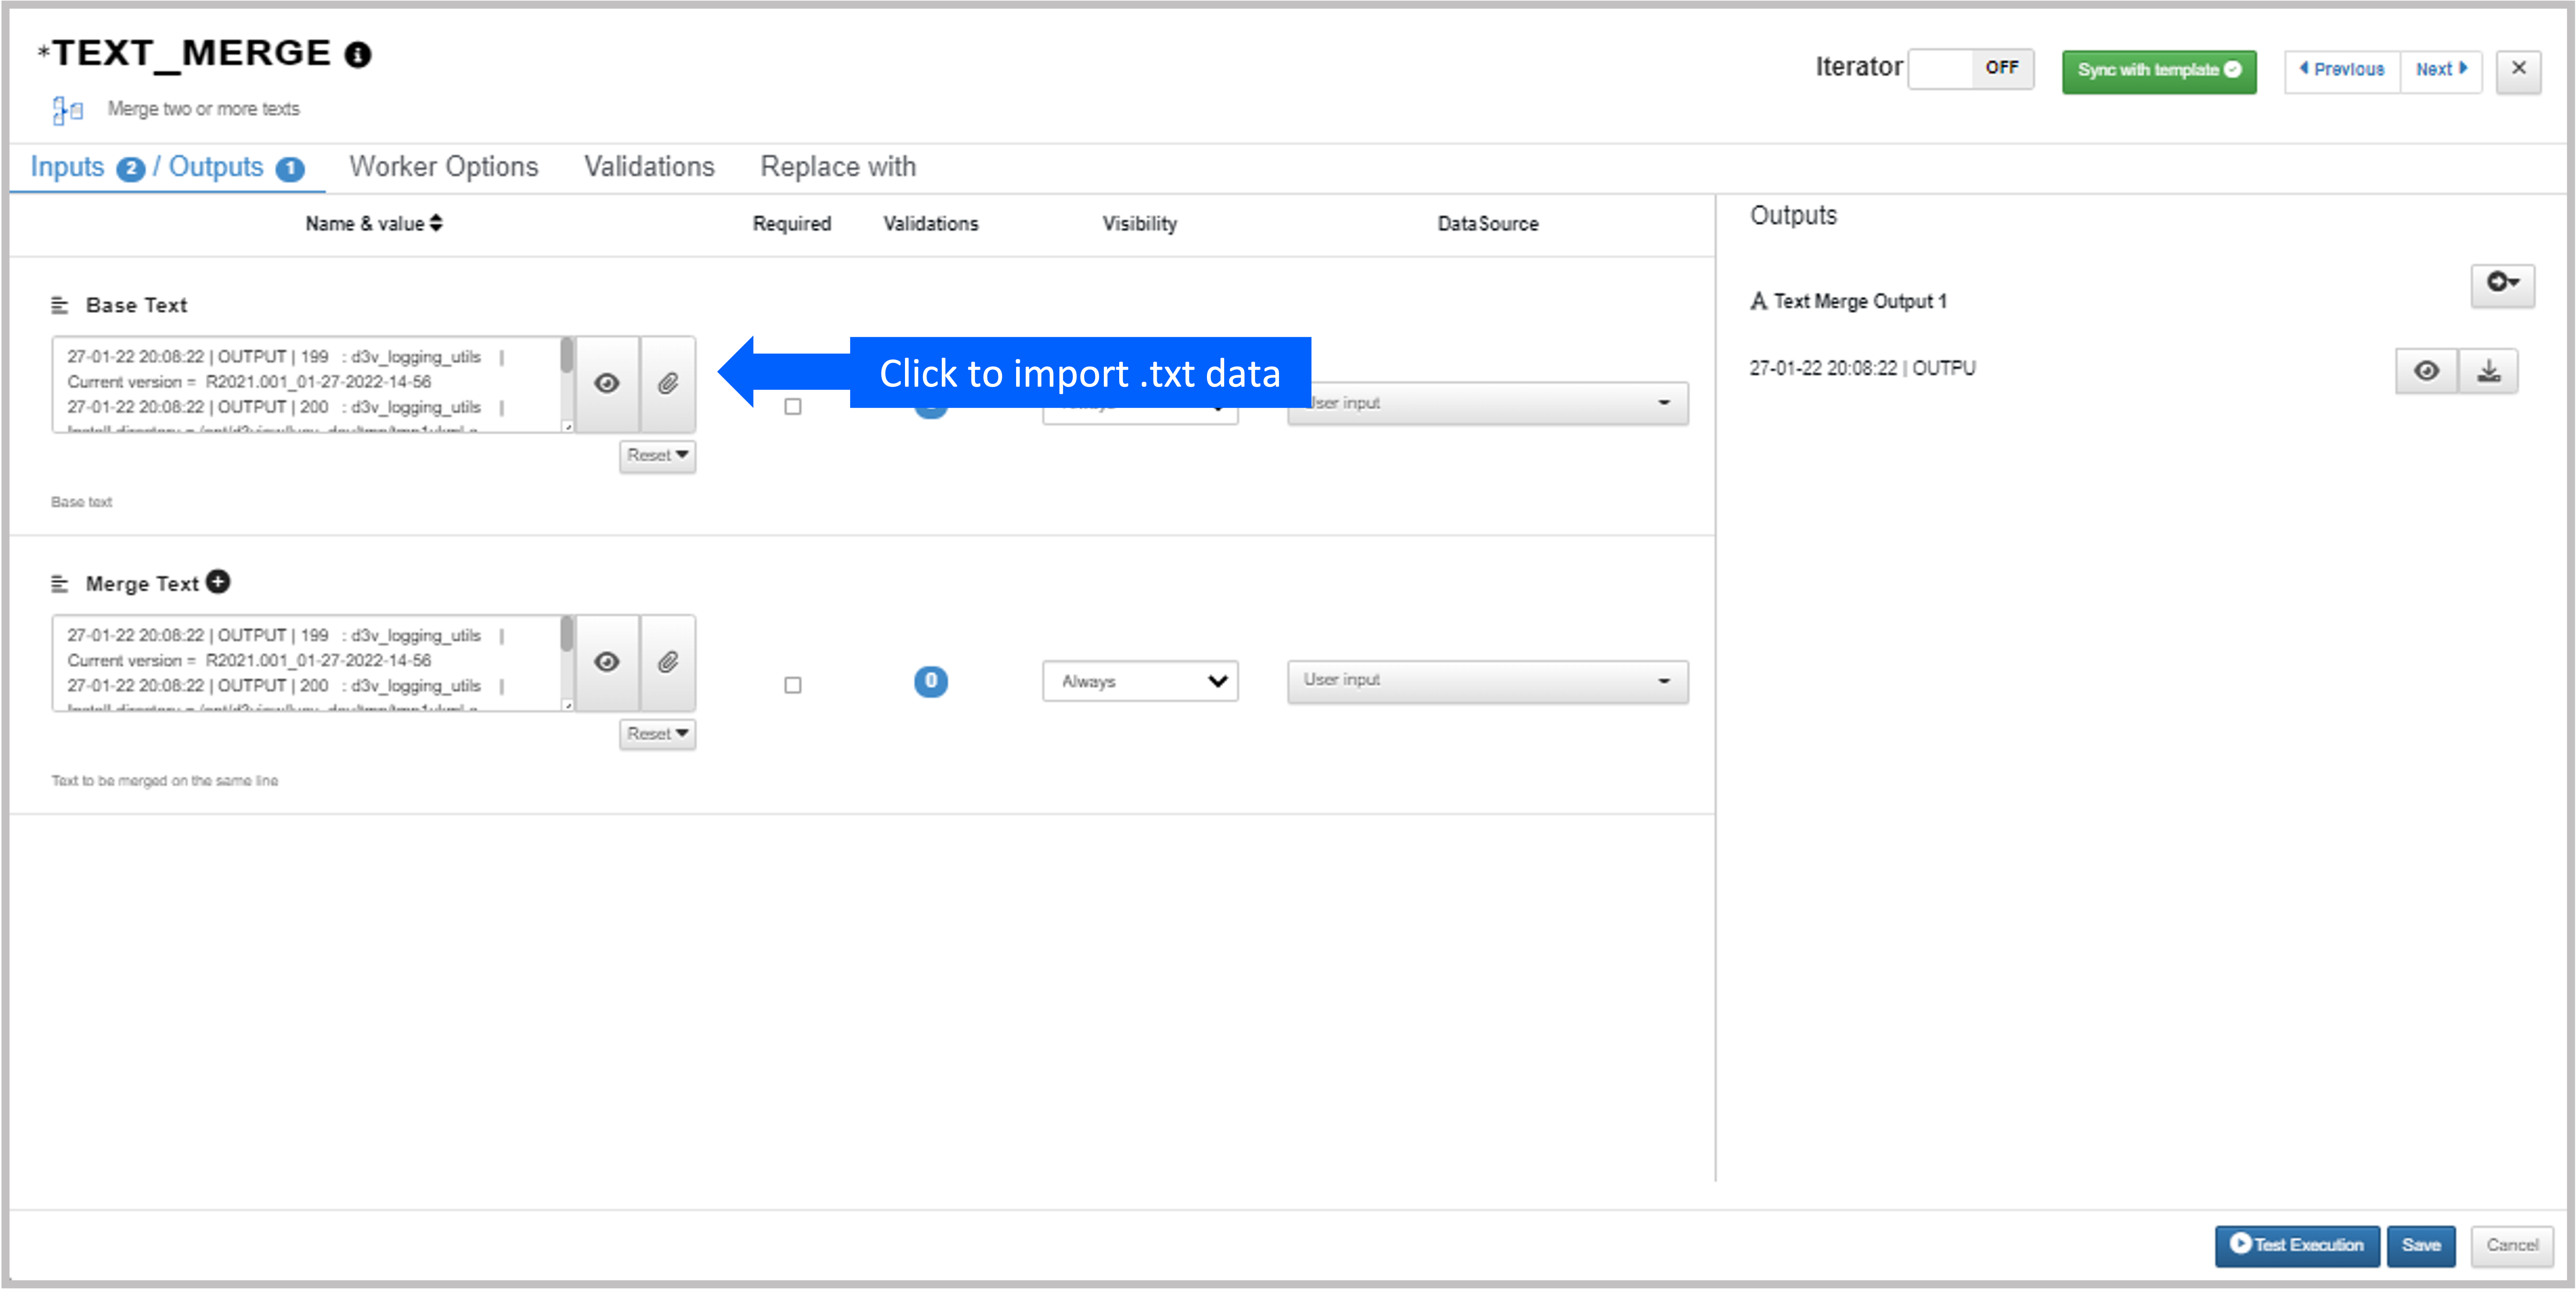
Figure 13: Generic Parser Text Upload
7.6. |upload| Import Workflow Files
You can import files from your computer to help create your workflow. Supported workflow files will have the extension .JSON if unpackaged or .D3ZIP if packaged with input data. (Learn how to export your workflow here.
Click on the import button at the top left, and choose a file from your computer. In the example below, a .D3ZIP file is imported.
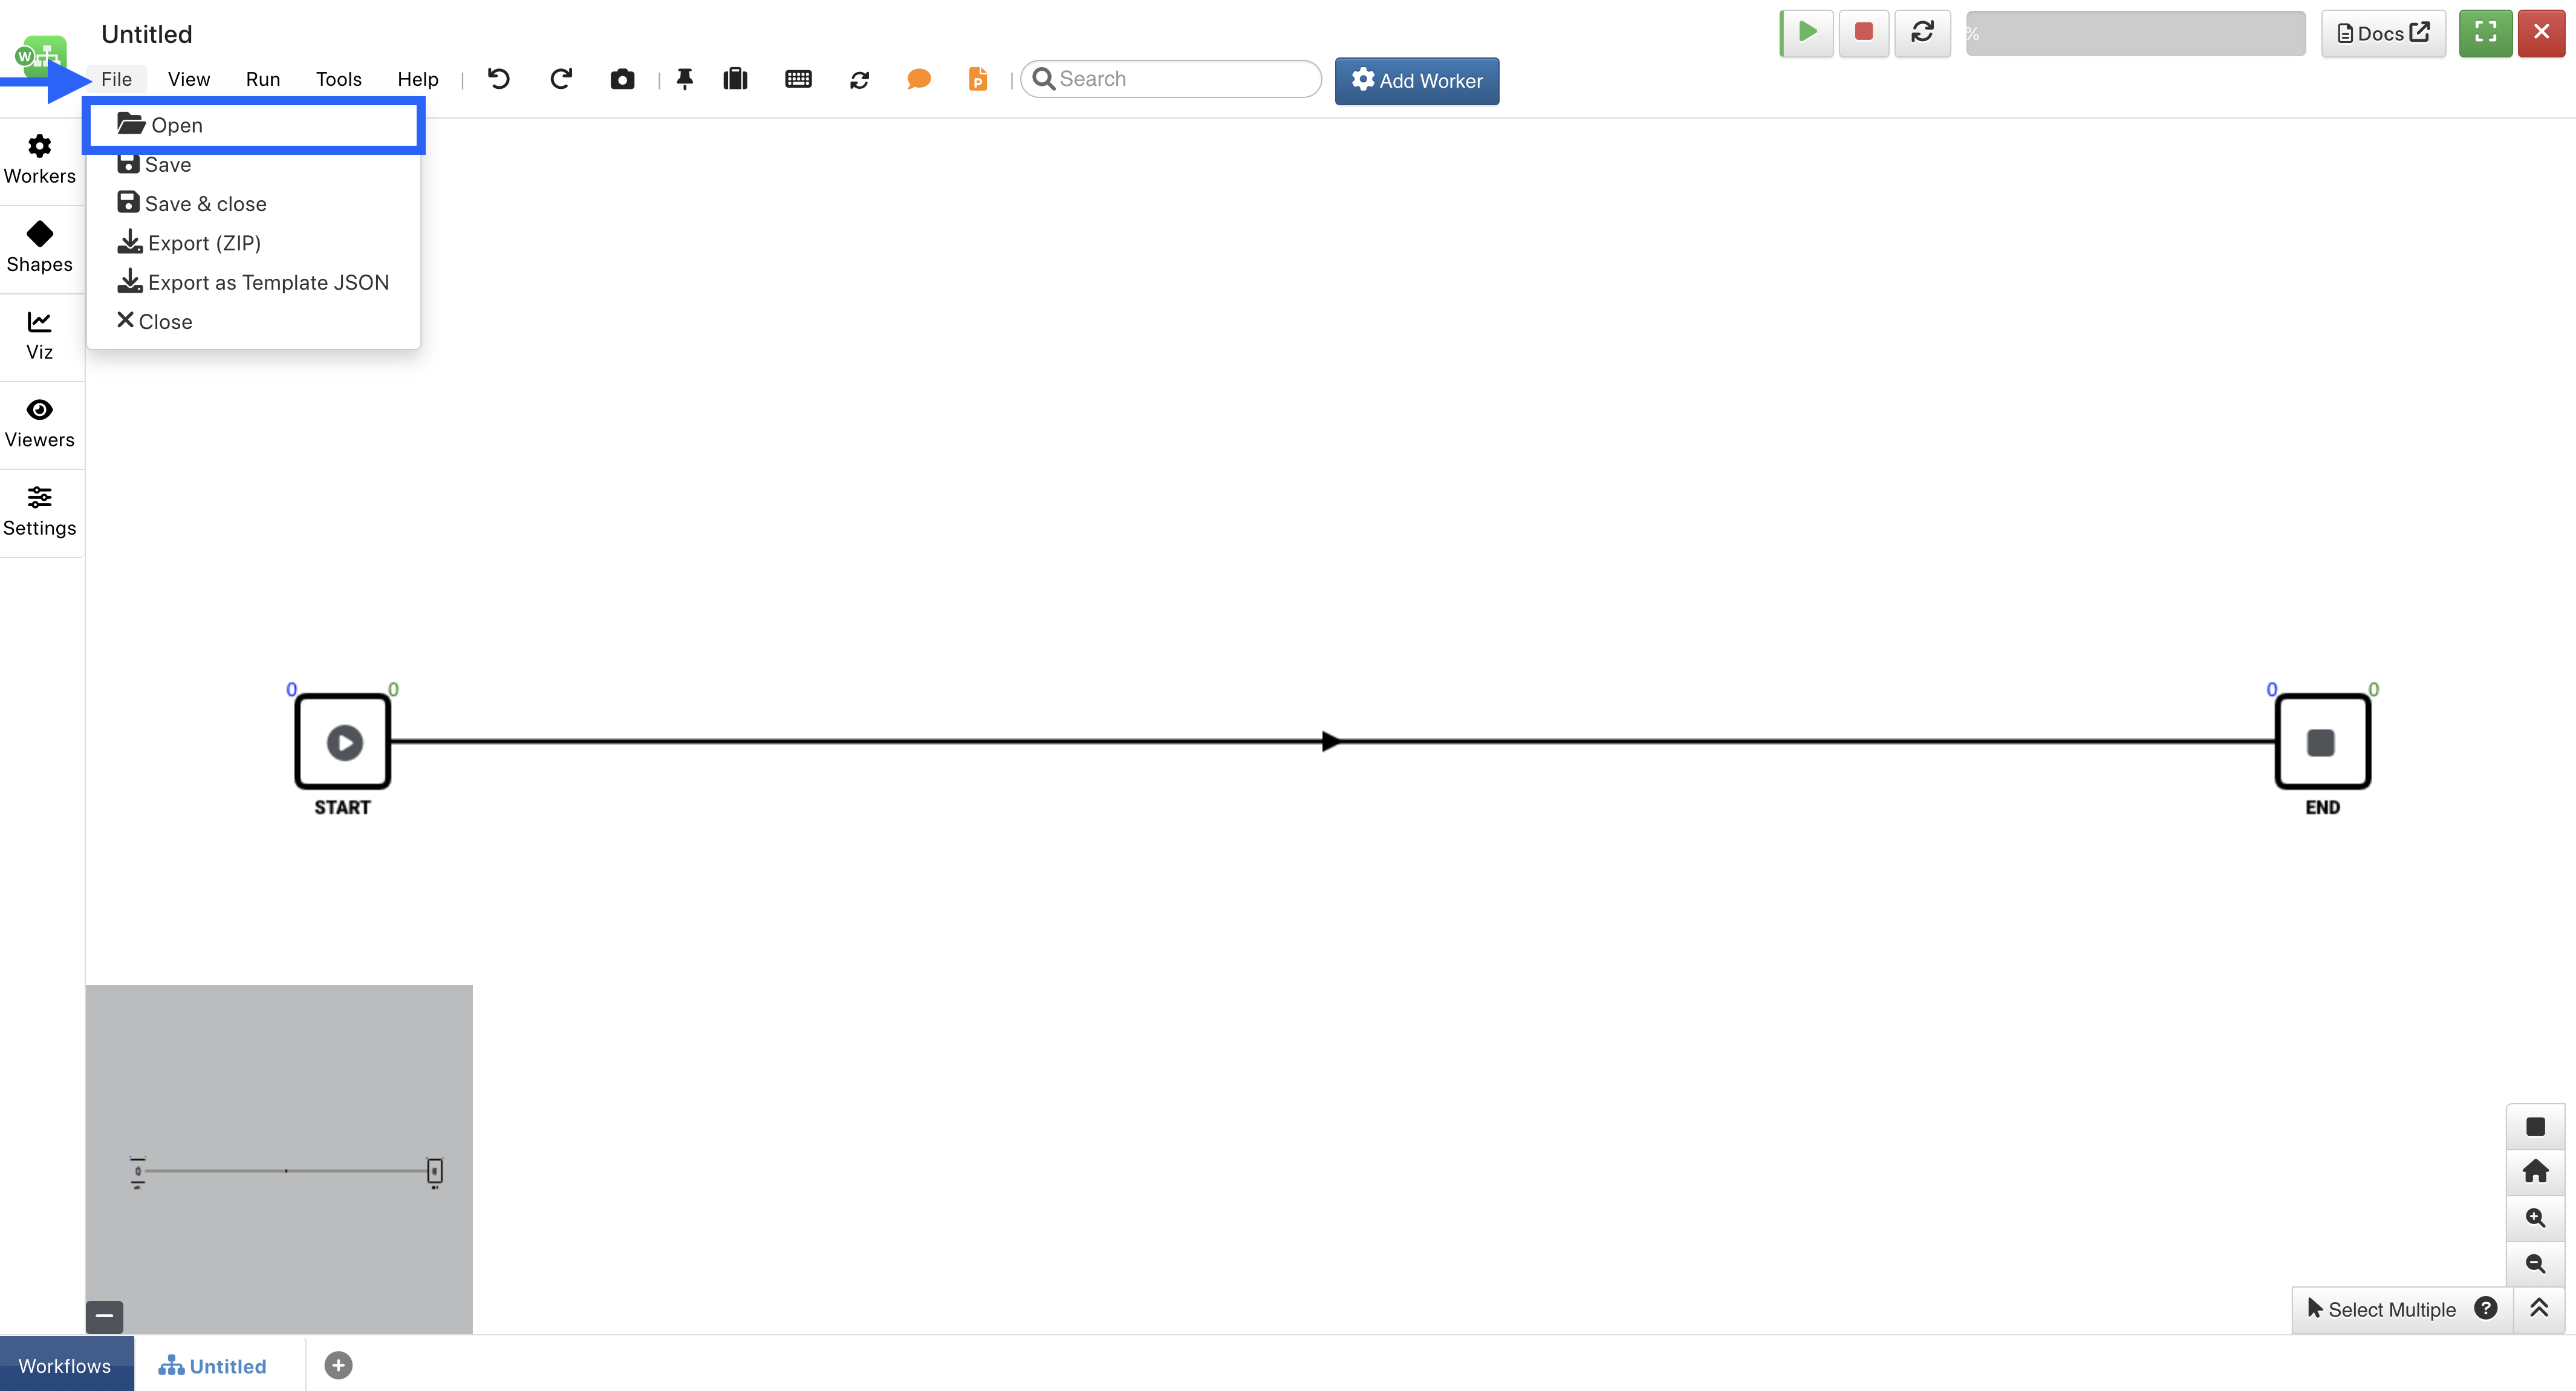
Figure 14: Import a JSON File as a Workflow
If you already have a workflow open and want to import a local one, you can choose to replace your current workflow with the uploaded one or merge with it.

Figure 15: Imported Workflow
After choosing to merge or replace, your imported workflow should appear on your Workflow Timeline as shown here:
Figure 16: Imported Workflow
Here is a video tutorial on how to import a worker file.
7.7. |table| Using Datasets
We can upload datasets into our START worker and select specific rows/columns to add into other workers.
|plus| Add Dataset in START Worker
Under the START worker, we’ll drag-and-drop the dataset (1) input into the form-builder. Click on Extract (2) to upload an excel-based file.
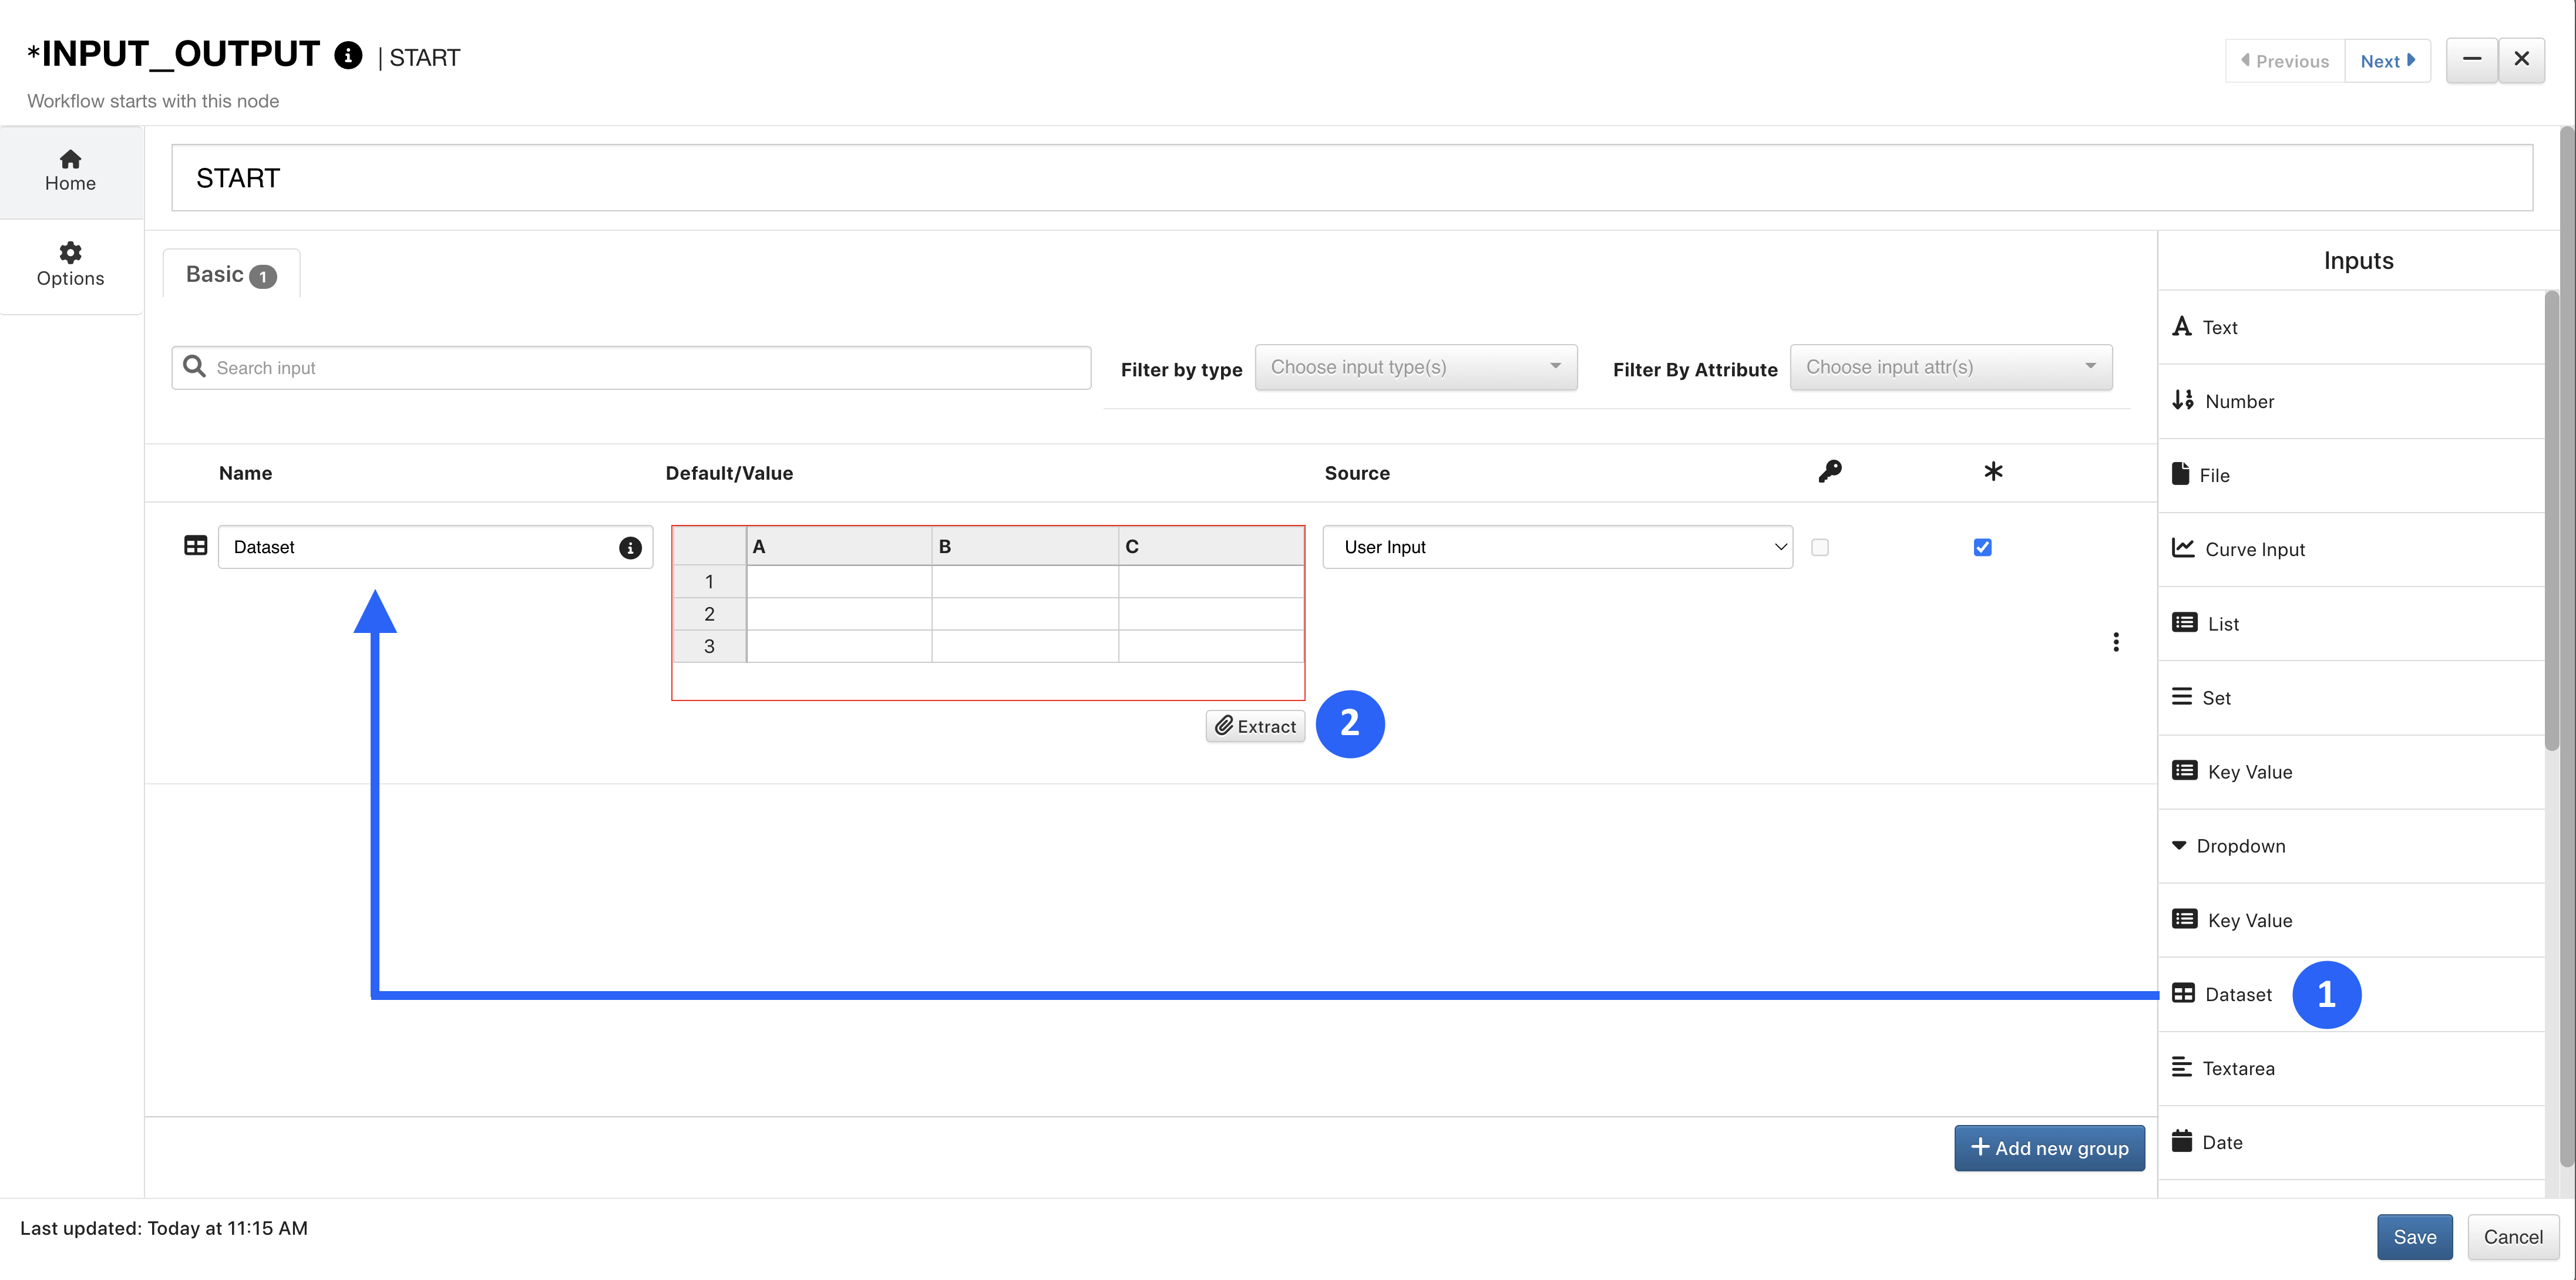
Figure 17: START Worker Add Dataset Input
The file will open in the Excel Parser for us to select which data to include. We can check Select All to include the whole dataset.
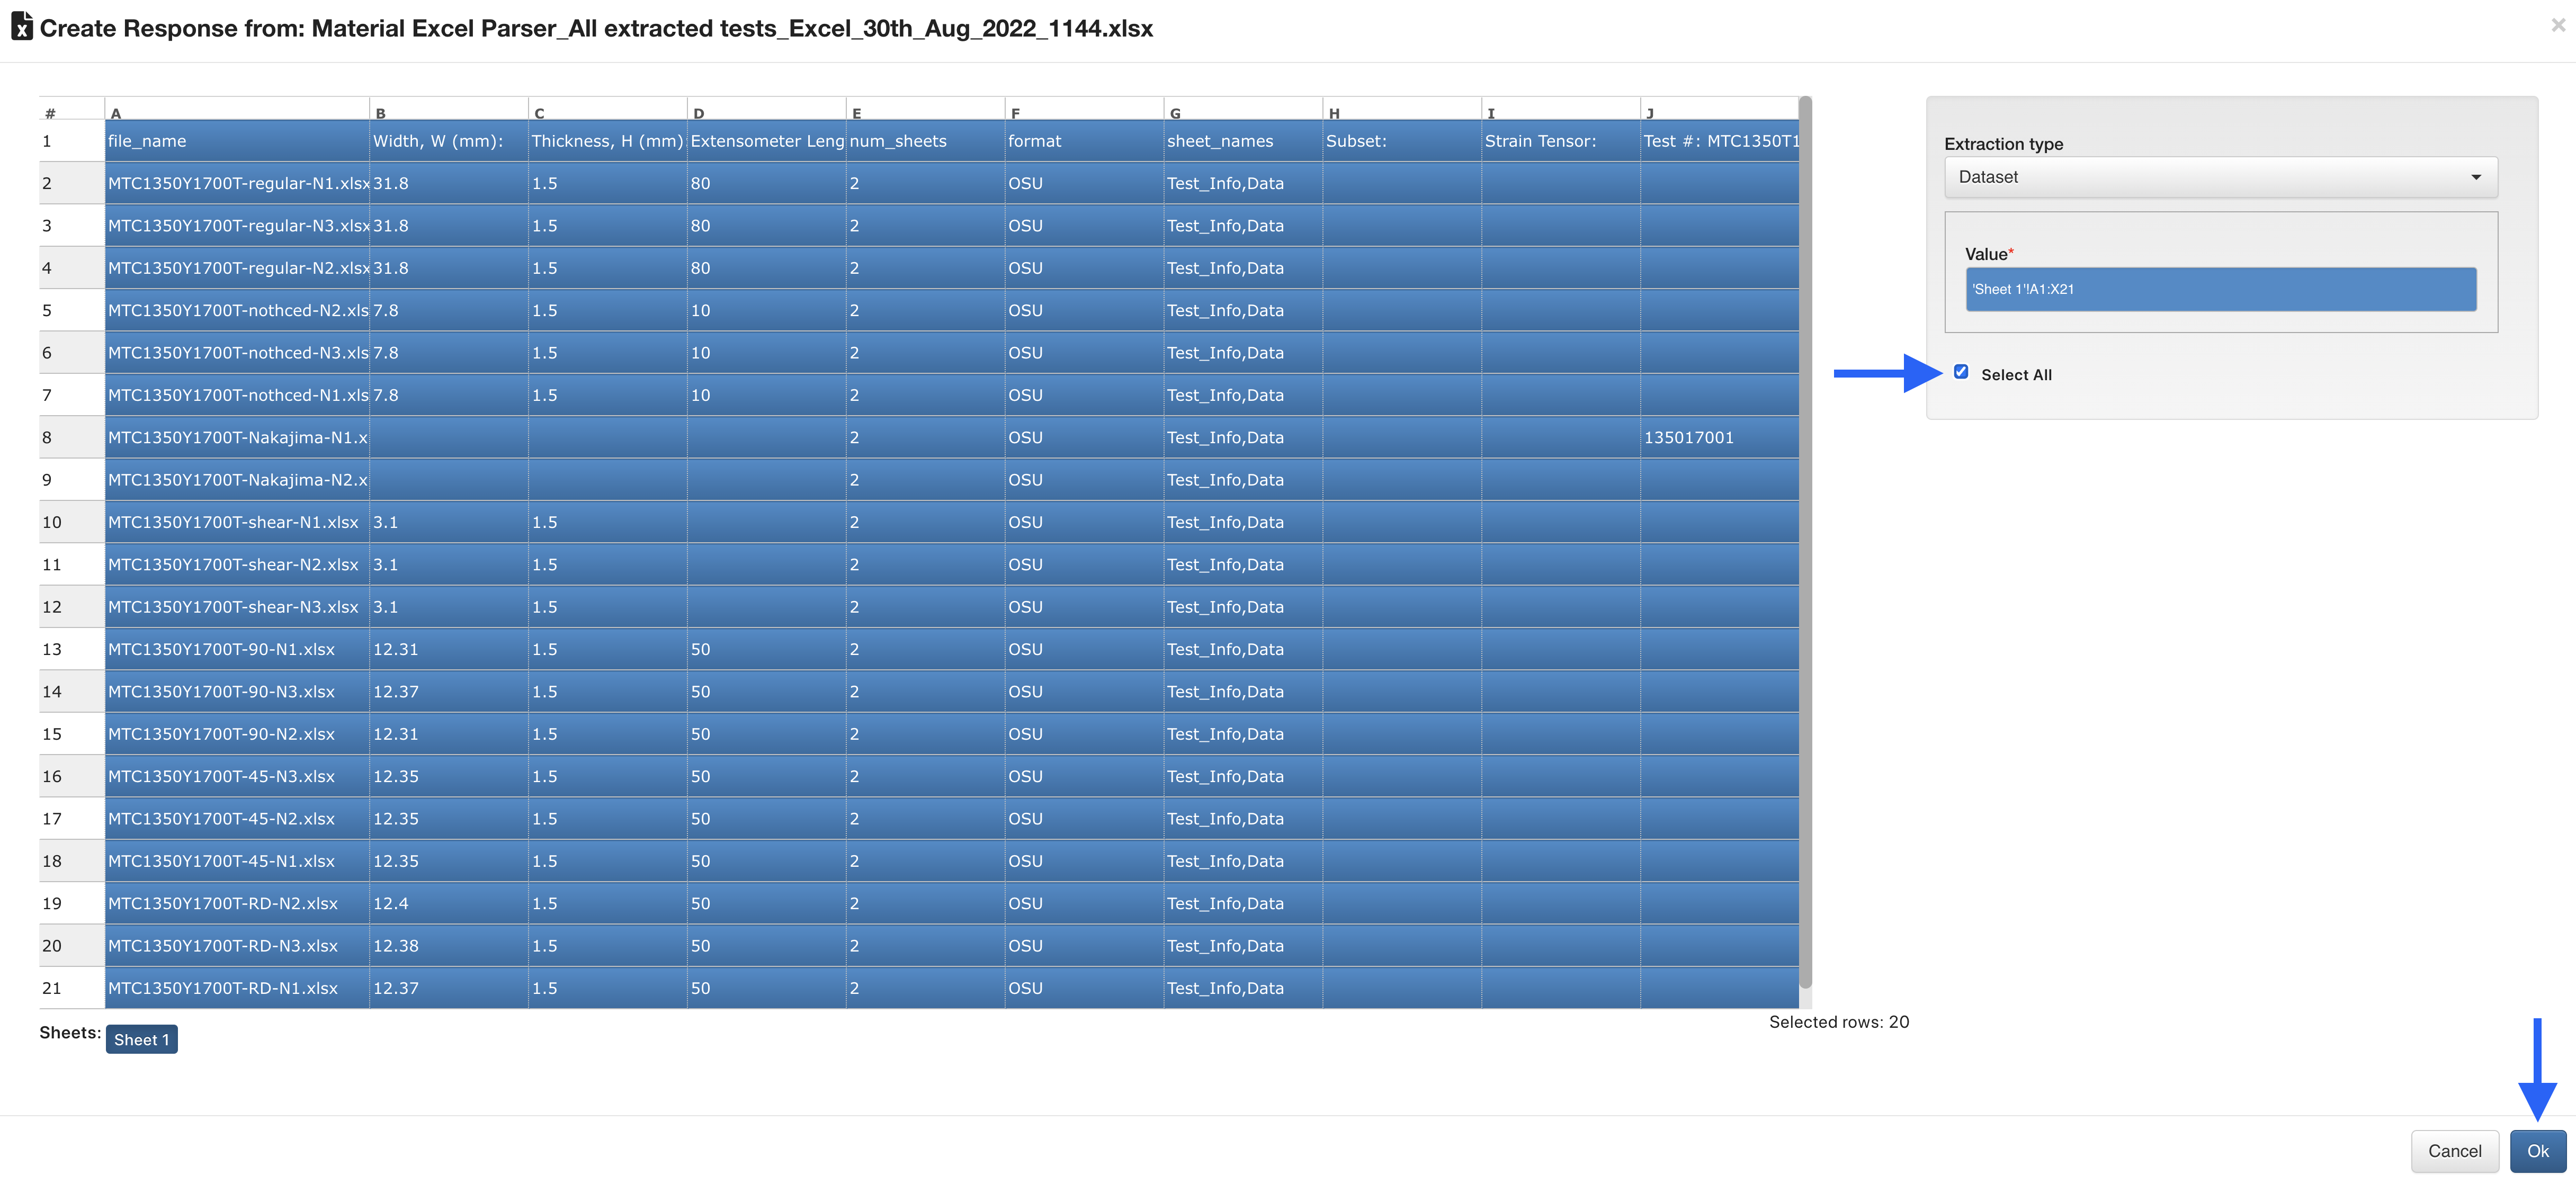
Figure 18: Select All Data in Excel Parser
Save the START worker to finish.
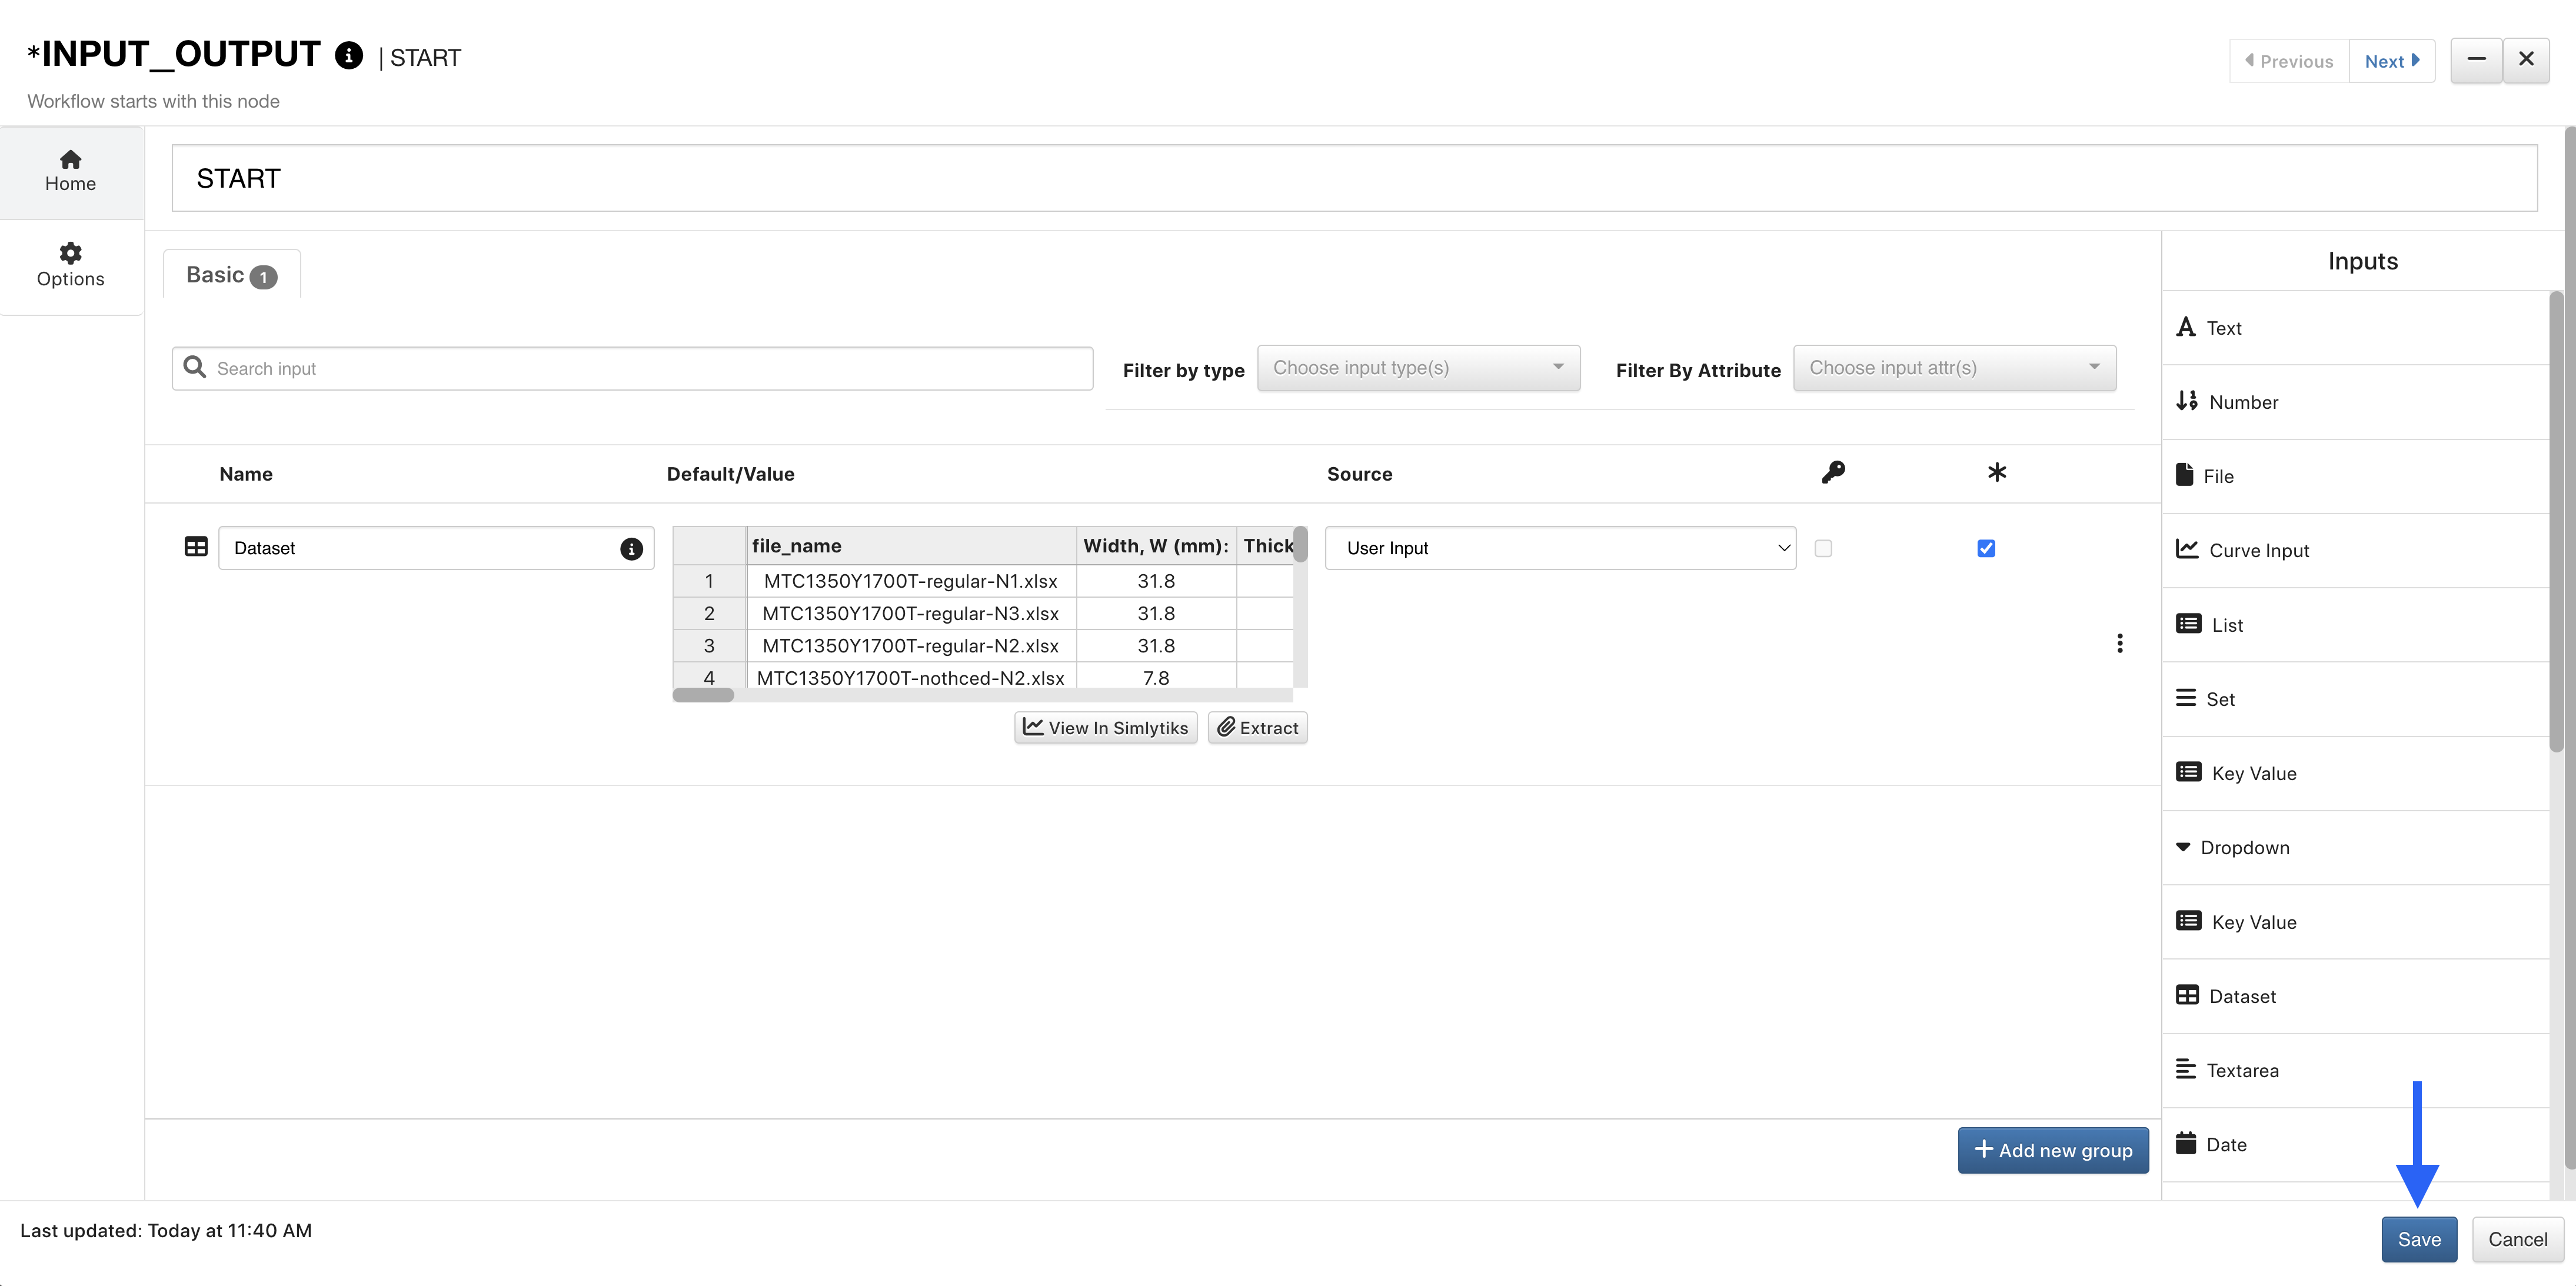
Figure 19: Save START Worker
|plus| Add Dataset Rows to a Worker
Adding dataset rows/columns to a worker requires us to add it to the canvas and open it for configuration. Learn how to do that under Building and Configuring.
After we open our worker, we can add a dataset row/column by choosing Previous Workers > START > Dataset Input > Row & Column under the DataSource. It’s important to note we can only add dataset rows/columns to certain workers, mainly curve(s).
Figure 20: Row & Column Selection for Curve Worker Data Source
Once we choose the Row & Column option as the selection type, a new window will pop up for us to choose our row/column. Here, we’ve chosen the curve highlighted from the Time vs Time column.
Figure 21: Choose Row & Column
After clicking Apply, we’ll see our curve input has been added from the dataset. The row and column will be shown, and we can also add a value for our color by. Finish by clicking Save.
Figure 22: Curve Input From Dataset
Workers can be clone with edges in workflows. Right context menu options are available for the edges of the worker.
Clone with edges