35. Publish, merge and sync Physicaltest responses
This page provides a brief introduction on how to publish, merge tests and sync time-histories
35.1. Overview
- Create a workflow and add the workers
- physicaltest_import_bms_data
- physicaltest_map_responses
- physicaltest_merge_responses
- physicaltest_sync_timehistories
Configurate each worker
Create the workflow
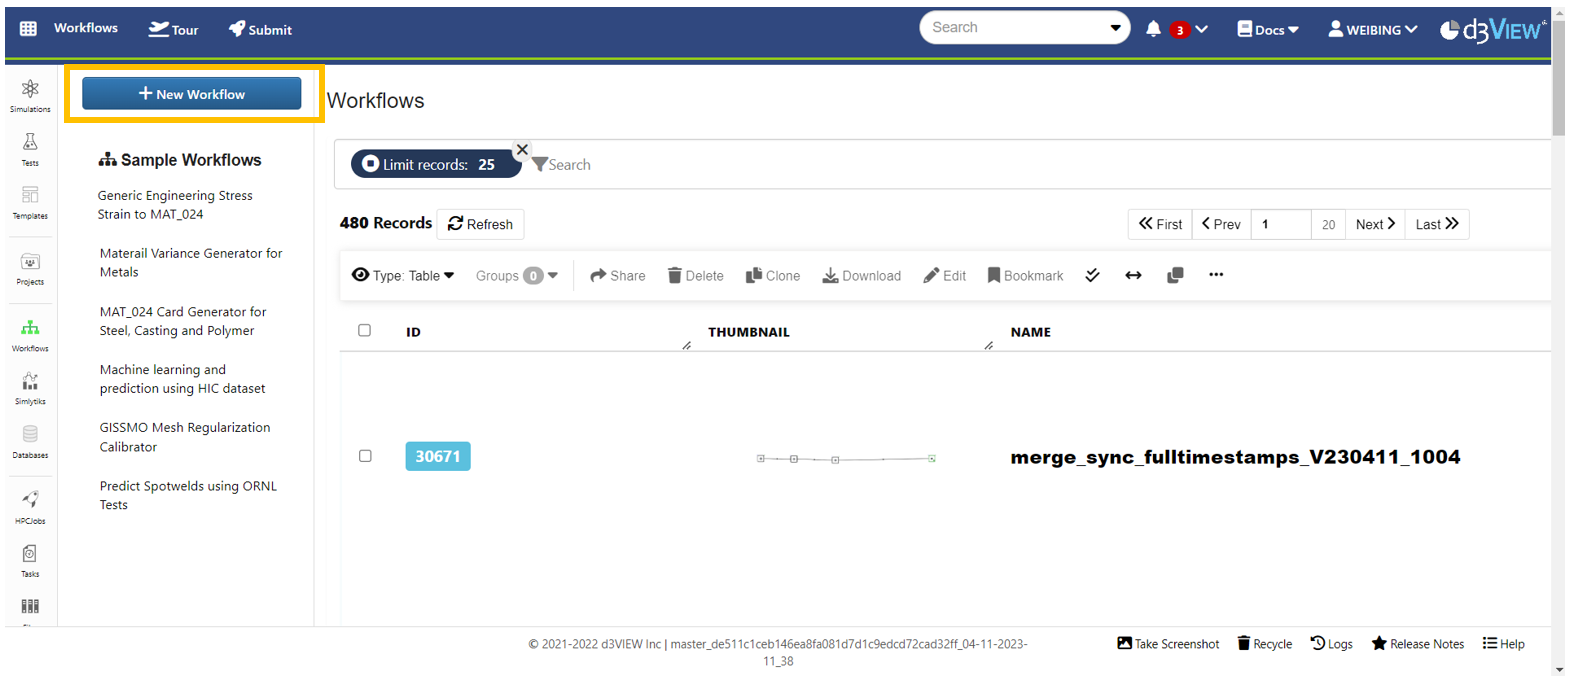
Create a new workflow
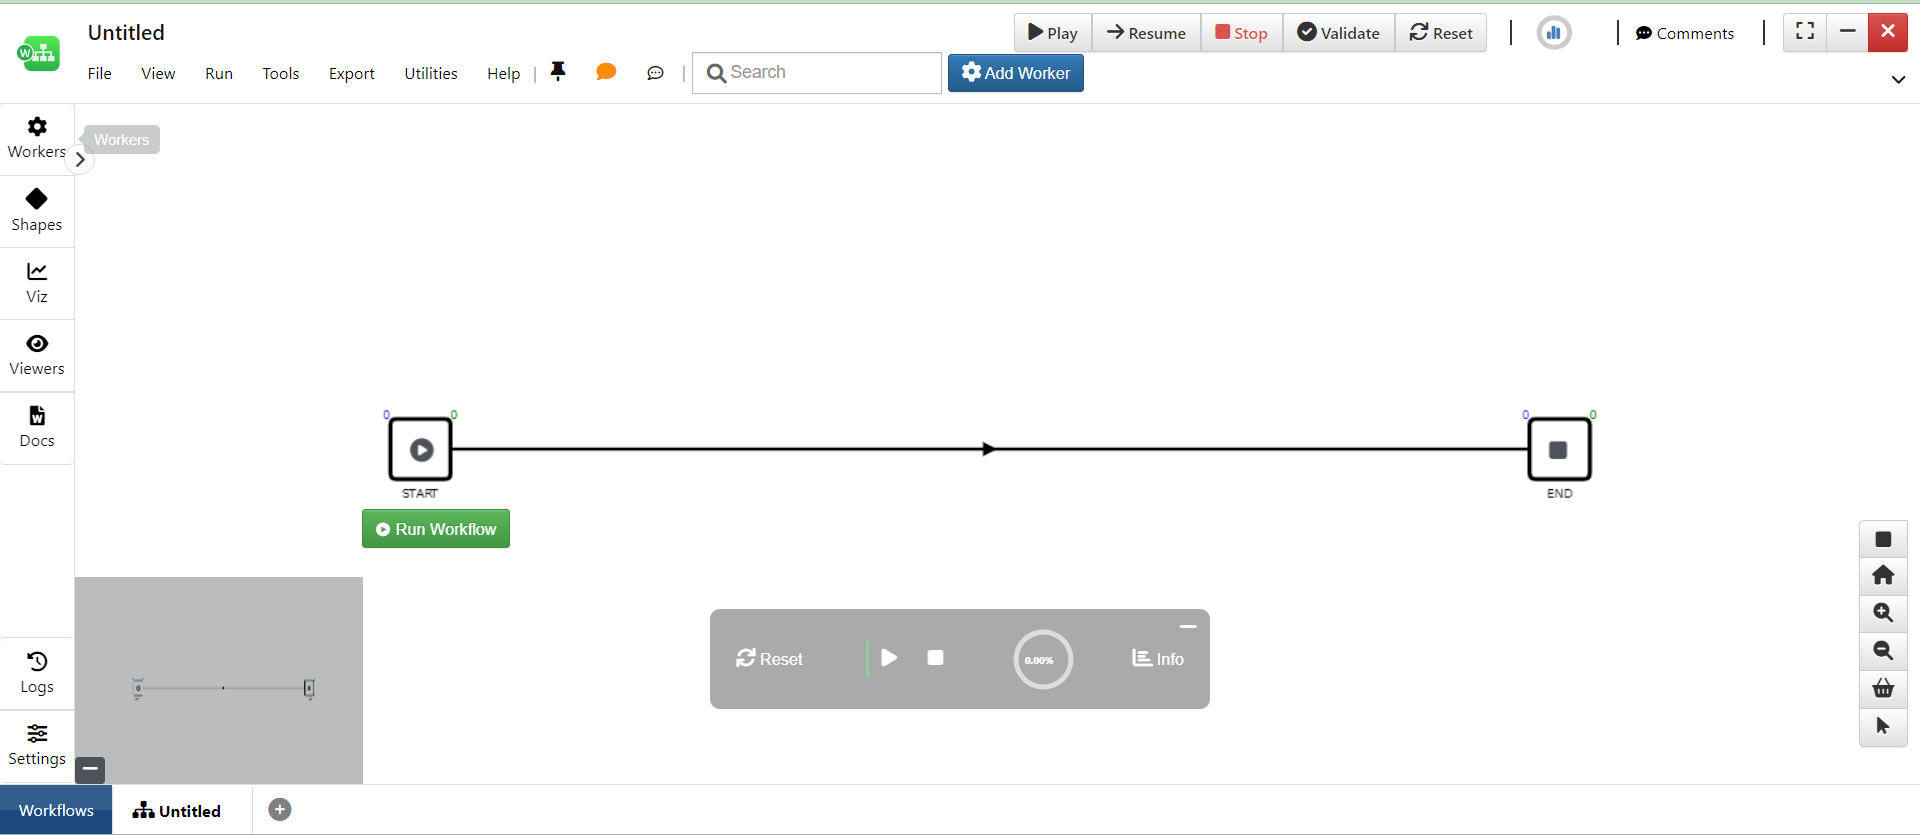
A newly created workflow
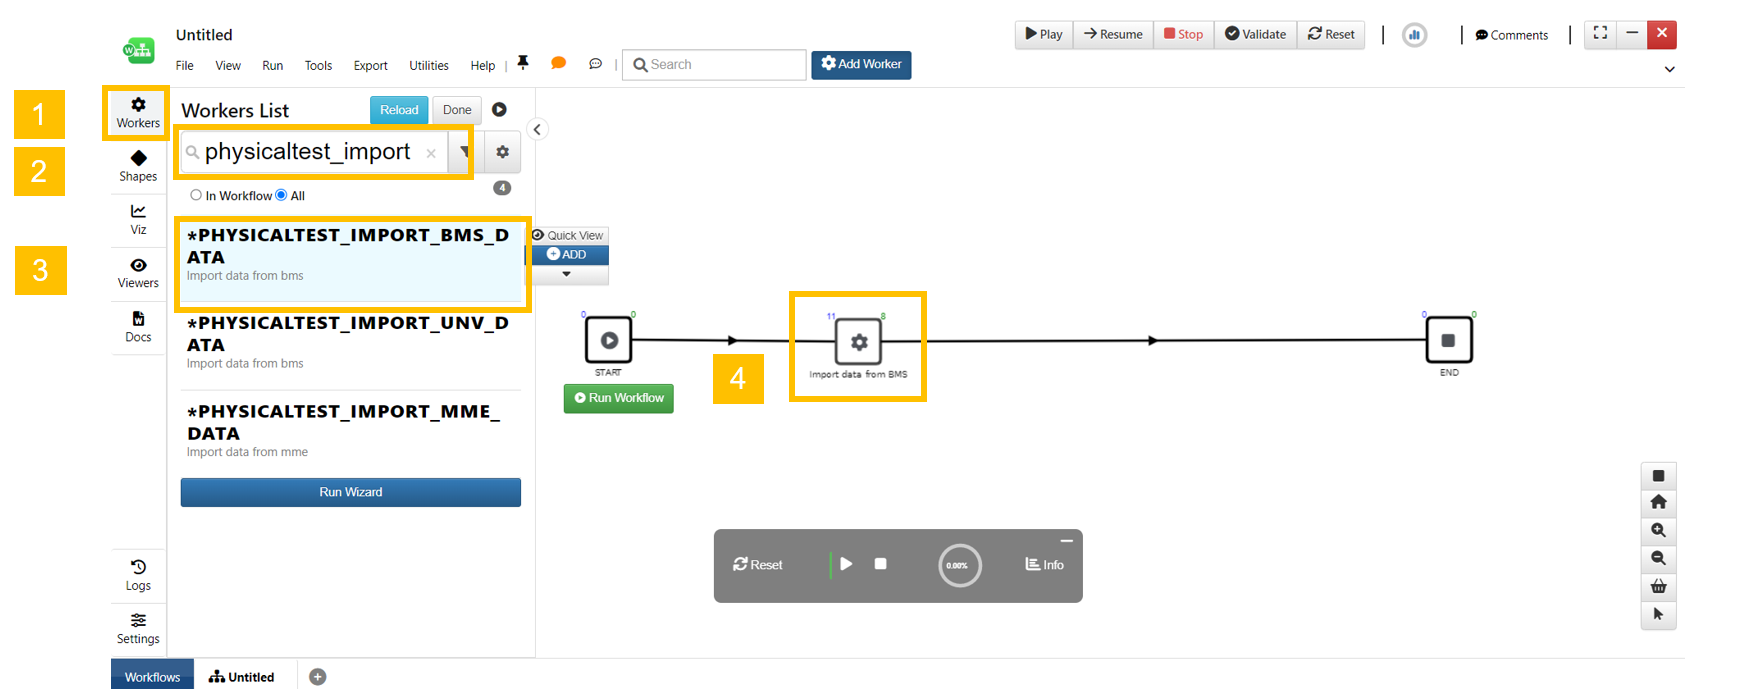
- Click on the “Workers” icon to see the list of workers.
- In the search bar, enter the worker’s name.
- Drag the worker and drop it to canvas on the edge
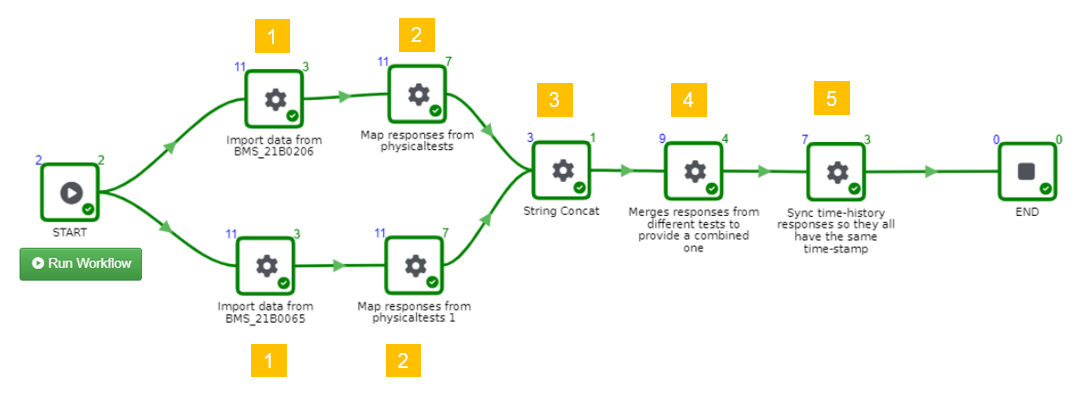
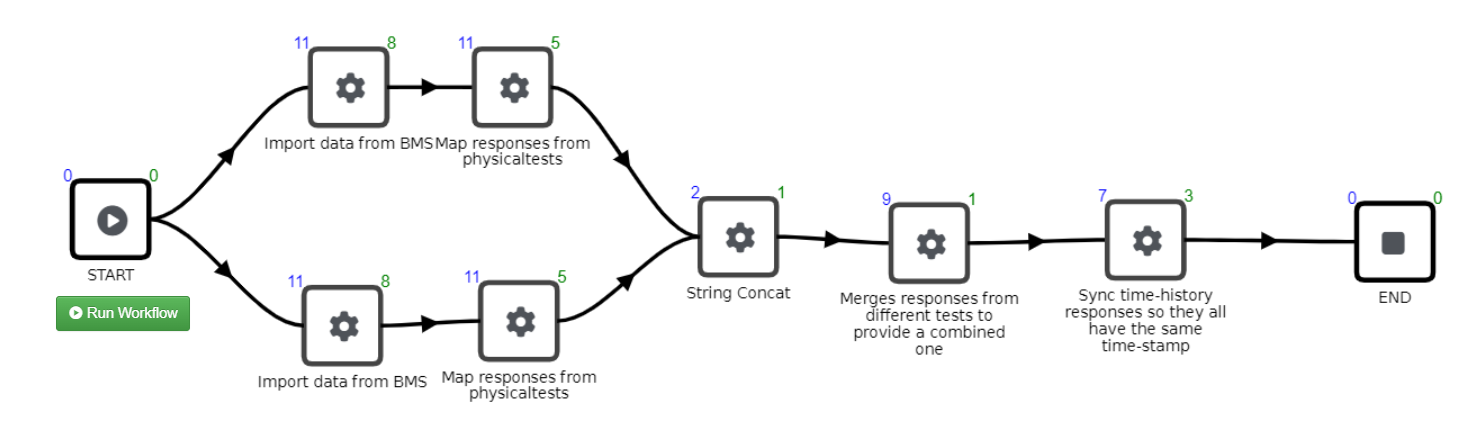
Add the required workers
- physicaltest_import_bms_data
- physicaltest_map_responses
- string_concat
- physicaltest_merge_responses
- physicaltest_sync_timehistories
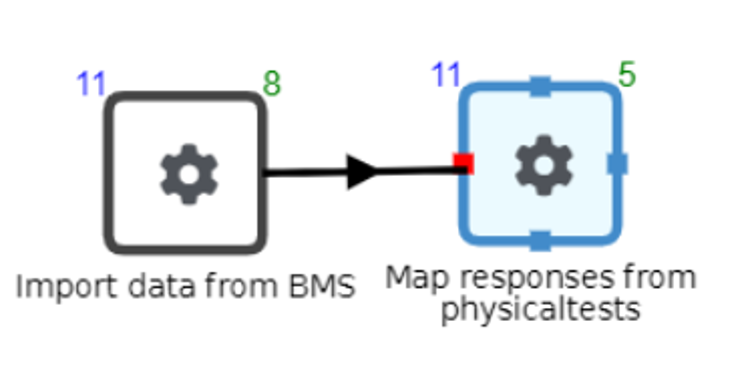
To connect two workers, move the cursor to the side of the first worker until a red square is visible, left click to activate the edge. Move the cursor to the side of the second worker and left click when a red square shows up.
Workers configuration
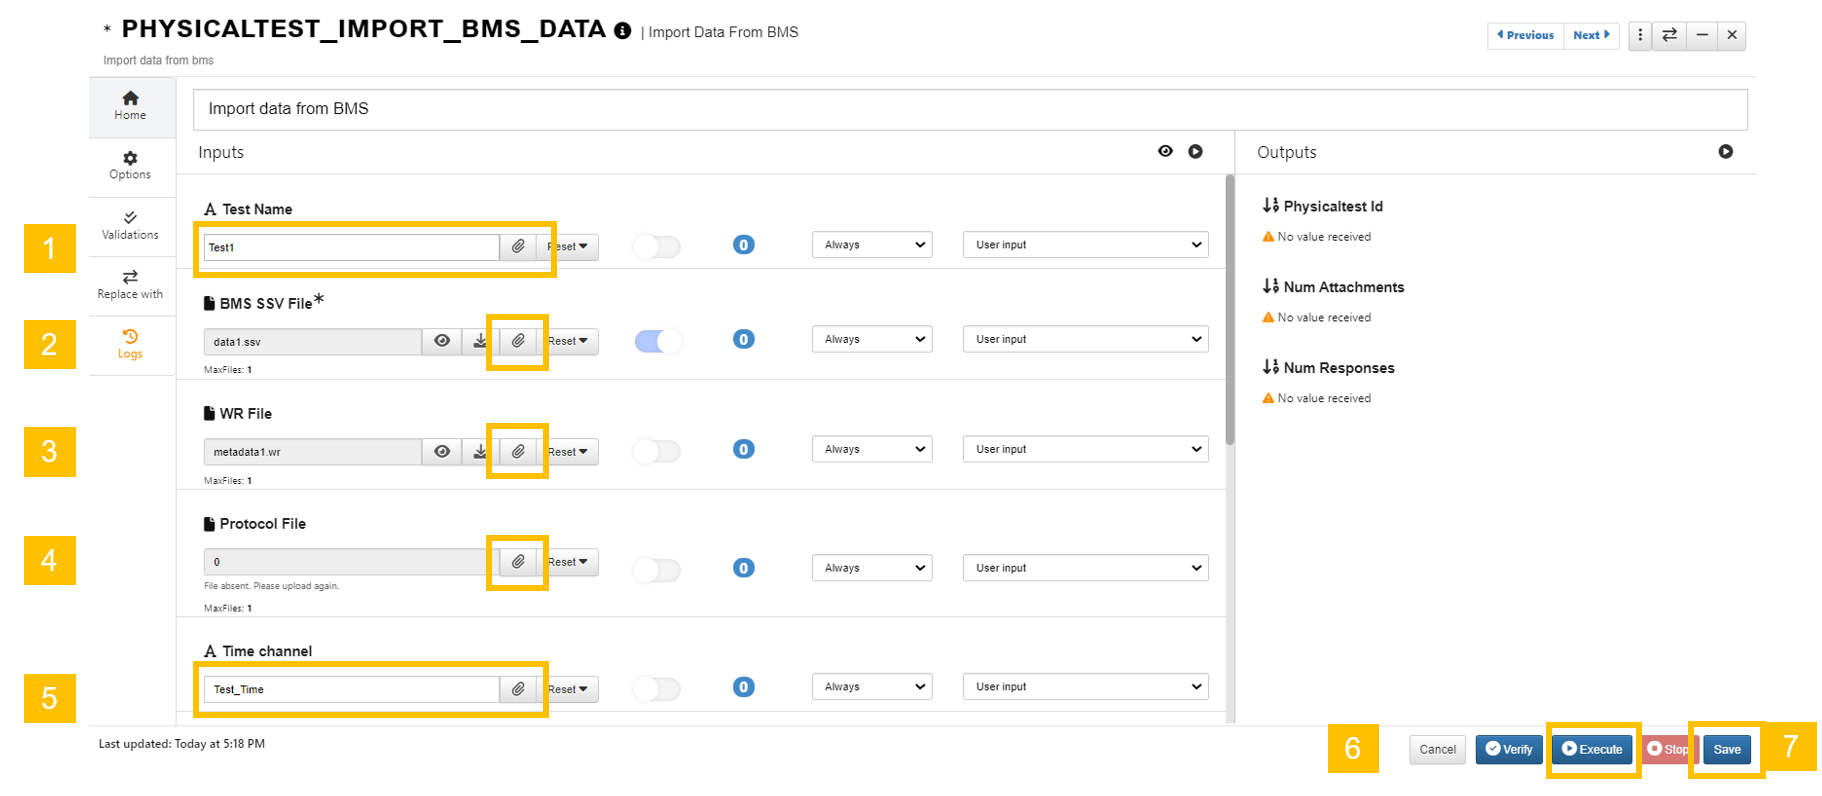
- Enter a name for the new test record to be created
- Click the icon to upload an ssv file that contains test data
- Click the icon to upload a WR file that contains the meta data
- Click the icon to upload a Protocal file if necessary
- Enter the correct name for the time channel (column name from the data file that represent time stamps)
- Click “Execute” to test run it.
- Click “Save” after the execution of the worker
The last two steps are needed in order to set up the next worker. Otherwise, we will not have a test ID output.
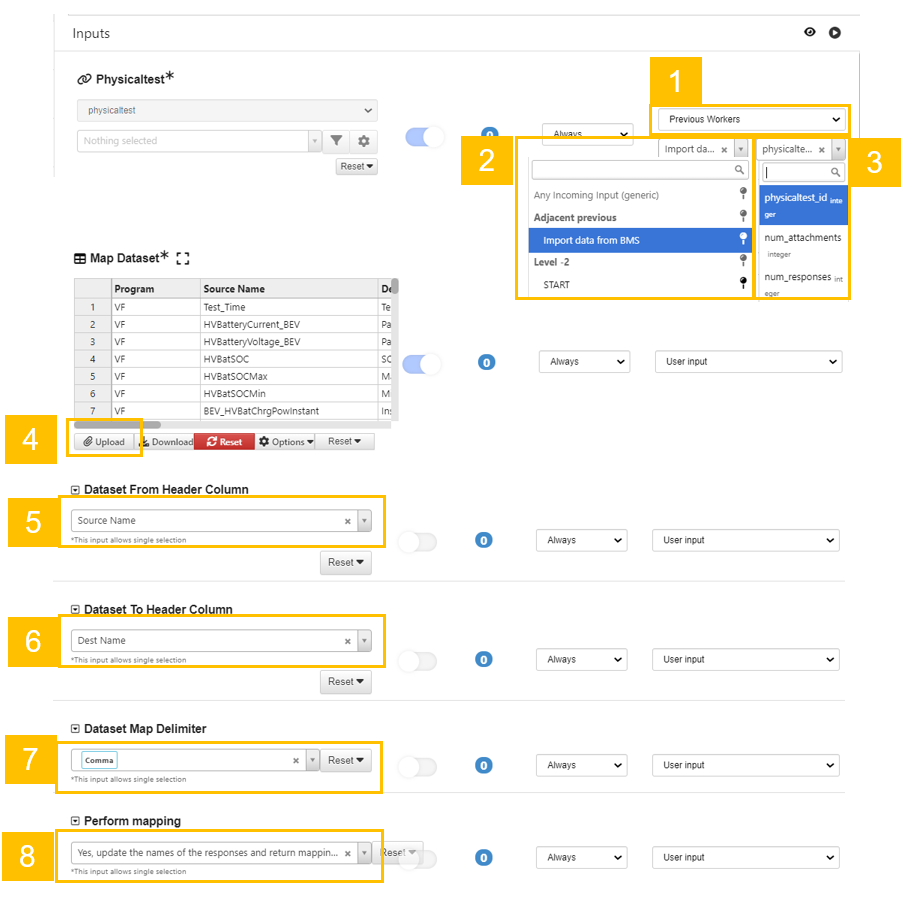
This worker will map the response names to new names as provided from the “Map Dataset”.
- Click and choose “Previous Workers”
- Click and select the previous worker “Import data from BMS”
- Click and select “physicaltest_id” (if the previous worker is not executed and saved, this option will not be available)
- Click “upload” to upload the csv file that contains at least two columns, one for response names to be mapped, and the other for the new names for these responses
- Click to select the column name that contains the responses names to be mapped
- Click to select the column name that contains the new response names
- If it is a csv file, choose “Comma”
- Click and choose “Yes”
- Execute and save the worker
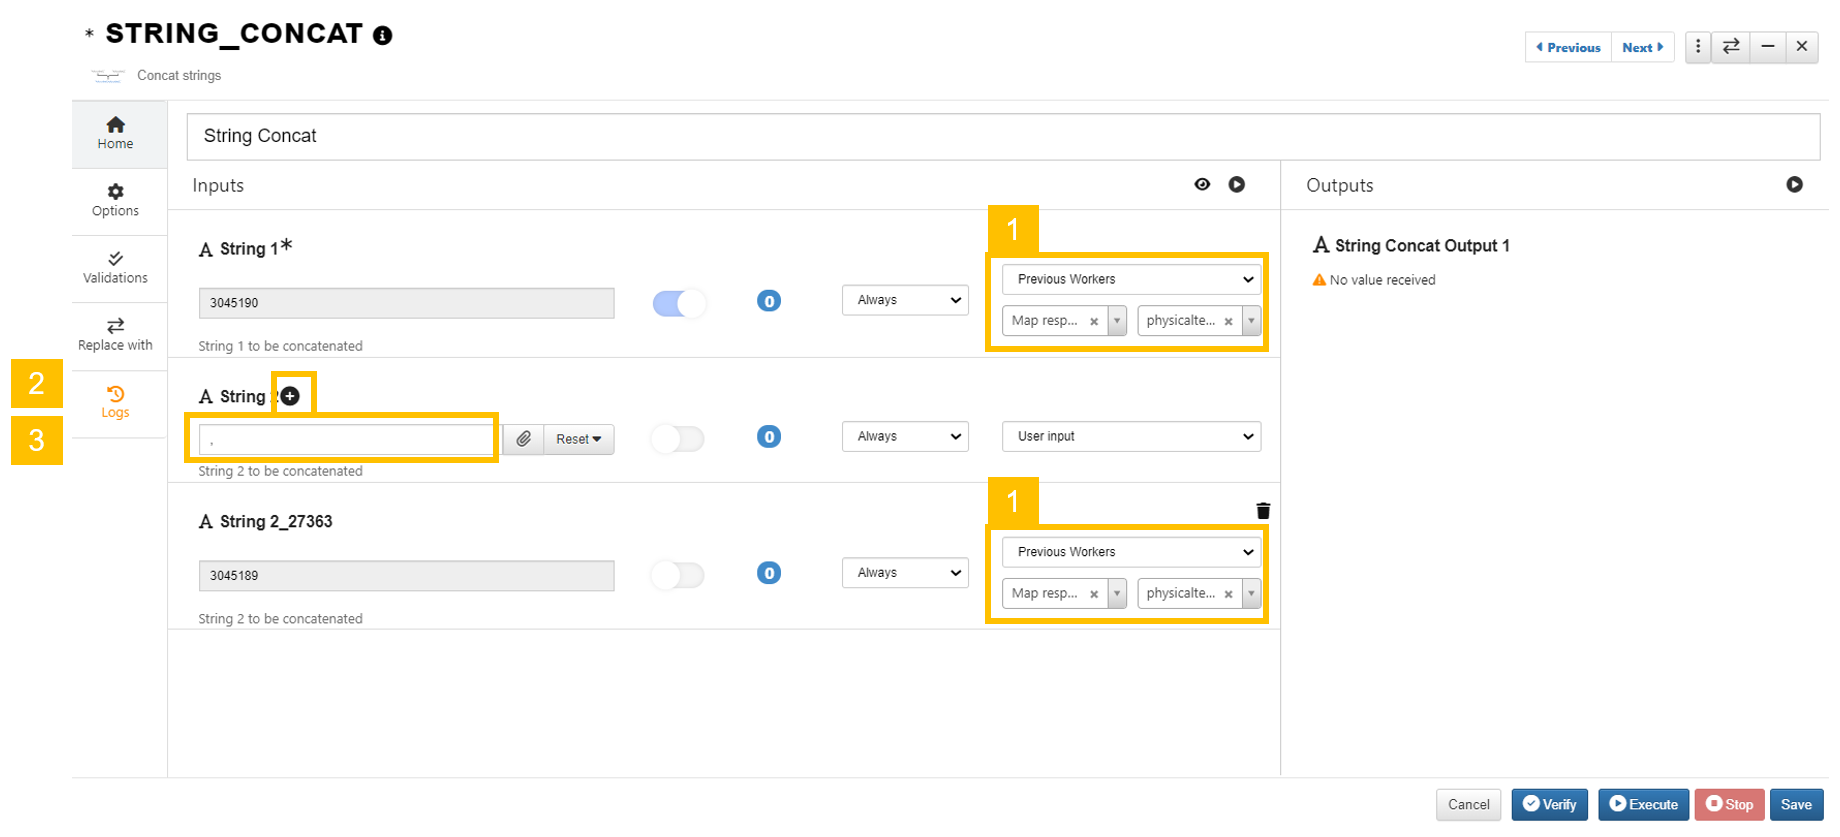
This worker paste two test IDs together to be used as one input for the next worker. The order of the test ID selected from step 1 will be used for merging the responses in the next worker.
- Click to select “physicaltest_id” from previous worker output
- Click the “add” icon to add another input
- Enter one comma (“,”)
- Save
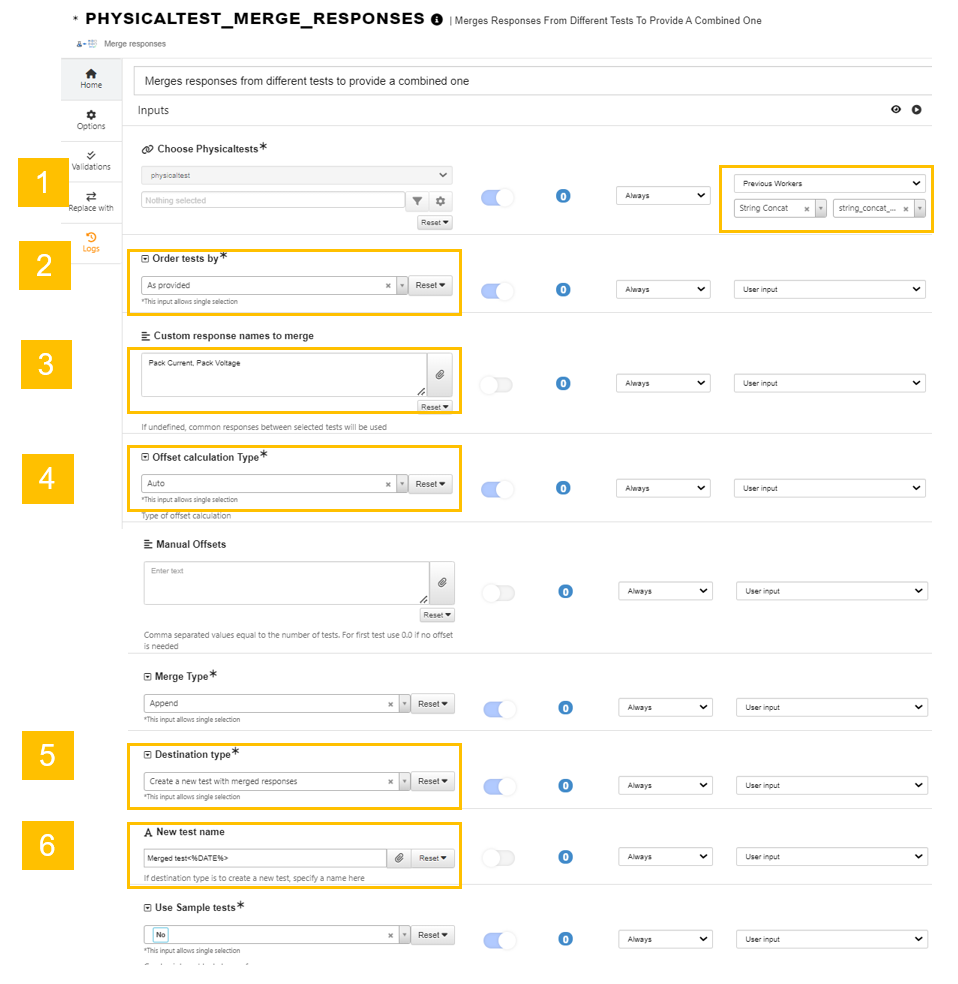
It merges the specified responses from the specified tests and create a new test record with the merged responses.
- Select the output from the previous (string_concat) worker
- Click and select “As provided”
- Type the response names to be merged, separated by comma
- Choose offset calculation type. If “Manual”, then the offset values need to be provided at the “Manual Offsets” input
- Click and choose “Create a new test”
- Provide a name for the new test record
- Execute and save (Otherwise, we won’t have the test ID to be used for the next worker)
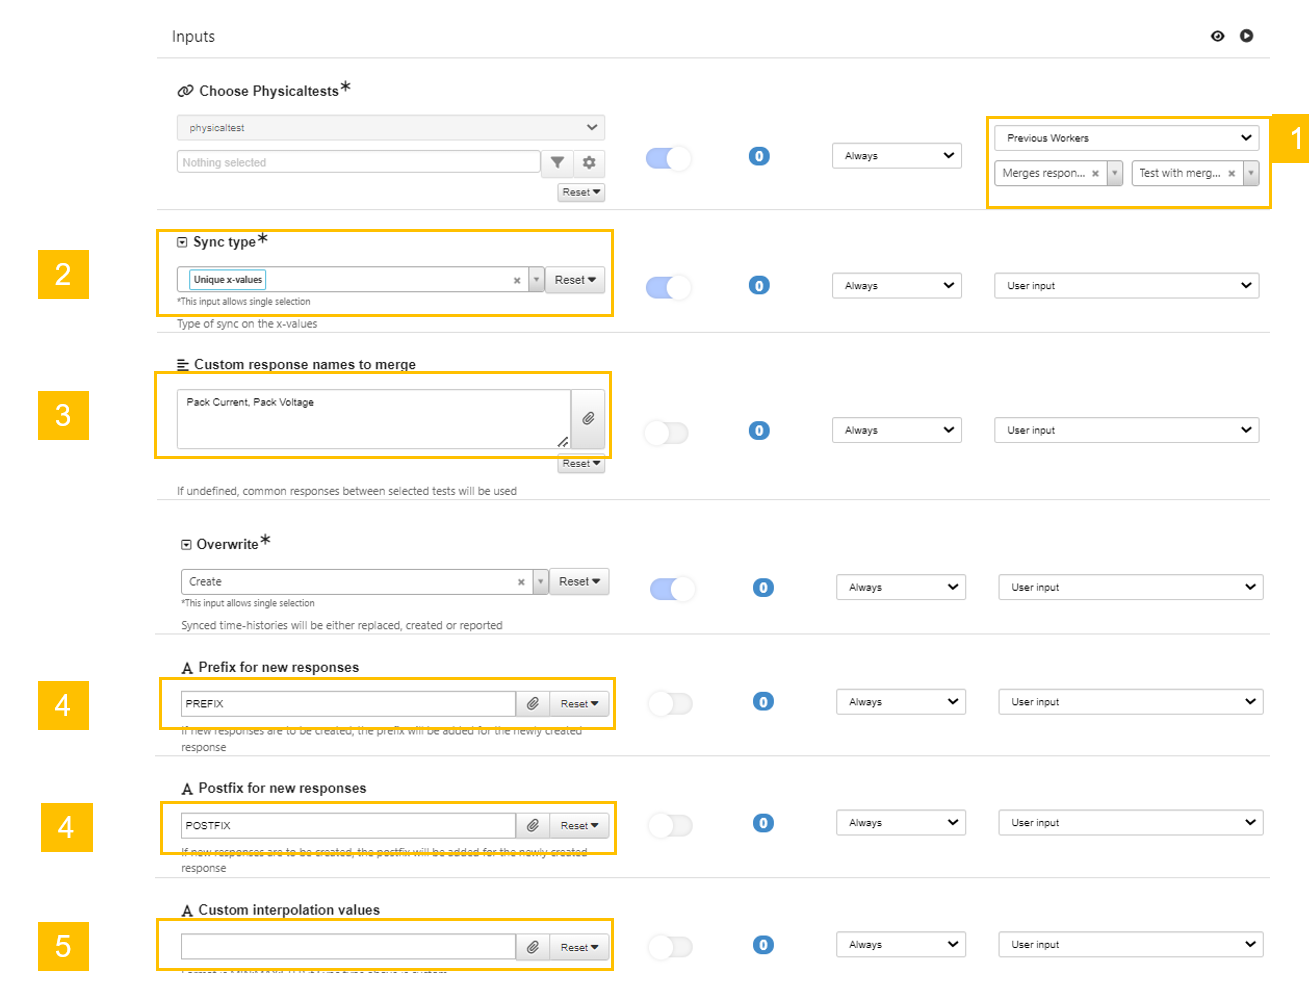
It sync the responses so that they have the same time stamps.
Click and select the output from the previous worker
- Choose one of the sync type
- UNIQUE: collect all unique x values across all selected responses to be used for the time stamps
- LARGEST: choose the largest time step identified from the responses to be used for generating the new time stamps
- SMALLEST: choose the smallest time step identified from the responses to be used for generating the new time stamps
- CUSTOM: use the time stamps specified by the option “Custom Interpolation values”
Provide the response names to be synced
Provide the prefix and postfix for the new responses to be created
If “Custom” is selected for “Sync Type” option, we can provide the time stamps ranges here in the format : “START:END:STEP”
Execute the workflow and view the new tests generated
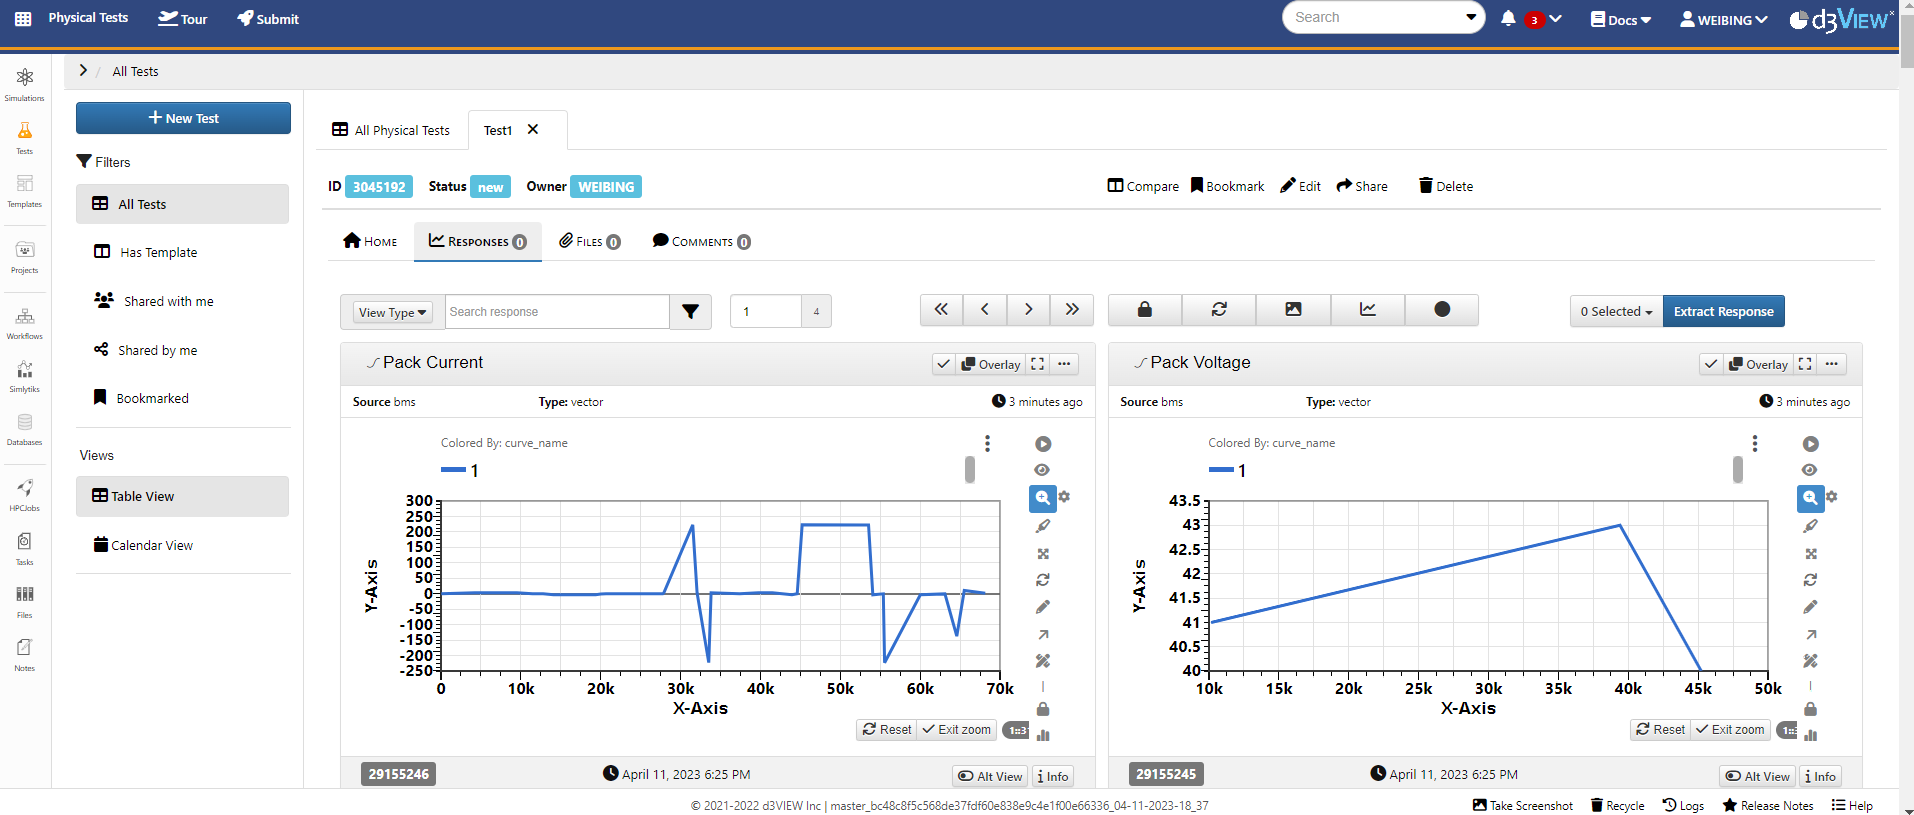
After we execute the workflow, we can go to the Physical Test application and we will notice there are three more tests we just created.
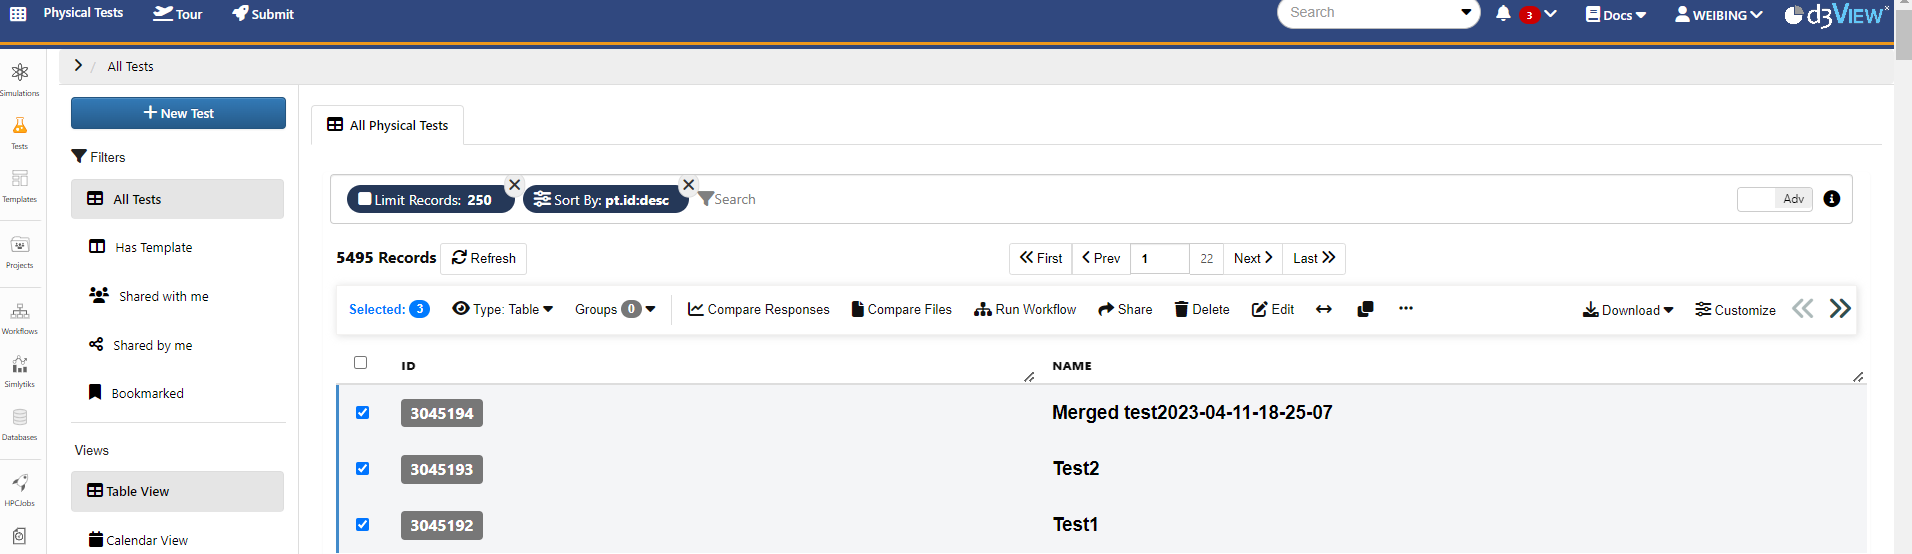
Opening either Test1 or Test2, we will see the responses we specified to be mapped.
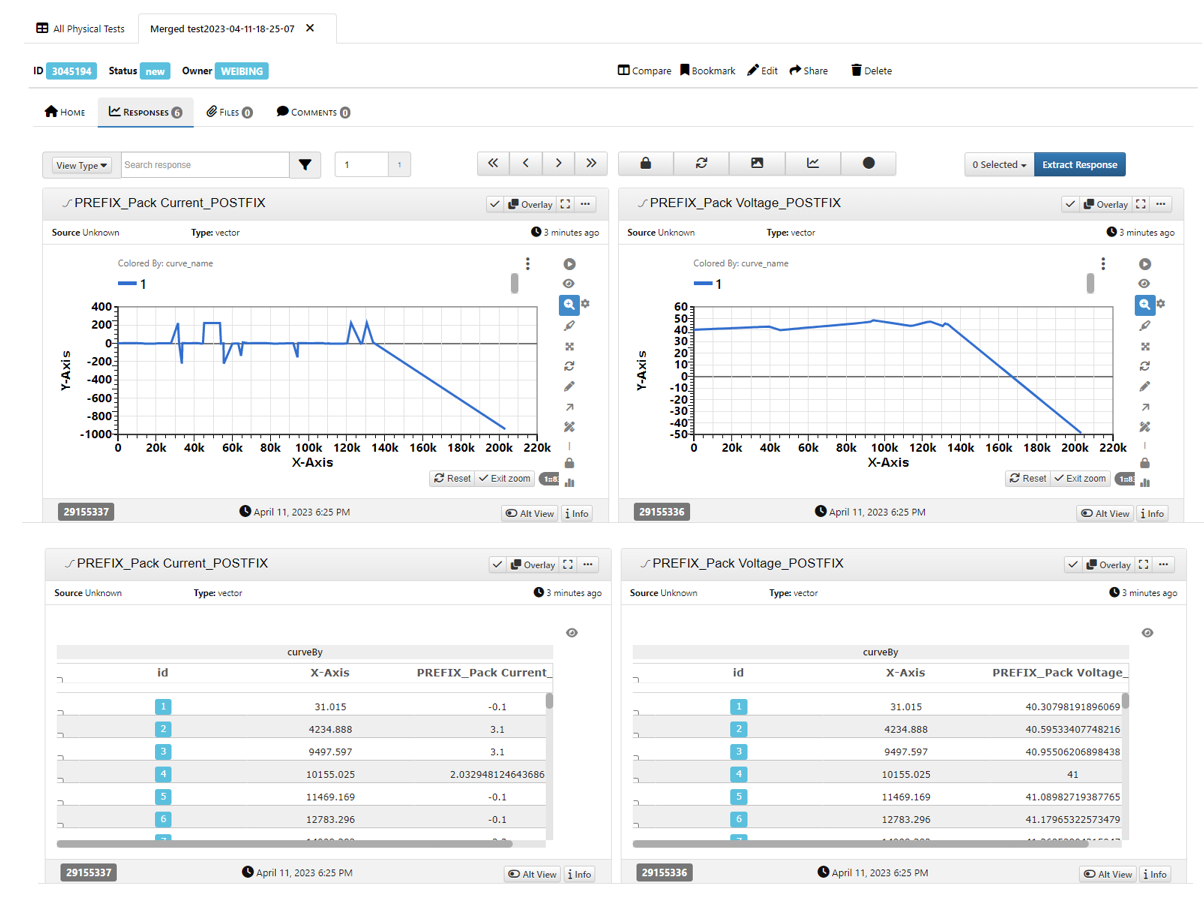
Opening the merged test, we can see that the test have the merged responses as well as the responses with the synced time stamps with the PREFIX and POSTFIX we specified.
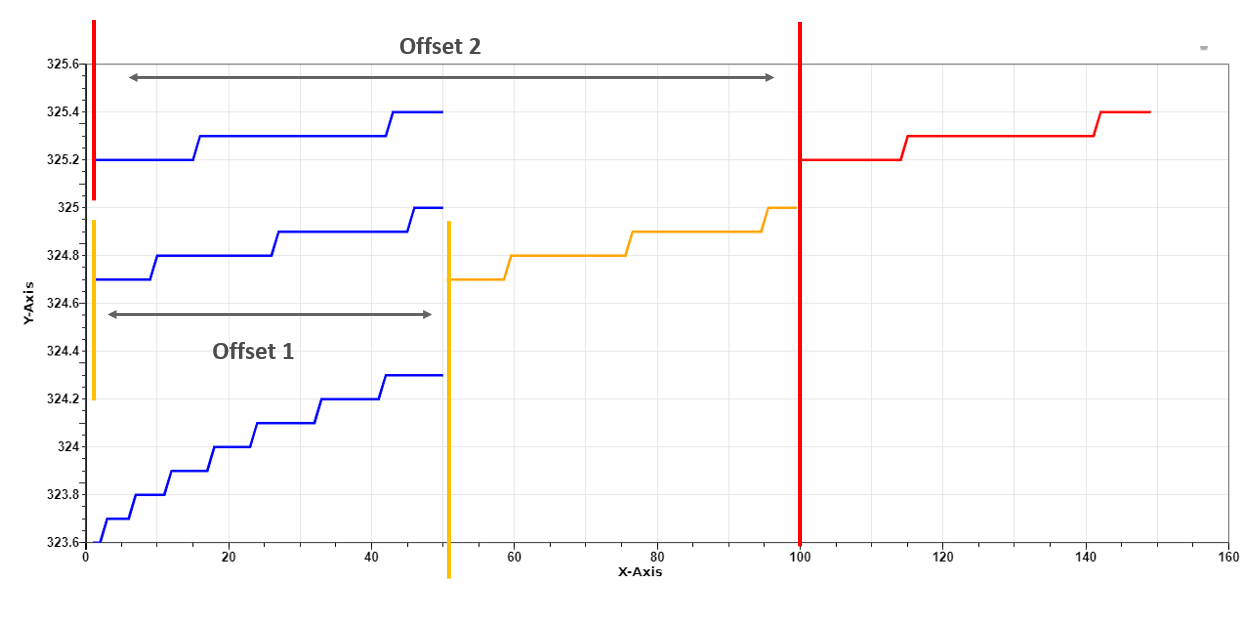
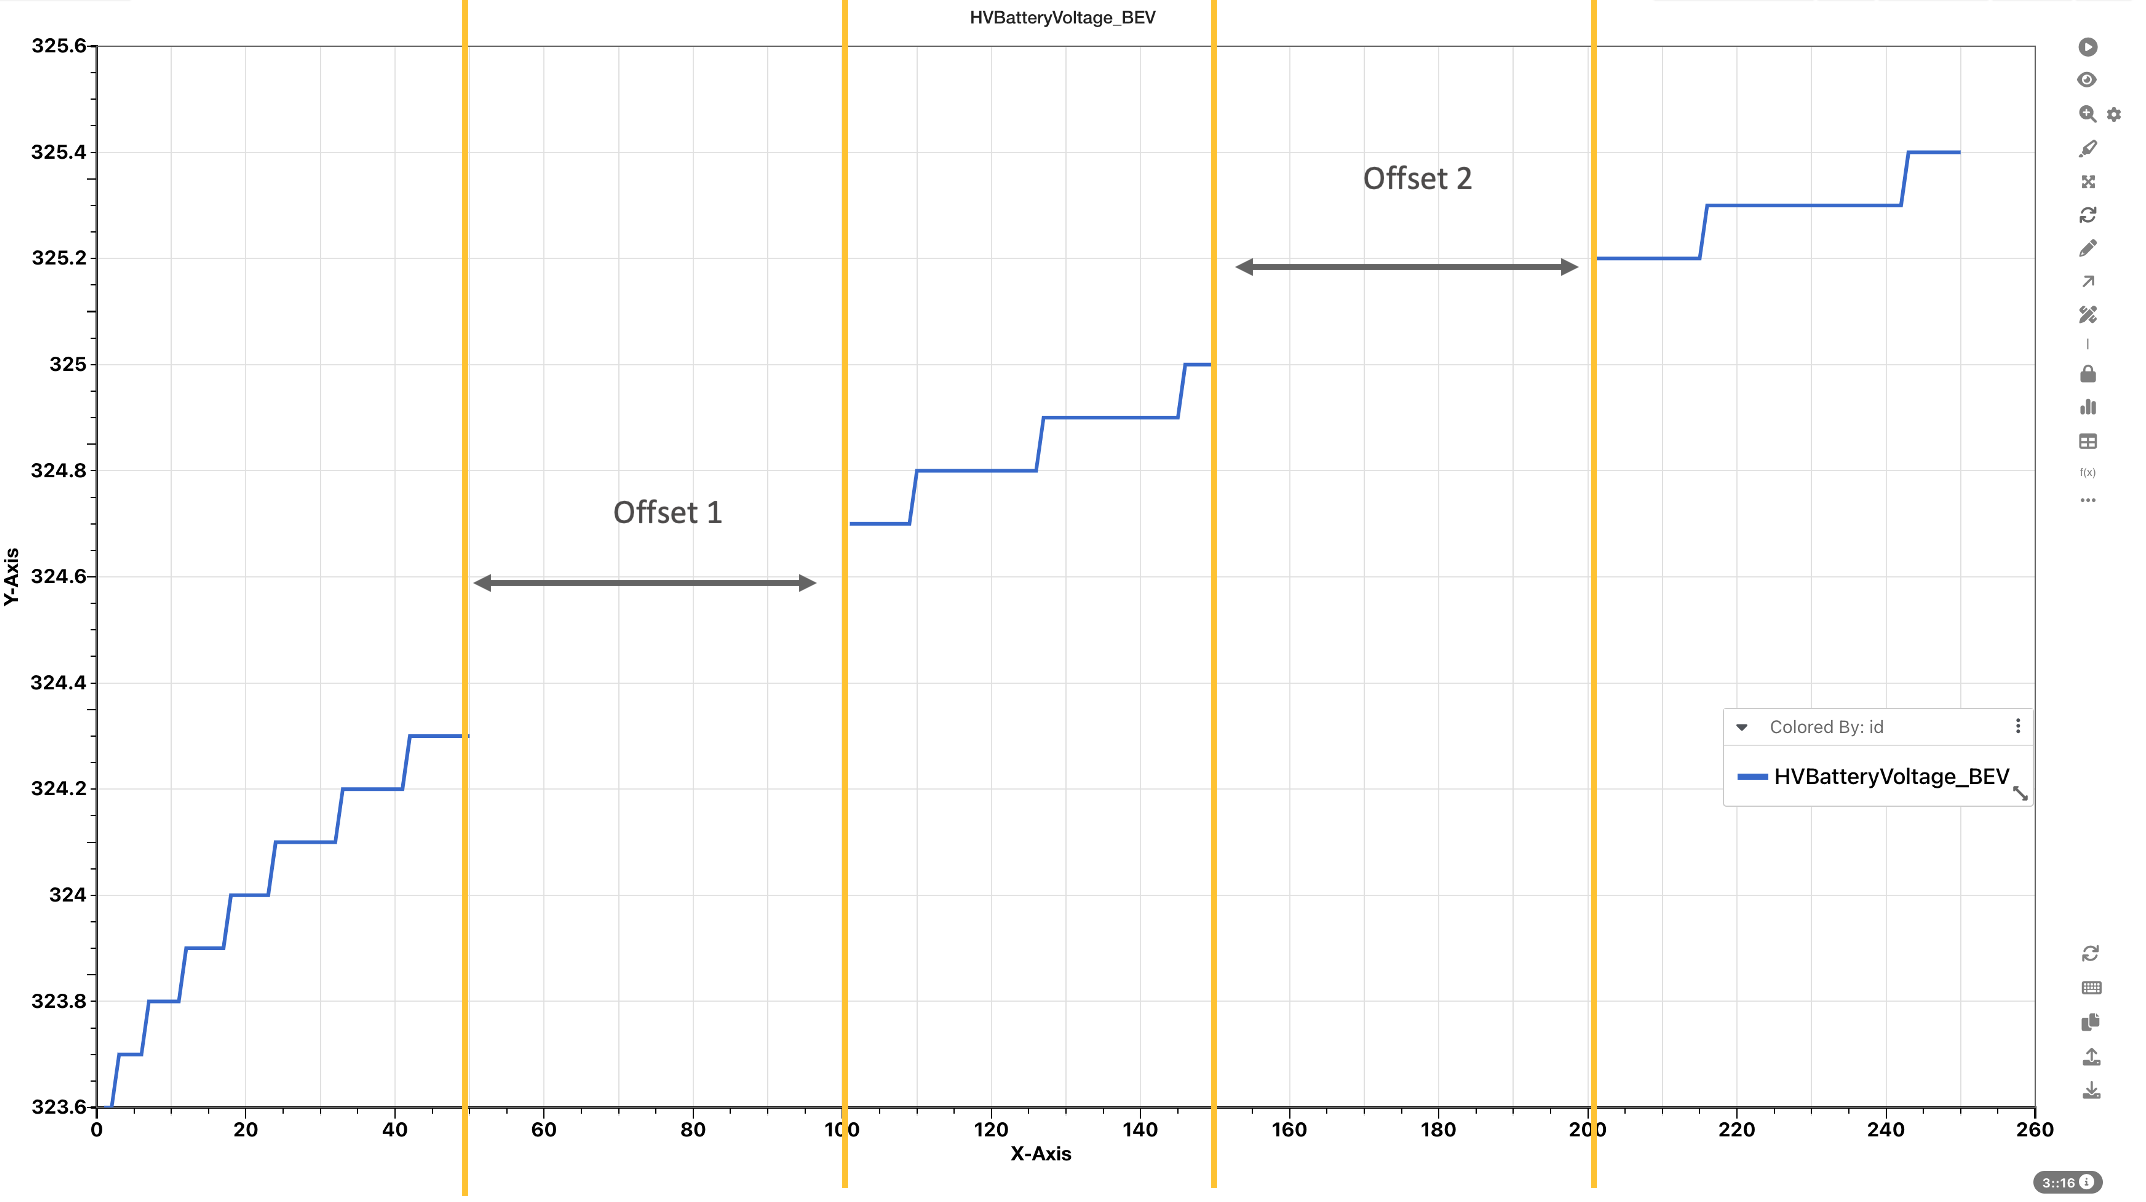
One important part of merging is how d3VIEW offsets the 2D responses based on the time-duration of the tests. When considering a parent test, we first compute the start and end times of all curves across all tests that are to be merged.. The first test is considerd BASELINE and remaining tests are considered as CHILDREN tests. We iterate over the CHILDREN tests and for responses found in the BASELINE test, we merge the response from the CHILDREN test to the BASELINE test. For instance, lets consider merging of a response R1 between two tests T1 (PARENT) and T2(CHILD) with T1 start and end times being T1.s and T1.e. The newly merged test MT will contain a new response R1 whose start time will T1.s and end time will be T1.e + (T2e-T2s). To create the newly merge test, we first compute the OVERLAP=T2.s-T1.e. If the OVERLAP is positive we pull-back T2.R1 by -1.0 * OVERLAP and if its negative we push forward the T2.R1 by T2.s.e. If we have more than 2 tests, we then keep updating the T1.R1.e to account for the newly updated merged response MT.R1.e and continue the same process in which the OVERLAP now will be T3.R1.s - CT.R1.e and so on.
Below is one of the examples of merging in which there is one BASELINE with a ending time of 50seconds, and two CHILDREN tests with start and ending times of 100,150 and 200 and 250 seconds. Based on the description above the OVERAP is 50 and 50 which is used to pull-back the CHILDREN responses such that the newly merged response will have no positive OVERLAP. To avoid repeated time-stamps, a small offset of 1.0 seconds are added at each merging.
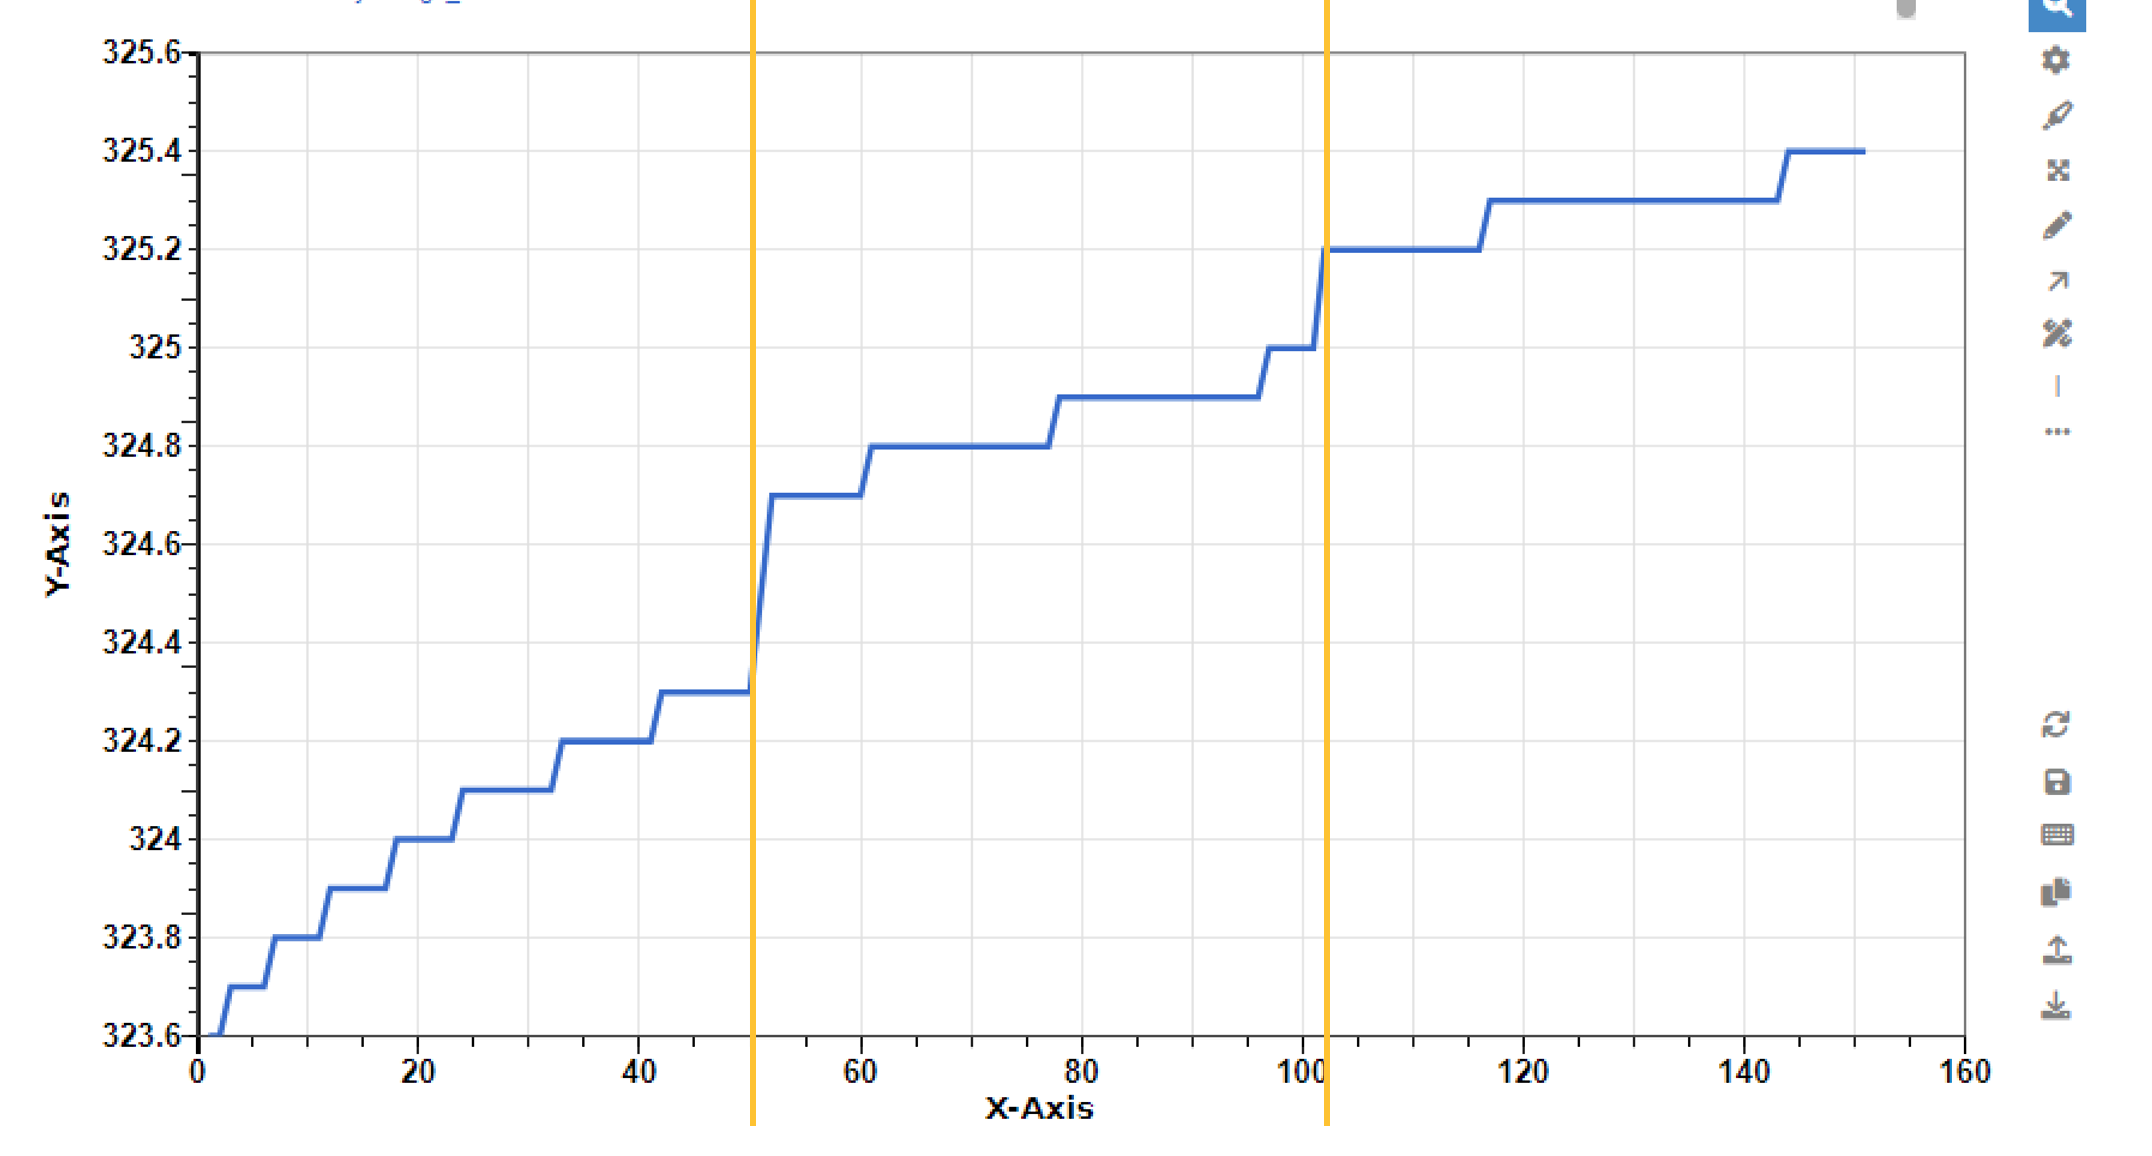
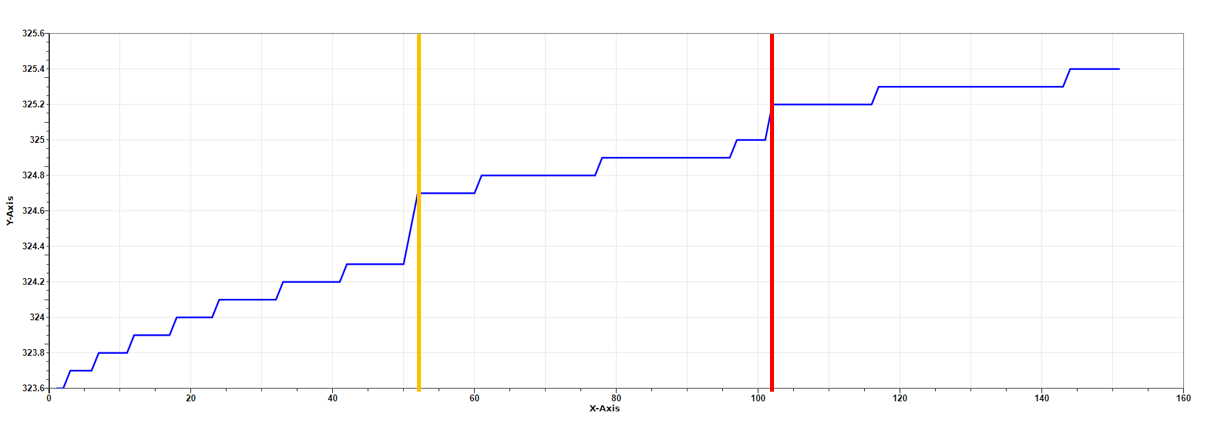
Here is another example where the BASELINE and the CHILDREN tests all have the same start and ending times of 1 and 50 seconds. In this case, we pull the CHILDREN responses forward. Again, to avoid repeated time-stamps, a small offset of 1.0 seconds are added at each merging.