4. Getting Started
In this section, we’ll go over getting started with creating a new workflow.
4.1. |star| Create a New Workflow
Create a new workflow by clicking on the top-right blue button from the Workflows main page.
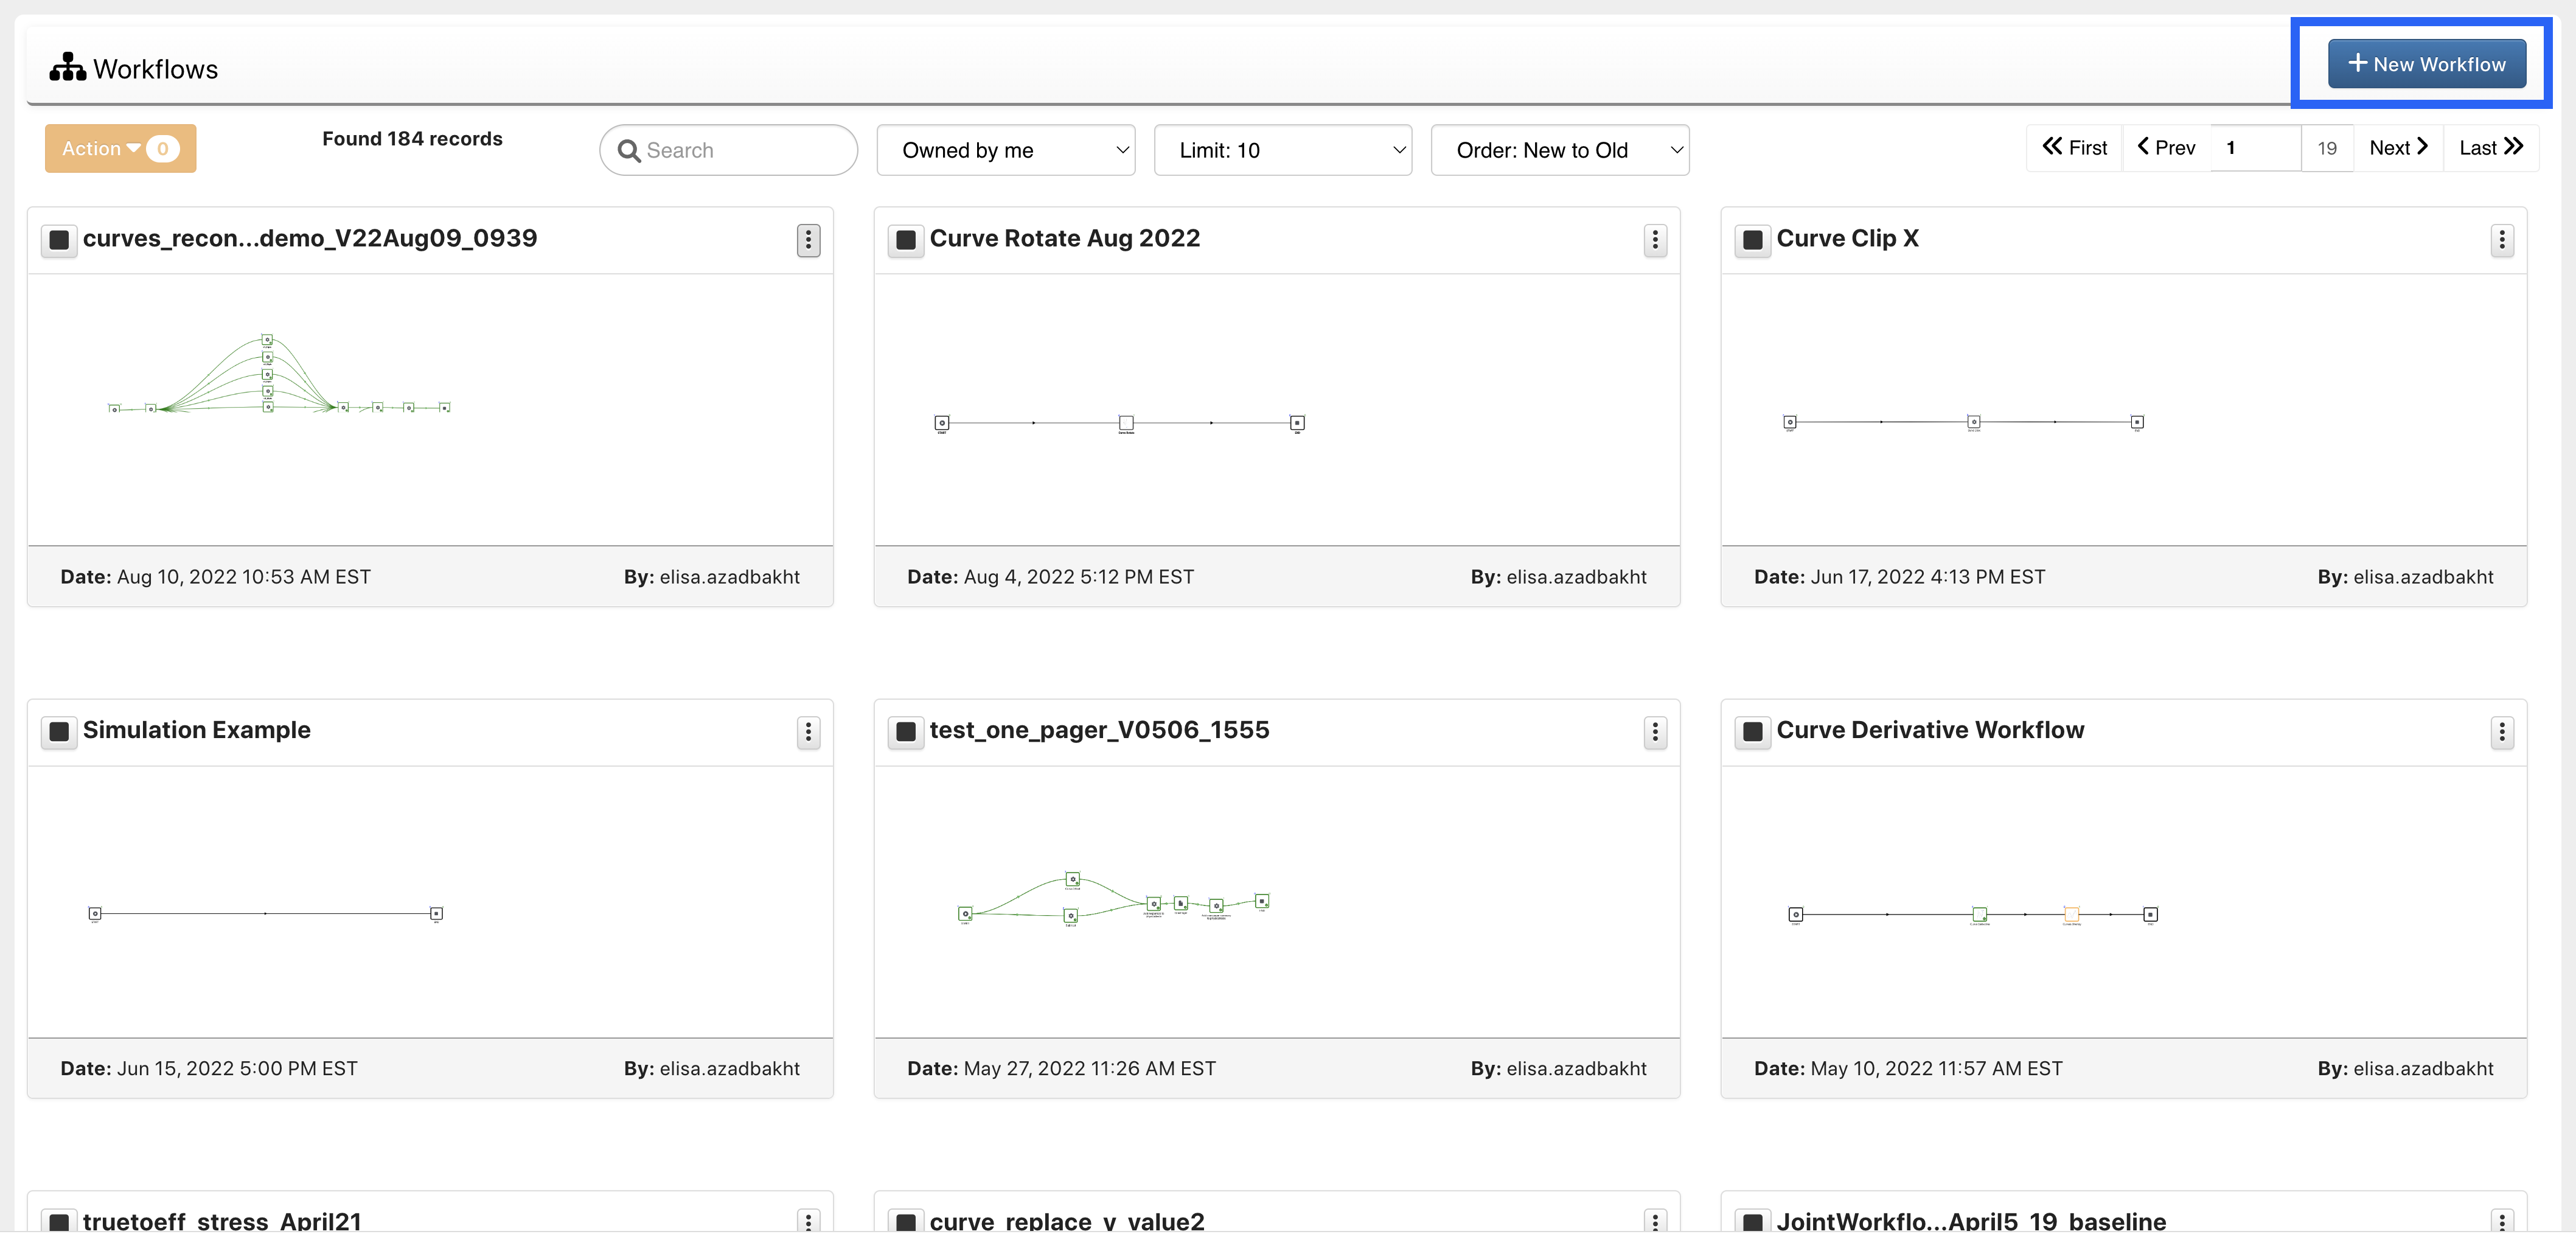
Figure 1: Create New Workflow
4.2. |mouse-pointer| Workflow Interface
Create, rework and execute your workflows all under the same mode. The following image maps out the actions that can be performed on your workflow listed below.
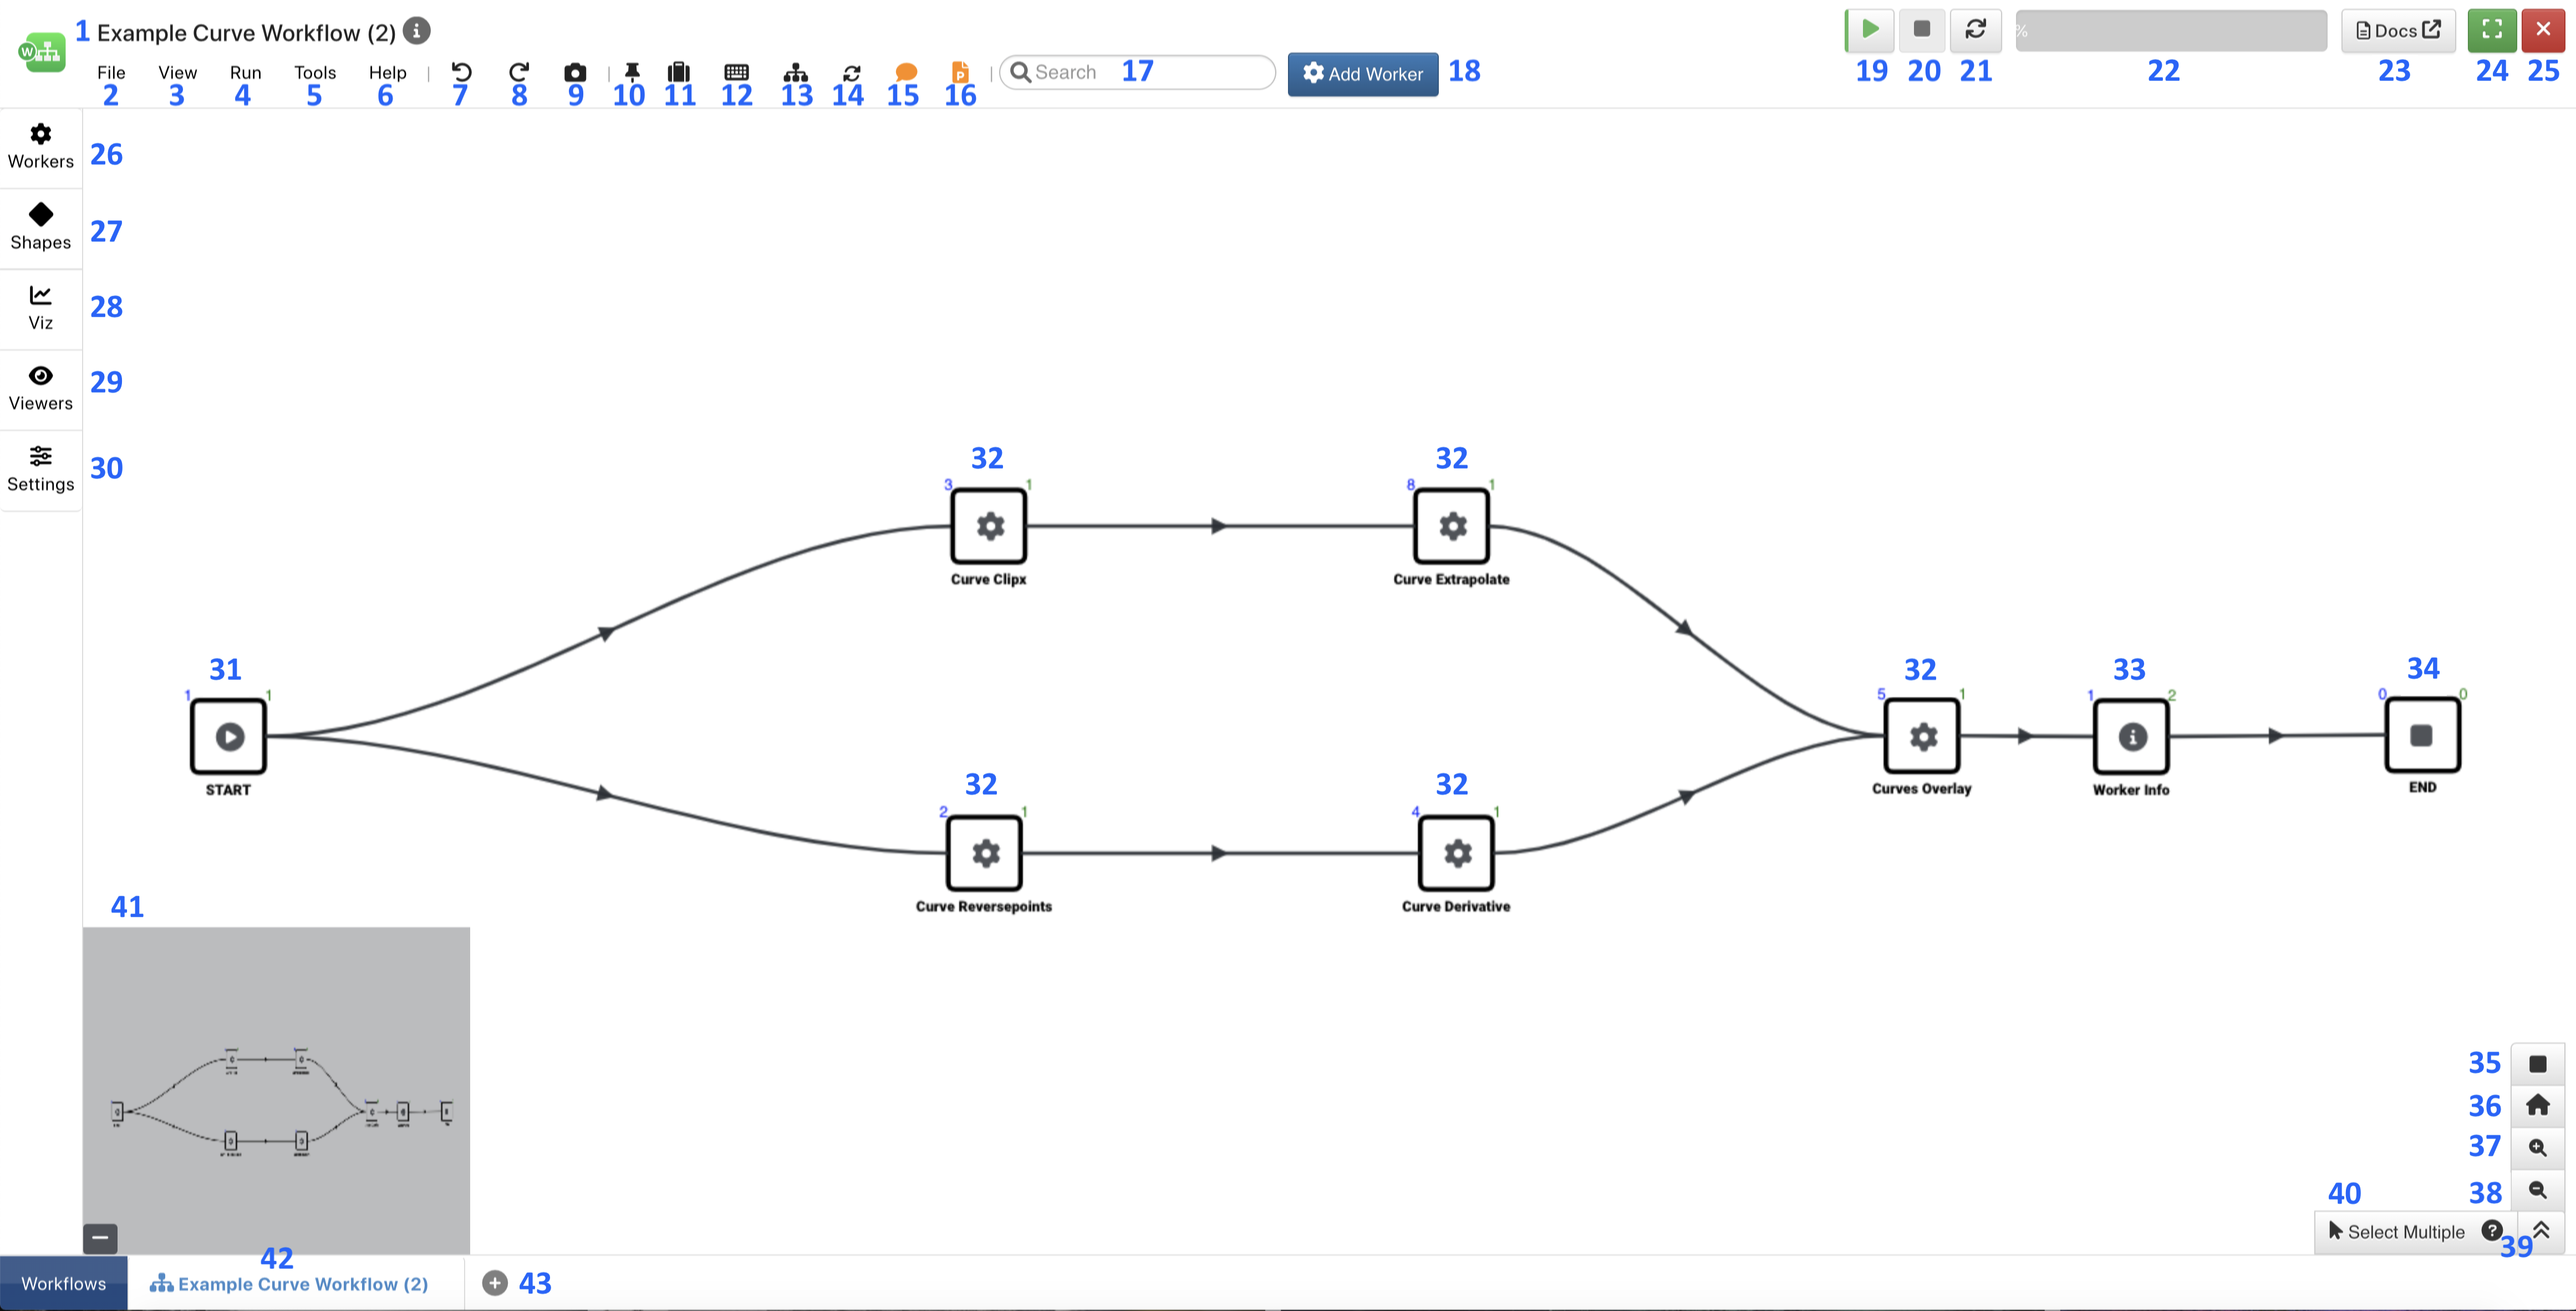
Figure 2: Edit Mode
- Name of the workflow
- File Menu: Save, Open, Download, etc.
- View Menu: Full screen mode option
- Run Options: Run, Pause, stop
- Tools: Extraction Stats and Report
- Help Menu: Tour, Worker Cheat Sheet
- Undo an action
- Redo an action
- Take a screen shot of the workflow
- Pin the current view to come back to it later
- Take a tour of the workflow canvas
- Review the keyboard shortcuts
- View Workflow Collection
- Refresh the canvas
- View workflow comments
- Show Reporters: see all available report generators in the workflow
- Search for workers, inputs or data in the workflow
- Add Worker: Review and add workers to the canvas
- Run the Workflow
- Stop Workflow Execution
- Refresh the Workflow Execution
- Workflow Execution Status
- Docs: link to this documentation
- Expand the window to full screen
- Close out of the workflow
- Workers: Review and add workers to the canvas
- Shapes: Add special workers such as Decision, Data Collector and Report Generator
- Visualization Workers: Newton and Parallel
- Viewers: View Files, Curves, Images and Charts/Datasets related to the workflow
- Settings: Reset data, Visualize worker sizes, Import from JSON
- START worker (all new workflows automatically have this)
- Added Workers
- Add Shape Worker
- END worker (all new workflows automatically have this)
- Auto-fit the workflow on the canvas (show all workers)
- Zoom to 100% (based on initial worker sizes)
- Zoom In
- Zoom Out
- View workflow logs
- Select multiple workers at the same time. Useful for multi-work editing.
- Thumbnail view of the full workflow. Click the minus symbol to hide.
- Current workflow tab
- Open another workflow tab
Note: As of August, 2002, workflows do not need to be opened in a separate mode to execute. Running the workflow is now always available at the top. Skip over to Executing to learn how run your workflow.
4.3. |pencil| Multiple Tabs
As of July 11, 2022, Workflows has the ability to open multiple workflows at once via tabs. Once we have a workflow open or have created a new one, we can click on the plus icon at the bottom of the workflow canvas to open another existing workflow.
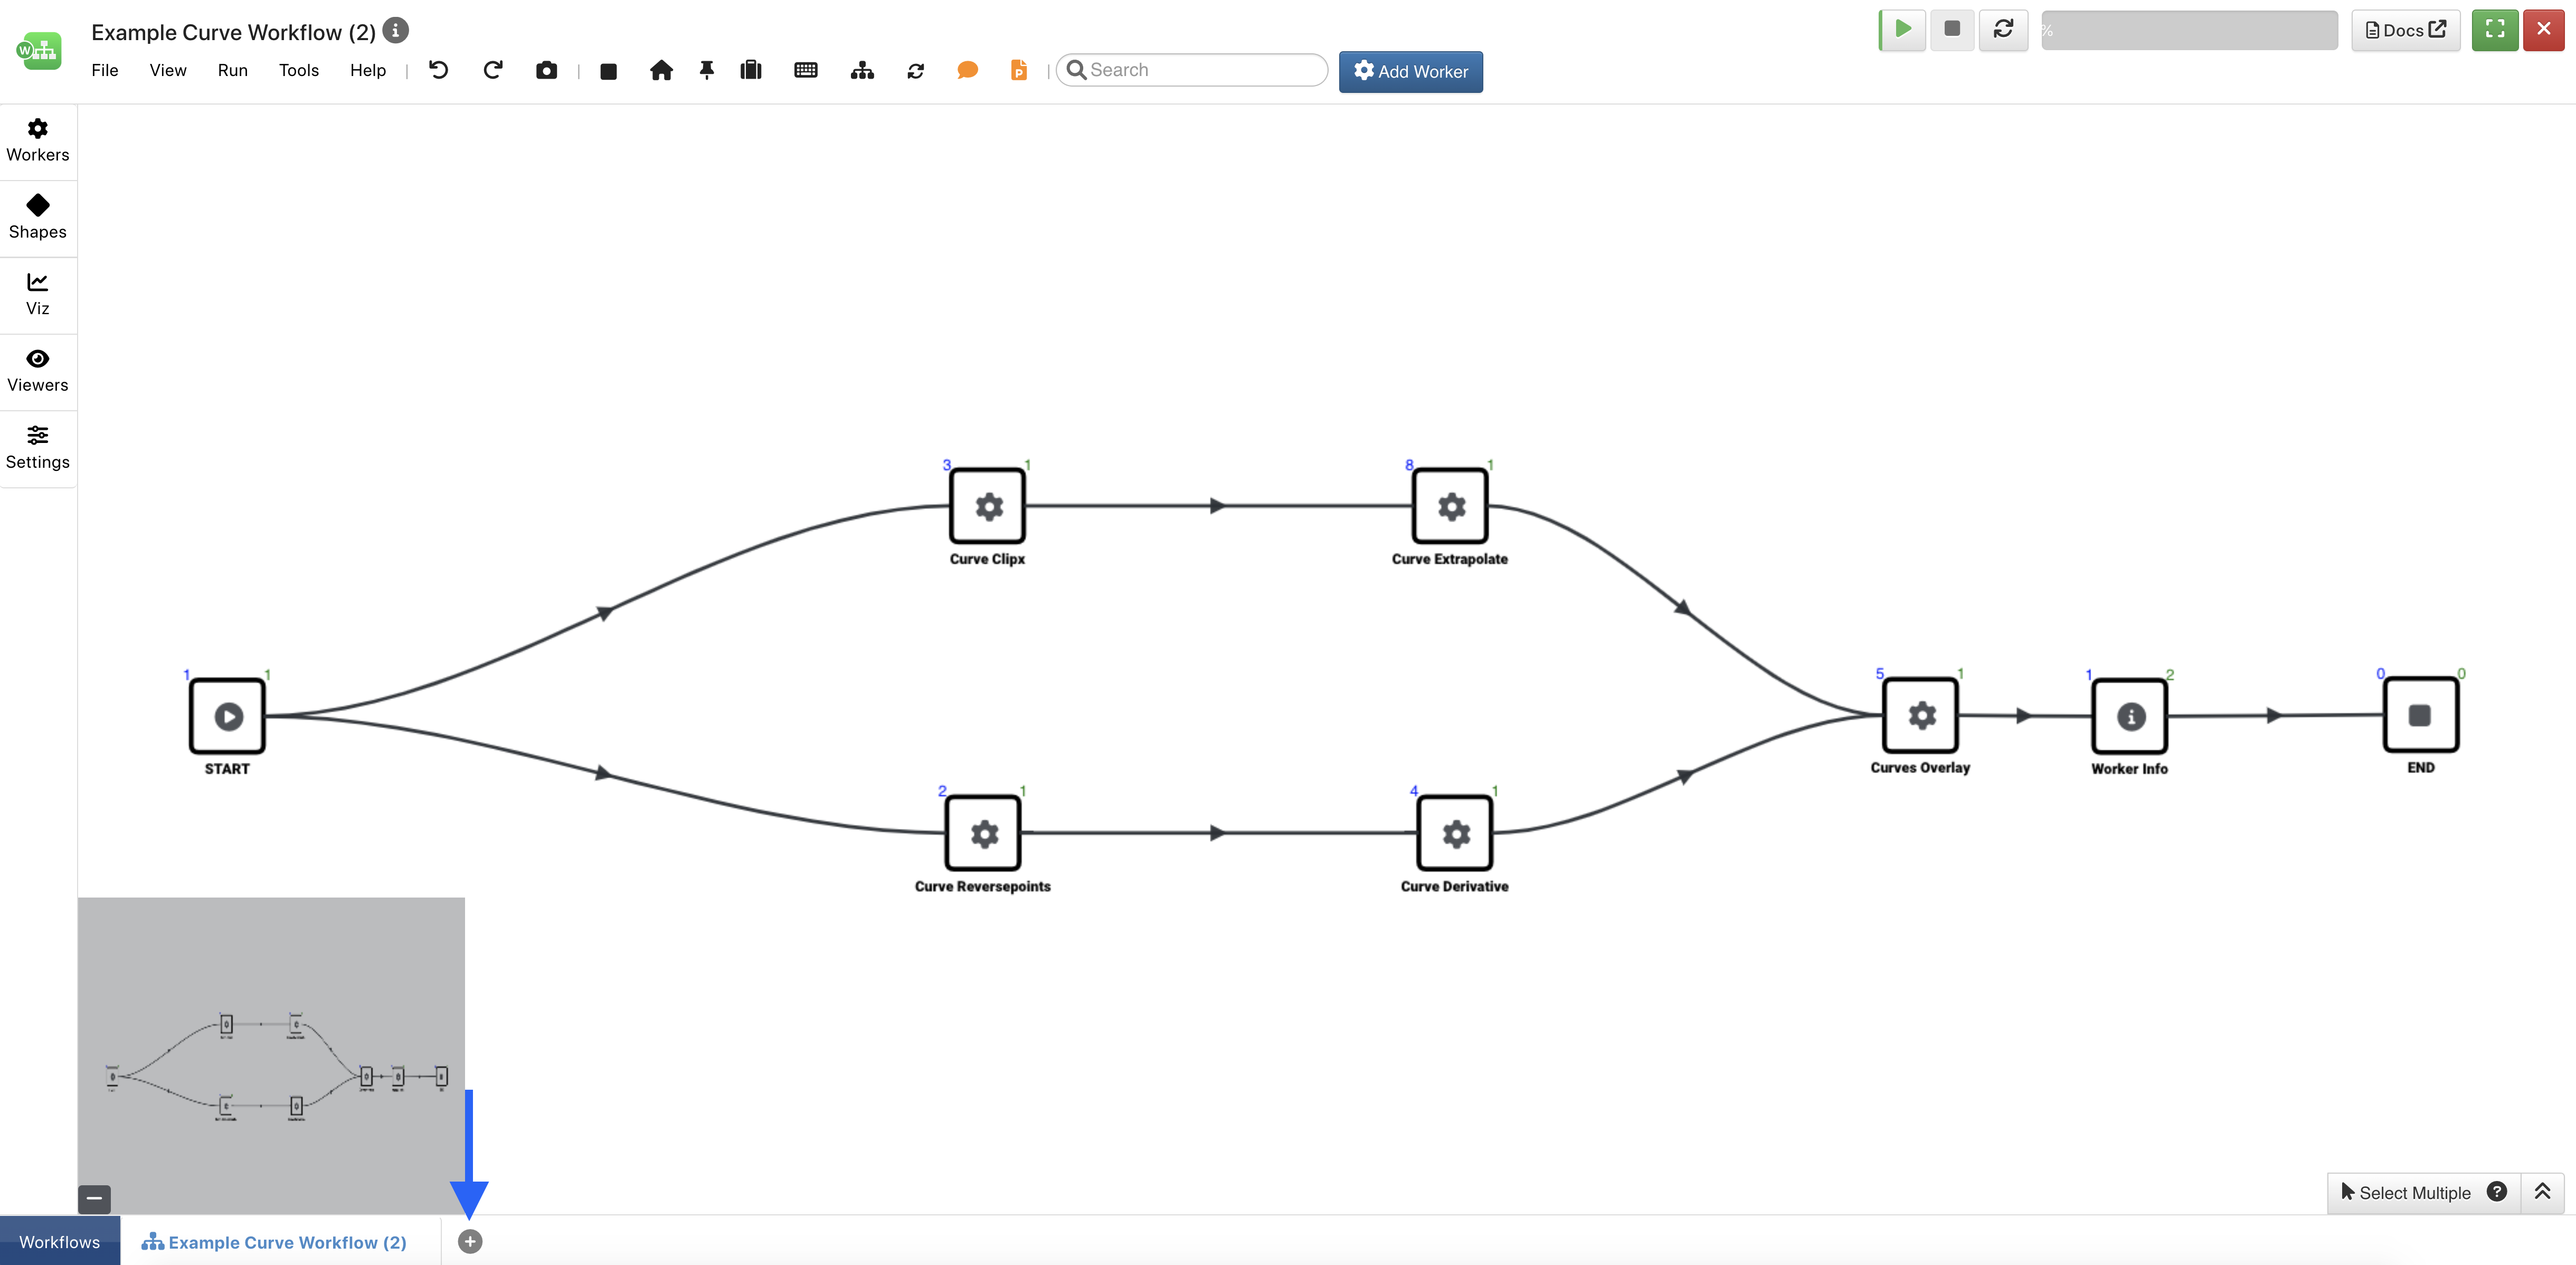
Figure 3: Open Another Workflow Tab
In the next window, we can review a list of all our available workflows and click on individual ones via the View icon (1) to preview them. Once we have one selected, we can hit apply (2) to add it to our canvas.
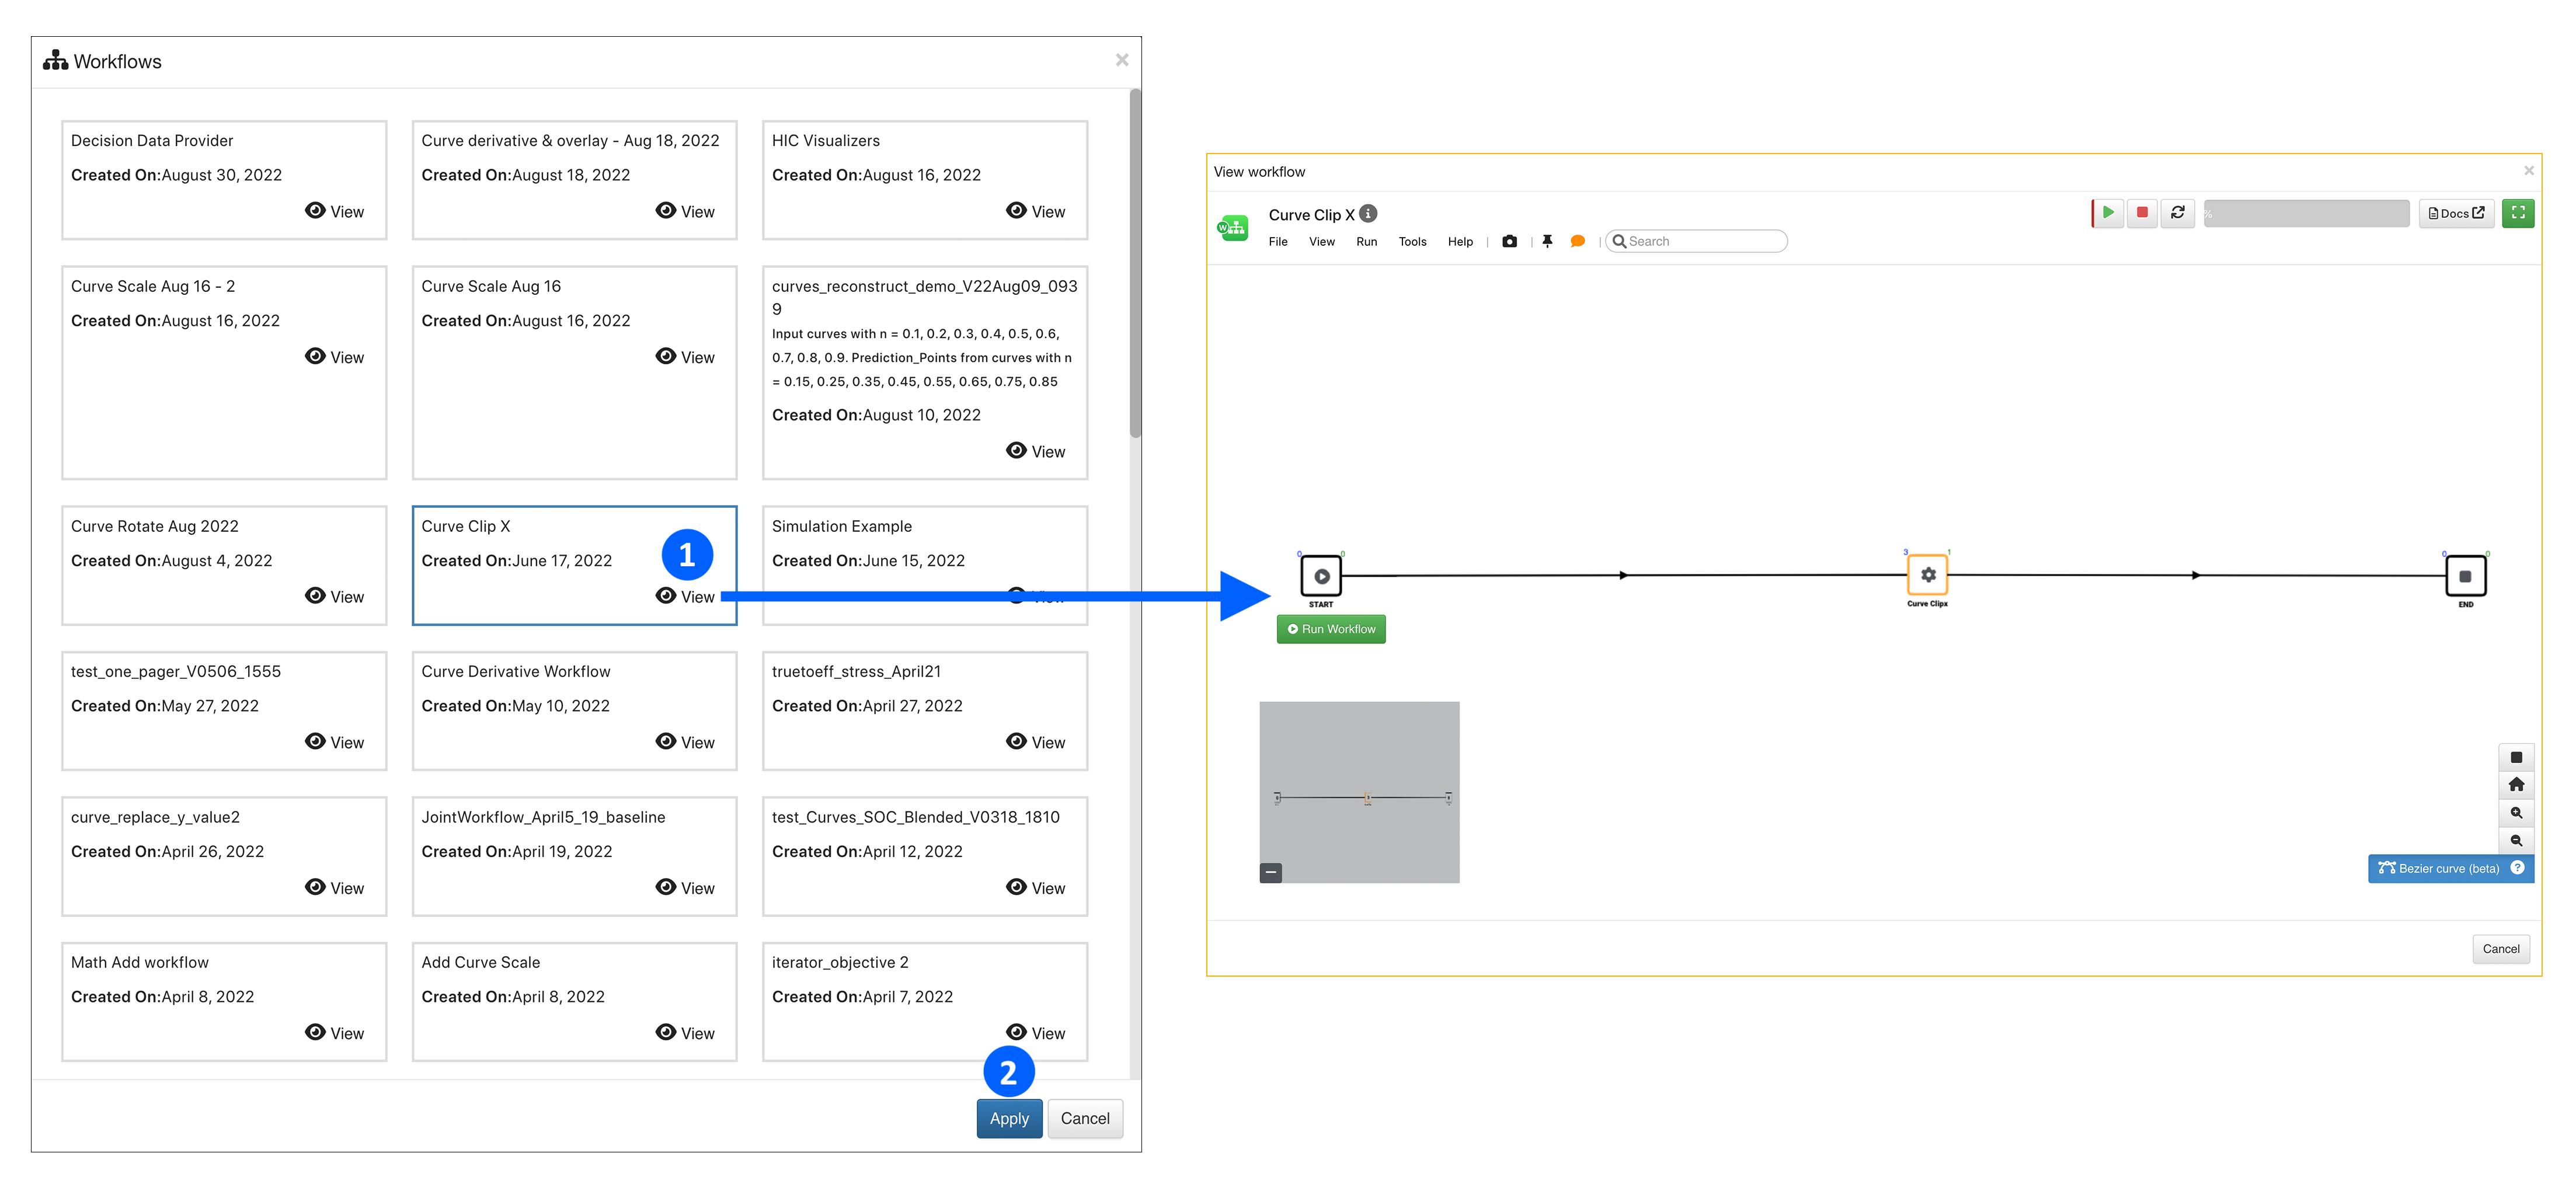
Figure 4: Open Another Workflow Tab
After applying, we’ll see our newly opened workflow on the canvas as the current tab. We can click on either tab to sift between the two workflows.

Figure 5: Workflow Tabs