9.  Saving and Sharing
In this section, we’ll go over the basic ways to save and share our workflow.
9.1. |floppy-o| Saving and |download| Exporting
Saving and exporting our workflow is simple. We simply choose from our desired option under the File Menu, just like with most computer applications. There are a few options for saving and exporting which are mapped out in the following:

Figure 1: Saving and Exporting Options
- Update/Save the current workflow
- Save As: save the workflow with a new name
- Update and Close: update the workflow and then close out
- Export (zip): export the workflow as a d3view workflow zip file. These files can be opened into any workflow canvas.
- Export as Template JSON; export the workflow bare bones, with the just the workers and no extra data.
|floppy-o| Saving a New Workflow for Execution
Save a new Workflow under File > Save & Close (or Save if you want to keep your workflow open).
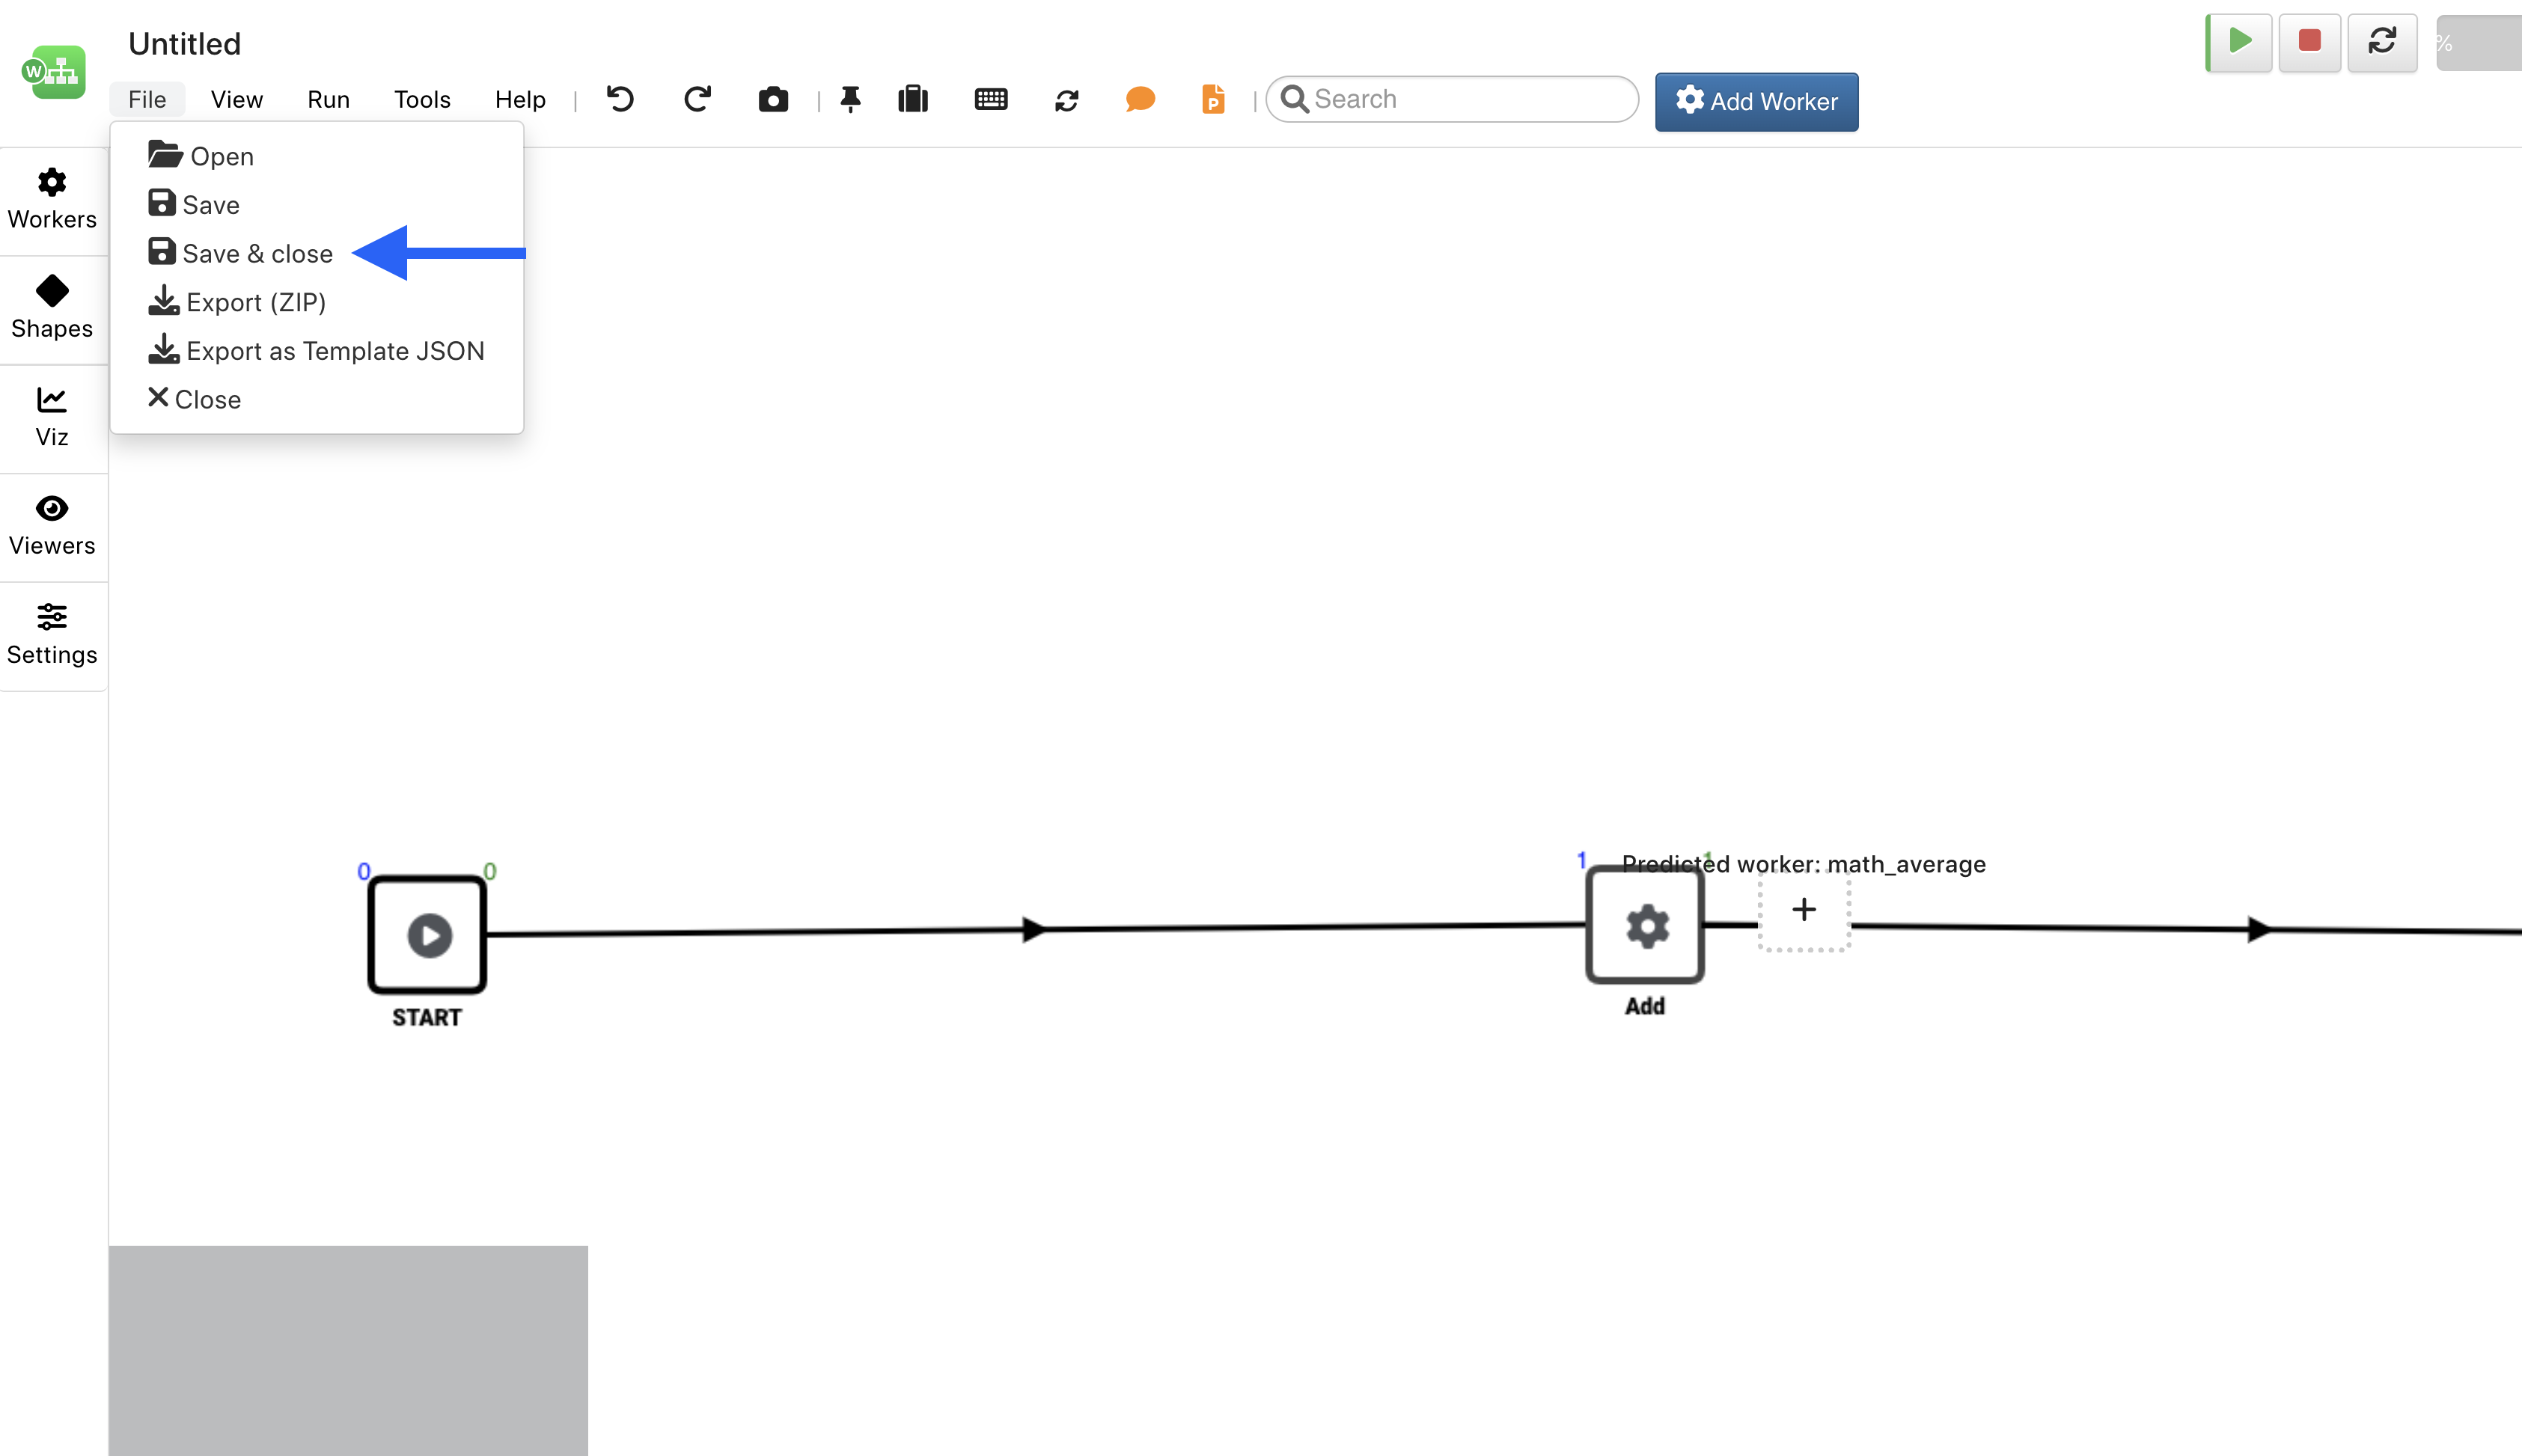
Figure 2: Save & Close a New Workflow*
Specify a suitable name and description in the pop-up window and click Save again.
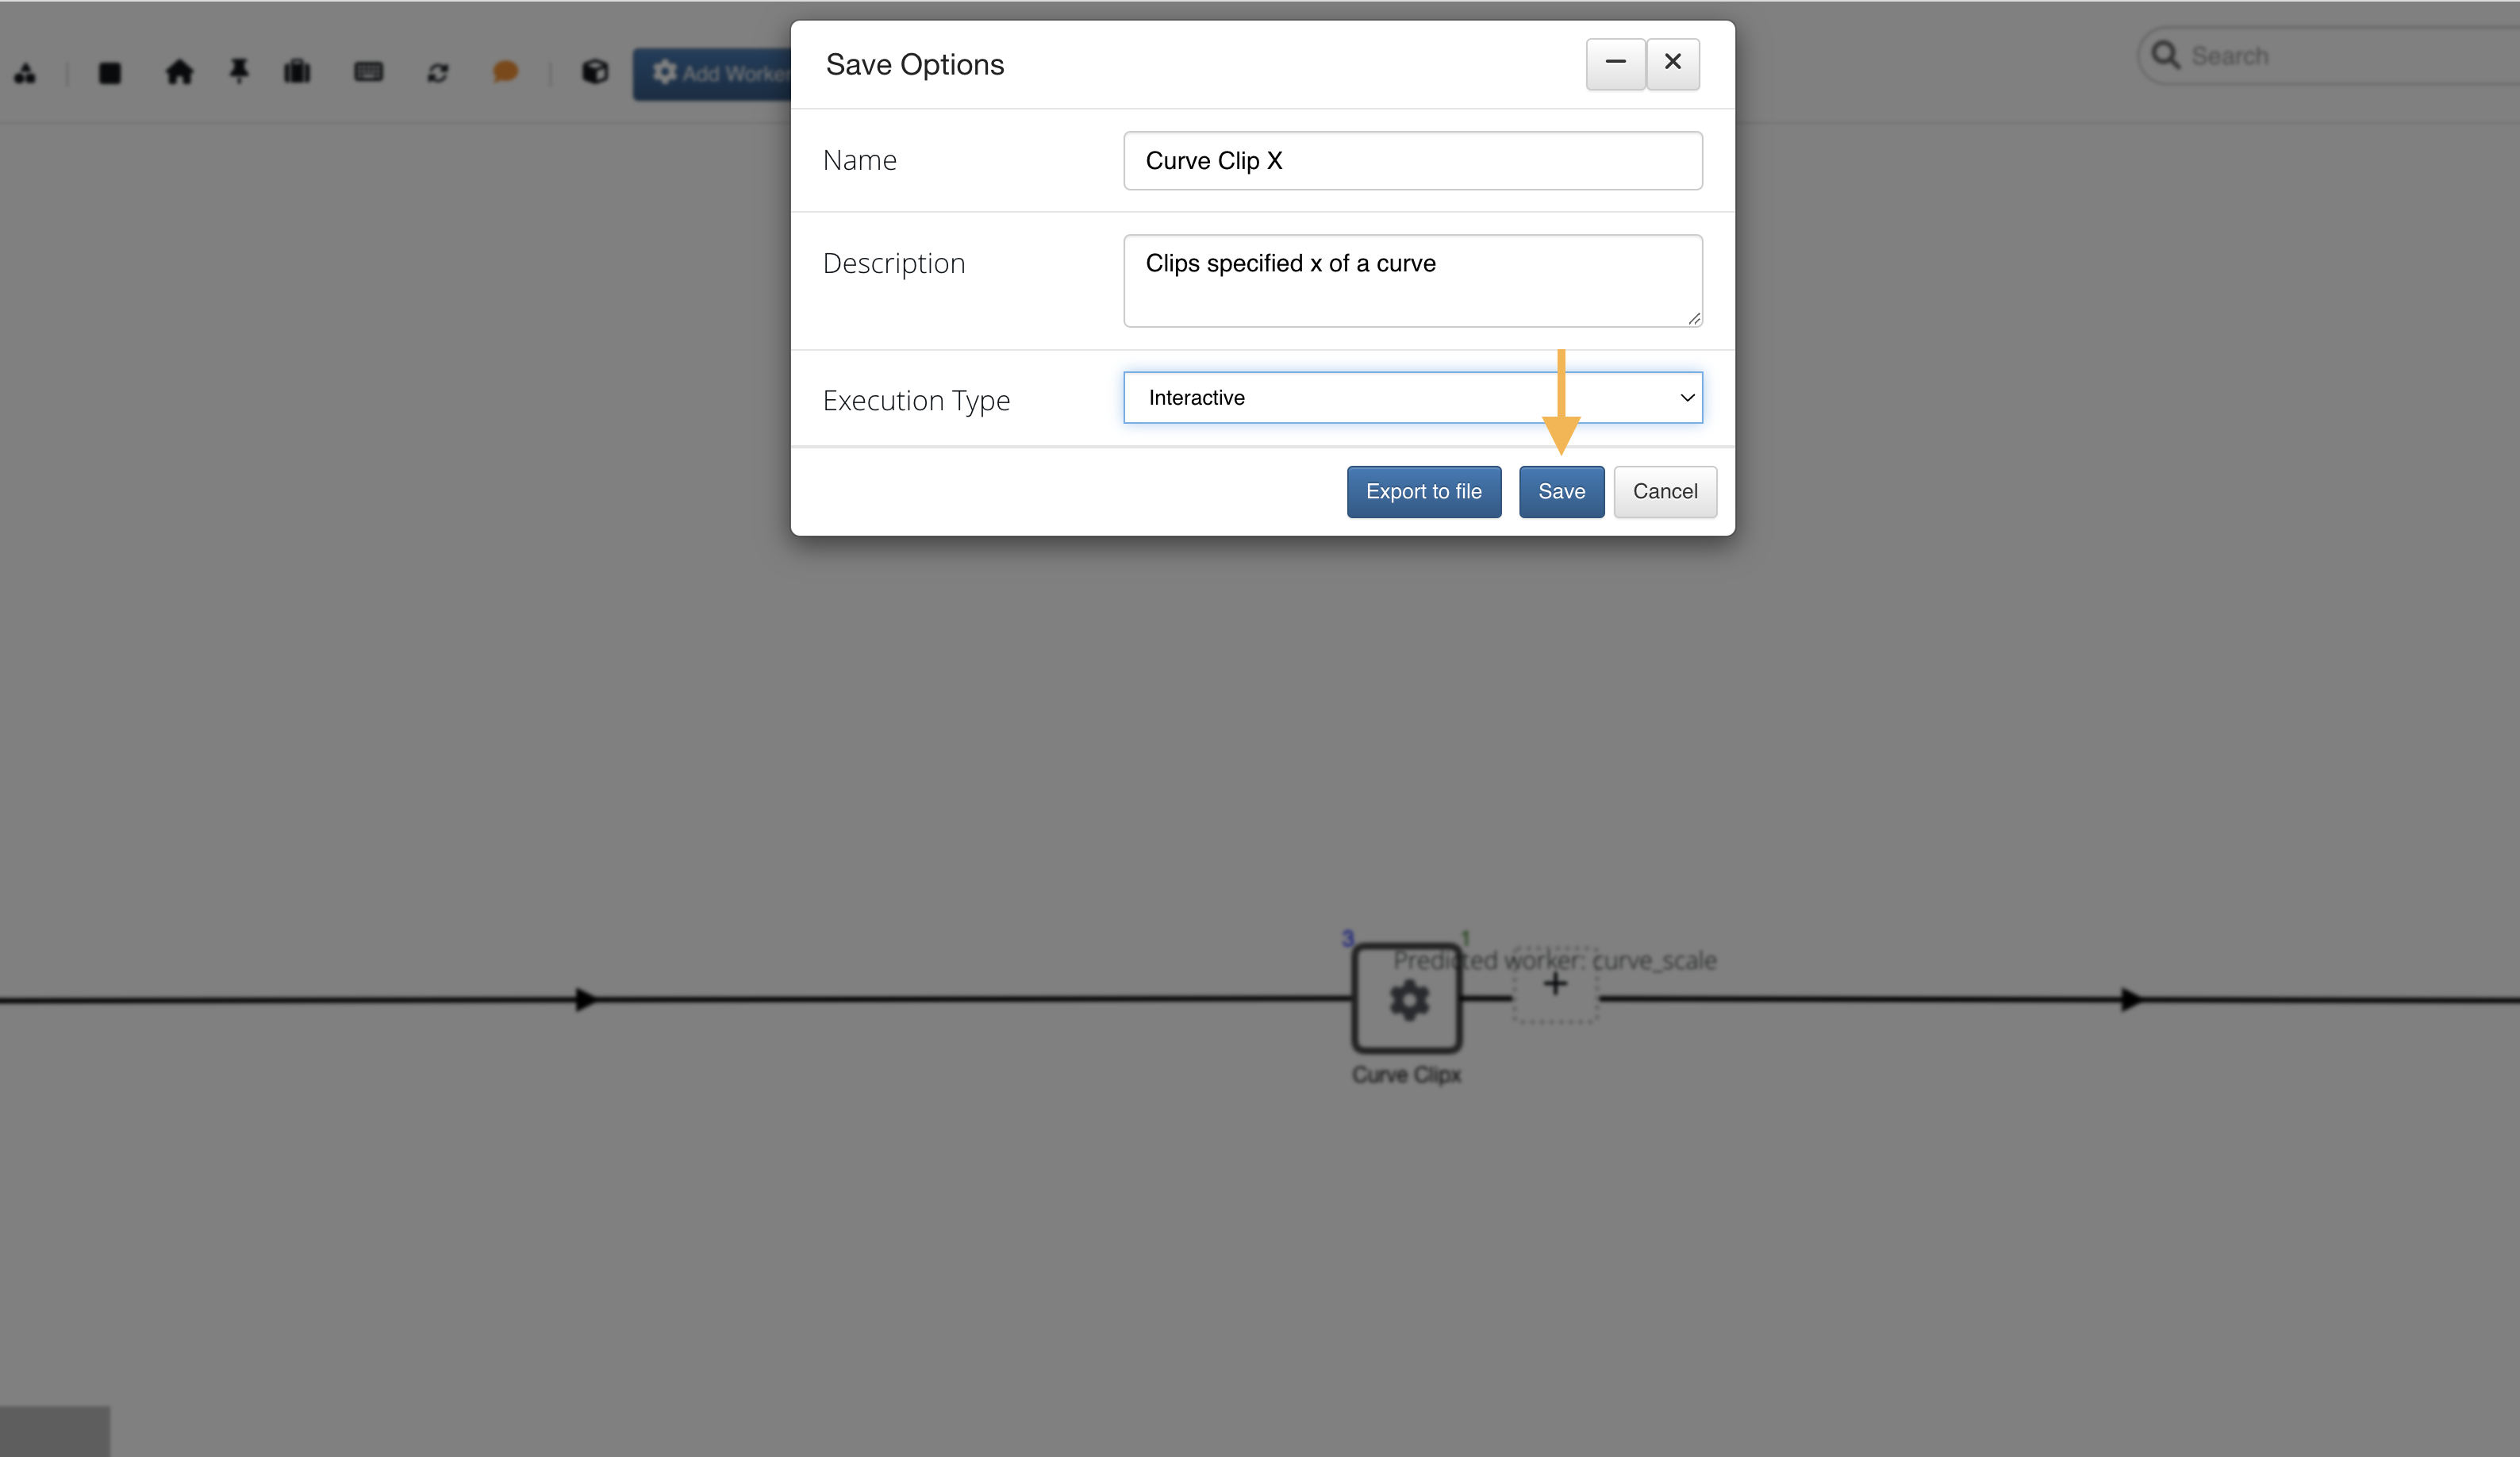
Figure 3: Save & Close a New Workflow
|download| Exporting a Workflow
Export a workflow as a fully packaged ZIP file (1) which includes all input files or a JSON template file (2) which will be the workflow structure. Click the Export button at the top right and choose which option you prefer. Exported Workflows can easily be imported in the way mentioned here.
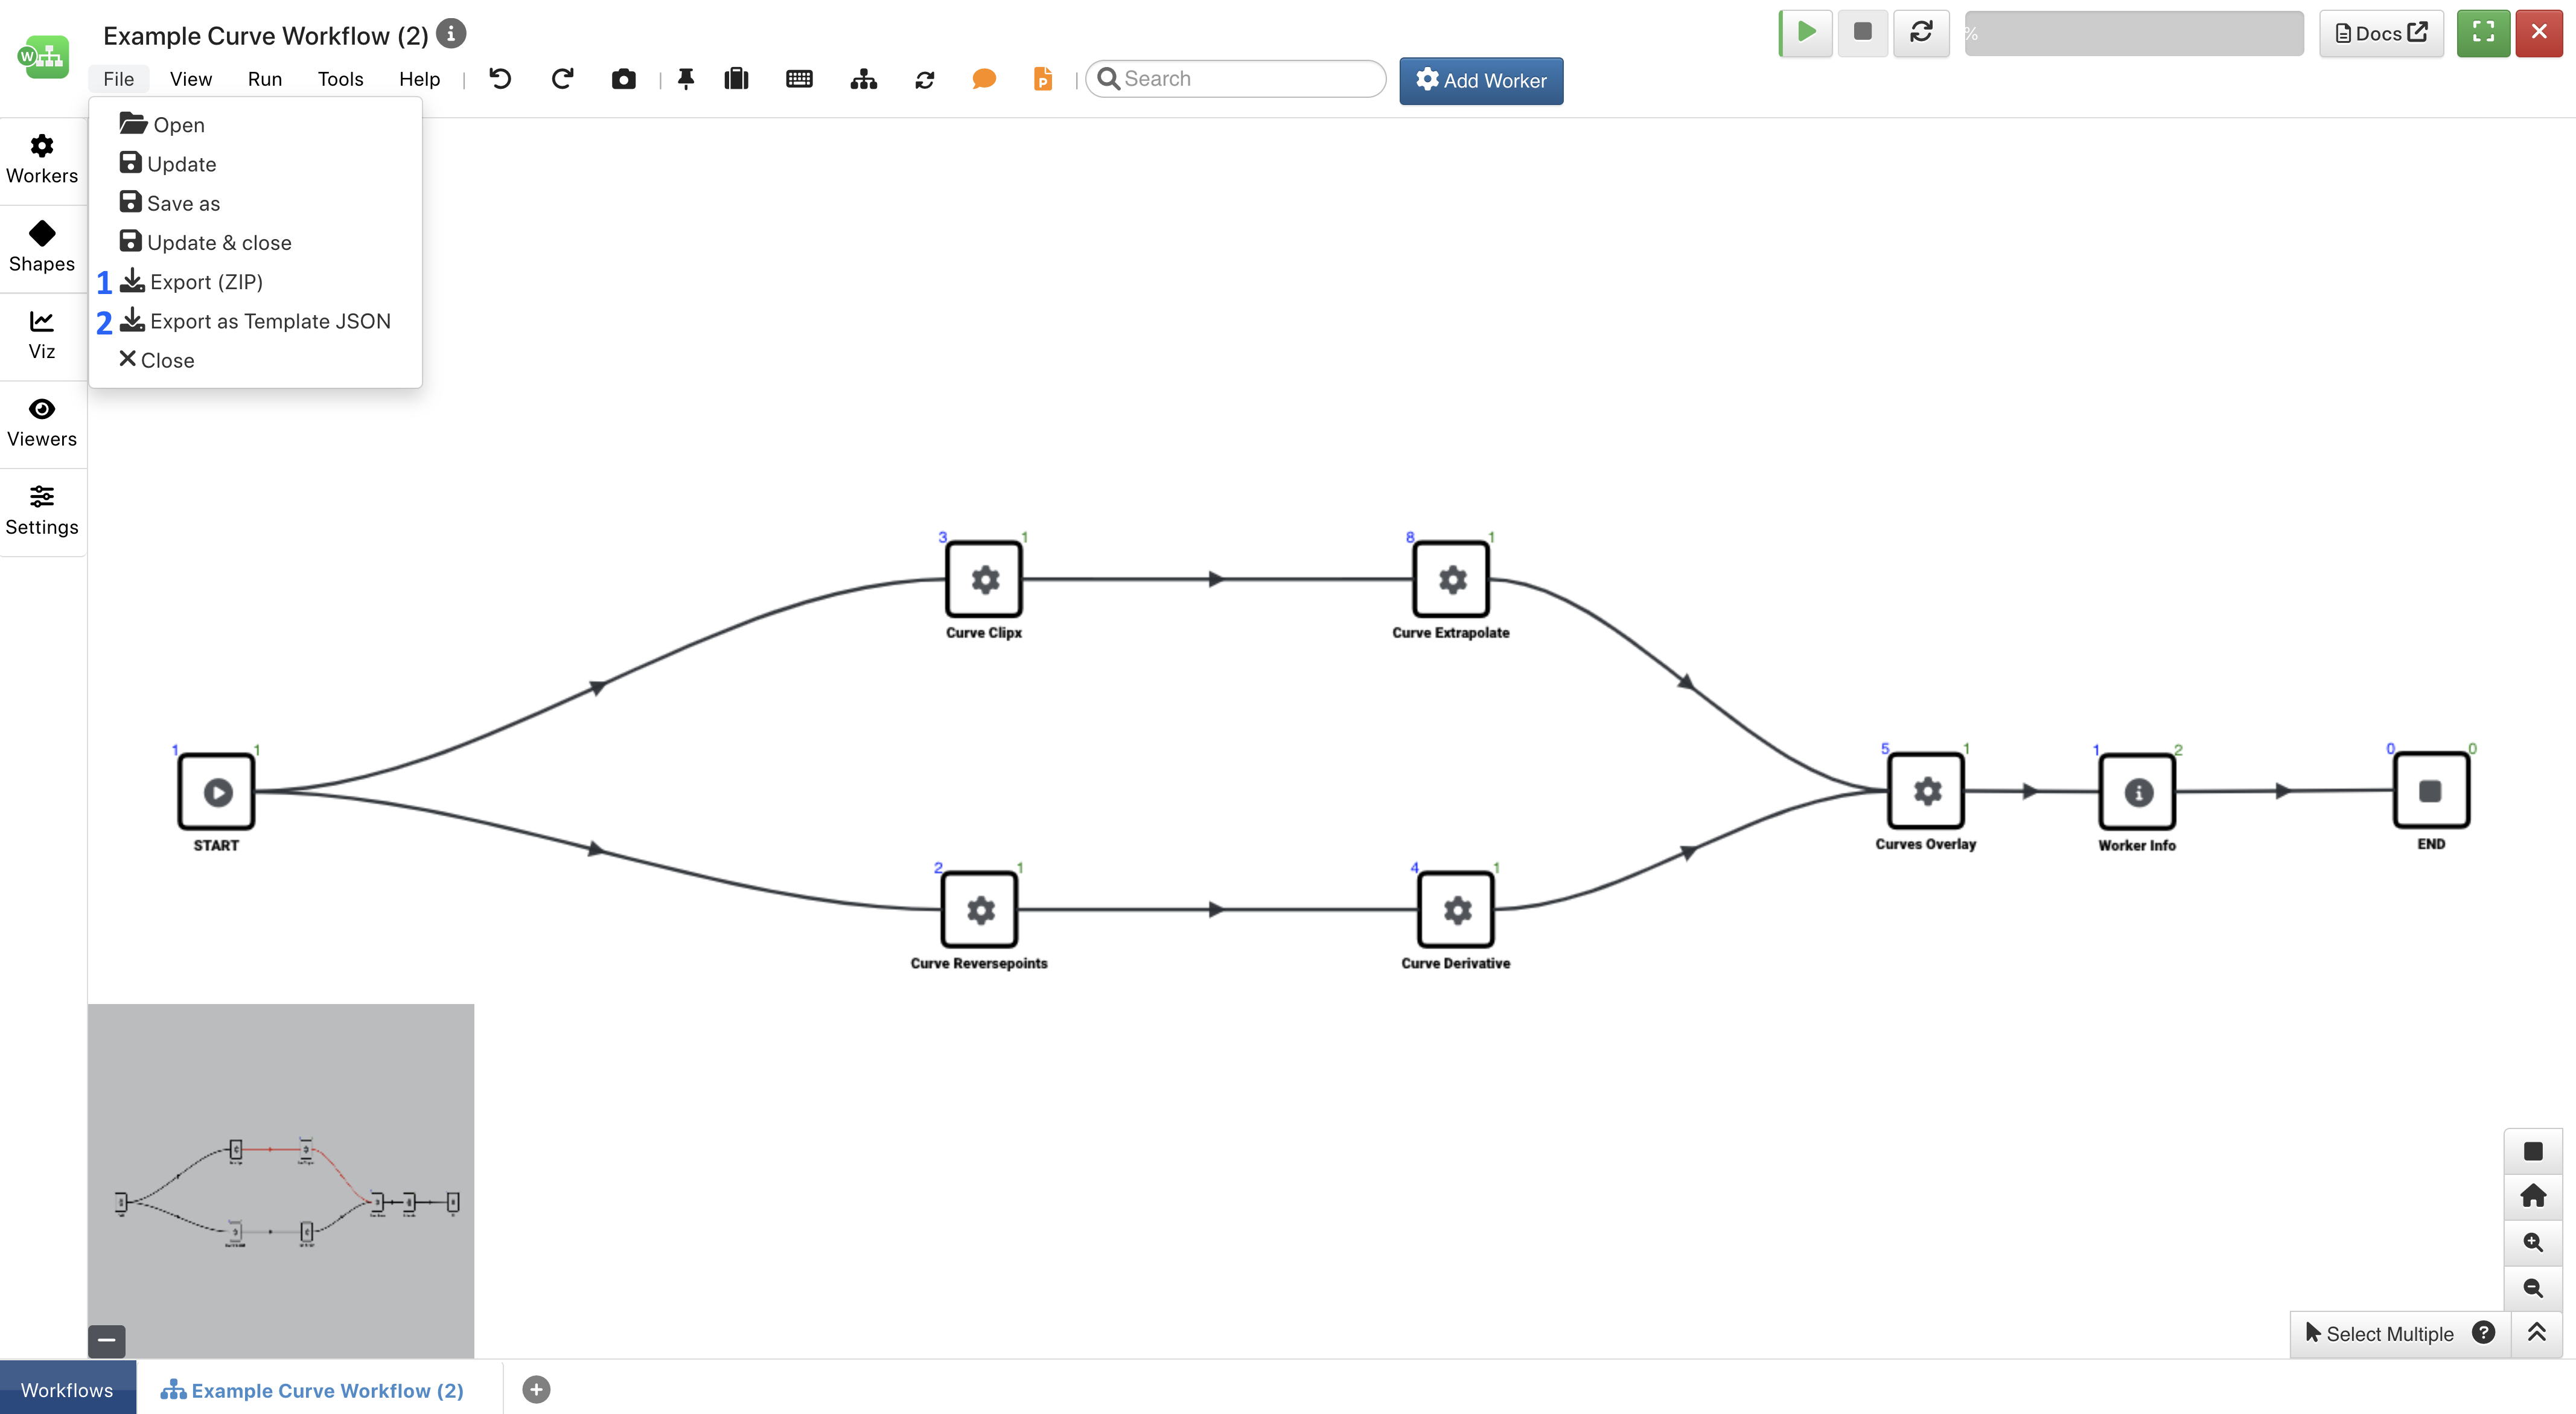
Figure 4: Export a Workflow
|file-powerpoint-o| Exporting a Report
Under the report generator worker, click on the Download PPT button to save your report as a PowerPoint file.

Figure 5: Export a Report
9.2. |history| Timeline
Under the tools menu at the bottom, we can view a timeline of all saved versions of our workflow.
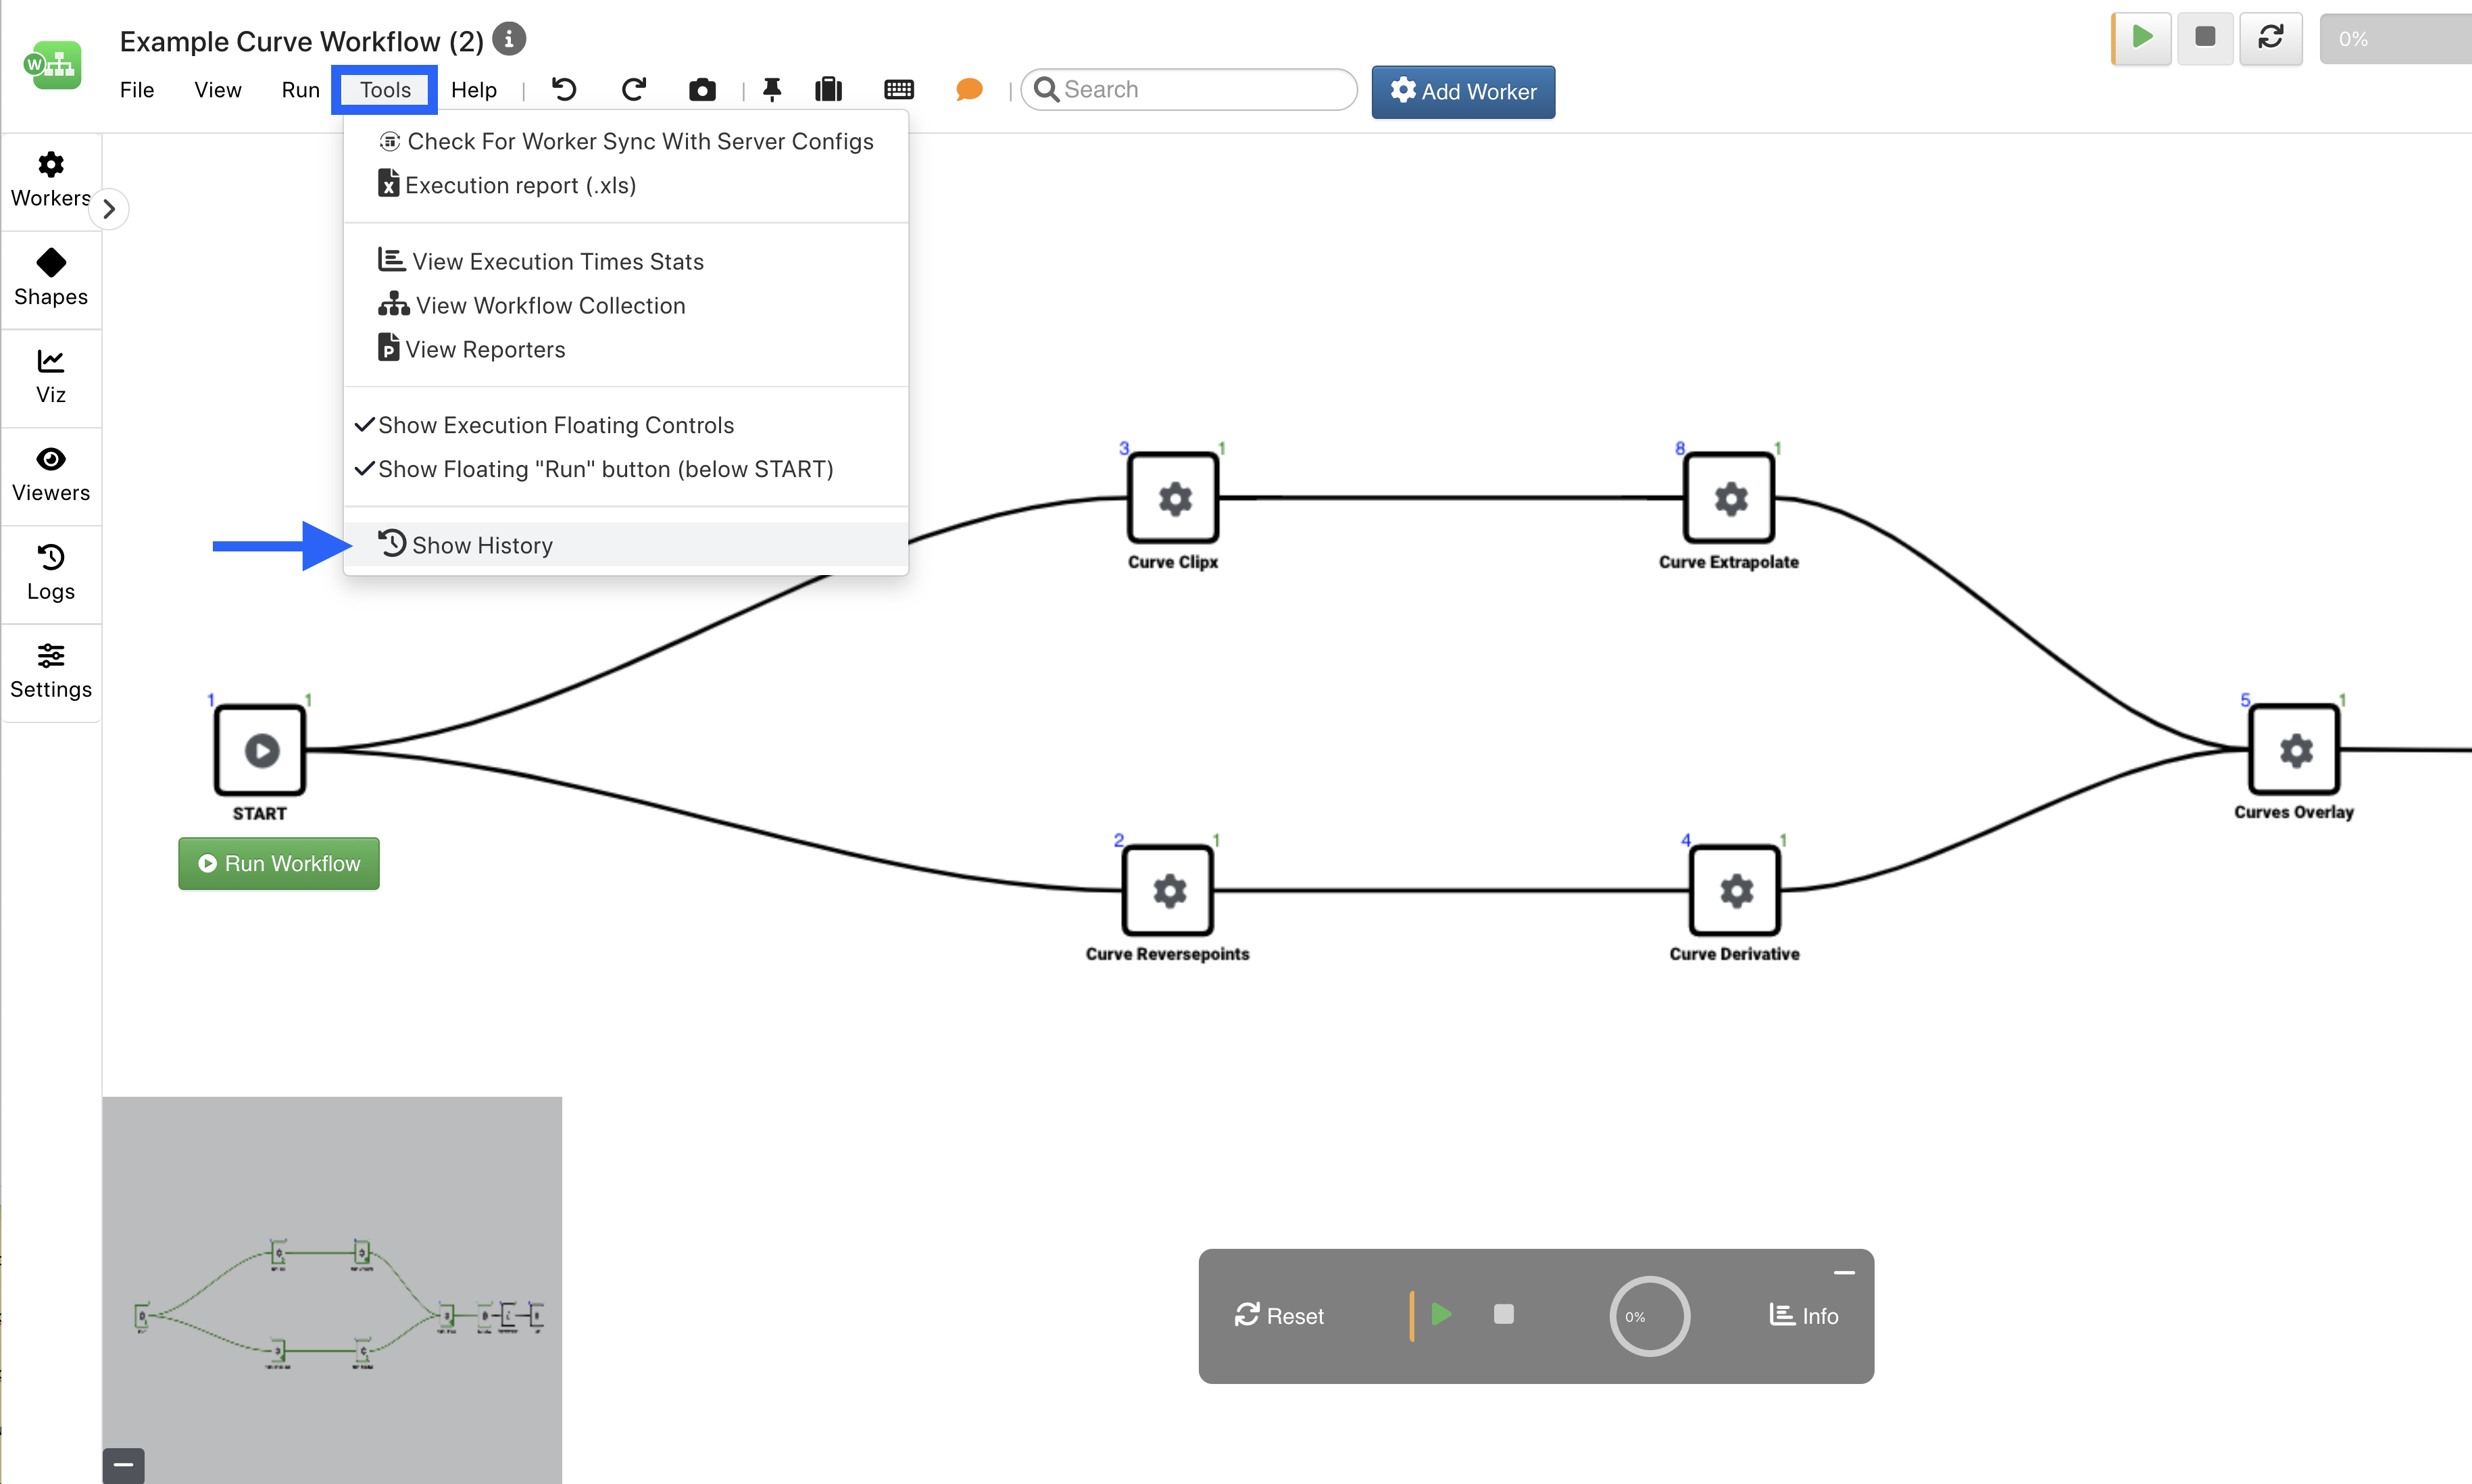
Figure 6: Show History
From here, we can view different versions and replace, merge or duplicate them.

Figure 7: View, Replace, Merge or Duplicate
Here is a video showing the process:
9.3. |share| Sharing
Sharing a workflow can be performed on the Workflows Main Page under the worker options for a particular worker. Click on the 3 dots next and then “Share” to get started.
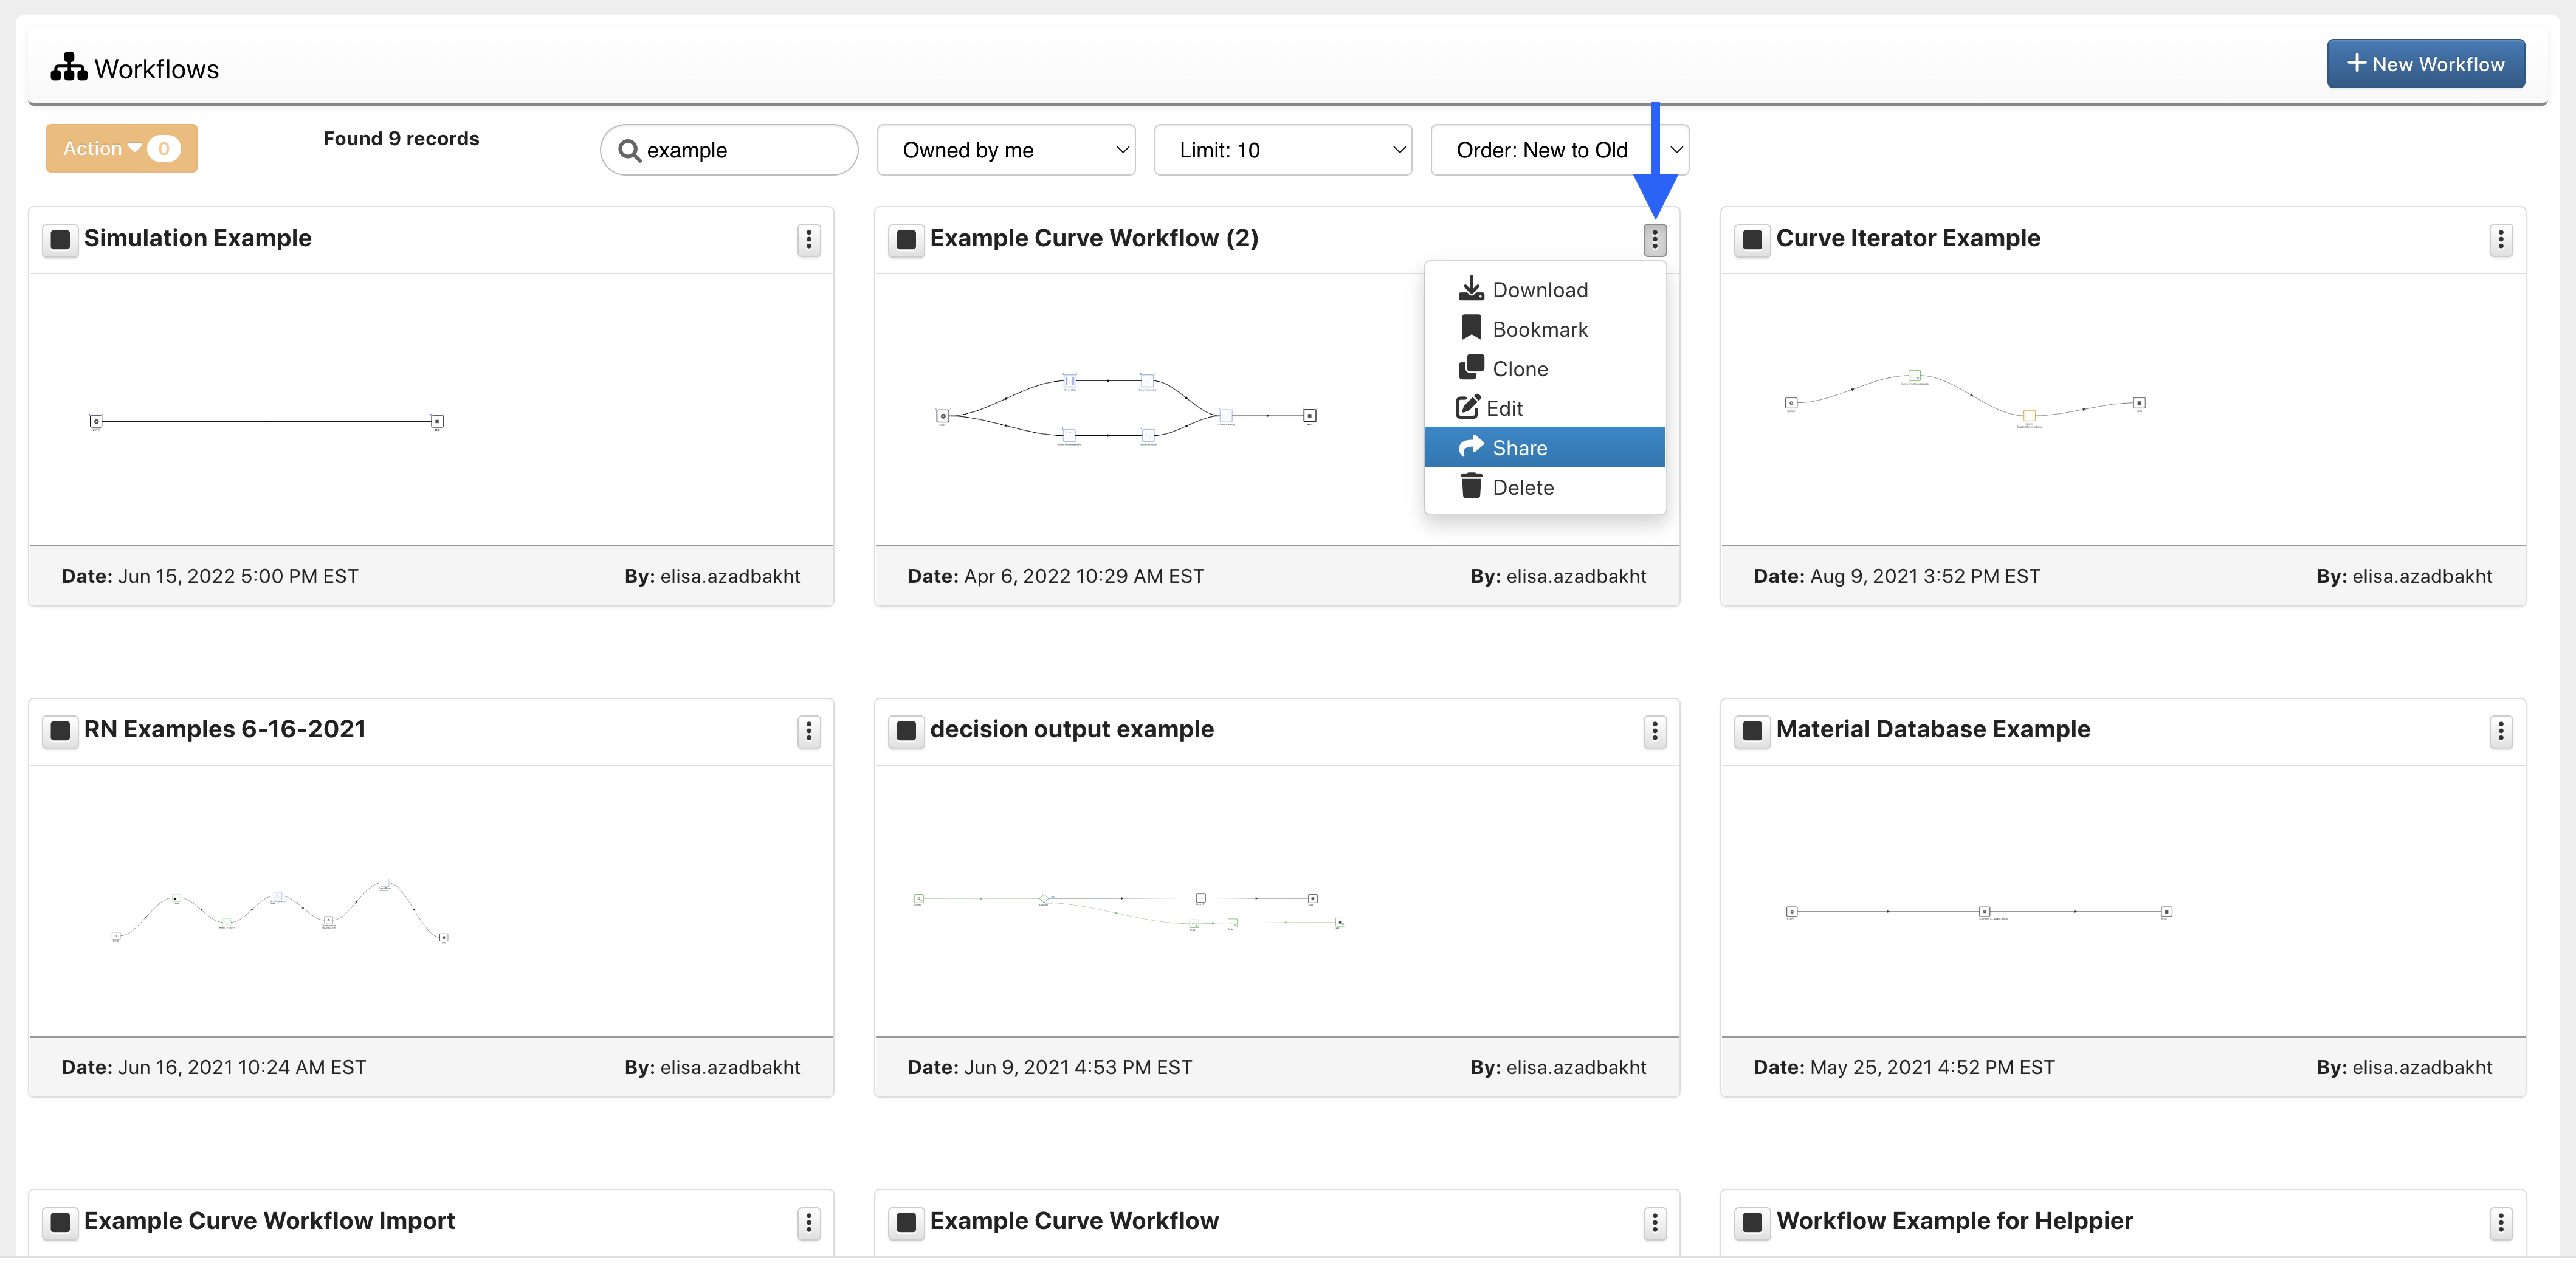
Figure 6: Sharing a Workflow
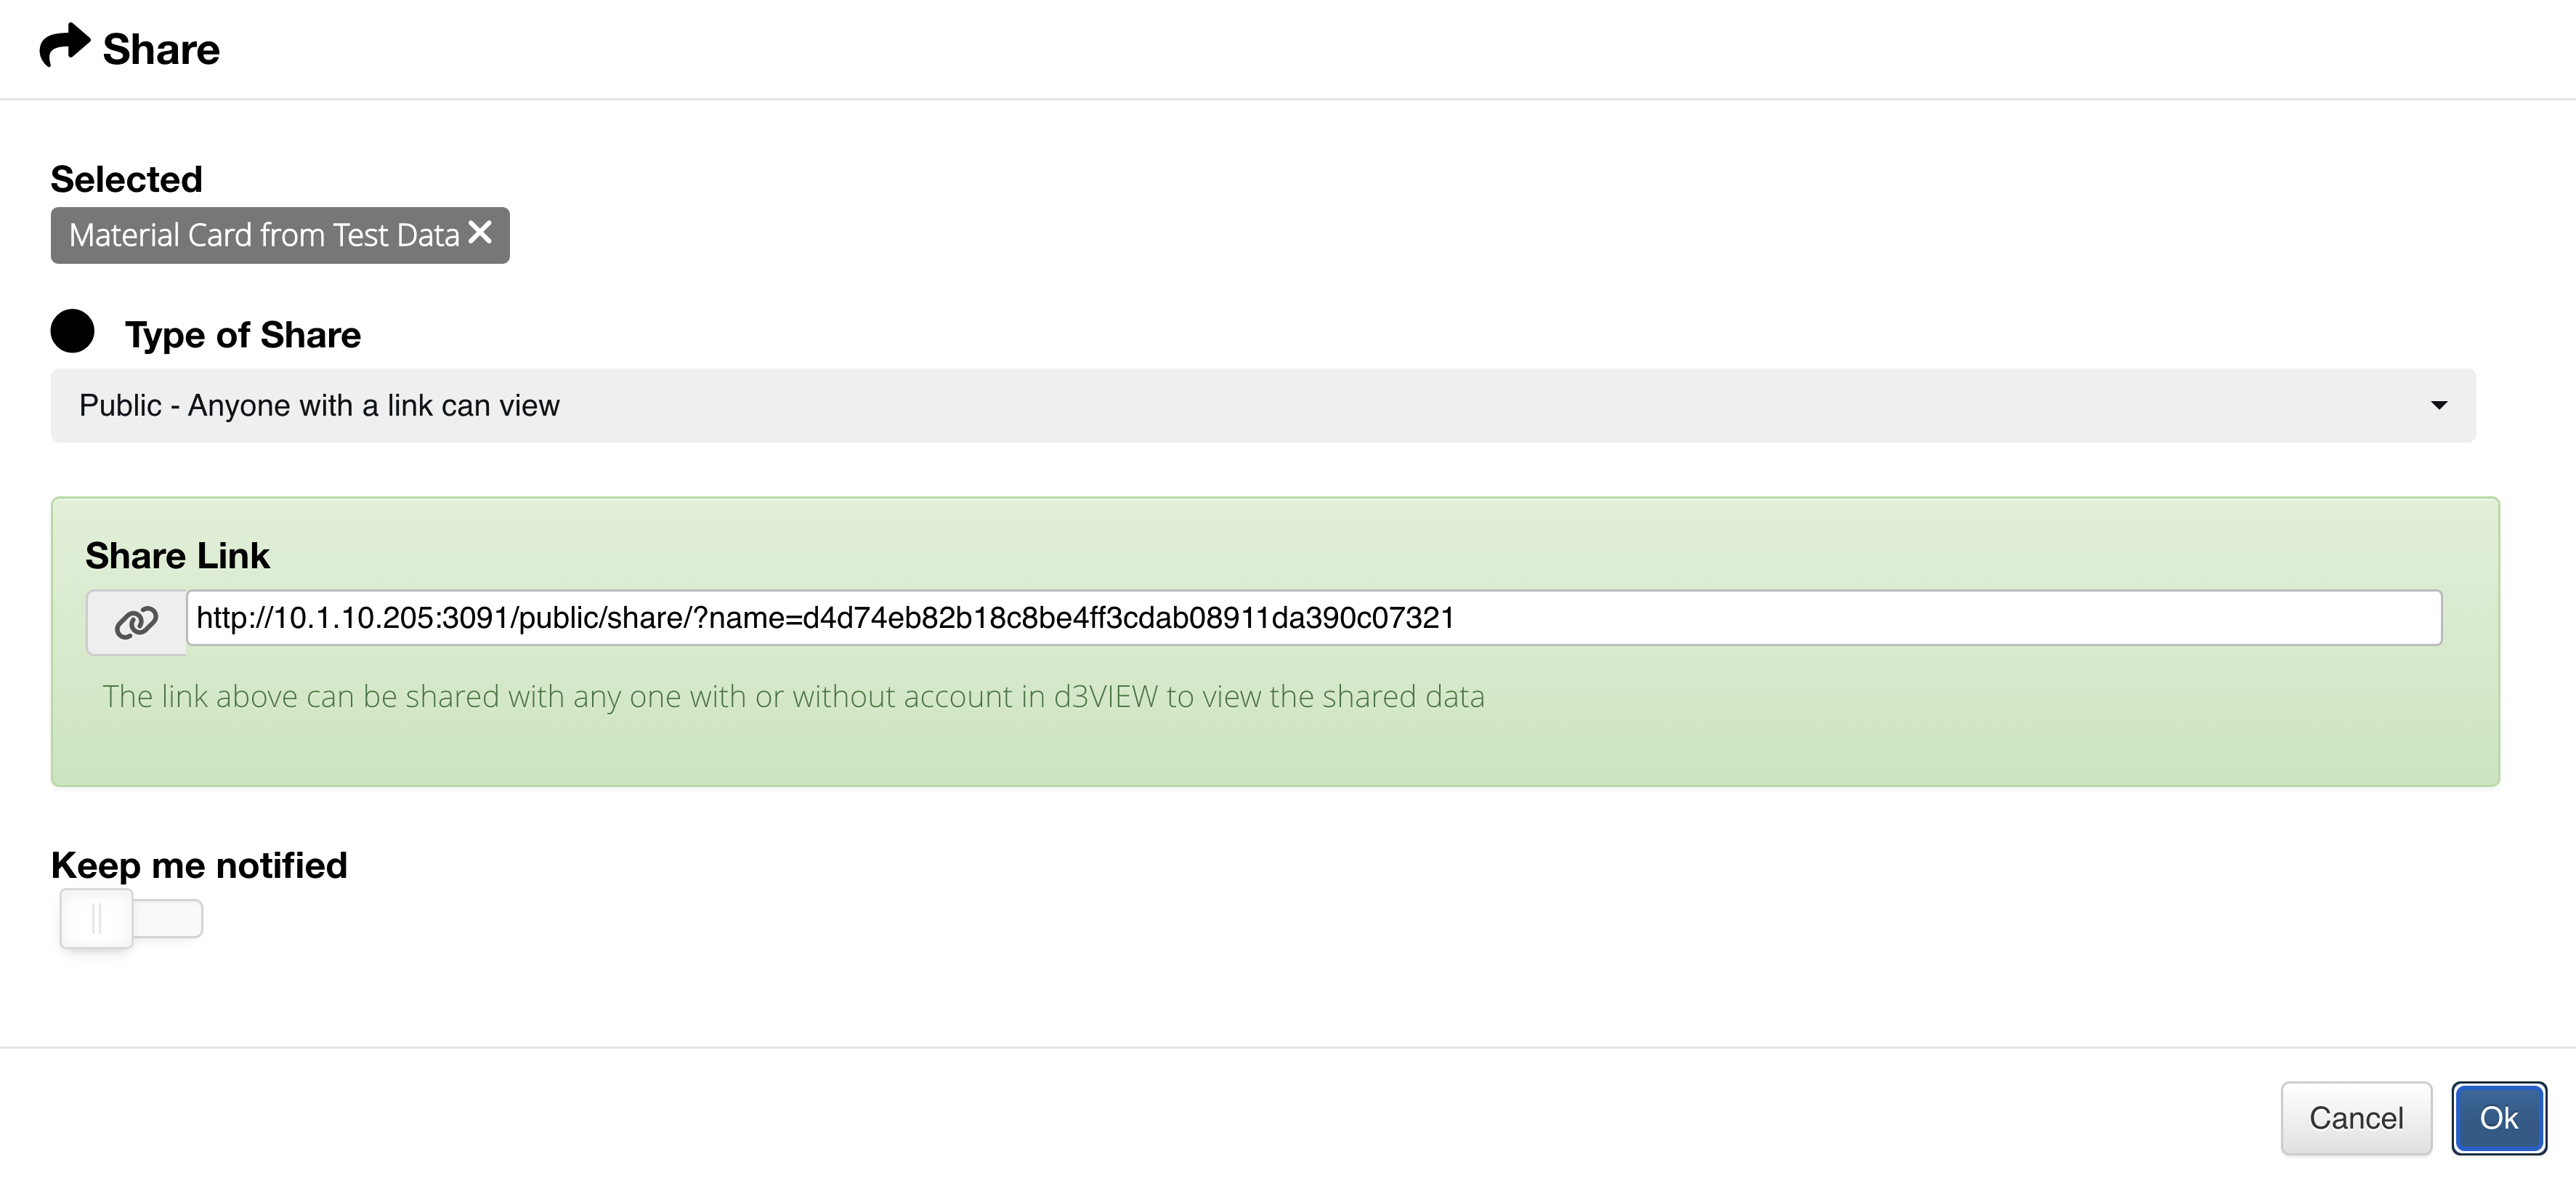
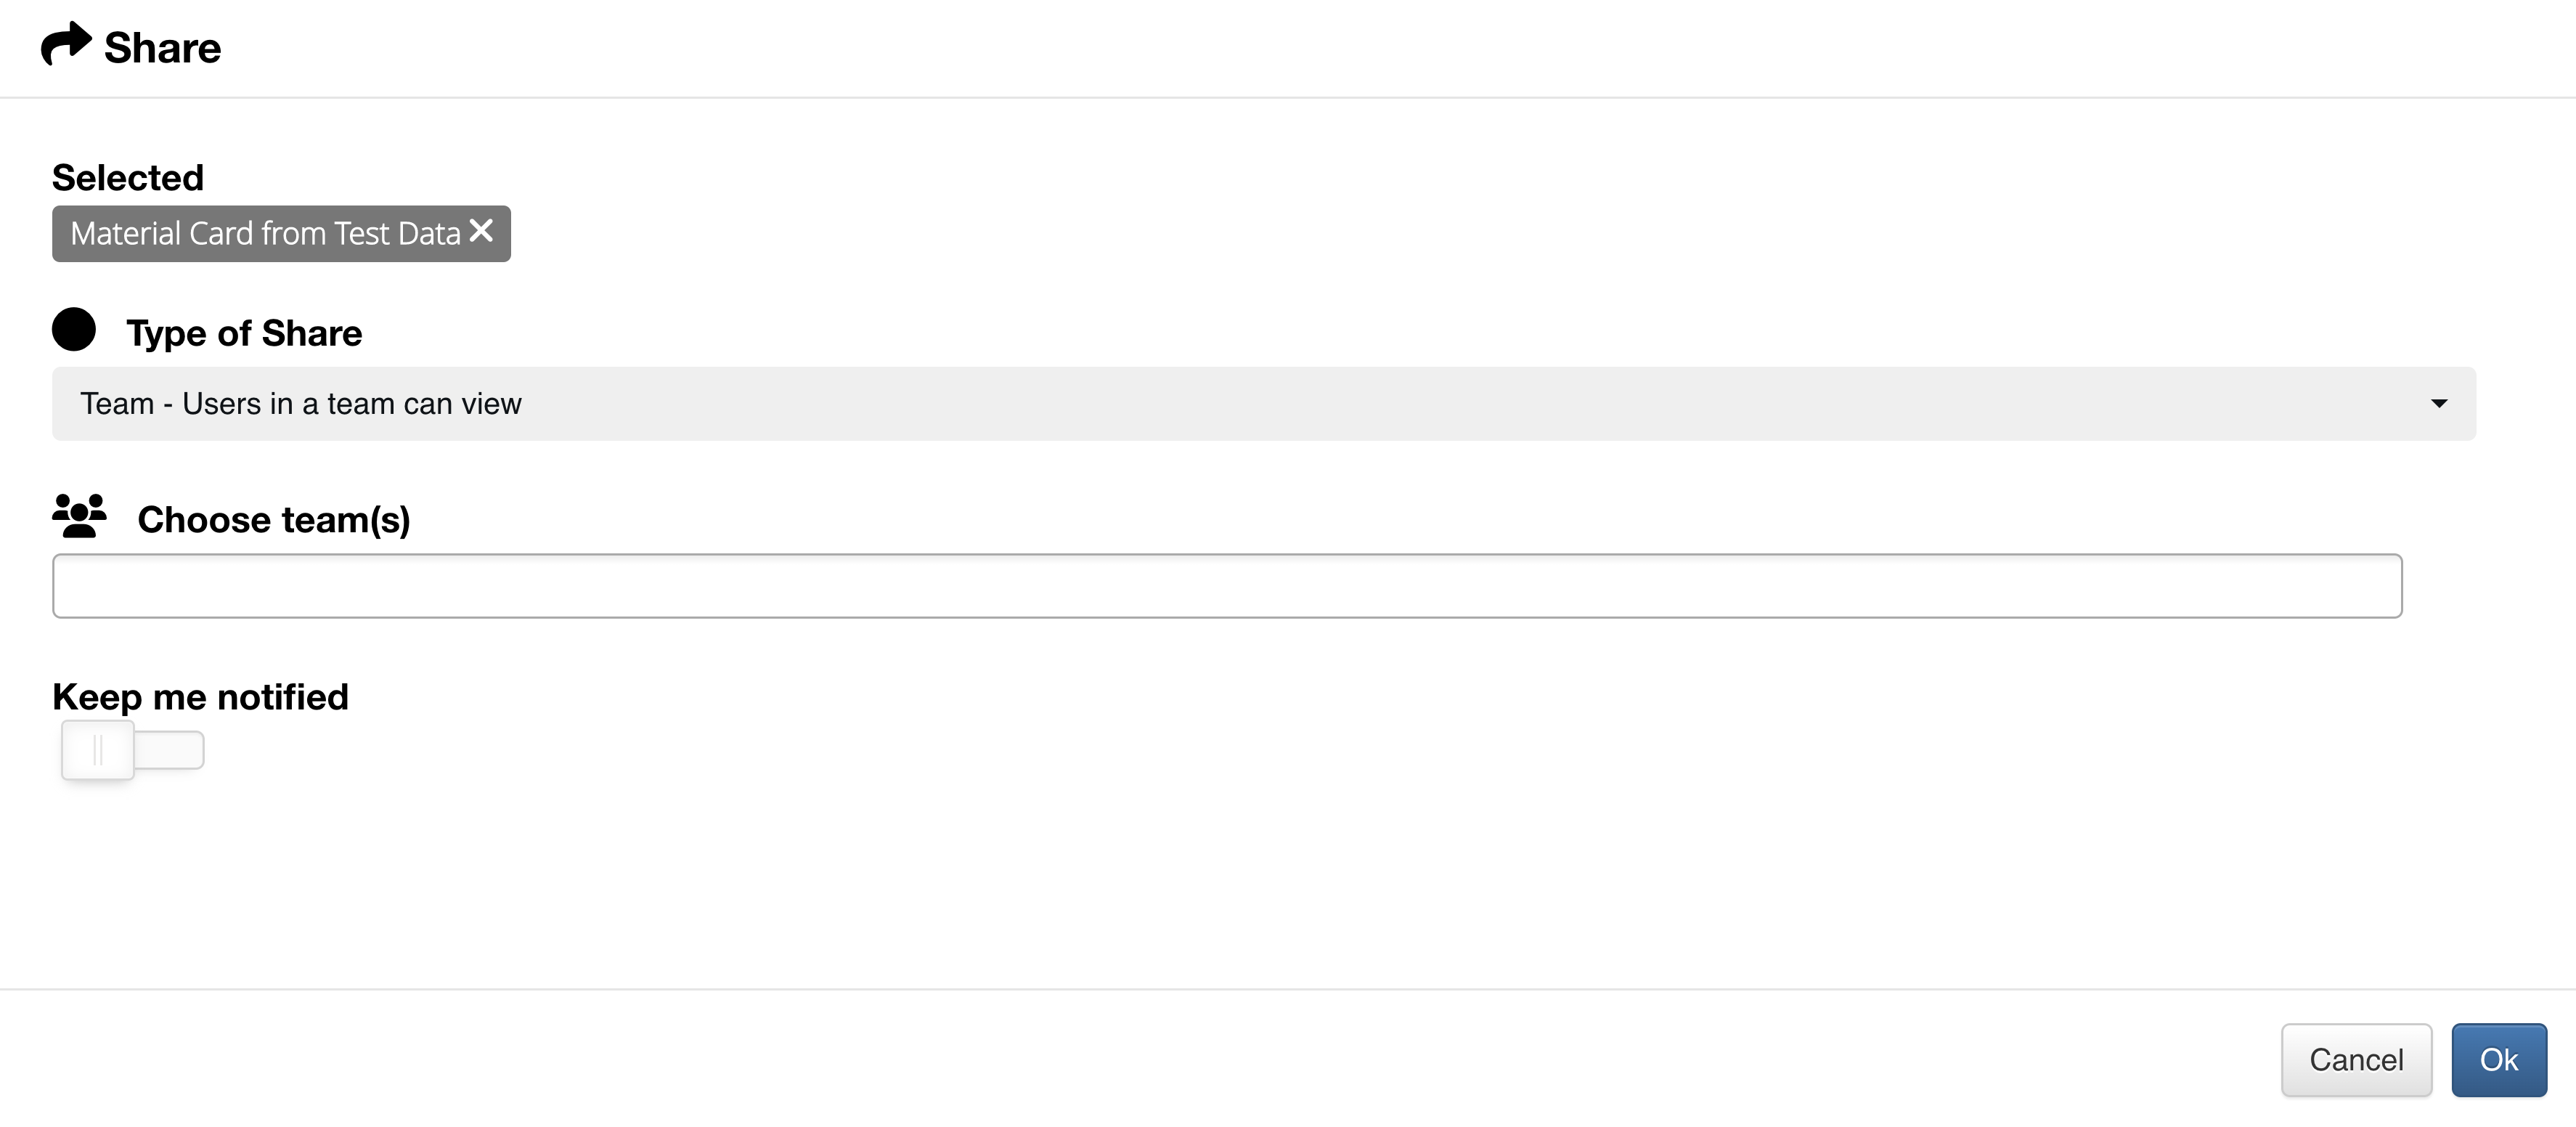
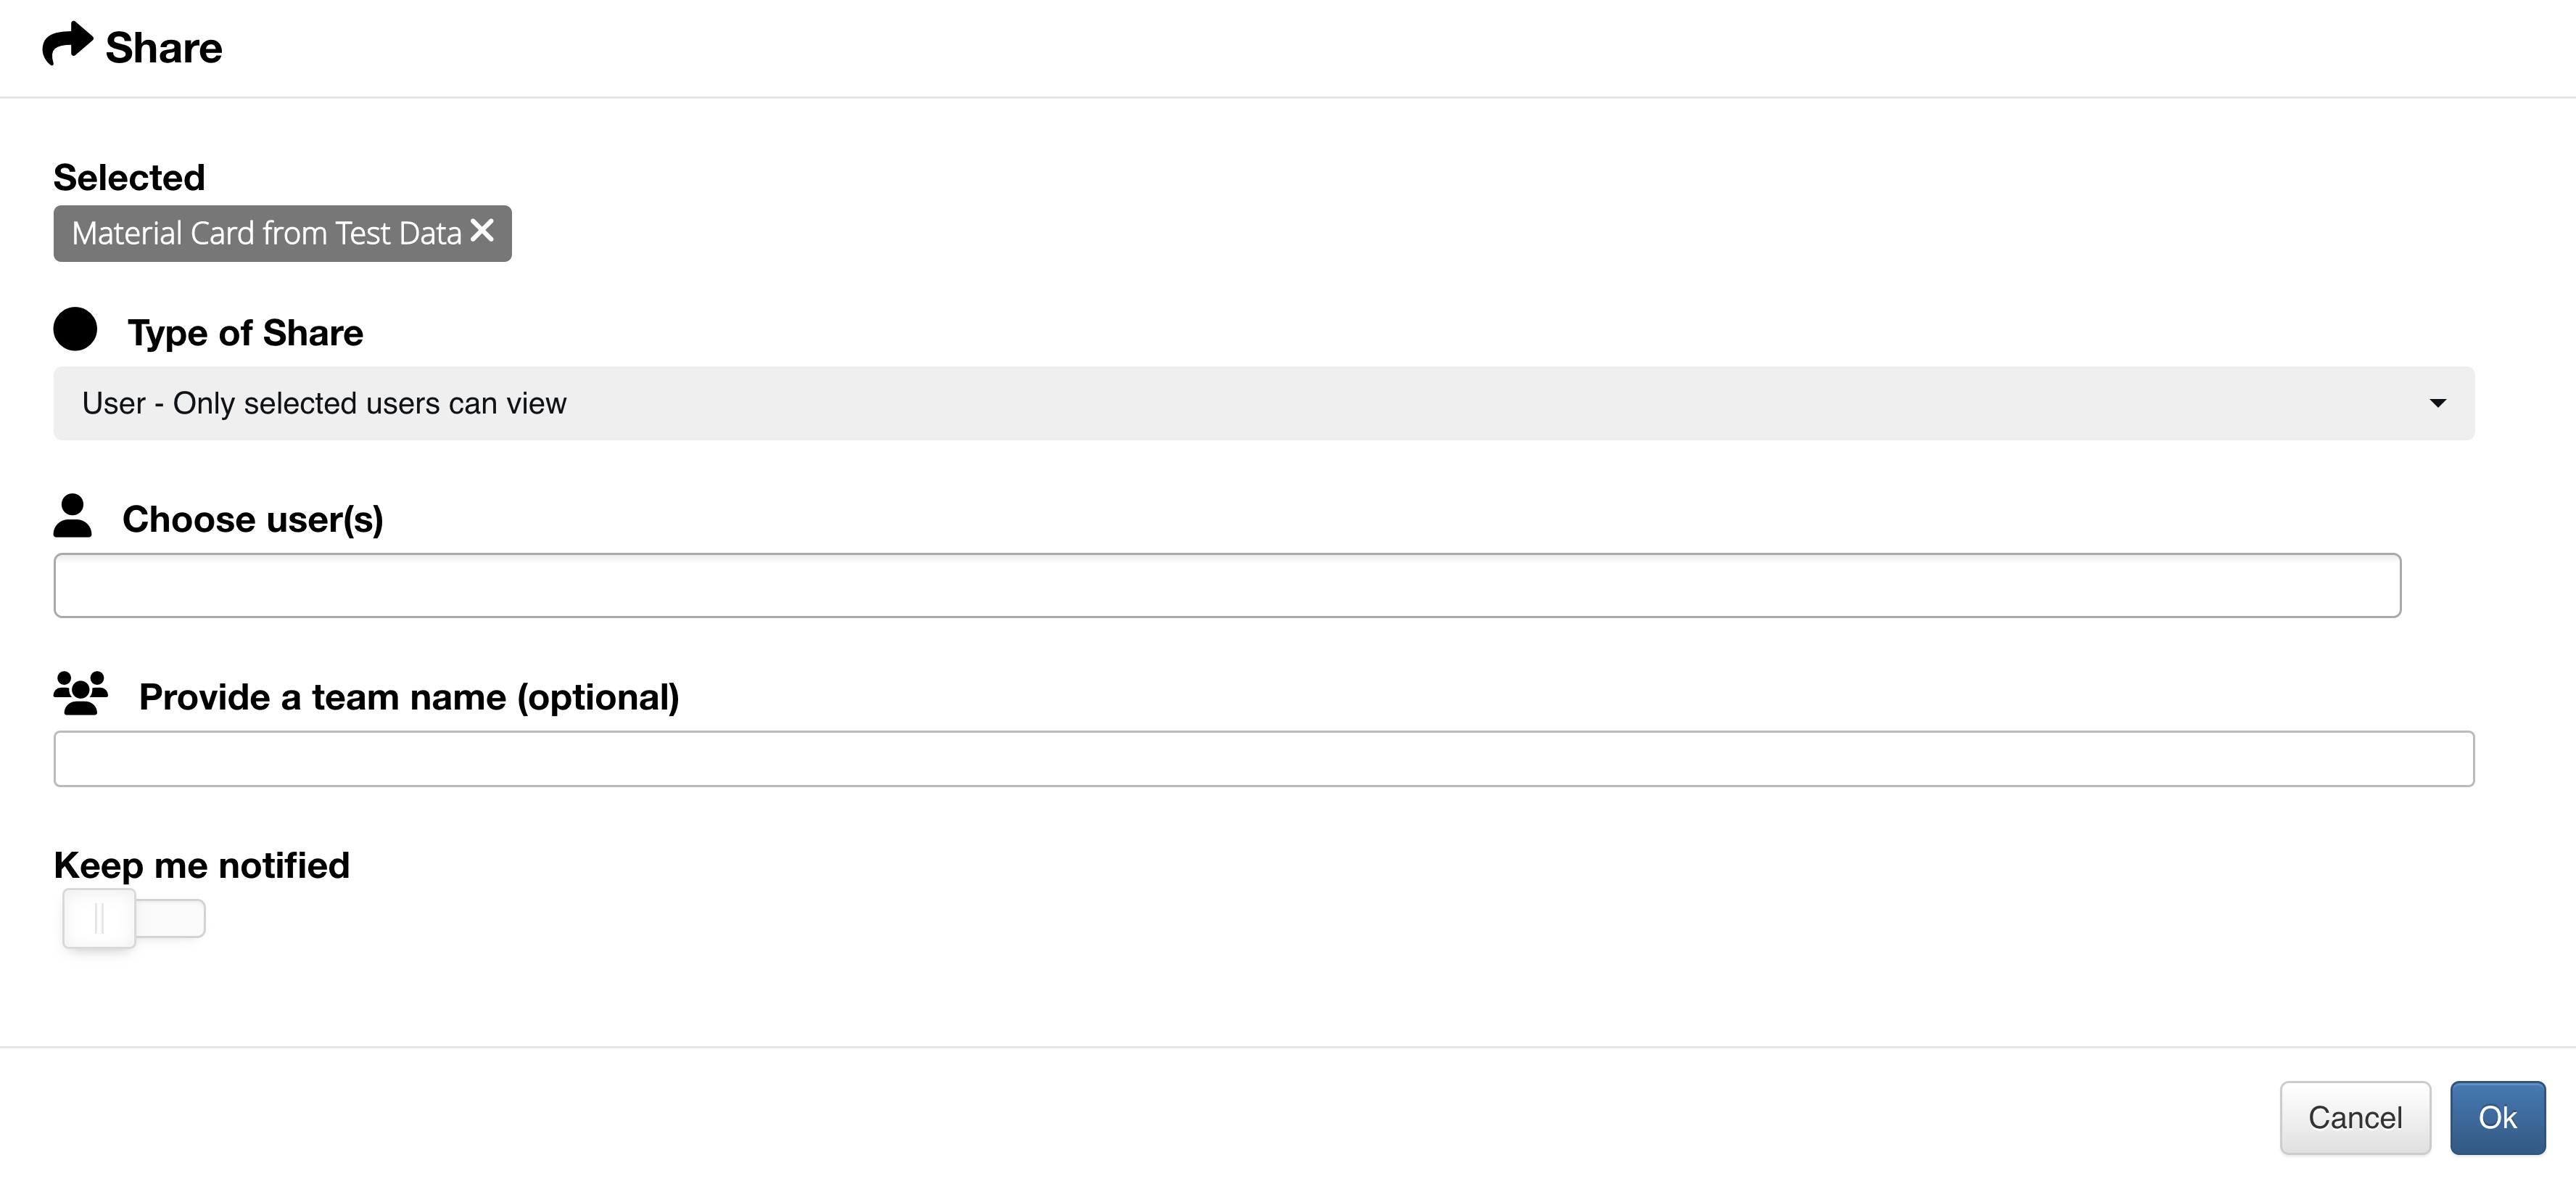
In the next window, we’ll choose the type of sharing for our workflow: Public Share, Team Share and User Share.

Figure 7: Sharing Type
The following video reviews the basics of sharing a workflow. Read on to learn more about each type of share.