2. Installation
This document describes how to install the d3VIEW platform on a Linux server, configure the application, and perform basic setup operations.
2.1. Install d3VIEW
The installation process includes downloading the installation build, choosing an architecture, performing the installation, starting the server, and completing application-level configuration.
2.2. Steps to Install d3VIEW
This section explains the complete install workflow from obtaining the build to starting the application server.
Downloading d3VIEW Build
- d3VIEW supports Linux systems such as RedHat, CentOS, Suse, and Ubuntu.
- Contact your distributor or email support@d3view.com to obtain the installation build (d3VIEW.run) for your target OS.
Architecture
d3VIEW supports three deployment architectures:
- The minimum architecture that can be used to run d3VIEW-Platform is a all-inclusive LAMP stack in which a single Linux server supports running Apache and Database. This is the simplest method to run d3VIEW and can support 1-5 users depending on the server capacity.
- The second method is to host d3VIEW-Platform using two servers that each run Apache and Database server separately. This is most commonly used for small-to-medium loads and is highly recommended. The two servers can be independent with local storage to each of the servers.
- The third method is high-availability and reducdant system in which the Database is run in a clustered environment and the Apache is run behind a load-balancer with multiple servers hosting the application
Variables
| SL NO | Variables | Description |
|---|---|---|
| 1 | D3VIEW_RUN_FILE | This is the .run file that contains Apache, Mysql, and other packages required by d3VIEW. This is provided by d3VIEW. |
| 2 | D3VIEW_INSTALL_DIR | This is the directory where d3VIEW will be installed. Typically, this would be /opt/d3view. |
| 3 | D3VIEW_BINARY | This is the .tgz file that contains the d3VIEW web application. Typical names include d3view_master_xxx.tgz. You can receive this file from d3VIEW Inc. |
| 4 | D3VIEW_APP_DIR | This is the directory where d3view binaries are placed and untarred. This is usually D3VIEW_INSTALL_DIR/app. |
Installation
Follow these commands on your Linux host to install d3VIEW:
- Copy and run the installation script:
Navigate to the d3VIEW installation directory (
/opt/d3view). Copy the installer file (d3VIEW.run) provided by d3VIEW into this directory.cp d3VIEW.run /opt/d3viewThe above command copies the
d3VIEW.runinstaller file into the/opt/d3viewinstallation directory.Next, change to the installation directory.
cd /opt/d3viewThis command moves the terminal session to the
/opt/d3viewdirectory, where the installer file is located.Run the installer using the following command.
./d3VIEW.runThis command executes the
d3VIEW.runinstaller script, which starts the installation process and installs the required components.
Verify that the installation files are present
Navigate to the
d3VIEWinstallation directory.cd d3VIEW
This command changes the current working directory to the
d3VIEWdirectory.List the files and directories to confirm the installation contents.
lsThis command displays all files and folders in the
d3VIEWdirectory. Verify that the required installation files are present.If the
tmpdirectory is missing, create it using the following command.mkdir tmp
This command creates a
tmpdirectory inside the currentd3VIEWdirectory.Start the application server
Run the following command to start the d3VIEW application server.
./d3view_server.sh start
This command starts the d3VIEW server and initializes the required application services.
Retrieve the Host IDs for licensing
Open a web browser and navigate to the following URL.
http://D3VIEW_SERVER:3080/hostids.php
Replace
D3VIEW_SERVERwith the hostname or IP address of the machine where d3VIEW is installed.This page displays the Host IDs, which are required to generate the d3VIEW license.
Below Image shows the host IDs info.
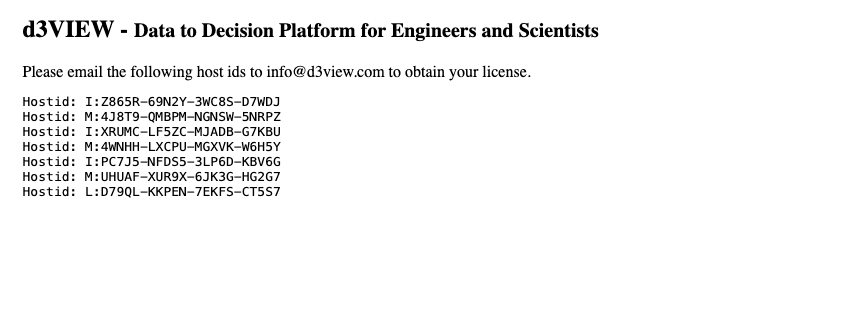
Host IDs info
Installing/configuring license
Configure the license file
After receiving the valid license file, open the
php.iniconfiguration file located in the following directory:/D3VIEW_INSTALL_DIR/amp/php/bin/php.ini
This file contains the configuration settings used by the d3VIEW application.
Update the license path
Edit the
php.inifile and update thelicense_pathparameter so that it points to the location of the new license file.Restart the d3VIEW server
After updating the license path, restart the d3VIEW server to apply the changes.
/D3VIEW_INSTALL_DIR/d3view_server.sh stop
/D3VIEW_INSTALL_DIR/d3view_server.sh start
The first command stops the running d3VIEW server, and the second command starts it again with the updated configuration.
The image below shows an example of the configured license path.
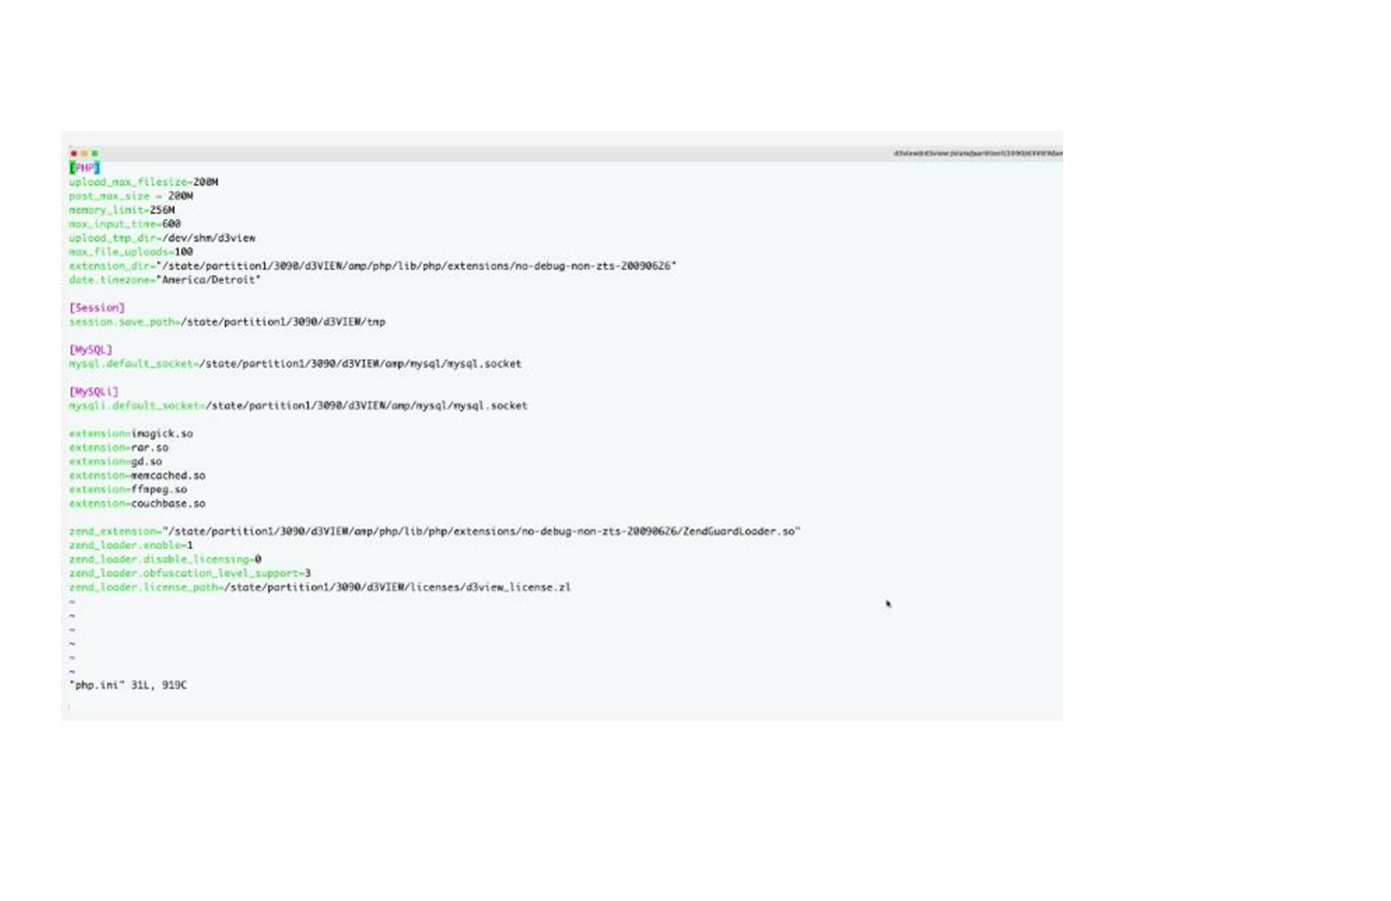
License path
Application Installation
Start the server using /D3VIEW_INSTALL_DIR/d3view_server.sh
Open the link http://D3VIEW_SEVRER:3080 ,which will open the installation page. Click on ‘Install’
http://D3VIEW_SERVER:3080
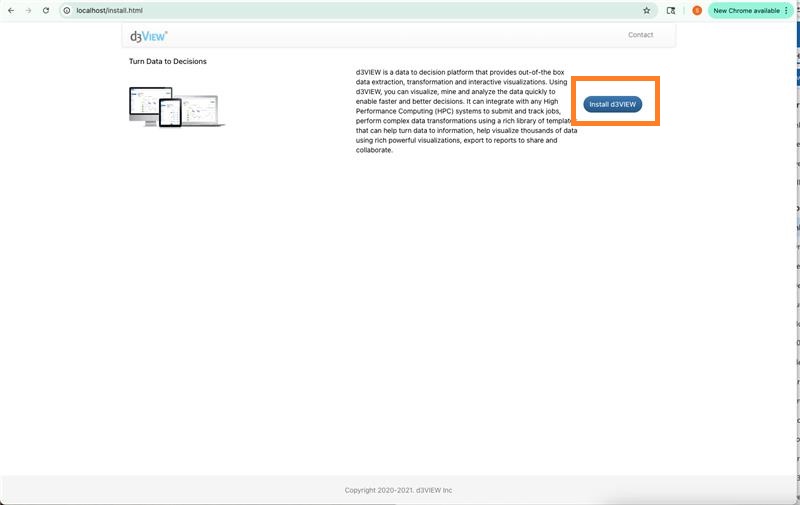
Install
- The next step in Installing is Database connection, and this will tell us how to connect to the Database.
- Provide Host name
- Username
- Password
- Database name
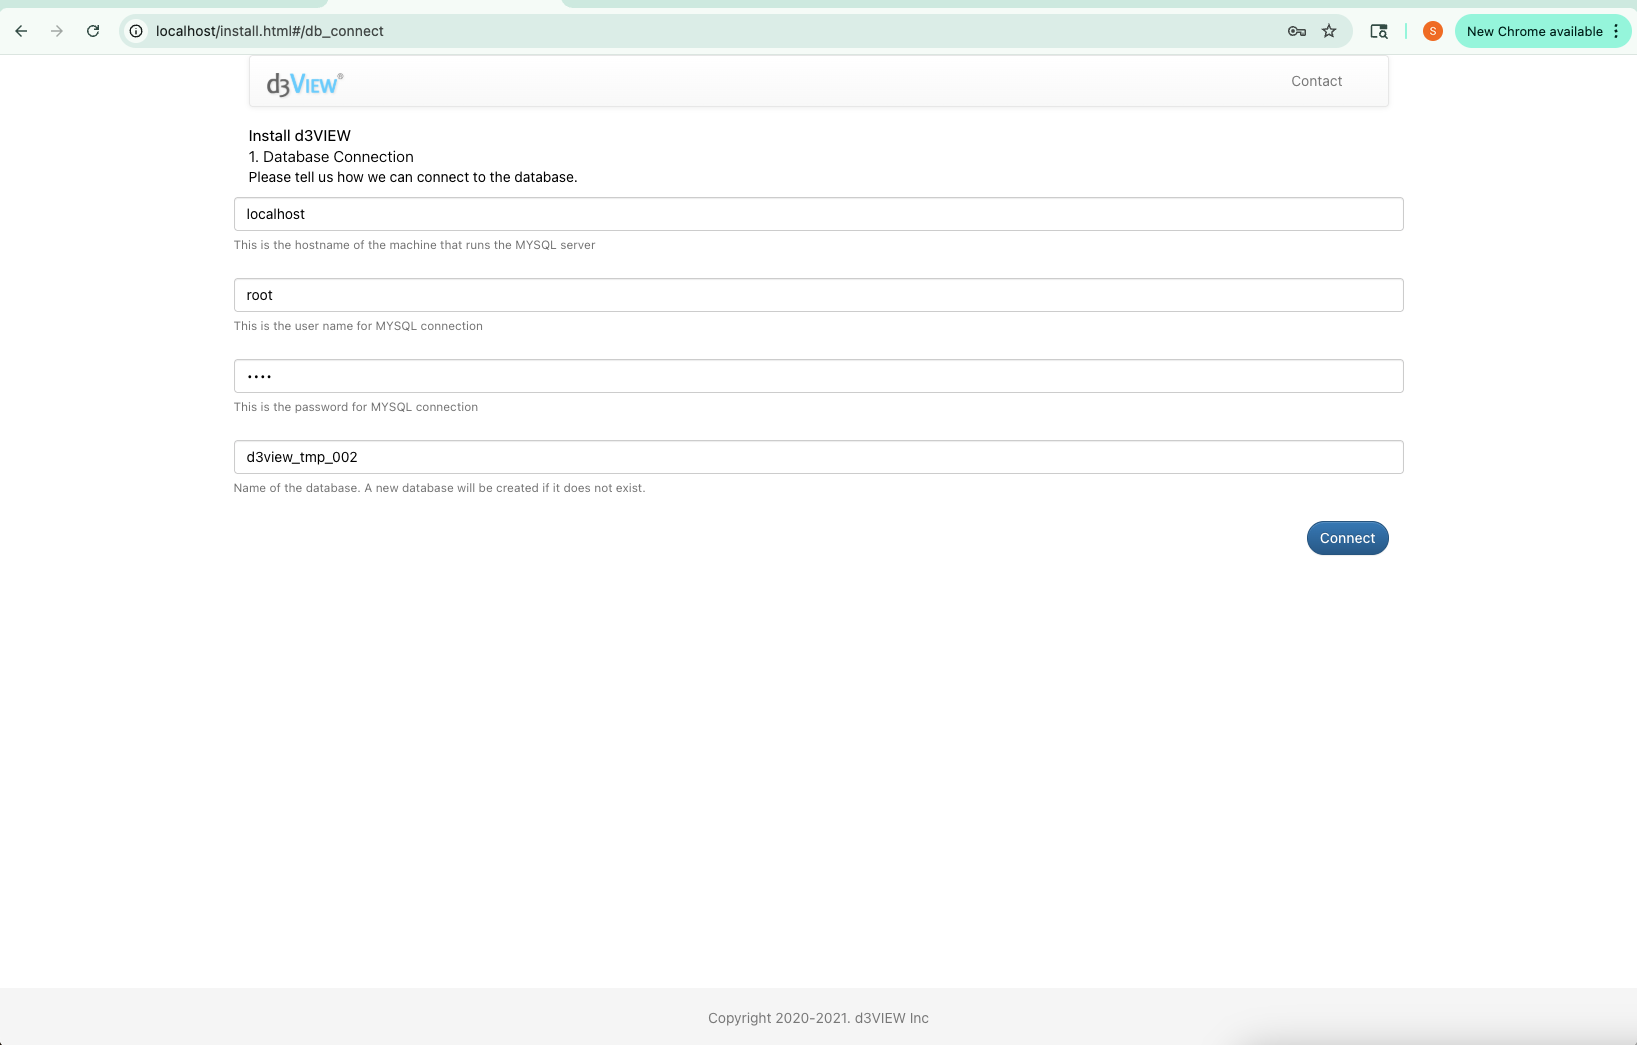
Database connection
Next step is to Create Administration account by providing - user name , email ID and Password.
Click on create account after adding the credentials.
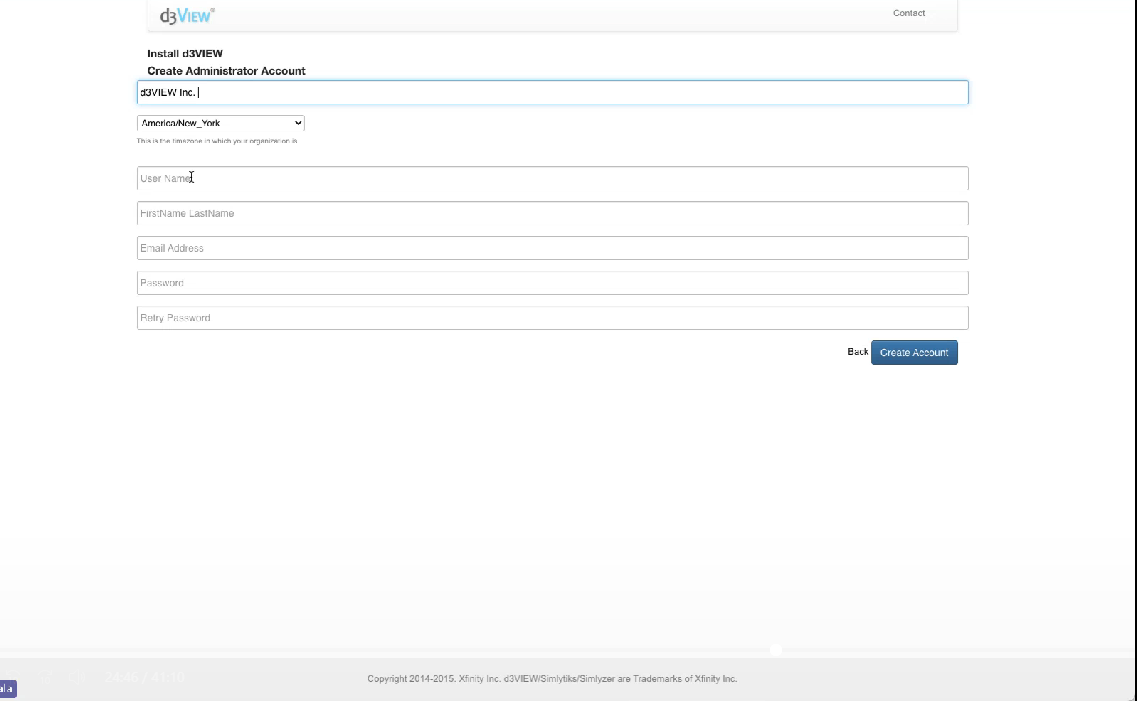
Administration
- Once the d3VIEW installation is complete and the account is created
- Login page will be navigated, and User can login to d3VIEW with the credentials.
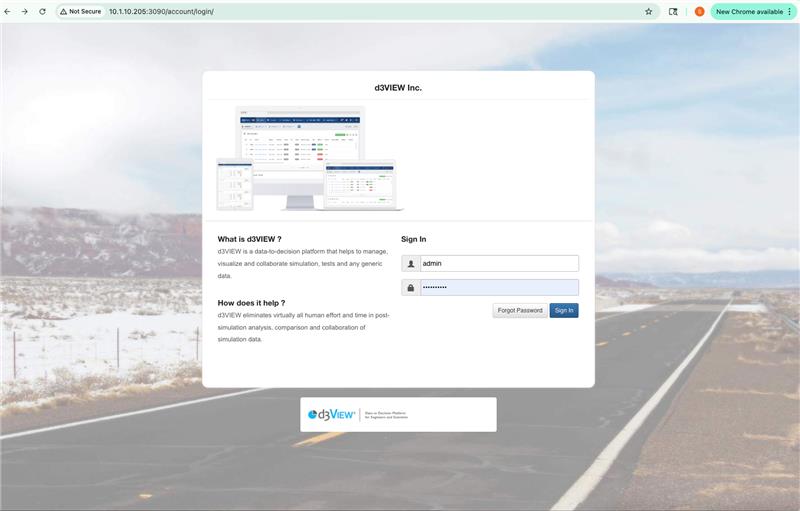
Login to d3VIEW
After successful login, the user will be directed to the d3VIEW dashboard, where you can start visualizing and analyzing simulation data.
2.3. Updating
Copy the new build file to the application directory
Place the new build archive file
d3VIEW_NEW_BUILD_FILE.tgzinto the d3VIEW application directory./D3VIEW_INSTALL_DIR/app/
This directory stores all extracted d3VIEW build versions.
Extract the new build archive
Navigate to the
appdirectory and extract the build file.tar -xzf d3VIEW_NEW_BUILD_FILE.tgz
This command extracts the archive and creates a new directory:
/D3VIEW_INSTALL_DIR/app/d3VIEW_NEW_BUILD_FILE/
Inside this directory, there is a folder named
webwhich contains the new d3VIEW application build.Navigate to the d3VIEW installation directory
Return to the main d3VIEW installation directory.
cd /D3VIEW_INSTALL_DIR/
Update the
websymbolic linkRemove the existing
weblink and create a new symbolic link that points to the newly extracted build.rm web ln -s /D3VIEW_INSTALL_DIR/app/d3VIEW_NEW_BUILD_FILE/web web
rm webremoves the existing symbolic link that points to the previous d3VIEW build.ln -s ... webcreates a new symbolic link namedwebthat points to thewebdirectory inside the newly extracted build.
2.4. Set up SSL Keys
Generate a Certificate Signing Request (CSR)
On the server where d3VIEW is installed, generate a CSR and private key using the following command:
openssl req -new -newkey rsa:2048 -nodes -keyout d3view_server.key -out d3view_server.csr
This command generates: -
d3view_server.key– the private key for the server -d3view_server.csr– the certificate signing request that must be submitted to the certificate provider.Submit the CSR for SSL certificate generation
Share the generated
d3view_server.csrfile with your network or security team (or certificate authority) to request the SSL certificate.Convert the issued certificate (if provided in
.p7bformat)If the SSL certificate is provided in
.p7bformat, convert it to.cerformat using the following command:openssl pkcs7 -print_certs -in ssl_certificate.p7b -out ssl_certificate.cer
This command extracts the certificate chain from the
.p7bfile and saves it as a.cerfile.Configure Apache to use the SSL certificates
Open the Apache configuration file:
D3VIEW_INSTALL_DIR/am/httpd/conf/http.conf
Add or update the following SSL configuration entries:
SSLCertificateKeyFile /path/to/d3view_server.key
SSLCertificateFile /path/to/ssl_certificate_from_network_team.cer
SSLCertificateChainFile /path/to/ssl_certificate_chain.cer
SSLCertificateKeyFile– Path to the private key generated in Step 1.SSLCertificateFile– SSL certificate provided after submitting the CSR.SSLCertificateChainFile– Certificate chain extracted from the.p7bfile.
2.5. Additional Information
Start Apache with root privileges (if port 80 is restricted)
Port
80typically requires root privileges. To start the Apache web server on this port, switch to therootuser.When starting Apache at this stage, ensure that MySQL is not started yet. This step only starts the Apache web server.
Switch back to the regular user
After Apache has started successfully, switch back to your normal user account.
Running the remaining services as a regular user ensures that MySQL and other d3VIEW processes operate with the correct user permissions.
Start the MySQL server
Start the MySQL server as your normal user (not
root).This ensures that database services run under the appropriate application-level permissions.
Access the d3VIEW application
Once Apache and MySQL are running, open a browser and access the d3VIEW application using the server URL.
2.6. FAQs
What happens in the scratch directory?
The scratch directory is used to create temporary files during data extraction processes. These files are typically intermediate files generated while processing simulation data.
What is the database directory?
The default database directory is:
D3VIEW_INSTALL_DIR/amp/mysql/data
This directory stores all database-related information used by d3VIEW.
How do I set up HPC integration?
Detailed instructions for configuring HPC integration can be found in the d3VIEW administration documentation:
https://www.d3view.com/docs/master/getting_started/Administration.html
What is ``FILE_TRANSLATORS``?
FILE_TRANSLATORS is used to convert LS-DYNA d3plot files into a
compressed format for efficient storage and processing.
What is ``SIMLYZER_HOST``?
SIMLYZER_HOST specifies the host where data extraction processes
can be performed in certain configurations.
How does LDAP authentication work?
By default, authentication is handled using the d3VIEW database. LDAP can be configured as an alternative authentication mechanism.
What is FORA?
FORA specifies the location of the FORA server. Example:
fora3.d3view.com
What is ``LUCY_EXE``?
LUCY_EXE should point to the Lucy executable location:
D3VIEW_INSTALL_DIR/lucy/bin/lucy