
17.  Analyzing
In this section, we’ll go over the Image Analyzer and Image Positioner visualizations as well as the GIF player for comparing similar images or GIFs in a dataset.
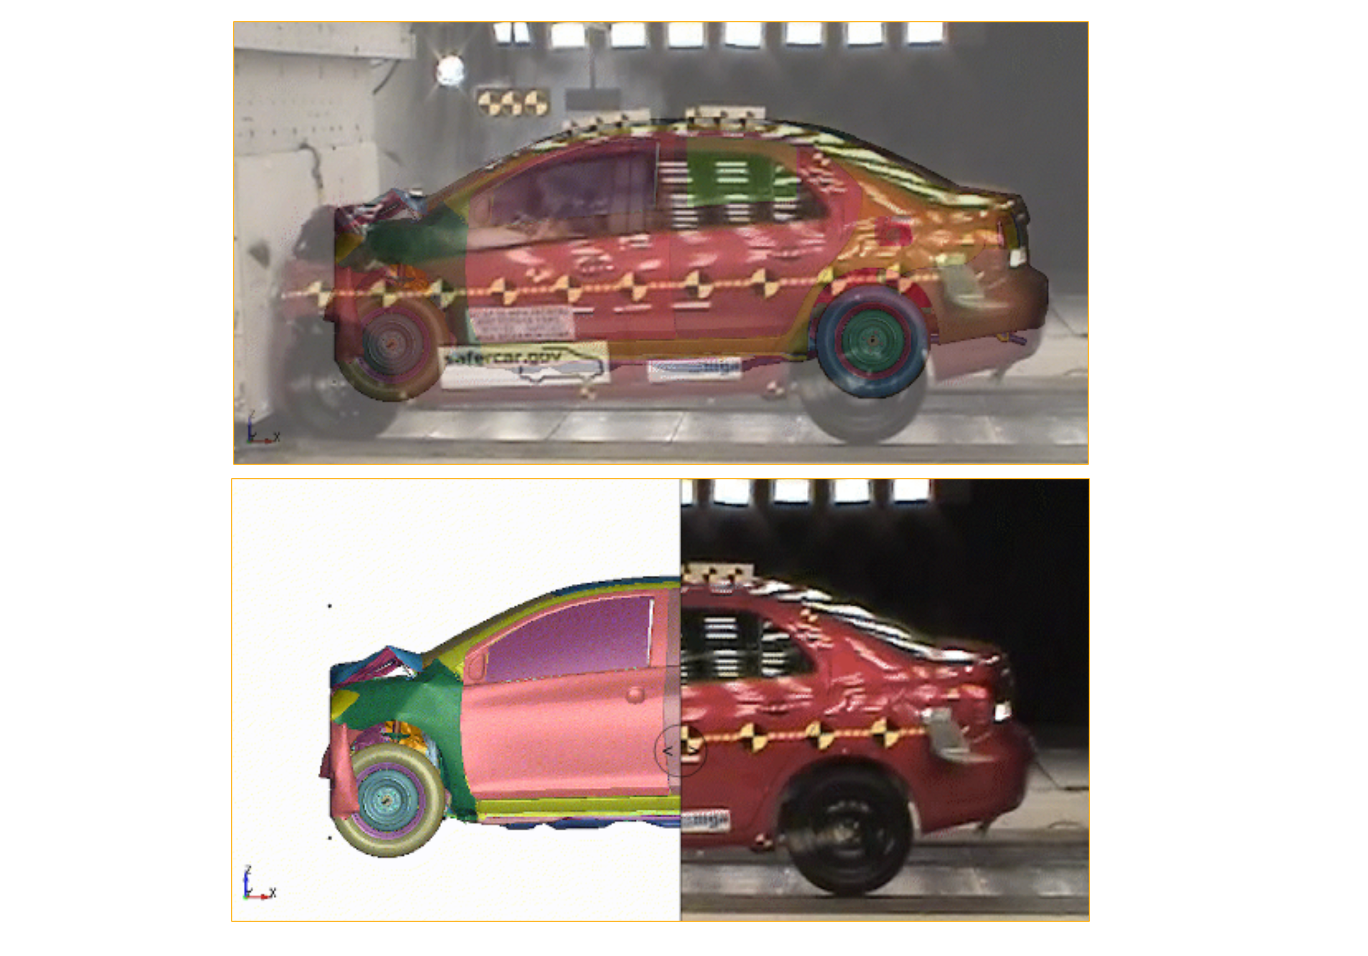
Analyzed Images of The Yaris Car Model Overlay Between CAE and Test
Image Analyzer

The Image Analyzer helps overlay and interpret difference of two images of the same dataset. Generally, these images will be in the same dataset column and be related for reasonable comparison. An example would be comparing a crash test image to a crash simulation image, as we have in the image below, which also illustrates the options for this visualization.
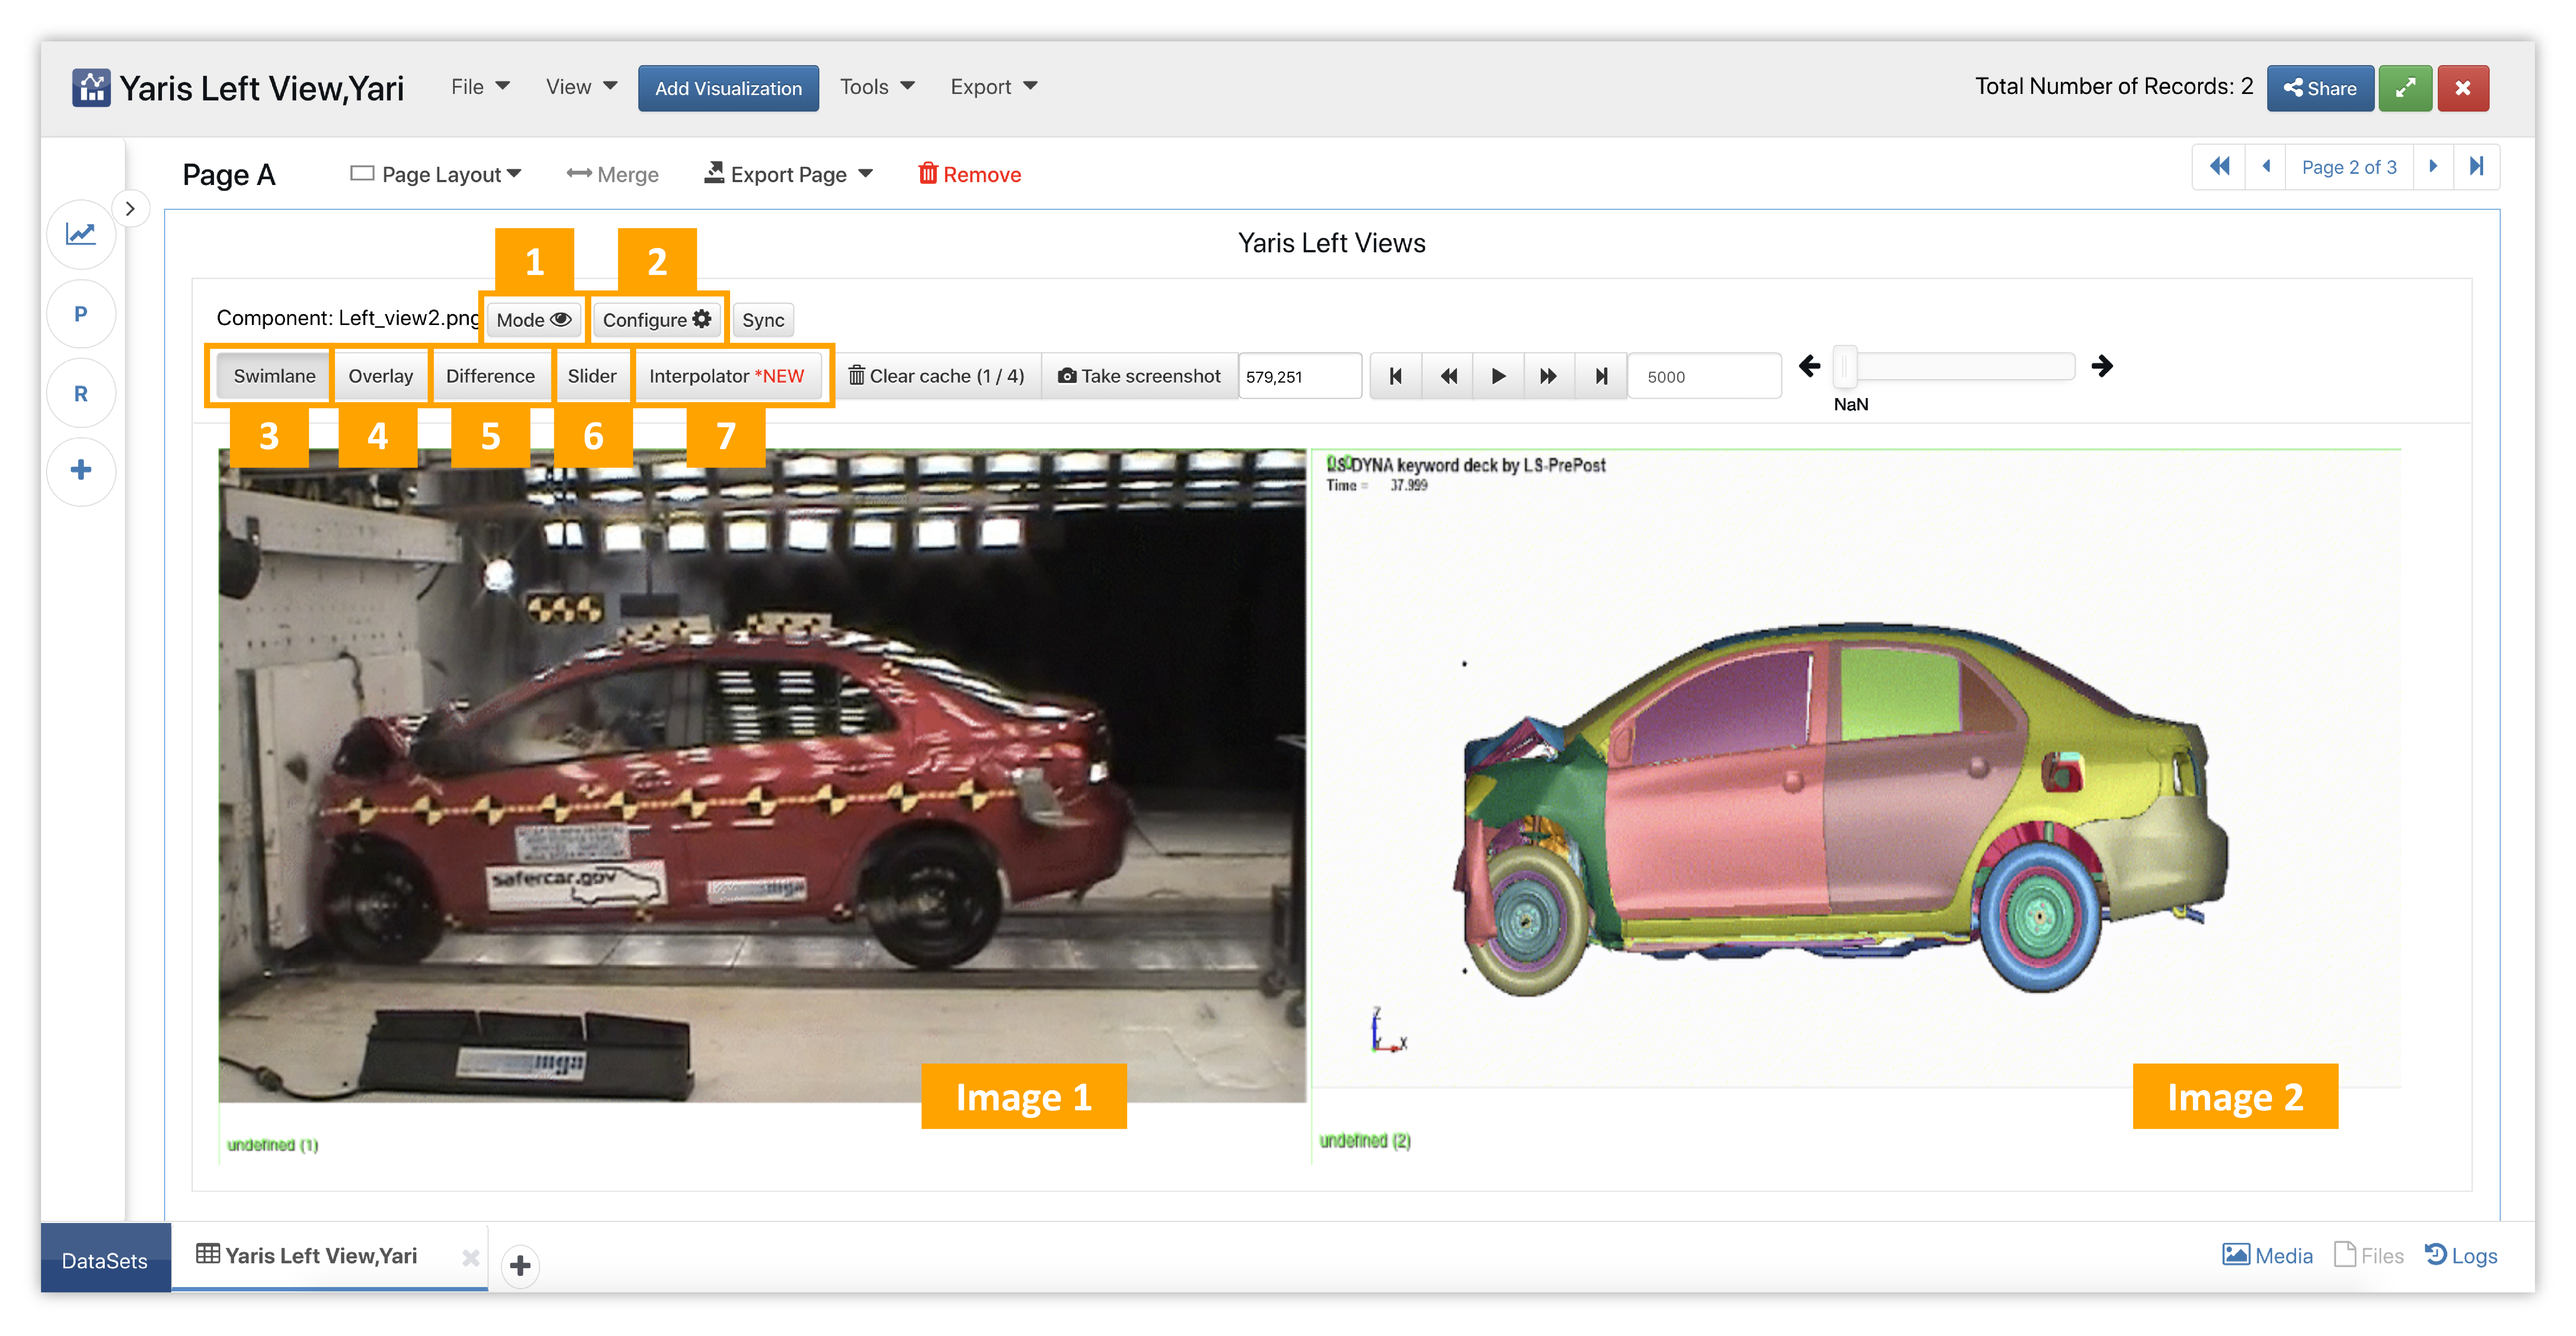
Figure 1: Image Analyzer Overview
- Mode: Hide or show the analyzer modes
- Configure: Use Image Positioner to line up images so they overlay nicely
- Swimlane: Basic view
- Overlay: Place image on top of one another to compare
- Difference: Blends colors based on brightness for color difference comparison
- Slider: Slide one image over the other for enhanced comparison
- Interpolator: Smoothly animates transition of one image over another
Overlay
The following video shows the overlay option for Image Analyzer with our crash and simulation images.
Difference
The following video shows the difference option for Image Analyzer with our crash and simulation images.
Slider
The following video shows the slider option for Image Analyzer with our crash and simulation images.
Configure
As we may have noticed in the crash and simulation example, sometimes the images do not line up correctly. When this happens, we can use the configure option to position them how we like. This option directly links us to the Image Positioner visualizer which we can also find separately in the visualization menu (more on it below). The following video shows how to position our crash and simulation images using the configure option in Image Analyzer.
Image Analyzer Examples
Chest X-ray
For this example, we’ll be analyzing two different chest x-rays to explore their differences.
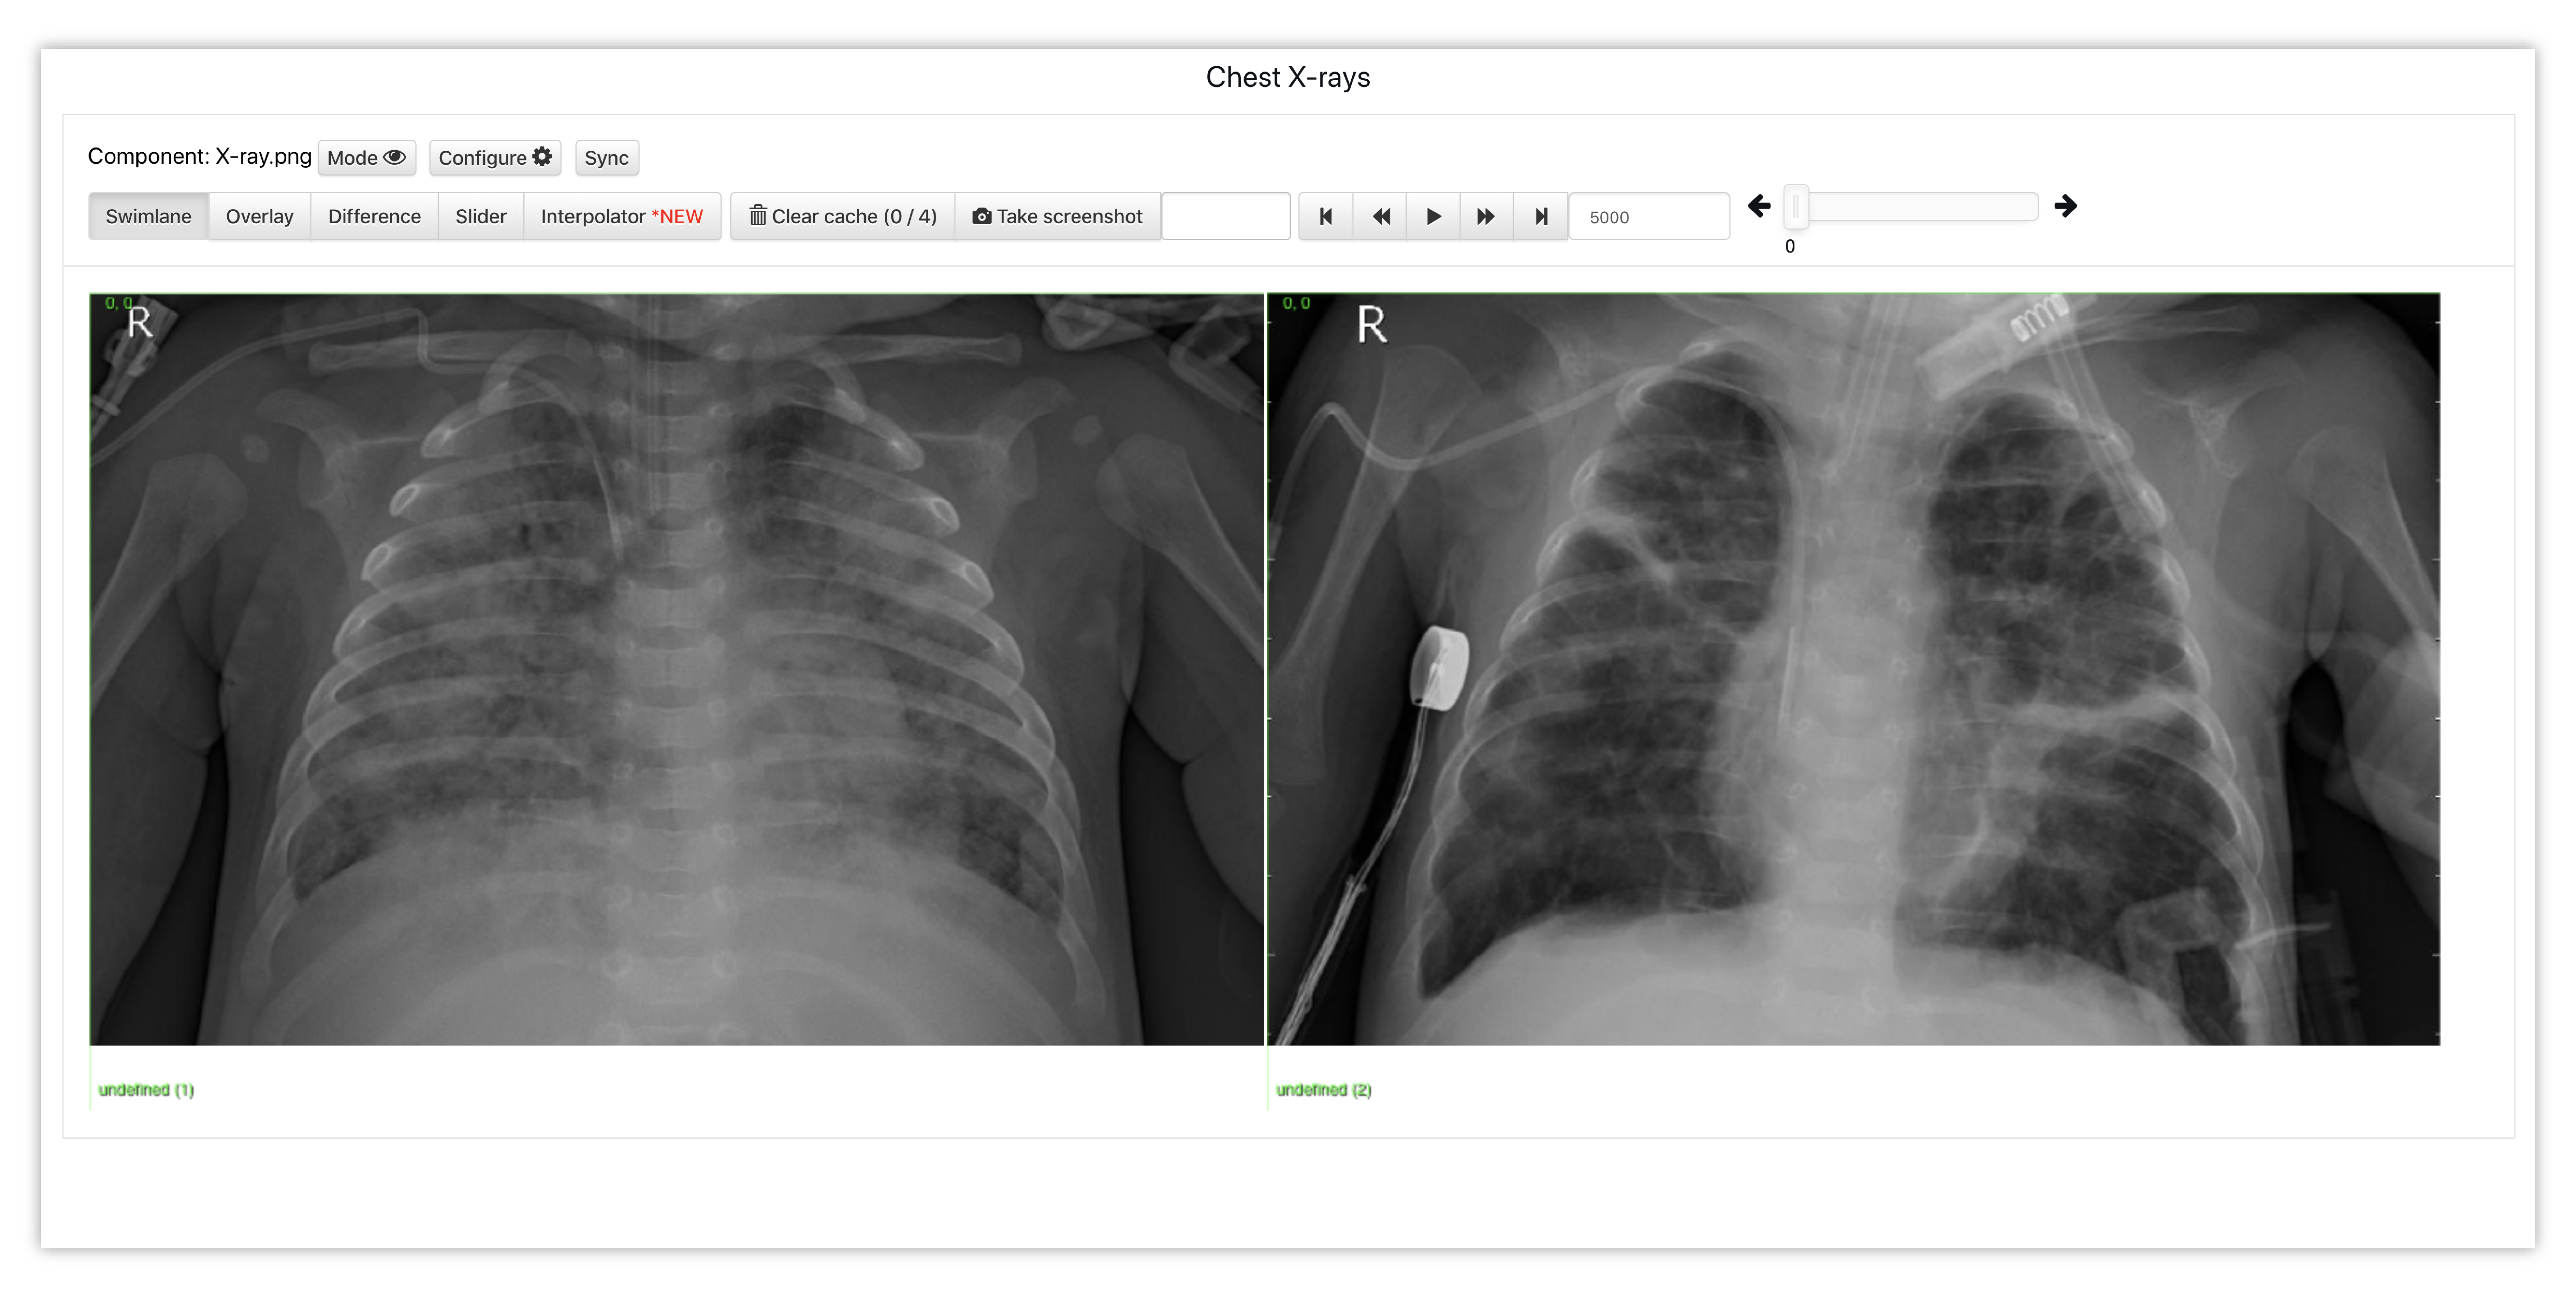
Figure 2: Chest X-ray
We can see the subtle differences in structure of the two ribcages as well as the darkened area in the second x-ray.
Stonehenge
For this example, we’ll be analyzing a sketch of how Stonehenge may have looked when it was first built and how it looks today.
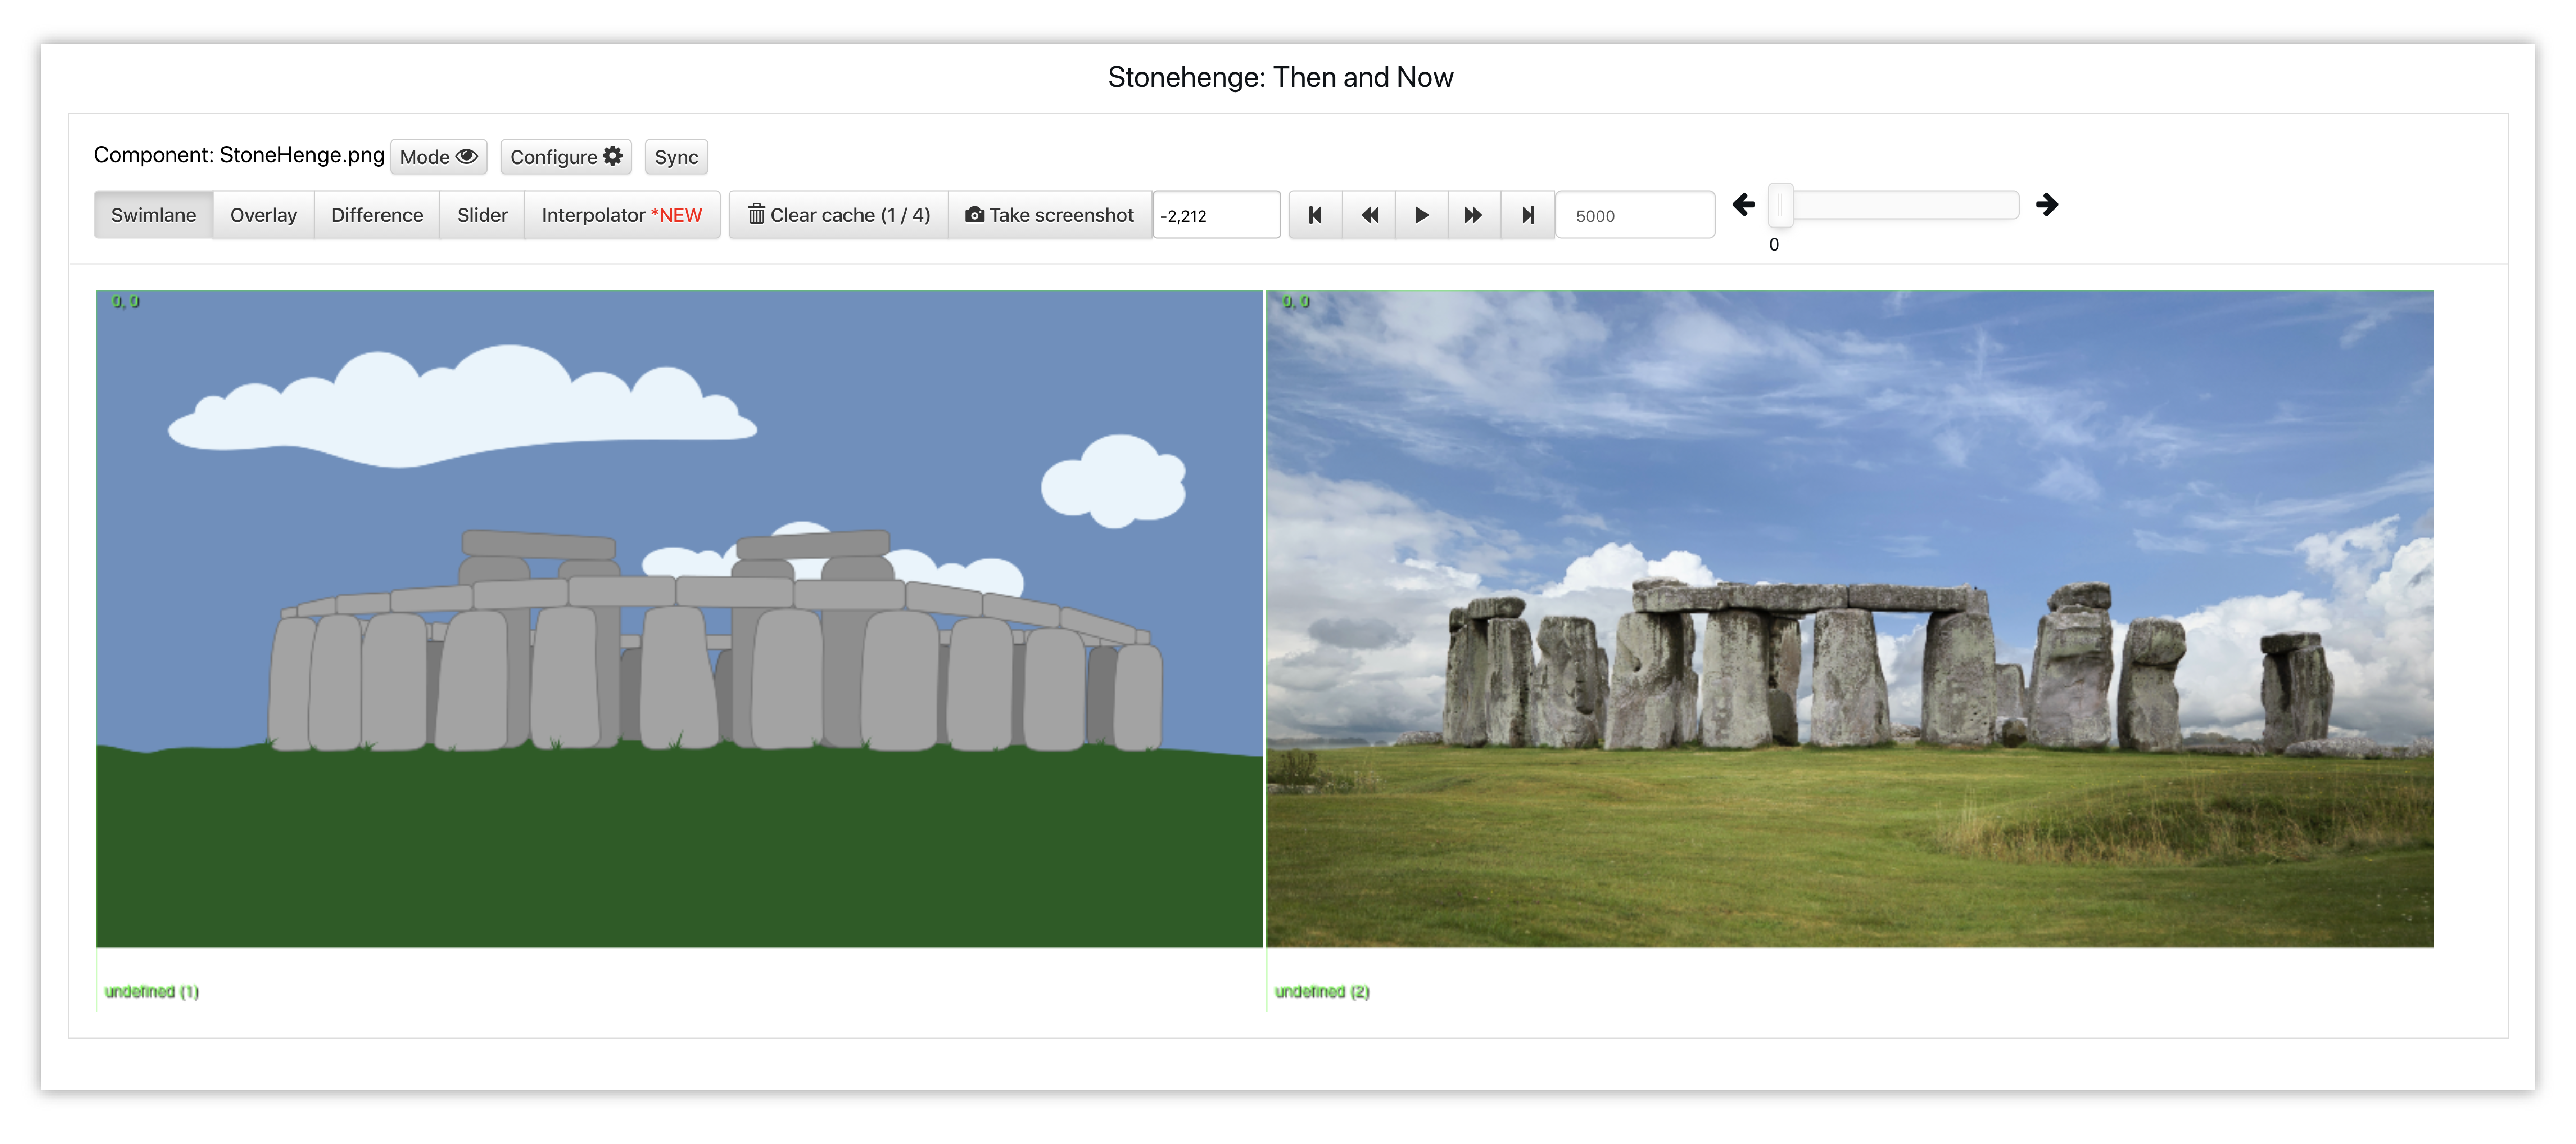
Figure 3: Stonehenge
Stonehenge’s proposed structure had symmetry, while its now weathered and missing stones have created a less balanced look.
Emerald Bay, Lake Tahoe
For this example, we’ll be analyzing how Lake Tahoe’s Emerald bay looks with and without boats.
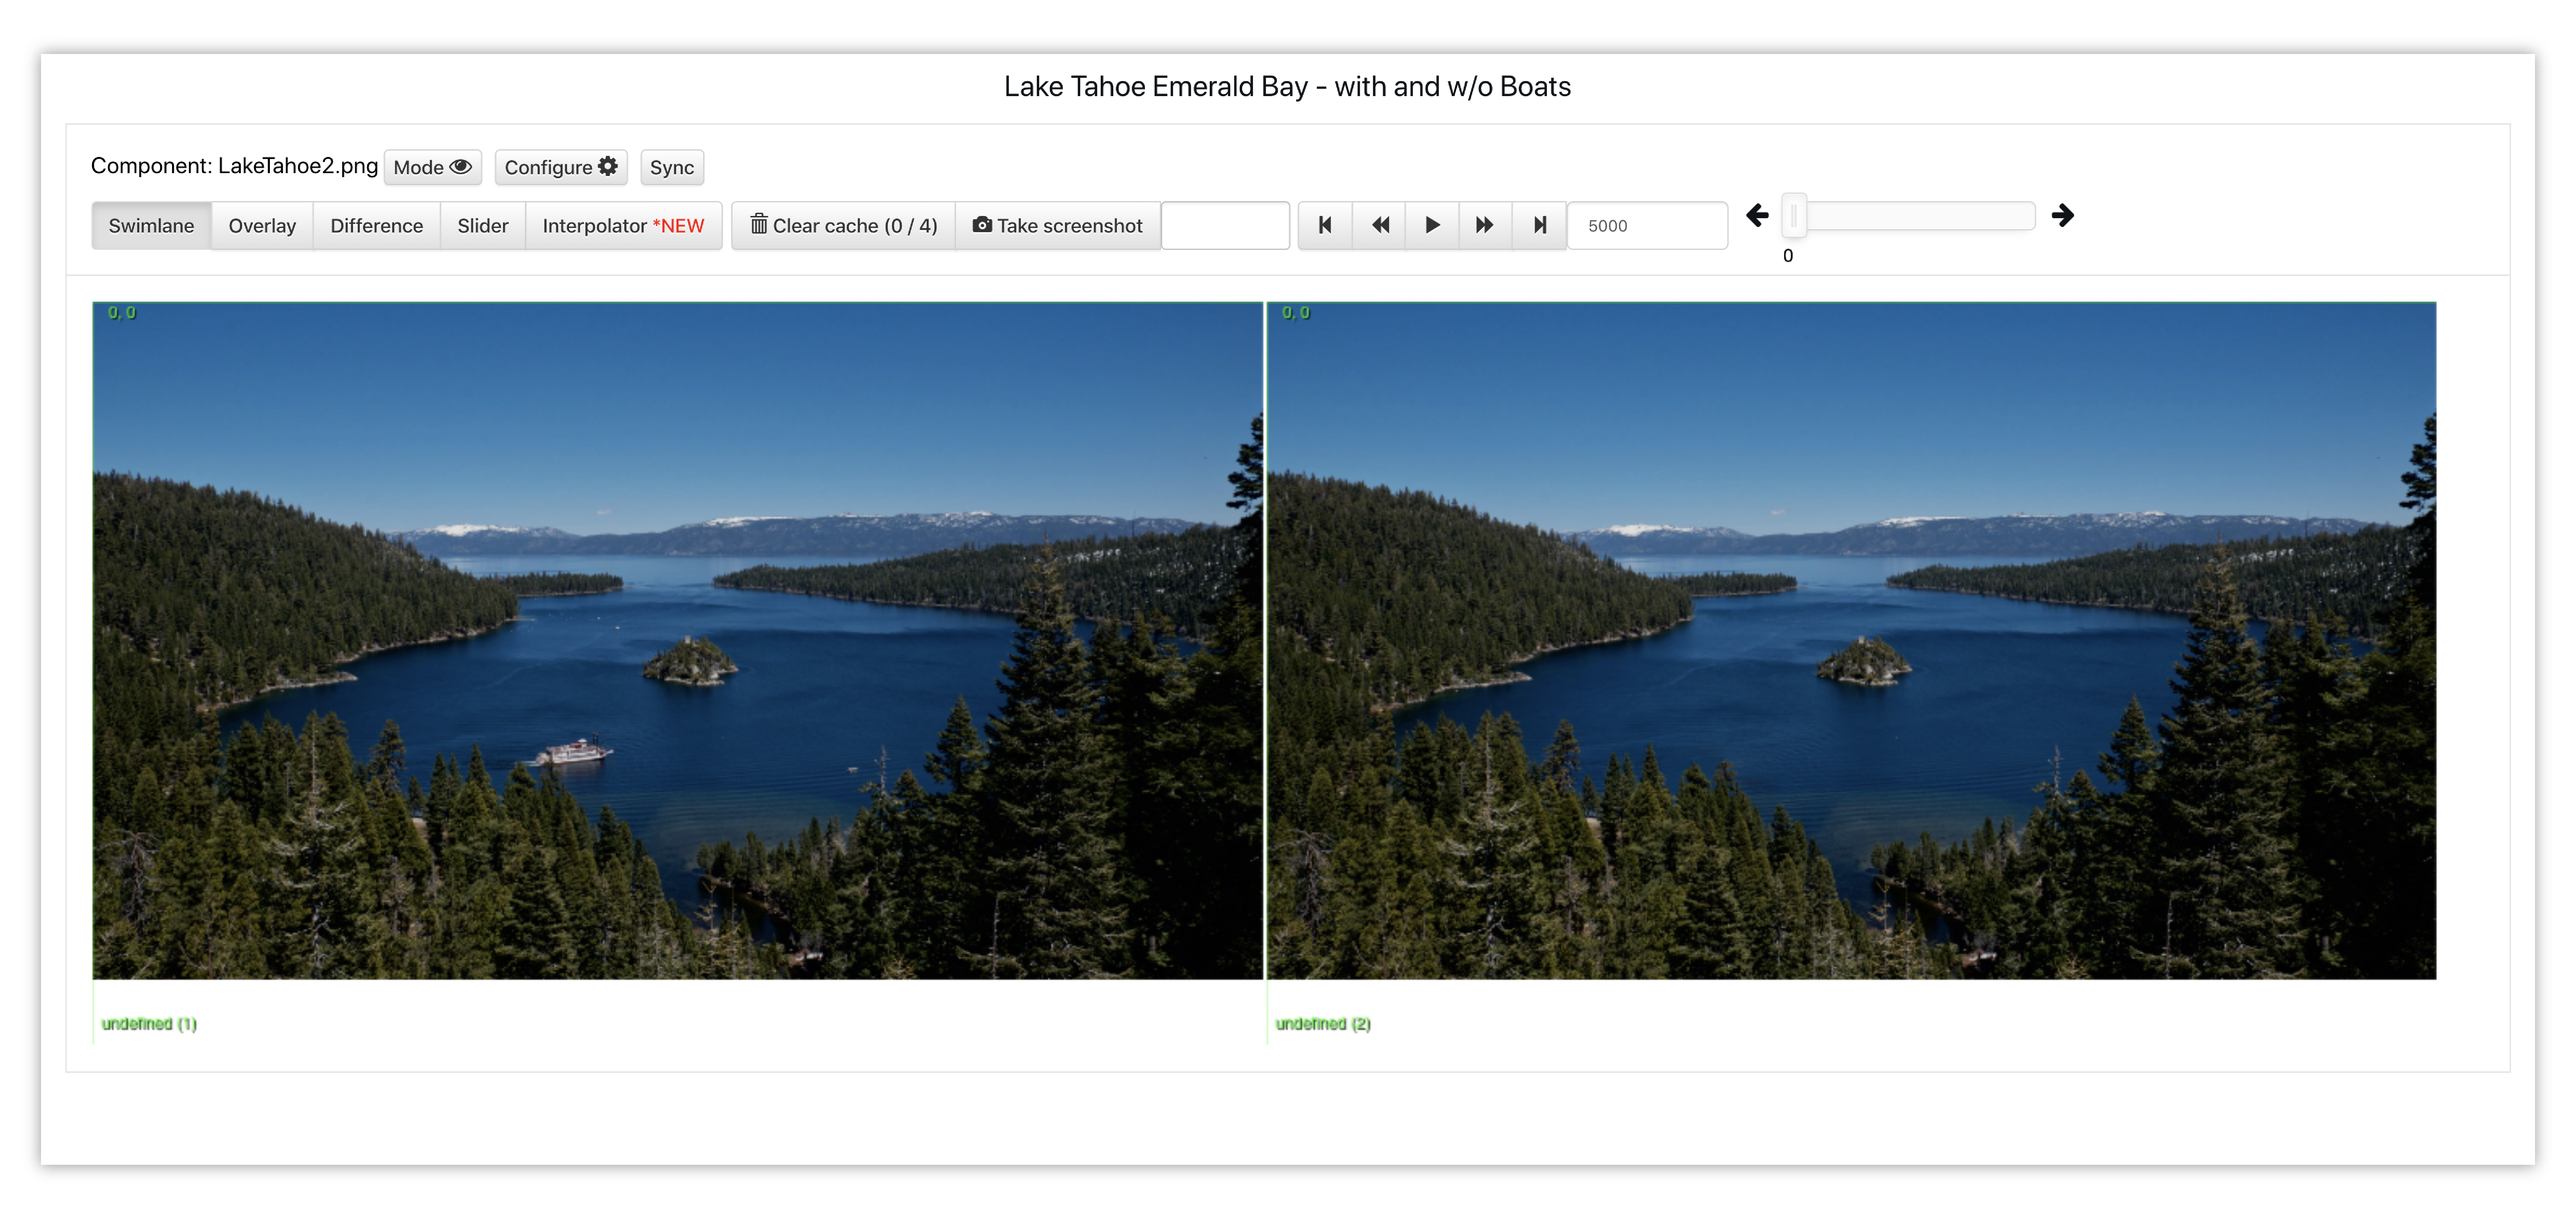
Figure 4: Emerald Bay, Lake Tahoe
The beauty of Lake Tahoe remains prominent with or without boats on its waters.
Head and Skull
For this example, we’ll be analyzing where a human skull is located underneath the skin.
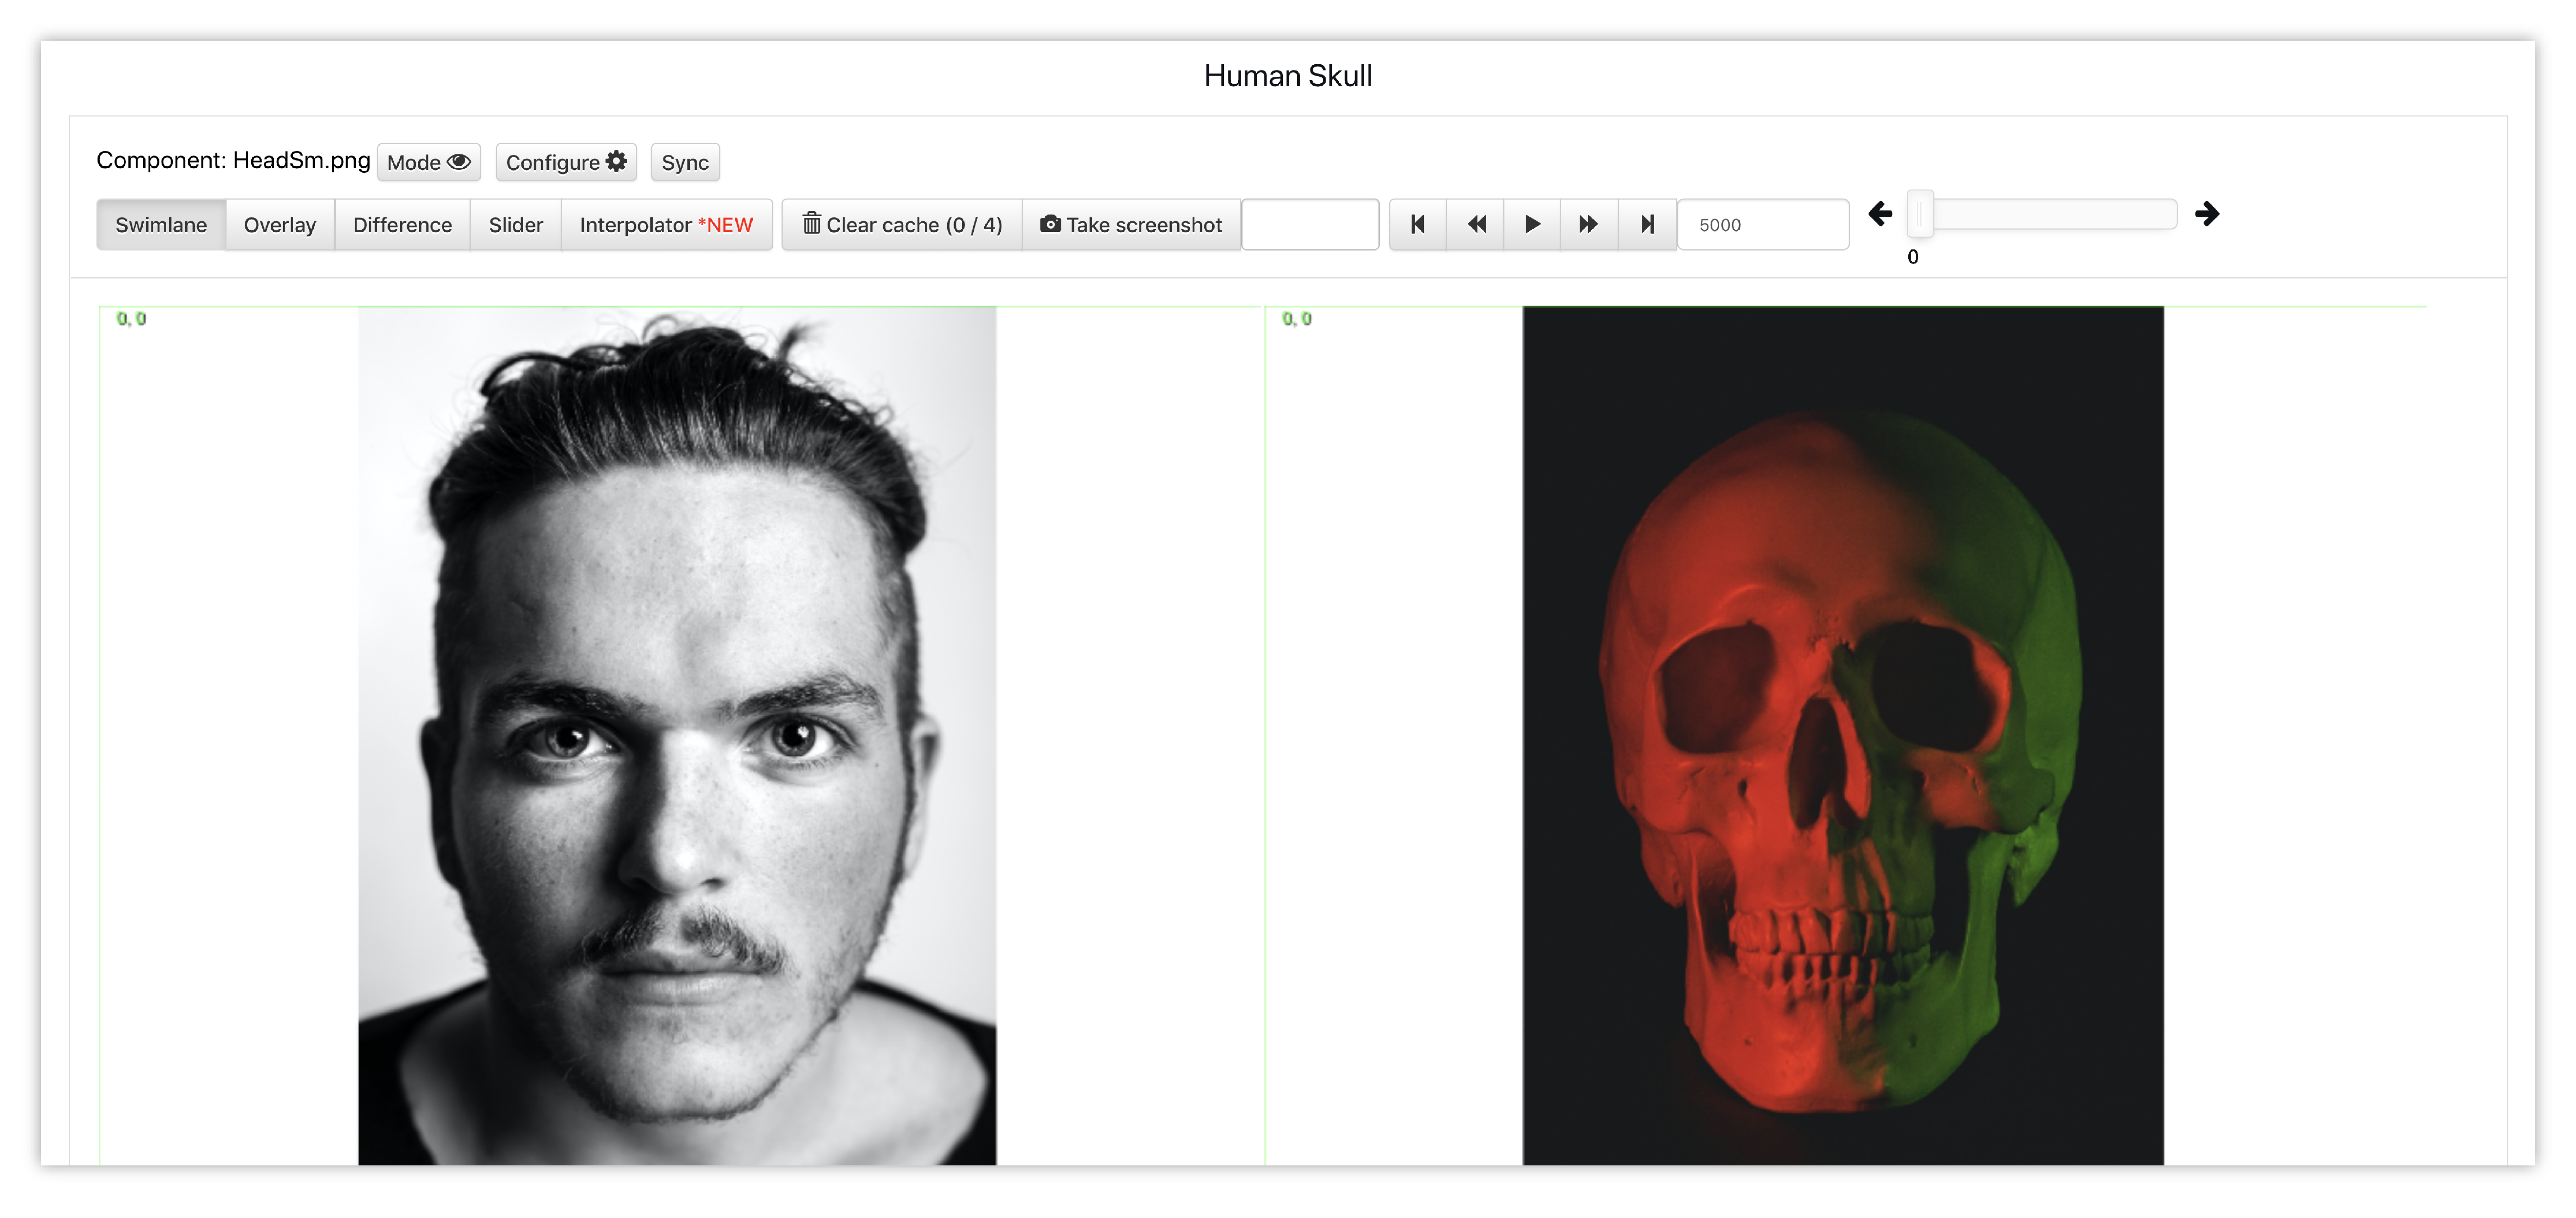
Figure 5: Head and Skull
Here, we can closely map out this man’s skull underneath his face.
Castles
For this example, we’ll be analyzing Disney World’s Cinderella Castle and how it compares to a real castle in Germany, Etlz Castle.
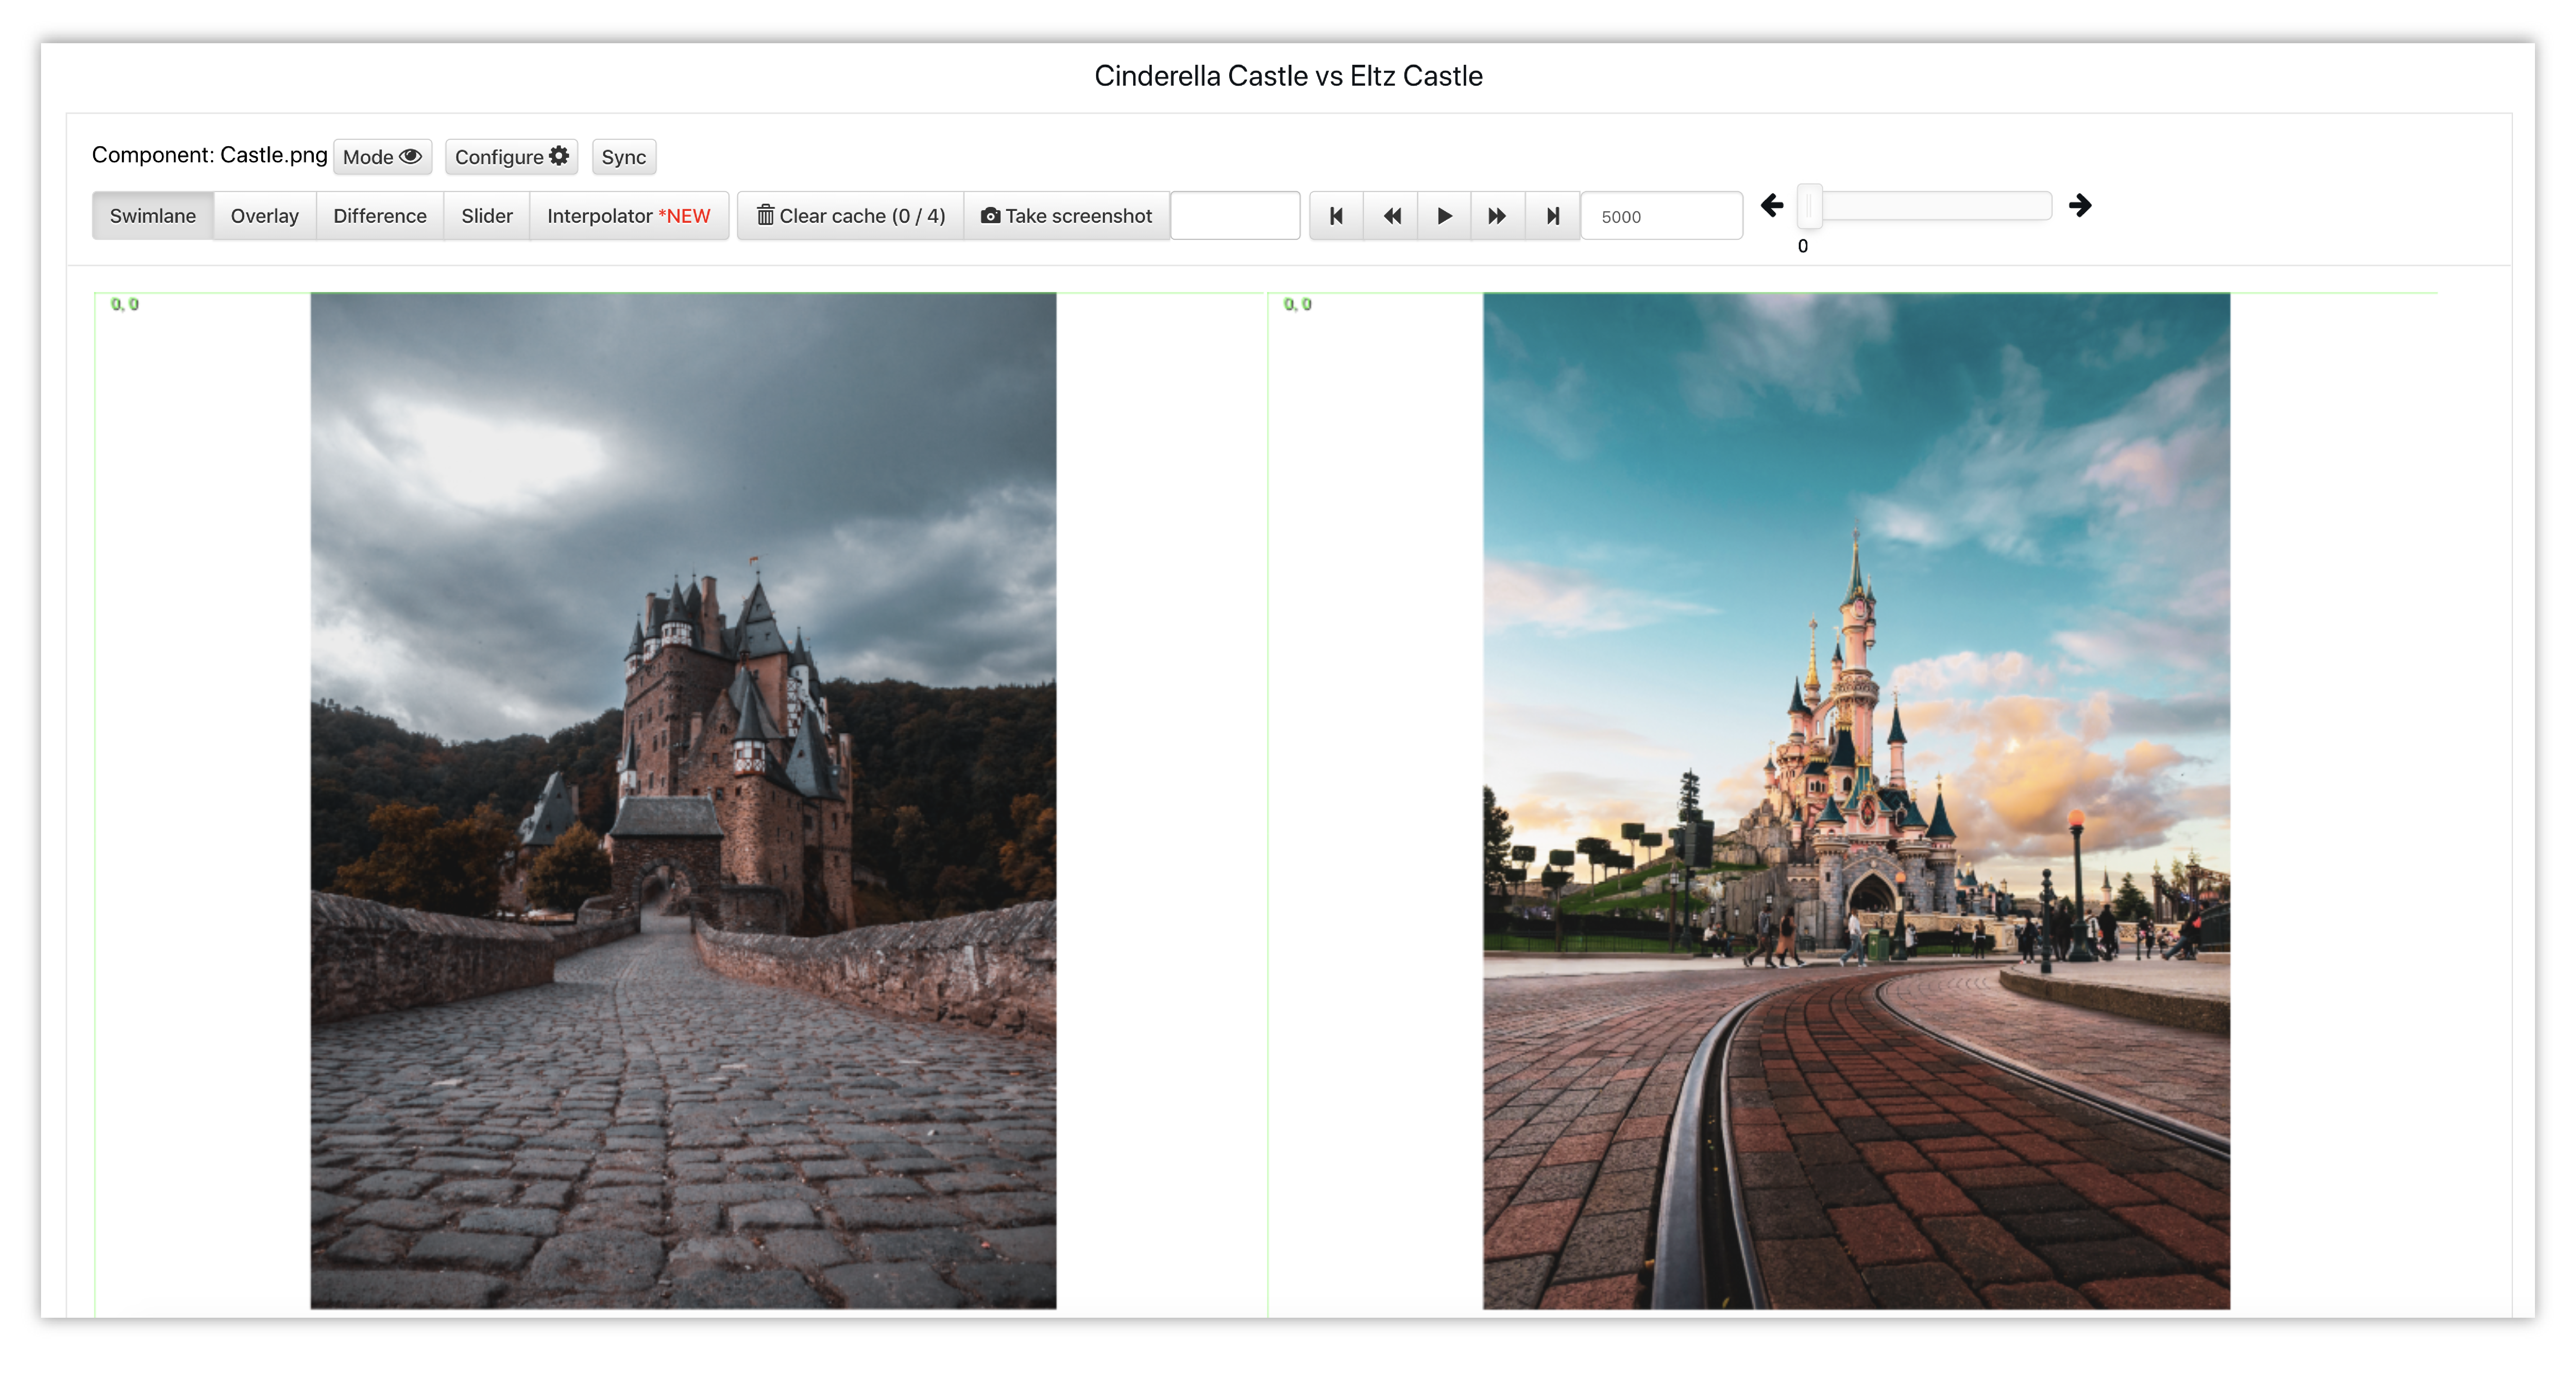
Figure 6: Castles
Though Cinderella’s Castle was actually based off Castle Neuschwanstein in Germany, we can still see the resemblance of Etlz Castle with Cinderella’s and the influence Germany’s castles have had on one of the most beautiful structures in the world’s most visited theme park.
Image Positioner
Image comparison can also be performed through the Image Positioner visualization. As mentioned above, image positioner allows us to overlay images more precisely so we can better examine their similarities and differences. There two options for positioning images: separated and overlay. Read on to learn more about each option.
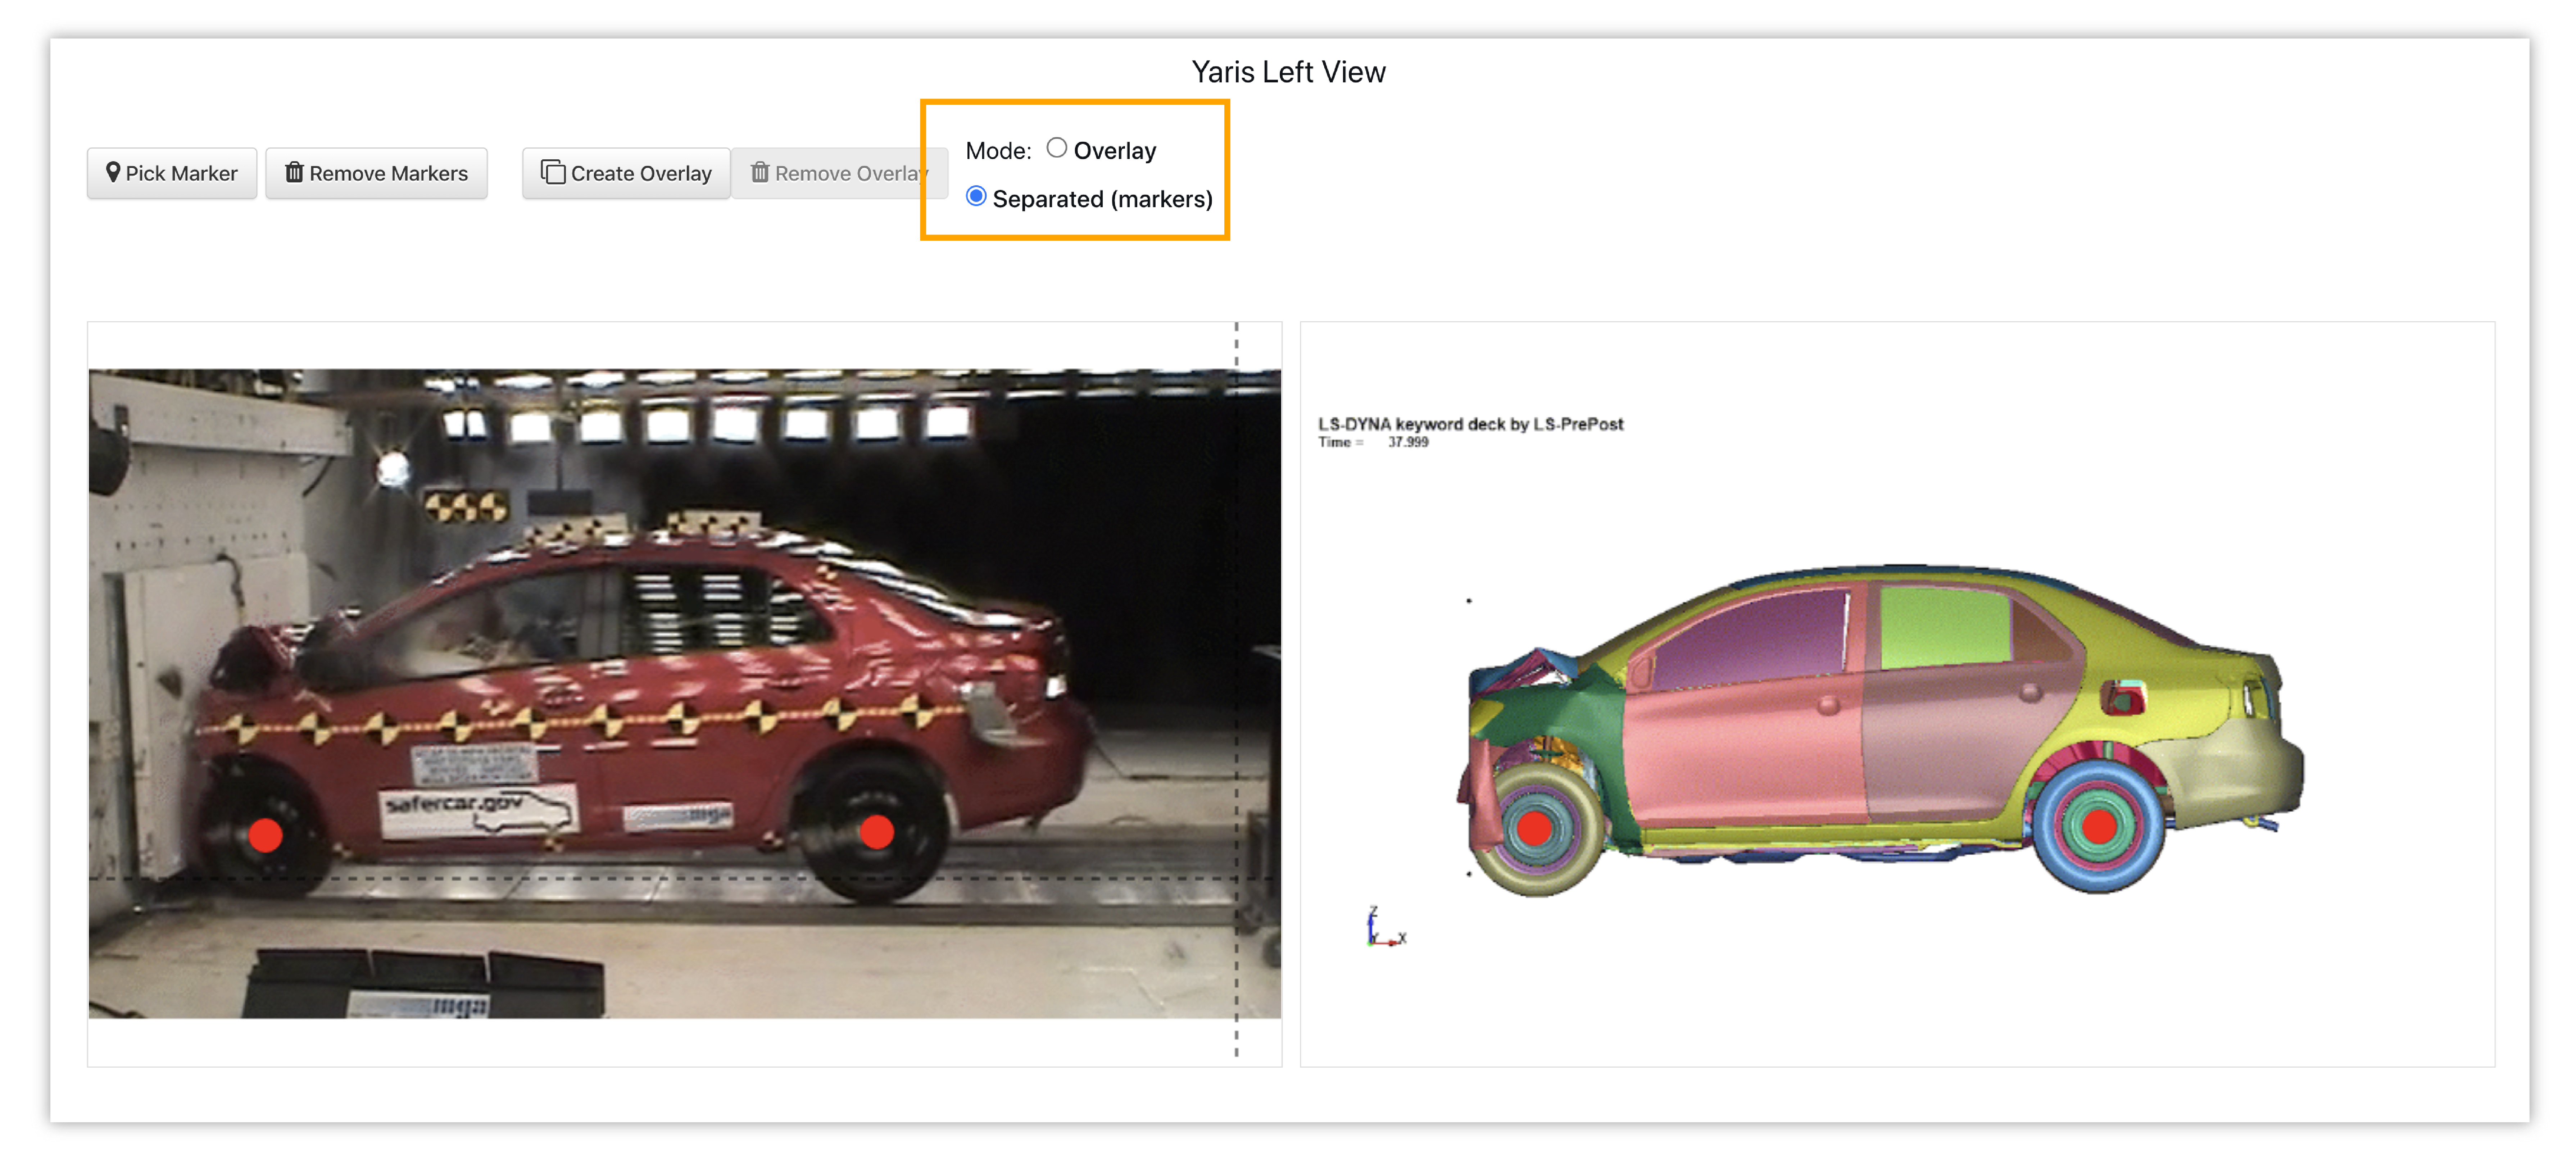
Figure 7: Image Positioner Modes
Separated
The separate option involves choosing two similar markers on each photo as reference for Simlytiks to line up and overlay them. The following image illustrates the options under this mode.
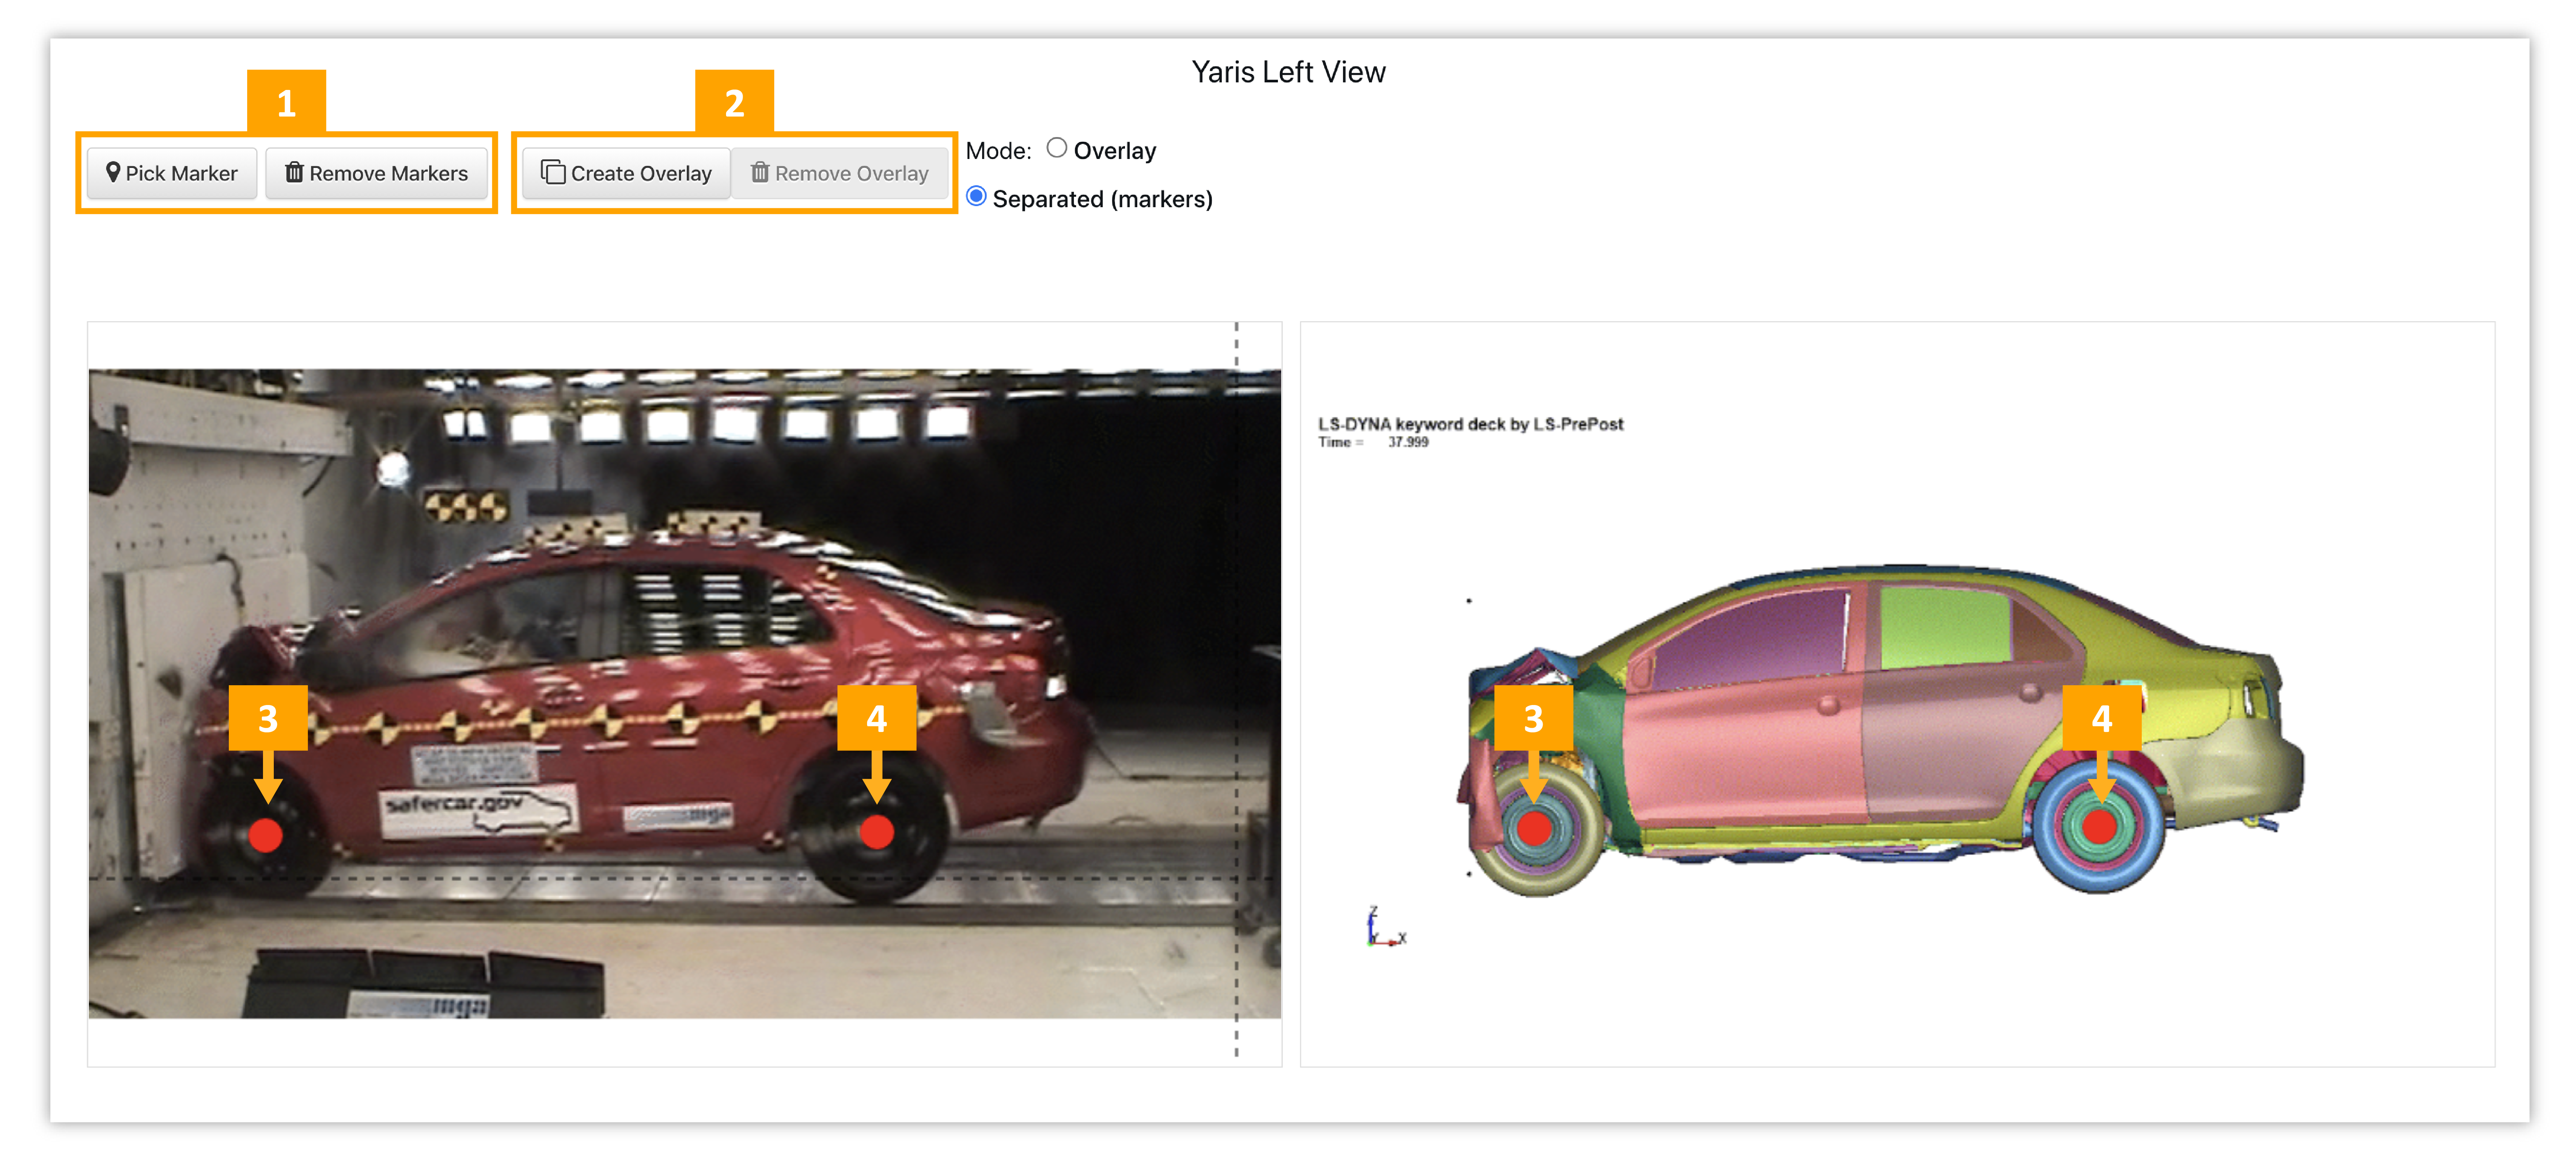
Figure 8: Image Positioner Separated
- Pick & Remove Markers: Pick two markers to set up the overlay with the option to remove them and start over
- Create & Remove Overlay: After picking markers, create overlay with the option to remove it and start over
- Markers: These markers were chosen first for both images
- Markers: These markers were chosen second for both images
This option is quicker, easier and most useful for images with identical points of reference. Here is how to set the markers and create the overlay using the Yaris Left View example.
Overlay
The overlay option involves manual image alignment using mouse scroll and image settings to overlay the images. The following image illustrates the options under this mode.
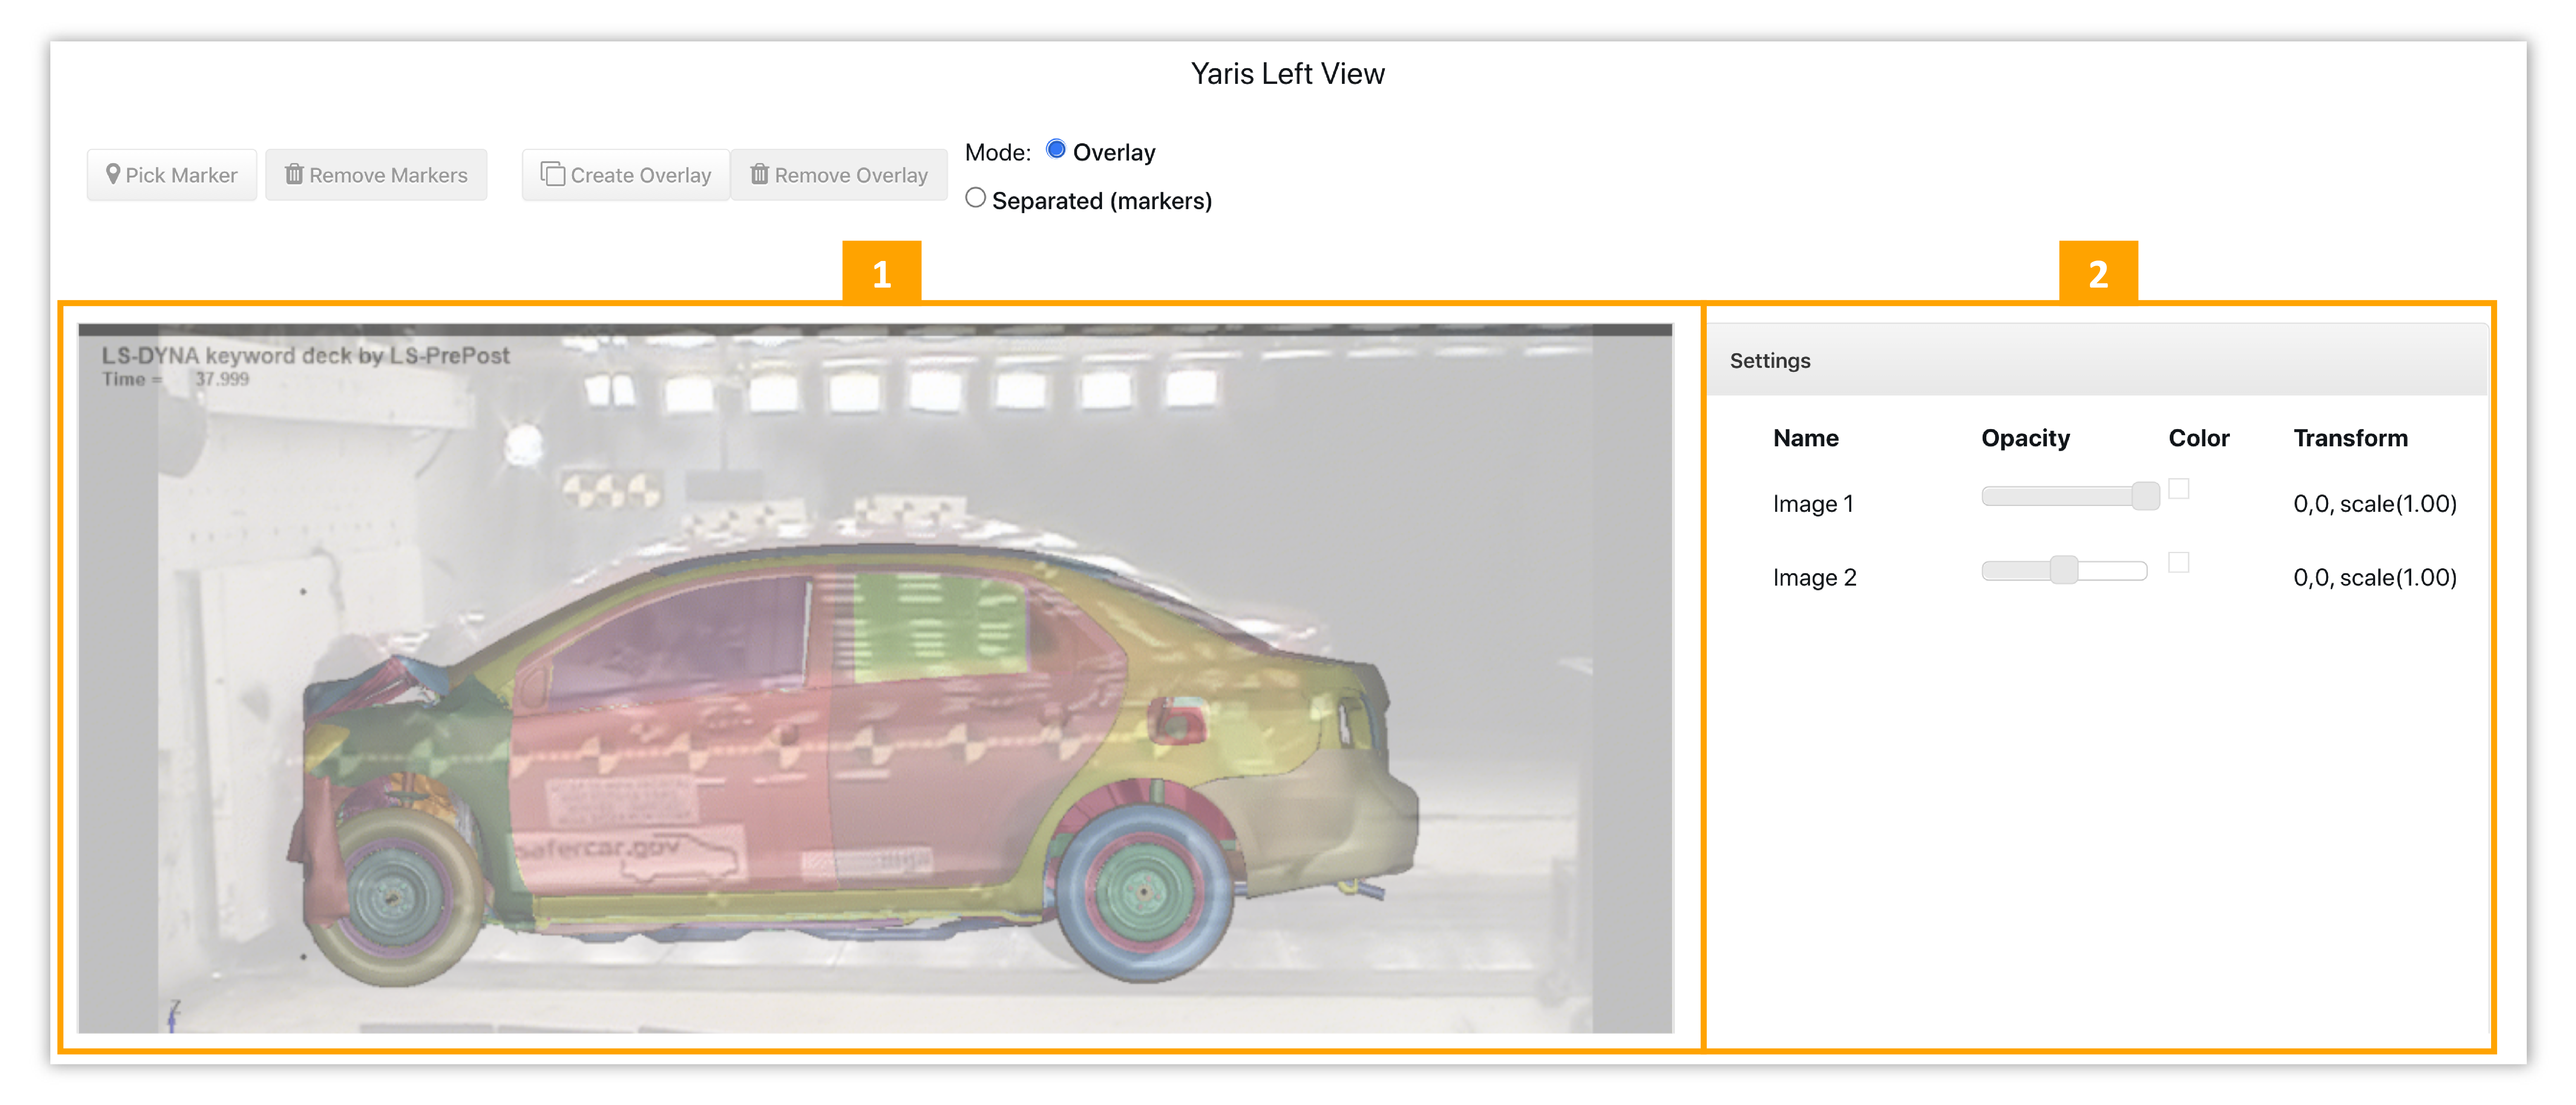
Figure 9: Image Positioner Overlay
- Overlay Preview: Move the top image by clicking-and-dragging and the scroll on the mouse to scale it
- Settings: Change image overlays or colors as well as choose precise scaling for each image
This option is great for images with less obvious points of reference or to create a more customized overlay. Here is how to line up the images manually to get our desired overlay.
Image Positioner Examples
Giza and Louvre Pyramids
For this example, we’ll be positioning the Louvre’s pyramid entrance over one of the Pyramids of Giza.
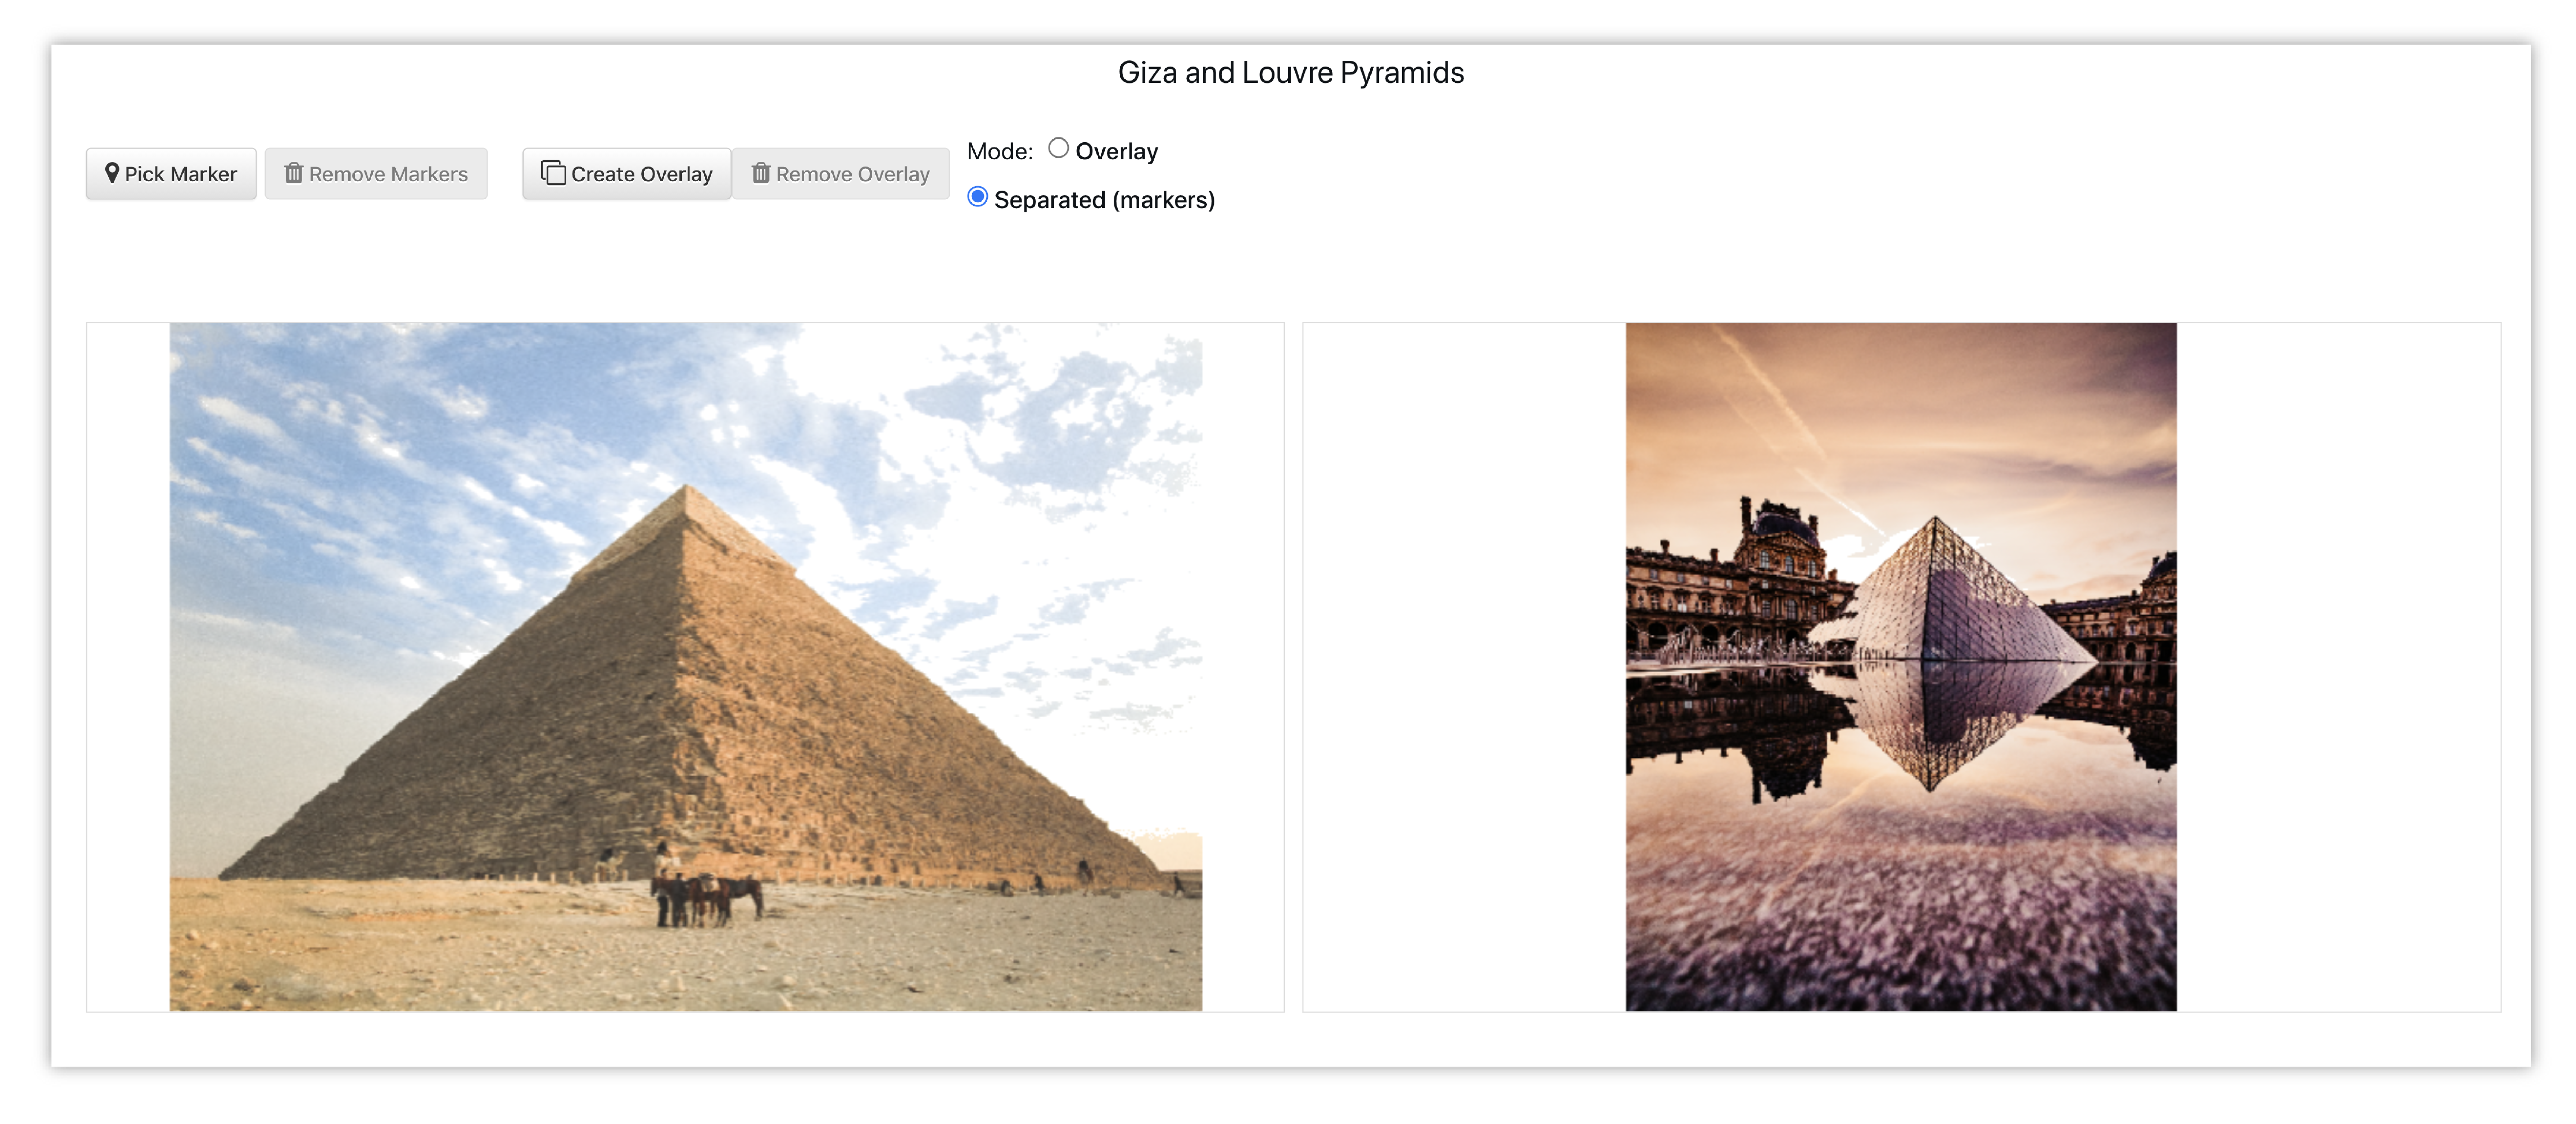
Figure 10: Giza and Louvre Pyramids
In the following video, we use the Separated mode since the points of reference for the pyramids are precise and identical.
Foot Xray
For this example, we’ll be positioning a foot X-ray over a human foot.
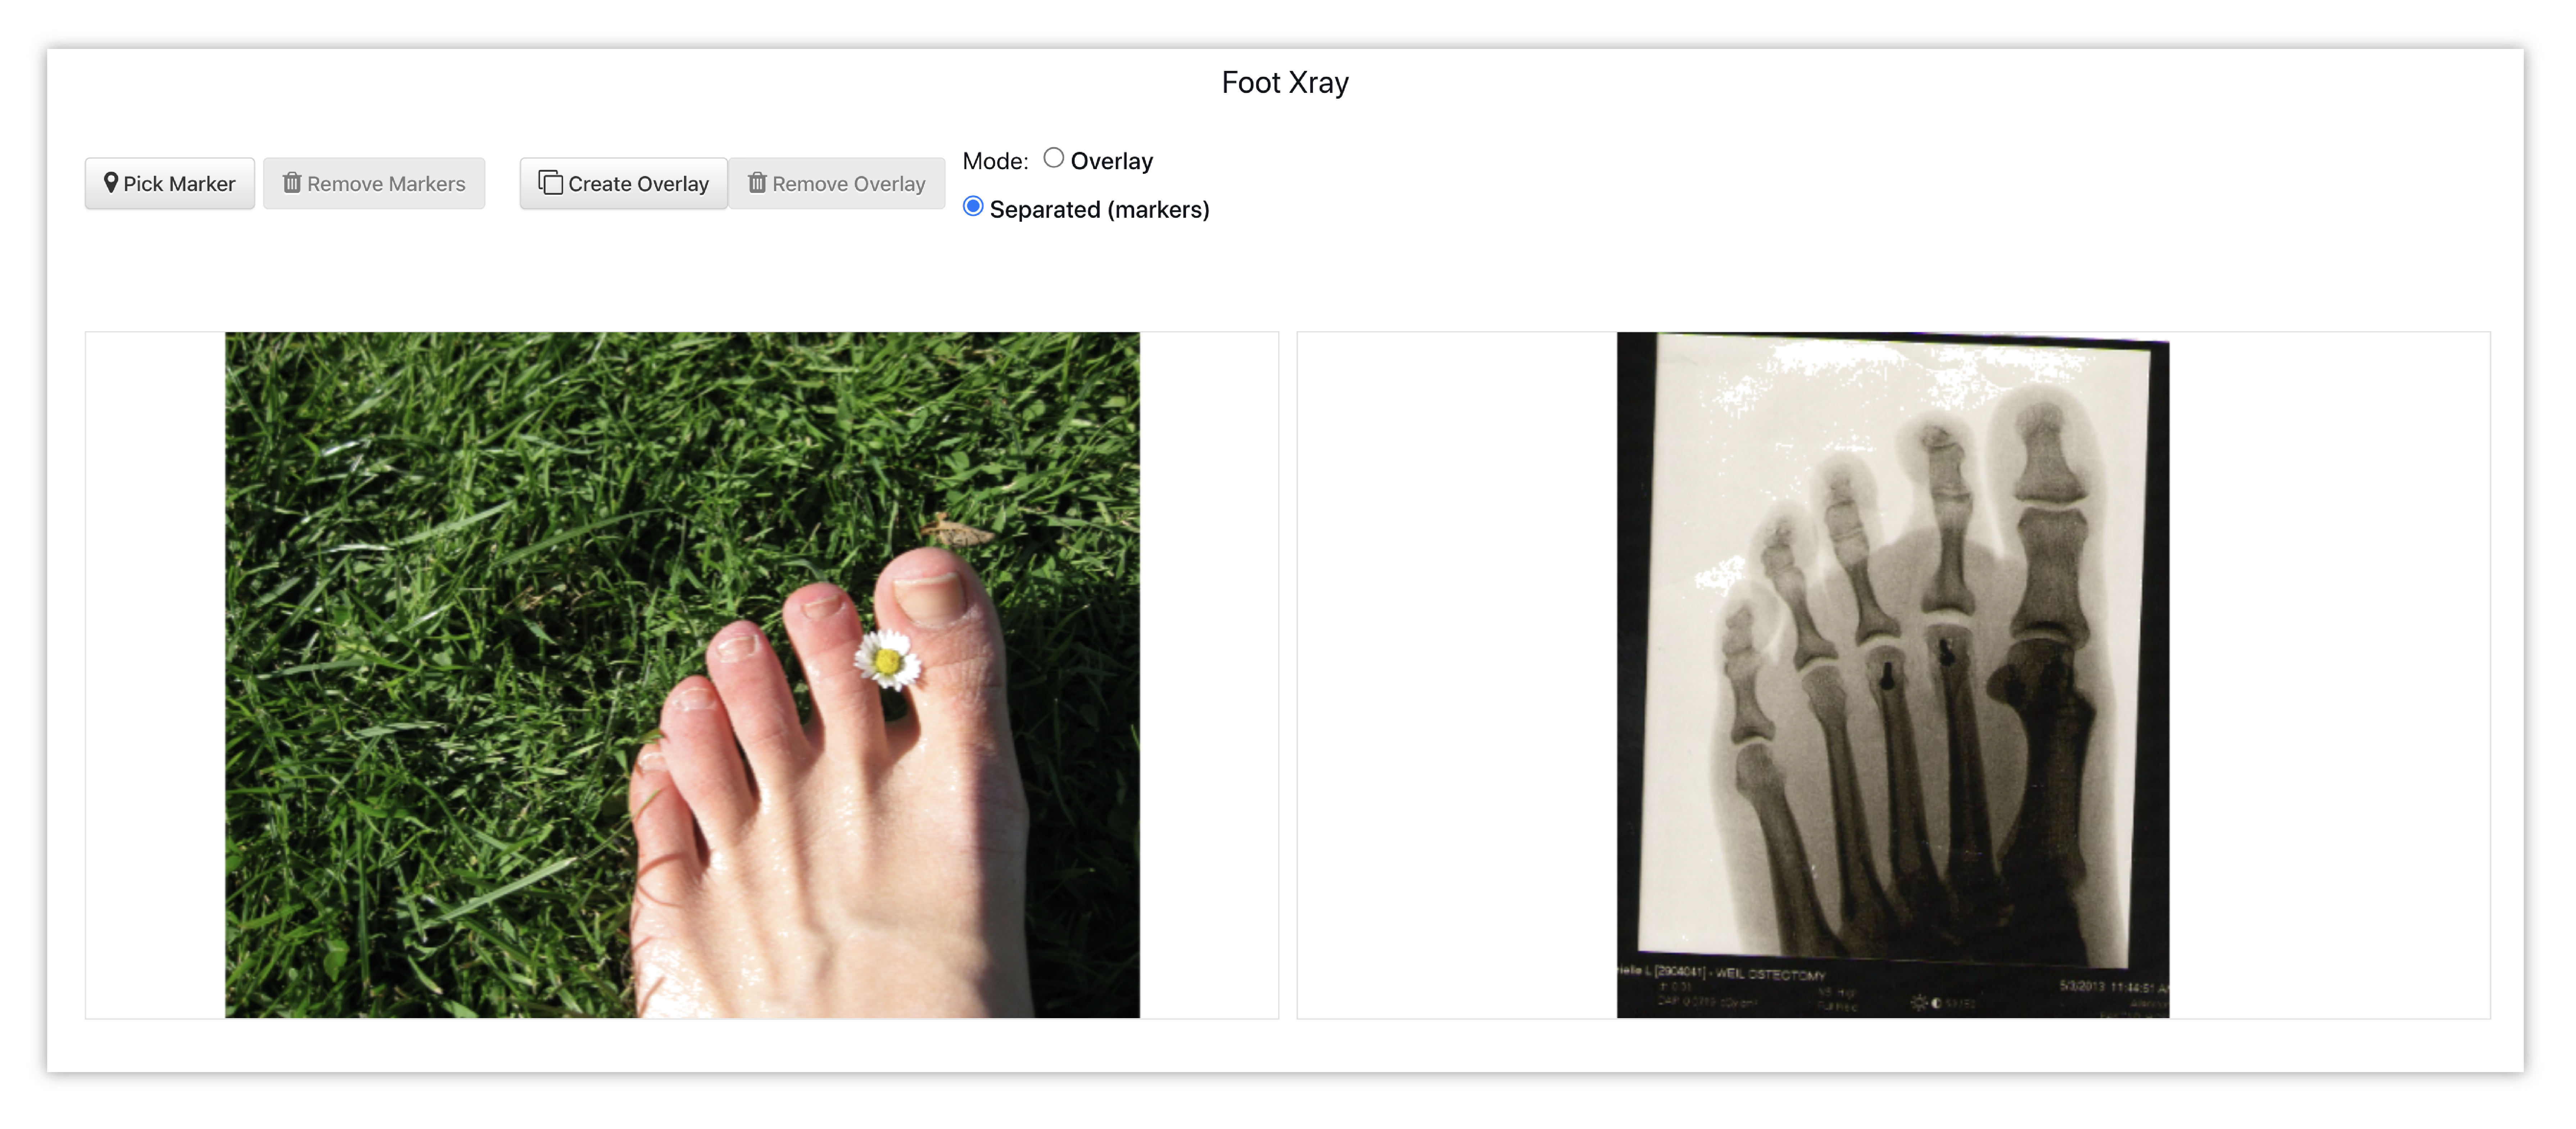
Figure 11: Foot Xray
In the following video, we use the Overlay mode to get the X-ray precisely where we want it on the foot.
GIF Player
Simlytiks supports GIFs which includes controls for stopping/pausing and overlaying/syncing.
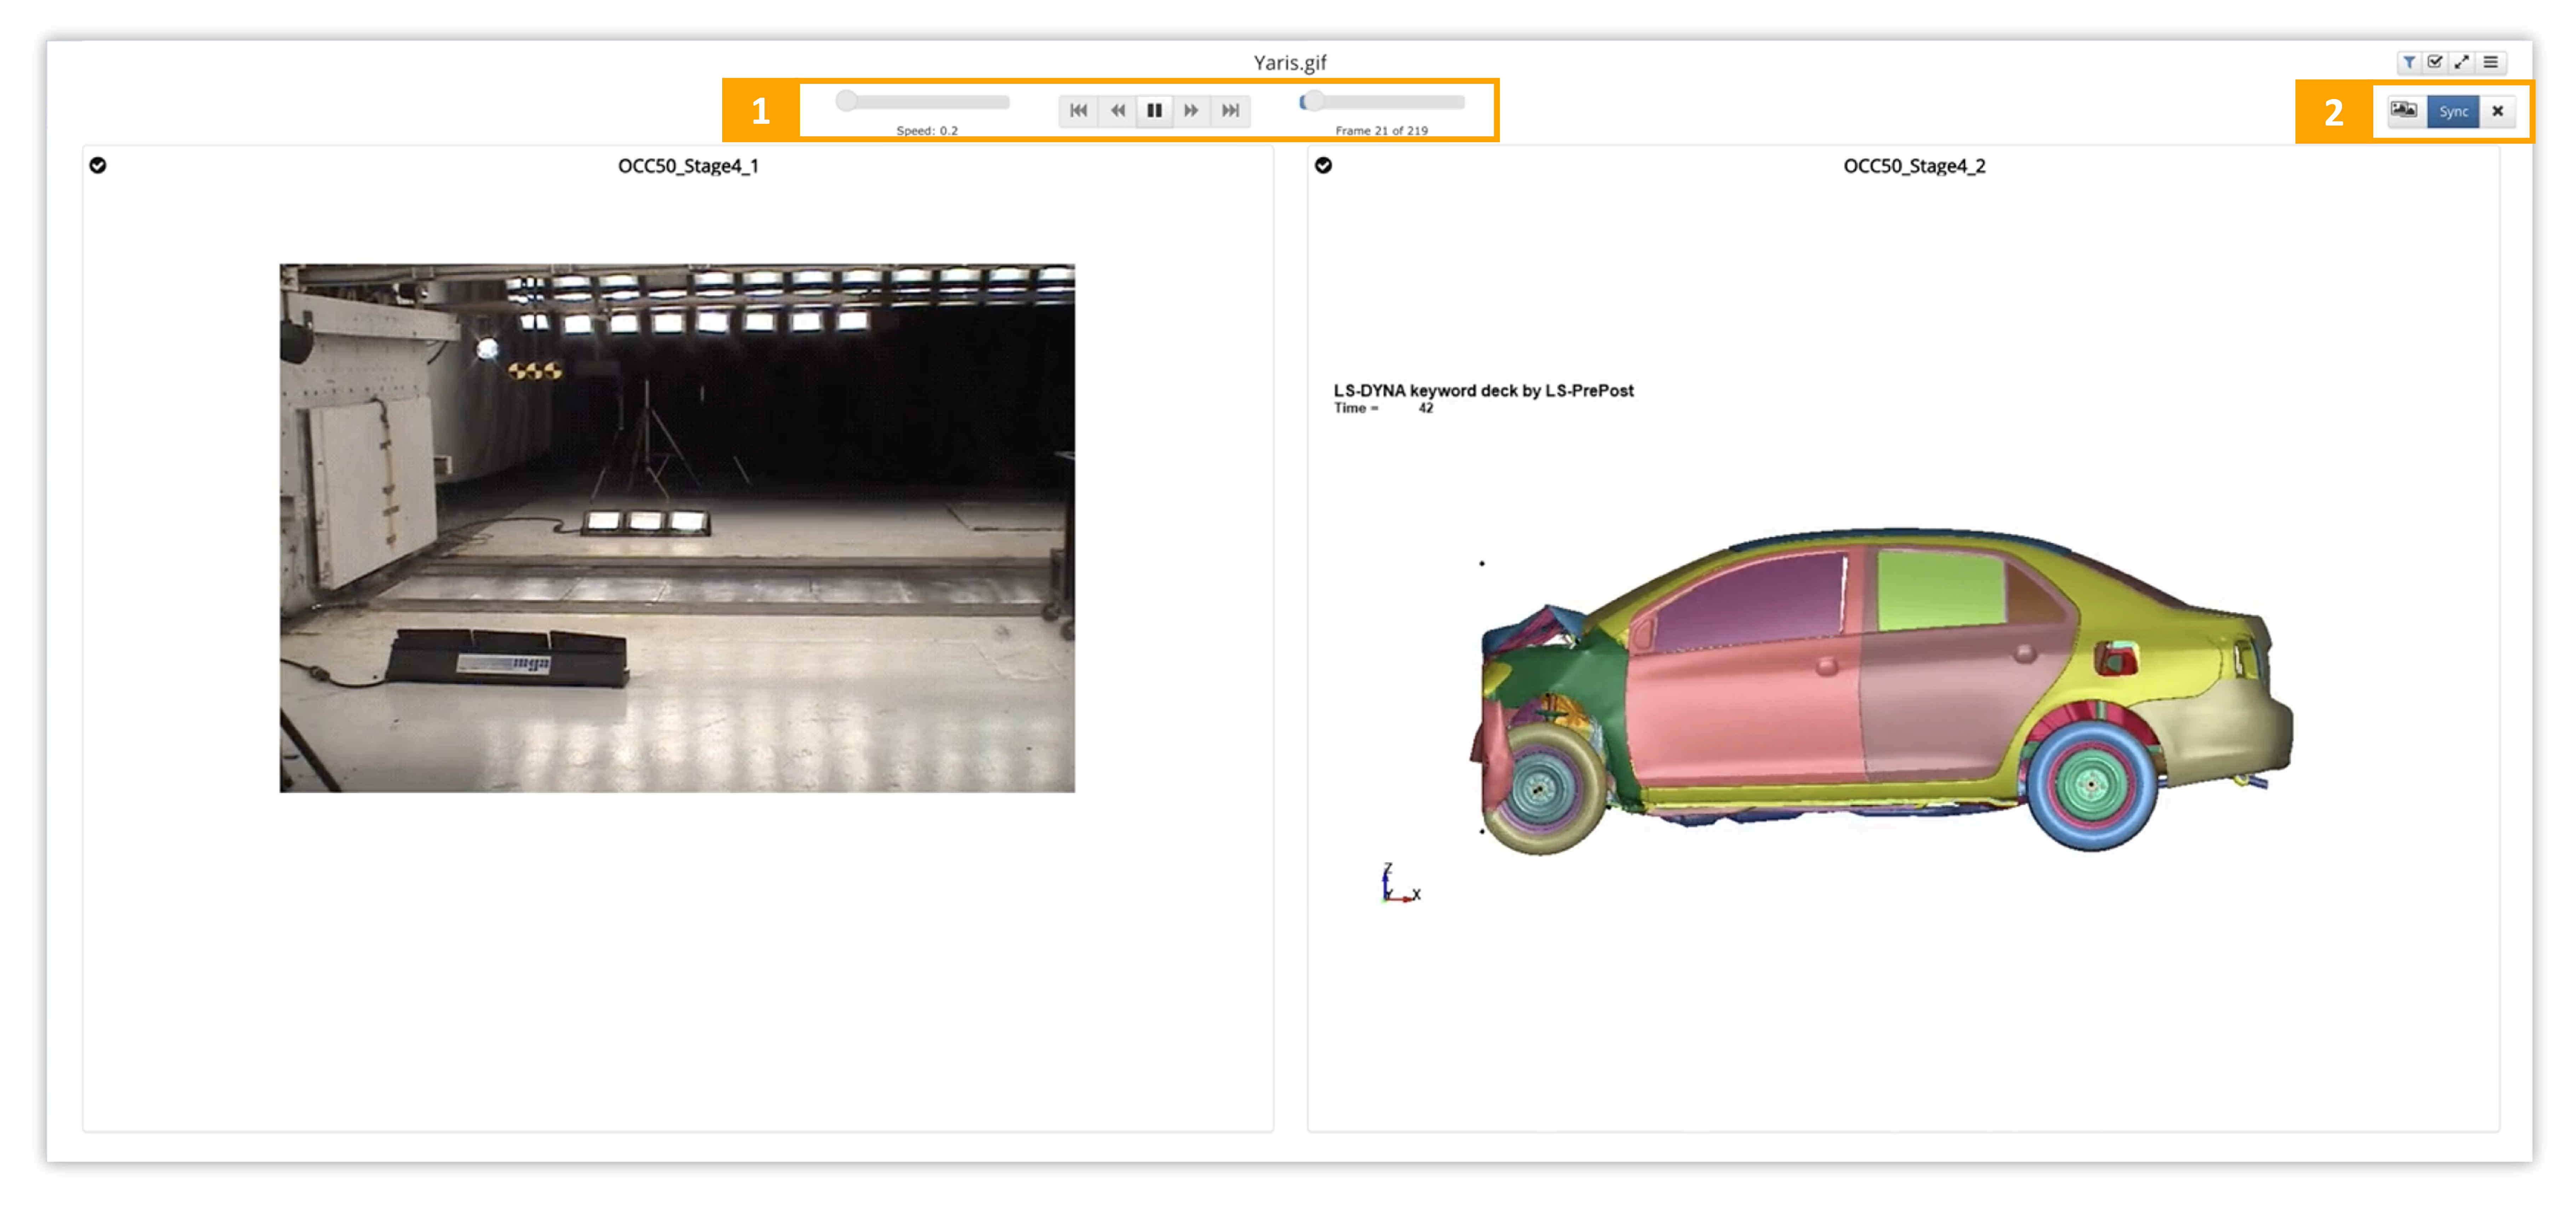
Figure 12: GIF Player Options
- Play Controls: Start/stop, rewind/fast-forward as well as scrub though each GIF using the slider bars.
- Overlay or Sync: Overlay the GIFs to compare them closer or sync them by playing them side-by-side (main/current option)
This allows us to compare more than just two image stills, as shown in the following video example. Here, we review our Yaris Left View crash test to the simulation using the GIF player.
Here is another example using creating and using GIF player for material calibration.
Gallery
The Gallery visualizer can be used for viewing GIFs, MP4s, JPGs, PNGs and other image files (including JFIF!). Add the Gallery visualizer to a page and choose an image column from the dataset in the drop-down.
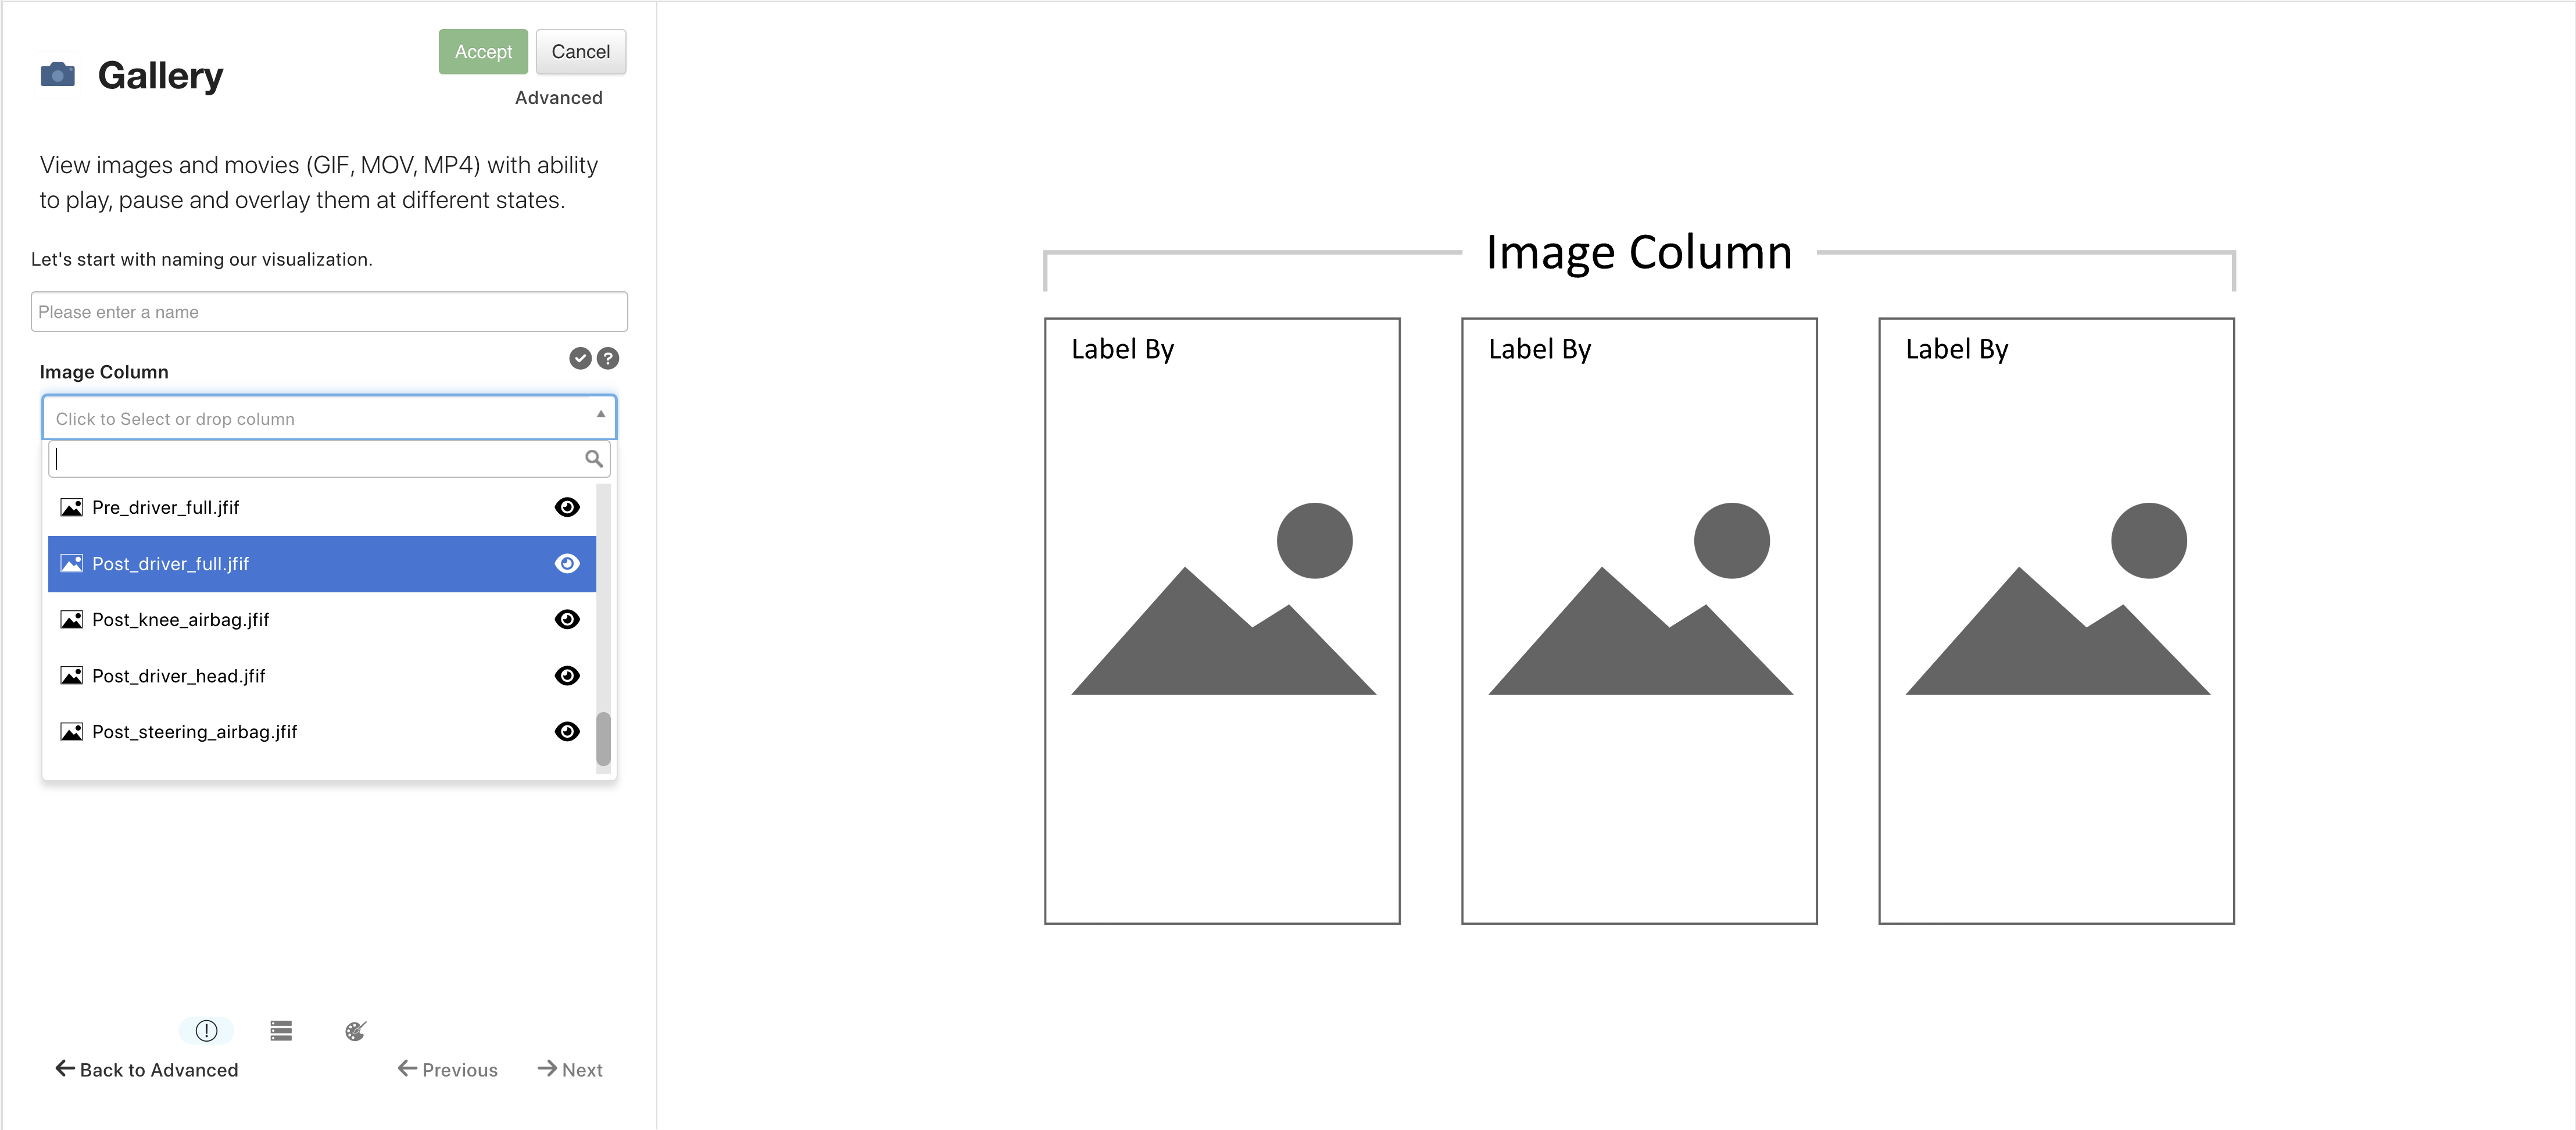
Figure 13: Image Gallery Choose Media
The Gallery will show the intended media with any necessary play controls.
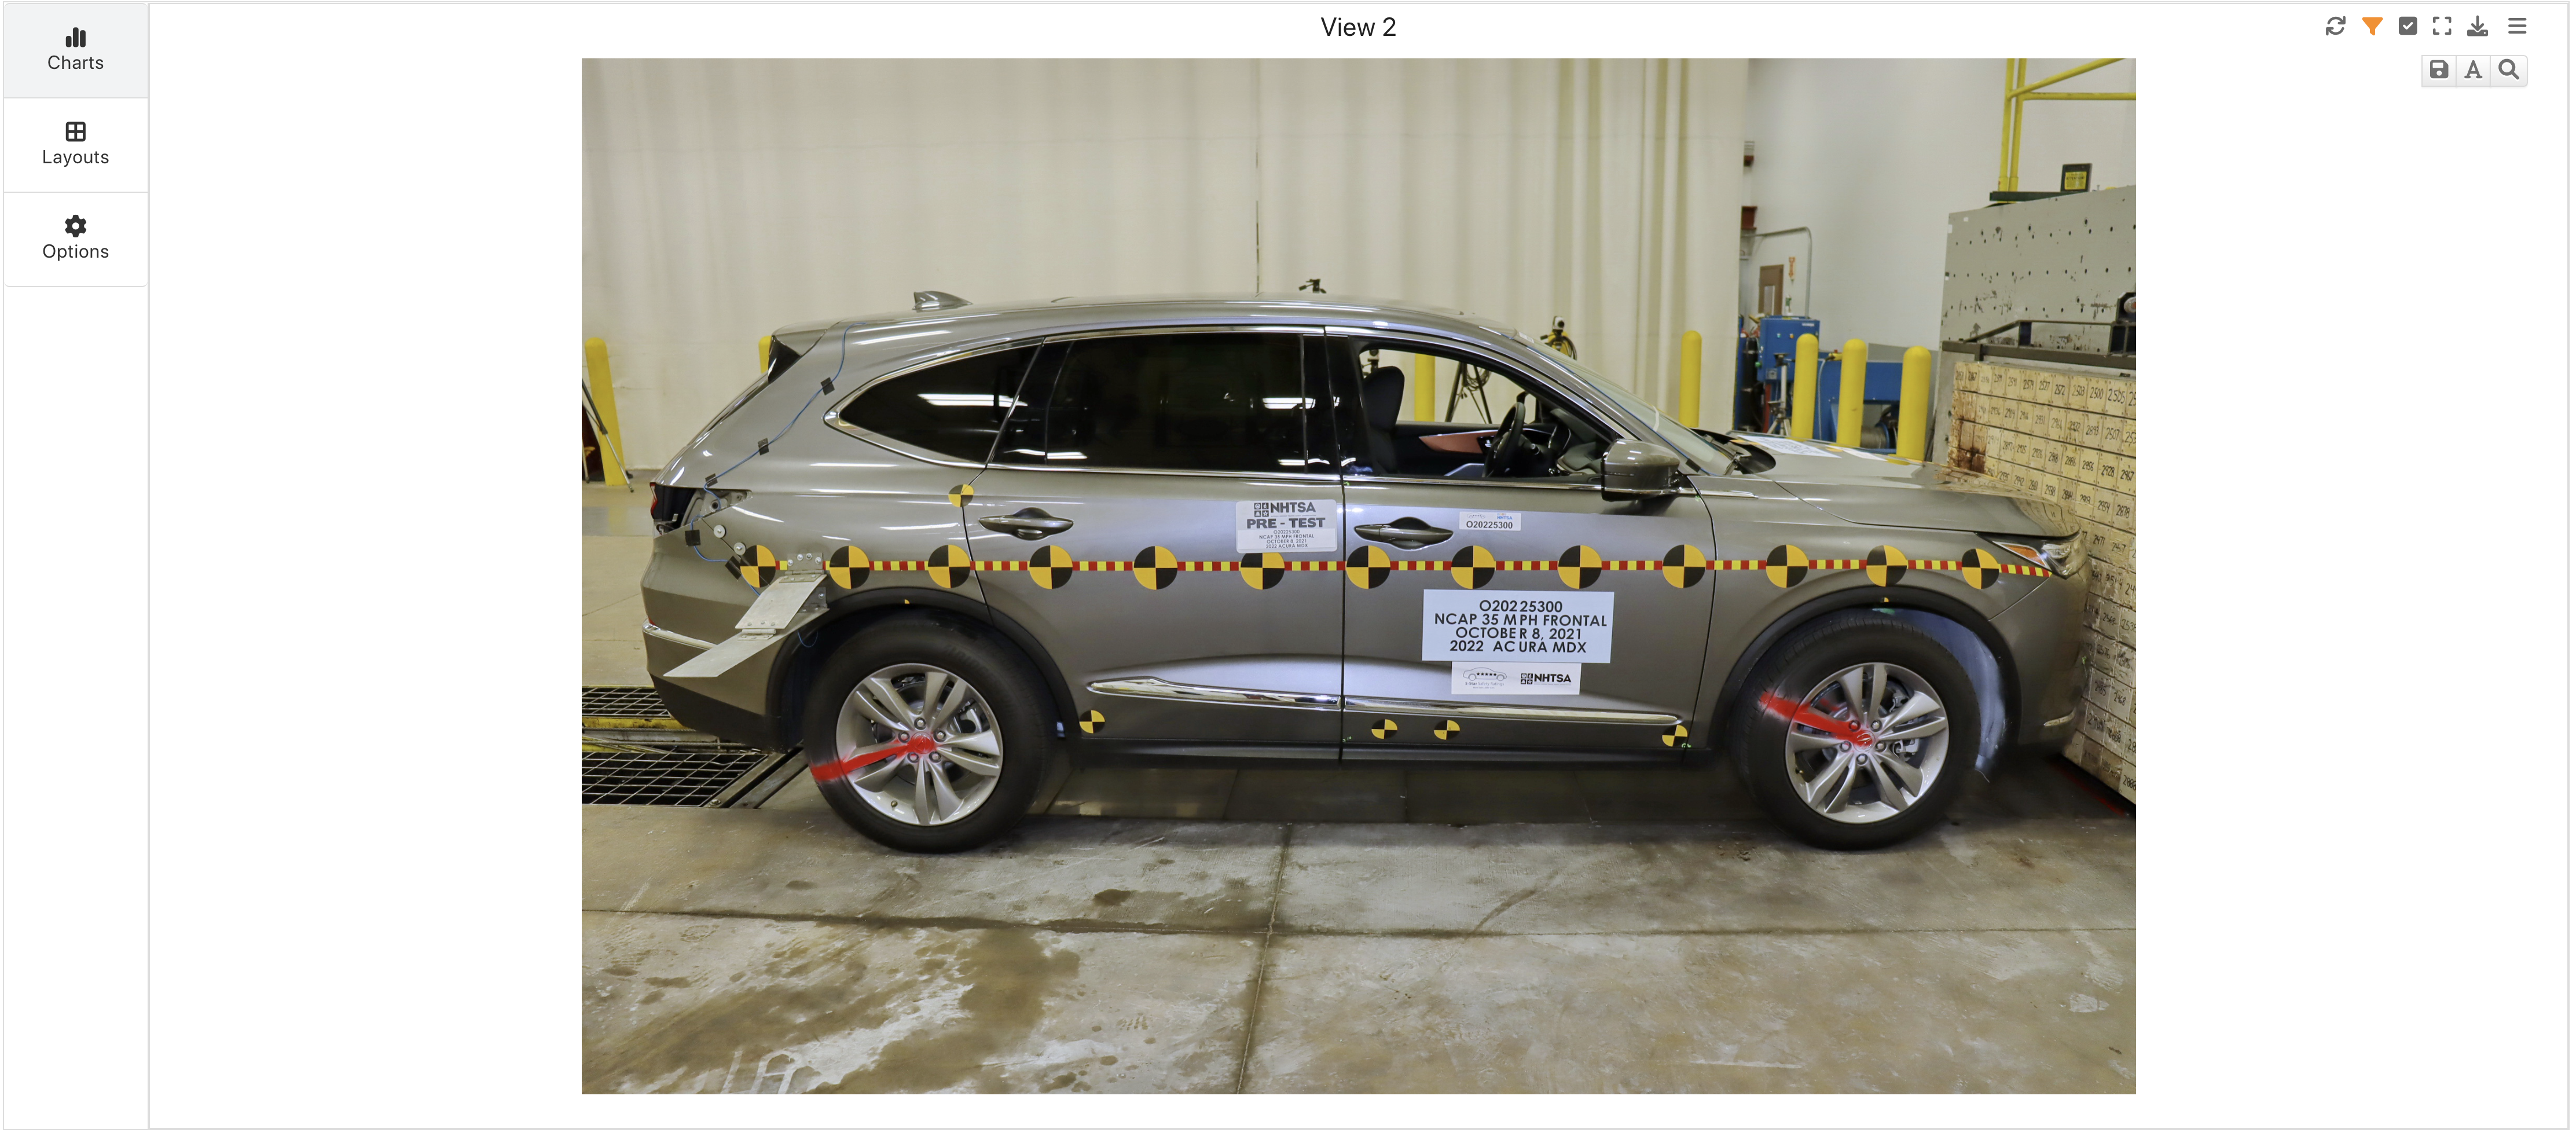
Figure 14: Image Gallery JFIF Example